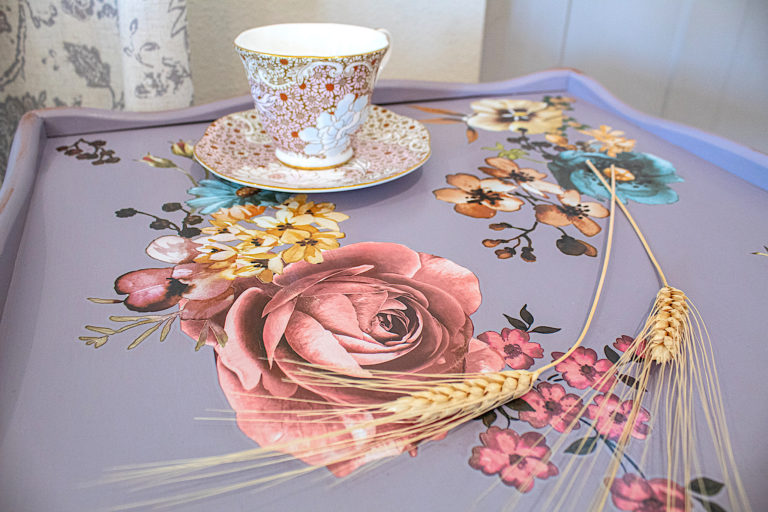
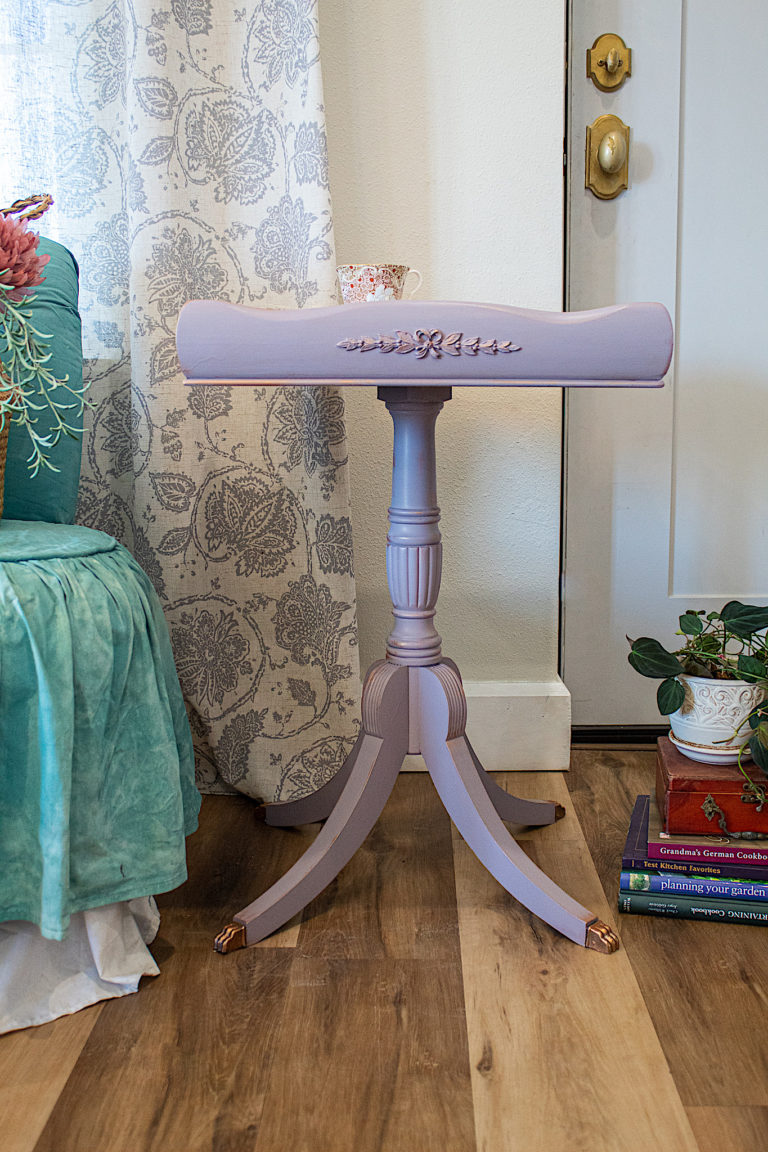
Oh Divine Lavender…I just had to try out this color on this adorable little table. Do you like?
Materials
- 1 Salvaged Table
- Fusion Mineral Divine Lavender Paint
- 1 Redesign With Prima Furniture Transfer
- Varathane’s Polyurethane, Satin
- Chalk Paint brush
- Foam Brush
- Dixie Belle Bronze Gilding Wax
- Misting bottle
- Sandpaper for prepping (i.e. 200 or higher grit)
- Sandpaper for transfer finish (400 grit or higher)
Here is the table before when I brought it home from the thrift store.

1. Prep
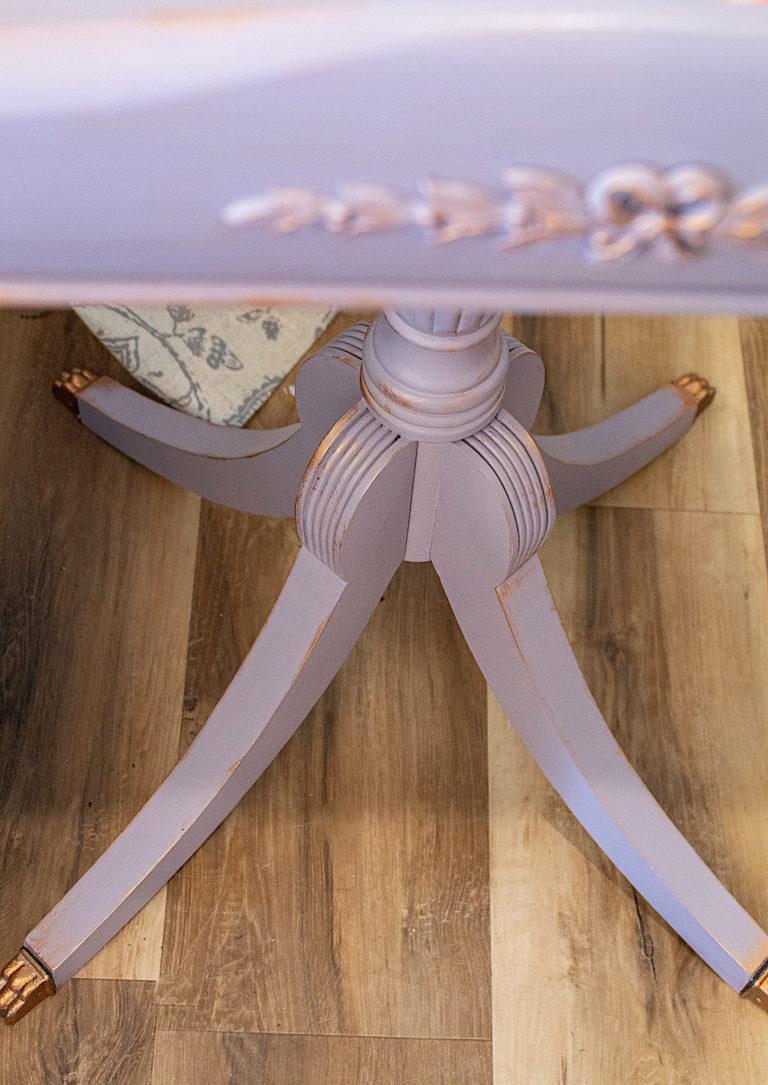
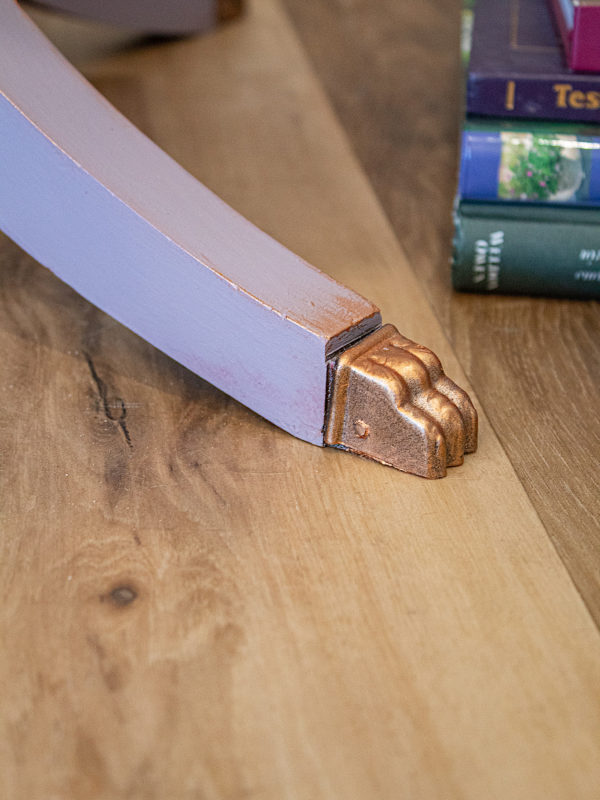
This table had some wear and tear. I first did a quick sanding down by hand with 240 grit sand paper. I filled in nicks with wood filler and cleaned everything with my vinegar solution. Then I gave the feet one coat of copper spray paint followed later by some bronze gilding wax.
Disclosure: Some of the links provided are affiliate links. By purchasing through these links it supports this blog and the work we do and there is no extra cost to you. If you would like to read our full disclosure, click HERE.
2. Paint
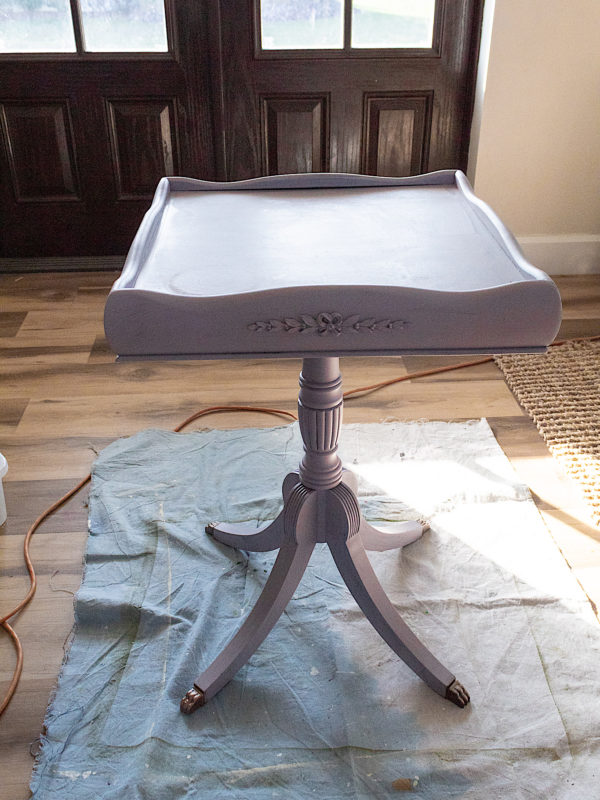
With chalk paint you really do not need to use primer. If I’m painting a light color like white or if I have a very glossy surface, I will typically prime. For this piece I did not prime. I started by applying one coat of the Divine Lavender paint. This is a beautiful color. I thought it would go very nicely with the dainty style of this table. I used my misting spray bottle as I painted. Keeping your surface a little wet is important when working with chalk paint. Here is the table after one coat. The coverage of this paint is fantastic.
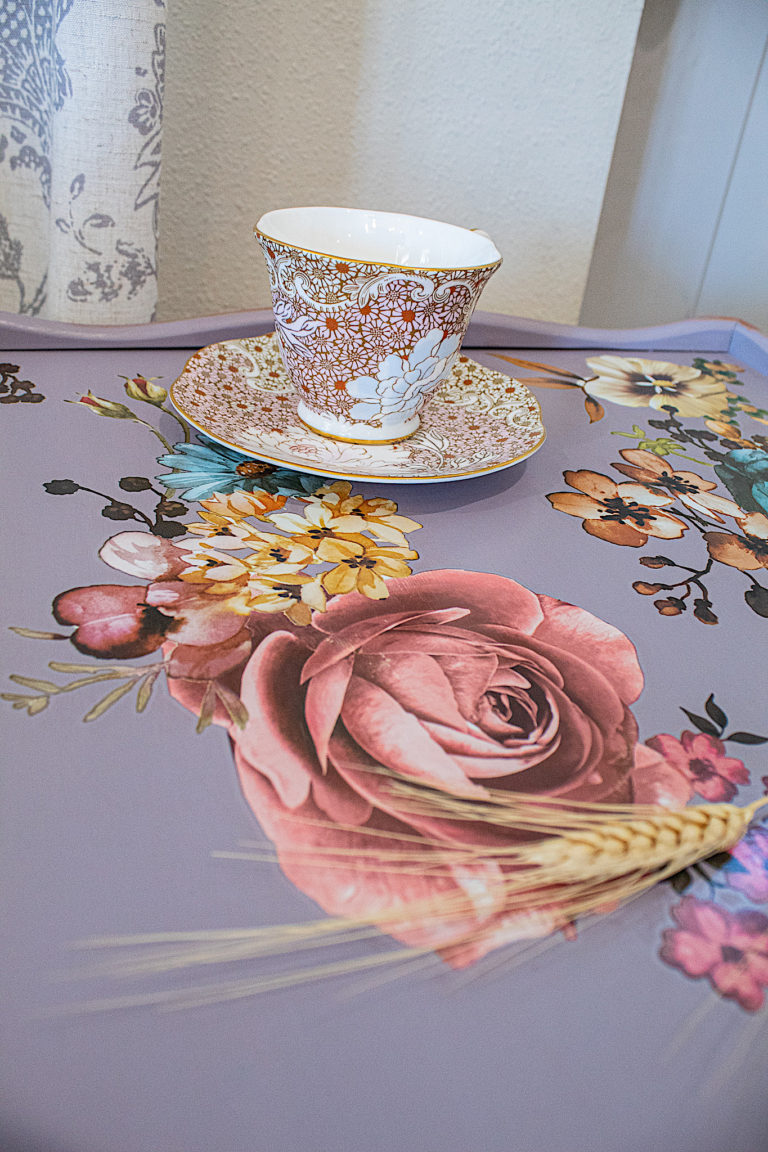
3. Transfer
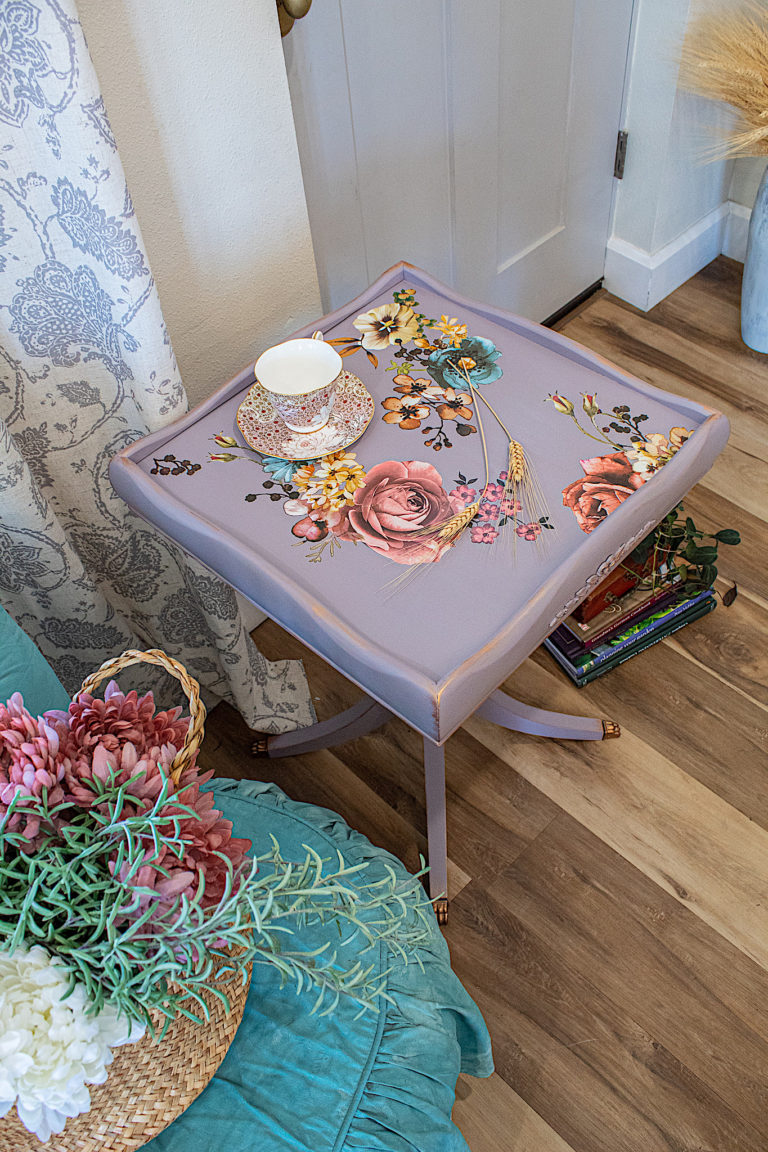
After my second coat of paint had dried, it was time to apply my transfer. I thought some flowers on the top would make a pretty statement on this piece. I started by cutting out some bouquets and seeing where I would position them. Here is a picture showing a cut out before I adhered it.
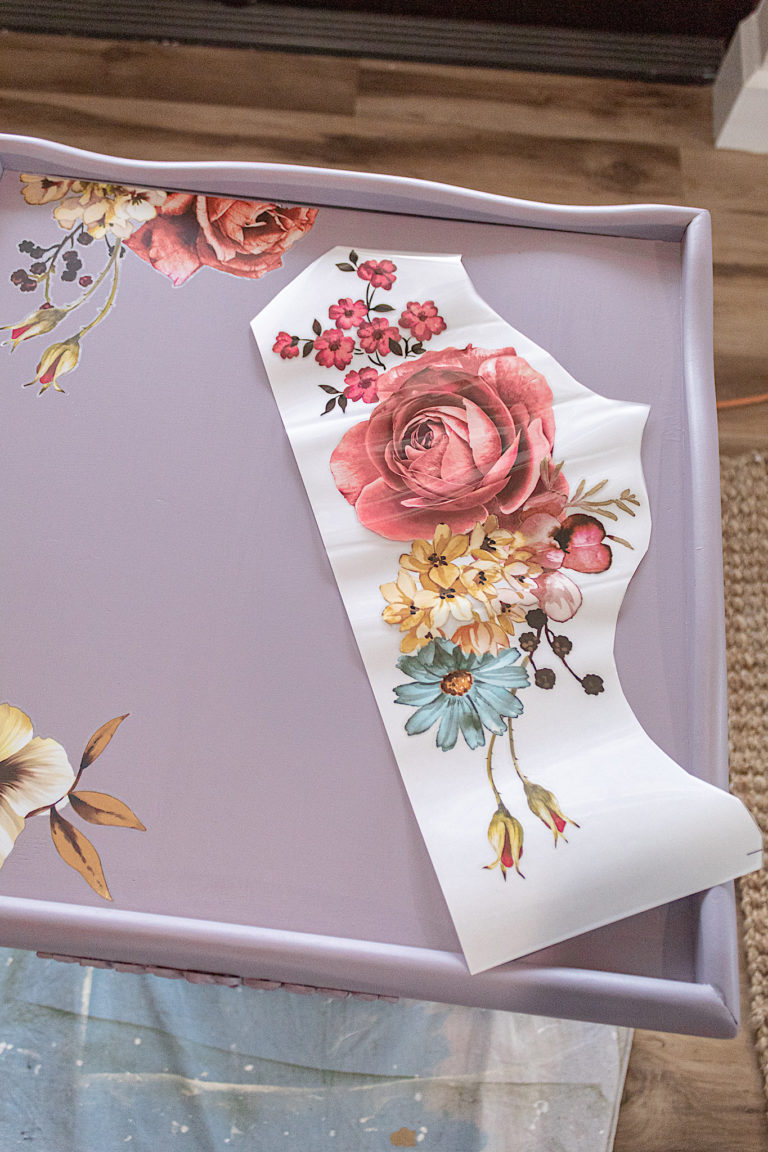
Once I decide where I want to adhere a piece, I remove the white plastic backing. Once this backing is off, you should be careful because the transfer will stick to anything.
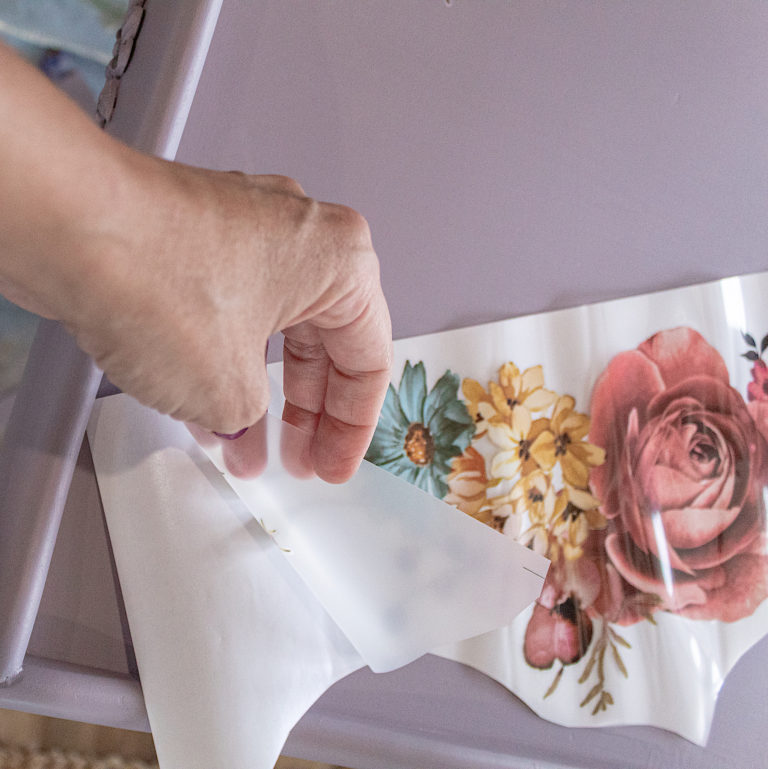
Once you place the transfer on your piece do not move it. Hold it in place as you begin to rub with the wooden tool that comes with the transfer. Rub over and over with a moderate amount of pressure all over the transfer. I’m a little neurotic with the rubbing. I go over it incessantly, but you probably don’t have to do as much as I do!
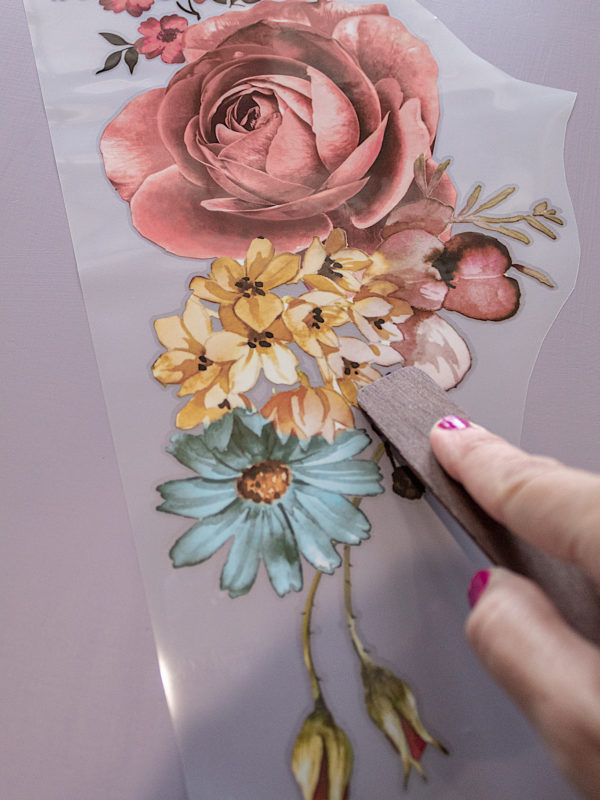
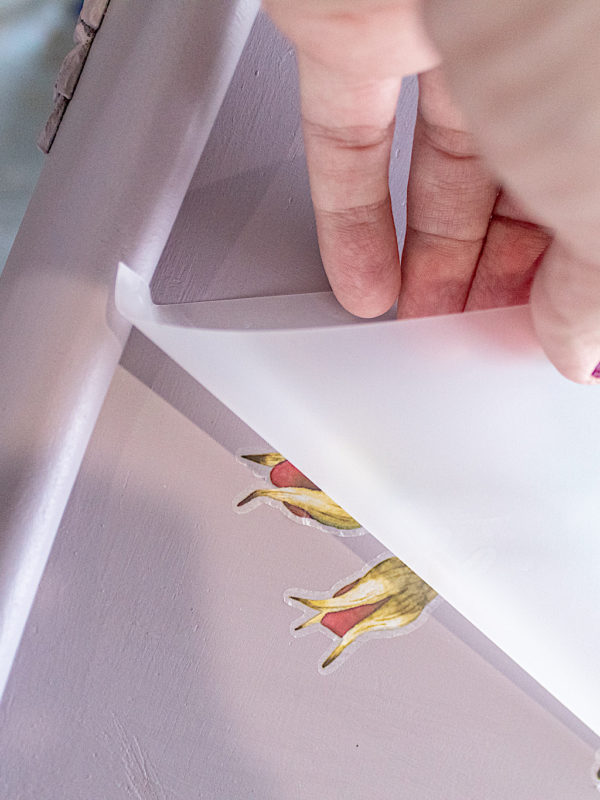
I continue rubbing even as I’m peeling back the transfer to make sure all the details and edges are adhering well.
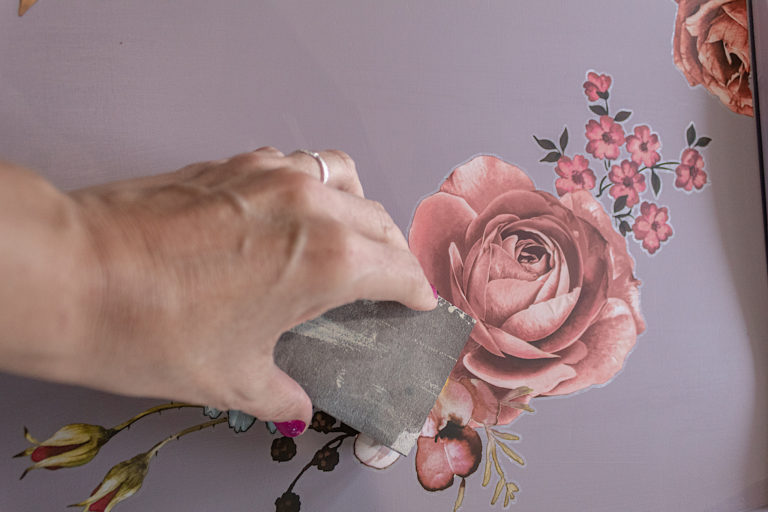
A final step I like to do is to take a very high grit sand paper (400 or higher) and go over the transfer very, very gently. This will help remove any air bubbles. You don’t want air bubbles when you apply your clear coat as the liquid will get under the transfer and discolor it. I also go around all the edges. This removes the appearance of the edges, making the transfer look more seamless.
Here’s a quick video demo of how I add the transfer.
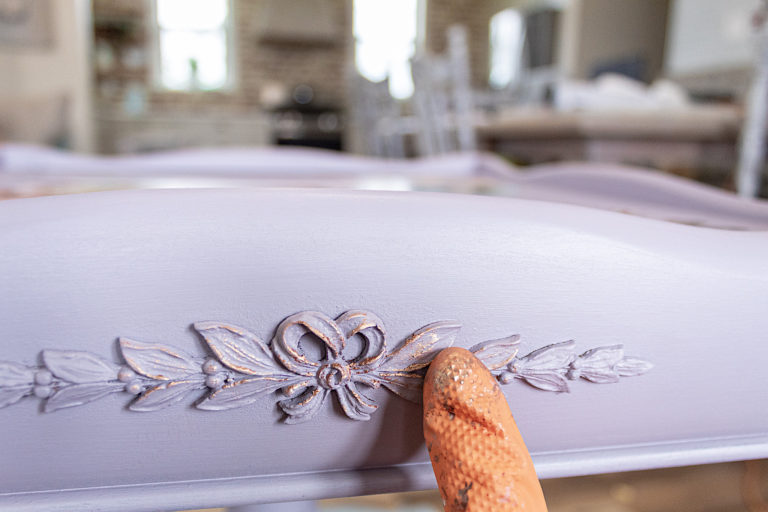
4. Decorative Wax
To highlight details, I went around the piece with my gloved finger and applied small amounts of Bronze Gilding Wax.
5. Finish
I applied polyurethane in satin to seal and protect the table. One coat everywhere and three coats on the table top. I recommend using a foam brush to apply clear coat. It keeps the bubbles away!

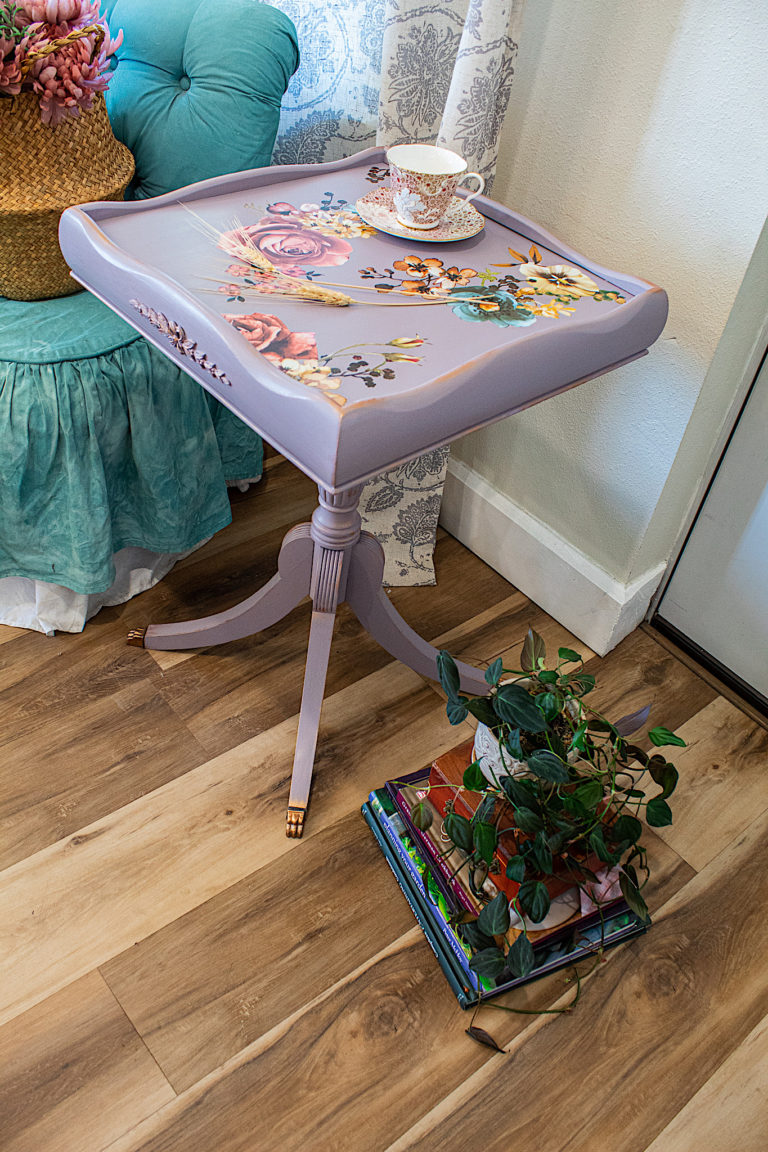
Isn’t this little table the cutest! I do hope you liked this tutorial. Let me know if you have any comments or questions. I always appreciate hearing from you.