Hello my friends! Today I wanted to do a quick post on how to make a raised stencil look on your furniture pieces. In fact, you can add raised stencils to many areas of your home to enhance your decor through texture and detail—doors, picture frames, stair risers, kitchen cabinets…and so much more. I love texture and patterns. Stencils give you pattern, and raised stencils add another dimension through texture. They also lend themselves beautifully to highlighting with paint and waxes.
Disclosure: Some of the links provided are affiliate links. By purchasing through these links it supports this blog and the work we do and there is no extra cost to you. If you would like to read our full disclosure, click HERE.
Prep your piece for adhesion by giving it a light sanding and good cleaning. Tape the stencil where you want it on your piece.
2. Apply Plaster Or Texture Paste
Follow the directions of your material. I used Plaster Tex on these projects because I had some left over from my Cinder Block Wall Transformation project. Another option is to use Texture Paste. Always read the instructions of your materials first. It may require mixing prior to application.
Using your putty knife, start applying your texture paste in sections. Apply generously in up and down motions, keeping your putty knife flat-like or parallel to your surface. In other words, don’t make curved in motions. You don’t want to press your paste under parts of the stencil where you don’t want it to go! I also like to use my finger to press down on the stencil around detailed parts as I go.
For easier application on drawer fronts, I take the drawer out and sit it up on a table.
3. Skimming
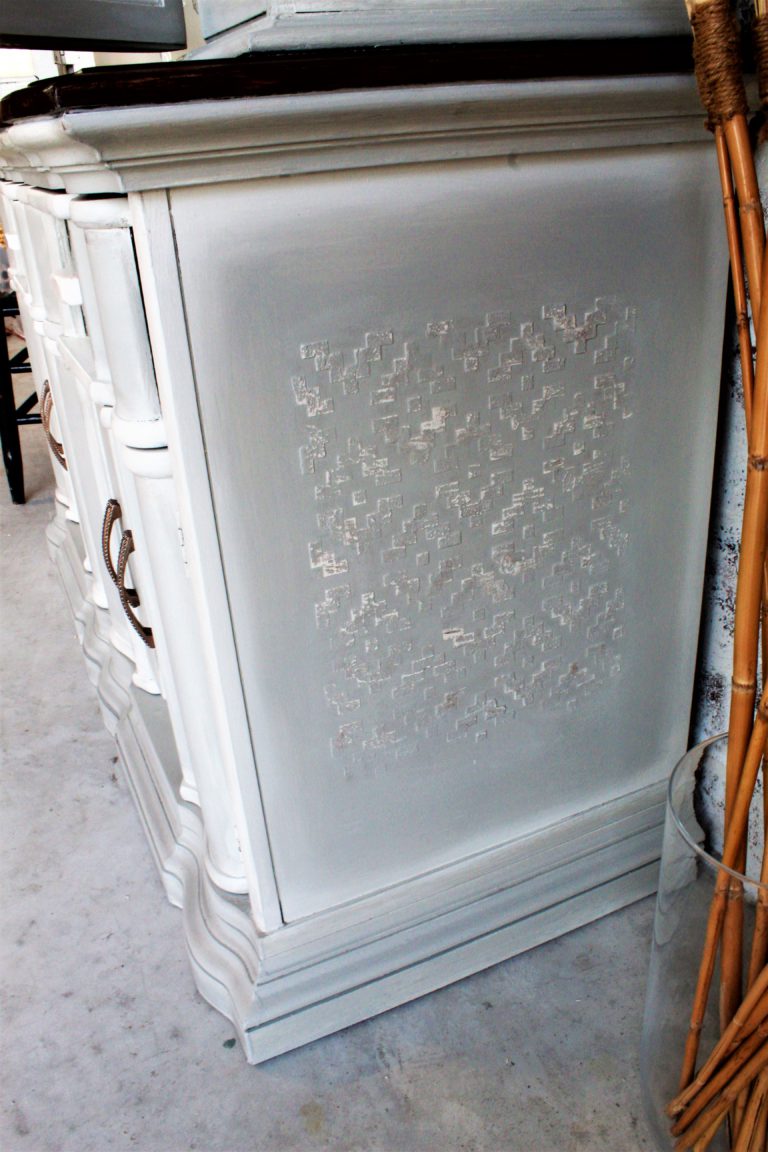
Once you have covered your entire stencil or at least the parts you want stenciled, skim down your paste with your putty knife. Do this carefully as you bring down the level of the paste to just above your stencil. I know it seems like you are not leaving enough on for texture, but trust me, it will have a nice level of elevation. I also find leaving the stencil too high can give you messy results.
4. Finishing
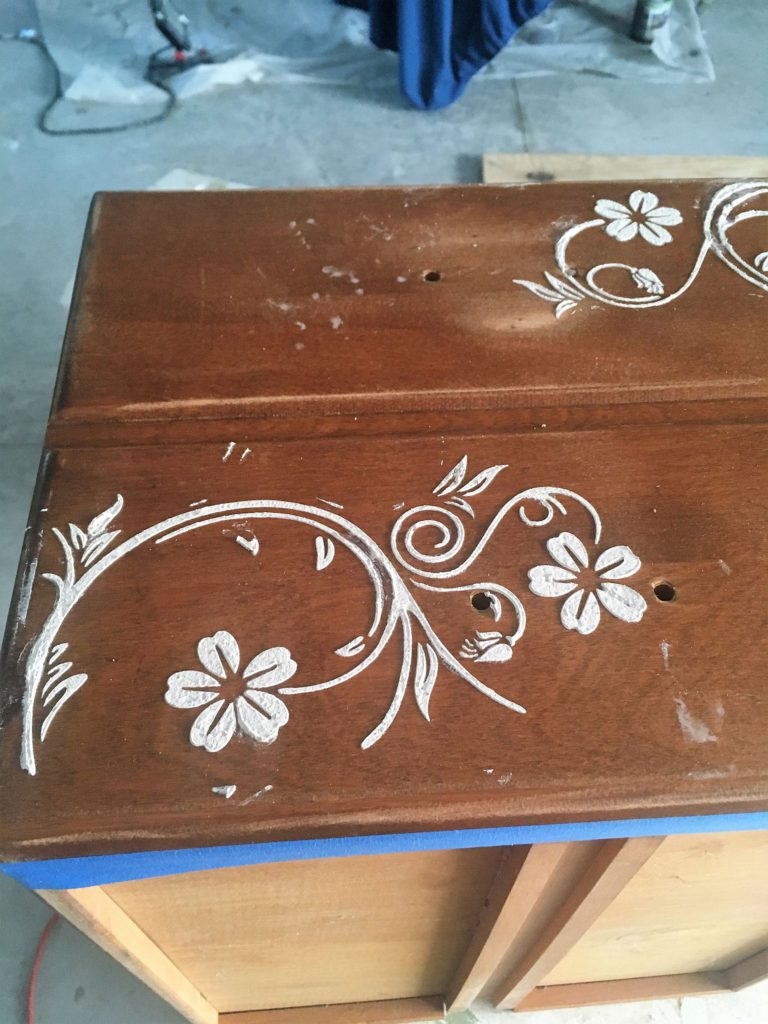
Once you’ve skimmed everything down, carefully pull off your stencil. Make sure to do this while everything is still wet. You don’t want your stencil to dry into your plaster!
If you notice parts that are smudged or out of place, you can take a small tool, like a tiny flat head screw driver or a pointy knife and clean up a little bit. If there are really uneven parts or areas that are looking too high, wait until everything dries and sand down where needed. But remember, imperfections can add really nice character to your stenciled look. Plus you are painting over later, disguising smudges and such.
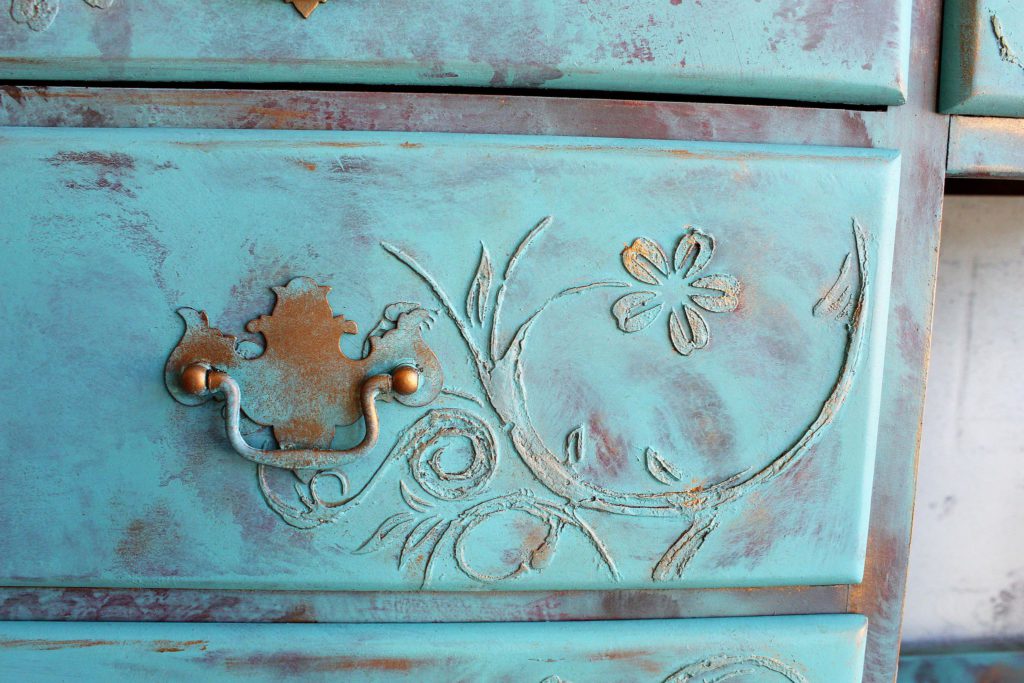
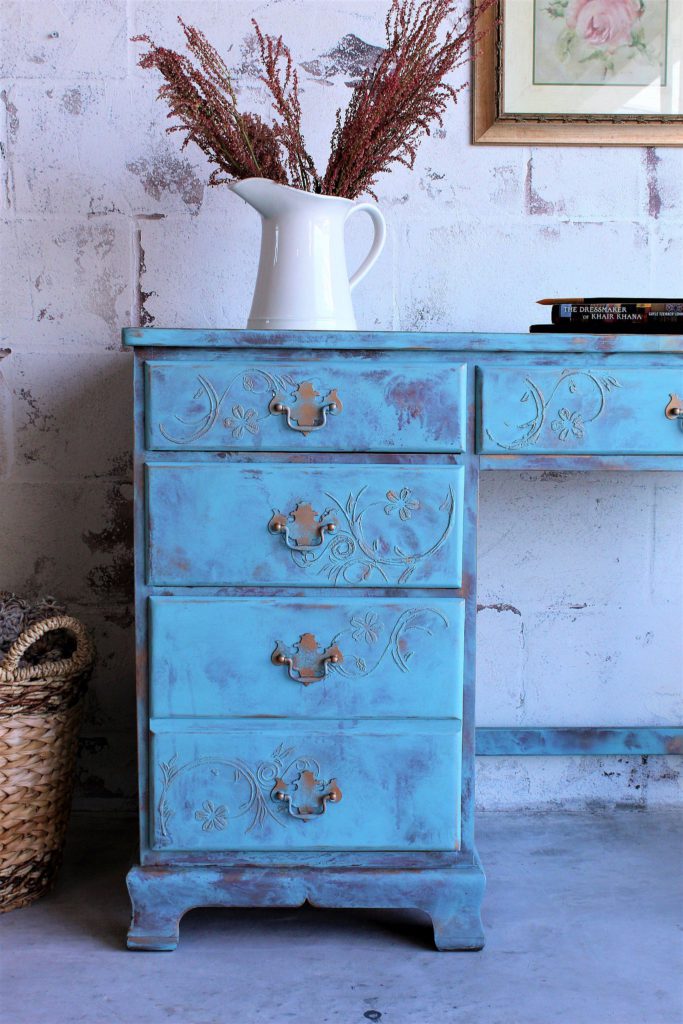
Once your stencil is dry, you can accentTo really bring out the texture you can accent with paint, glaze or metallic waxes. I love all the Prima Marketing Decor Metallic Waxes…I have them in many colors. For starters, they smell delicious and they go on beautifully and the little jar lasts me forever. I used Aged Brass on my Sea Cottage Desk drawer fronts.
So lovely readers, pretty easy huh? Let me know if you have any questions. I’ve also done a quick video demo of the raised stencil application process for you below. Enjoy!