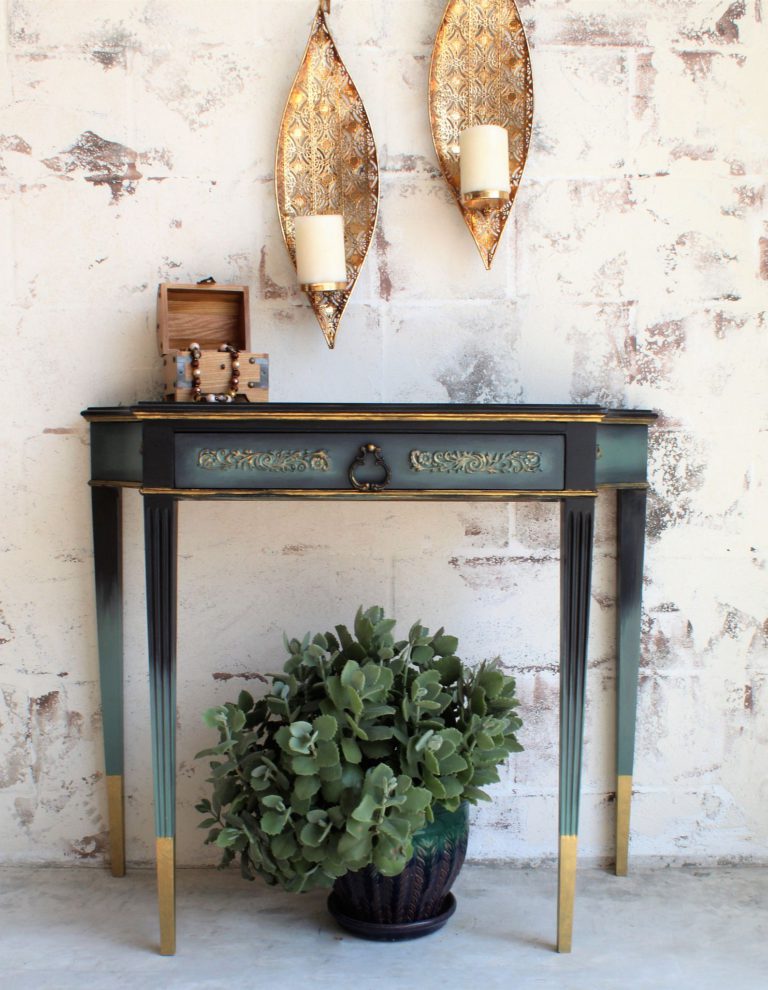
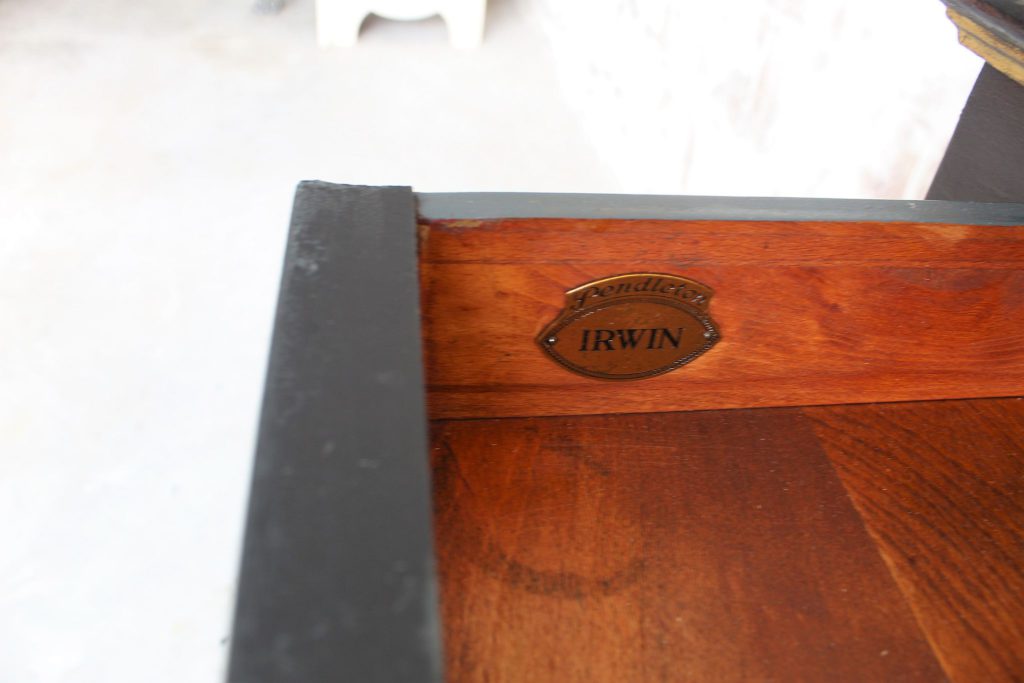
To my delight I stumbled upon this super cute table at a local thrift store. When I later did some research on the Irwin Pendleton furniture line, I was even more delighted to learn of this table’s vintage history, possibly dating back to early or mid-century. Double the win, pretty and historic!
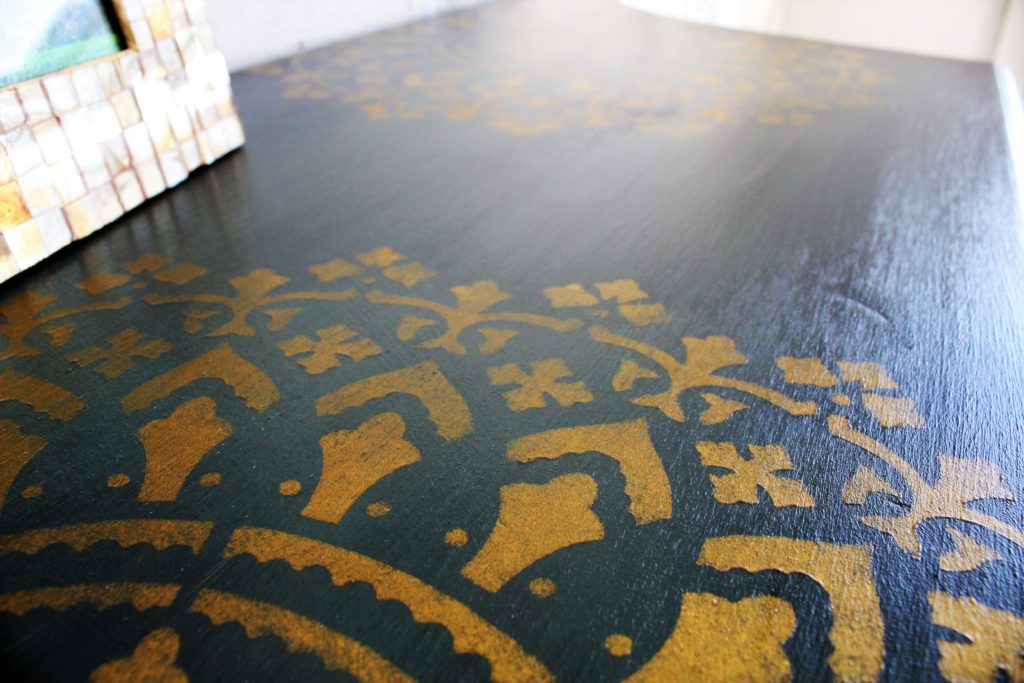
When I (first) redid this table, I added a beautiful gold stenciled pattern to the top. Everything was well and dandy until the very end. Working in my garage has its disadvantages. One of these is flying debris that lands on your wet paint or clear coat. (not fun) It wasn’t until I was editing my staged photos that I noticed it. Small particles, many of them white, dried in everywhere! Uggh! (If you look closely, you can see them in the picture). And no matter how I lightly sanded or tried picking them out with my nail, it was not working. Or even worse, it was pulling up bits of paint. Once you start to mess with a finished piece and you attempt touch up with paint, especially on a piece that has a blended paint technique, you can never get it quite right.
It’s moments like these when I sometimes just want to cry! You’ve put in hours of work and used you pricey supplies…and well, it all goes down the drain. (pooh) But what can I say lovelies? Everything is a lesson learned. From this experience and (a few others), I was able to convince my husband to build me a workshop! (Stay tuned) In the meantime, follow me as I start over with this table. Sanding the stencil off the top was the first step.
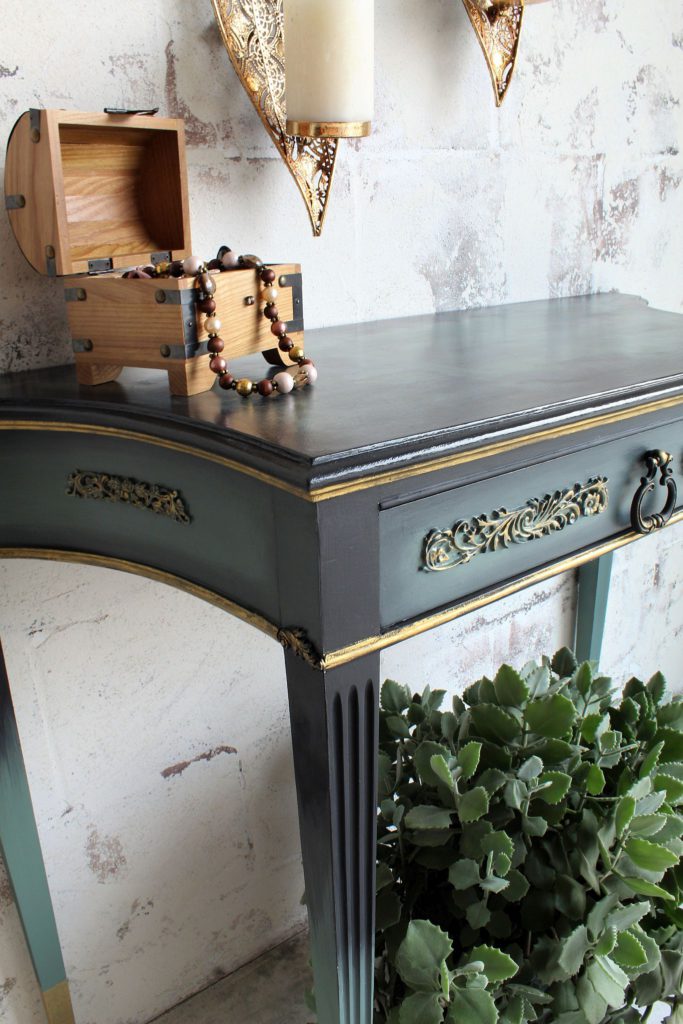
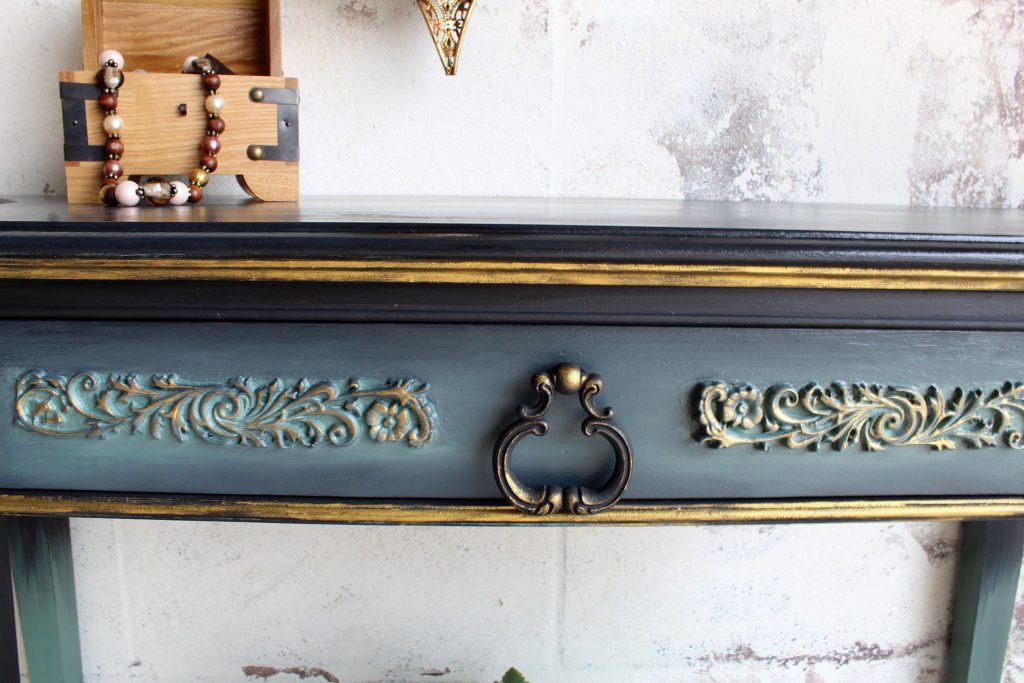
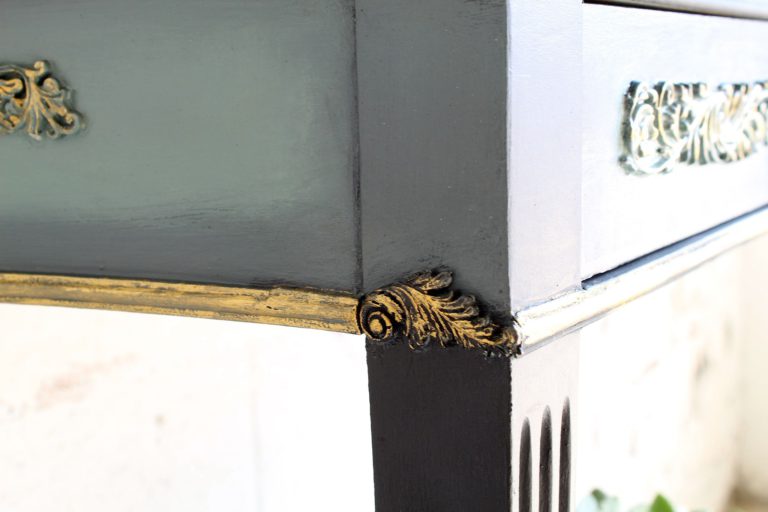
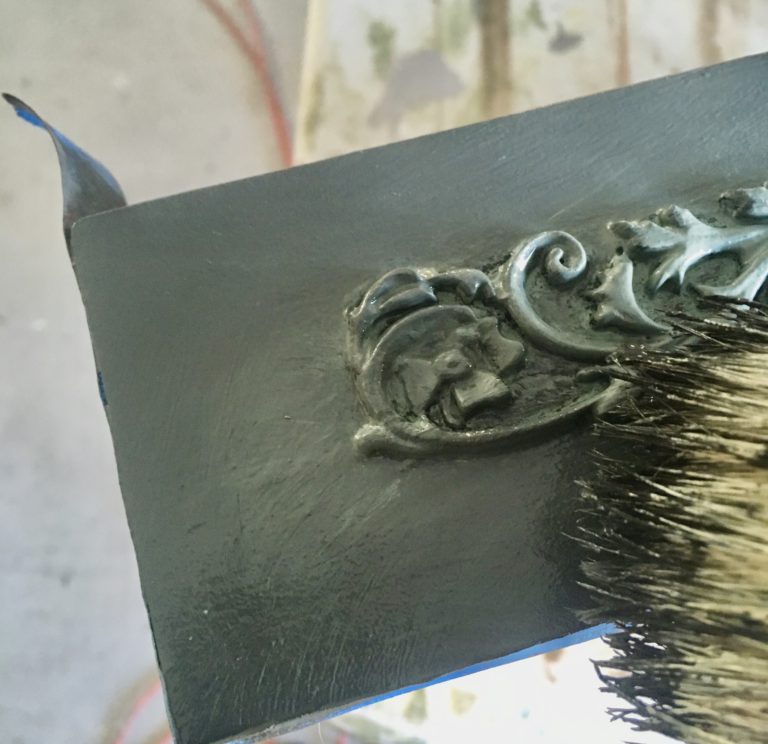
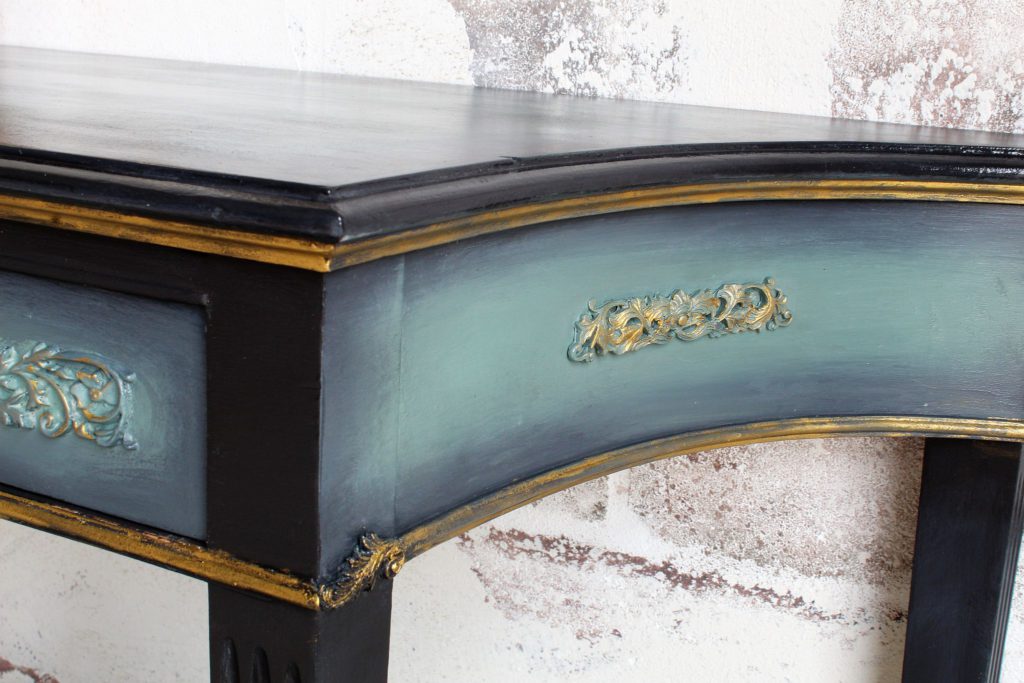
After priming the entire piece, I made some decorative moulds using this Baroque Silicone Mold and my Amazing Casting Resin. In my Floral Bench Postyou can see a full tutorial on making decorative moulds. I added them to the front and sides of the table and I used the small leaf mould to fill in where a piece of the trim had broken off. Don’t these mouldings spruce things up so lovely?
2. Chalk Painting
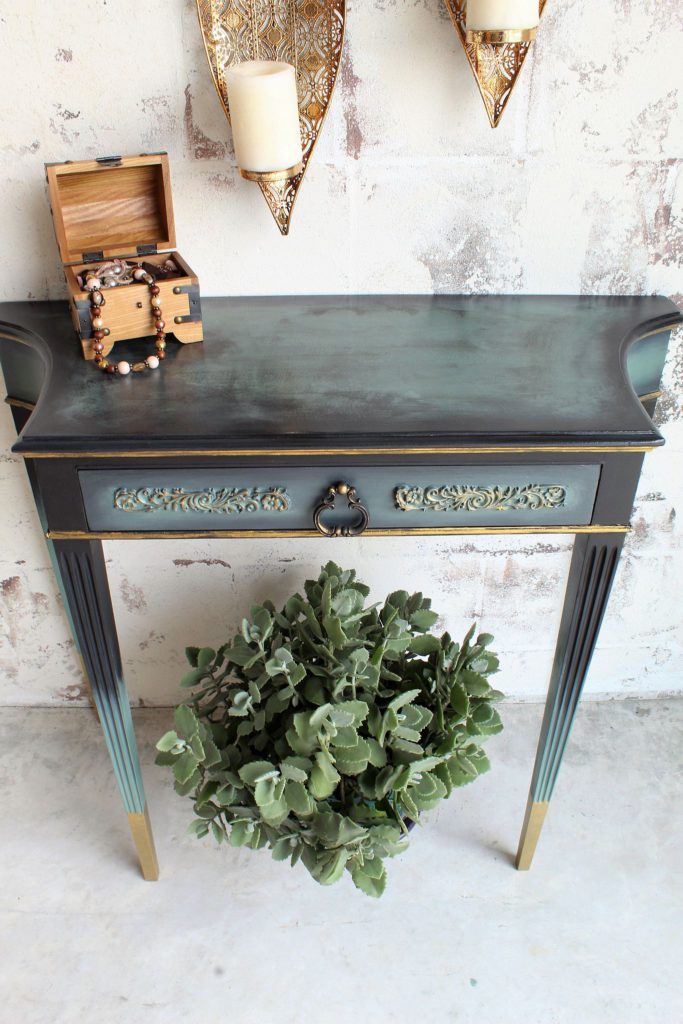
This table has an elegant frame, so dark, regal colors came to mind when I was planning my design.
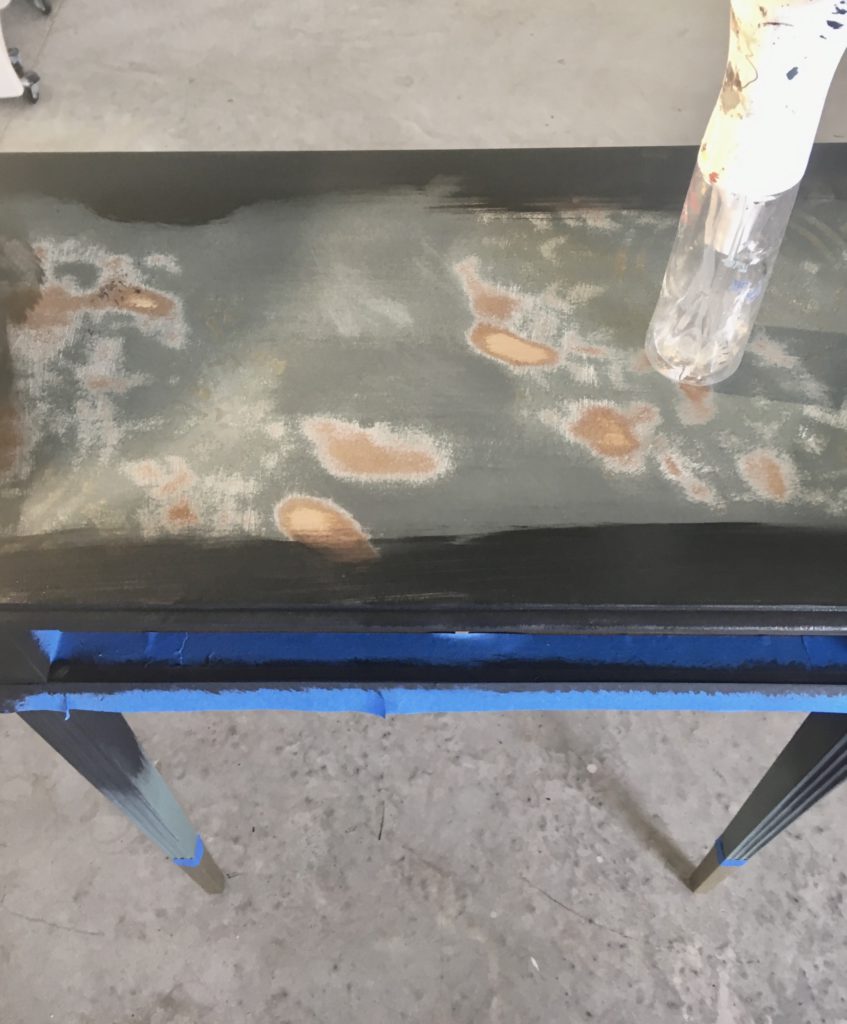
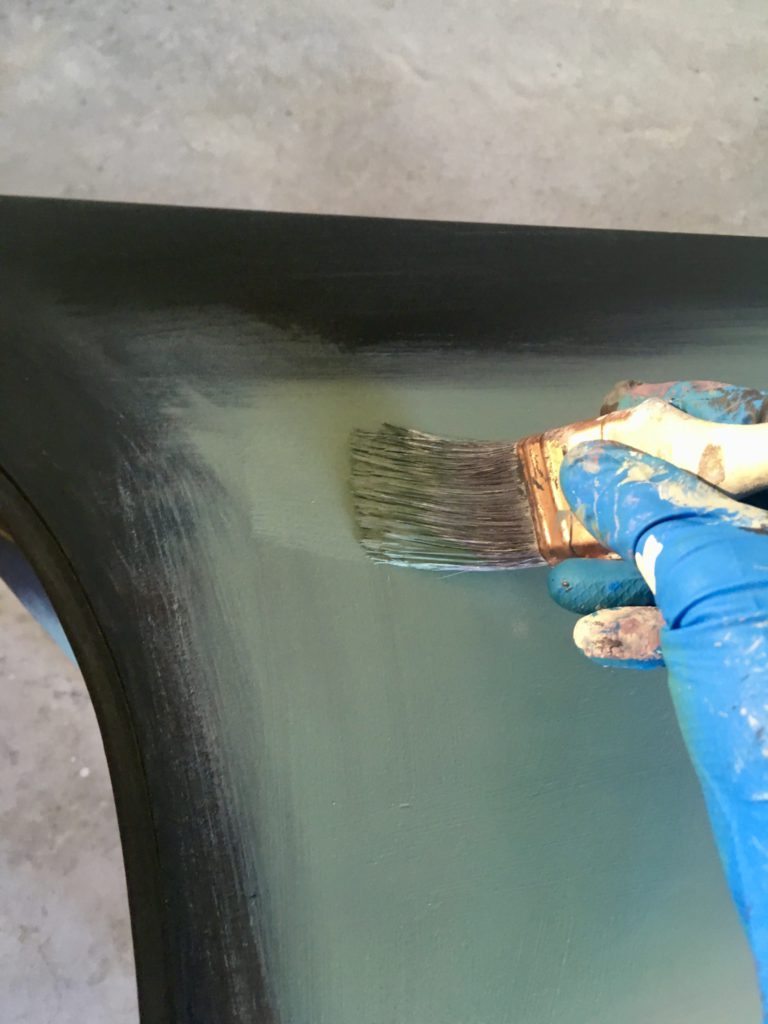
I applied my first coat of Onyx Black and Boreal Green with a rough blended technique. I wasn’t worried about a perfect blend since it was only the first coat. I basically painted some definition of where each color would go. (I.e. Black highlighting edges, green in the middle).
3. Starburst Technique
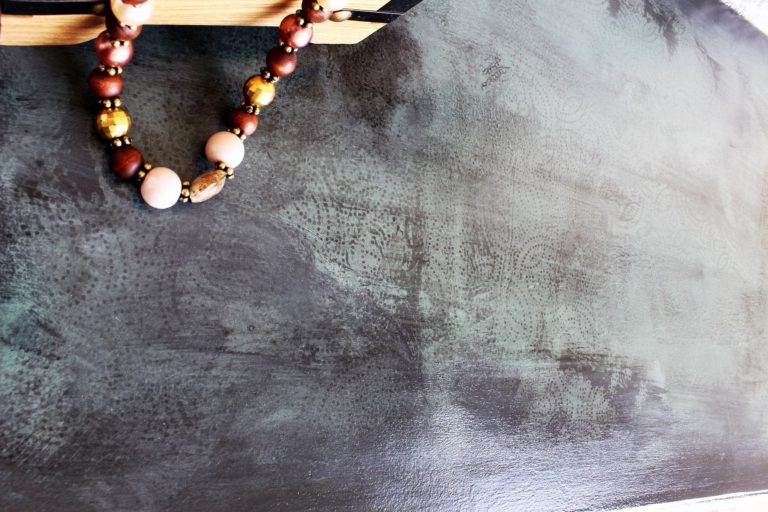
I wanted to do something really creative and show-stopping for the table top. I started by creating a Starburst technique. At least the look reminded me of a starburst. 🙂 This was done by applying the second coat of my black (perimeter) and green (middle), making sure to keep the paint damp using my water mister. Once the colors were in the desired position, I used my brush to feather out the green over the black edge, all around the piece. Moisten slightly as you go to help your brush pull the paint.
Here’s a video showing how I did the Starburst Technique.
I absolutely loved the results! The Starburst effect is really beautiful and unique. You could leave as is or I can see adding stencils or a pretty transfer to the middle. But I decided to go even further with another technique…remember I wanted something show-stopping? I felt this table deserved it after losing its pretty stencils. 🙁
4. The Paper Towel Pattern Effect
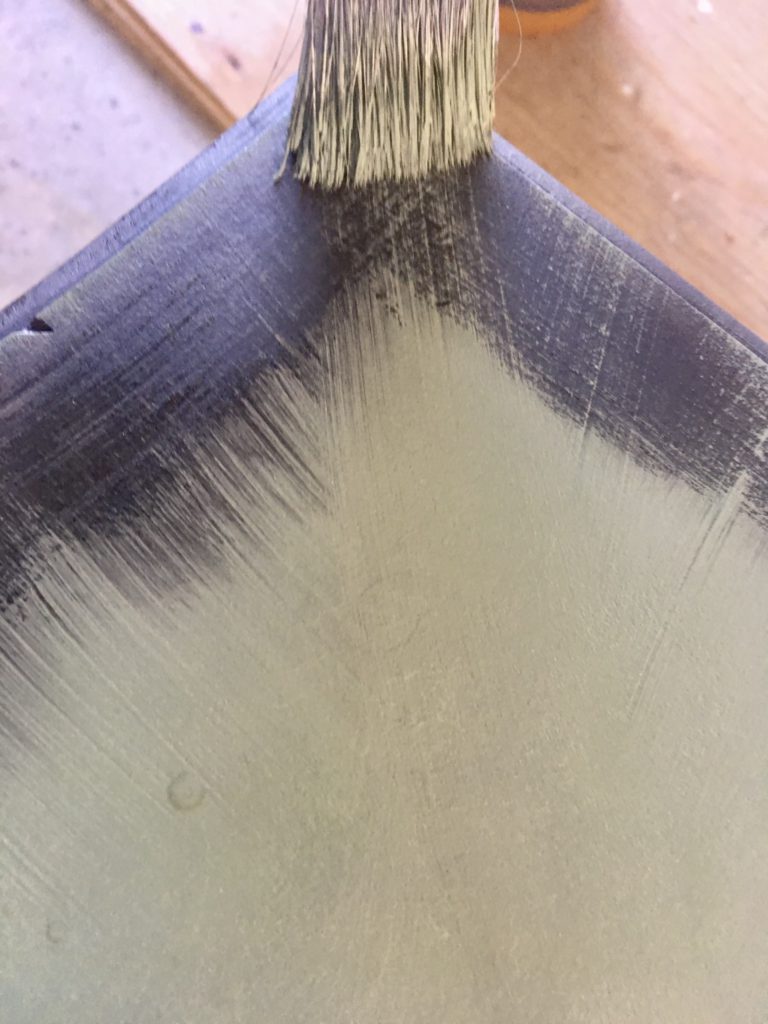
To create this spectacular, magnetizing look, you are going to use paper towels that have a raised pattern. Make sure the paper towels are white. You don’t want any ink getting onto your paint. To begin, add your third coat of the black and green but this time invert the locations. Black in the middle, green around edges. This will create contrast when your paper towel pulls up paint.
While your paint is still wet, take one sheet of paper towel, with the raised pattern side facing down towards your piece, and gently press it onto your piece. Then pull back to reveal patches of pattern. If your paint begins to dry, reapply in areas you want more pattern.
This is a technique to use if your goal is a mesmerizing sea of pattern, not a perfect, orderly and symmetrical pattern. For that, you could use stencils. The video below demonstrates how I did the paper towel pattern technique.
5. Finishing Your Piece
I went around the mouldings and some of the table edges with Prima’s Vintage Gold Metallic Wax using my finger to highlight details. I applied Varathane’s Polyurethane in Glossfor the table top. The gloss sheen really brought out the depth of the patterned look and added a nice touch of elegance.
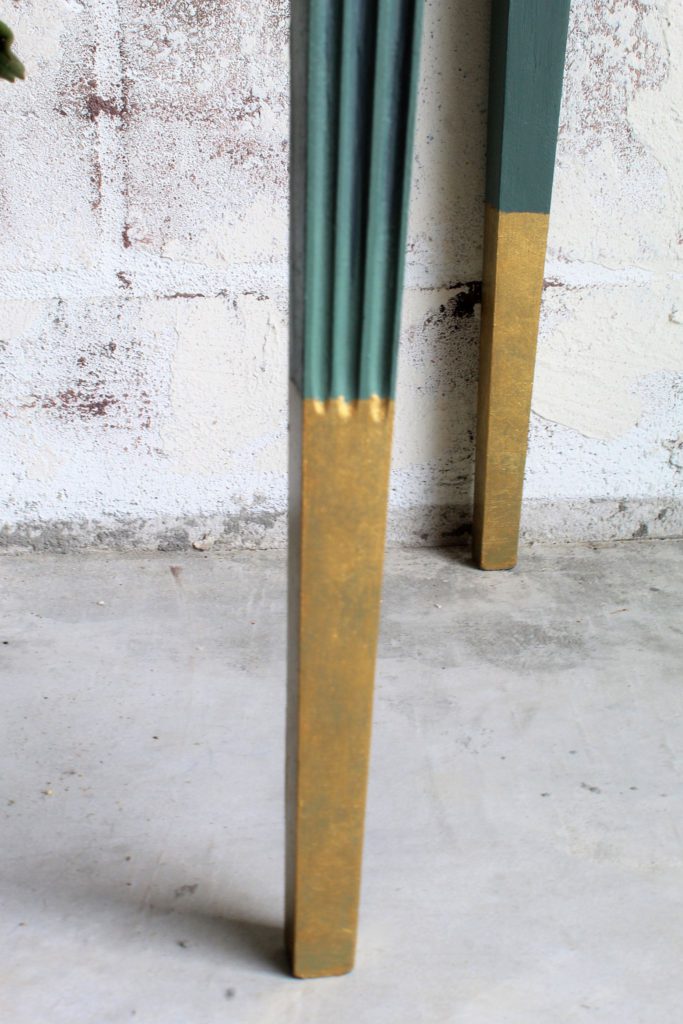
I taped off the bottom of the legs and wiped on with a rag three coats of Americana’s Glorious Gold Enamel Paint. It dries very quickly so it doesn’t take too much time to add this very pretty detail.
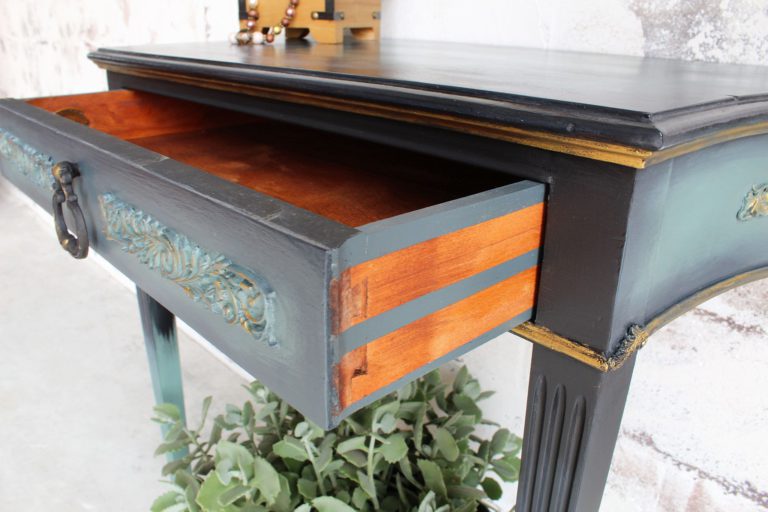
I used Danish Oil to restore the richness of the wood in the drawer. It came out simply luscious. I’ve used this product in my home on wood elements whenever I want to bring out the natural color and grain and don’t want to cover it up with stain. I get a pint and it goes a VERY long way.
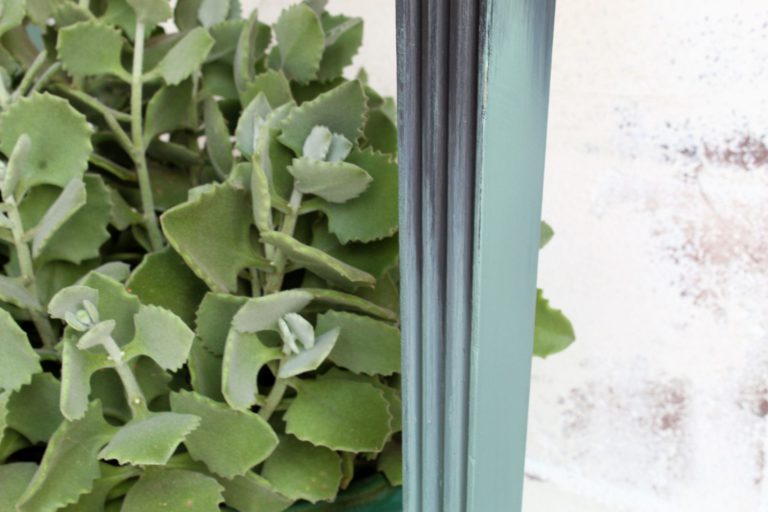
For the drawer sides, I used tape and my Boreal Green to create a striped detail. You could wax the rest of the piece or clear coat. I chose Varathane’s Polyurethane in Satin to seal the legs, front and sides.
I really hope that you enjoyed this tutorial! I’d love to hear your preference on the top? Gold stencils or Paper Towel Effect? Wishing everyone a wonderful journey on your creative projects!
This Irwin Vintage Table is now available on my Etsy Shop.