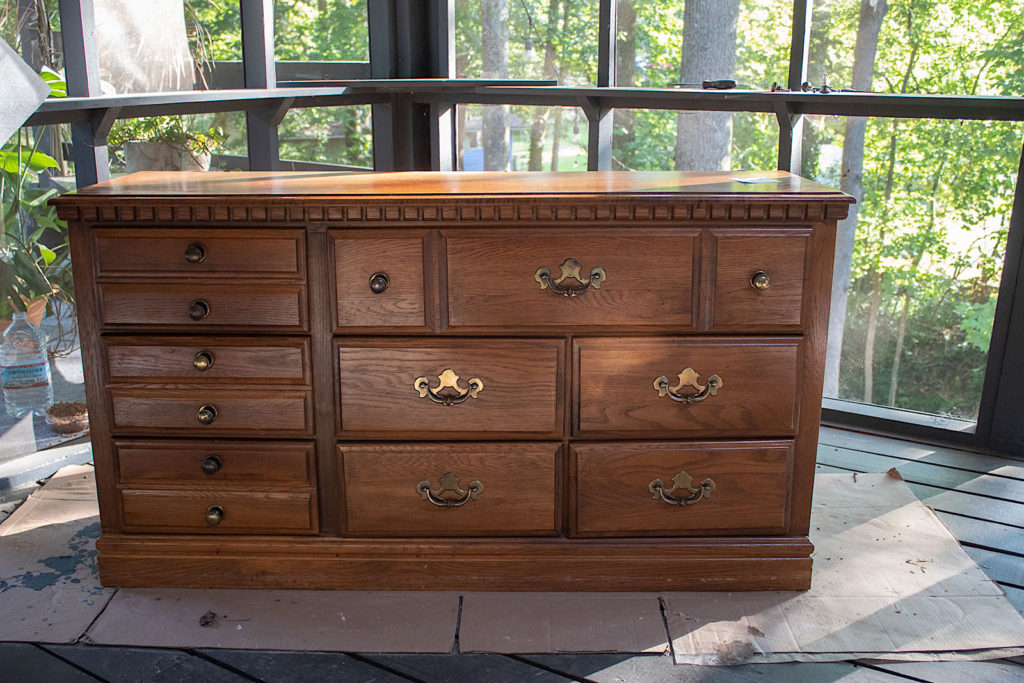
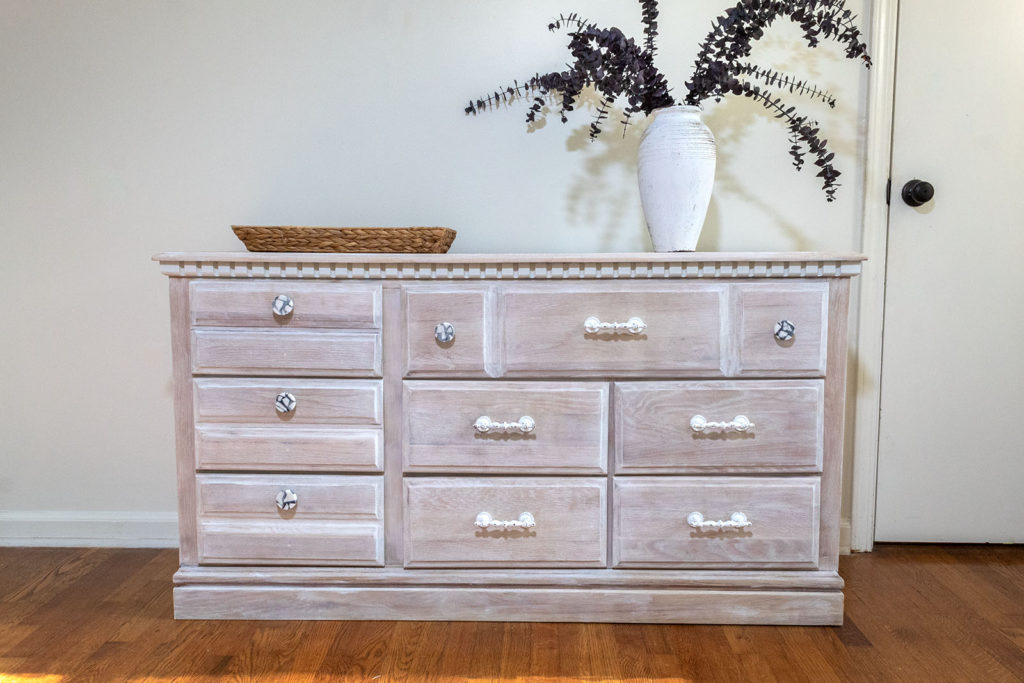
Greetings lovely readers! We needed a dresser for the main bedroom in our new house. I found a used dresser that was just the right size, but it desperately needed an updo! The orange look simply had to go. Today I’m sharing an easy technique for toning down the orangeness of old wood so that you can revive your beloved furniture pieces. Join me as I transform this dresser and give it a fresh, Coastal Vibe.
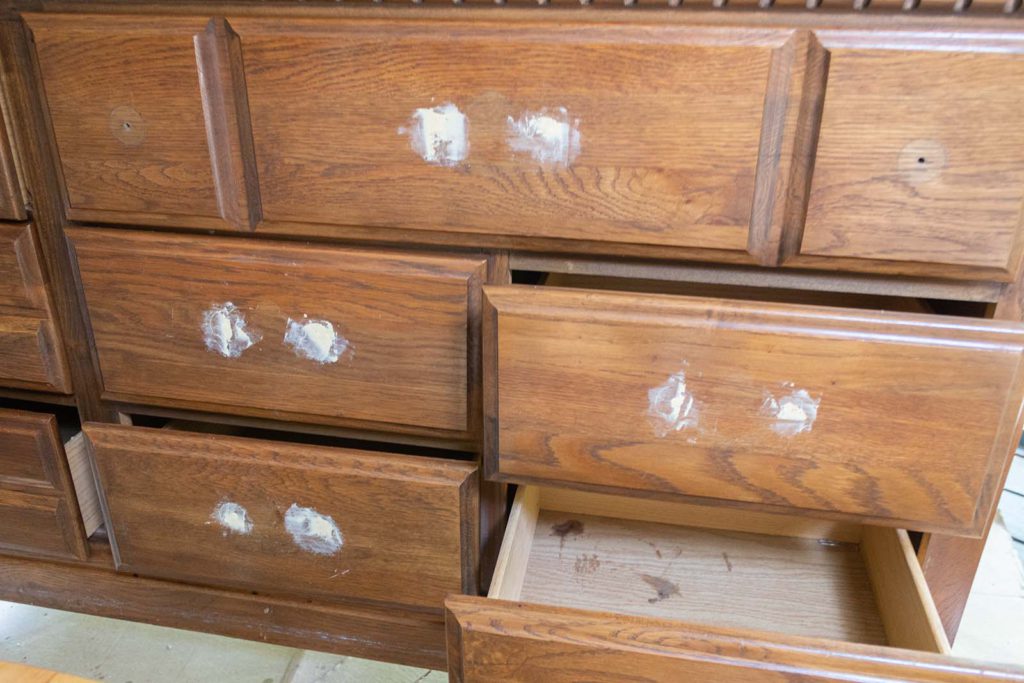
I’m using wood filler to fill in some old hardware holes. This dresser has, in my opinion, an excess of hardware. It makes the aesthetic look a bit dated. So I’m going to fill some in to reduce the amount of hardware. I will also be buying some new stylish hardware.
With my putty knife, I go over the holes and leave a slight elevation of filler over the hole. That way I can sand everything smooth and level once it is dried.
Disclosure: Some of the links provided are affiliate links. By purchasing through these links it supports this blog and the work we do and there is no extra cost to you. If you would like to read our full disclosure, click HERE.
Step 2. Sanding
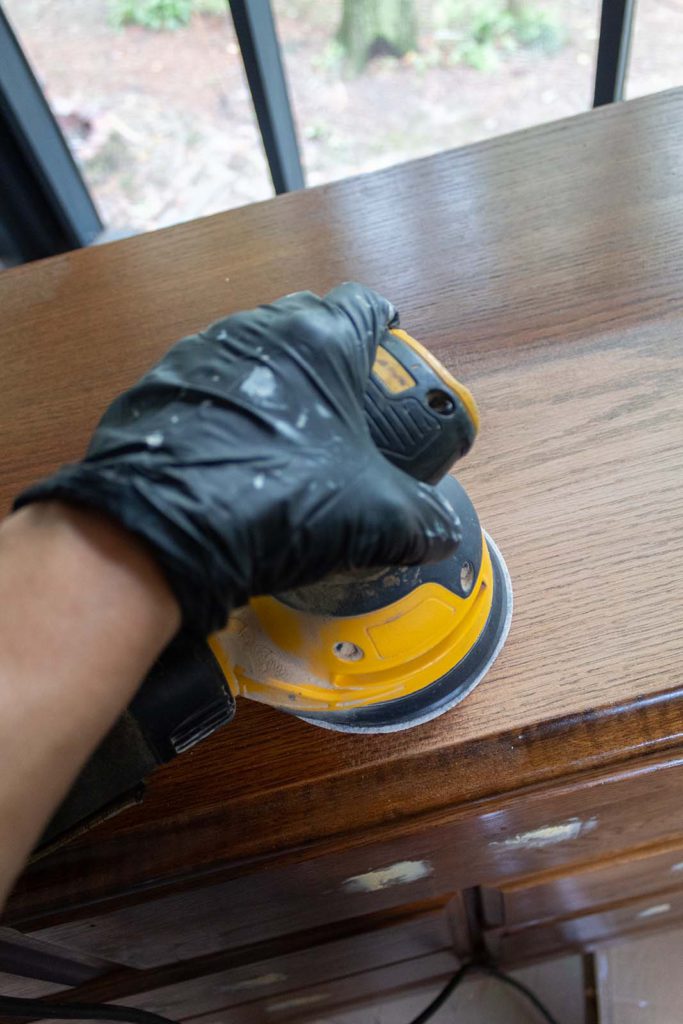
The first step in getting this dresser in shape for a new look is to get rid of the old and orange finish. Over time stains and clear coats can acquire an orange or yellow aesthetic. It is time to update this dresser as this look will just not do.
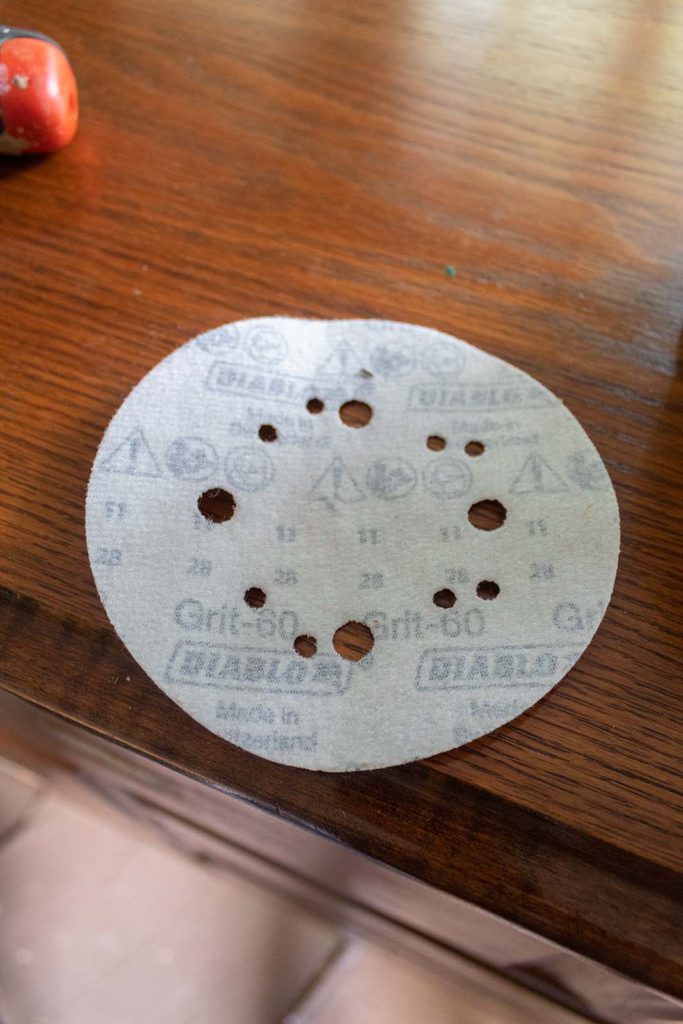
I’m going to roll up my sleeves, arm myself with loads of patience and whip out my orbital sander. Because let me warn you, sanding an entire furniture piece to the raw wood is a time consuming job. But if you get into it, it is actually quite meditative!
I need sandpaper with some strong grit to get through the clear coat and the stain. I’m going to probably go through about 8-10 of these 60 grit sandpaper pads. Make sure you buy enough sandpaper when doing a big sanding job.
Once I sand everything to the bare wood, I will come back over the surface with a high grit (400 or 800) to give it a nice soft and smooth finish. This step doesn’t take so long.
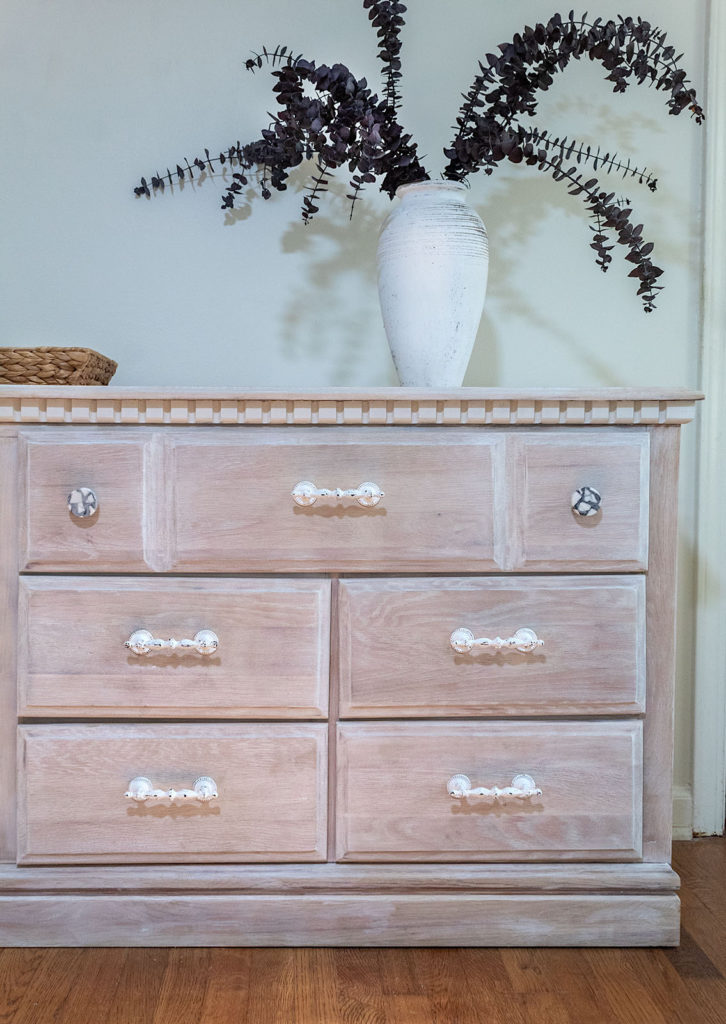
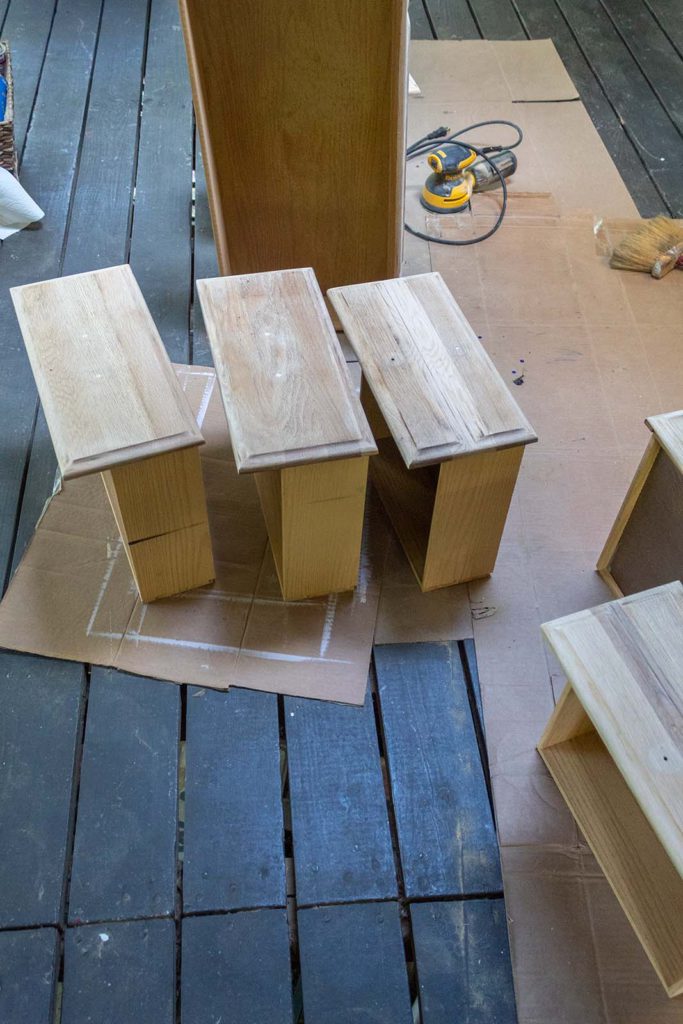
It took me quite a while to sand everything, including the drawers, but it was so worth it. Look at the beautiful wood underneath! Instead of painting over the finish, I’m glad I took this route. Since the style in our main bedroom is light and airy with a bit of a coastal feel, I think the natural wood aesthetic of the dresser will fit in nicely.
Step 3. Create A Paint Wash and Tone Down the Orange Wood
The picture above may look as if the wood on the drawers is whitish. However, it has in fact some strong orange undertones that most stains would accentuate, rather than tone down. There are some stains that may work to counteract those stronger pigments in aged wood.
I used a sun bleached stain when we built the mudroom shoe rack in our previous home and absolutely loved it. But the wood was also white wood and new wood, so not much of an issue with orange wood in this case.
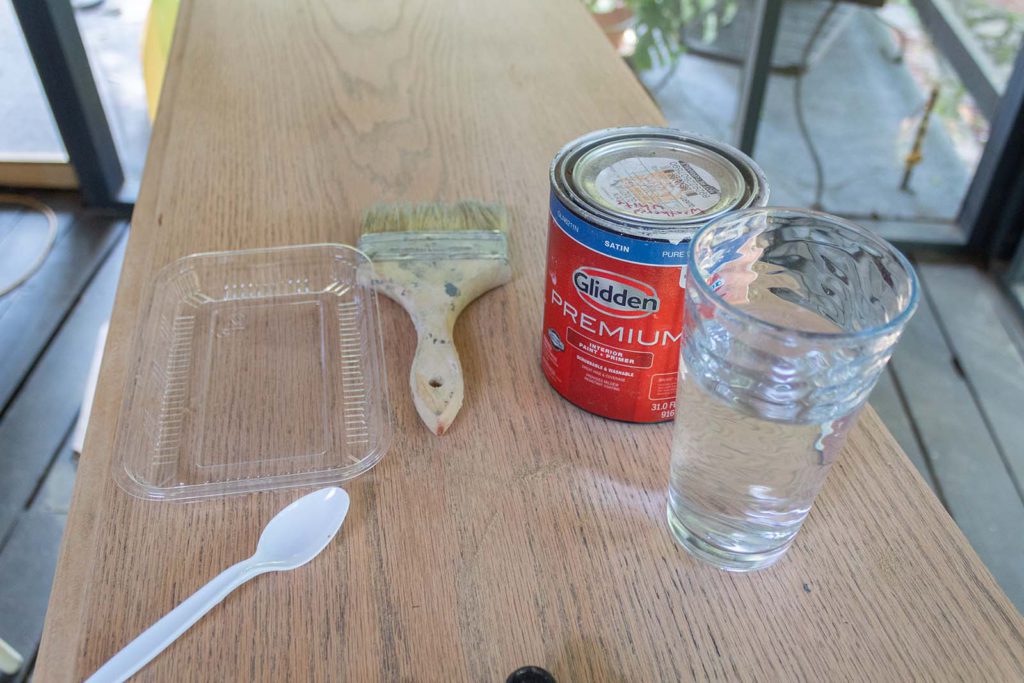
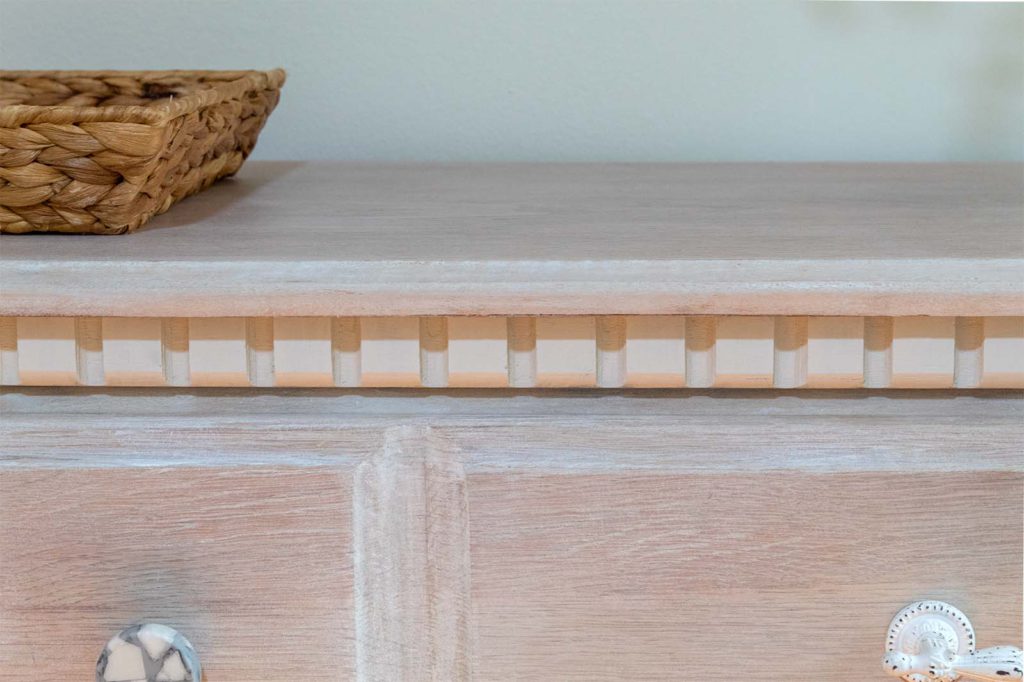
Today I’m going with a paint washing technique to combat any orangeness in the wood of this old dresser. I like that the paint wash will provide a whiter aesthetic, while preserving some of the wood grain look.
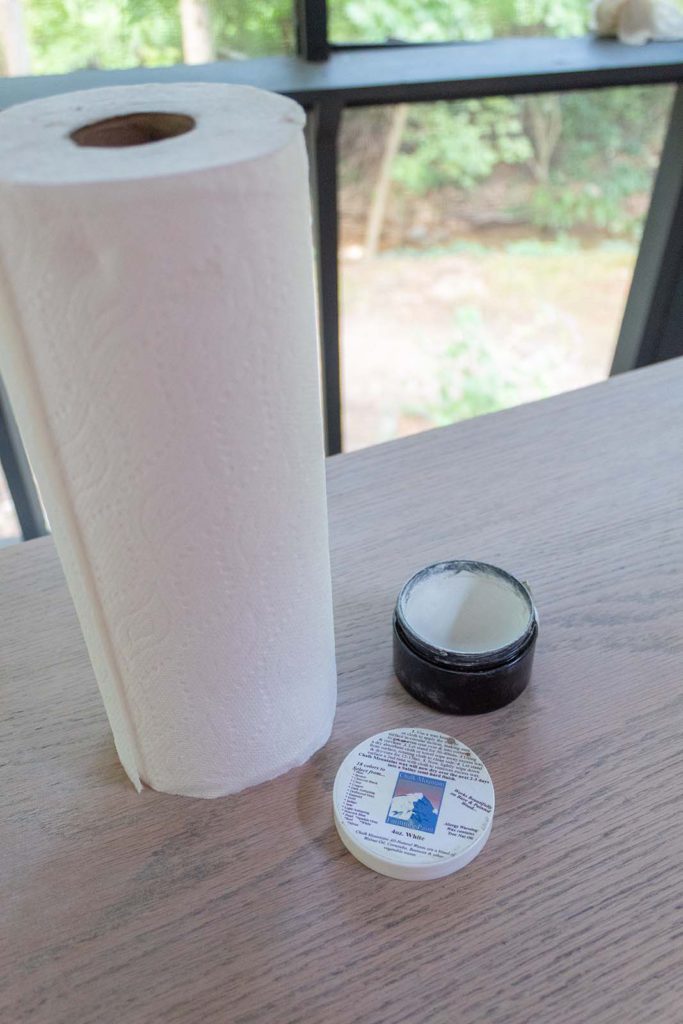
To make the paint wash, I’m using about 4 tablespoons of weathered white chalk paint, mixed with about 1/4 cup water. These are estimates of the ratio. I would suggest playing with the amounts until you get the desired consistency. More paint in the mix means less wood grain exposed. Too little paint will result in more of the original wood color coming through
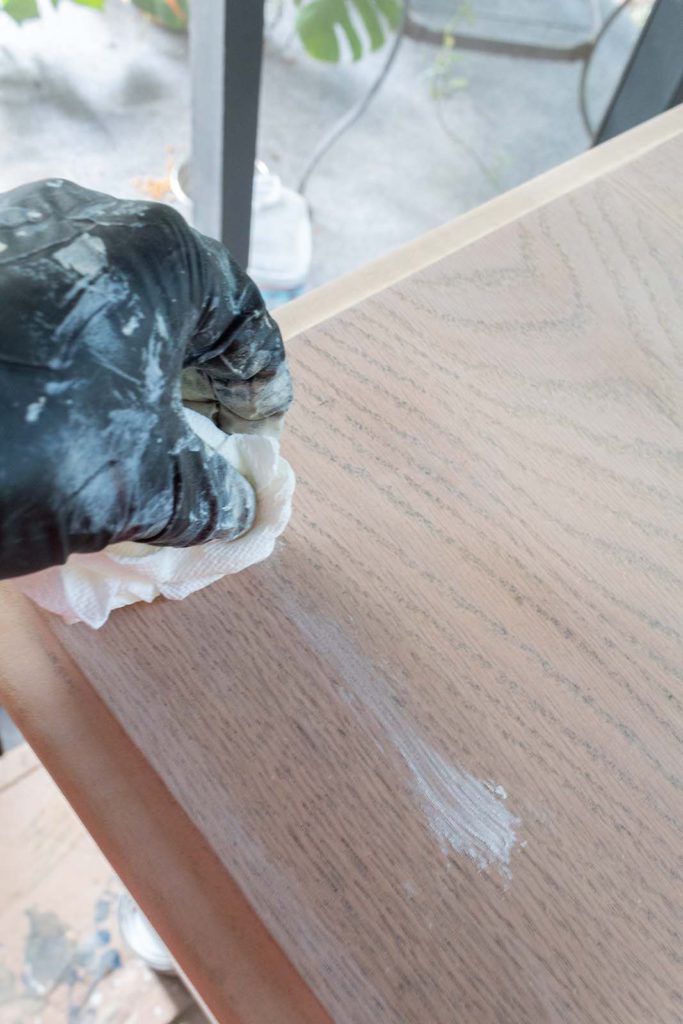
Apply Your Wash
Your wash should be pretty liquidy and runny…not thick like paint. You can try out an application and see if it needs more paint or if you need to thin it out with more water.
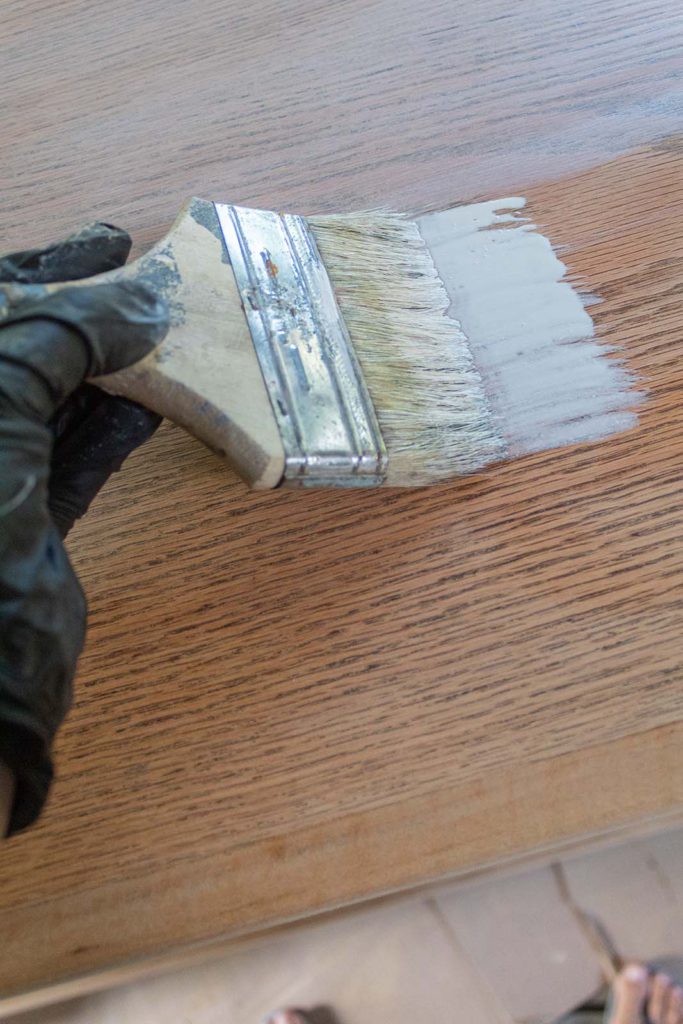
I’m going to use my large chippy brush to apply the wash to the dresser. This will allow me to get more coverage, more quickly.
Tips for applying the paint wash: • Get the top part of your brush wet by dipping it in the wash • Make a few long, slow strokes on your furniture • Make sure the wash is liquid enough to glide across the surface • Follow the direction of the grain of the wood • Work in small sections at a time • Immediately wipe the section back with a paper towel
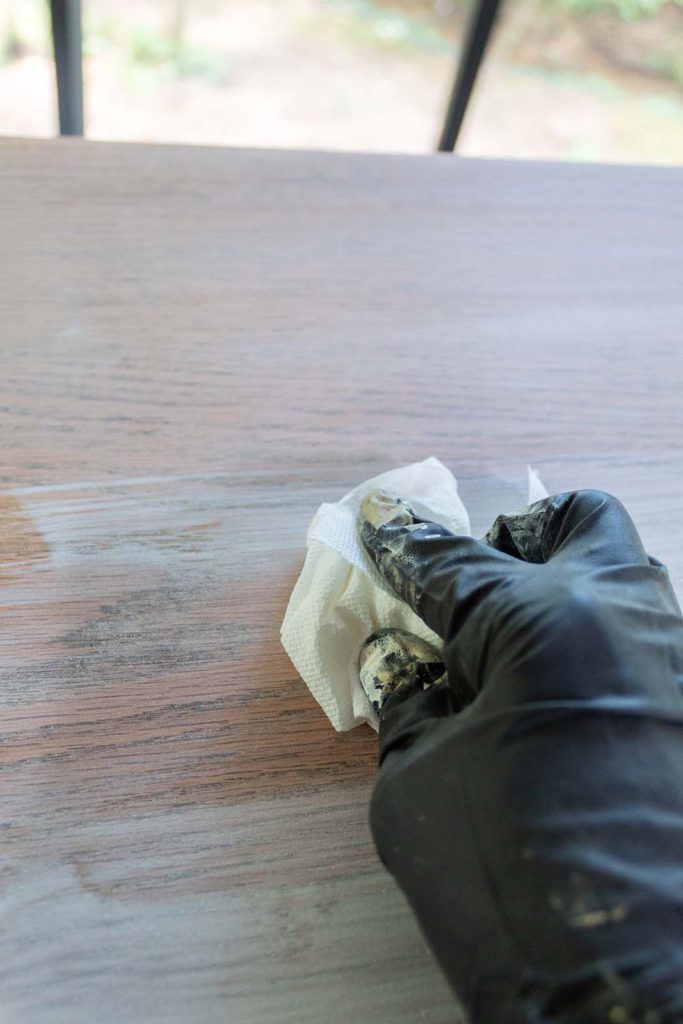
Wipe Your Wash
The paint washing process is a two-step method. You first apply it with your brush strokes and then you quickly wipe the painted areas back with a paper towel or a rag. The wiping helps thin out the painted area and pushes in the wash so that the wood absorbs it evenly and beautifully.
Step 4. Seal Your Furniture
I’m using white liming wax to seal the furniture. I could also use a clear coat polyurethane or a clear finishing wax. Using the white wax further enhances the white aesthetic, making it more airy and light, in my opinion. I use this brand of wax a lot and love the results. Plus it does not have strong chemical smells. Once cured, the wax will serve to protect the finish of your furniture. It will also be easier to clean the dresser.
Applying the wax takes some time and patience. I manually rub it in each inch and corner of this dresser, making sure not to miss a spot. I use paper towels, but you could also use a lint free cloth. The waxing part can also be very satisfying as you watch it enrichen the white washed surface.
Watch the Video of This Renovation
The Reveal
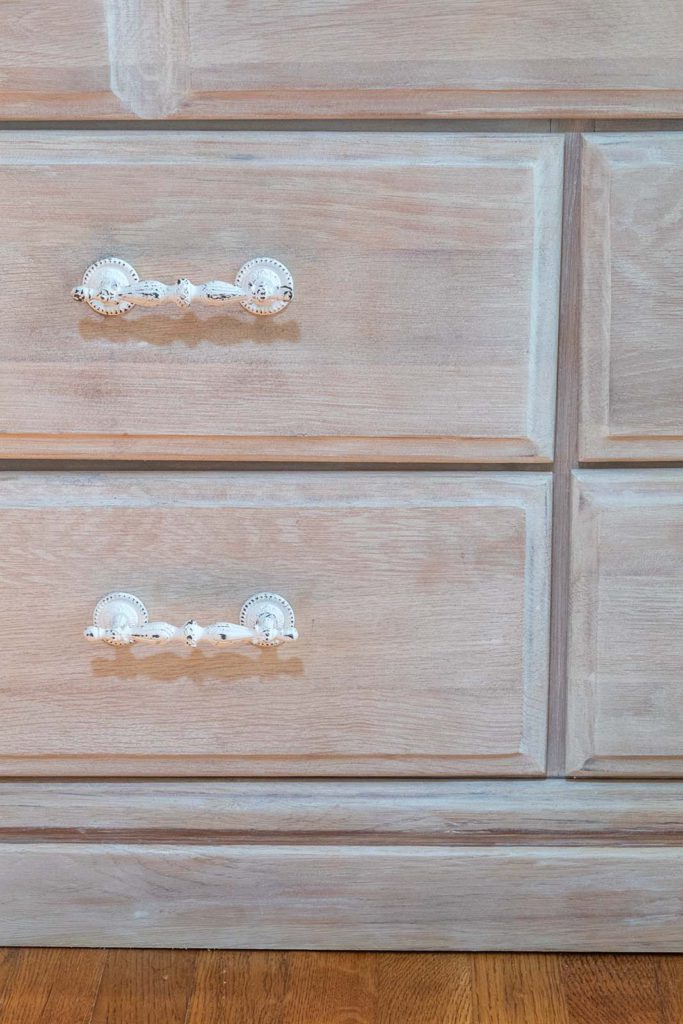
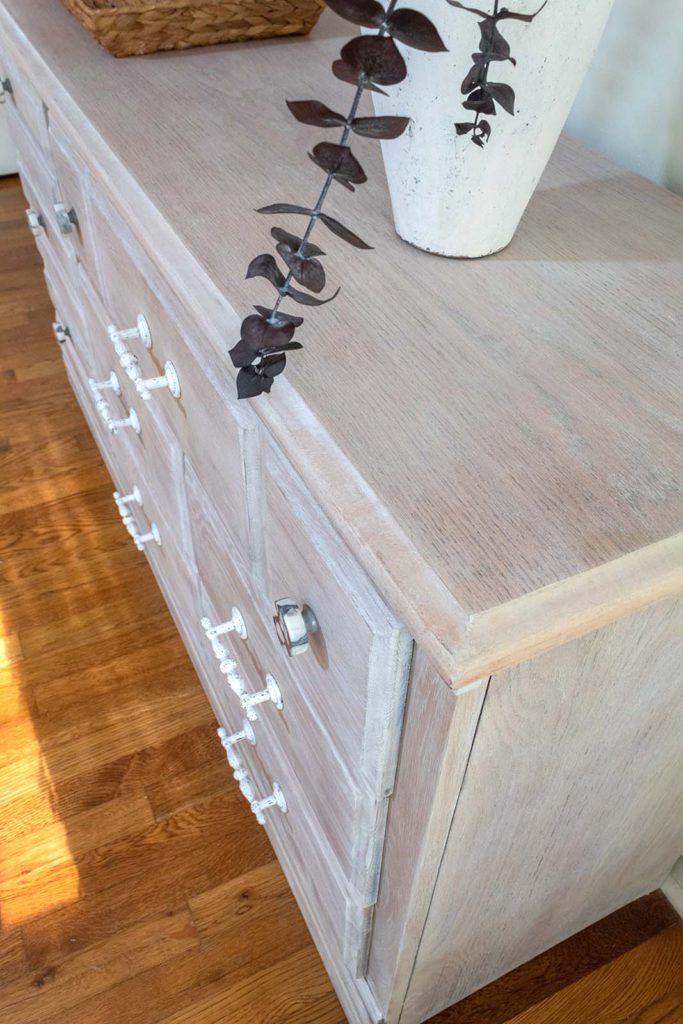
I found some white pulls with a rustic aesthetic and some gorgeous knobs to update this piece. Hardware goes a long way in elevating the look of your furniture.
One thing regarding the filled hardware holes that I realized after the fact, is that the paint wash will not fully hide them. You can still see them slightly as shown in the next picture. But I’m okay with it. In person it’s actually not so noticeable.
The best way to hide hardware holes would be to paint the furniture piece.
So lovelies, did you like this renovation? Isn’t it a wonderful way to revive a furniture piece? Let me know what you think of our new dresser in the comments below. Be sure to subscribe at the bottom of this page so you don’t miss any future posts! Hugs and see you soon.
Here is one more look at the before and after of this dresser.