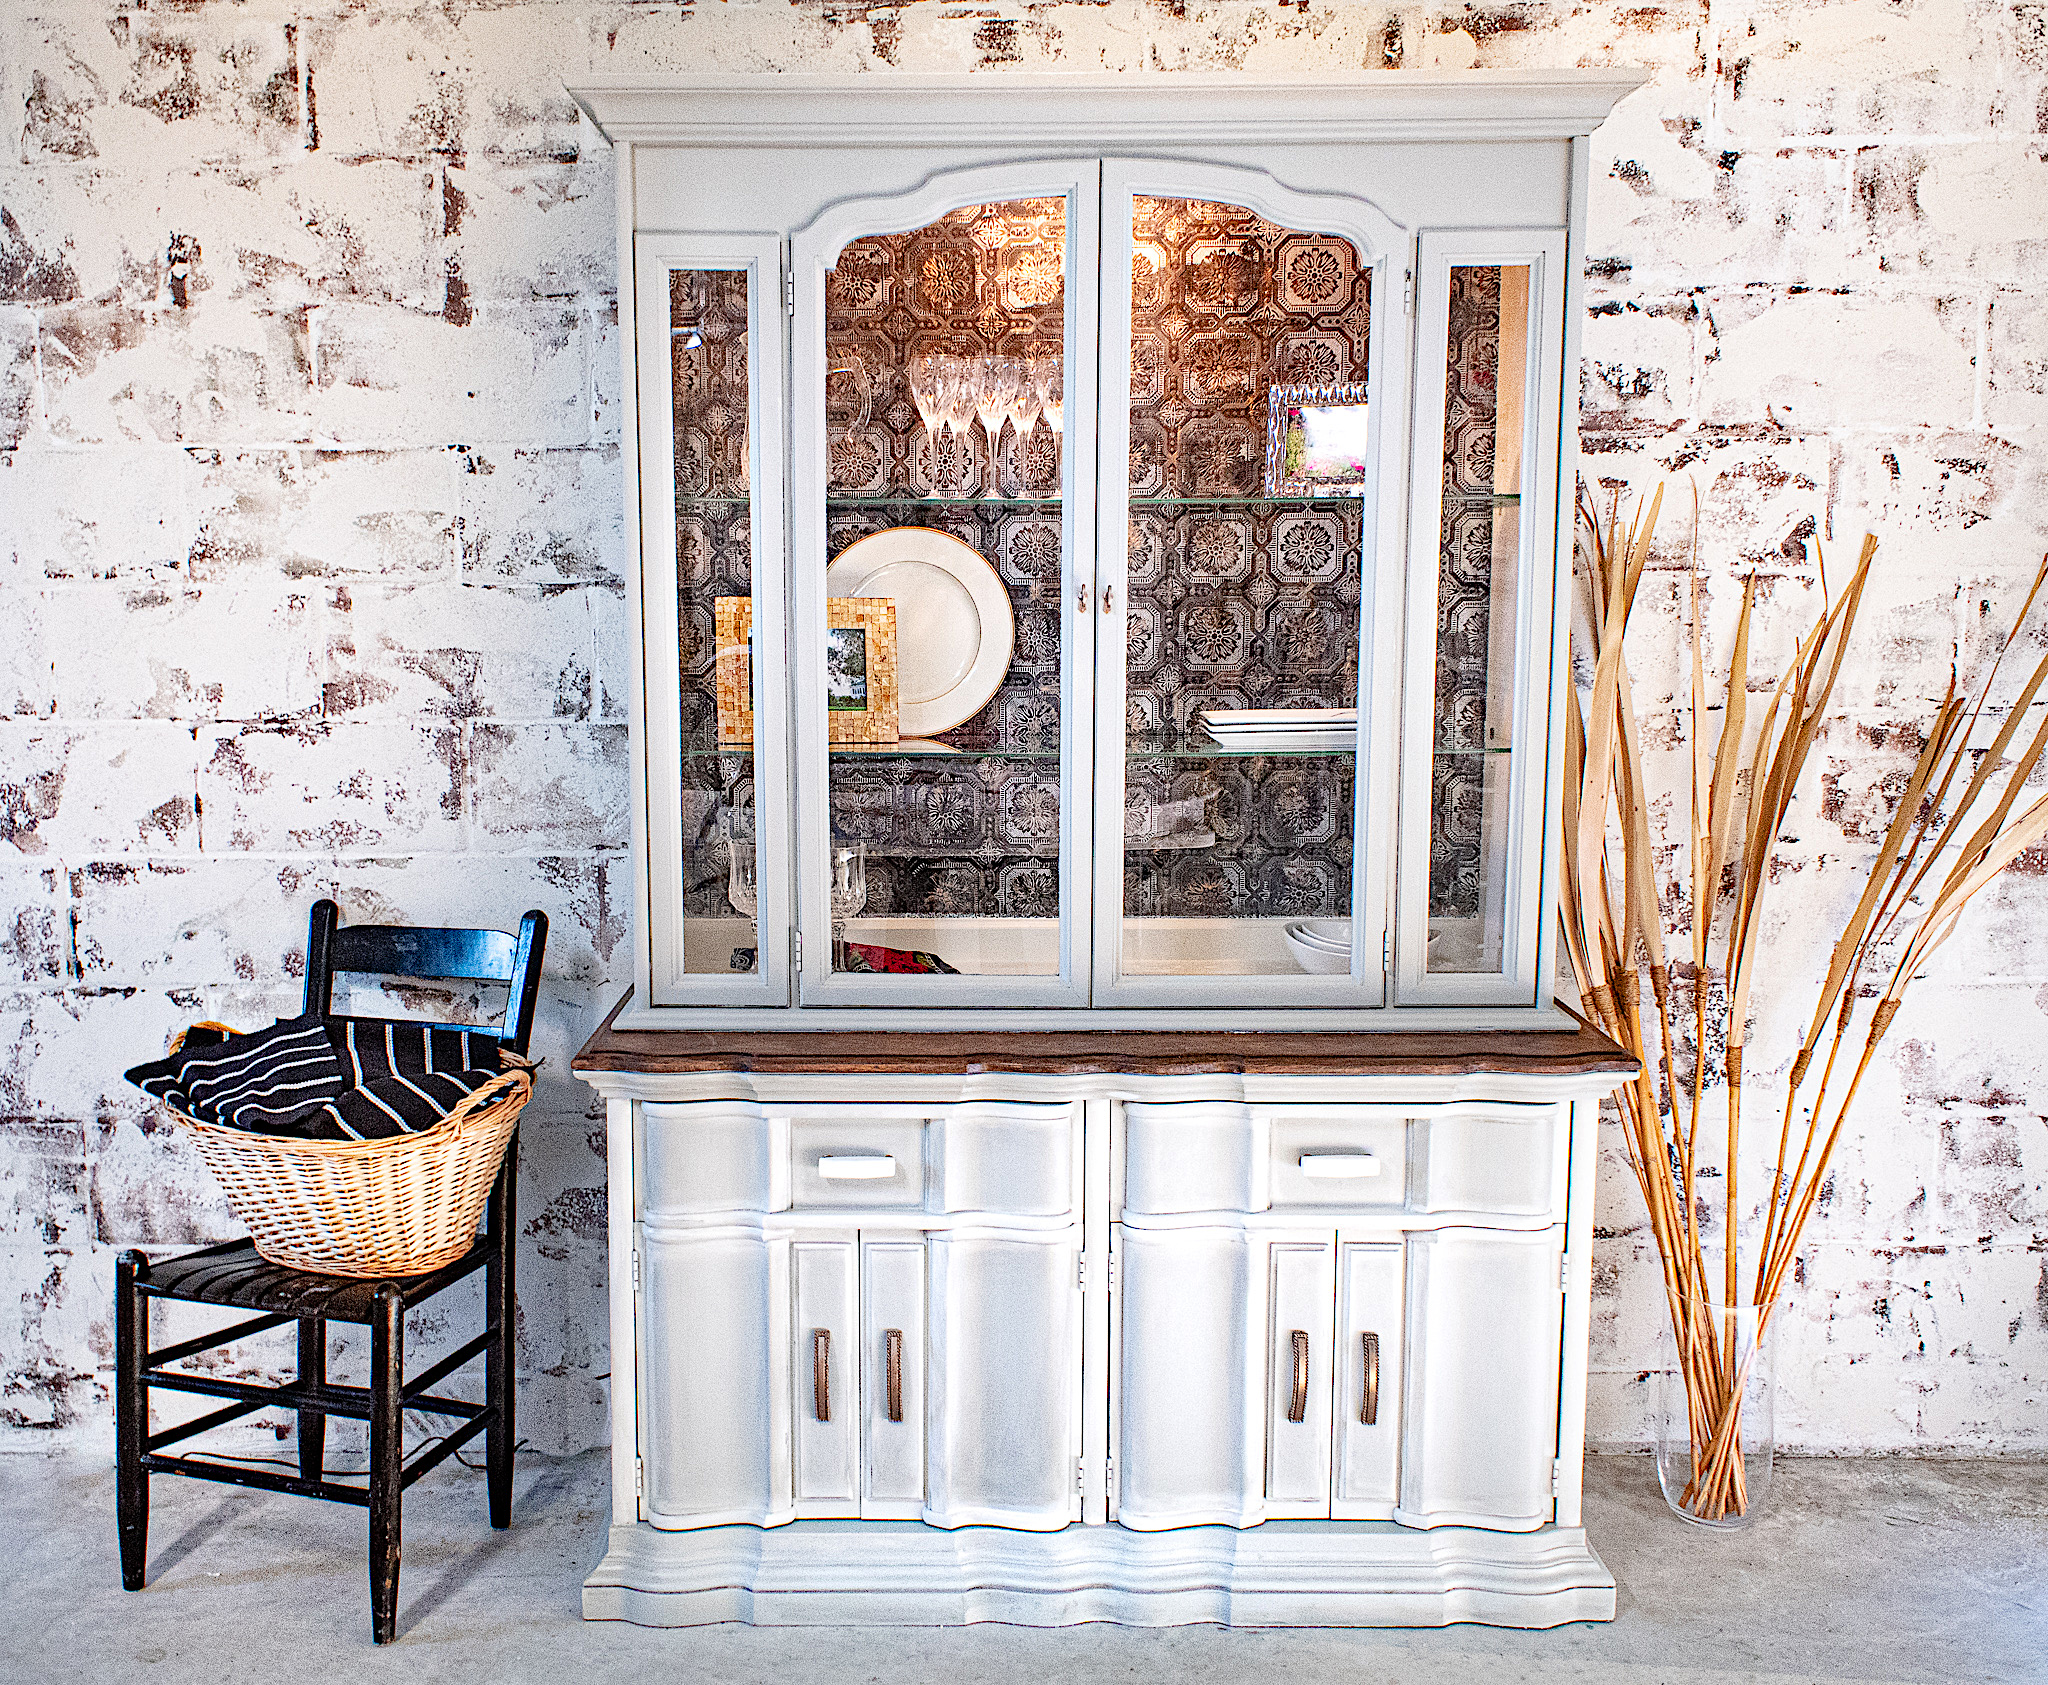
Hello lovelies! I am excited and relieved to share this next piece with you. Relieved because this grand China Hutch almost made me throw in the towel a couple times. But boy am I glad I didn’t. It came out so stunning that I can now stand back and admire the worth of the work. Join me as I share with you a few techniques and lessons learned: ٭The importance of prepping wood pieces for a light paint color ٭Adding wallpaper to your furniture ٭Creating raised stencils to your pieces
And here is the before. Clearly in need of some sprucing up.
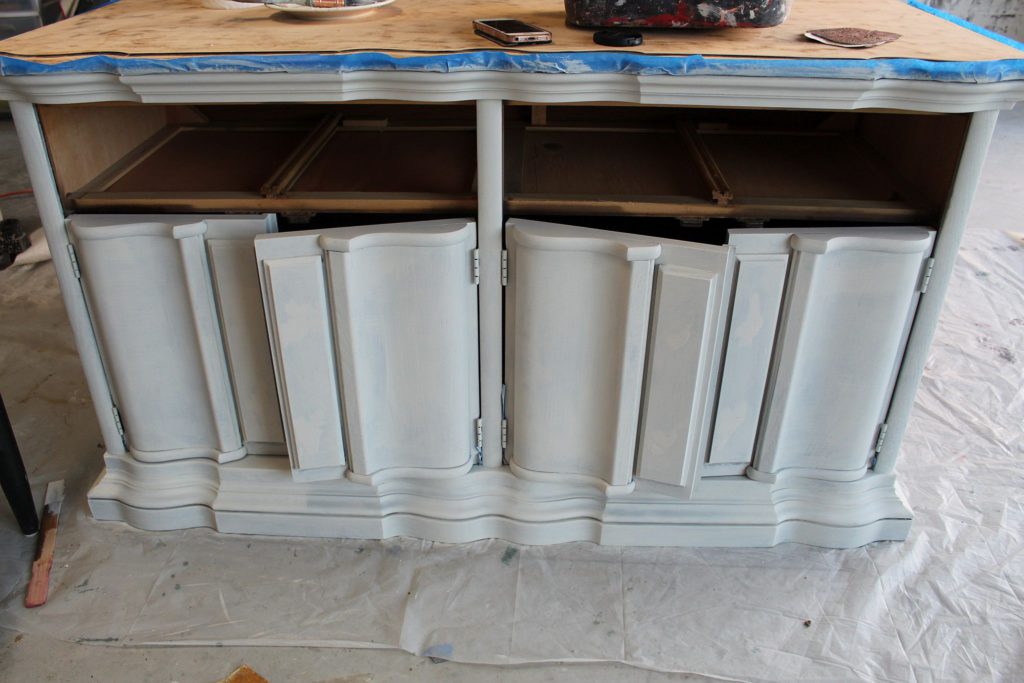
So I have a confession to make. My original plan to paint this piece white was a flop. The picture below shows the piece after one coat of Glidden’s Meeting House White. This was after sanding and applying two coats of primer. But this wood was not having it. It was still going to bleed through the white. And the bleed-through continued with the second coat after that. At this point I almost gave up. I had painted both pieces 4 times including primer, and the coverage was still looking uneven!
Disclosure: Some of the links provided are affiliate links. By purchasing through these links you are supporting this family blog and the work we do and there is no extra cost to you. If you would like to read our full disclosure, click HERE.
But it’s not like me to walk away from a challenge, especially one that can teach me something. So I went back and sanded everything with 120 grit sandpaper. Then I shellac’d everywhere. I went in another direction with the paint using a warm gray—Behr’s Arid Plains—as my primary color and that did the trick…beautiful coverage. I still used the white but only for my lowlights. Lesson learned for painting wood furniture white: ٭Prepping can be a waste of time if you don’t use the right products. ٭Invest in a good primer. Denise from Salvaged Inspirations recommends Zinsser’s BIN primer. It’s shellac based so you skip the step of having to seal with shellac.
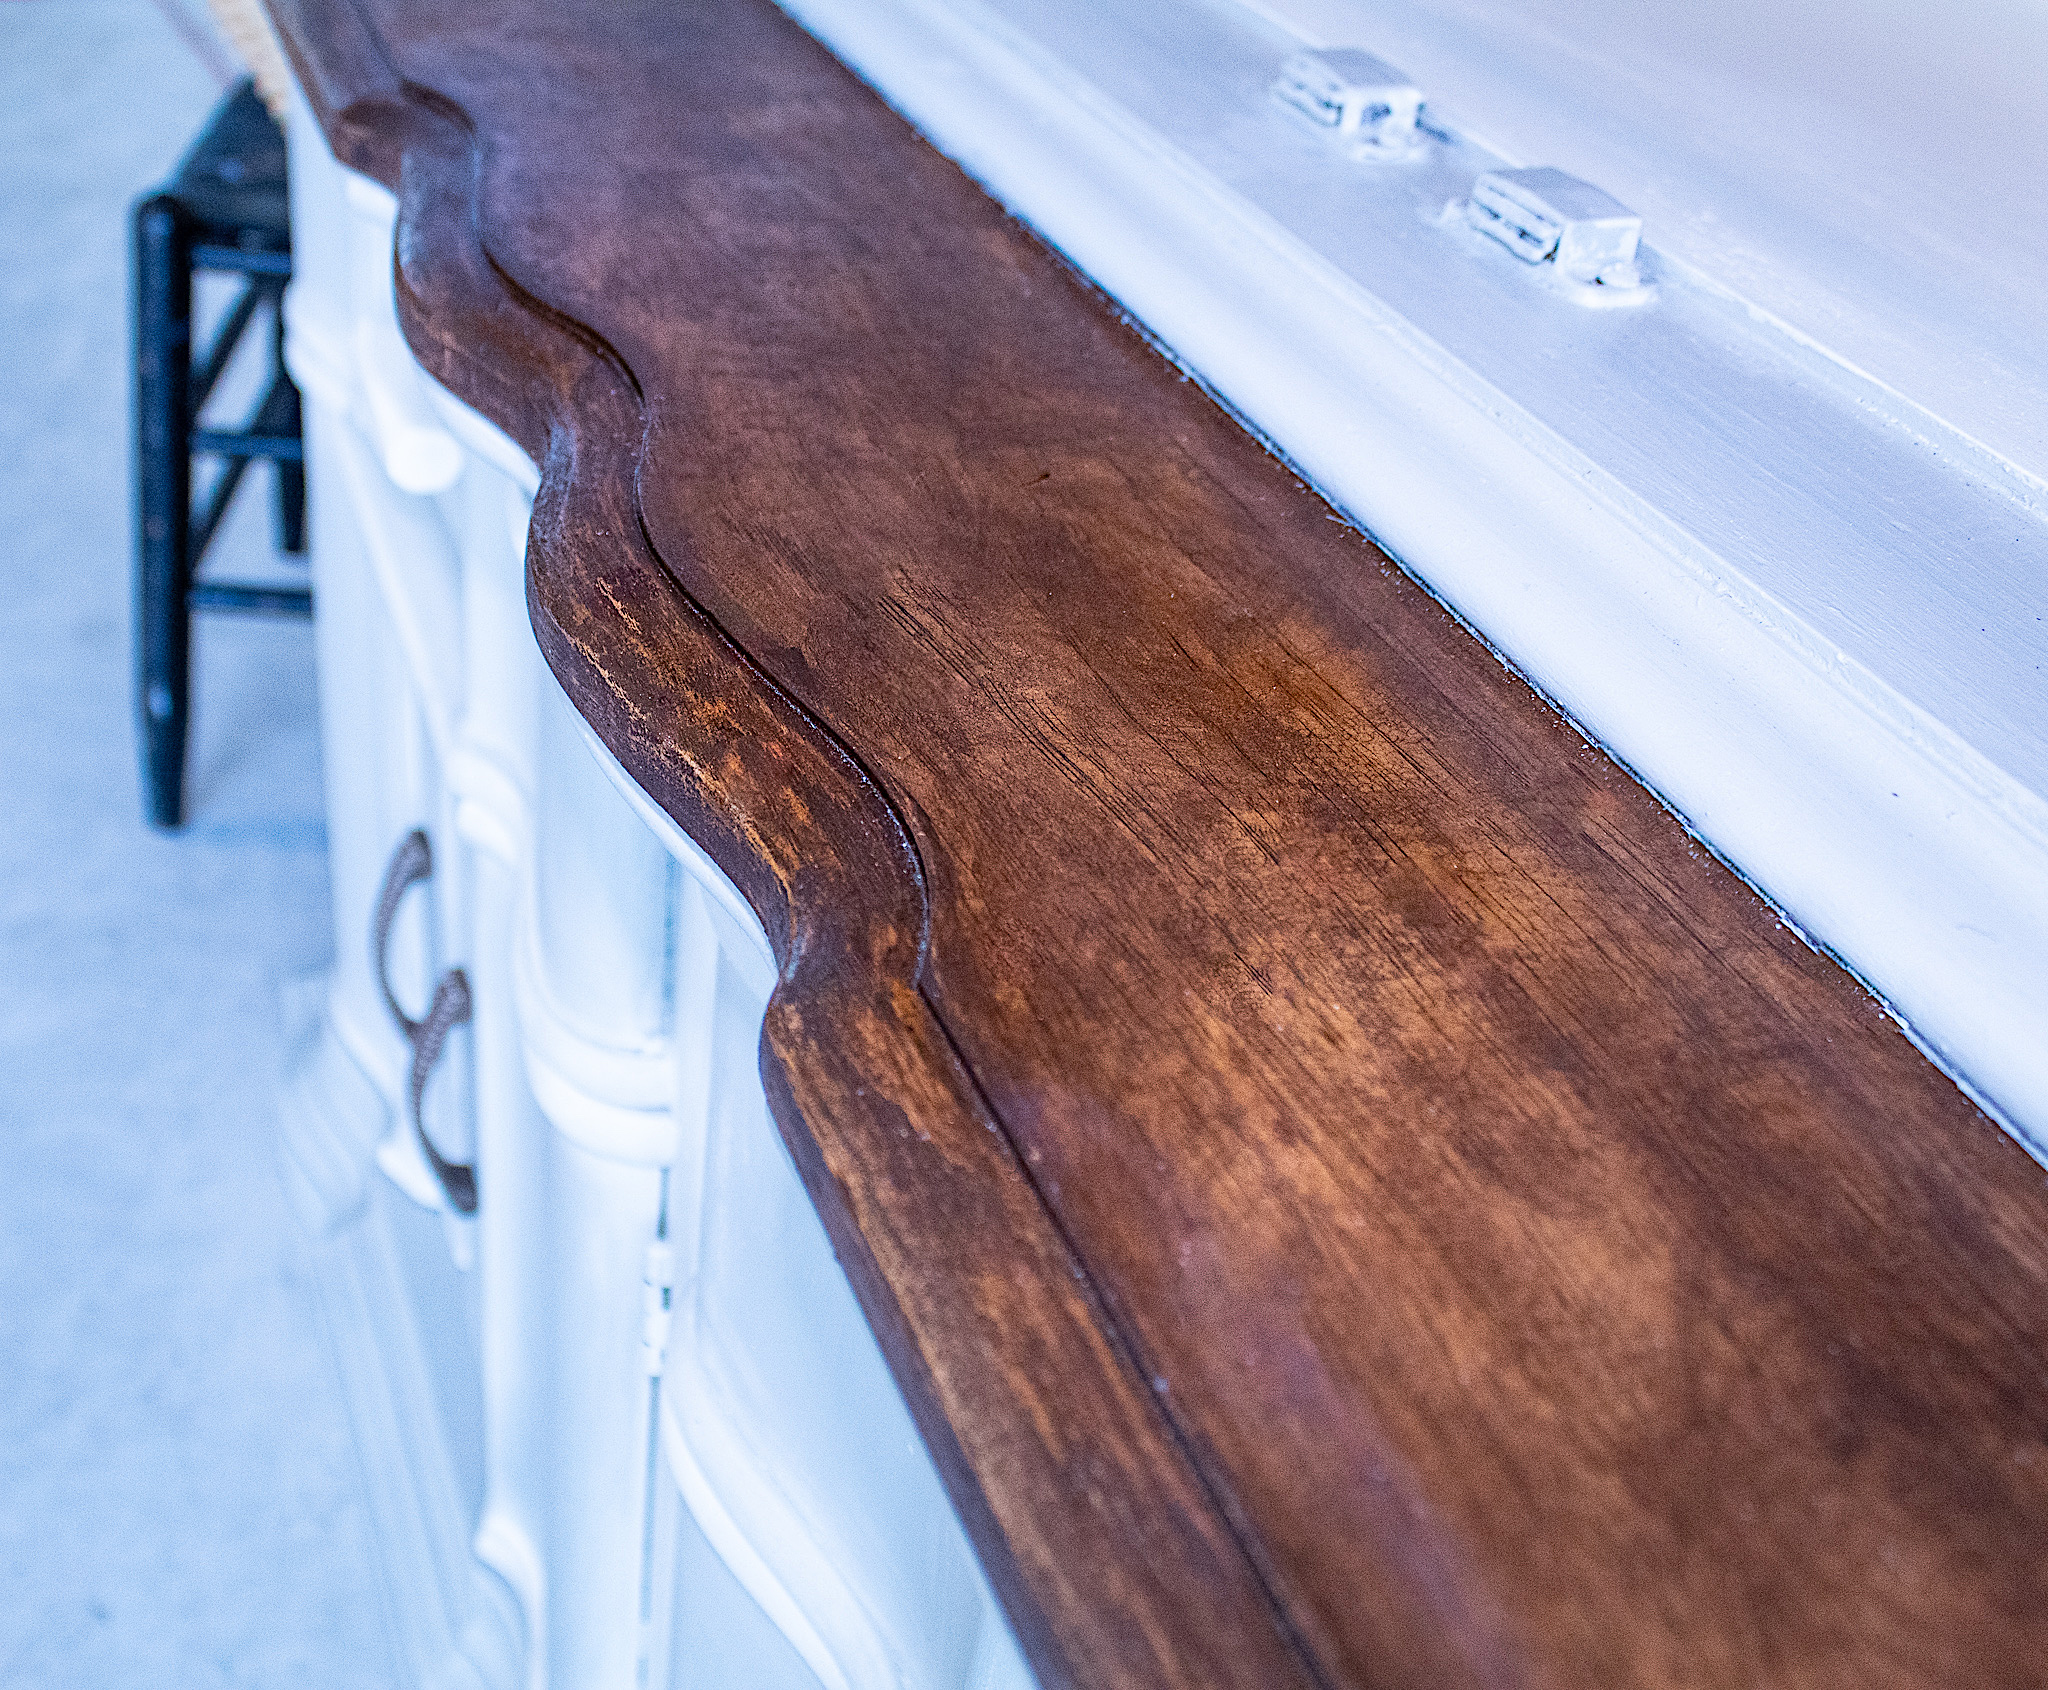
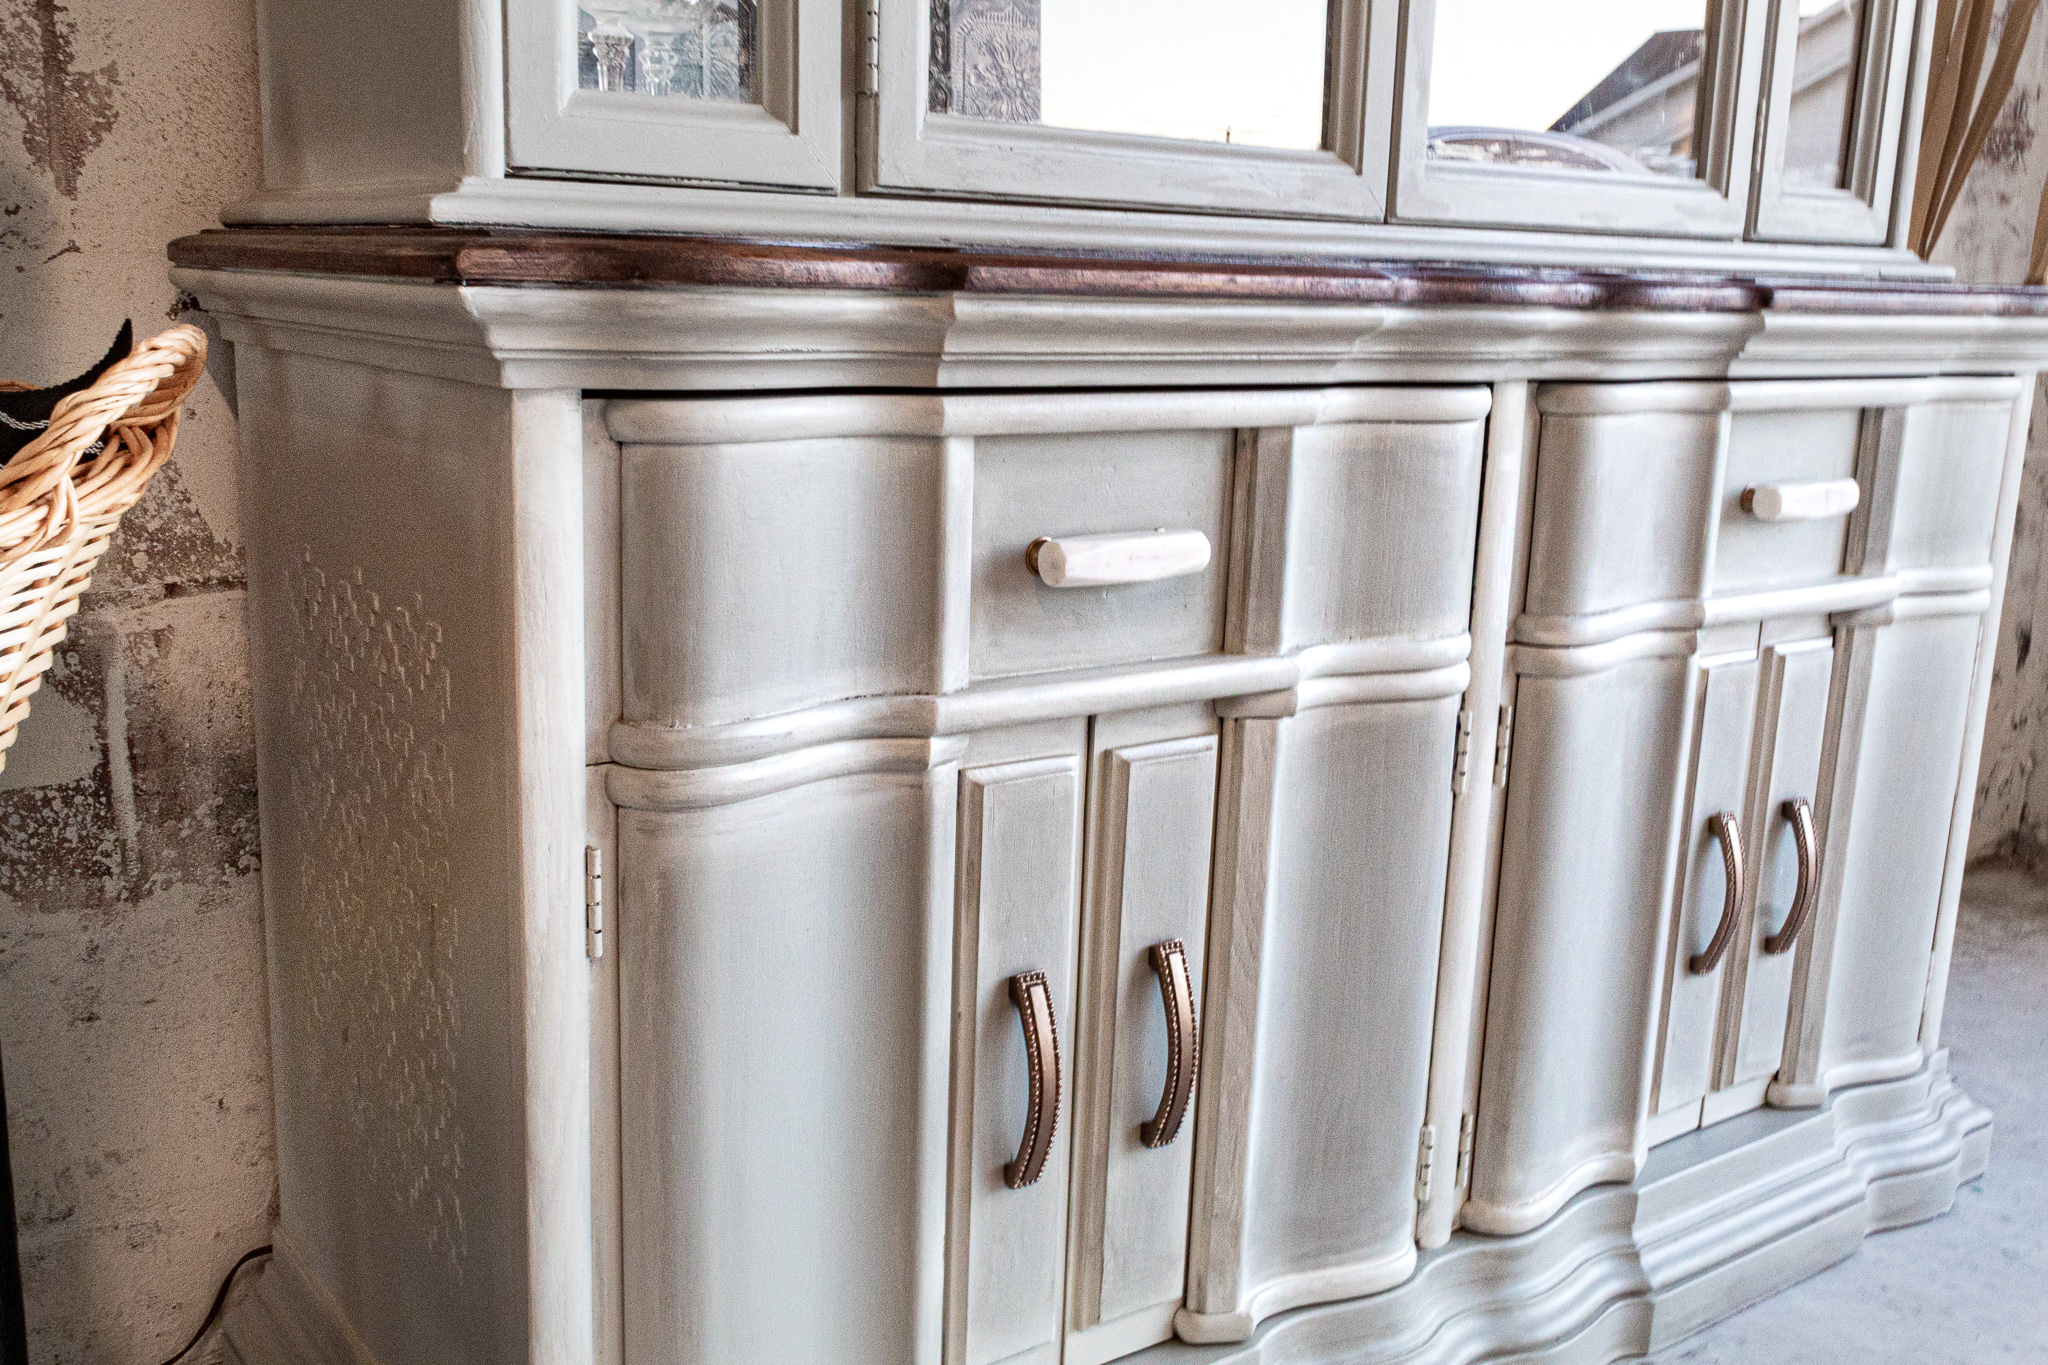
For the top of the buffet, I sanded it down to the raw wood with my orbital sander using a 60 grit. Then I cleaned it with vinegar and applied my Walnut Gel Stain. I love this stuff. It is like spreading fudgy chocolate! Then I gave it a top coat of Gator Hide. I tinted it by mixing a small amount of Gator Hide on a plate with a tiny bit of walnut regular stain I had. Tinting it helps to avoid getting streak marks with your Gator Hide top coat.
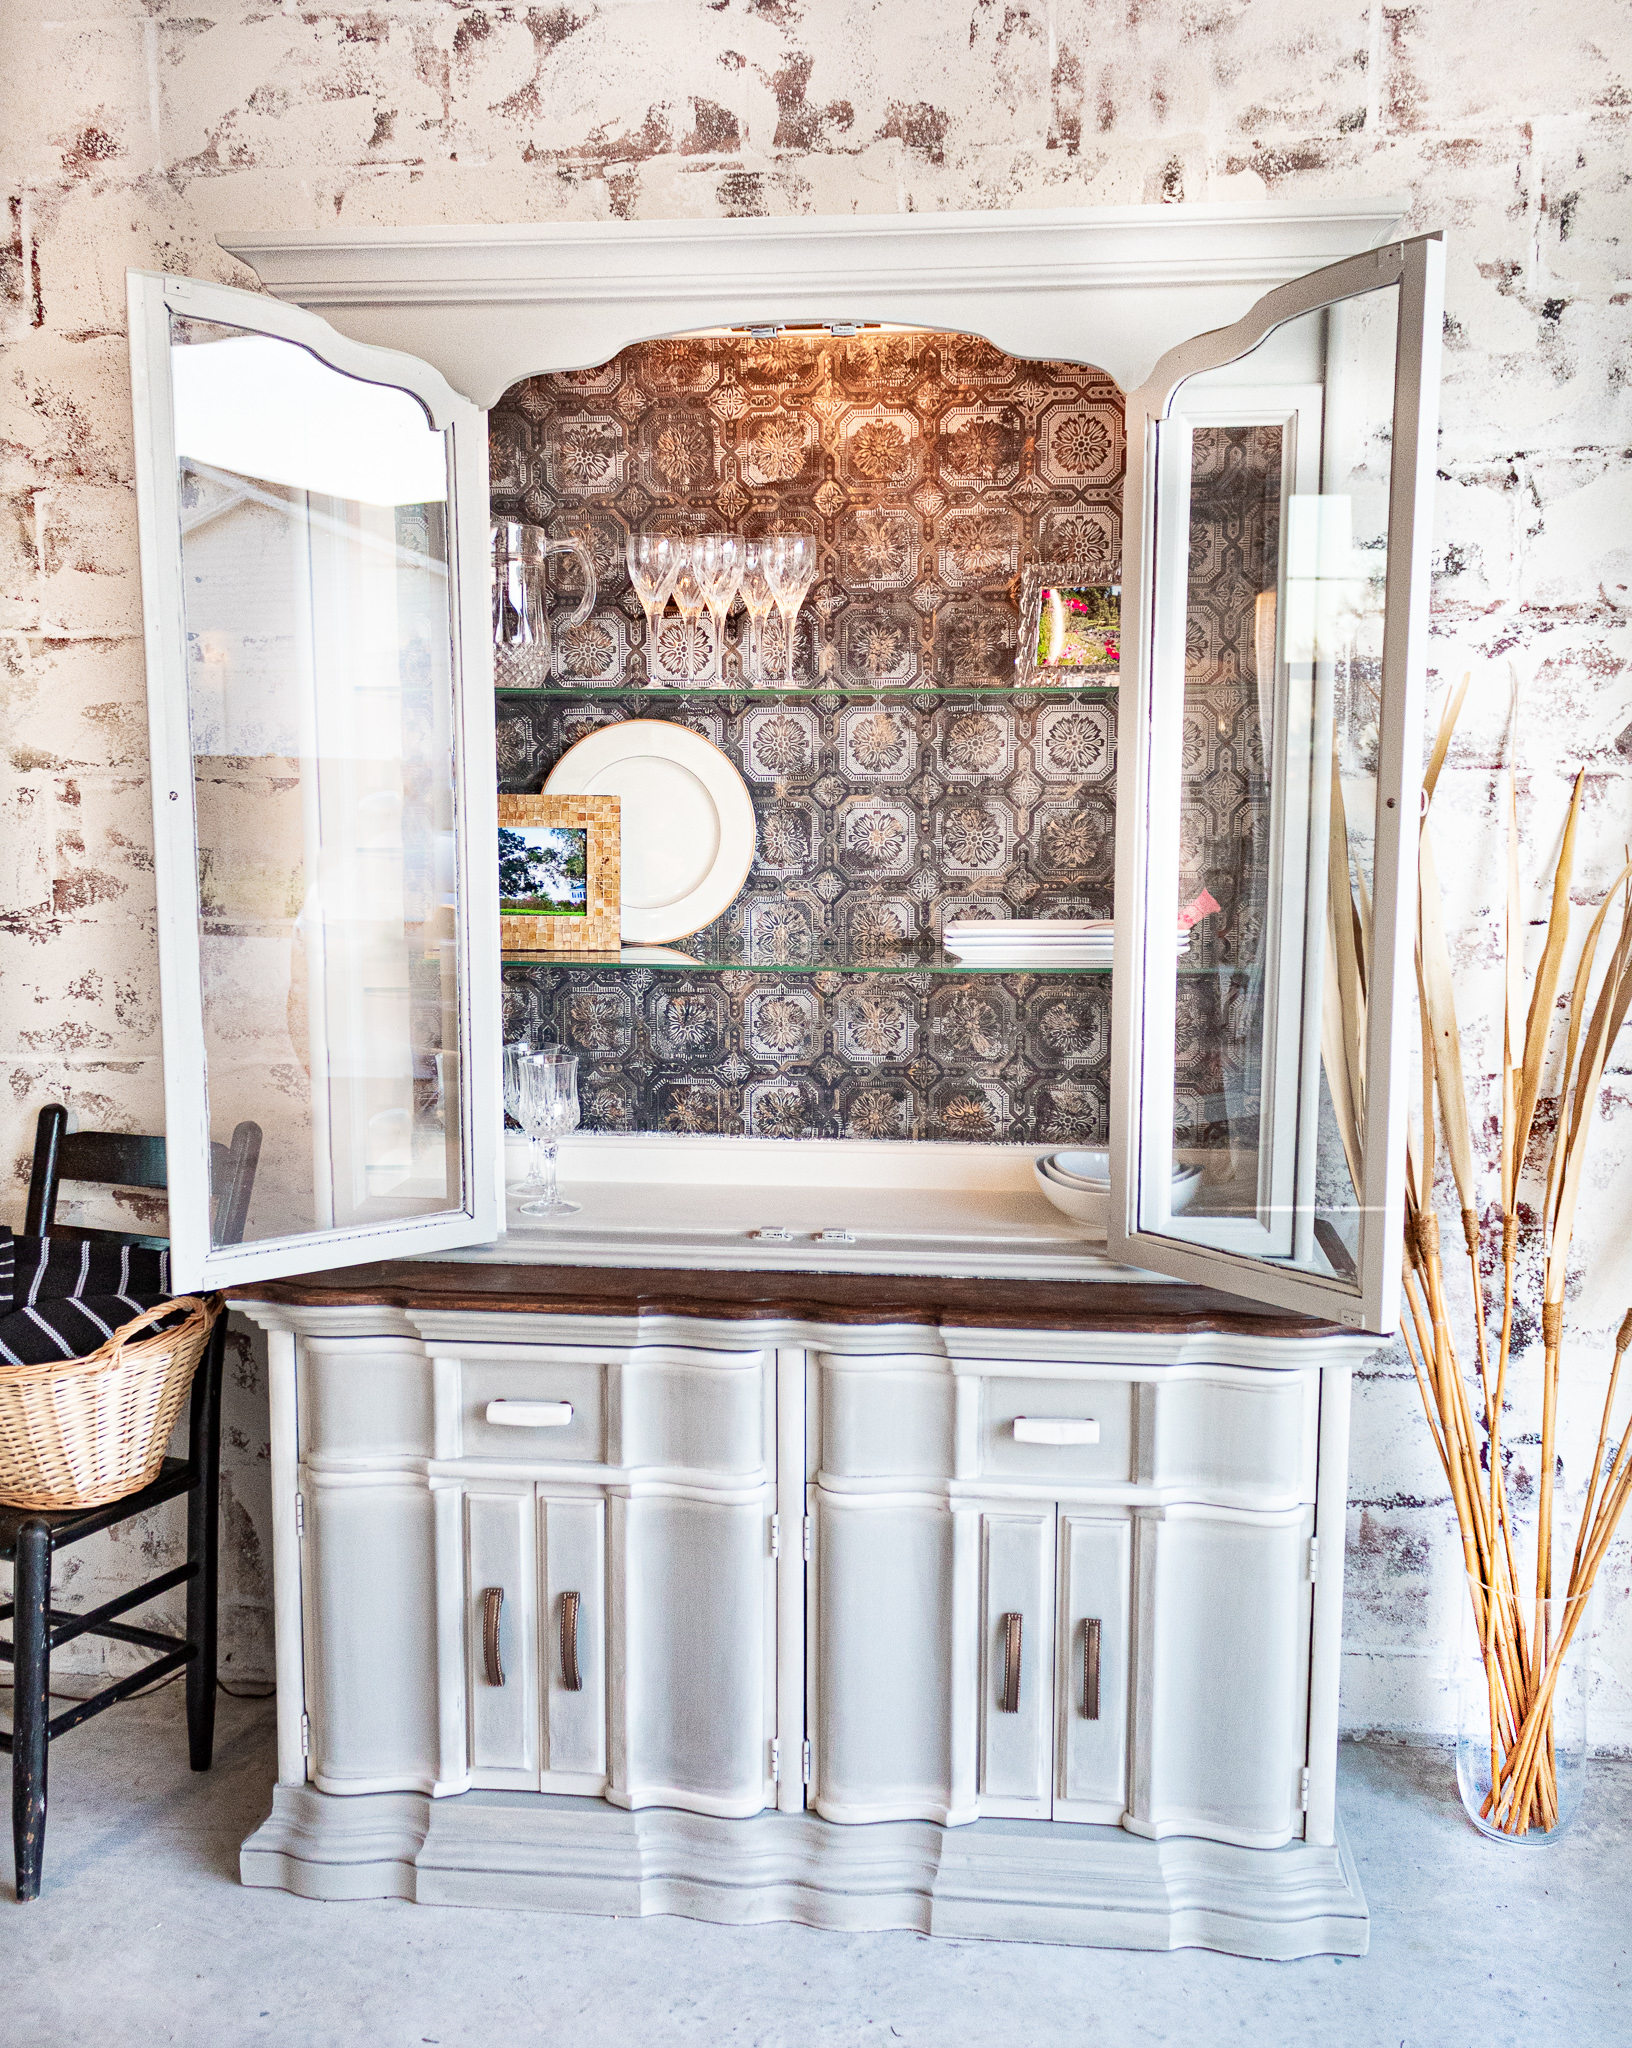
enter wallpaper
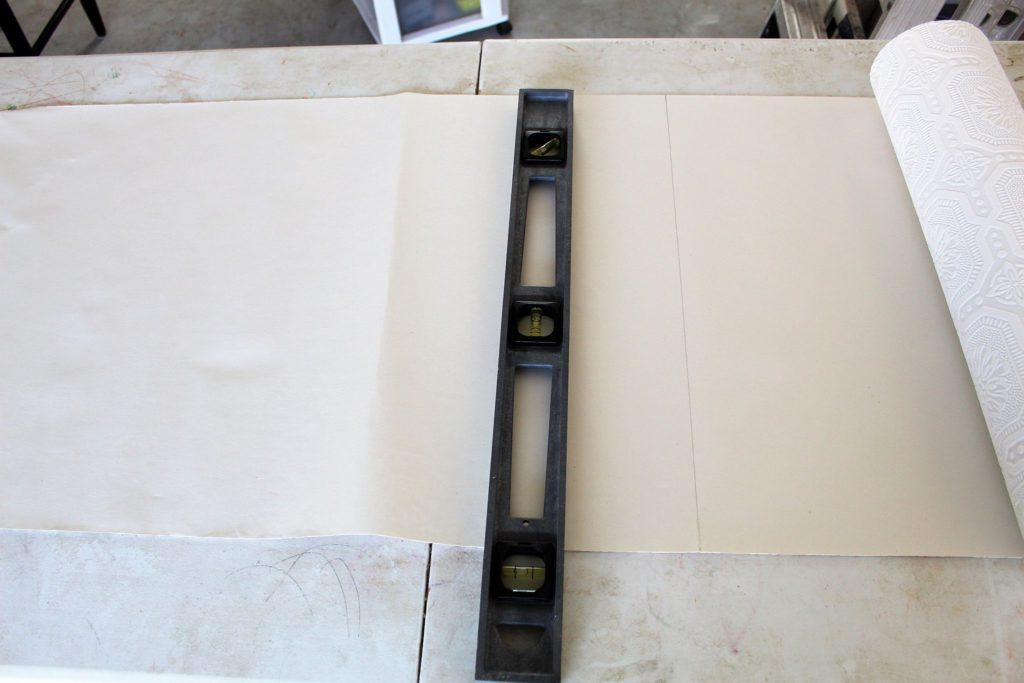
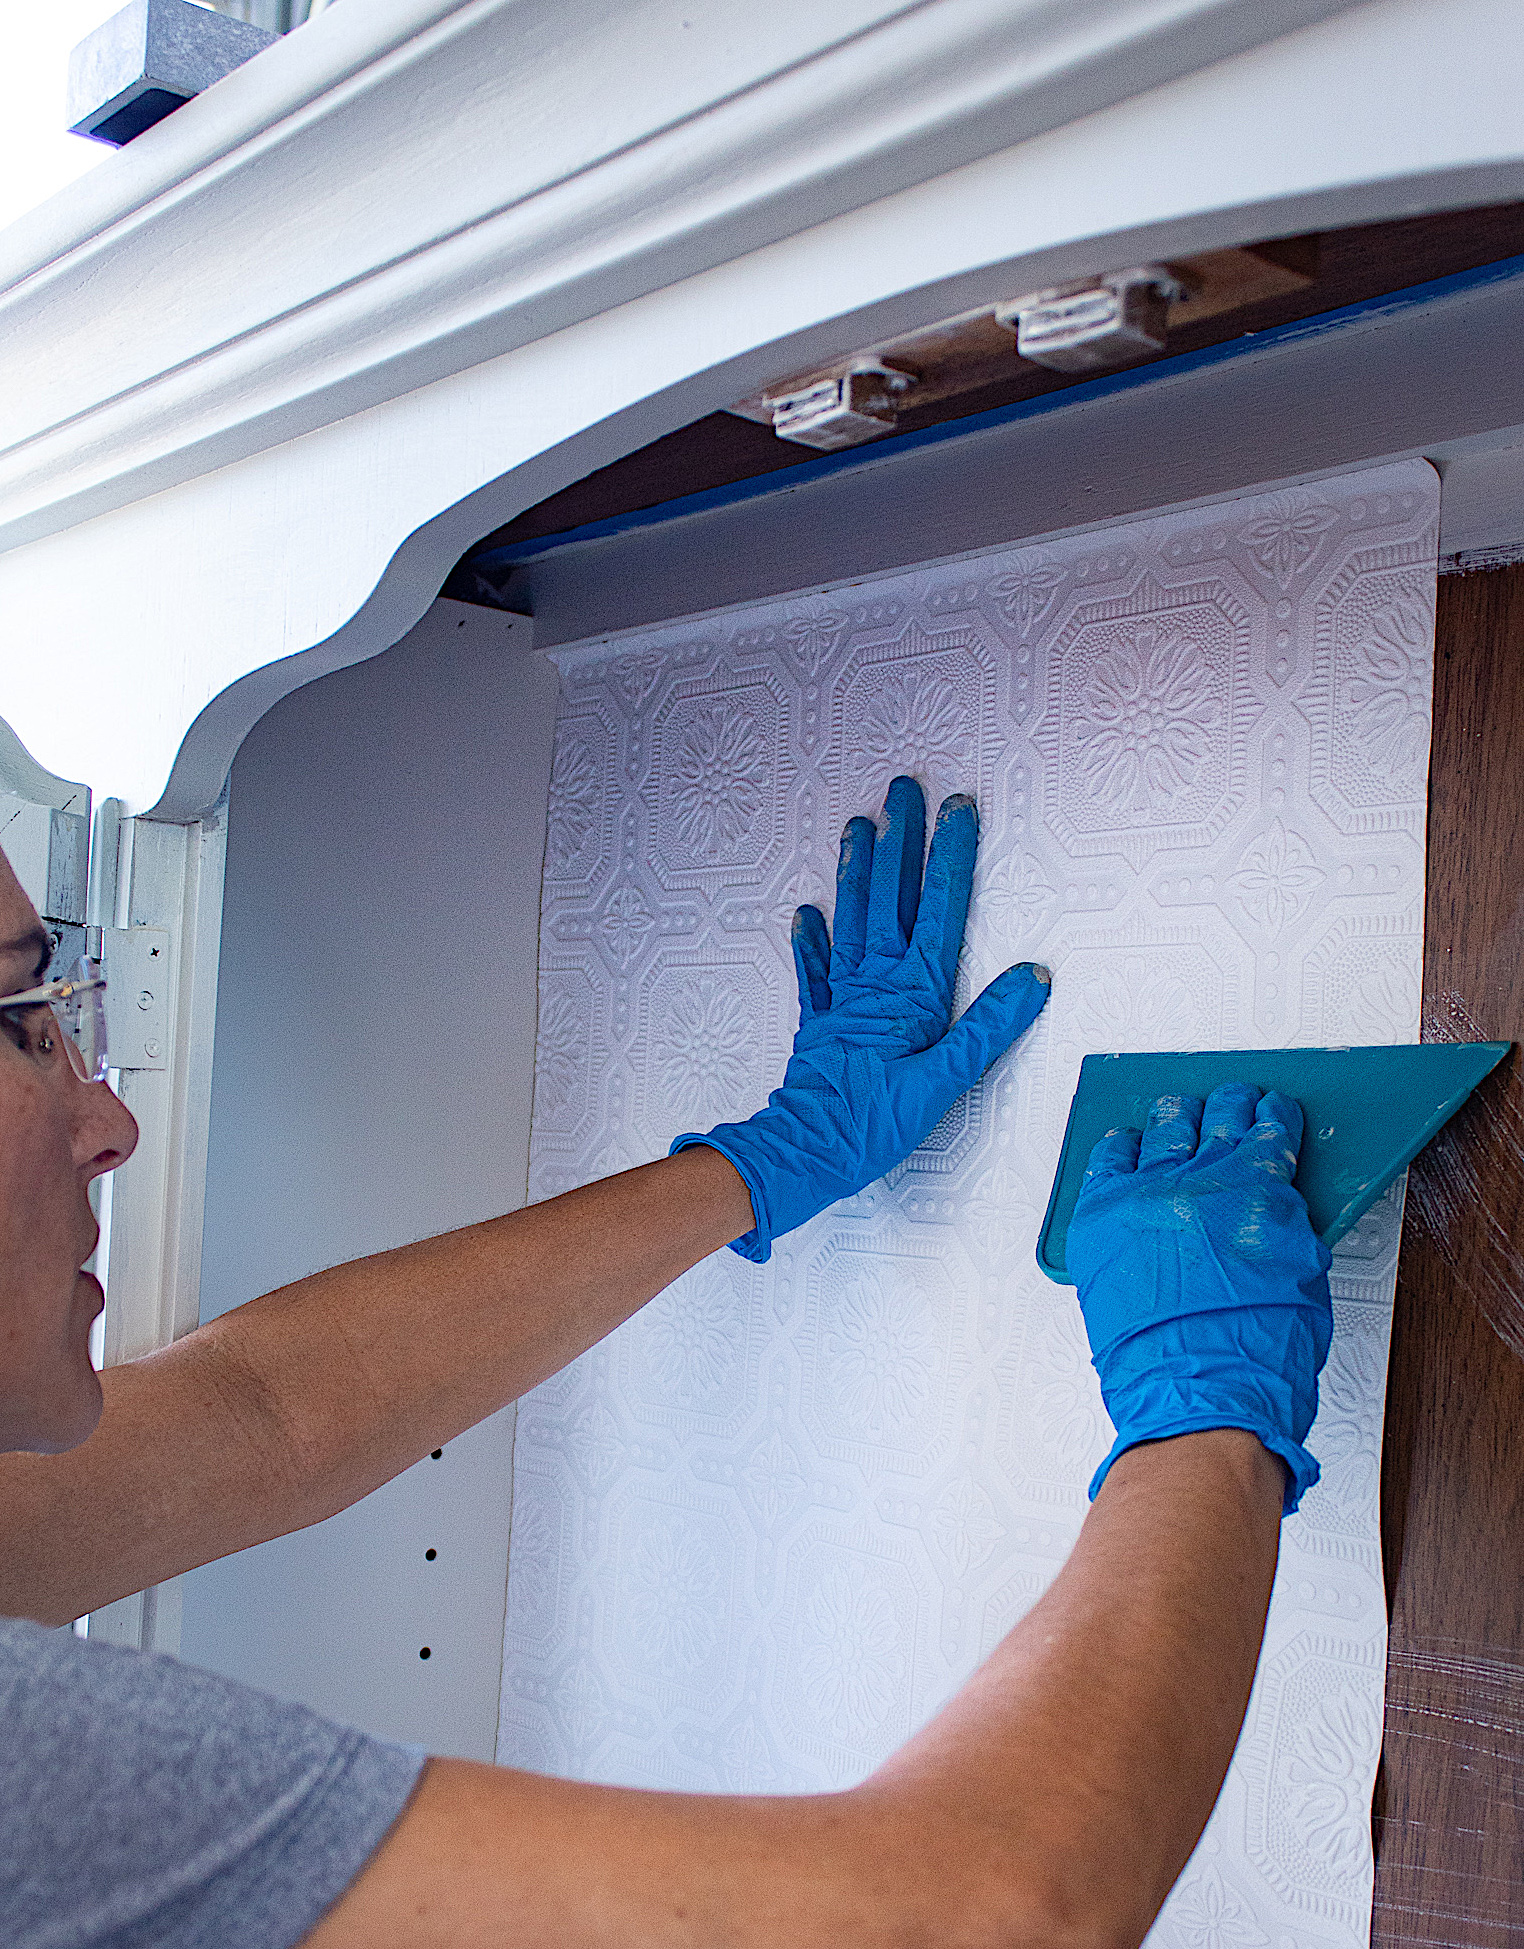
Measure your furniture for your first panel and use a straight edge to mark your cutting line
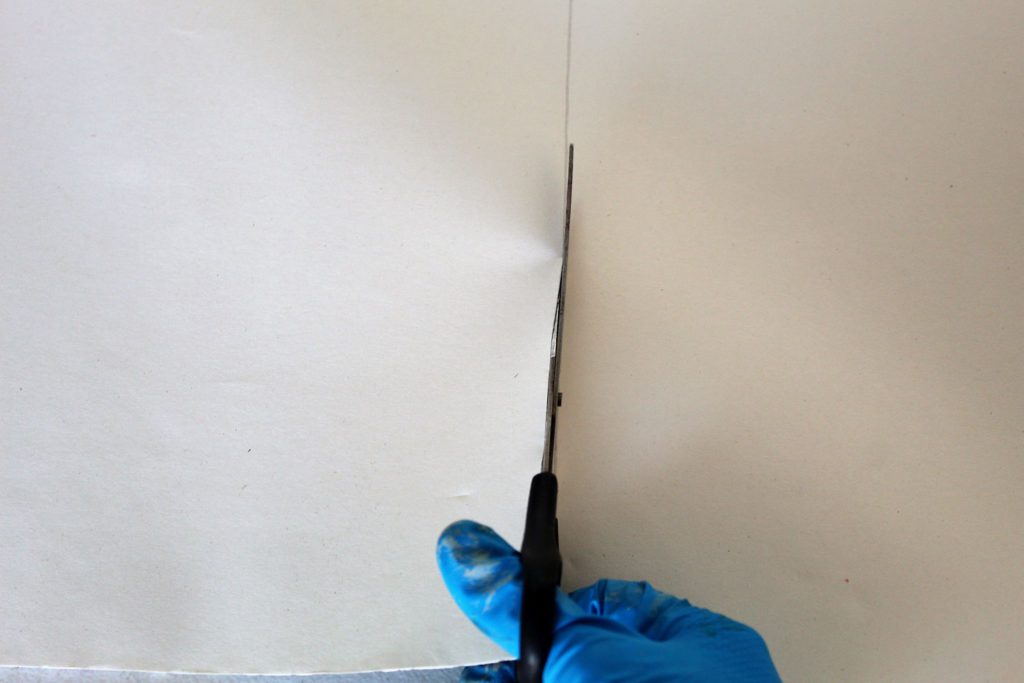
Cut your first panel
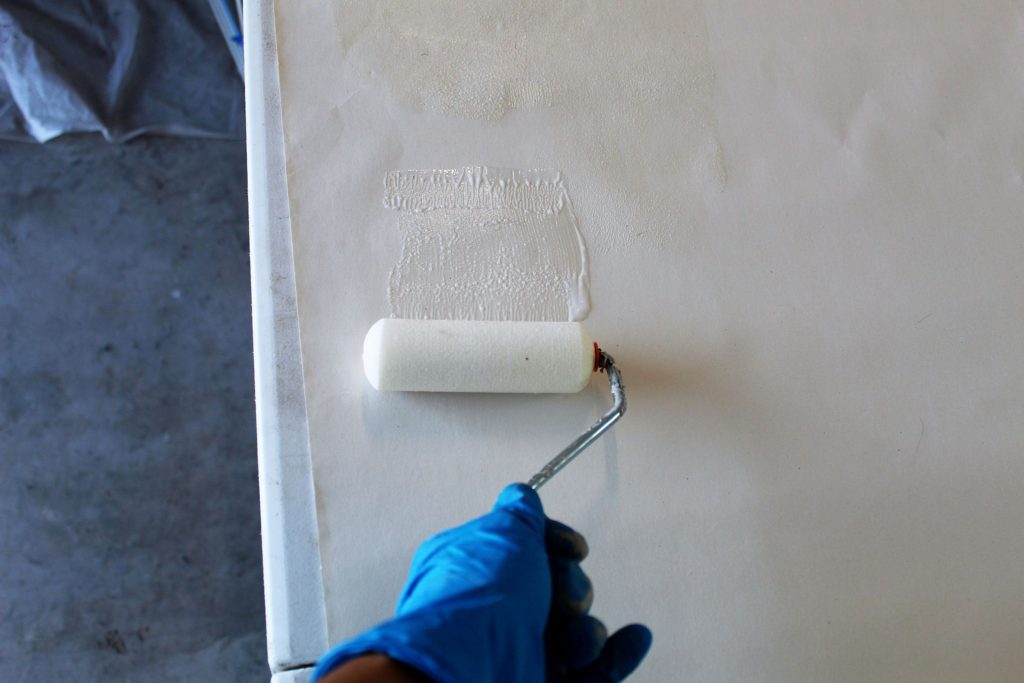
Generously roll on your wallpaper adhesive
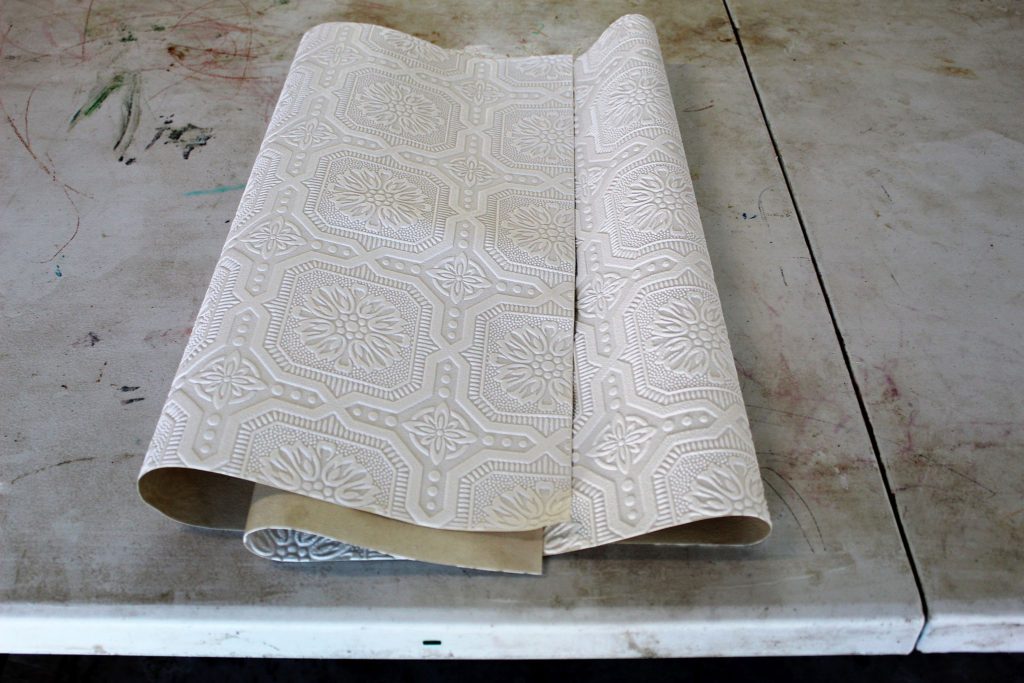
Fold your cut pieces to let the glue set for 5 minutes
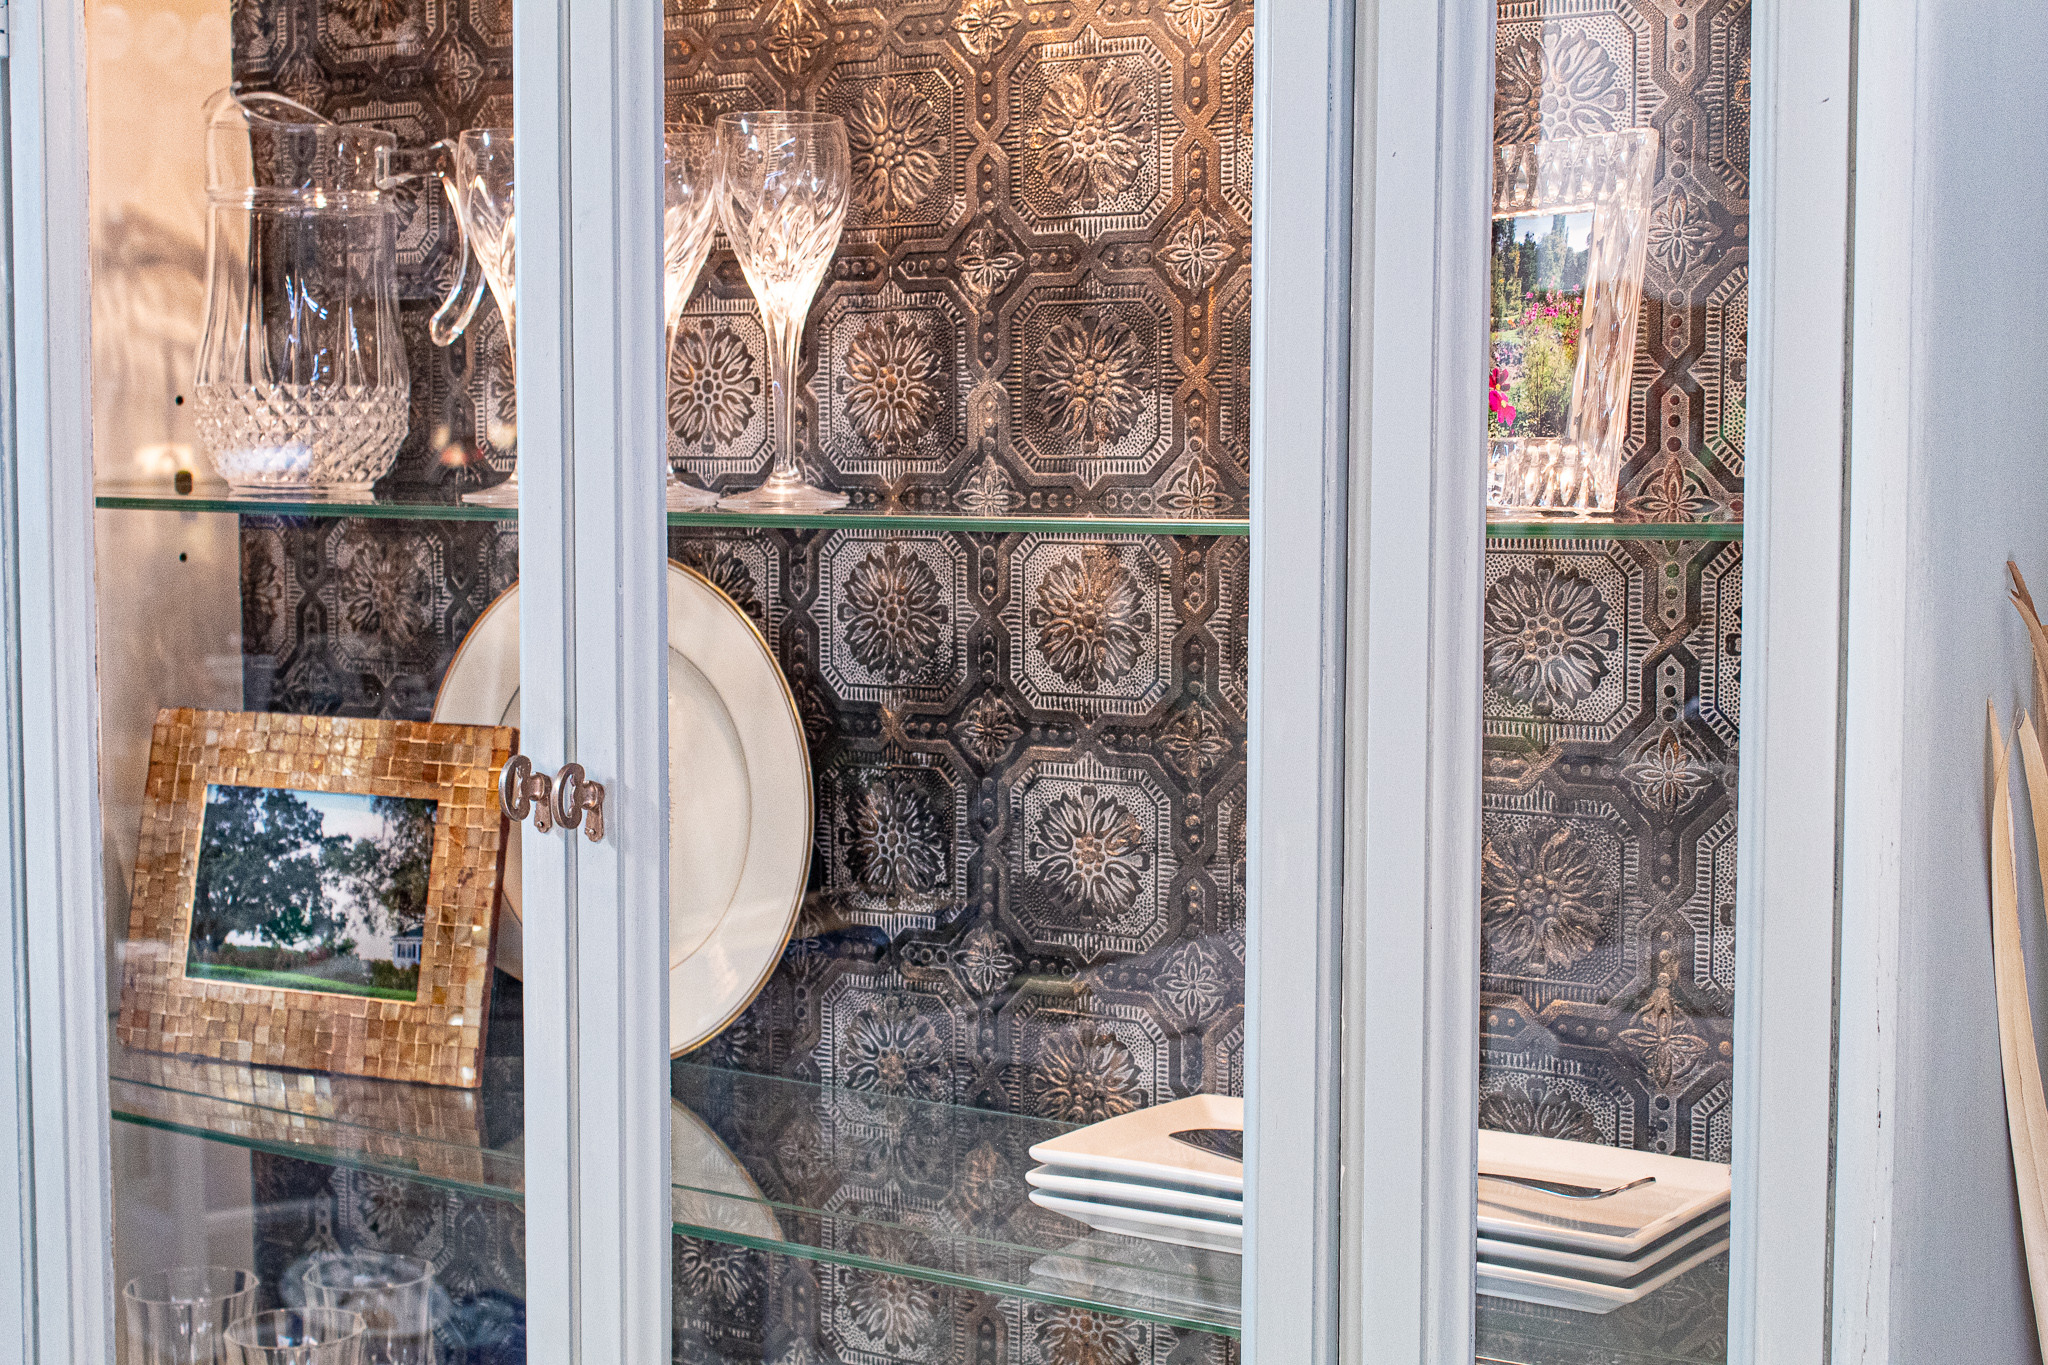
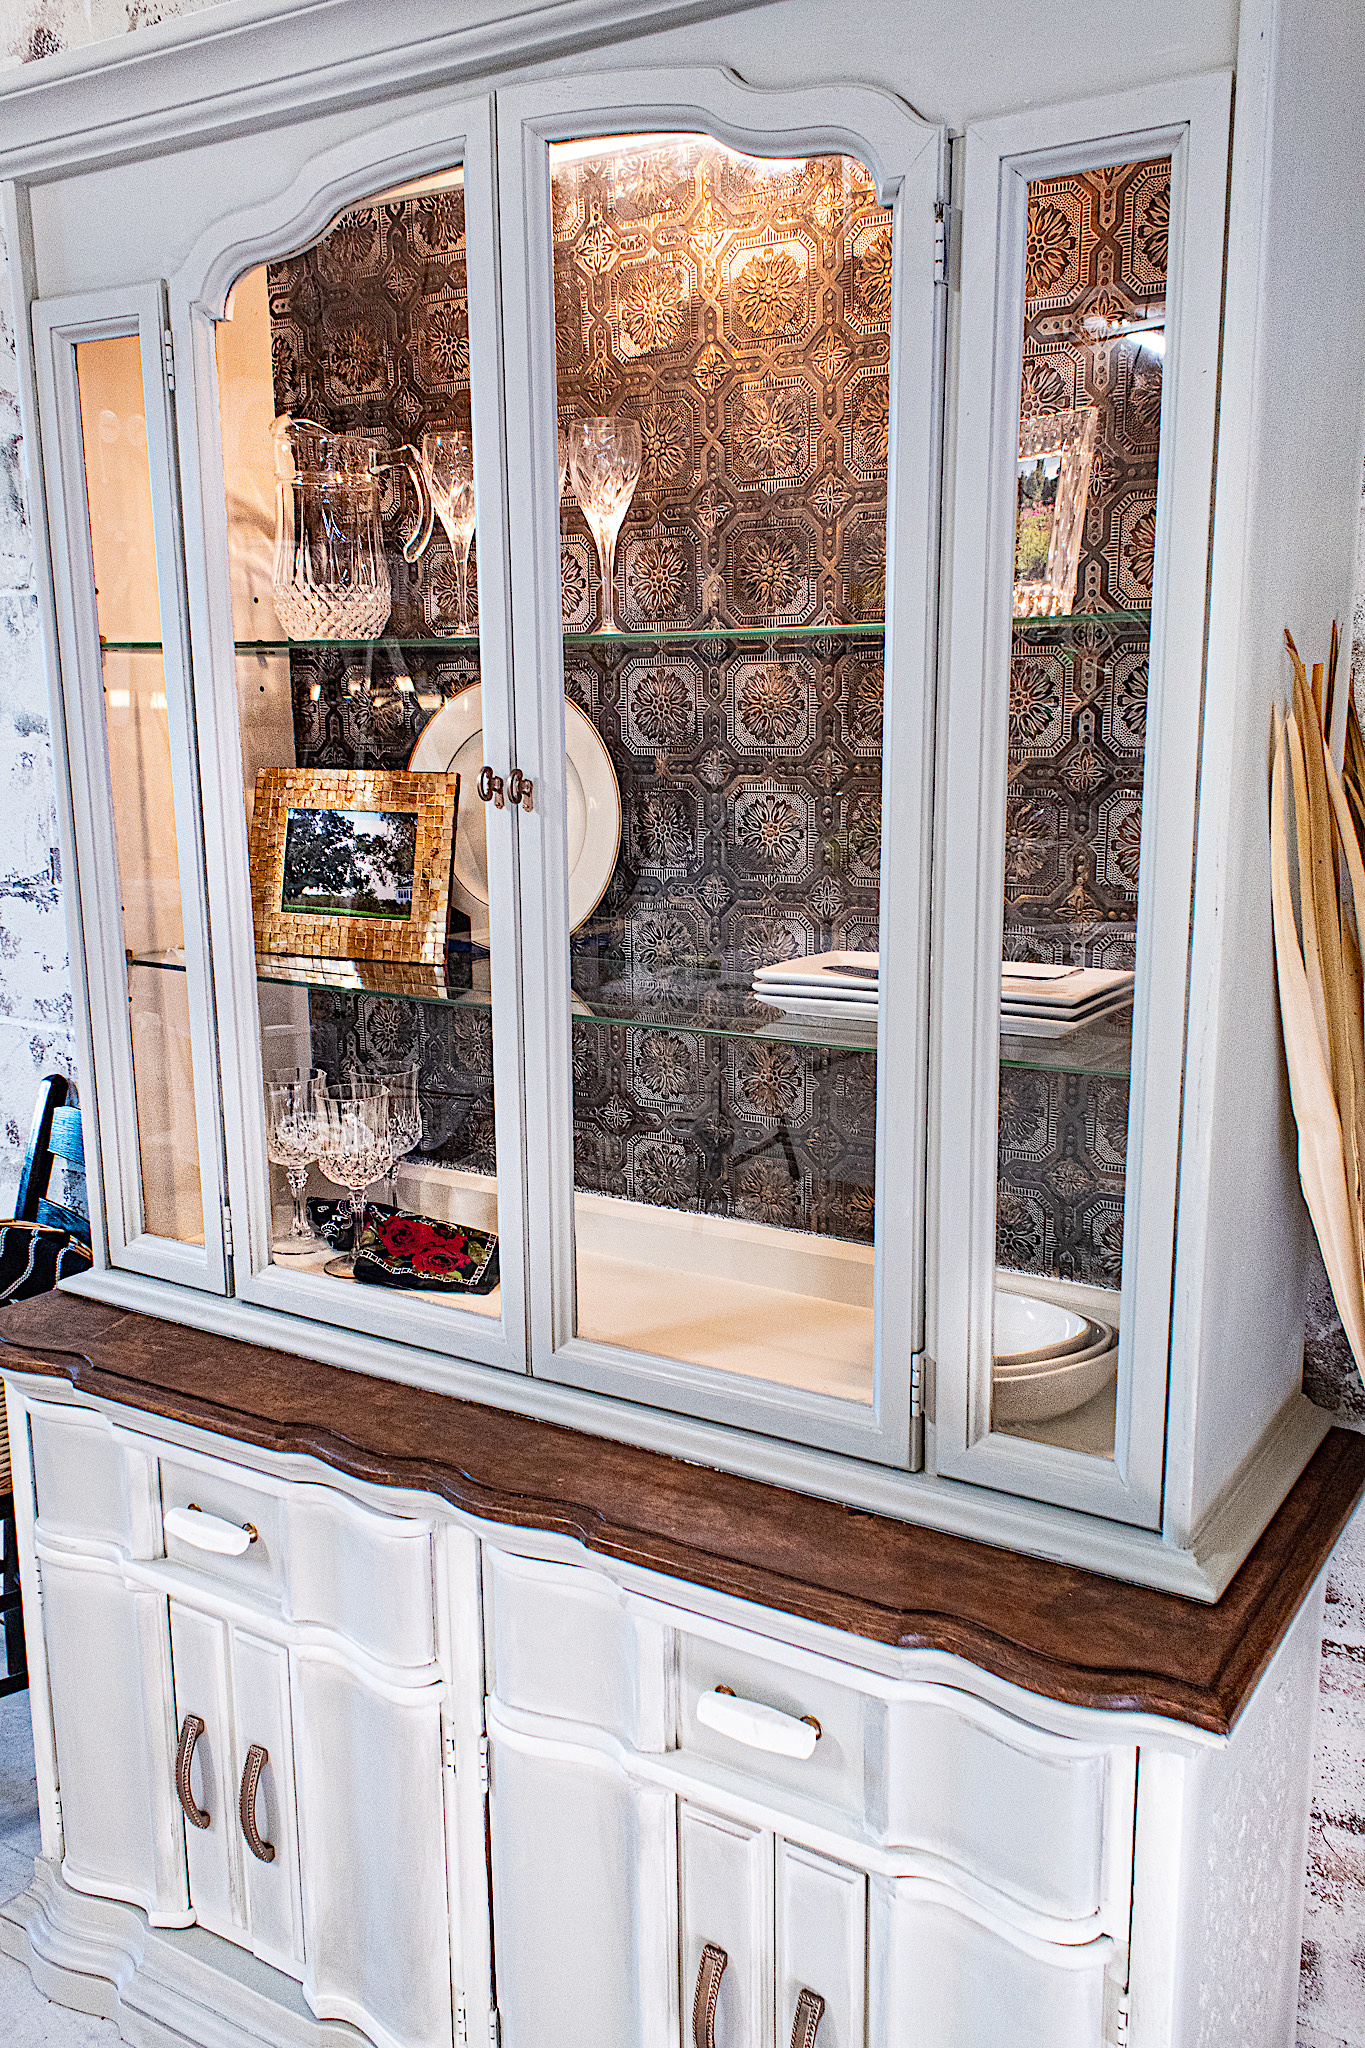
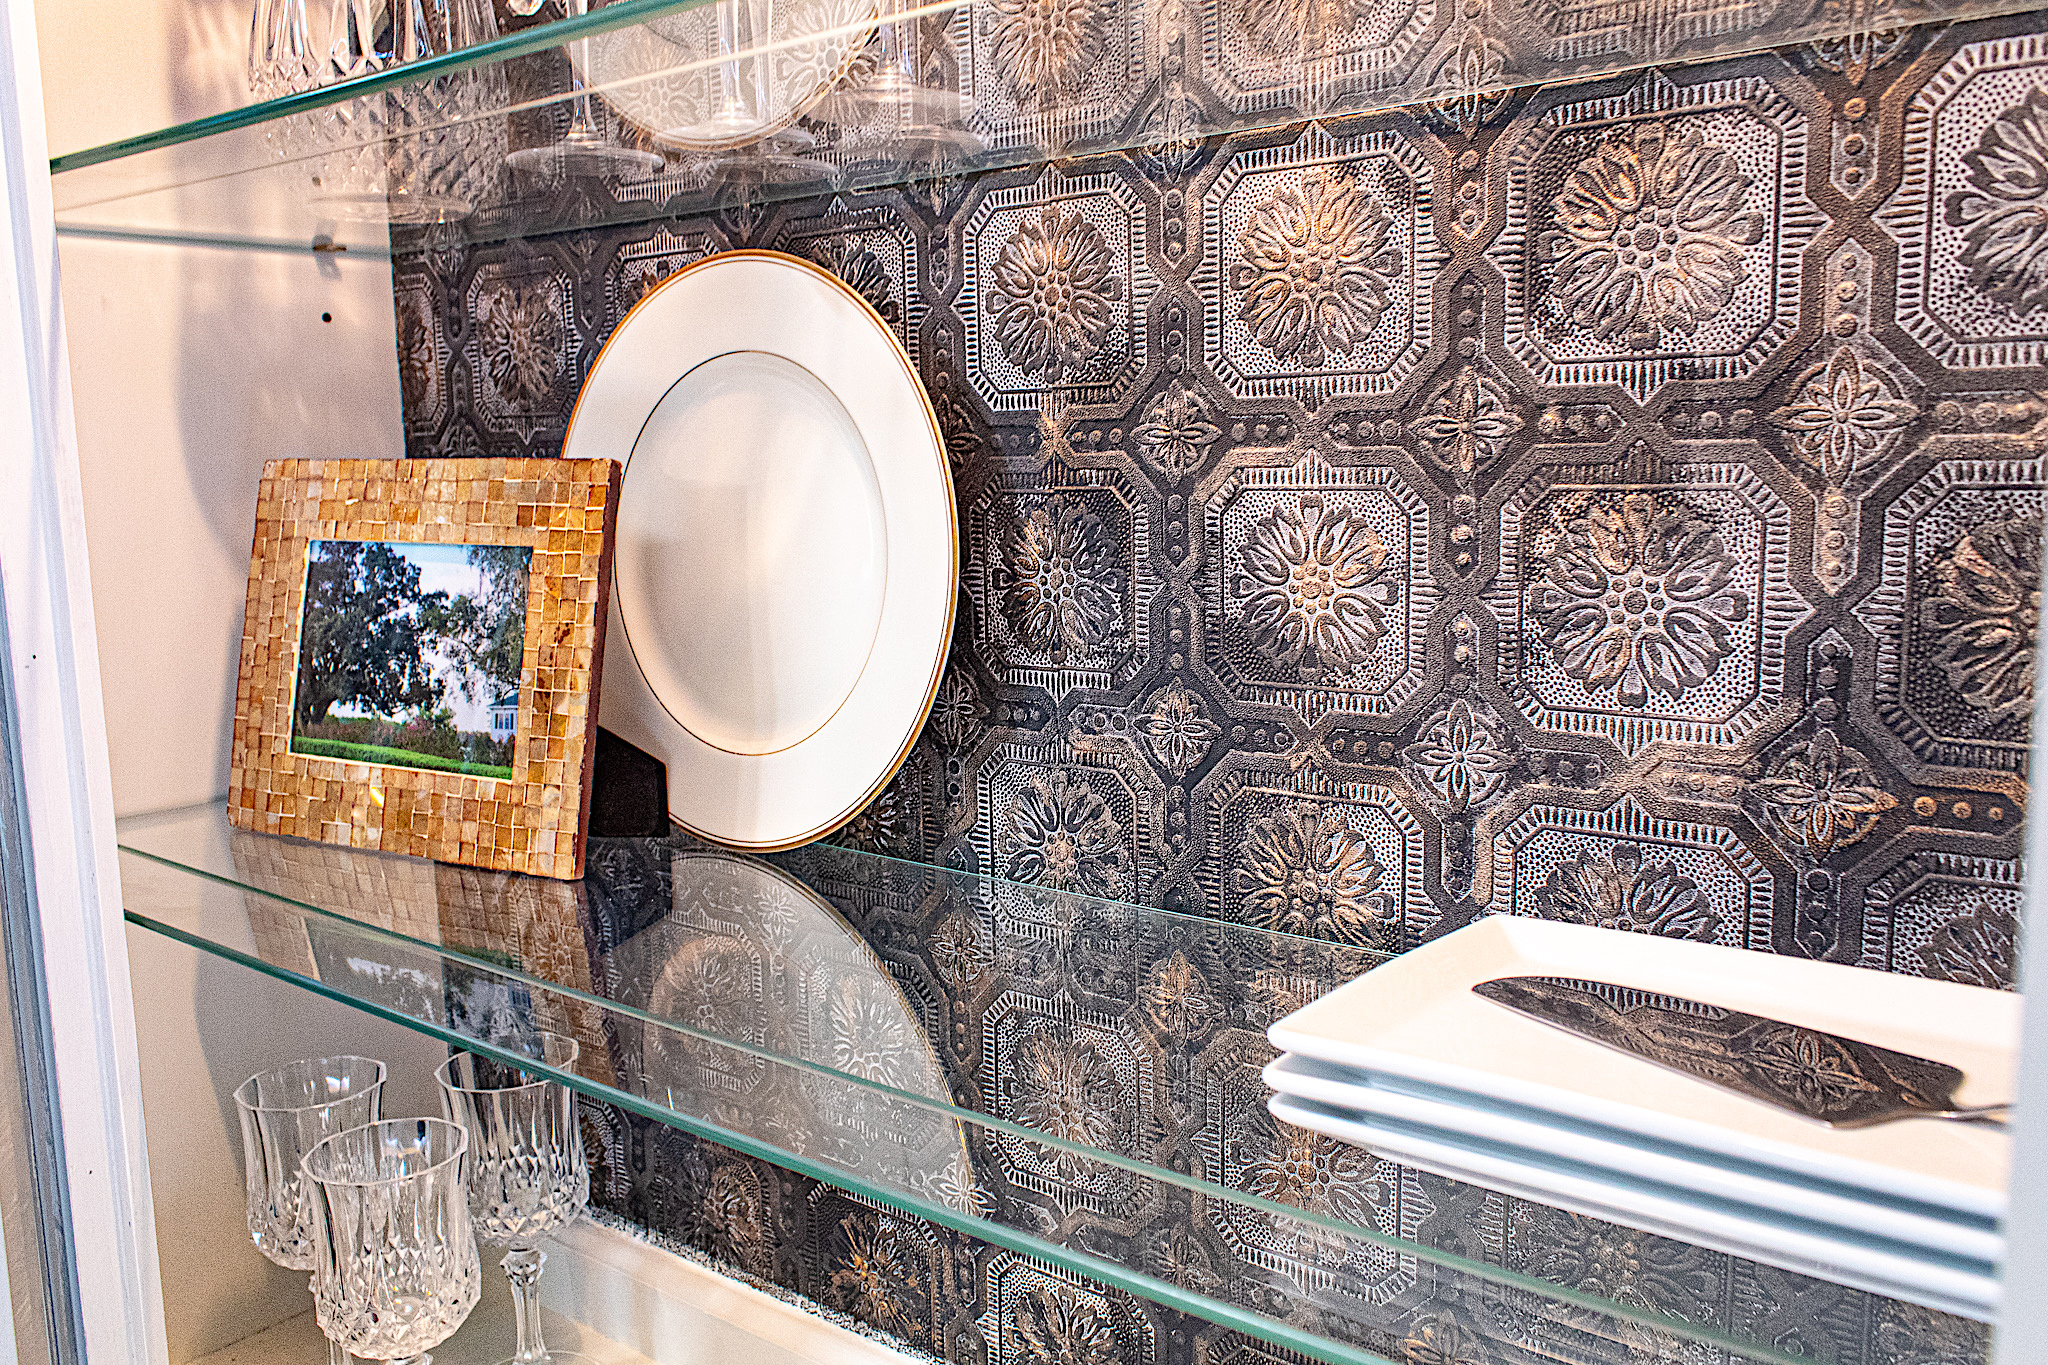
I love this Graham and Brown textured, paintable wallpaper. It is thick and so easy to apply. I lined my first piece to the top edge of the back of the hutch. Using my smoothing tool, I went from top to bottom smoothing everything out and pressing the wall paper onto the wood. I trimmed any excess paper at the edges with an exacto knife. Then I hung my last two pieces. I only wallpapered the back wall for an accented look.
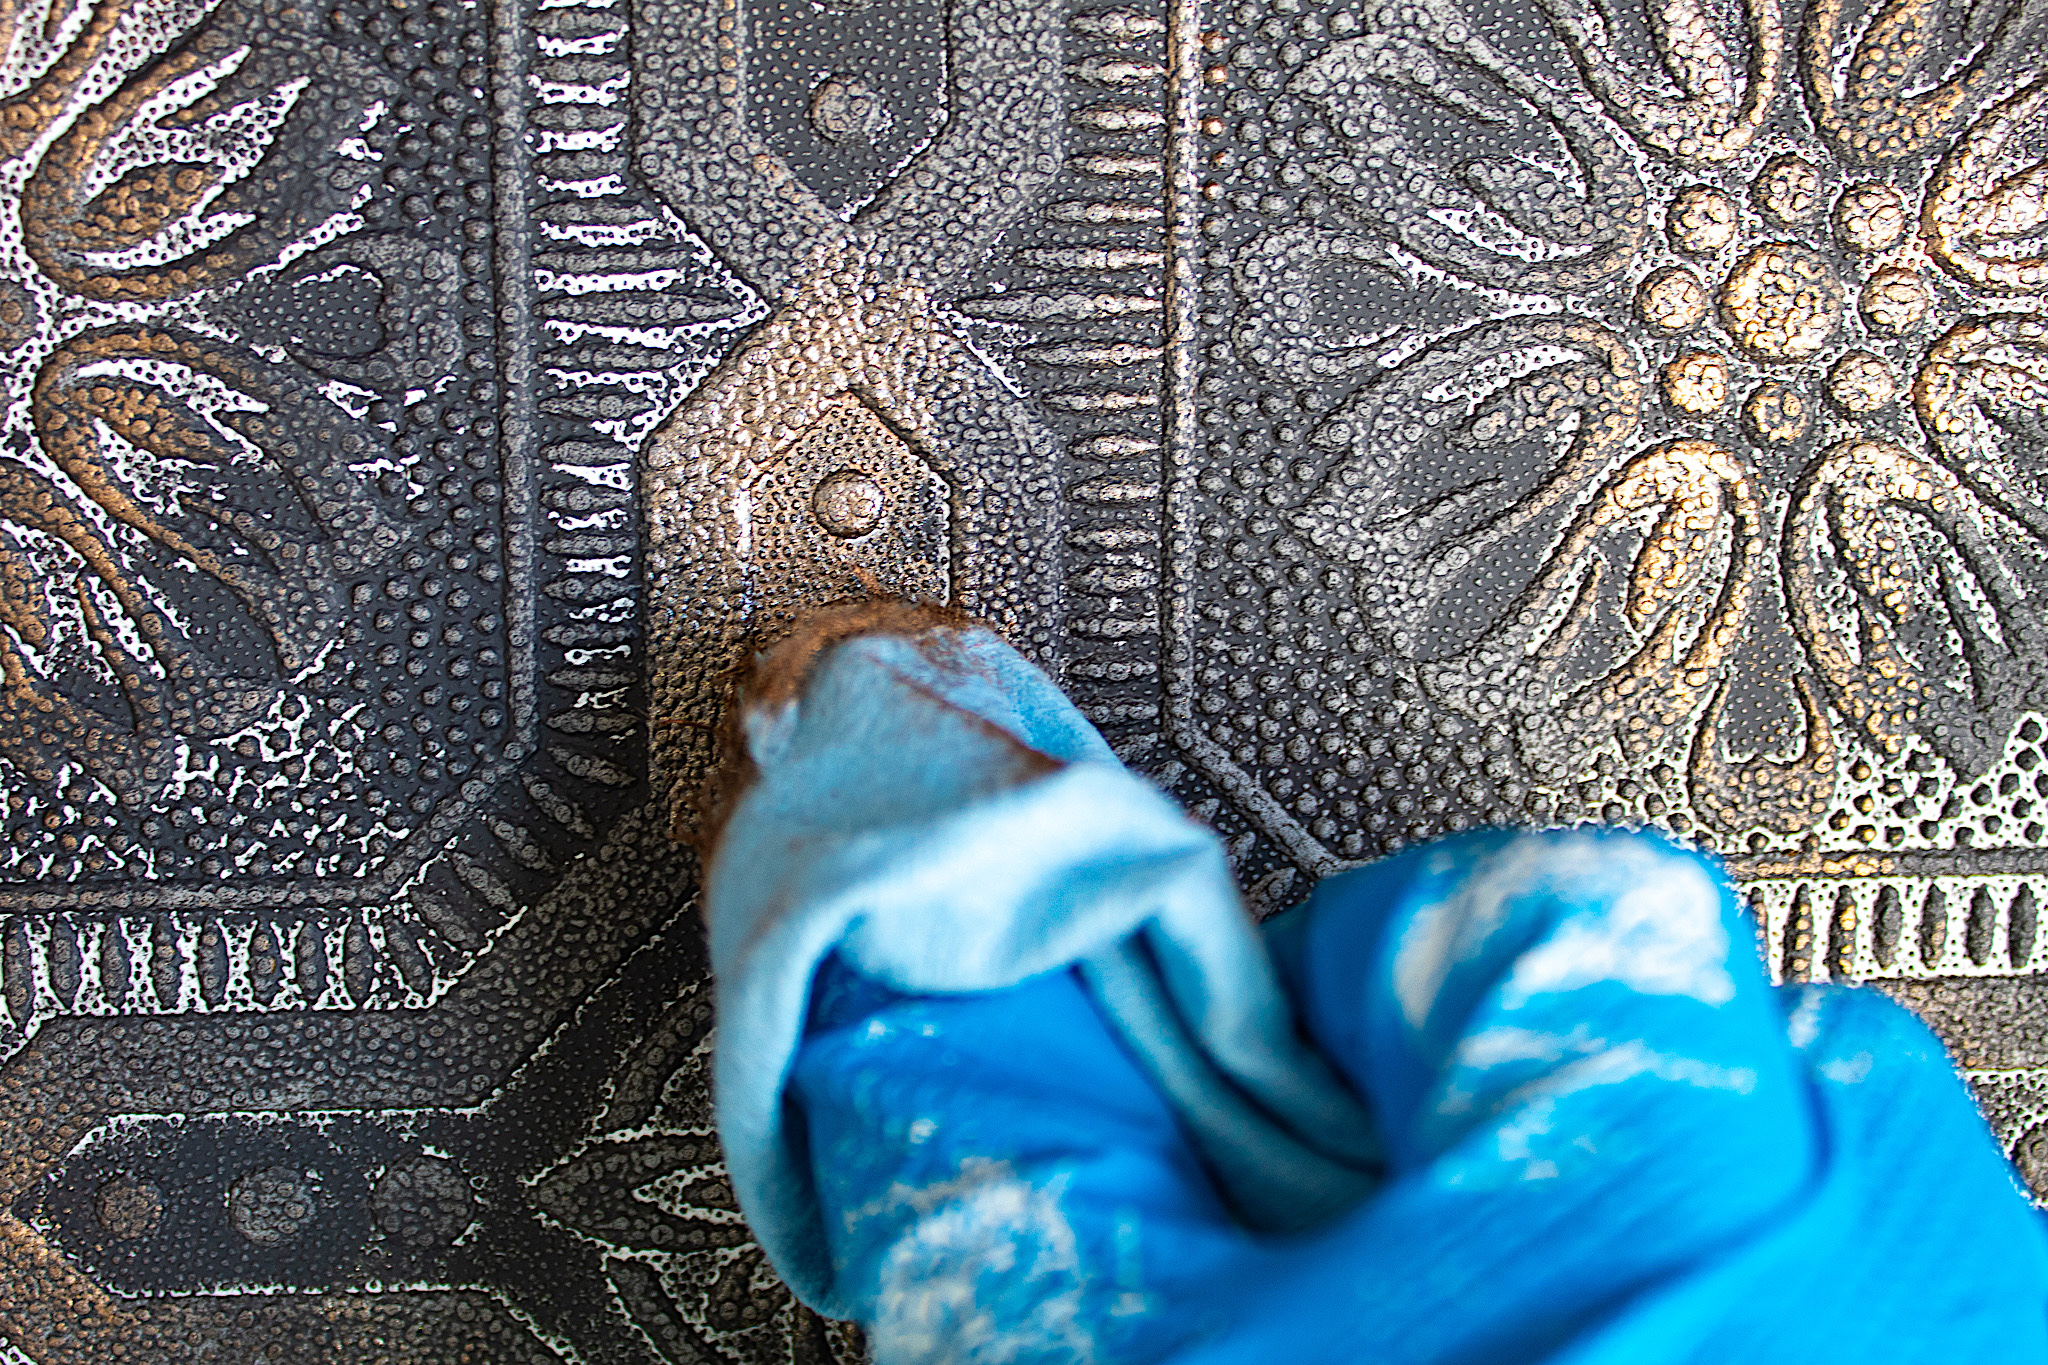
I first painted the wallpaper with Behr’s dark secret. I used a mini paint roller and lightly rolled over the paper. In some parts I added a little more paint, but mostly I kept it light. This technique creates depth and an old world look. After the paint dried, I highlighted the details at random with my aged brass wax. This Prima Alchemy wax which comes in different colors is gorgeous. It goes a long way and truly gives a metallic look. The end result was just what I was looking for.
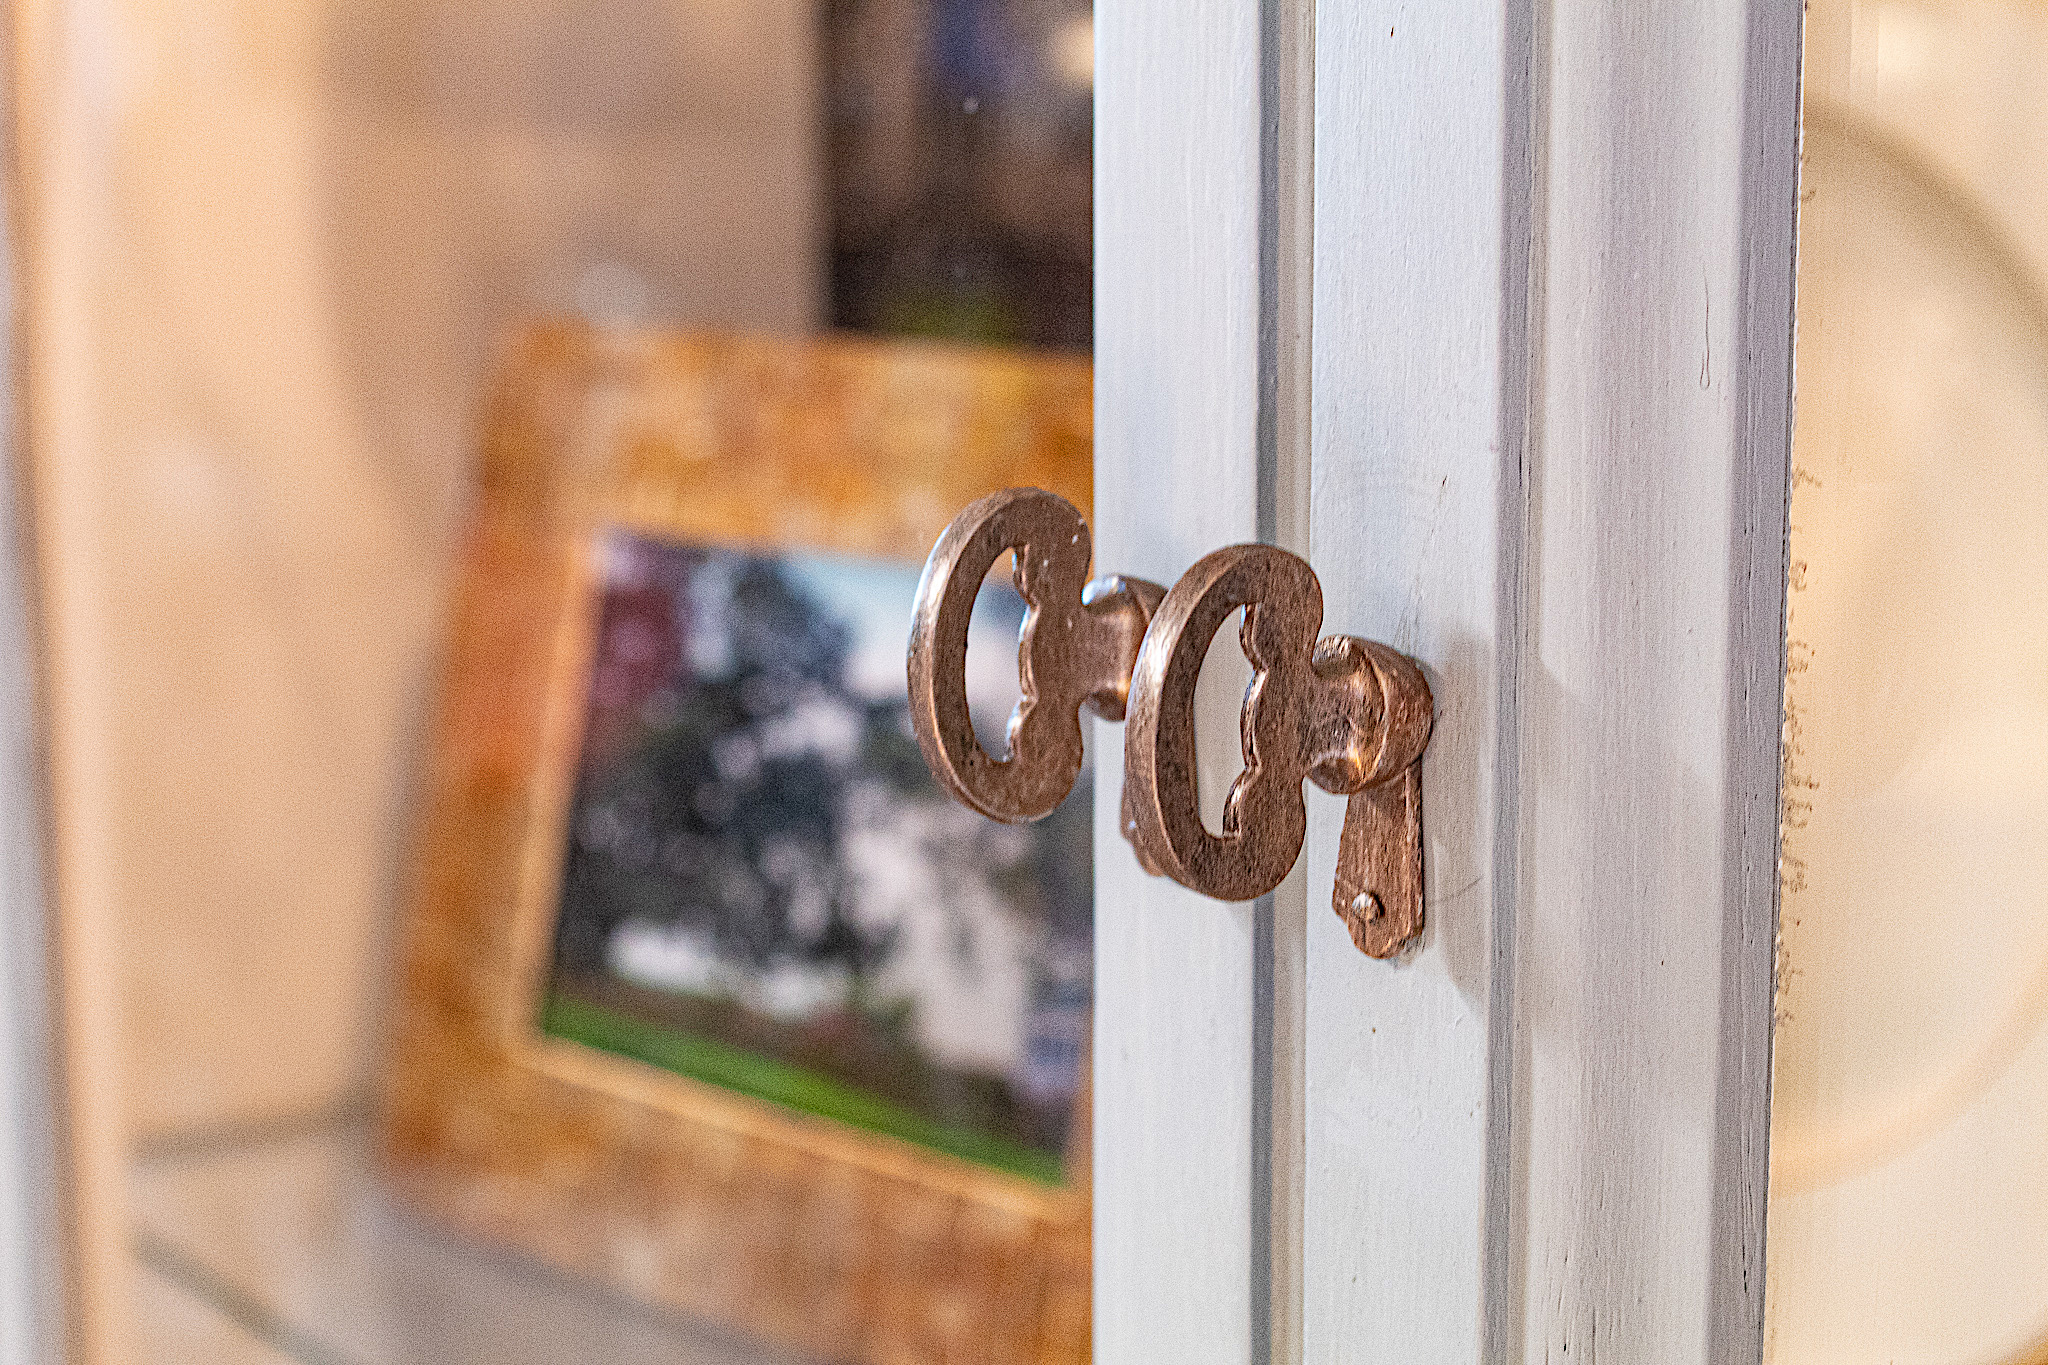
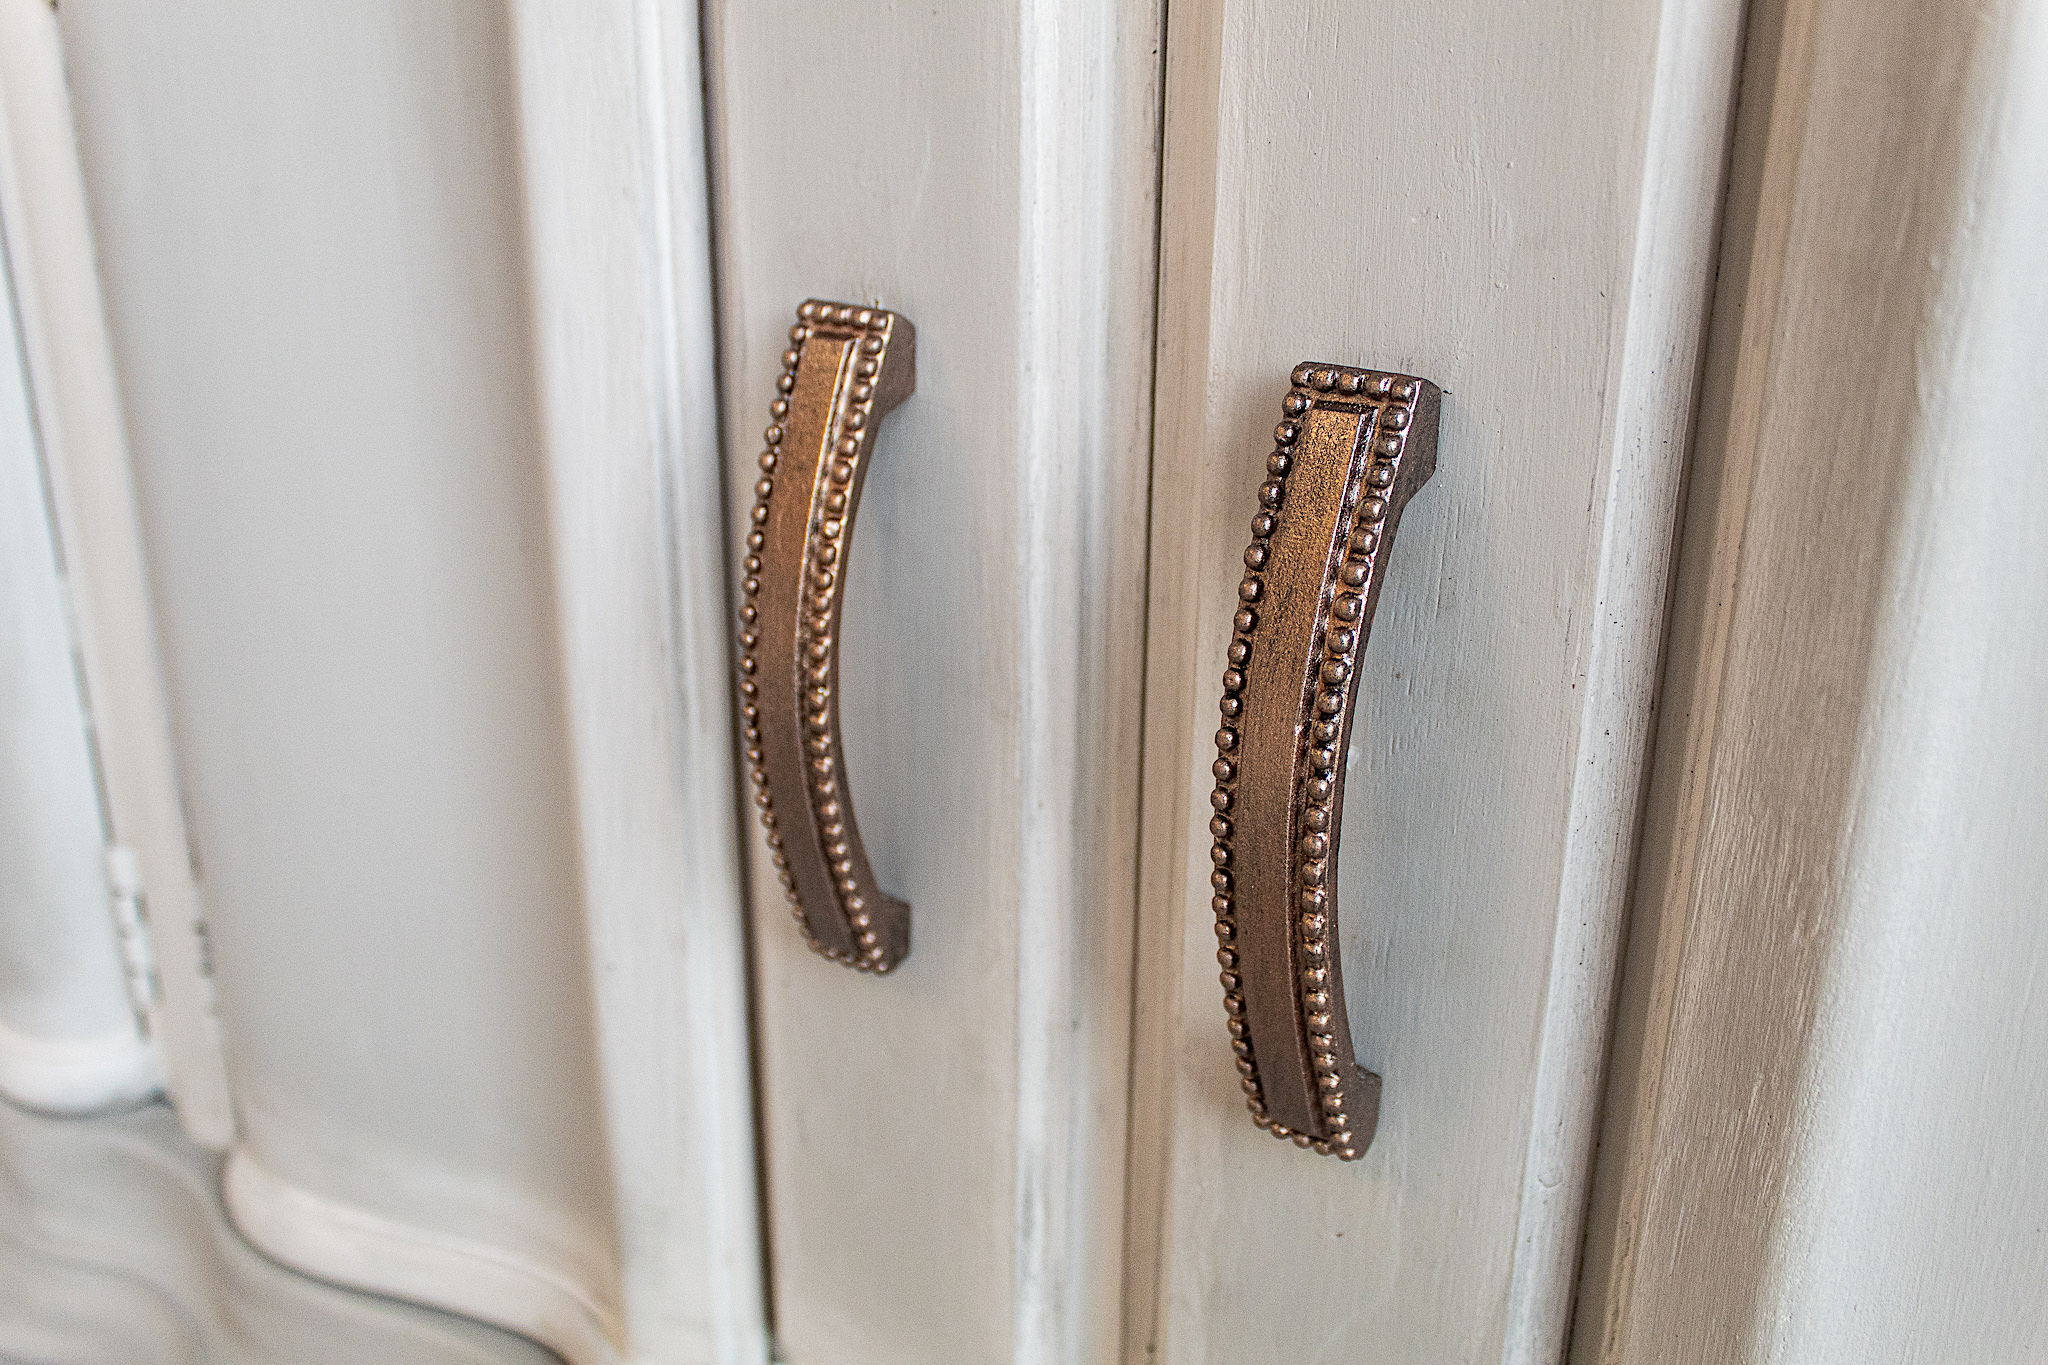
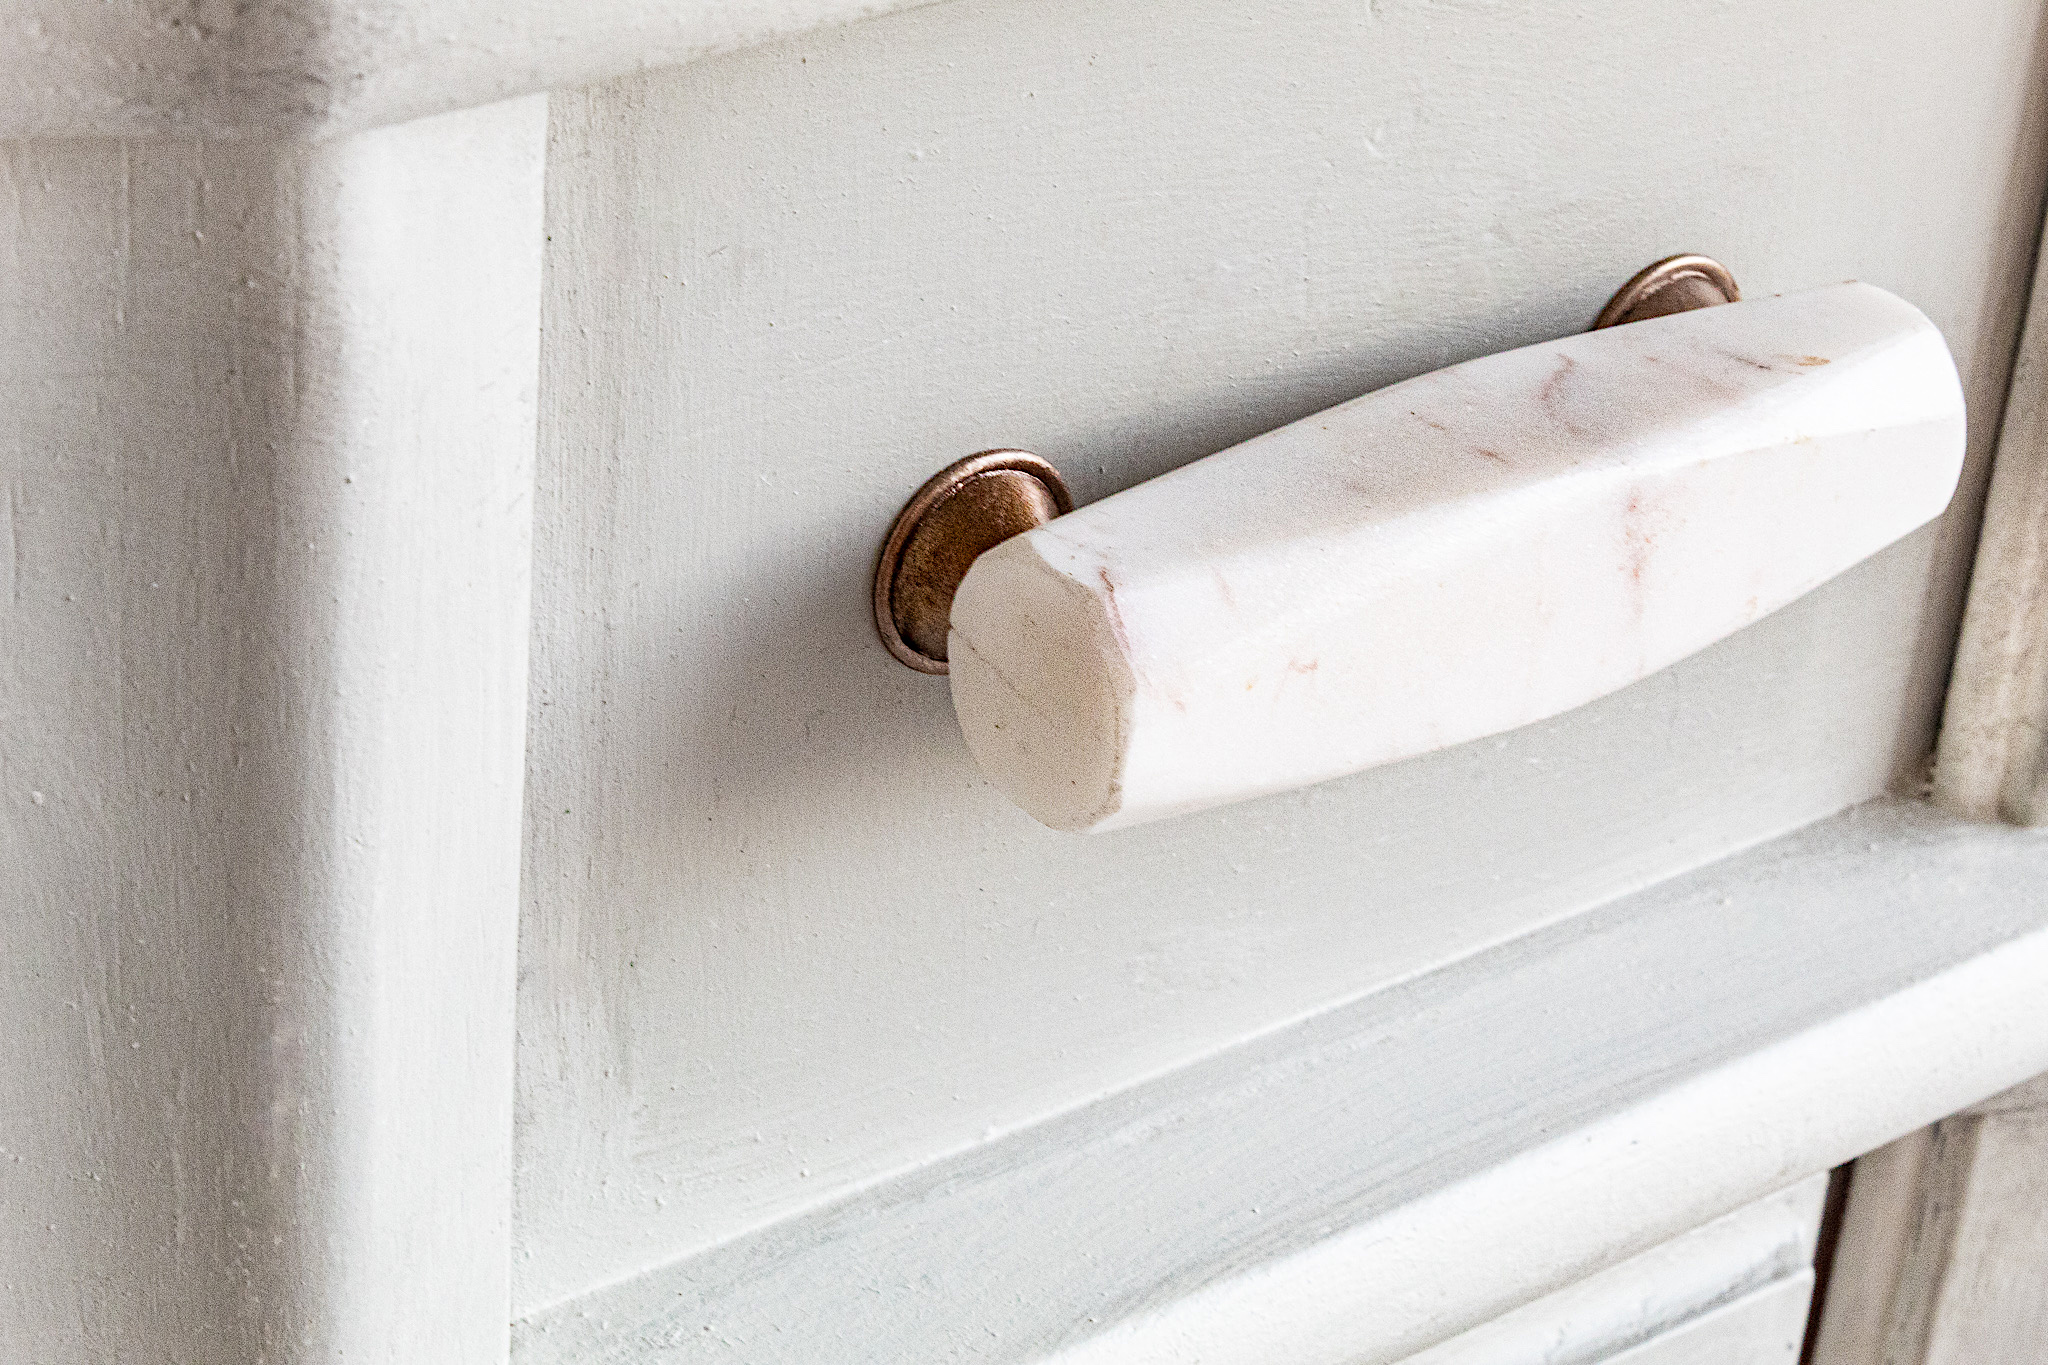
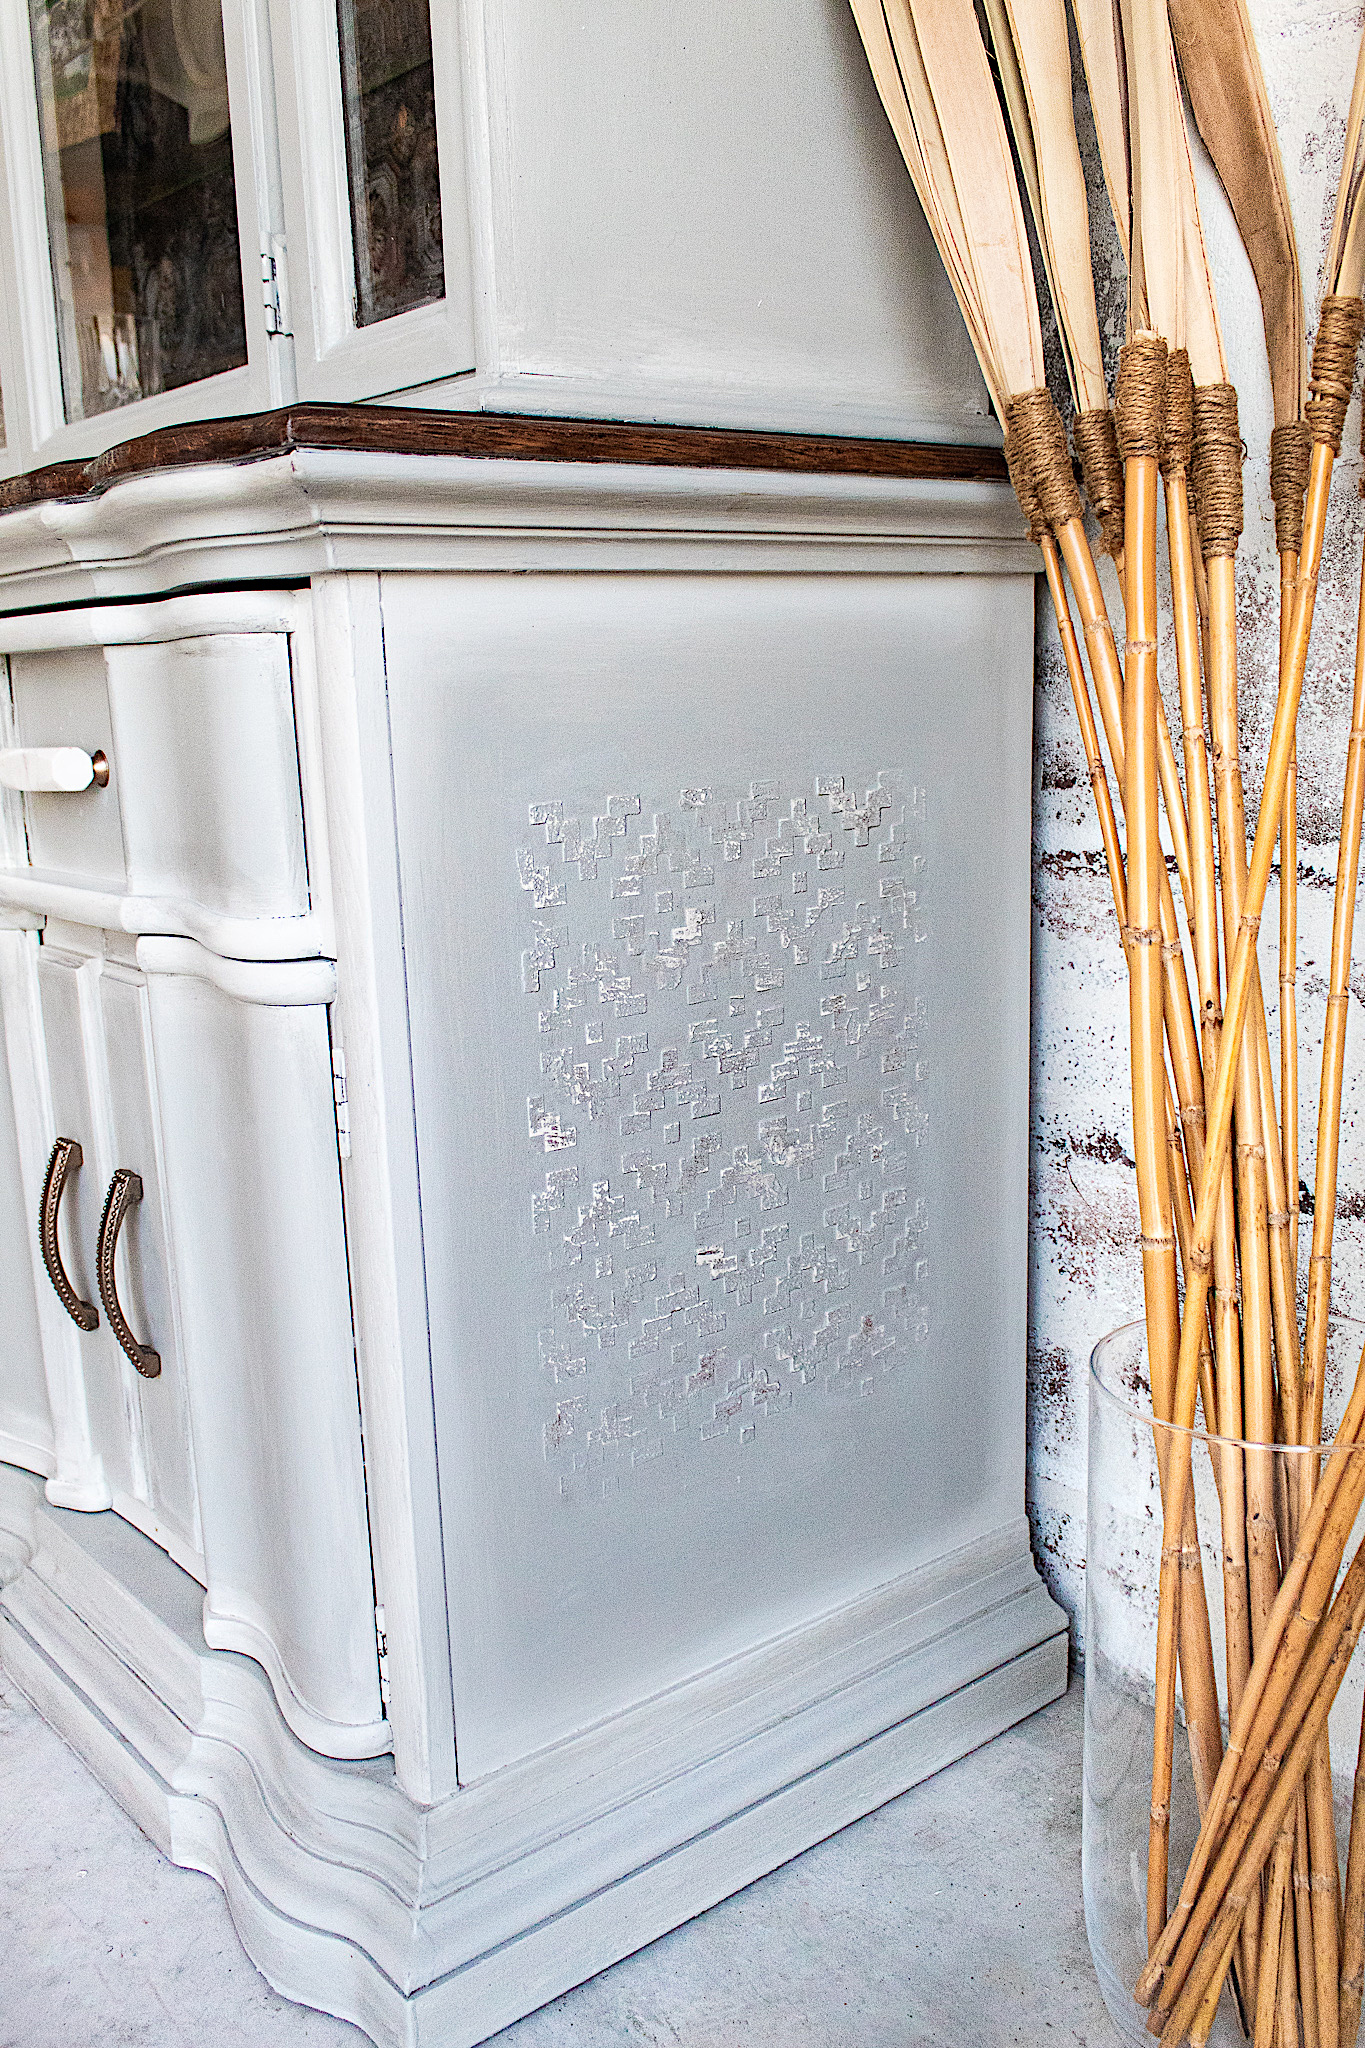
Although the hardware on the buffet was nice, I felt it was too bulky for what I wanted. Instead I found some beautiful pulls at Hobby Lobby for the drawers and for the doors. I like to mix and match hardware when I feel it will coordinate appropriately. The pulls were too dark for the look I was going for. So I gave them 3 coats of my bronze metallic paint and they turned out oh so gorgeous.
short videos demonstrating the renovation process
And there you have it friends! Incorporating enriching details and accents like wallpaper may take time and patience but will completely elevate the presentation of your piece.
Thank you for following me on this journey of giving this China Hutch new found love, in spite of the sweat and (almost) tears! She sure was worth it. Let me know what you think of the Stately China Hutch.
2 thoughts on “Wallpapering furniture – Stately China Hutch”
Gabriel Eisner
Hi do you have a video of all your steps?? We would love to reproduce this with our own hutch.
Hi! I’m sorry I don’t…unforuntately I wasn’t so up-to-par with videos when I did that renovation! Now I try to document tutorials from start to finish. If you have a certain part of the look you want more details on the steps, just let me know. I’d be happy to share some pointers. Good luck with your project, it sounds exciting!