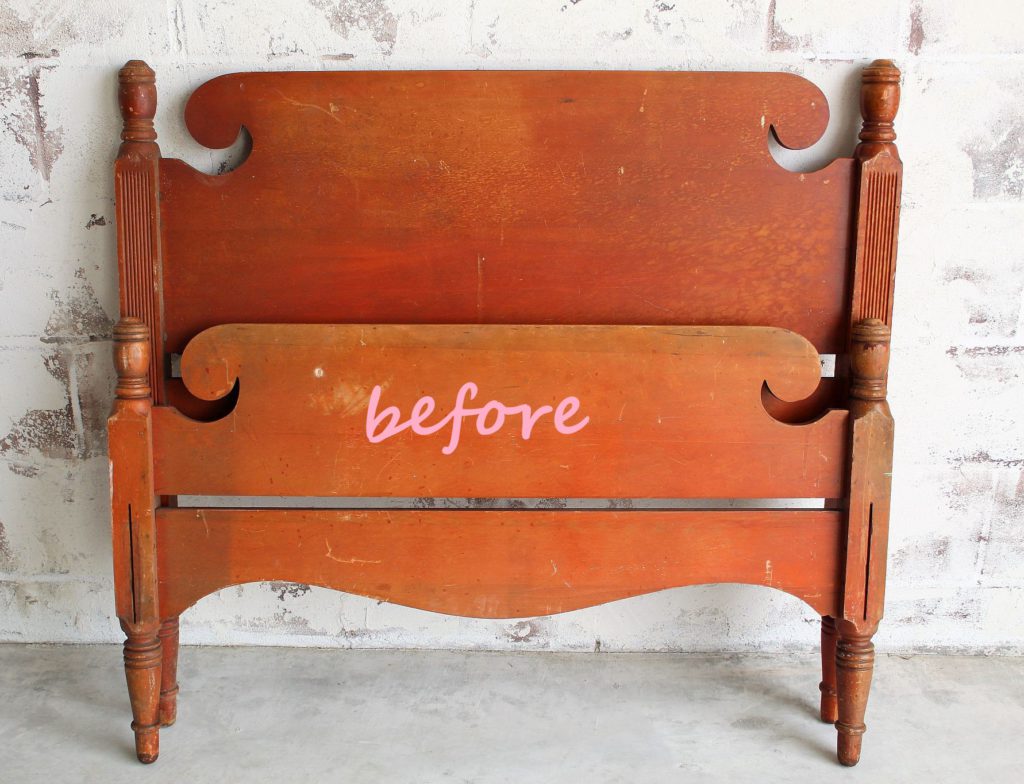
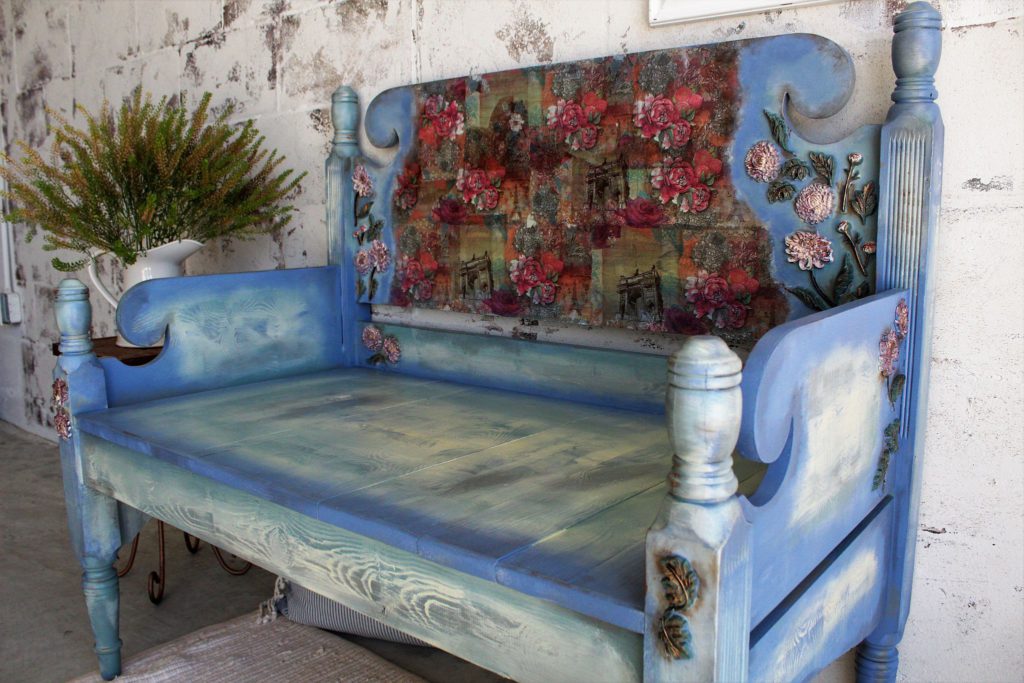
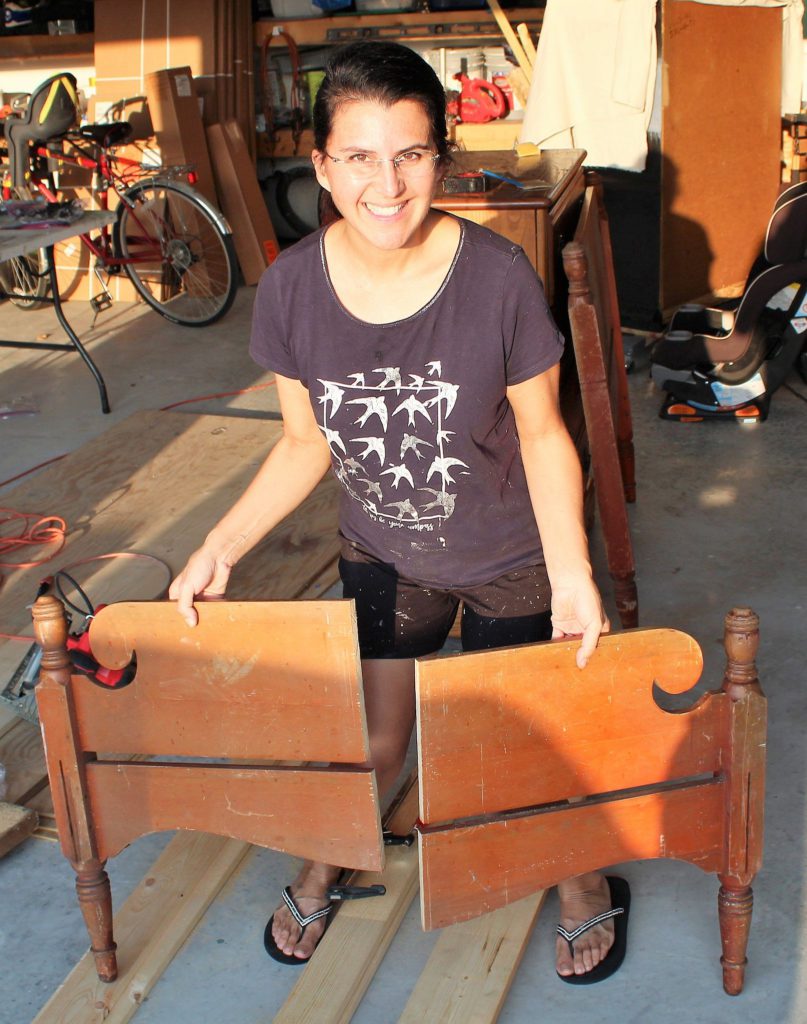
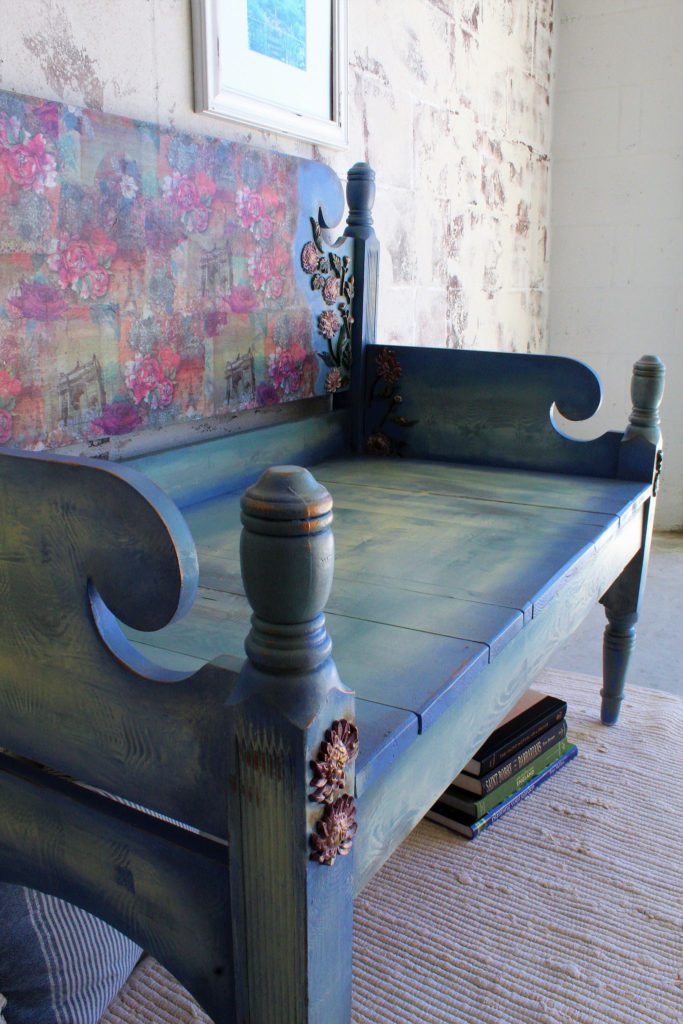
Hello lovely readers! This post shows you how my husband Ronny and I built this bench from a twin size headboard and footboard I found on FB Marketplace. I picked up three sets of twin frames so I still have two available for custom painting.
The Floral Moulds and Decoupage Bench post will walk you through the second part of this project, the design and painting process. In the tutorial I share some very easy techniques for making her BEAUTIFUL!
MATERIALS: *1 twin size headboard and 1 footboard *Miter Saw (optional) *Circular Saw *Power Drill *Nail Gun *Orbital Sander (similar) *3 inch wood screws (8) *2.5 inch wood screws (4) *1.25 inch wood screws (6) * Level *6 foot lengths of each of the following wood sizes (we used spruce) –1″ x 10″ –1″ x 6″ –1″ x 4″ *4 feet of one 2″x 4″ *4 feet of one 1″ x 2″ *A piece of scrap wood to use as a saw guide *Clamps
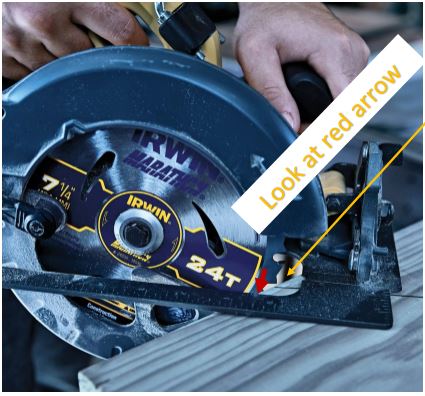
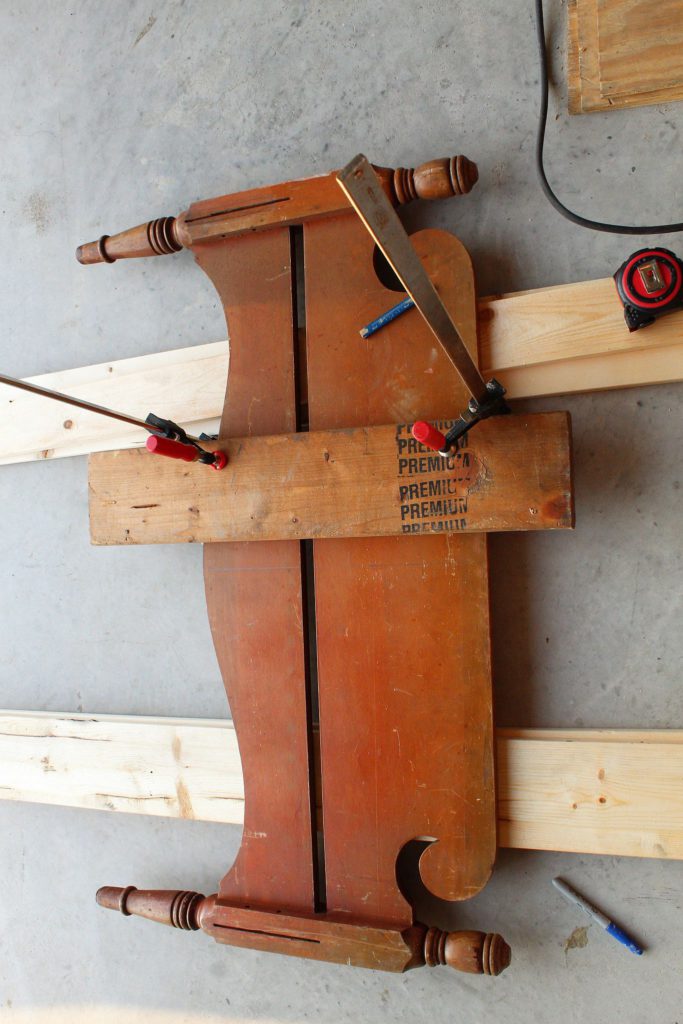
First step in the bench building process—cutting the foot board which will make the sides of the bench: 1. Lay the foot board down on support boards. 2. Measure and draw a line down the middle point of the headboard. 3. So that your circular saw cuts in a straight line, measure the distance from your saw’s blade to its protective edge (see pic 1 below). For our saw the distance was 1.5 inches. 4. Then measure out that same distance from the middle point line you drew on the headboard and place a piece of wood at that point. This board will serve as a guide and guard rail keeping your saw straight as it cuts. So for ex. our blade to edge distance was 1.5″ so we placed a board on top of the headboard 1.5 inches to the left of the middle line we had drawn. (pic 2 below) 5. Secure your board tightly with clamps because you will push up against it with your saw as you are cutting.
Pic. 1
Pic. 2
Success!
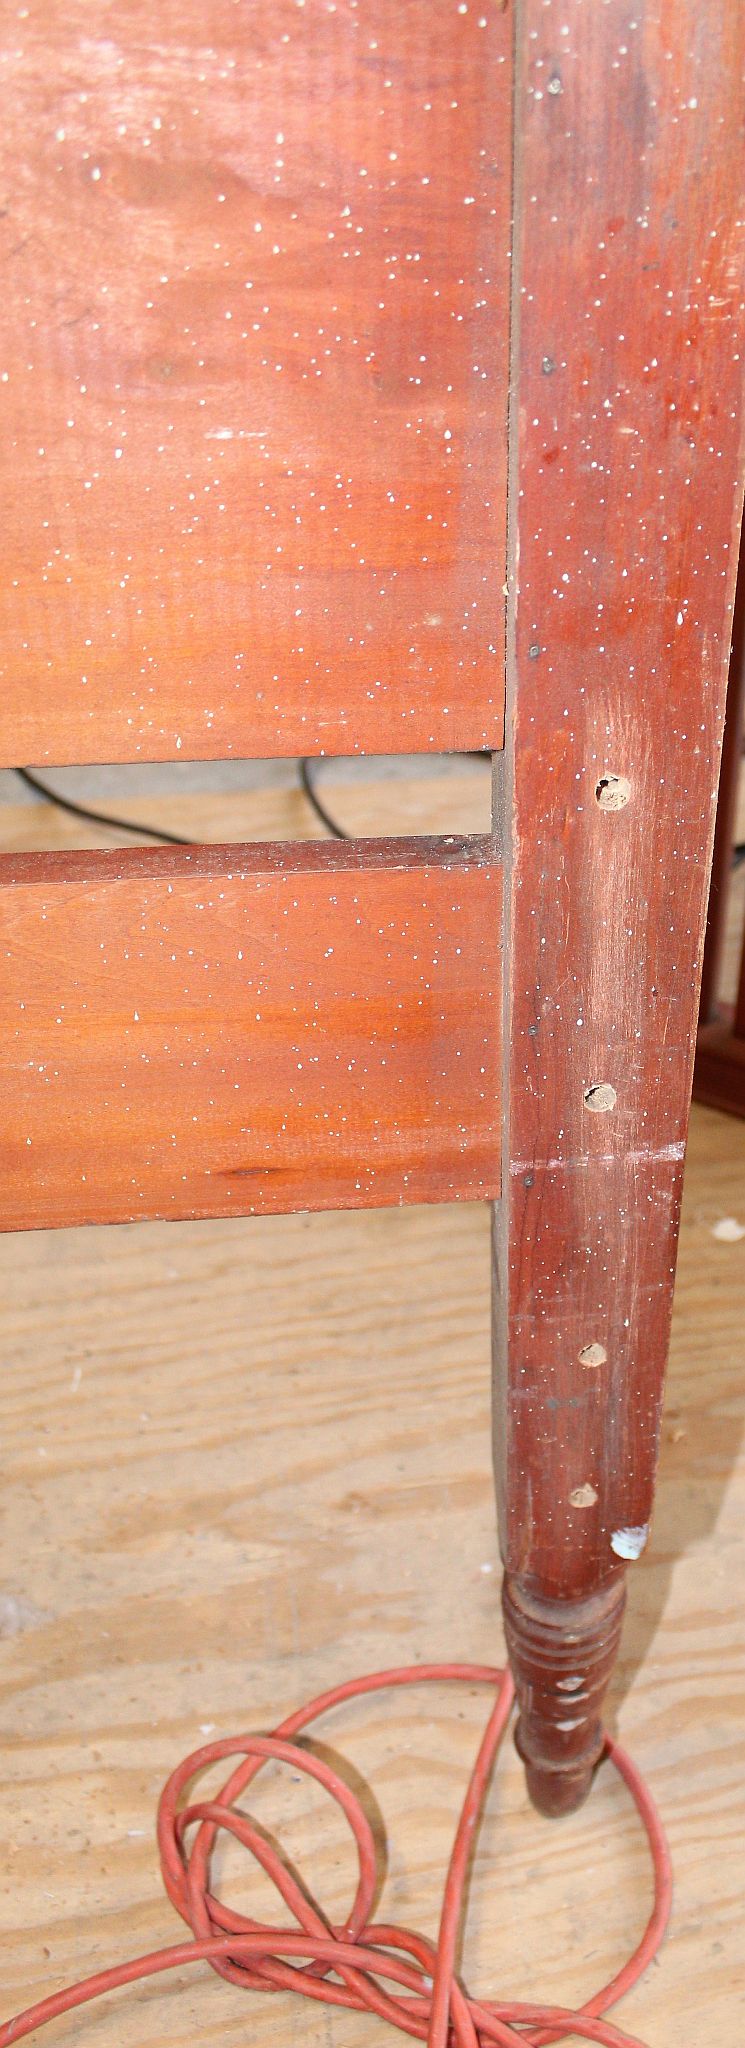
Sand the cut ends for a smooth finish. Then continue with the next step of drilling holes into your head board: 1.Holding your headboard straight up, take one of your footboard side pieces and stand it up against one of the leg ends of the headboard. Place it where it would be when connected. Take a sharpie and mark 4 points for holes where the foot board will connect with the headboard. 2. From the front of the headboard drill 4 pilot holes using your marked points as guides. 3. Repeat this process on the other end of your headboard.
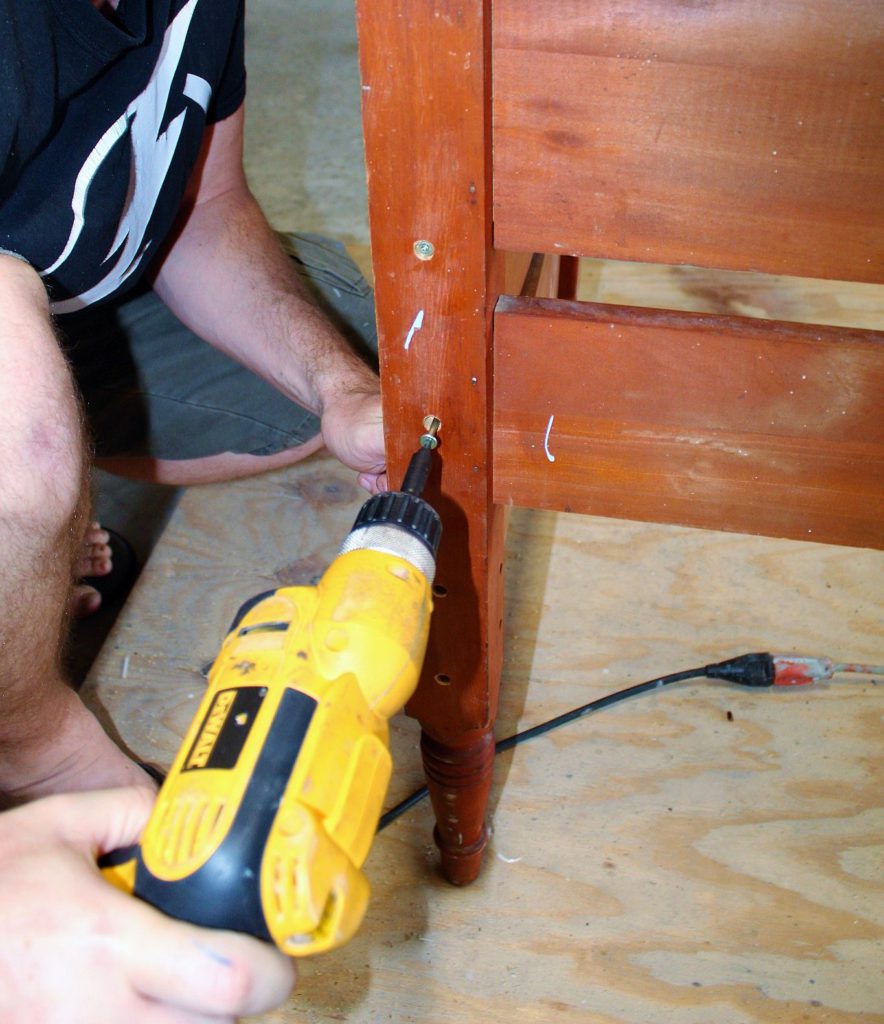
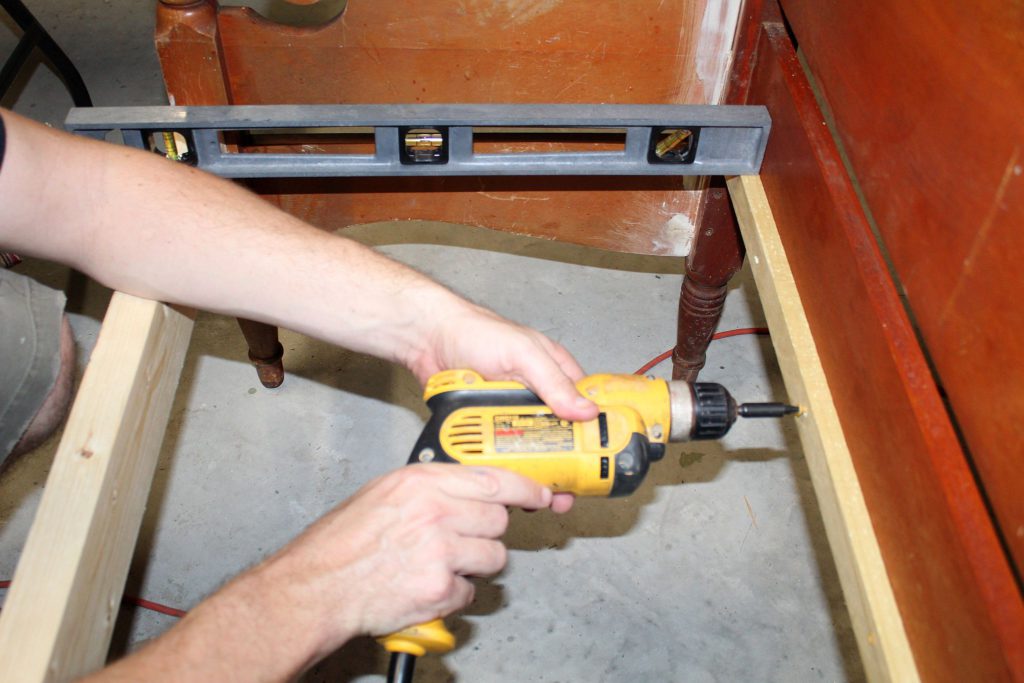
4. Now take your first side piece and hold it up flush to you headboard. Using 3″ wood screws, slowly drill the screws in from the back of the headboard, through the headboard and into the footboard. To help prevent wood split, Ronny drilled in a little, reversed it out a bit before drilling in again. He does this a couple of times.
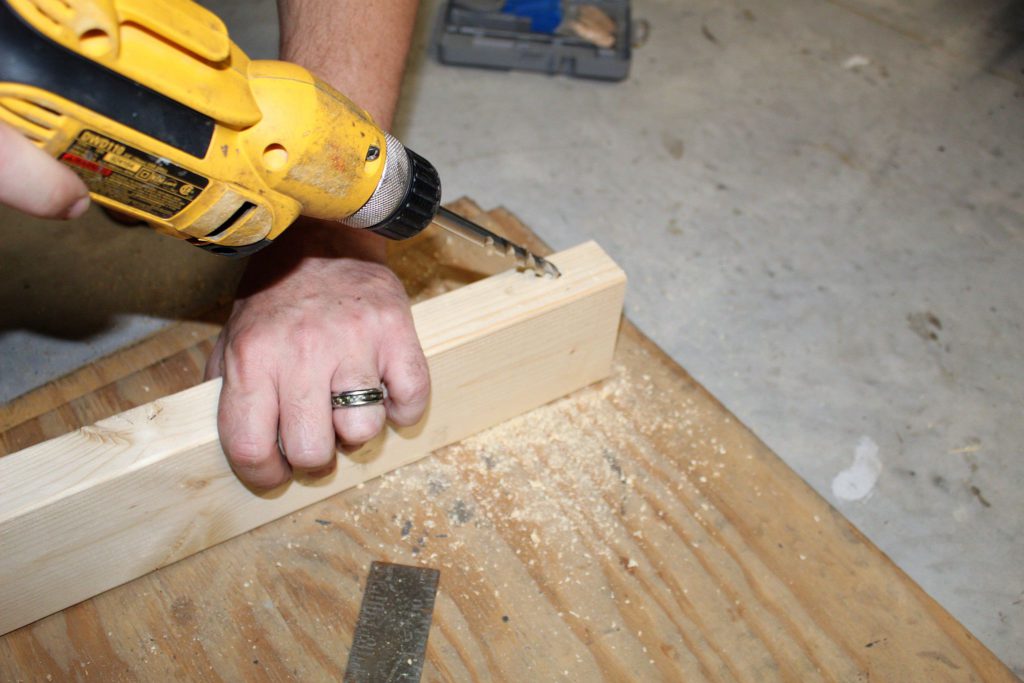
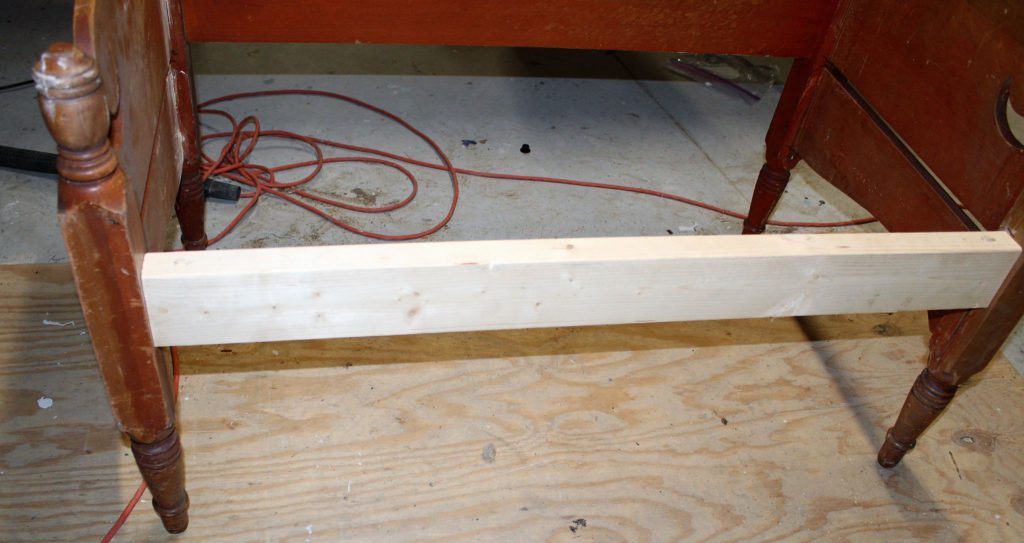
Once both sides of your bench are drilled in, you can now attach your front horizontal support board: 1. Measure the width from the inside of one of your side pieces to the inside of the other side piece. 2. Cut your 2″ x 4″ to this width. 3. Drill two pilot holes at an angle on each end of the 2″ x 4″ for a total of 4 holes. One hole will be drilled on the top and one on the bottom.
4. Mark on your bench the height and depth you want your seat to be. We chose 17″ from the floor for height and 21″ for depth. 5. Using 2.5″ screws attach your front support board into each side piece of the bench at the marked level.
Now that you have a support board on the front of your bench to sit under your seating boards (coming soon), you will also add a support board on the back. 1.Measure the distance of the width in the back. It should be the same as the distance you measured for your front support board. 2. Cut your 1″x 2″ to this width. 3.Attach the cut 1″x 2″ (at the same height level as the front support board) to the back of the headboard using six 1.25″ wood screws.
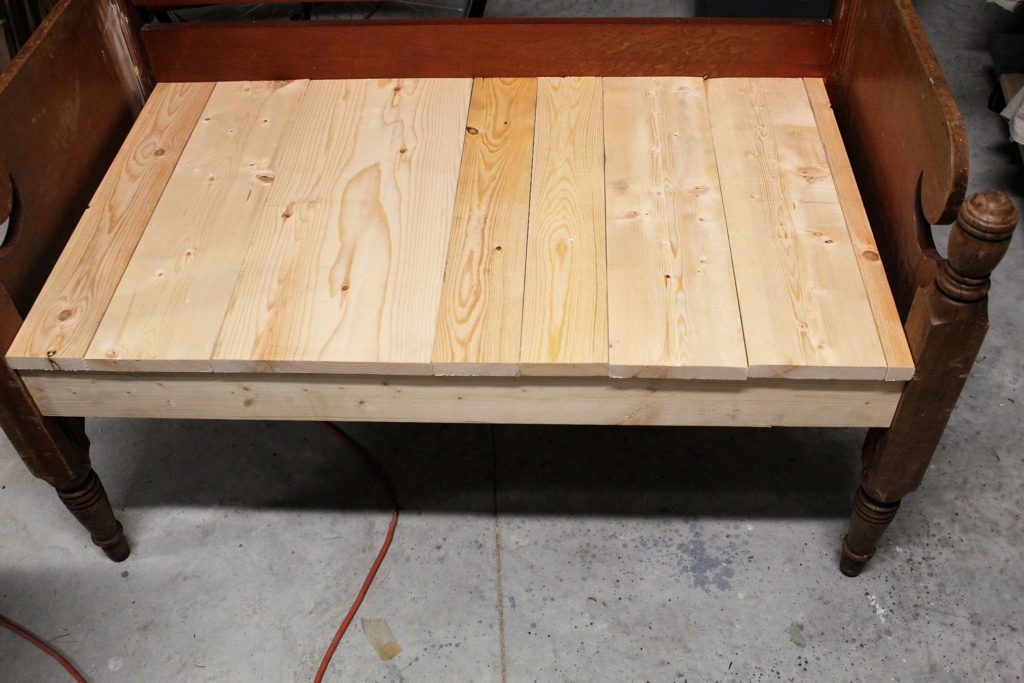
To complete the bench, we cut our spruce boards to make the seat: 1. Cut various pieces of the 6 foot length boards. Each were cut the same length. To leave a small overhang over the front support board we cut the seat pieces at a length of 21″. We used the miter saw for nice clean cuts, but you can also use a table saw or circular saw. I wanted a mixed look of different sized boards on the seat, however, you may choose to go with all same sized boards.
Once I arranged them in an order I liked, I sanded the front edges of the boards to give a slight curved look. I painted the bench before nailing the boards on with the nail gun for easier access. I hope you enjoyed this tutorial! Please let me know if you have any questions and be sure to see the full completed project at Floral Moulds And Decoupage Bench.
THESE ARE SOME OF THE TOOLS WE USED TO COMPLETE THIS PROJECT