Think you can’t paint? This incredibly easy painting technique will have you painting like a pro! Don’t pay for expensive paintings when you can create your own jaw-dropping wall art.
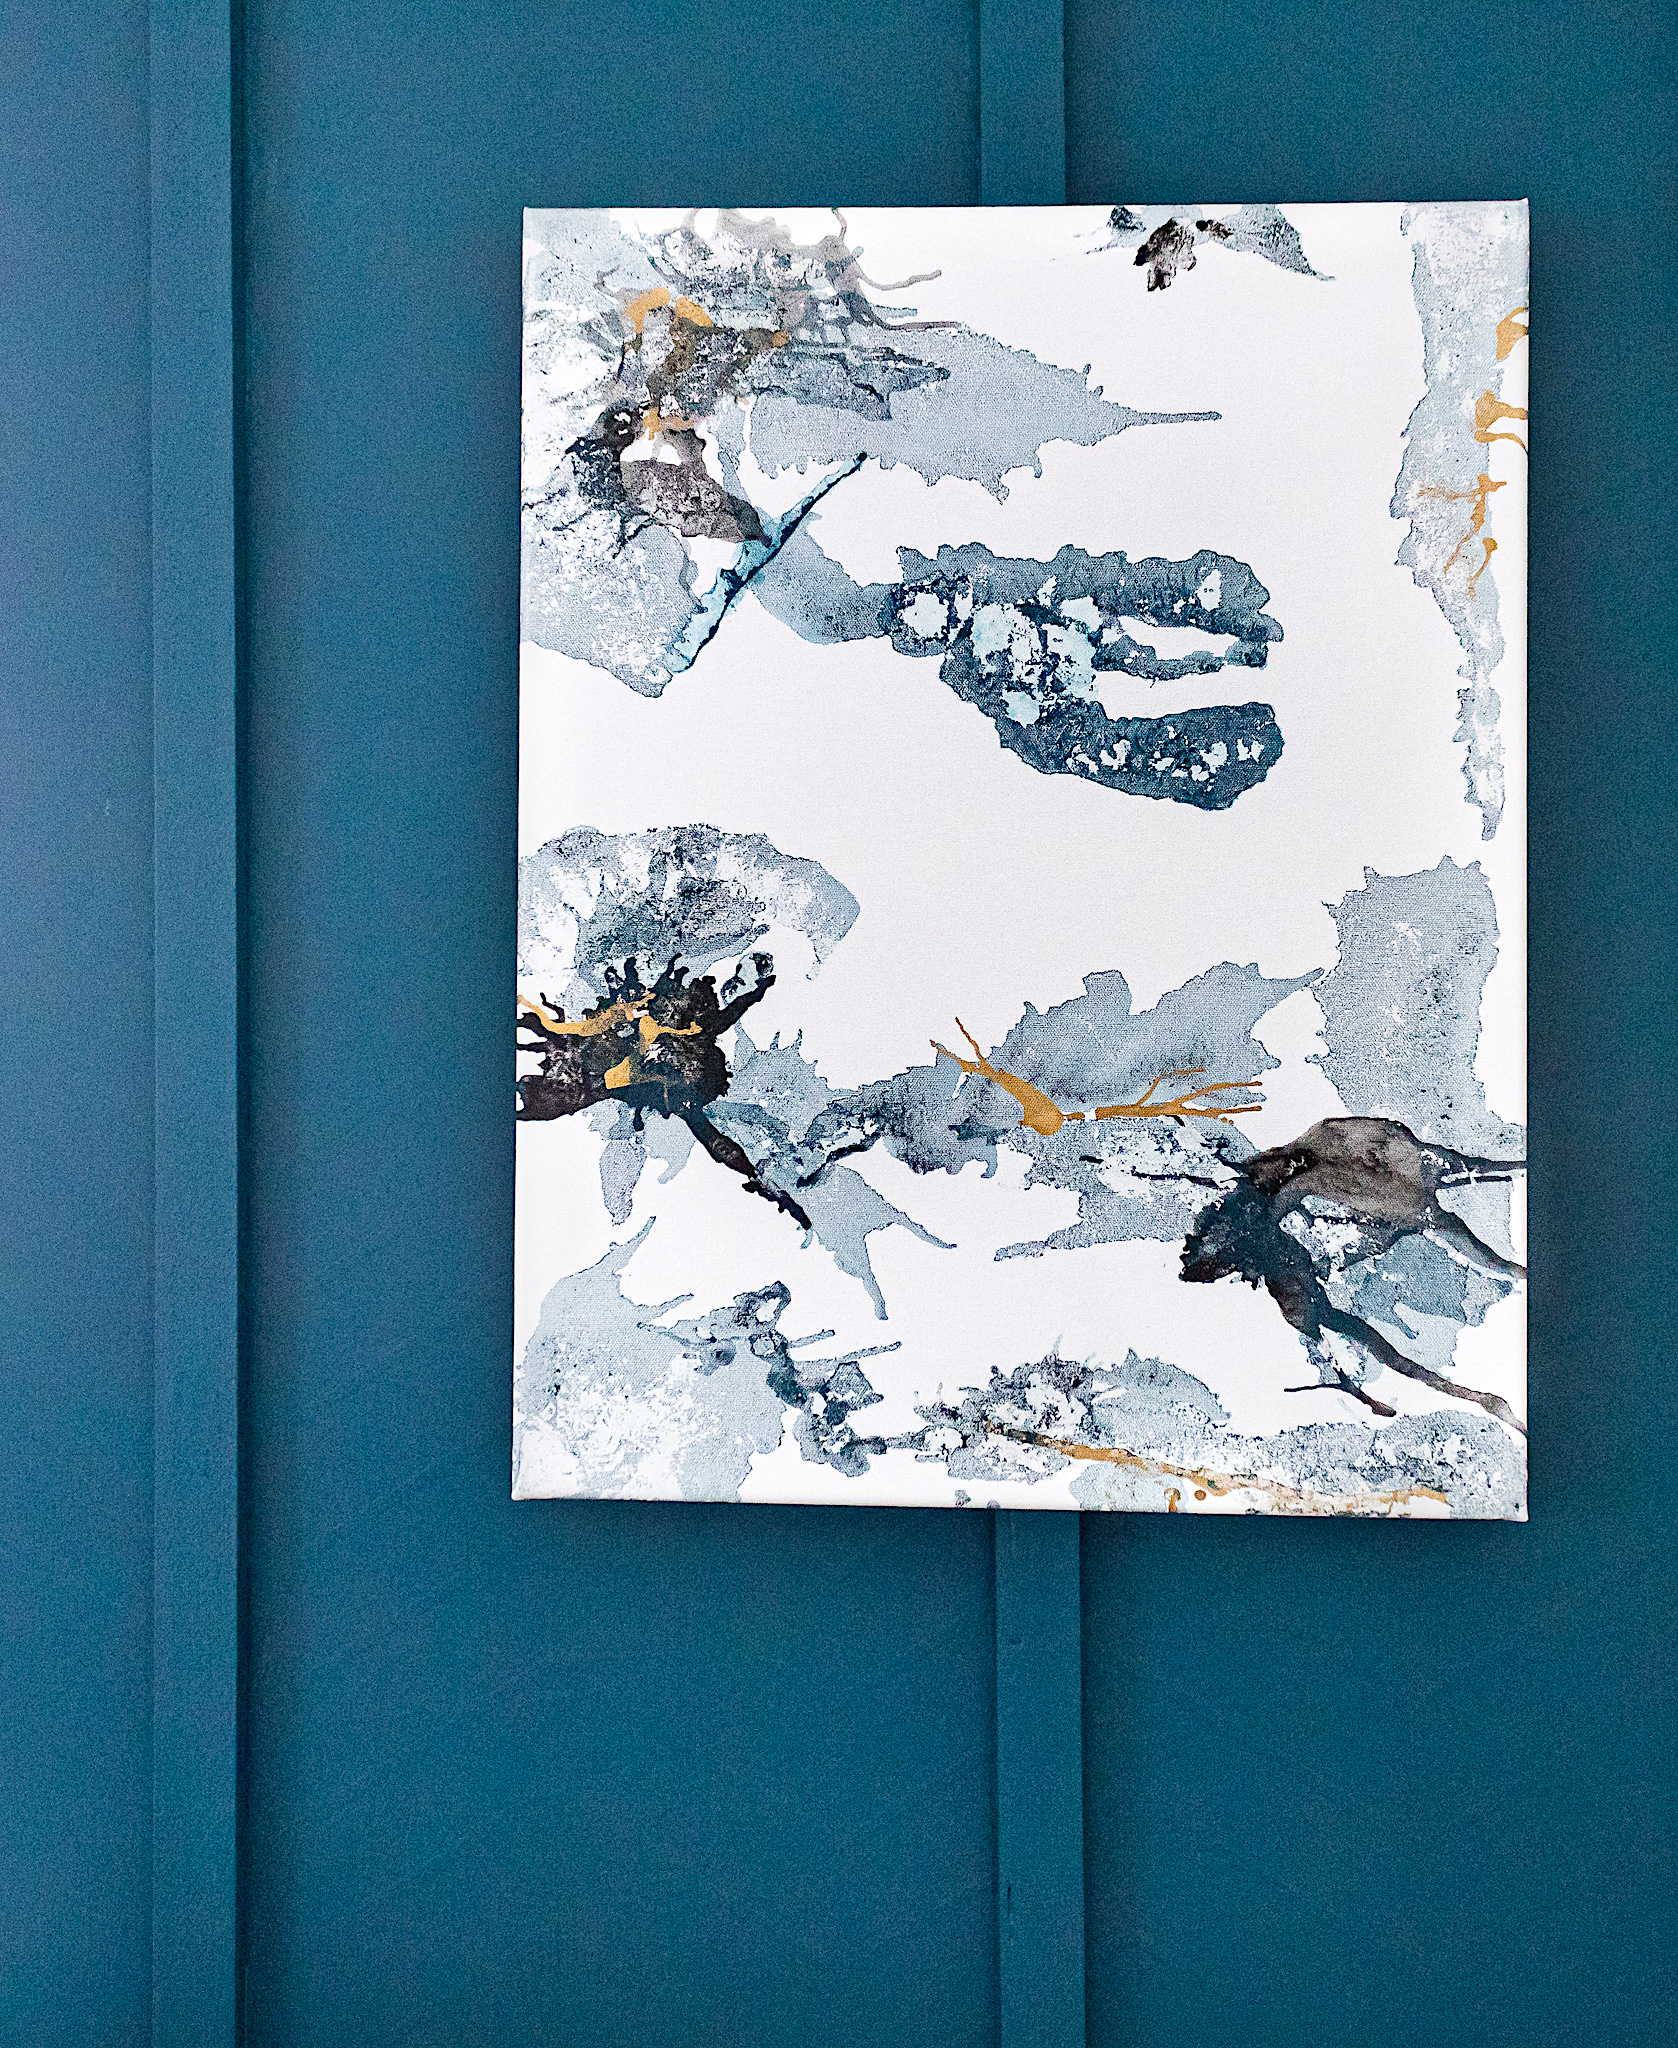
This was one of several quick and easy DIY projects I did as part of my son’s bedroom renovation. I wanted an art piece to feature on the new accent wall—something with a modern, abstract vibe. I really love how the painting came out. Let me show you just how easy it is.
In full disclosure this was my first attempt at a version of alcohol ink painting and I did not know what I was doing. But I’ve been known to jump into the creative process without studying the “rules” first. This time was not different!
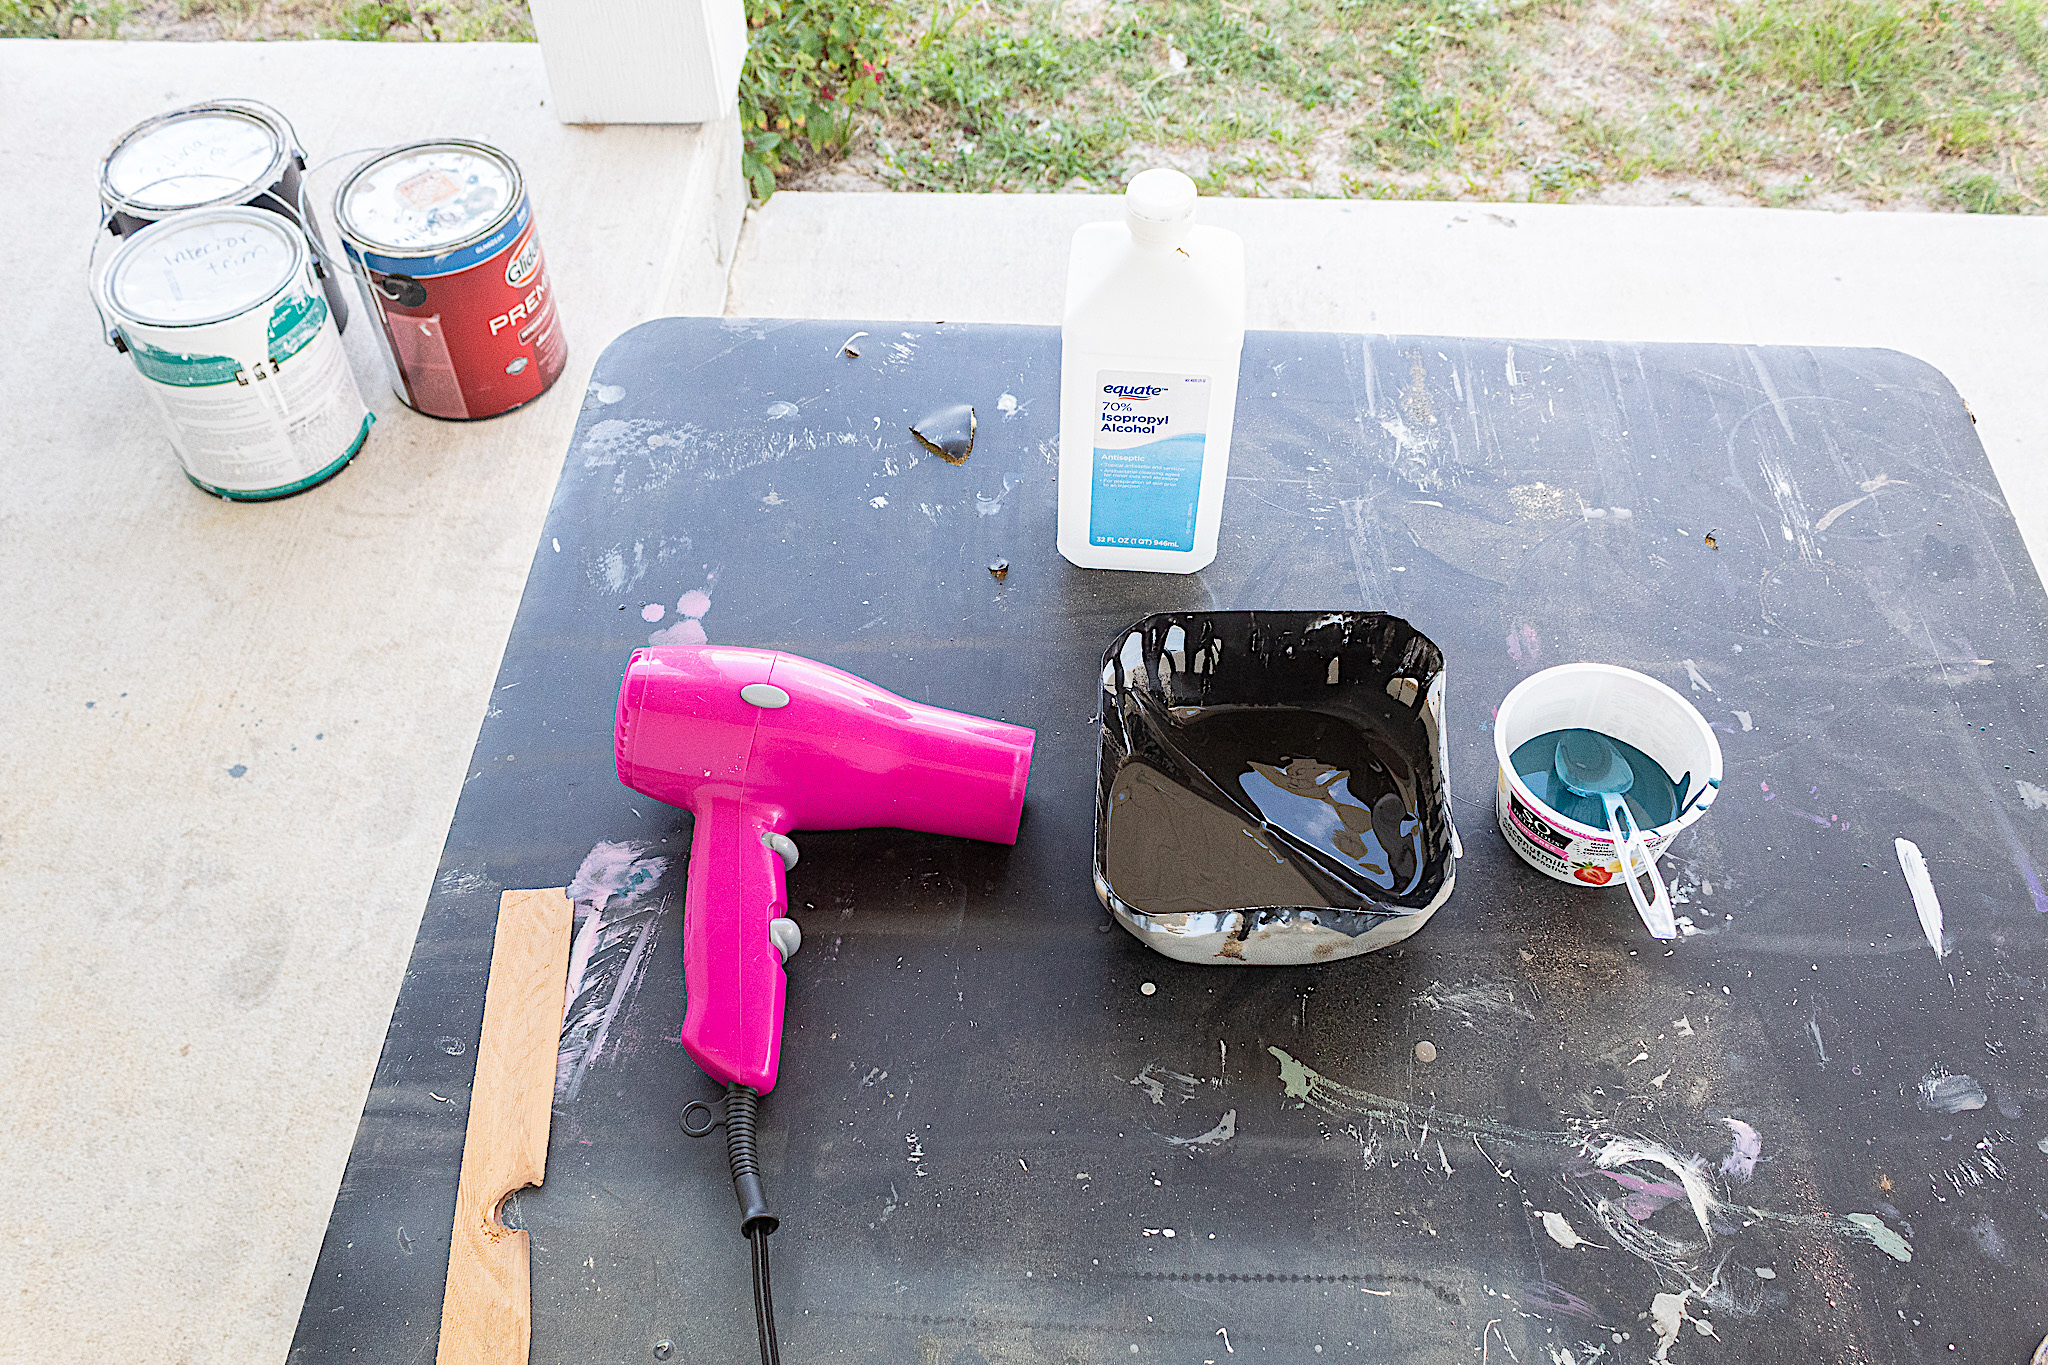
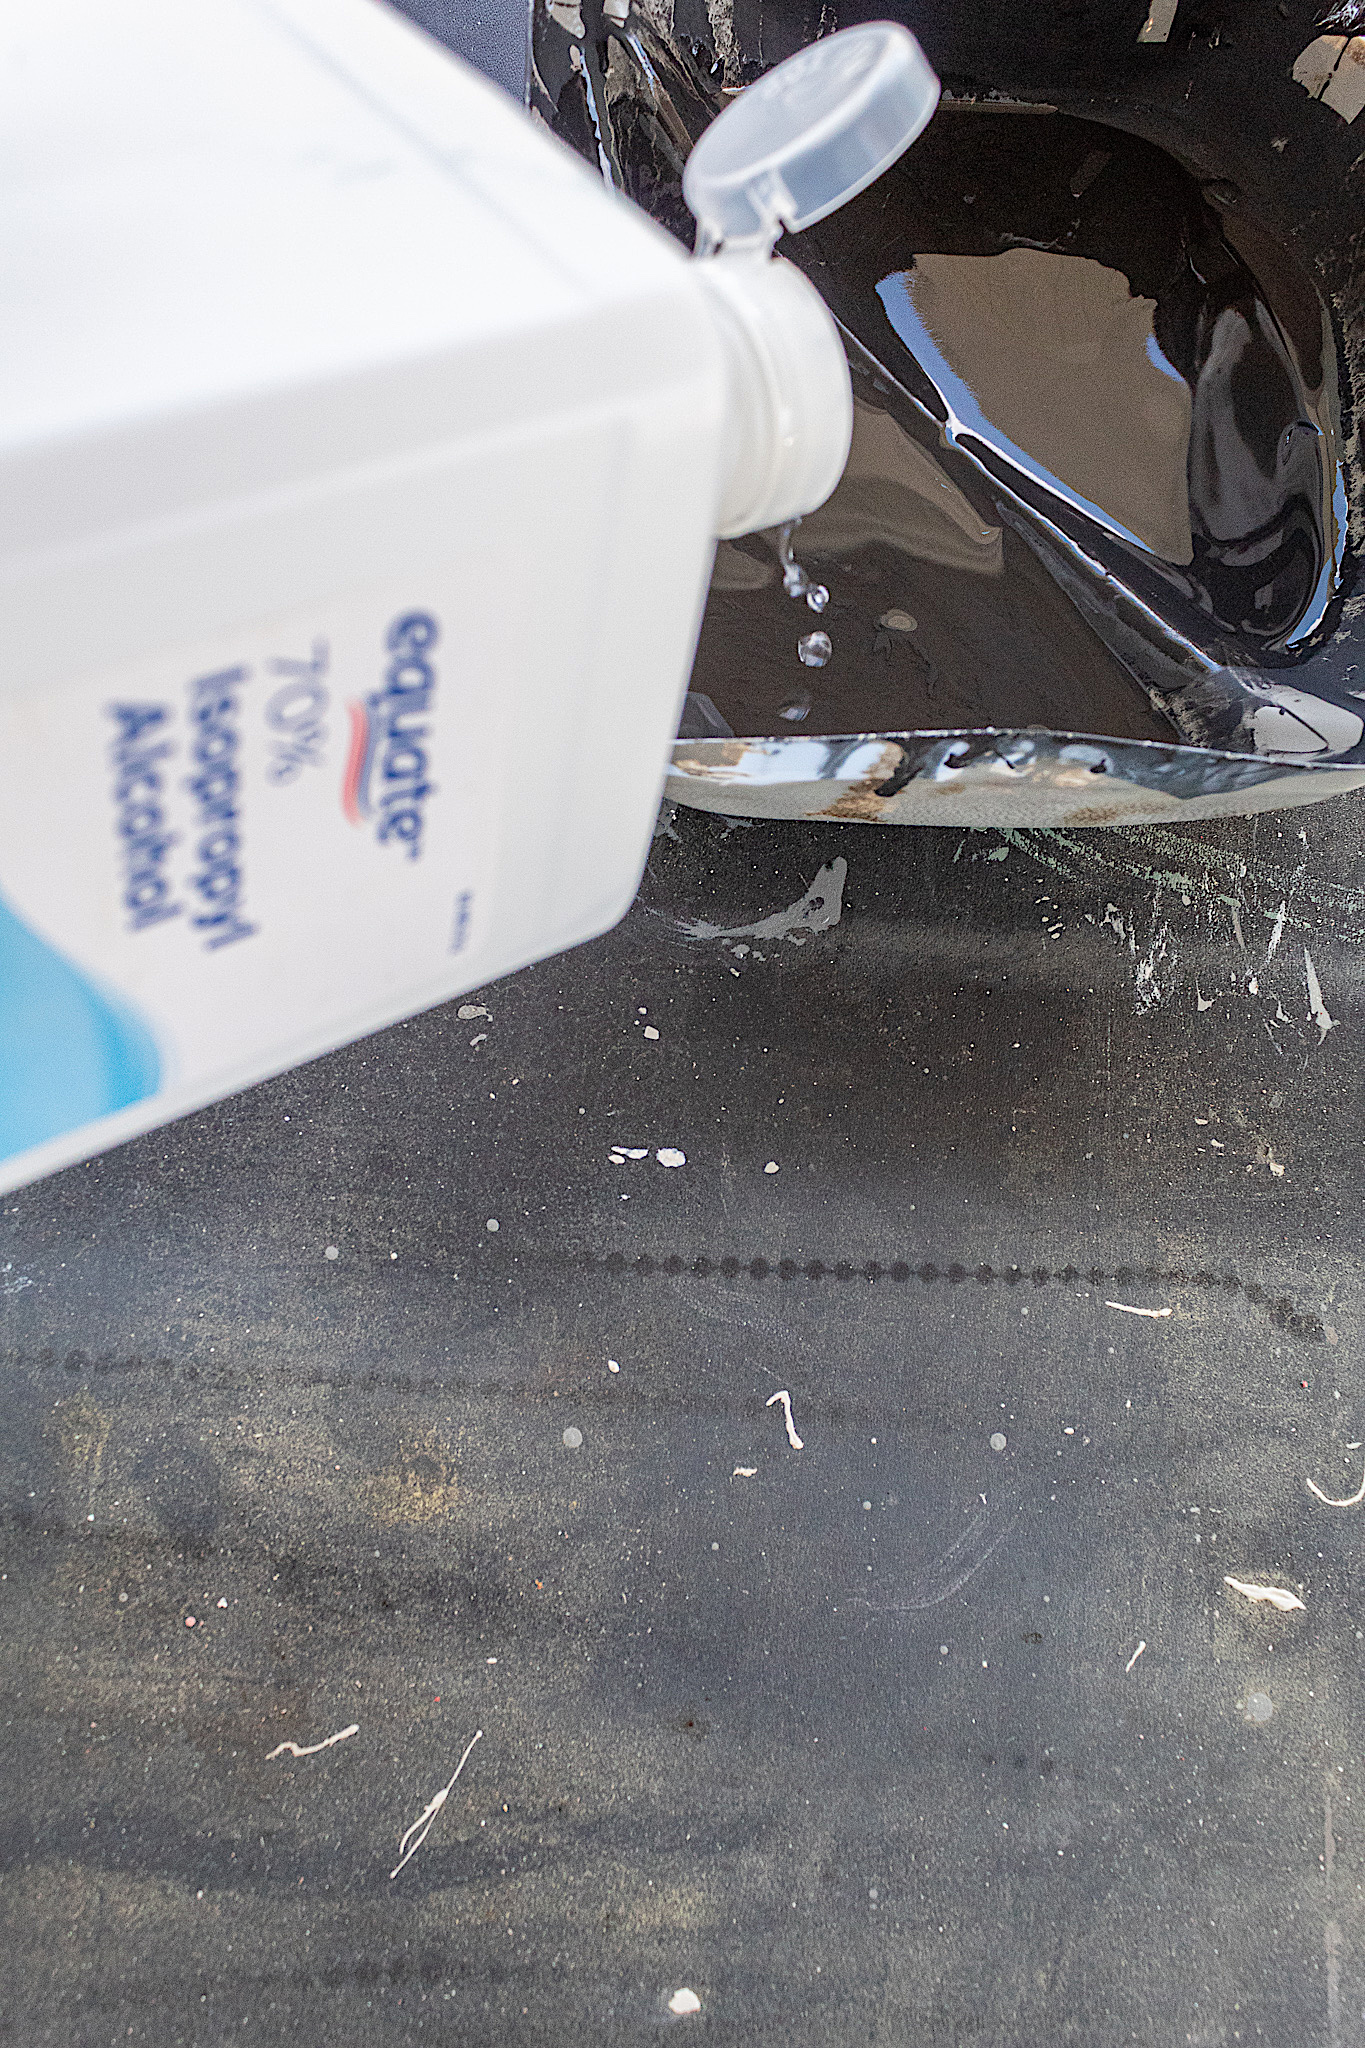
I began experimenting by adding alcohol to my paints—about 2 tablespoons of alcohol to 3 tablespoons of paint. I tried using some chalk paint and some latex paint. I learned that the latex paint worked much better for this technique since it moved much more freely on the canvas.
STEP 2. Begin Painting
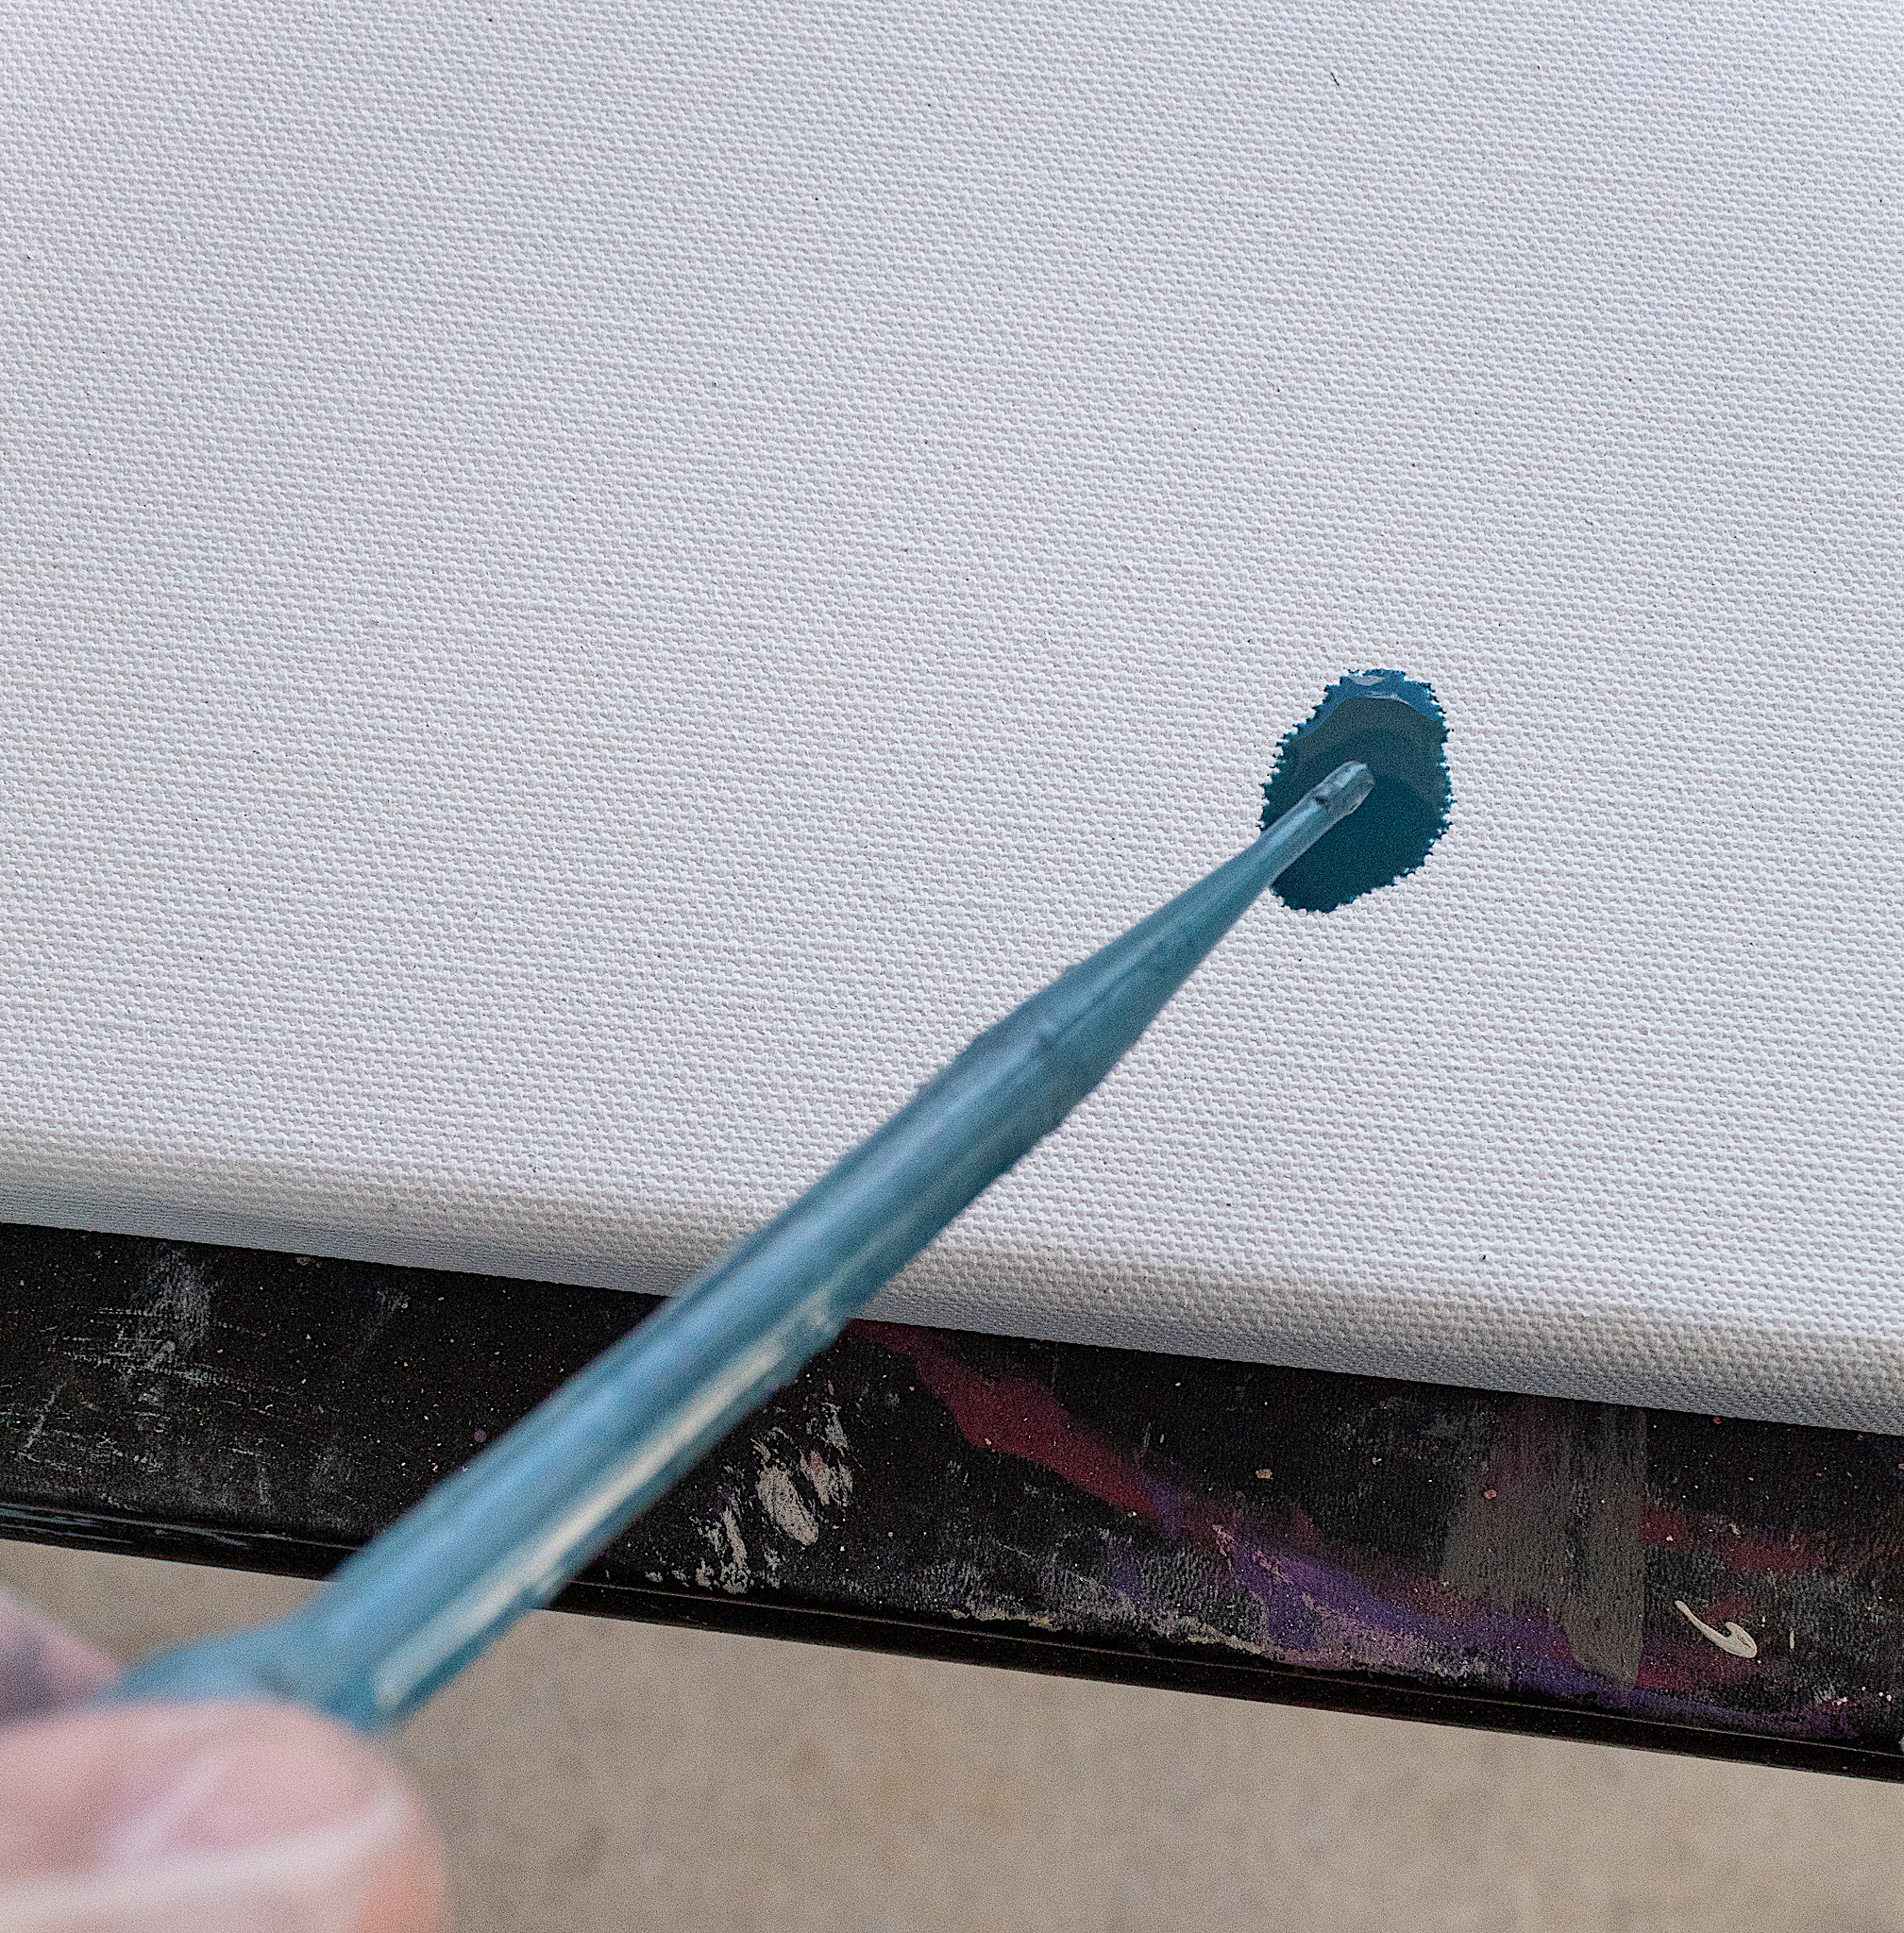
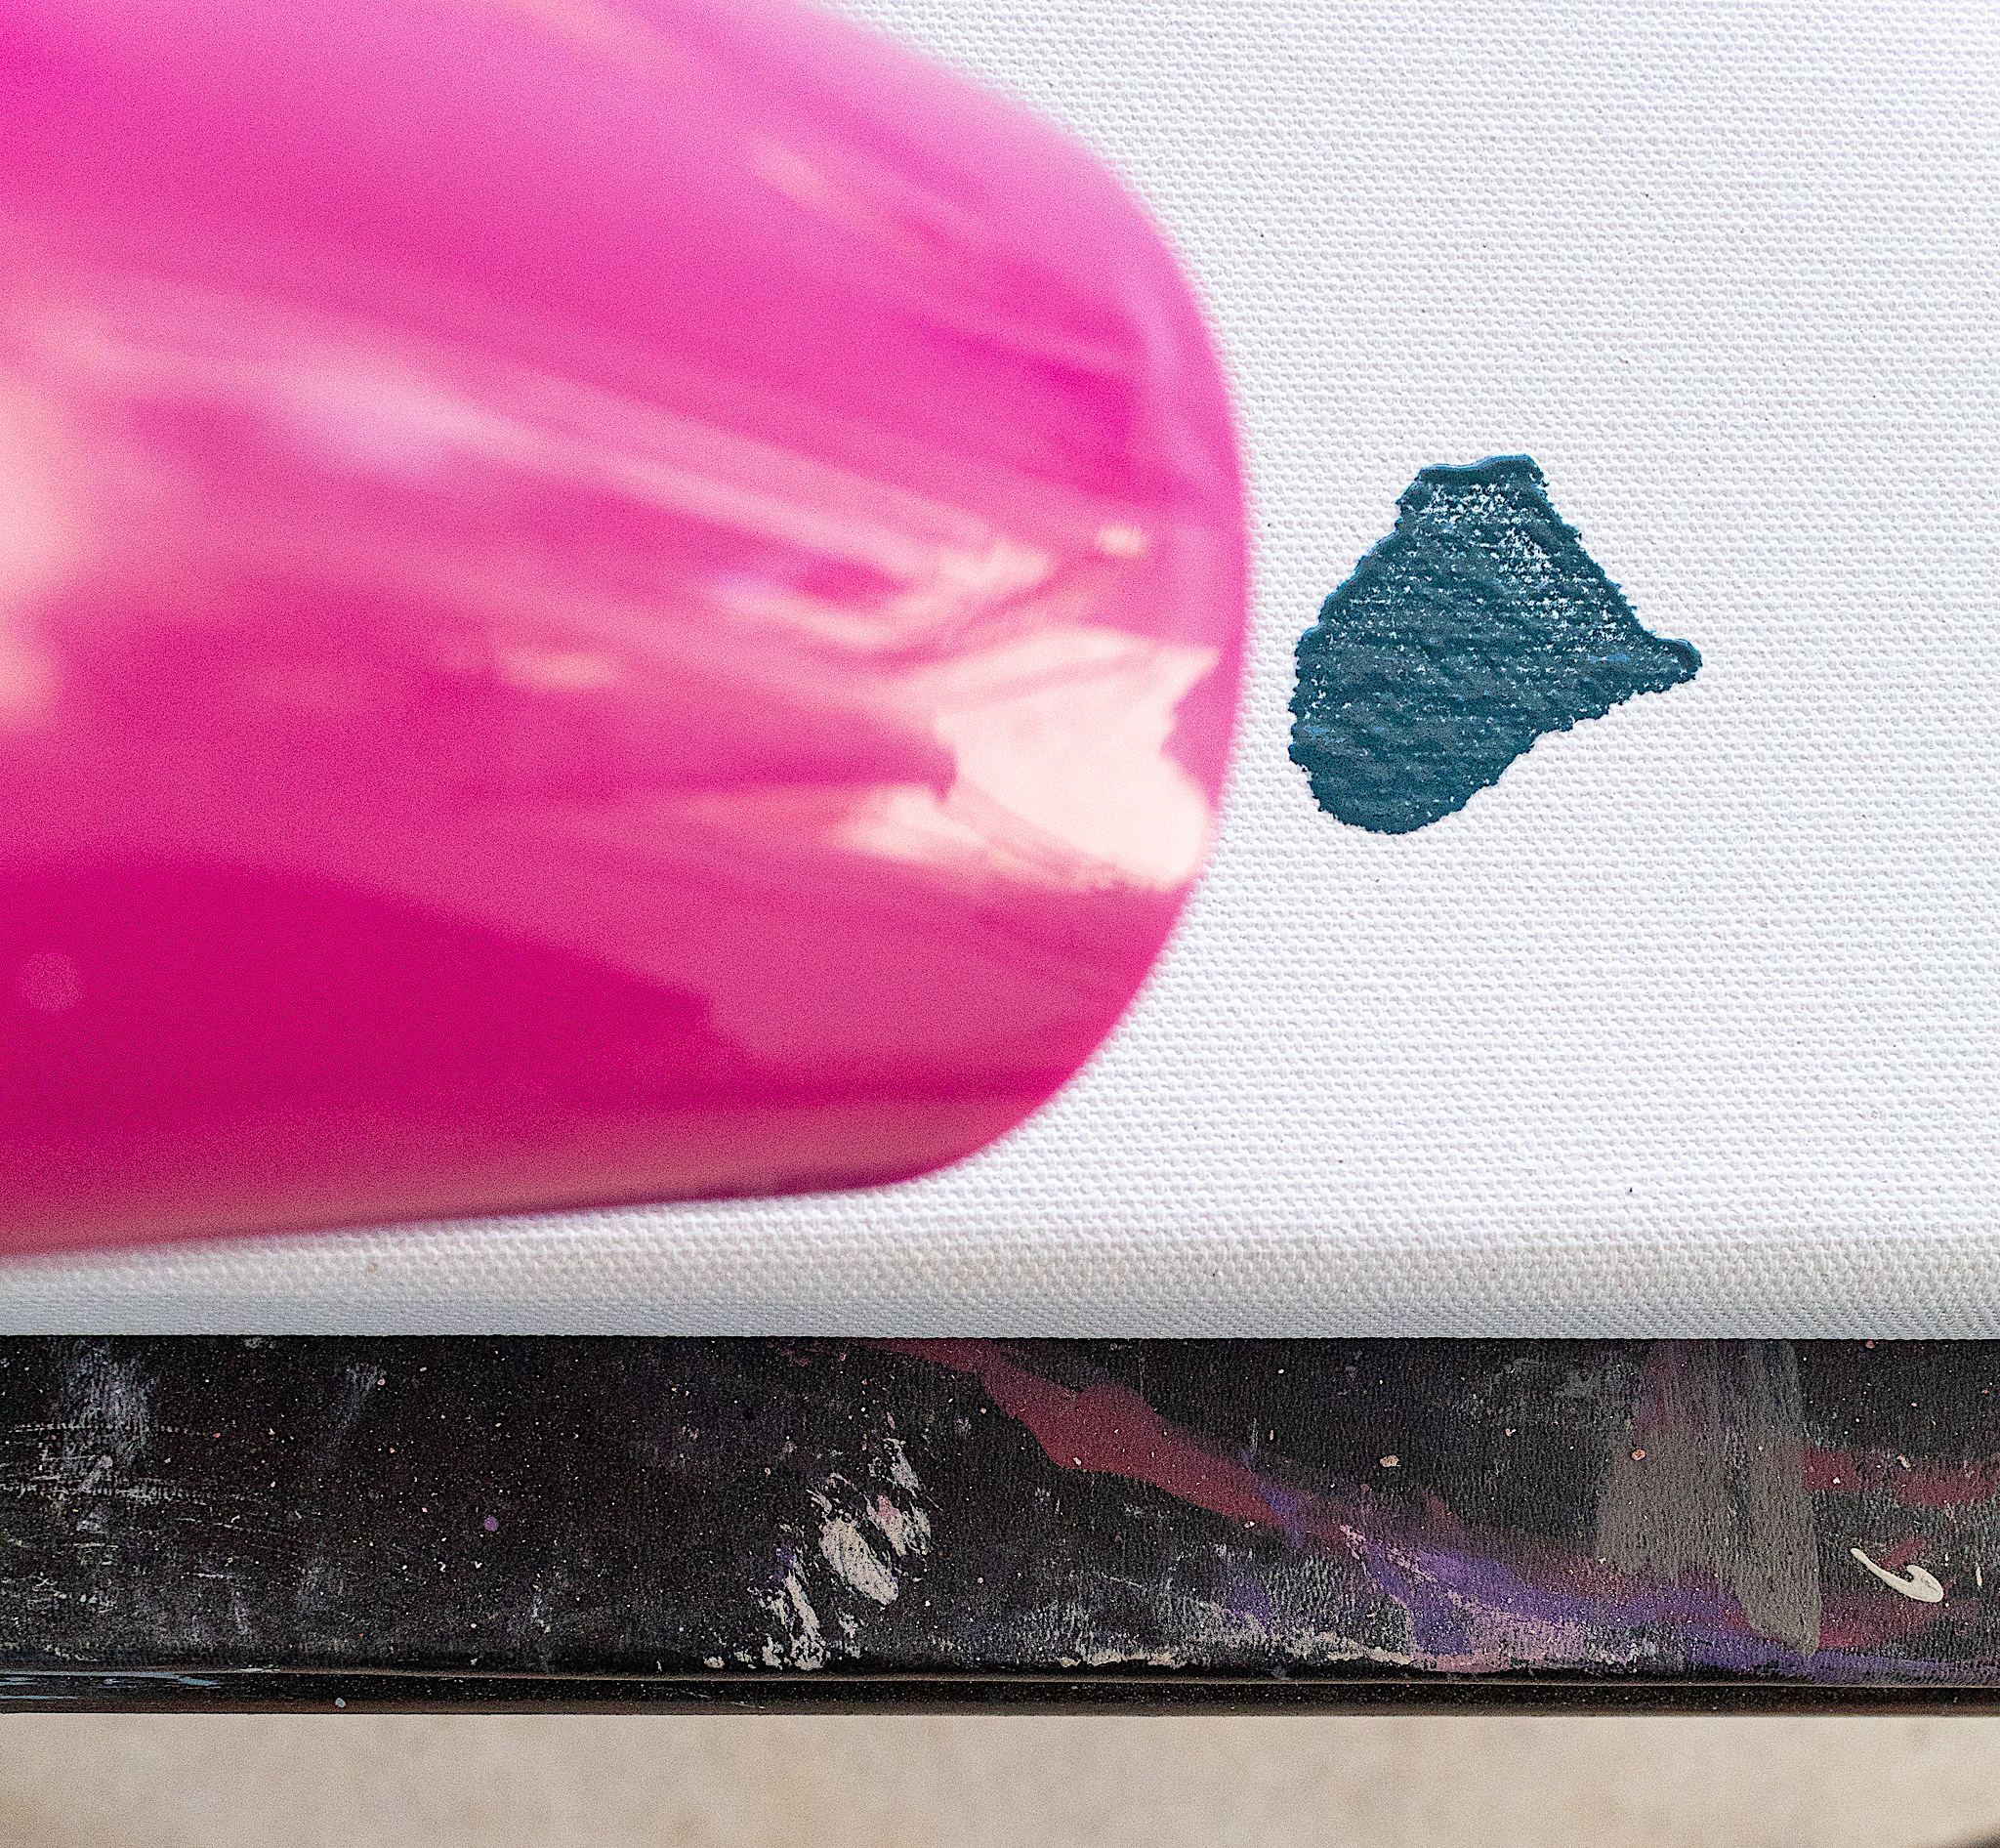
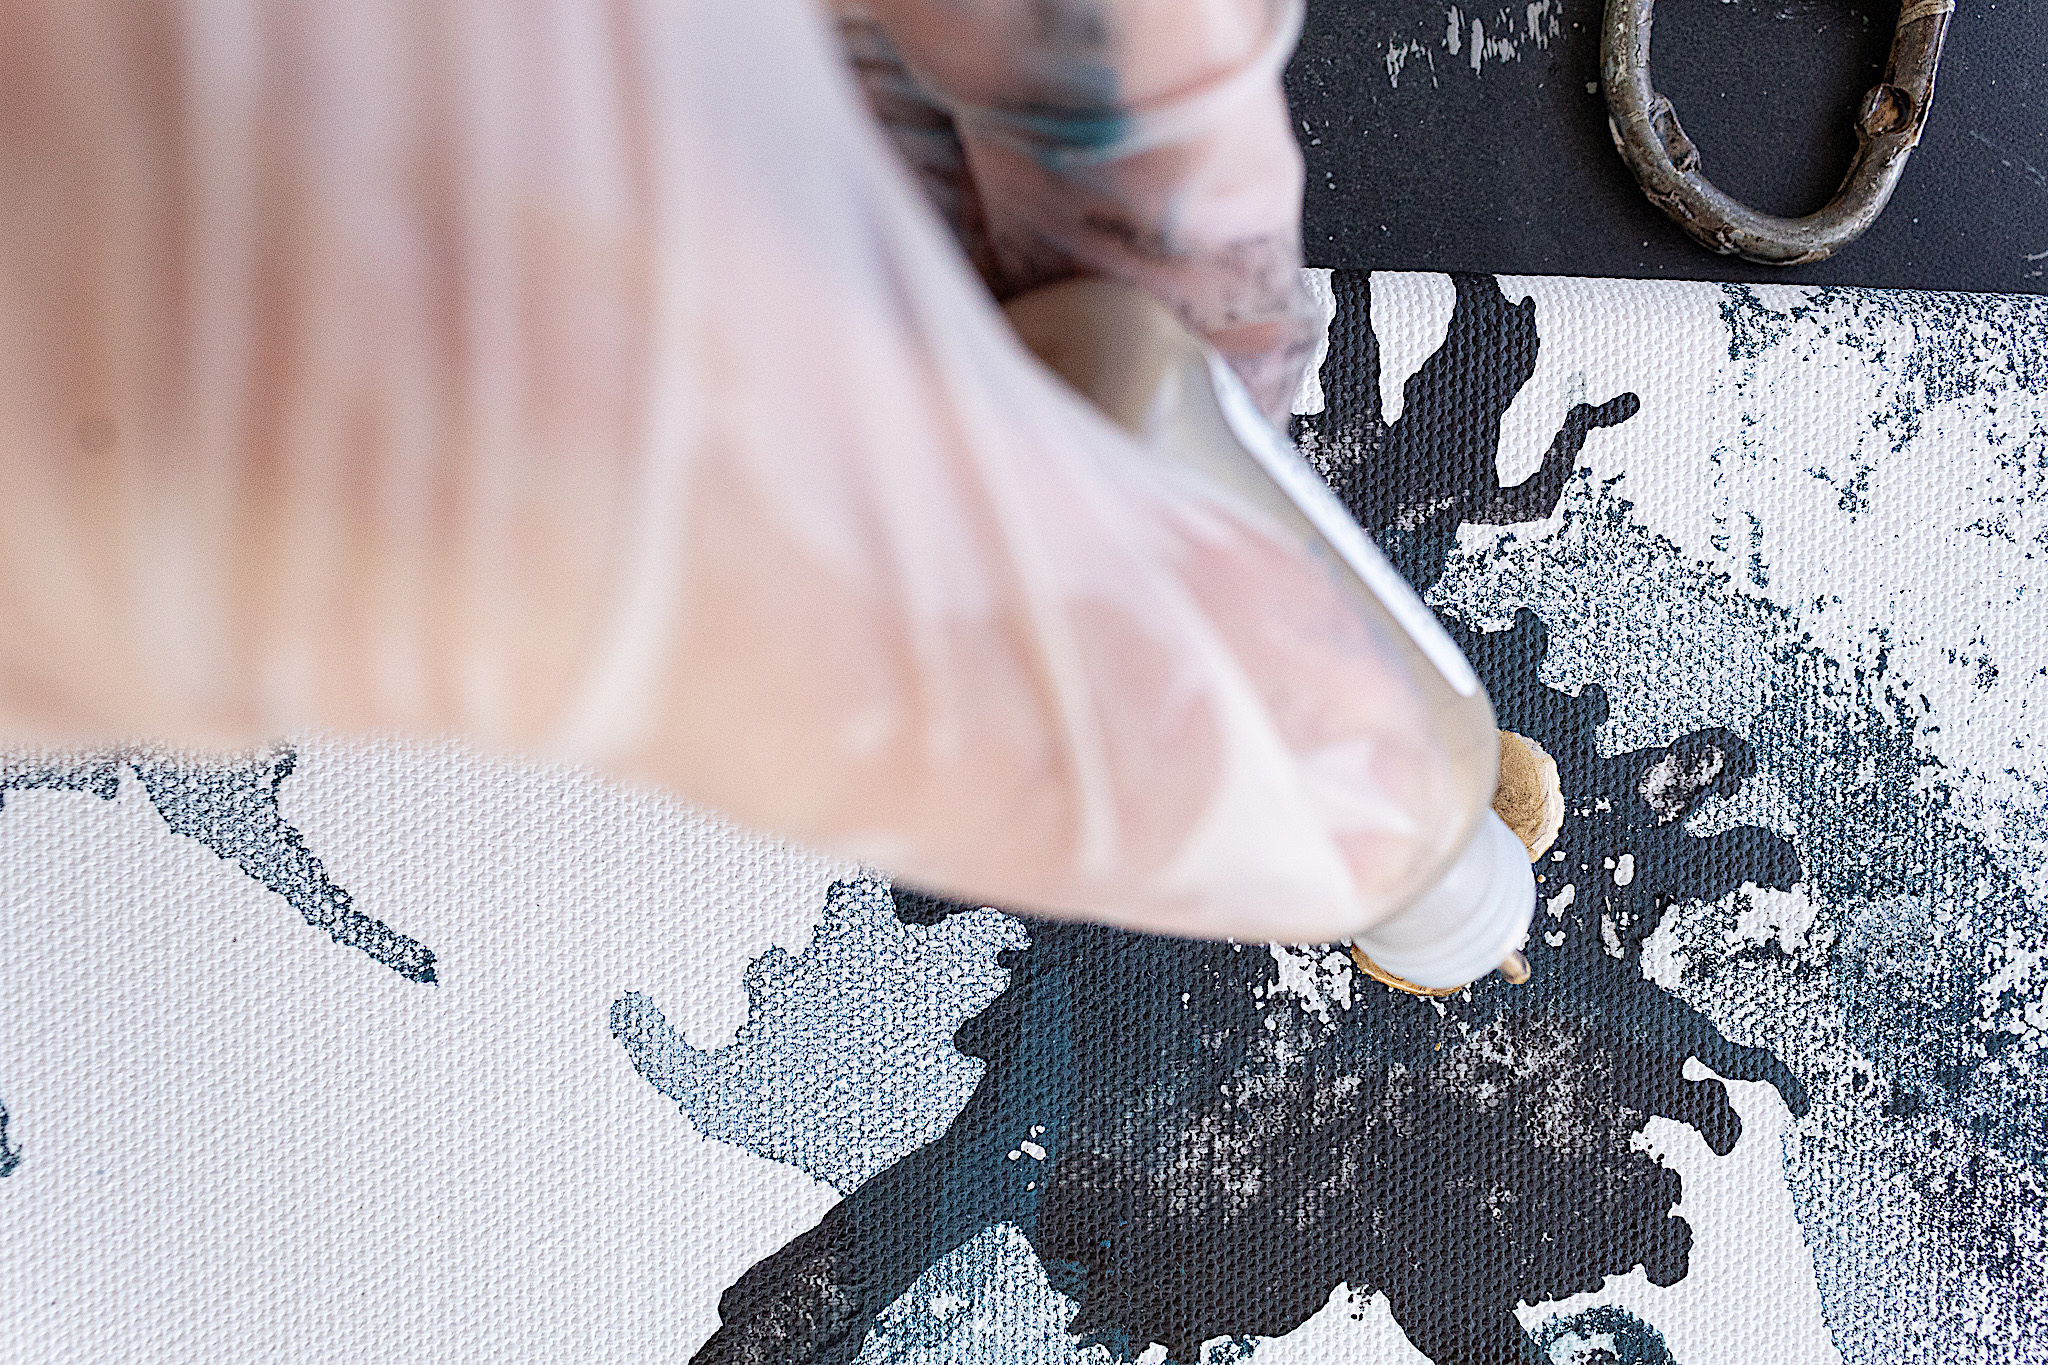
I mixed my paints with my plastic spoon. Once you put paint on your canvas you want to have your blow dryer and a paper towel ready in hand. I took my dropper and squeezed it into my first paint color and dropped some of the paint onto my canvas.
This is where you can get as creative as you like. Whether you drizzle in a circle, make some dots, a puddle or a random pattern—it’s all art. I do however recommend working in small sections at a time.
Step 3. Blow Drying
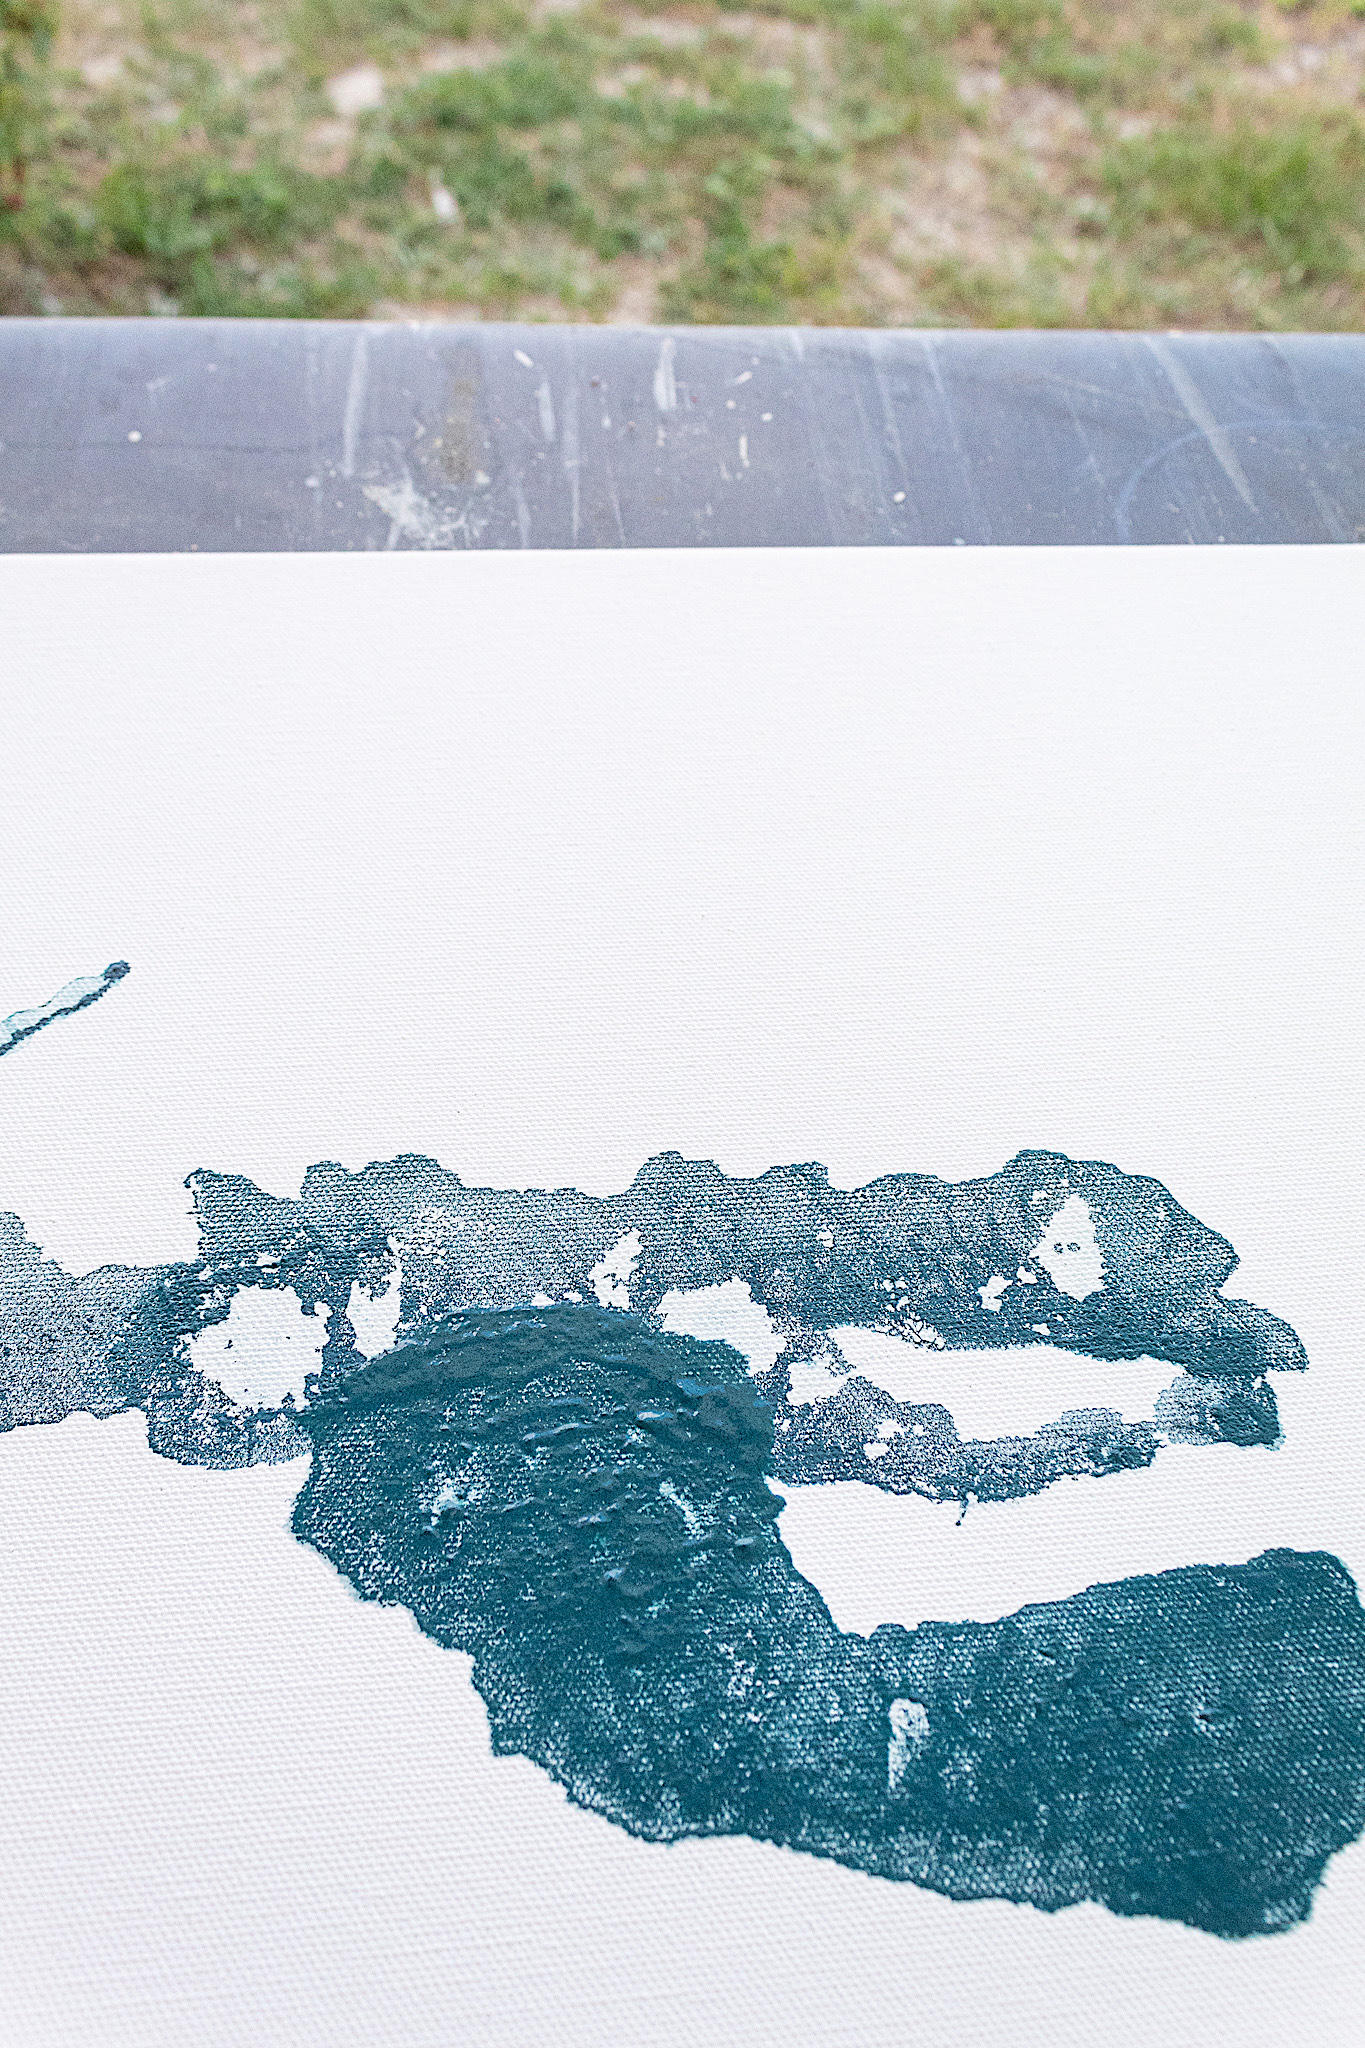
As soon as you drop your paint on the canvas, take your blow dryer and use it to move the paint in different directions. This will create beautiful patterns and tones on your canvas.
Step 4. Paper towel effect
After blow drying a section of paint, I took a paper towel and dabbed in random parts of the painted area. Doing this lifts some of the paint off, exposing some of the white and creating a very cool look. This step is optional but I really liked the additional dimension it added.
Disclosure: Some of the links provided are affiliate links. By purchasing through these links you are supporting this family blog and the work we do and there is no extra cost to you. If you would like to read our full disclosure, click HERE.
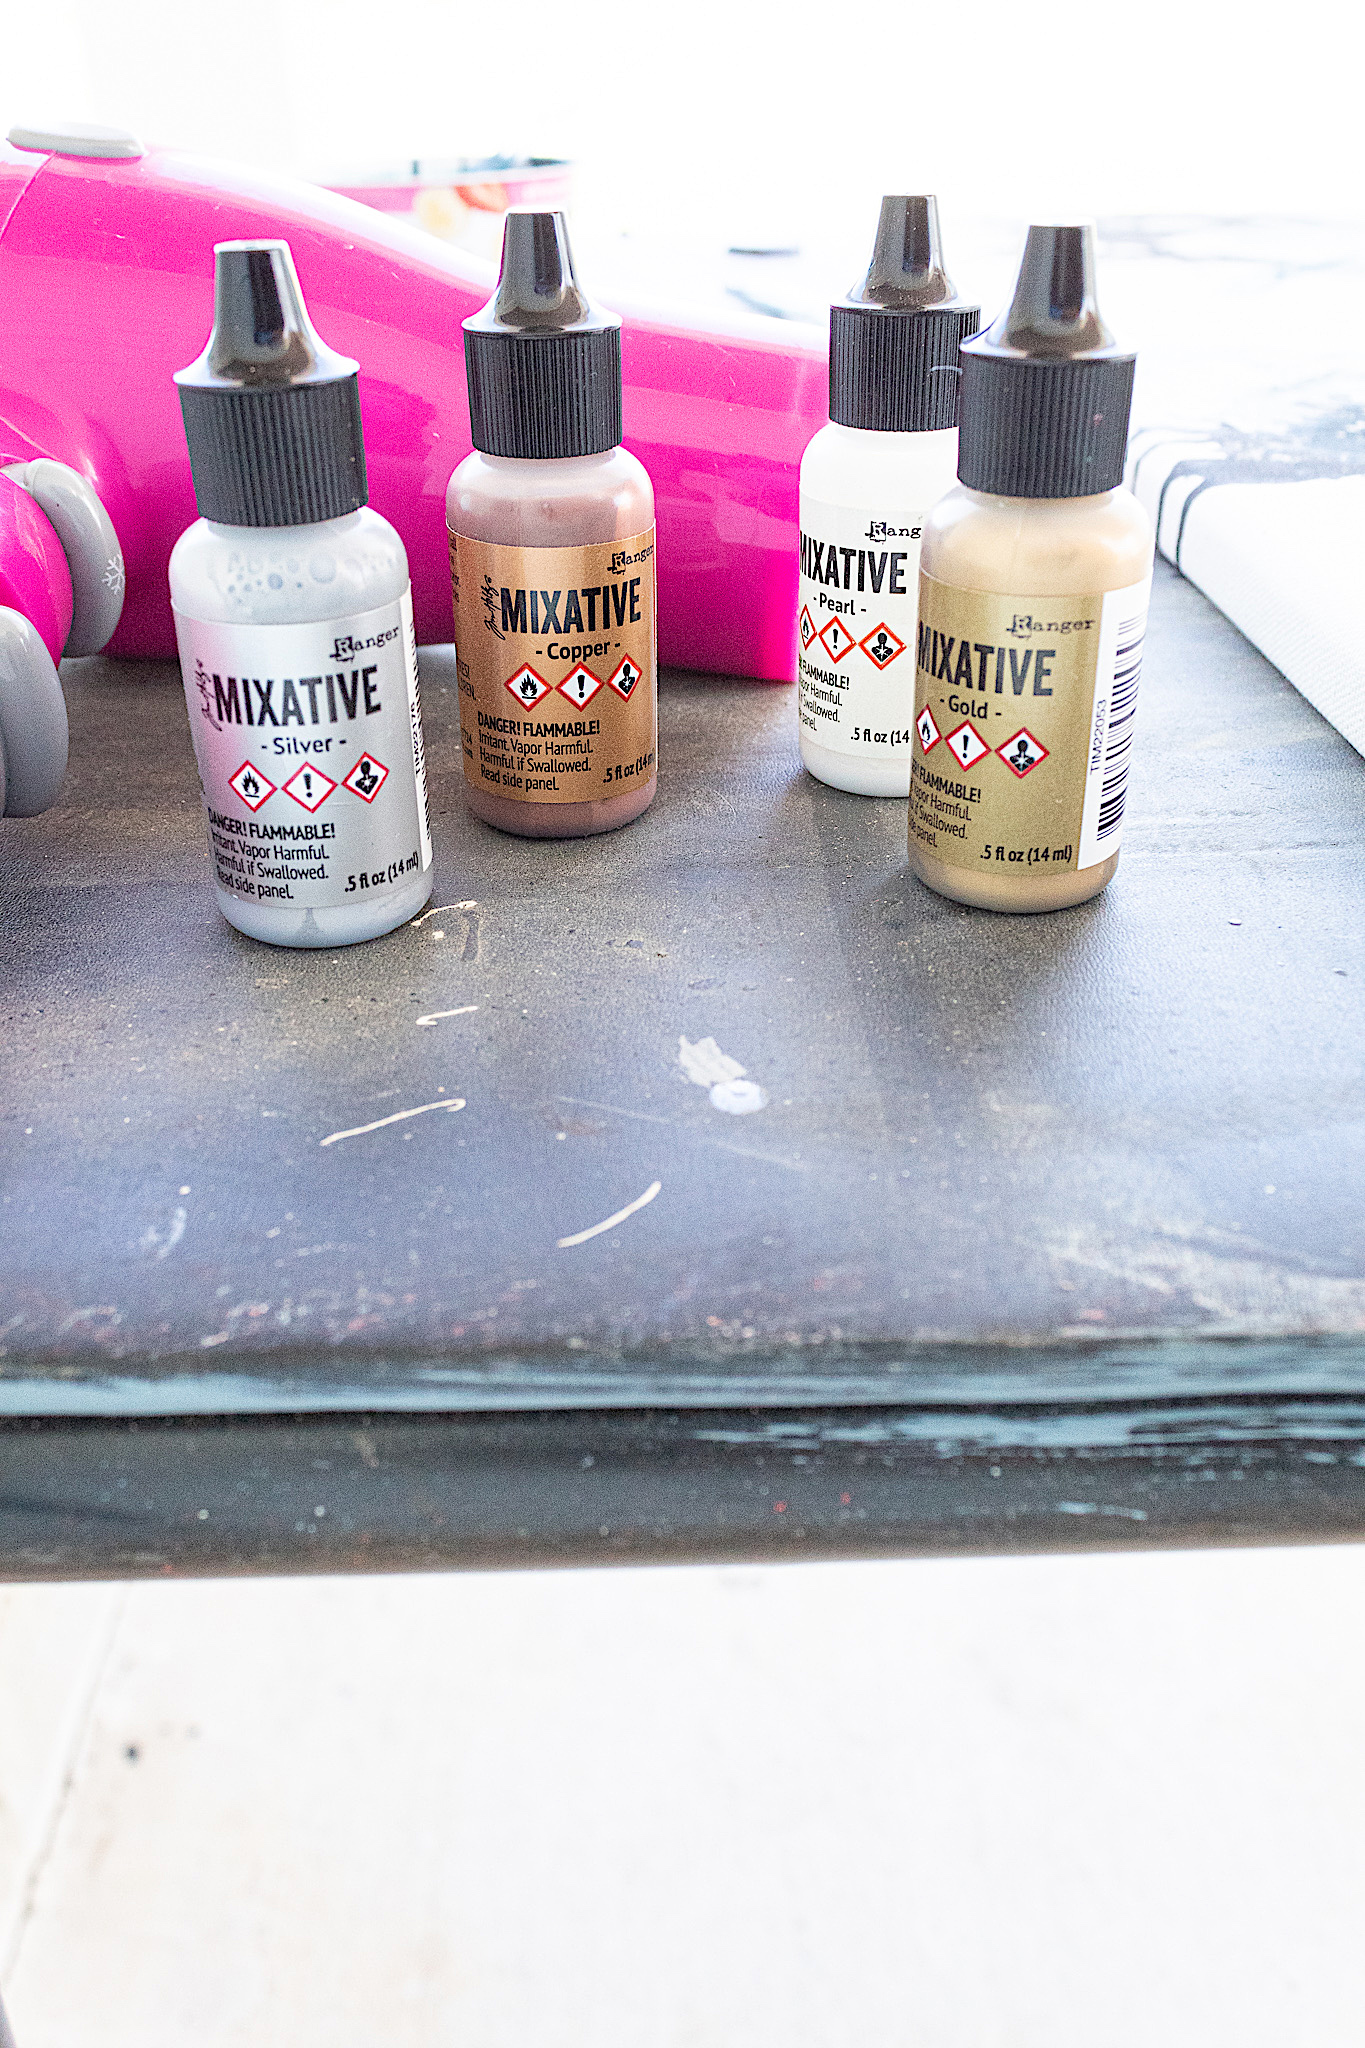
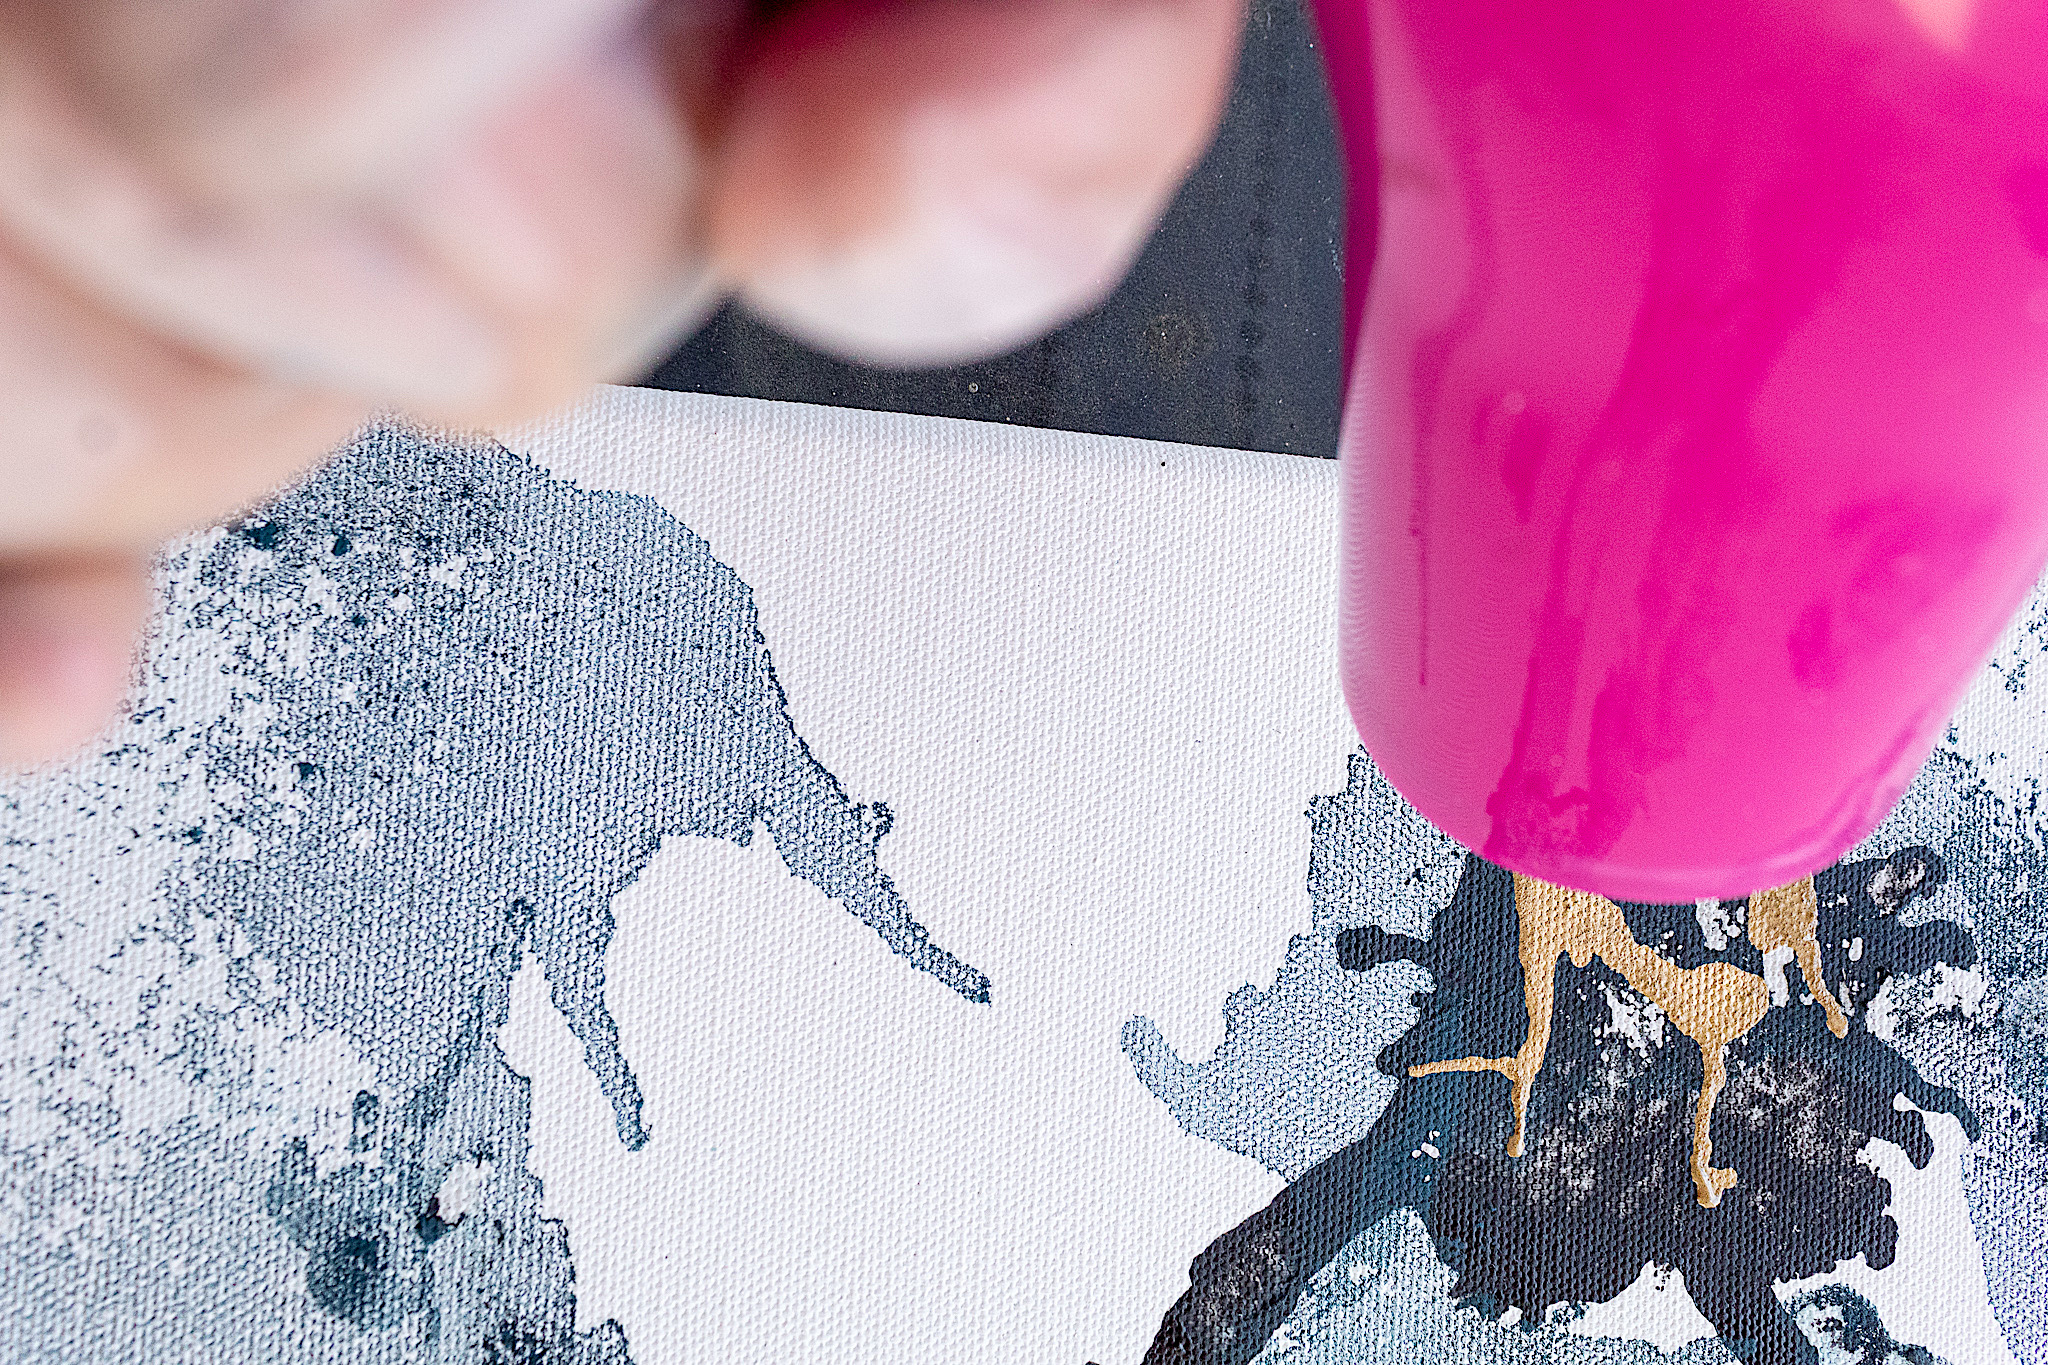
Step 5. Metallic Mixatives
For a little glam on my painting I repeated the entire process but this time using my metallic mixatives. You don’t need the dropper. You can simply squeeze the mixative bottle upside down to add paint to your canvas.
I added some dots and lines of gold over some of the colors I already painted. Then I used the dryer to spread the gold around.
Watch My Video Demo Of This Project
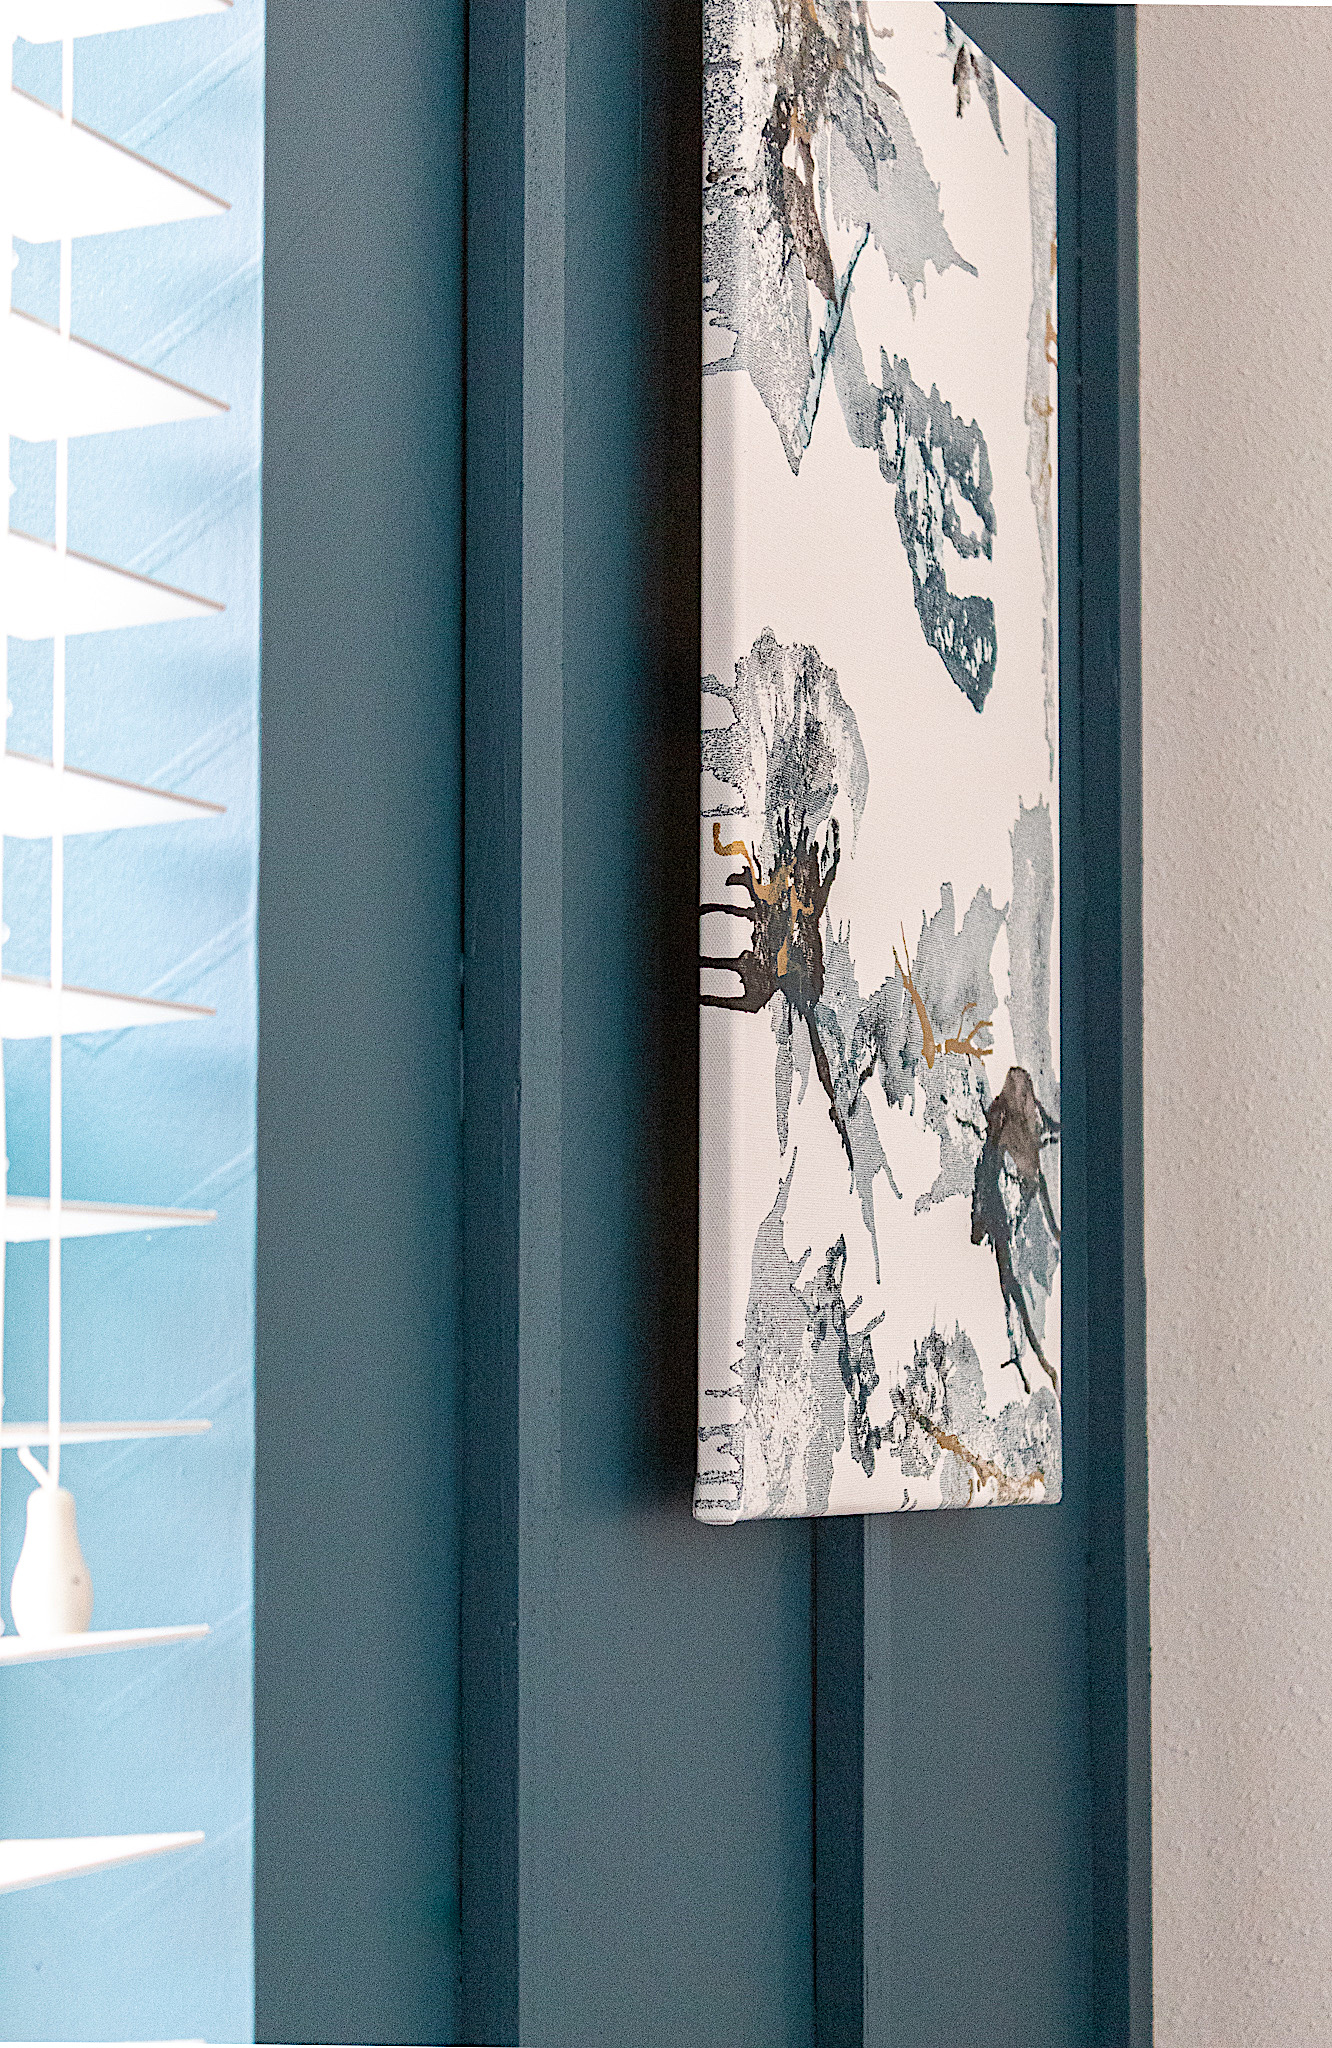
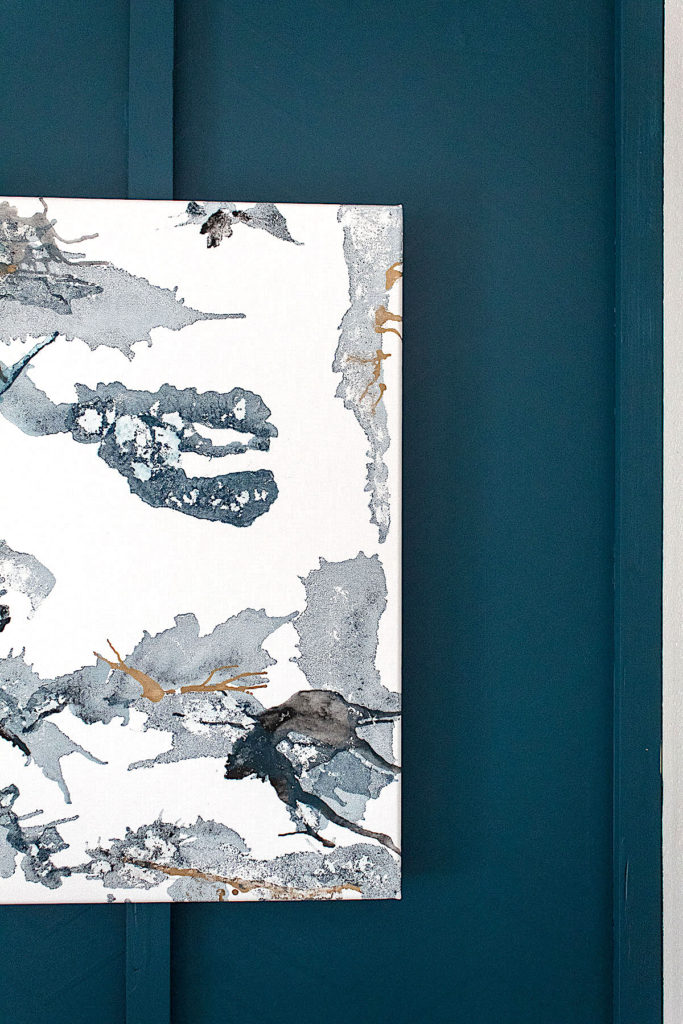
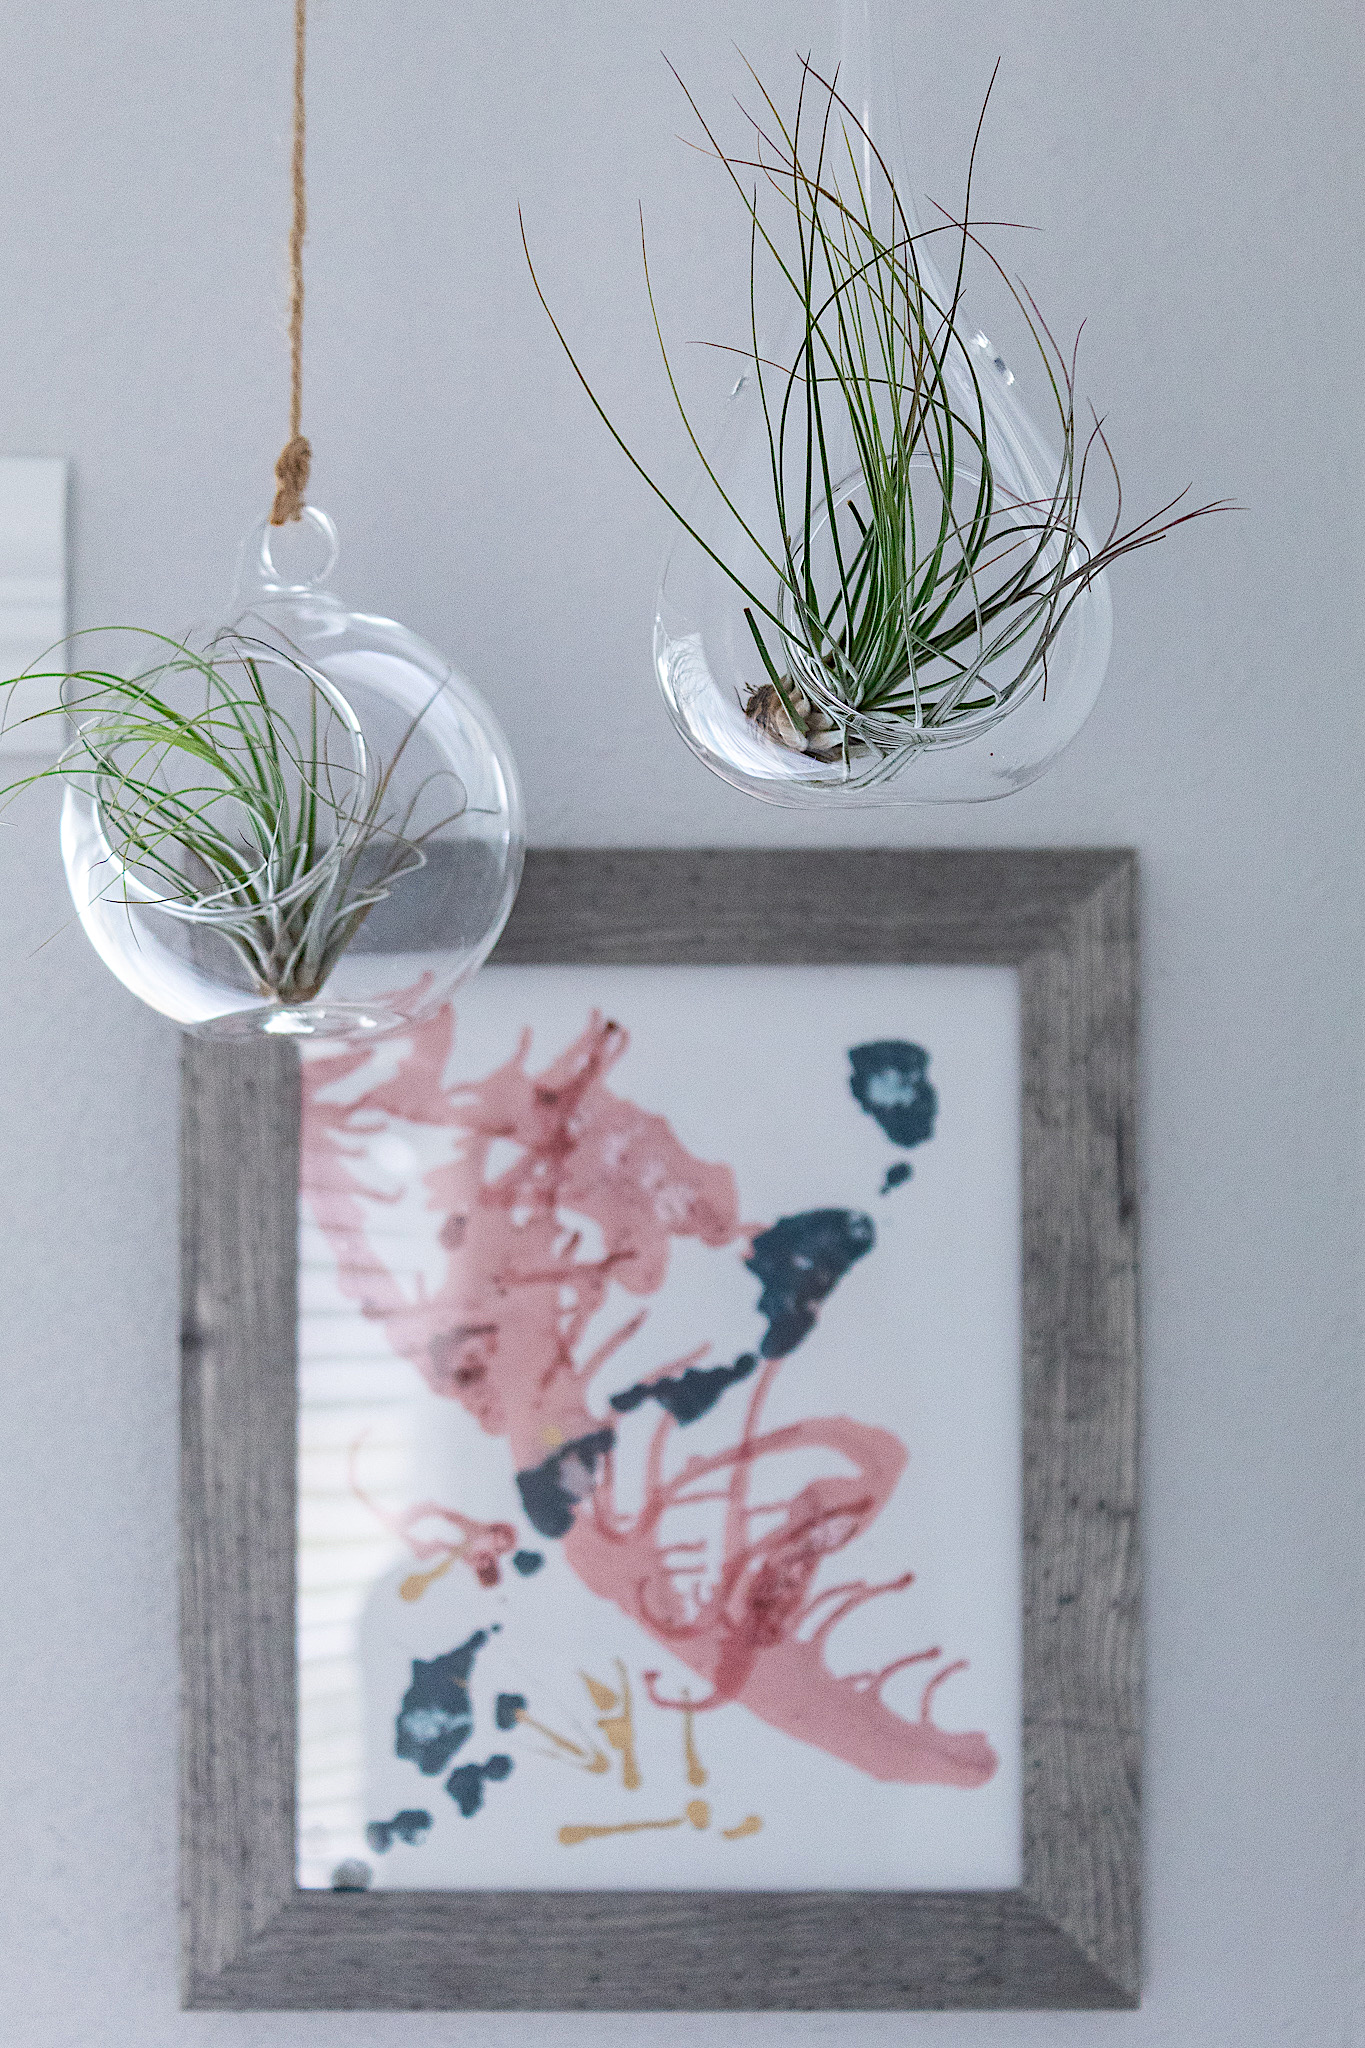
Now Hang Your Master Piece!
That’s it my friends. You can now enjoy your beautiful wall art. I love what this technique does to the paint on the canvas. It brings out such beautiful texture.
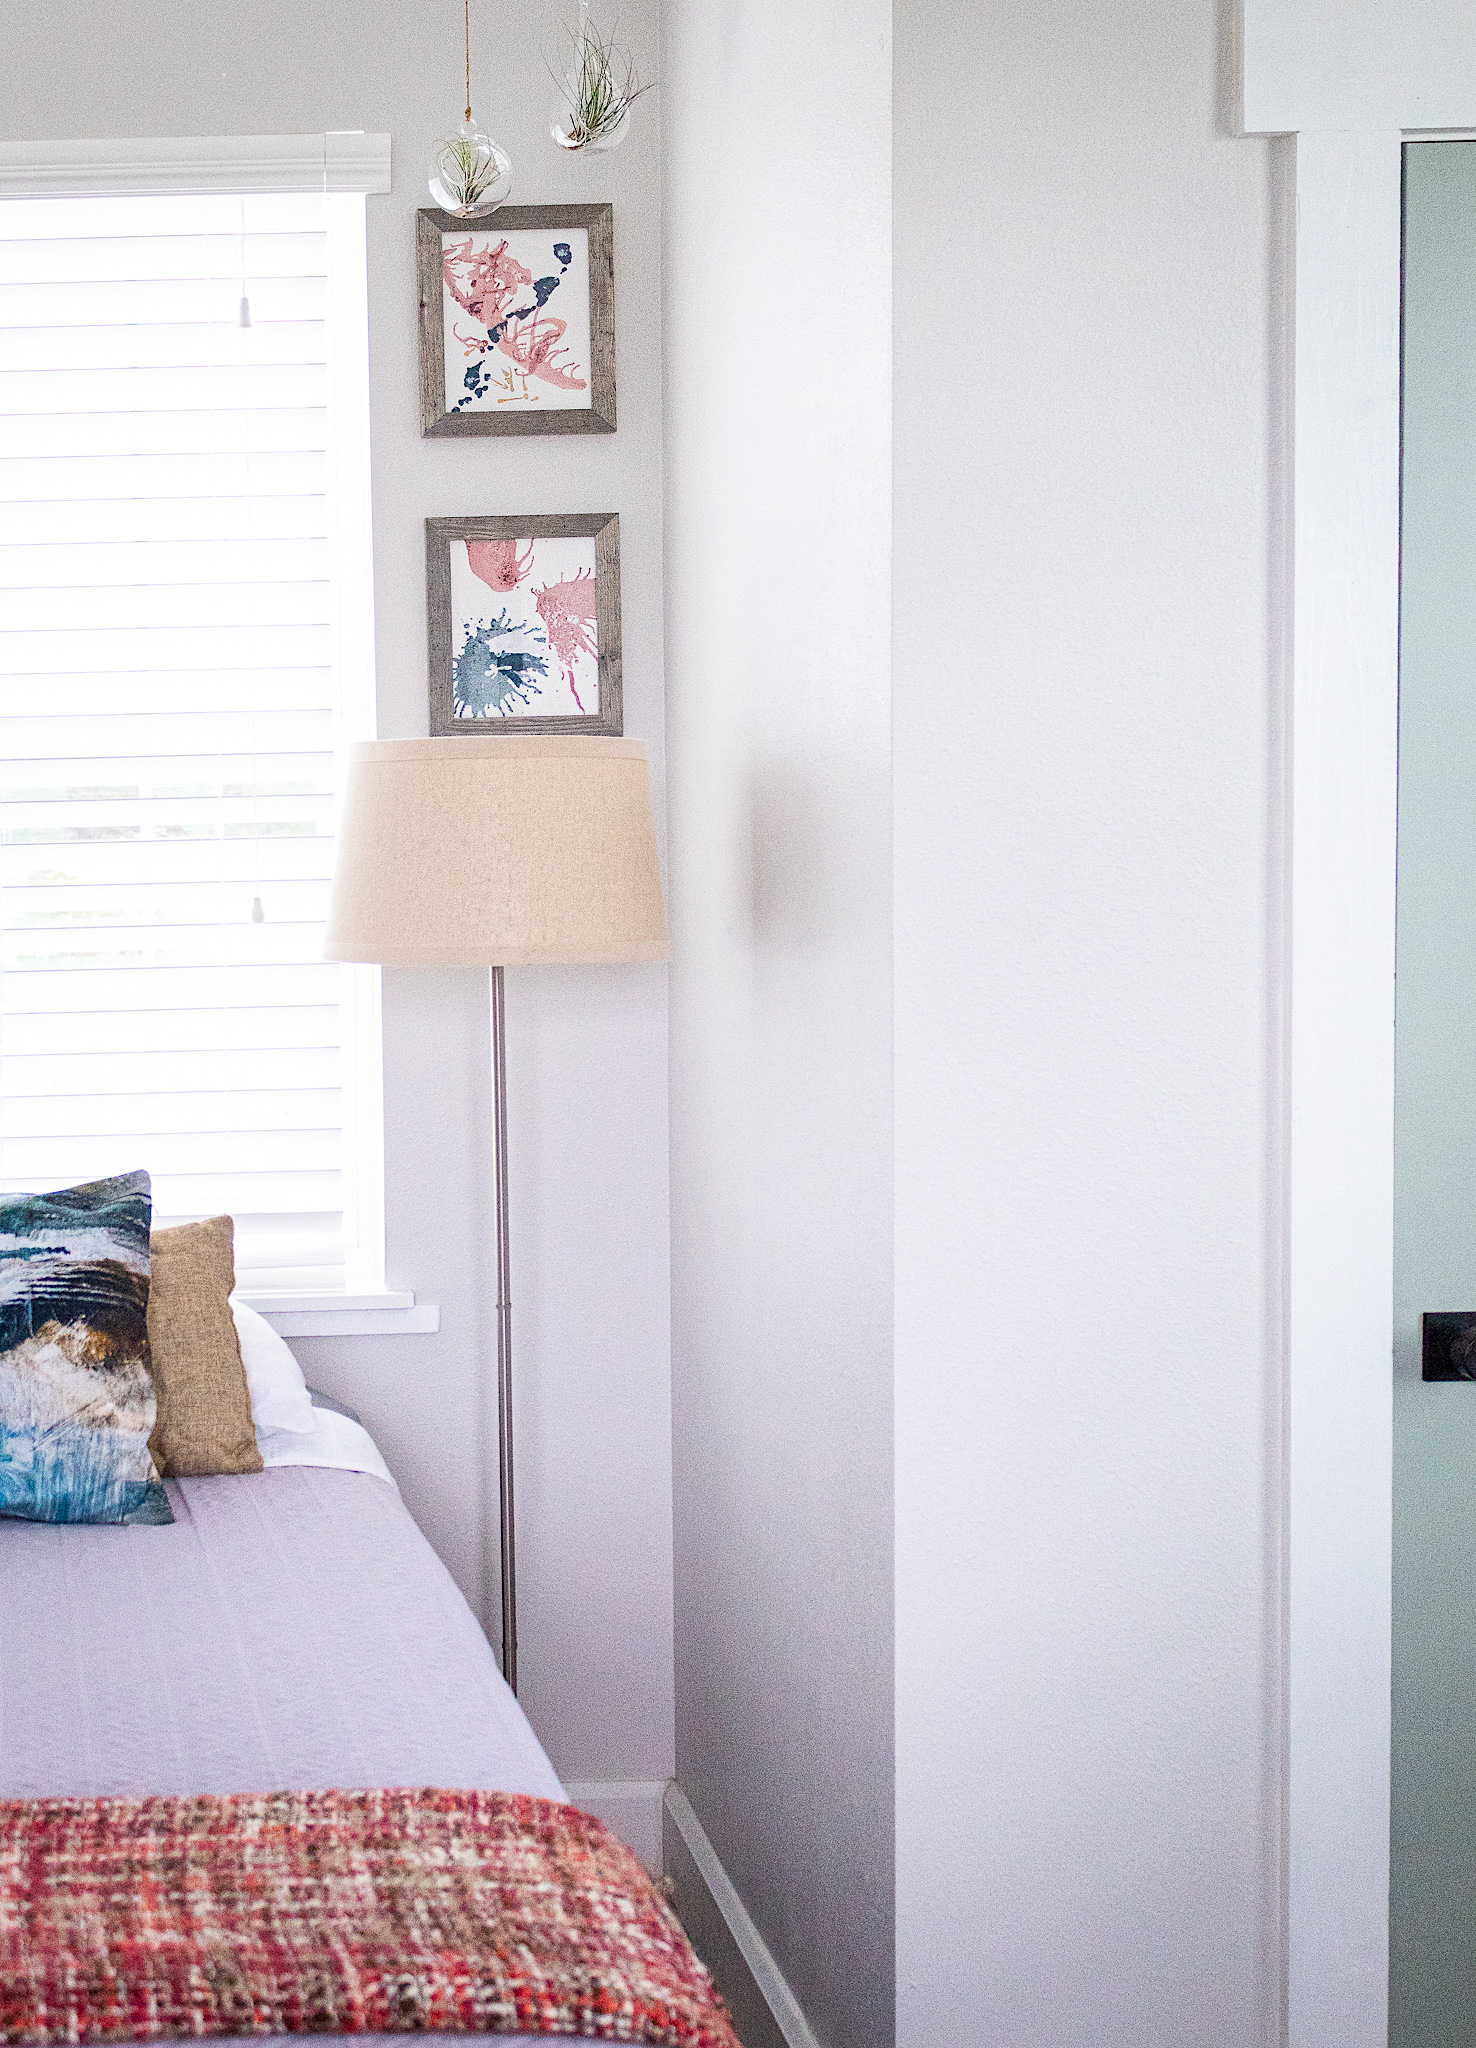
I had so much fun with this project that I had my kids do some pieces too and they were so proud of their creations. Aren’t they lovely?
Thank you for reading Nooks In Bloom friends and be sure to SUBSCRIBE at the bottom of this page for more fun tutorials!


This post is packed with useful insights—simple yet powerful! Thanks for sharing such well-thought-out content.
Thank you for your kind words and feedback!