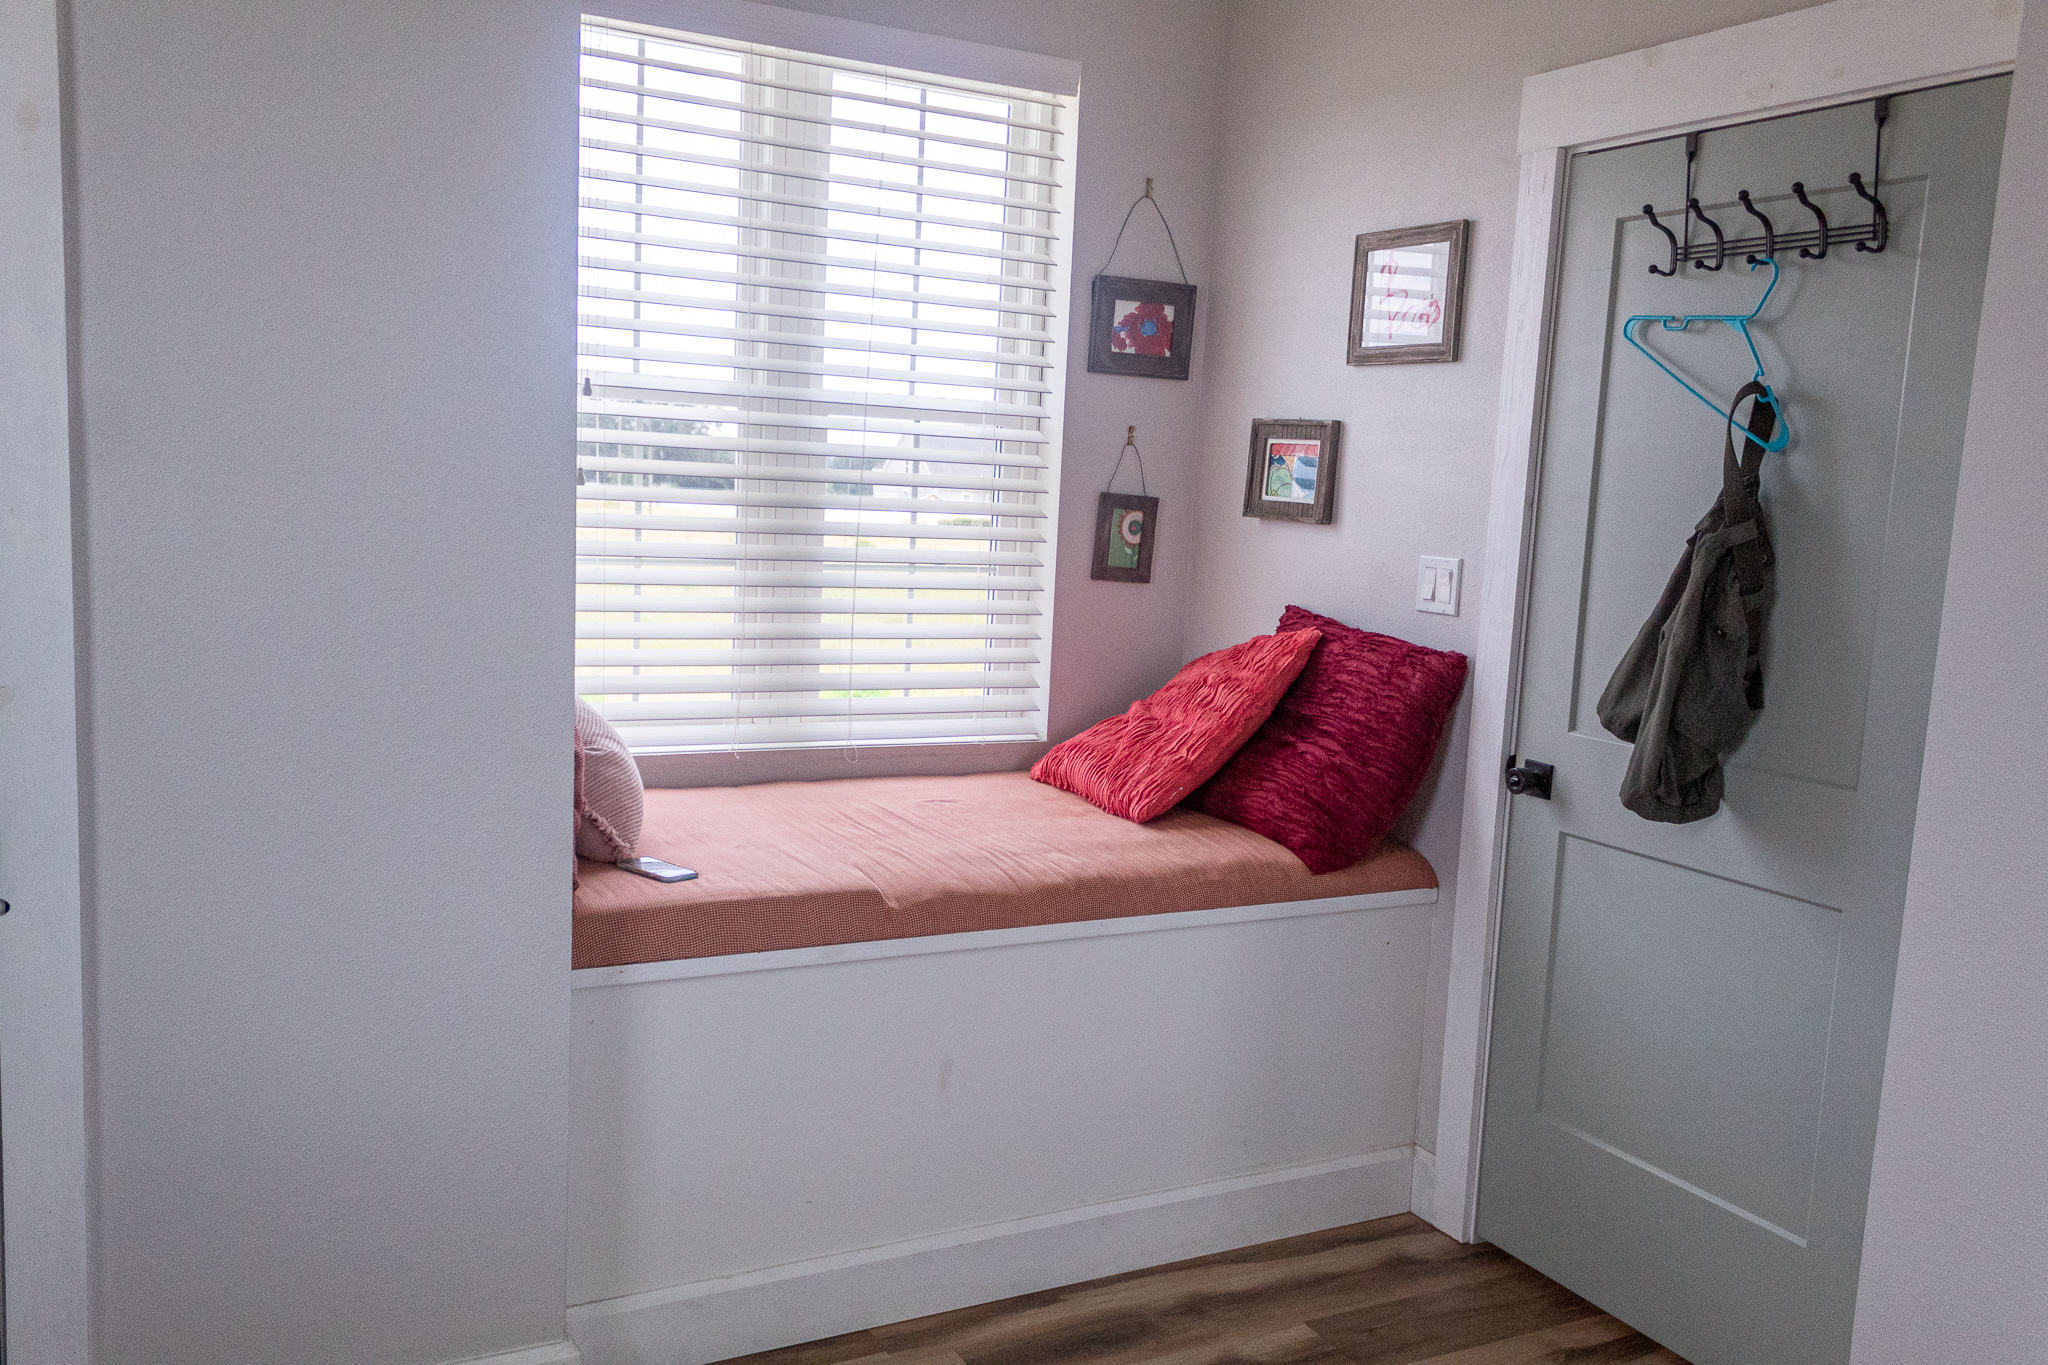
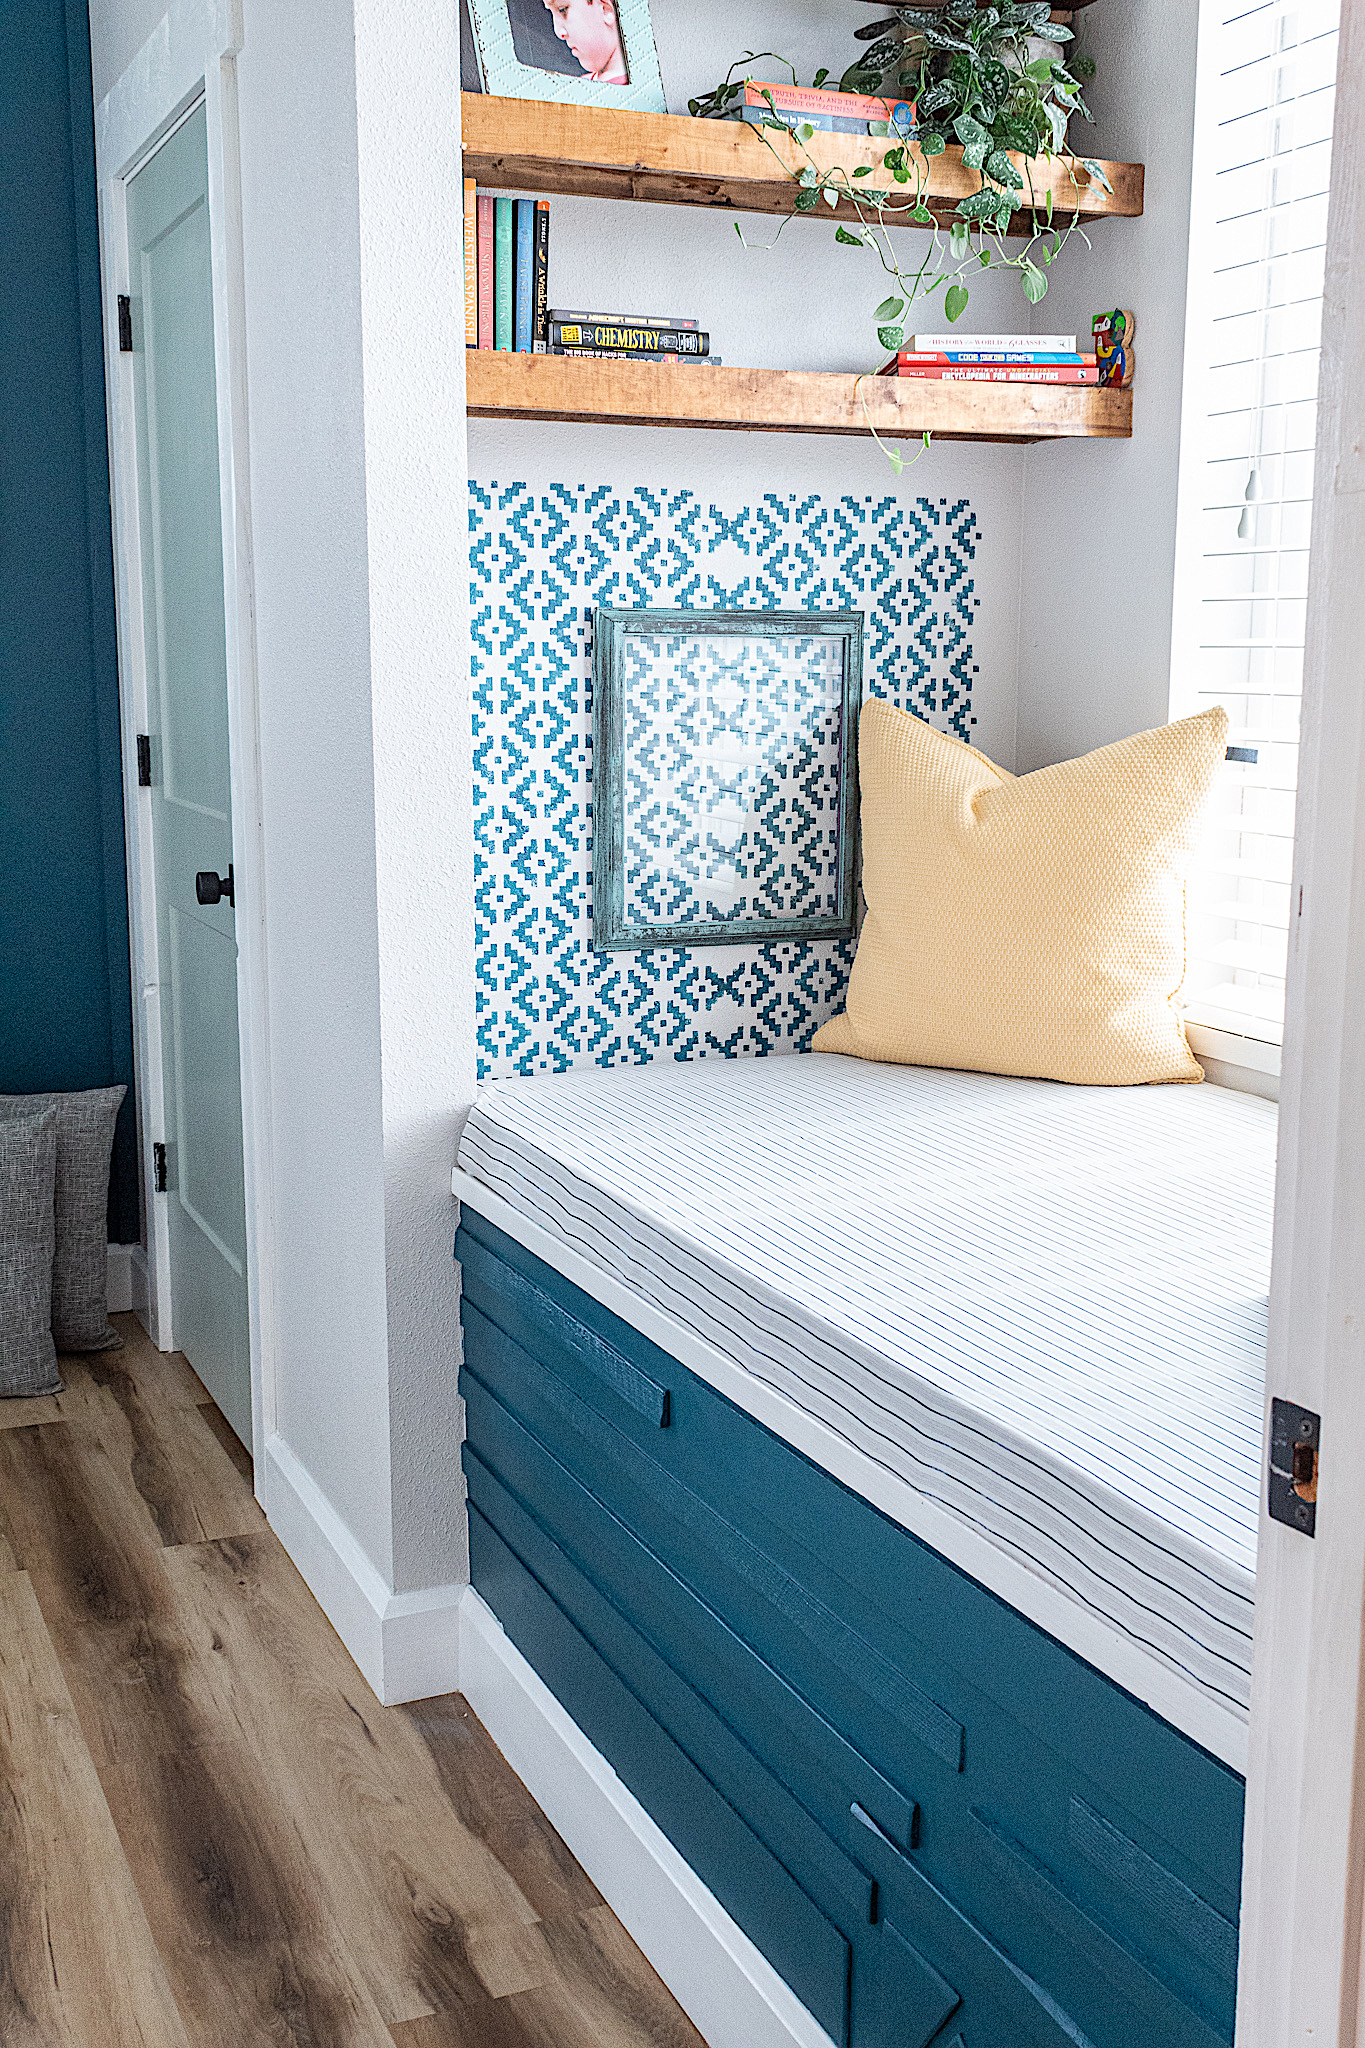
Today we are doing a very cool DIY on our son’s window seat. Some scrap wood, a fun paint color and a little sweat equity and you too can use this technique to give your window seat, banquette or your walls a modern and stylish new look!
One of the projects I had been putting off since we built our house two years ago was trimming out the base of my oldest son’s window seat. Once he became a teenager we decided to update his entire room. There was no better time to tackle this project. So let’s get started and I’ll show you how I decked out this window seat!
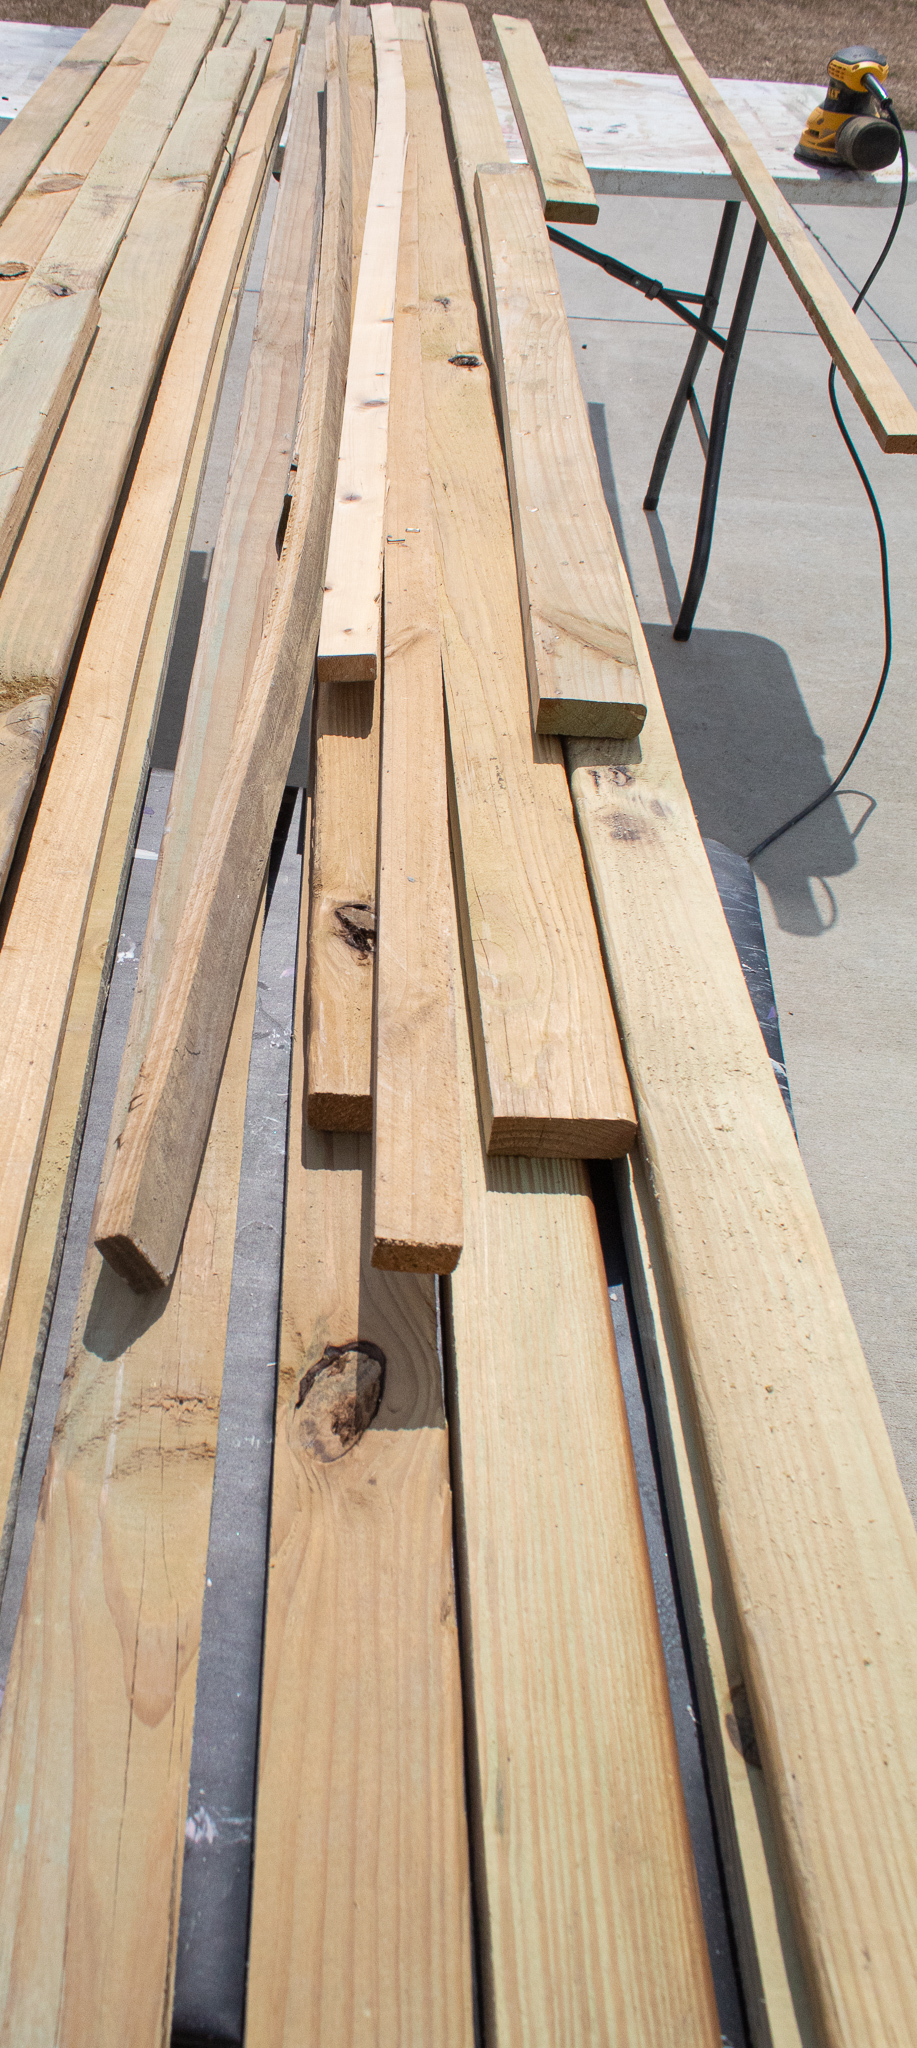
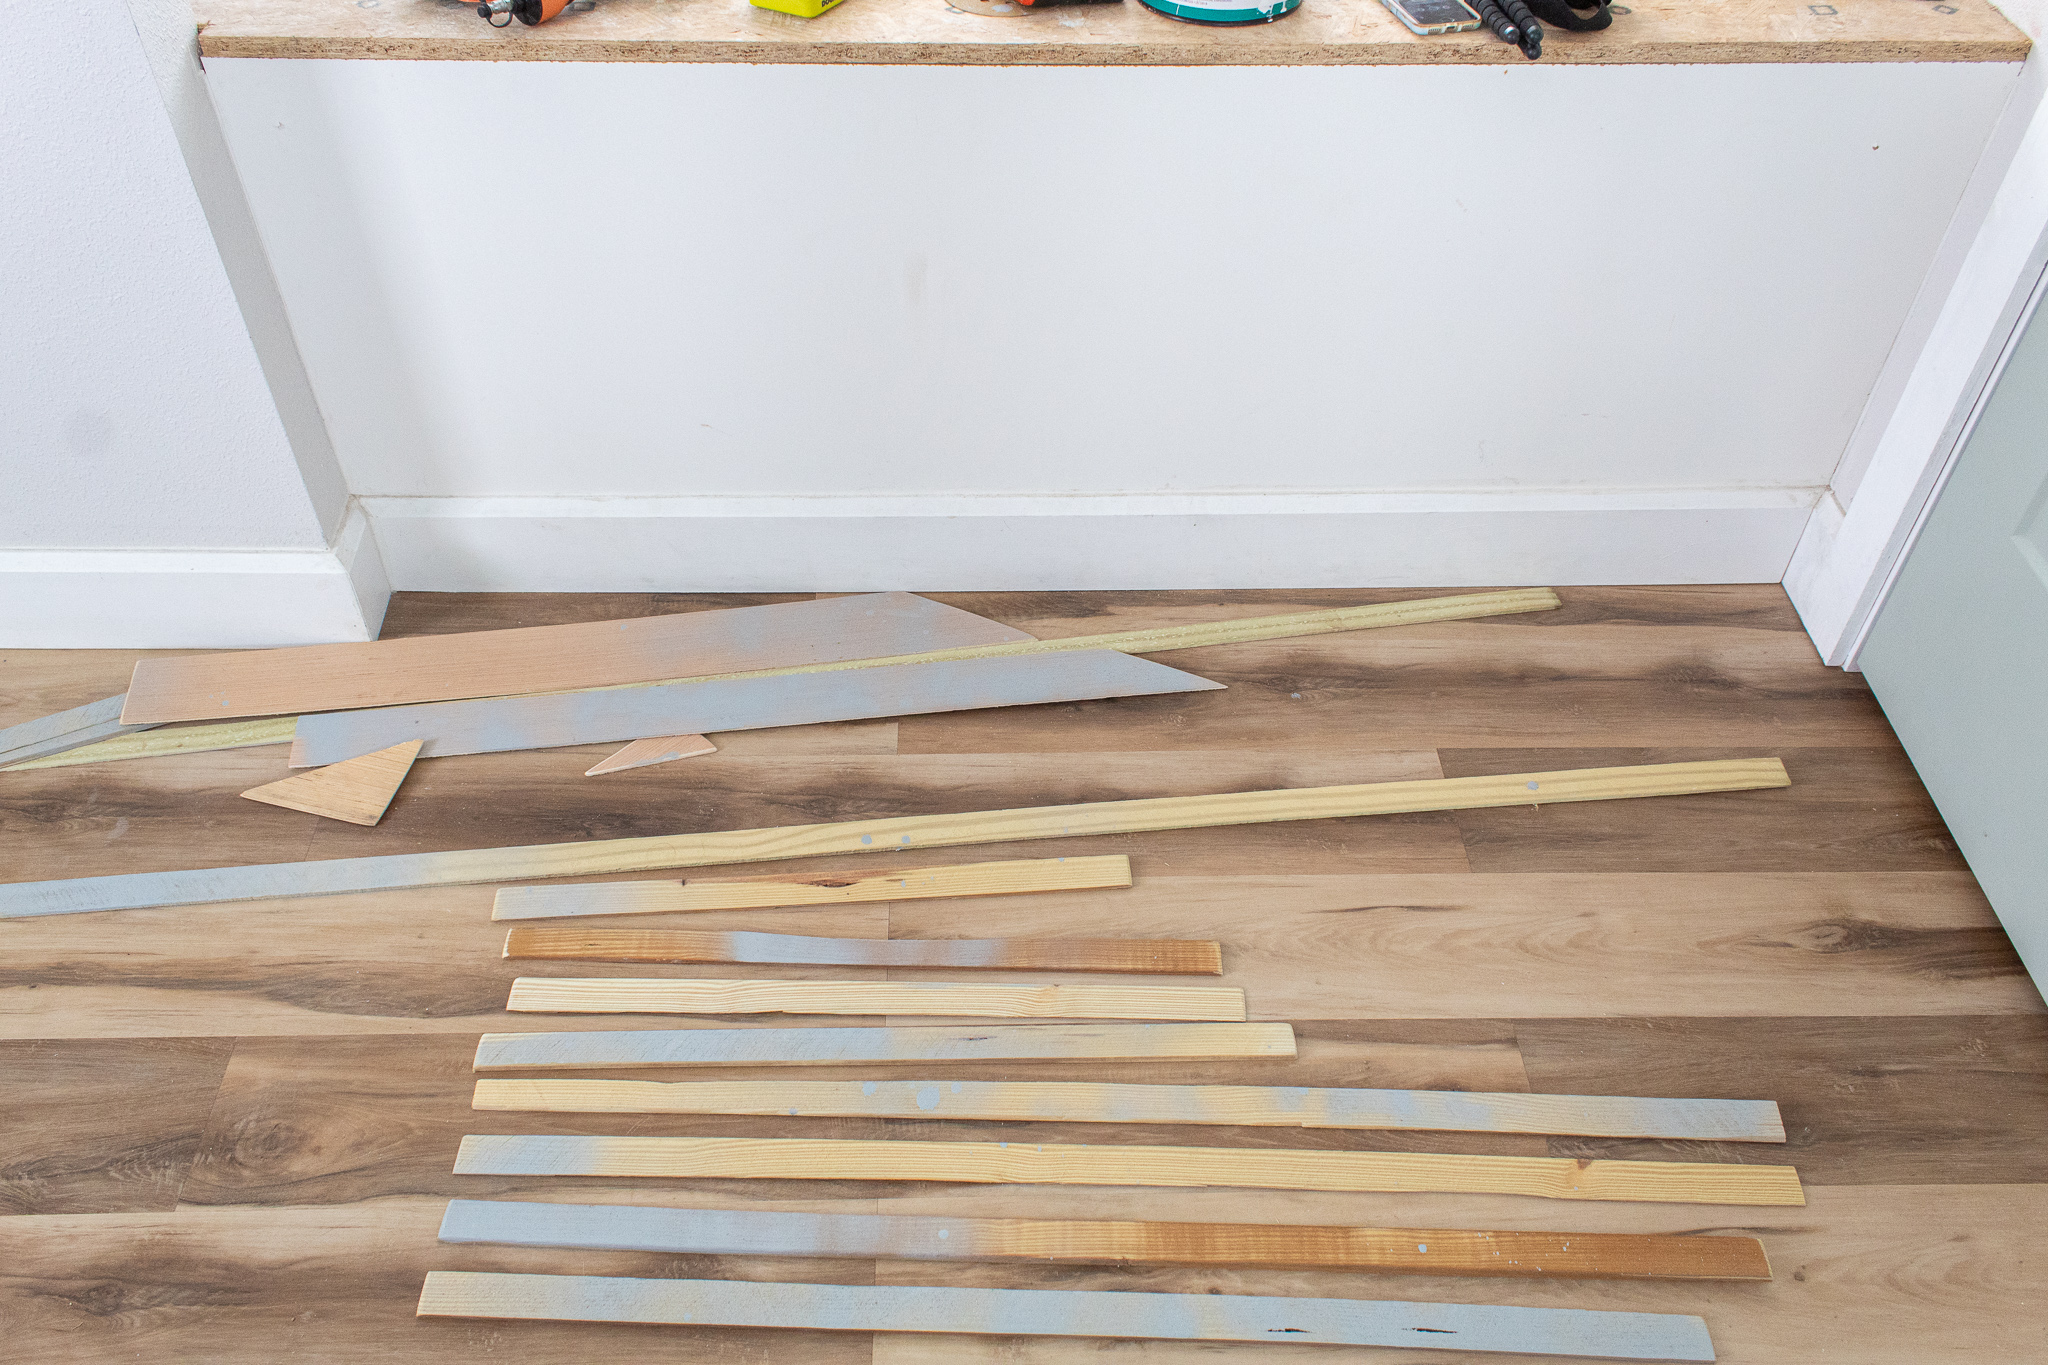
I gathered up some scrap 2 x 4’s and other wood pieces we had in our garage. I only ended up using one 2×4 worth of cuttings and some trim. Depending on the size of your project, you may need to use more cuttings.
Disclosure: Some of the links provided are affiliate links. By purchasing through these links you are supporting this family blog and the work we do and there is no extra cost to you. If you would like to read our full disclosure, click HERE.
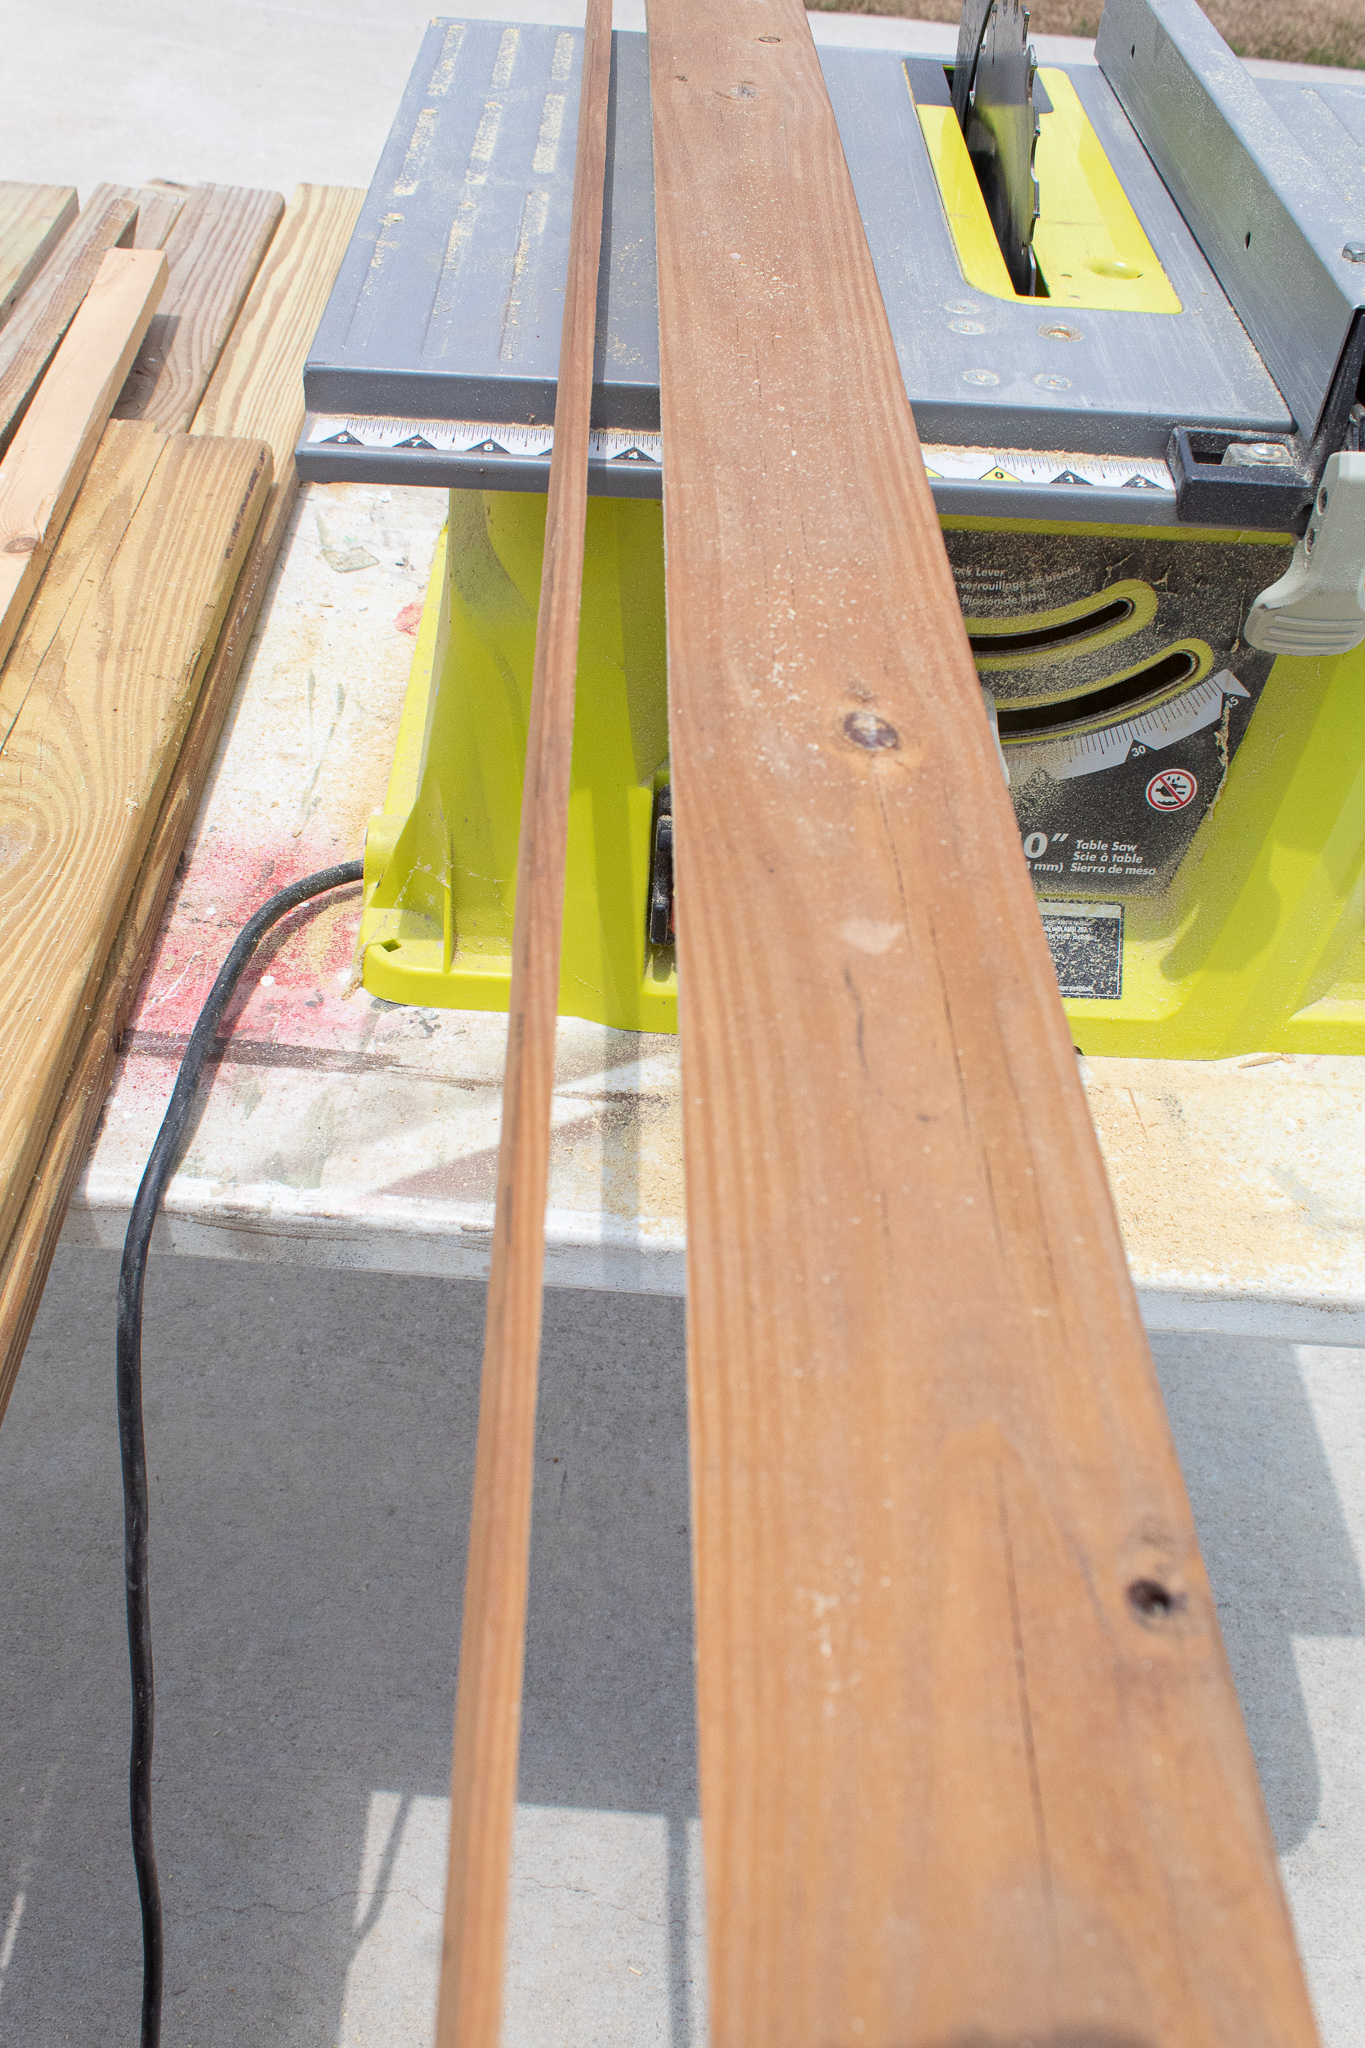
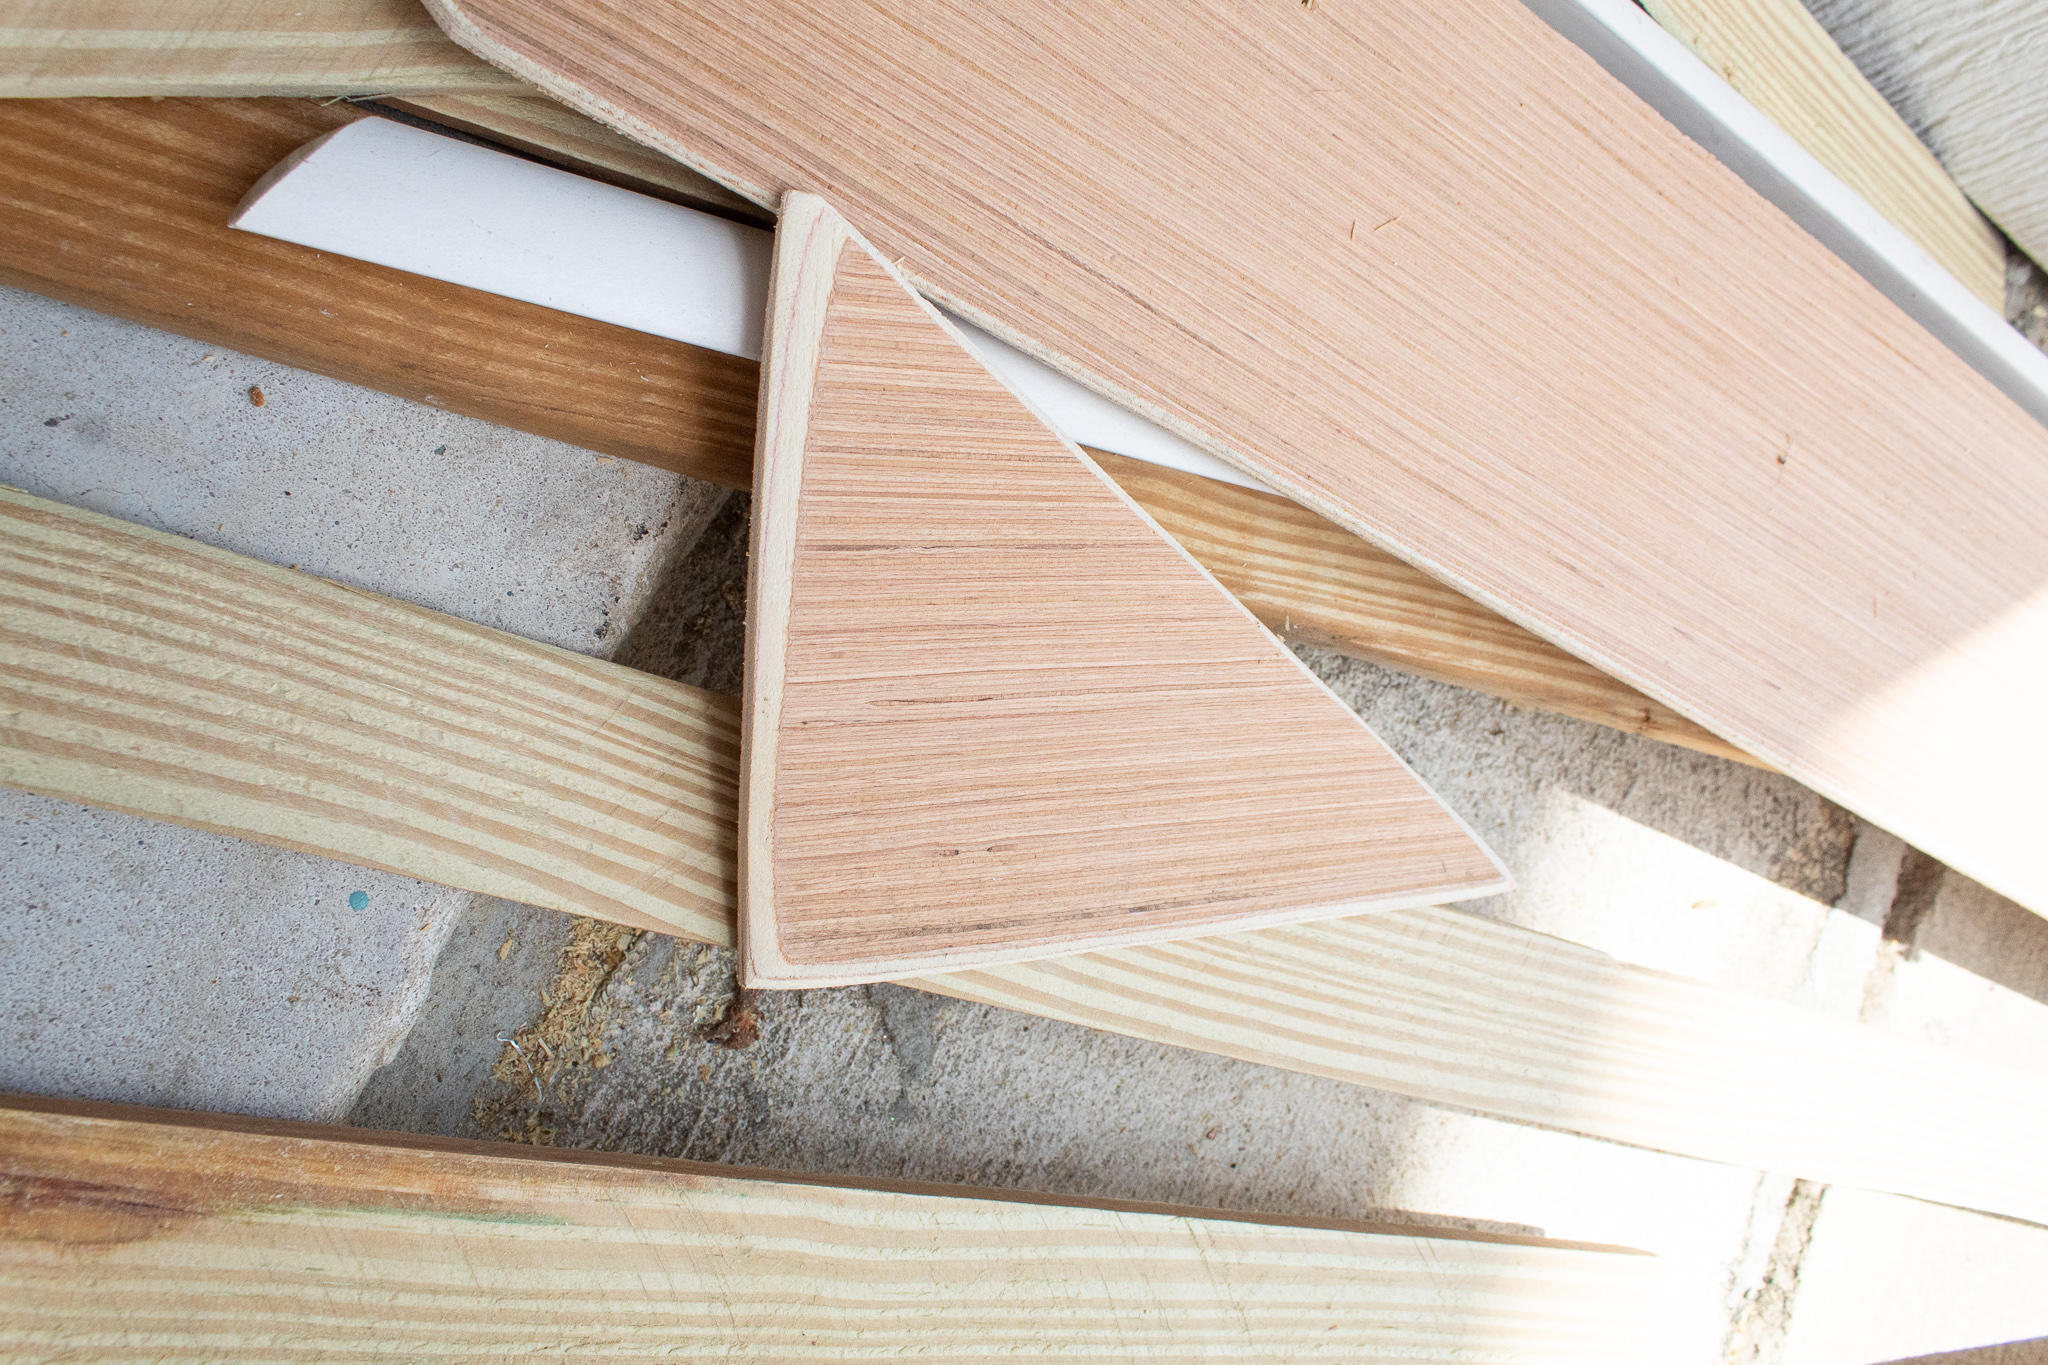
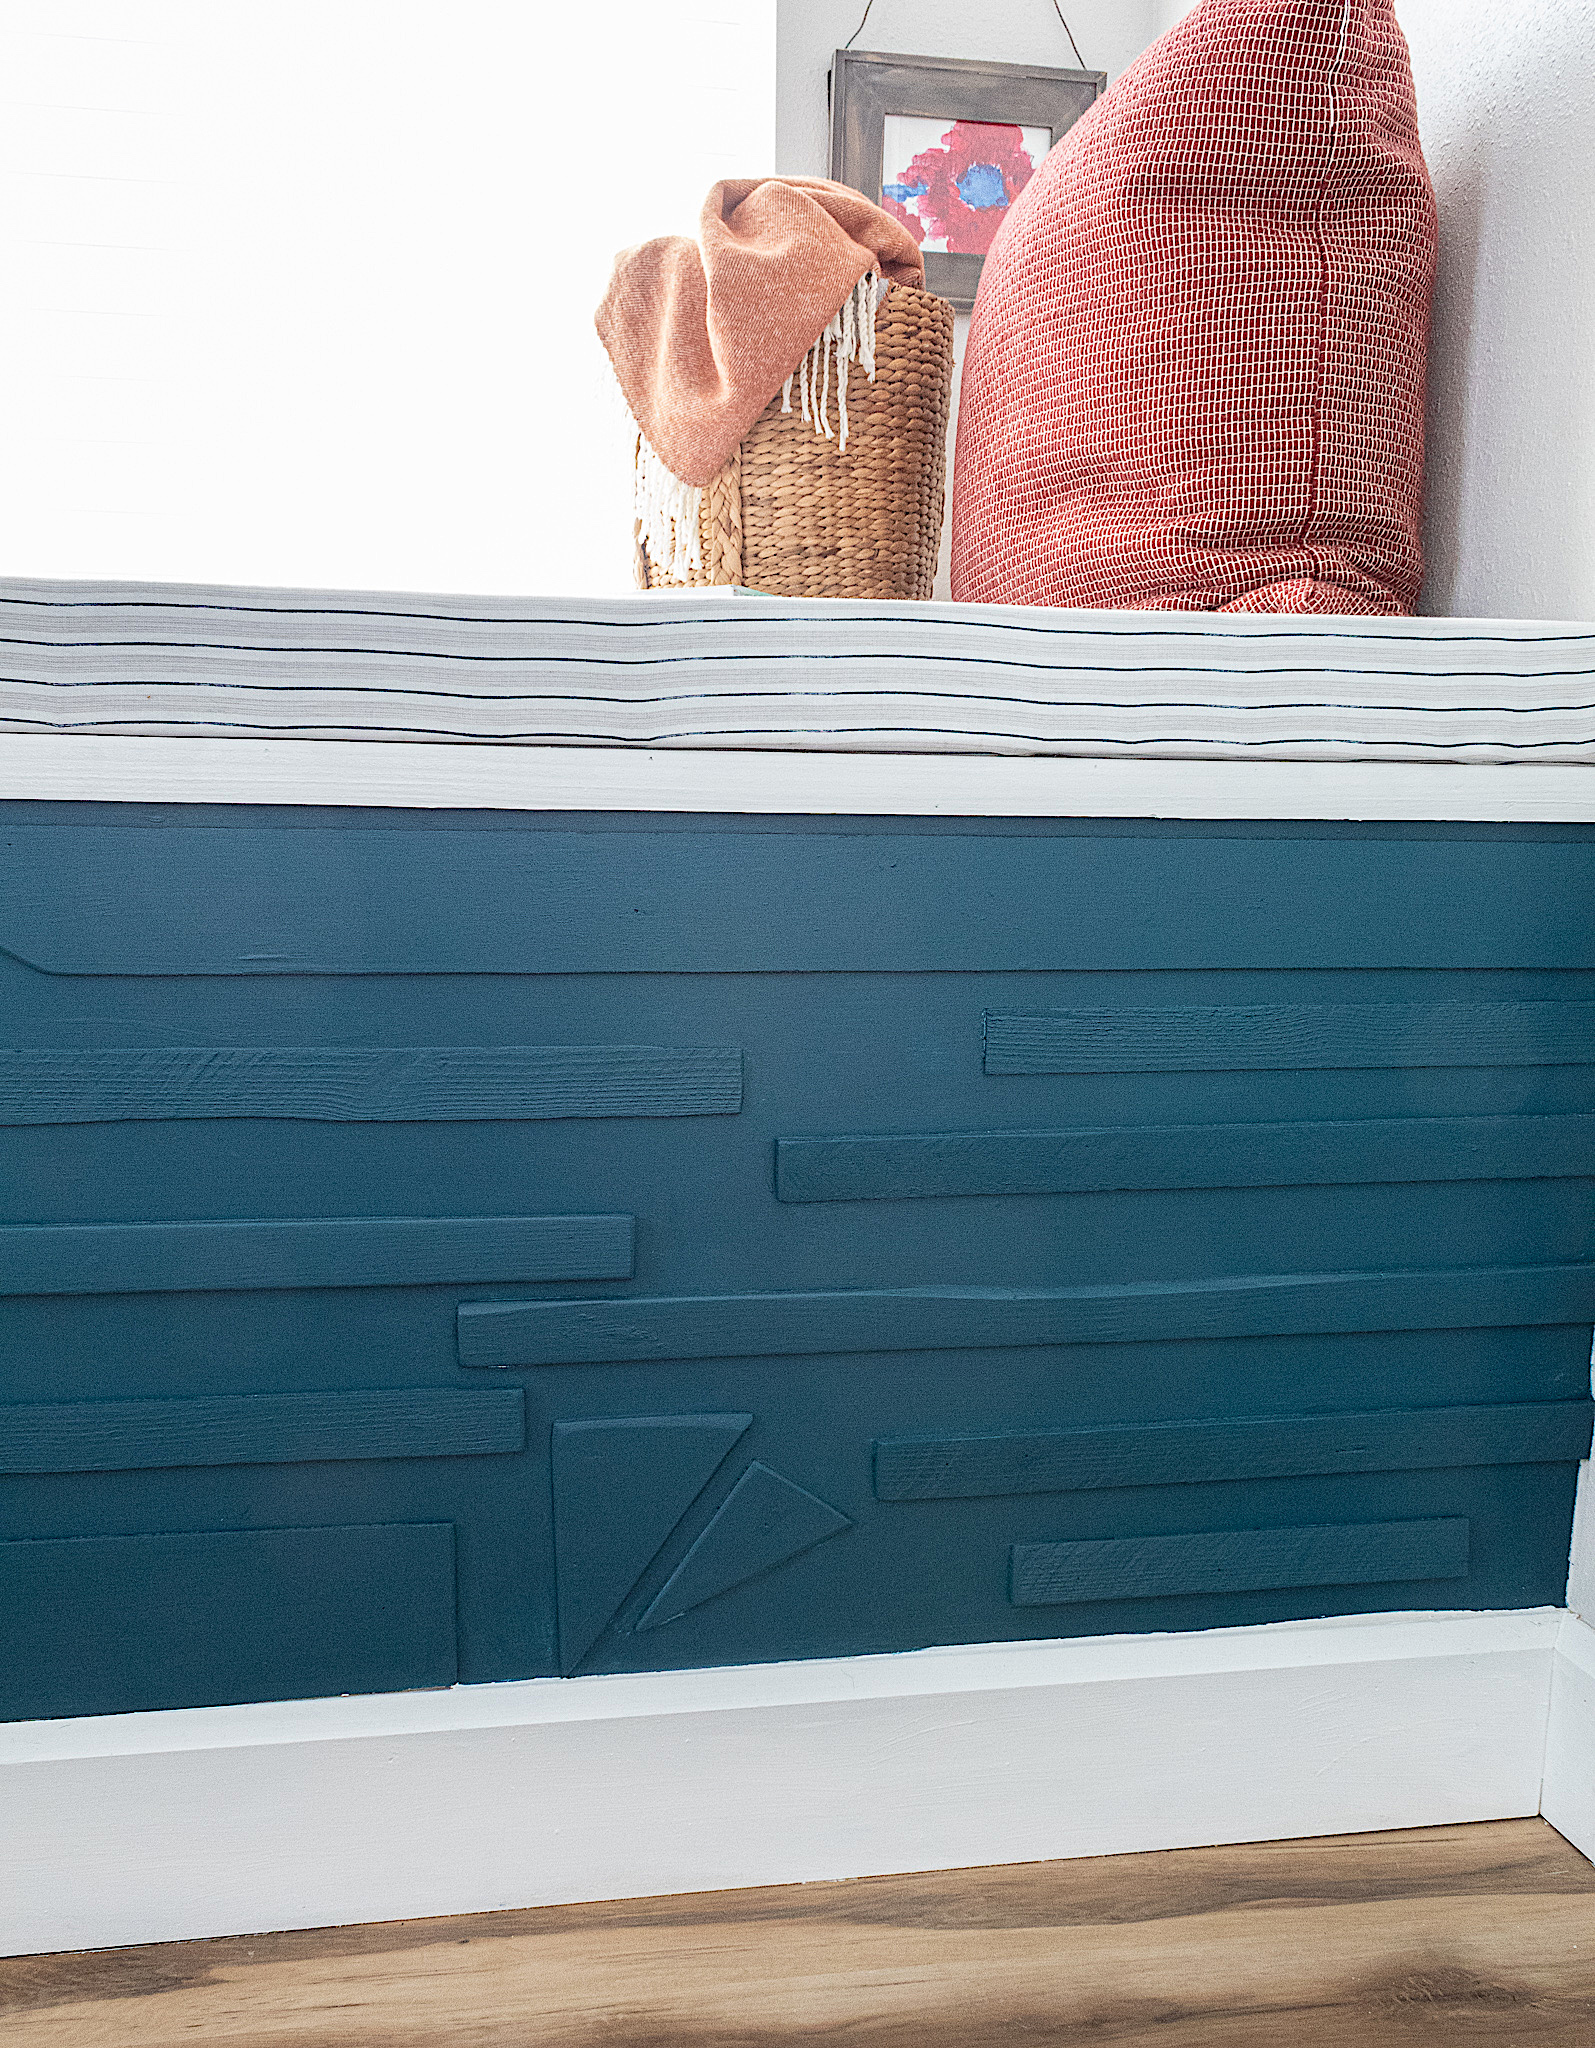
I ran my boards lengthwise through the table saw to cut long, thin pieces in varying sizes. I also cut some small pieces in triangle shapes for a fun detail.
Remember nothing needs to be perfect or precise. We are going to be creating abstract wood art.
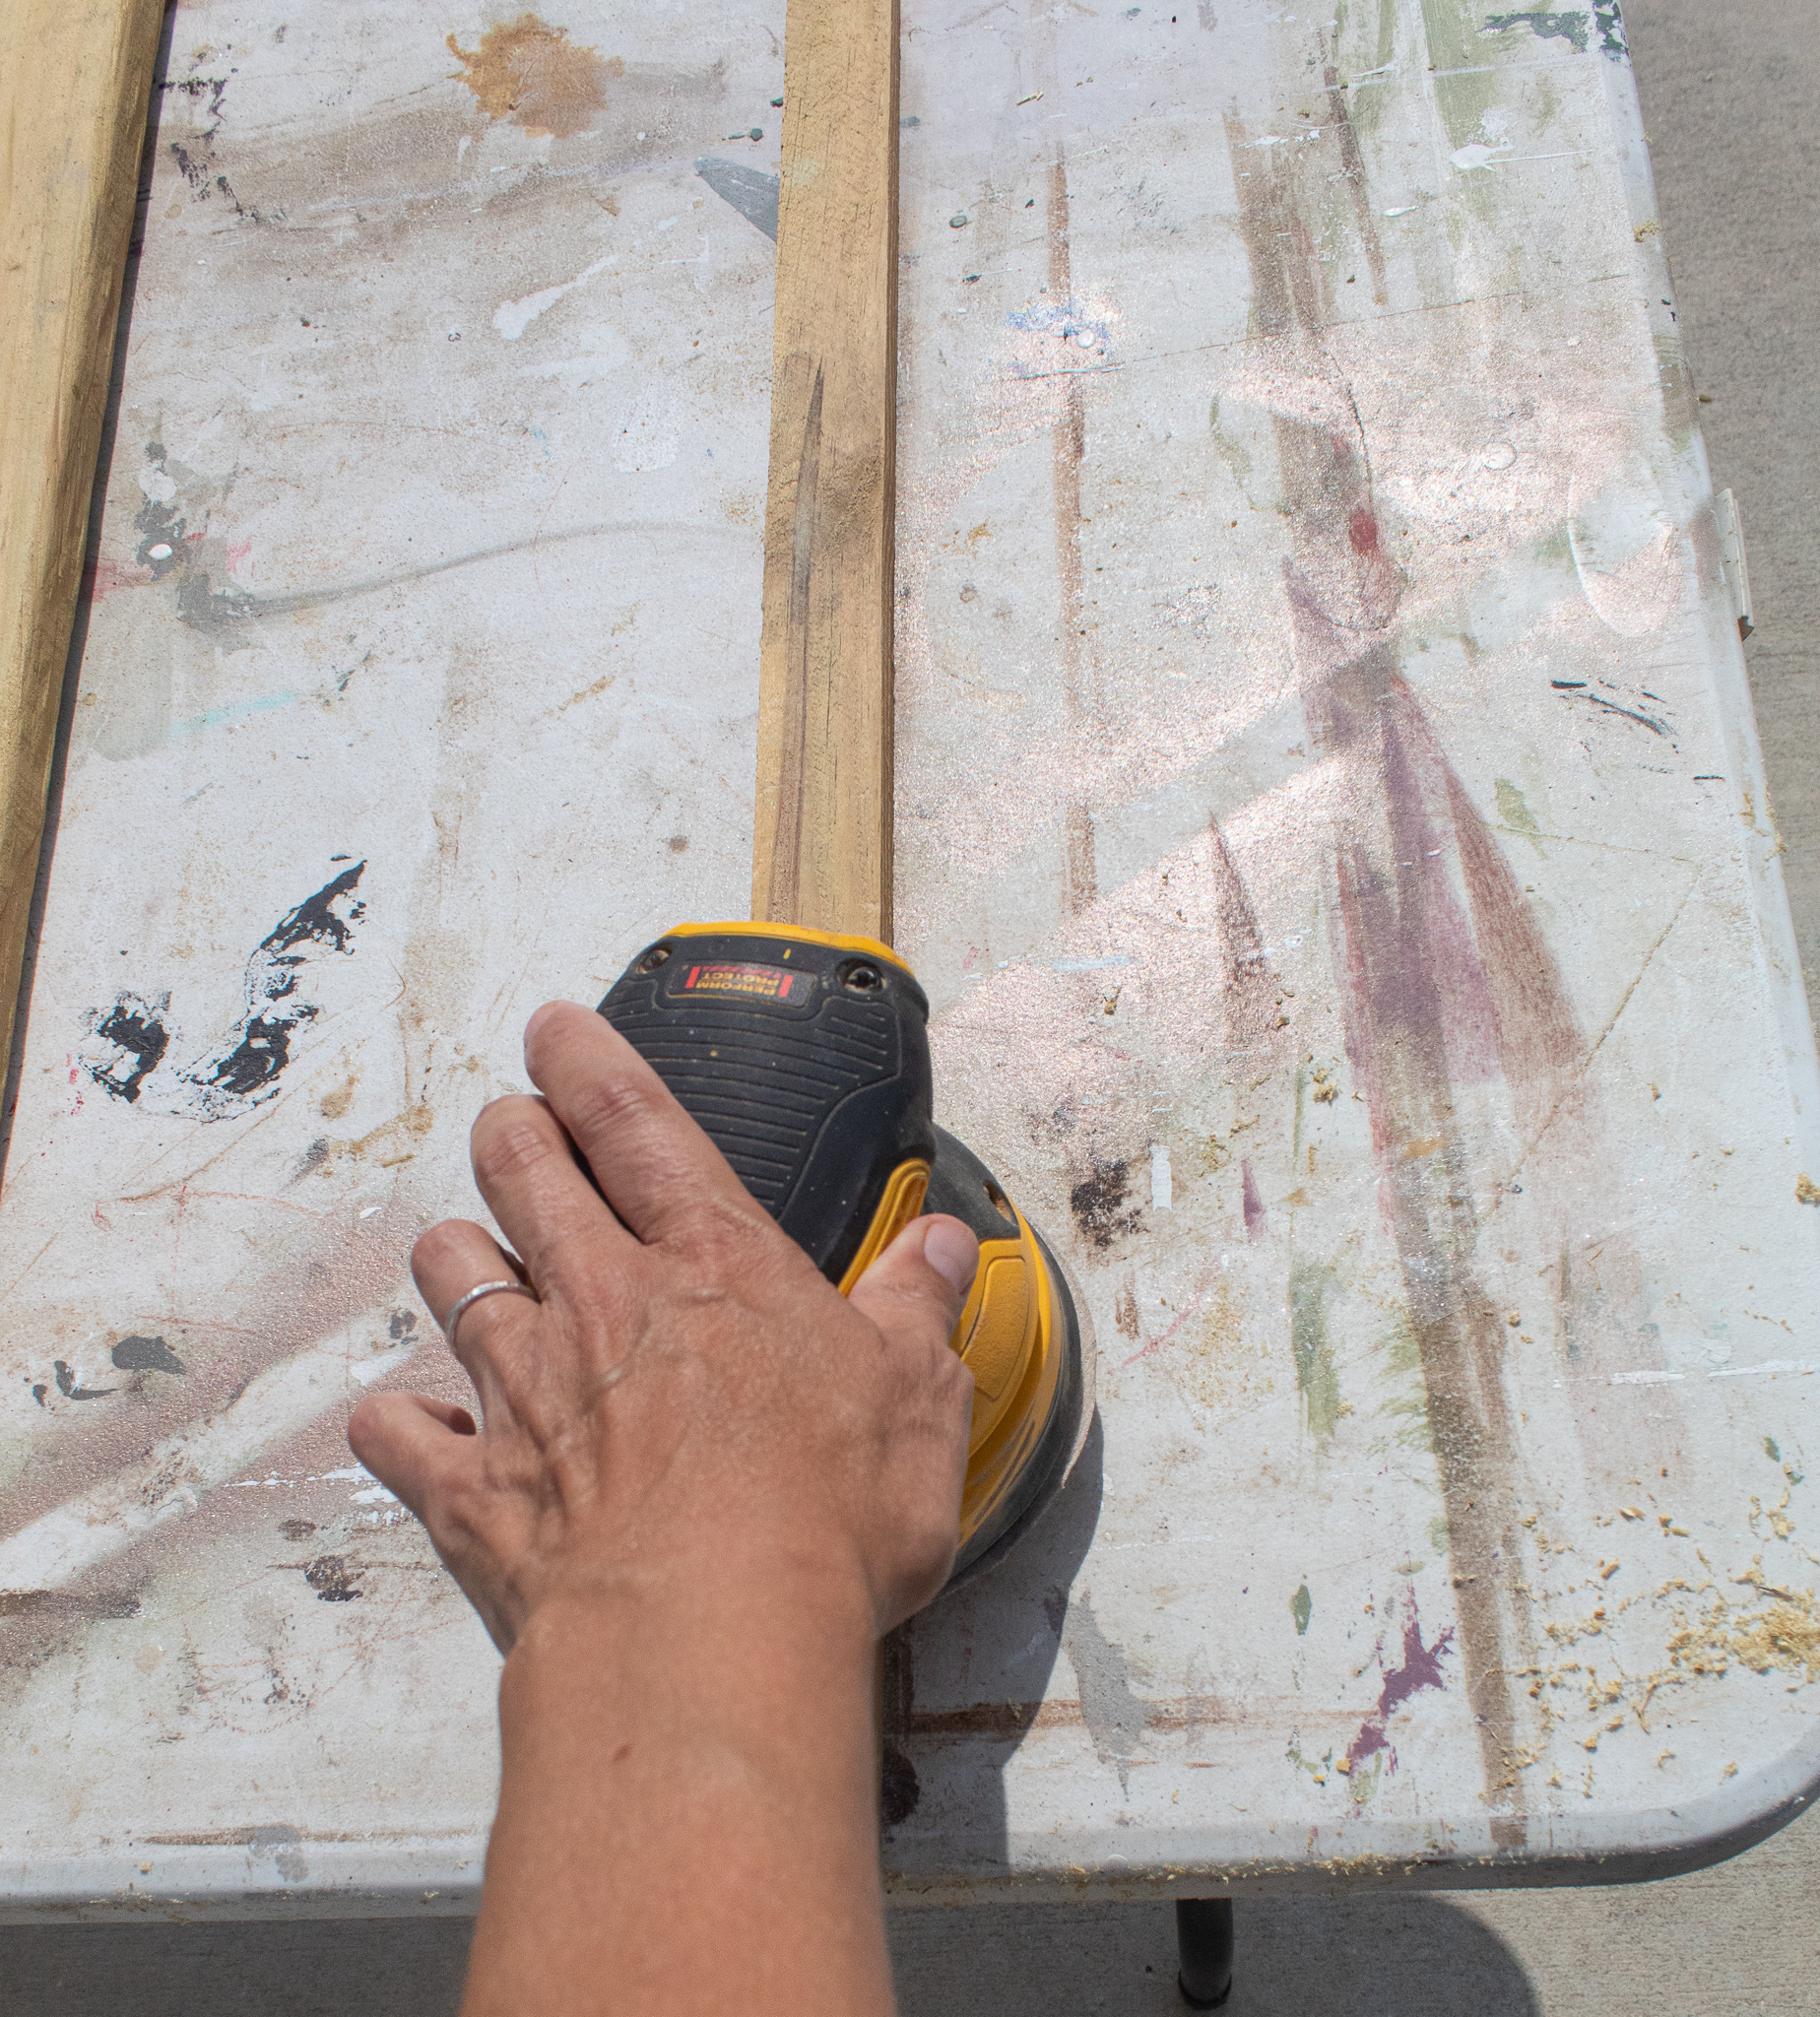
Step 2. Sanding
Once your pieces are cut you can sand them to create a smooth finish. I also used my sander to round edges like in this triangular piece I cut.
Step 3. Nailing your wood
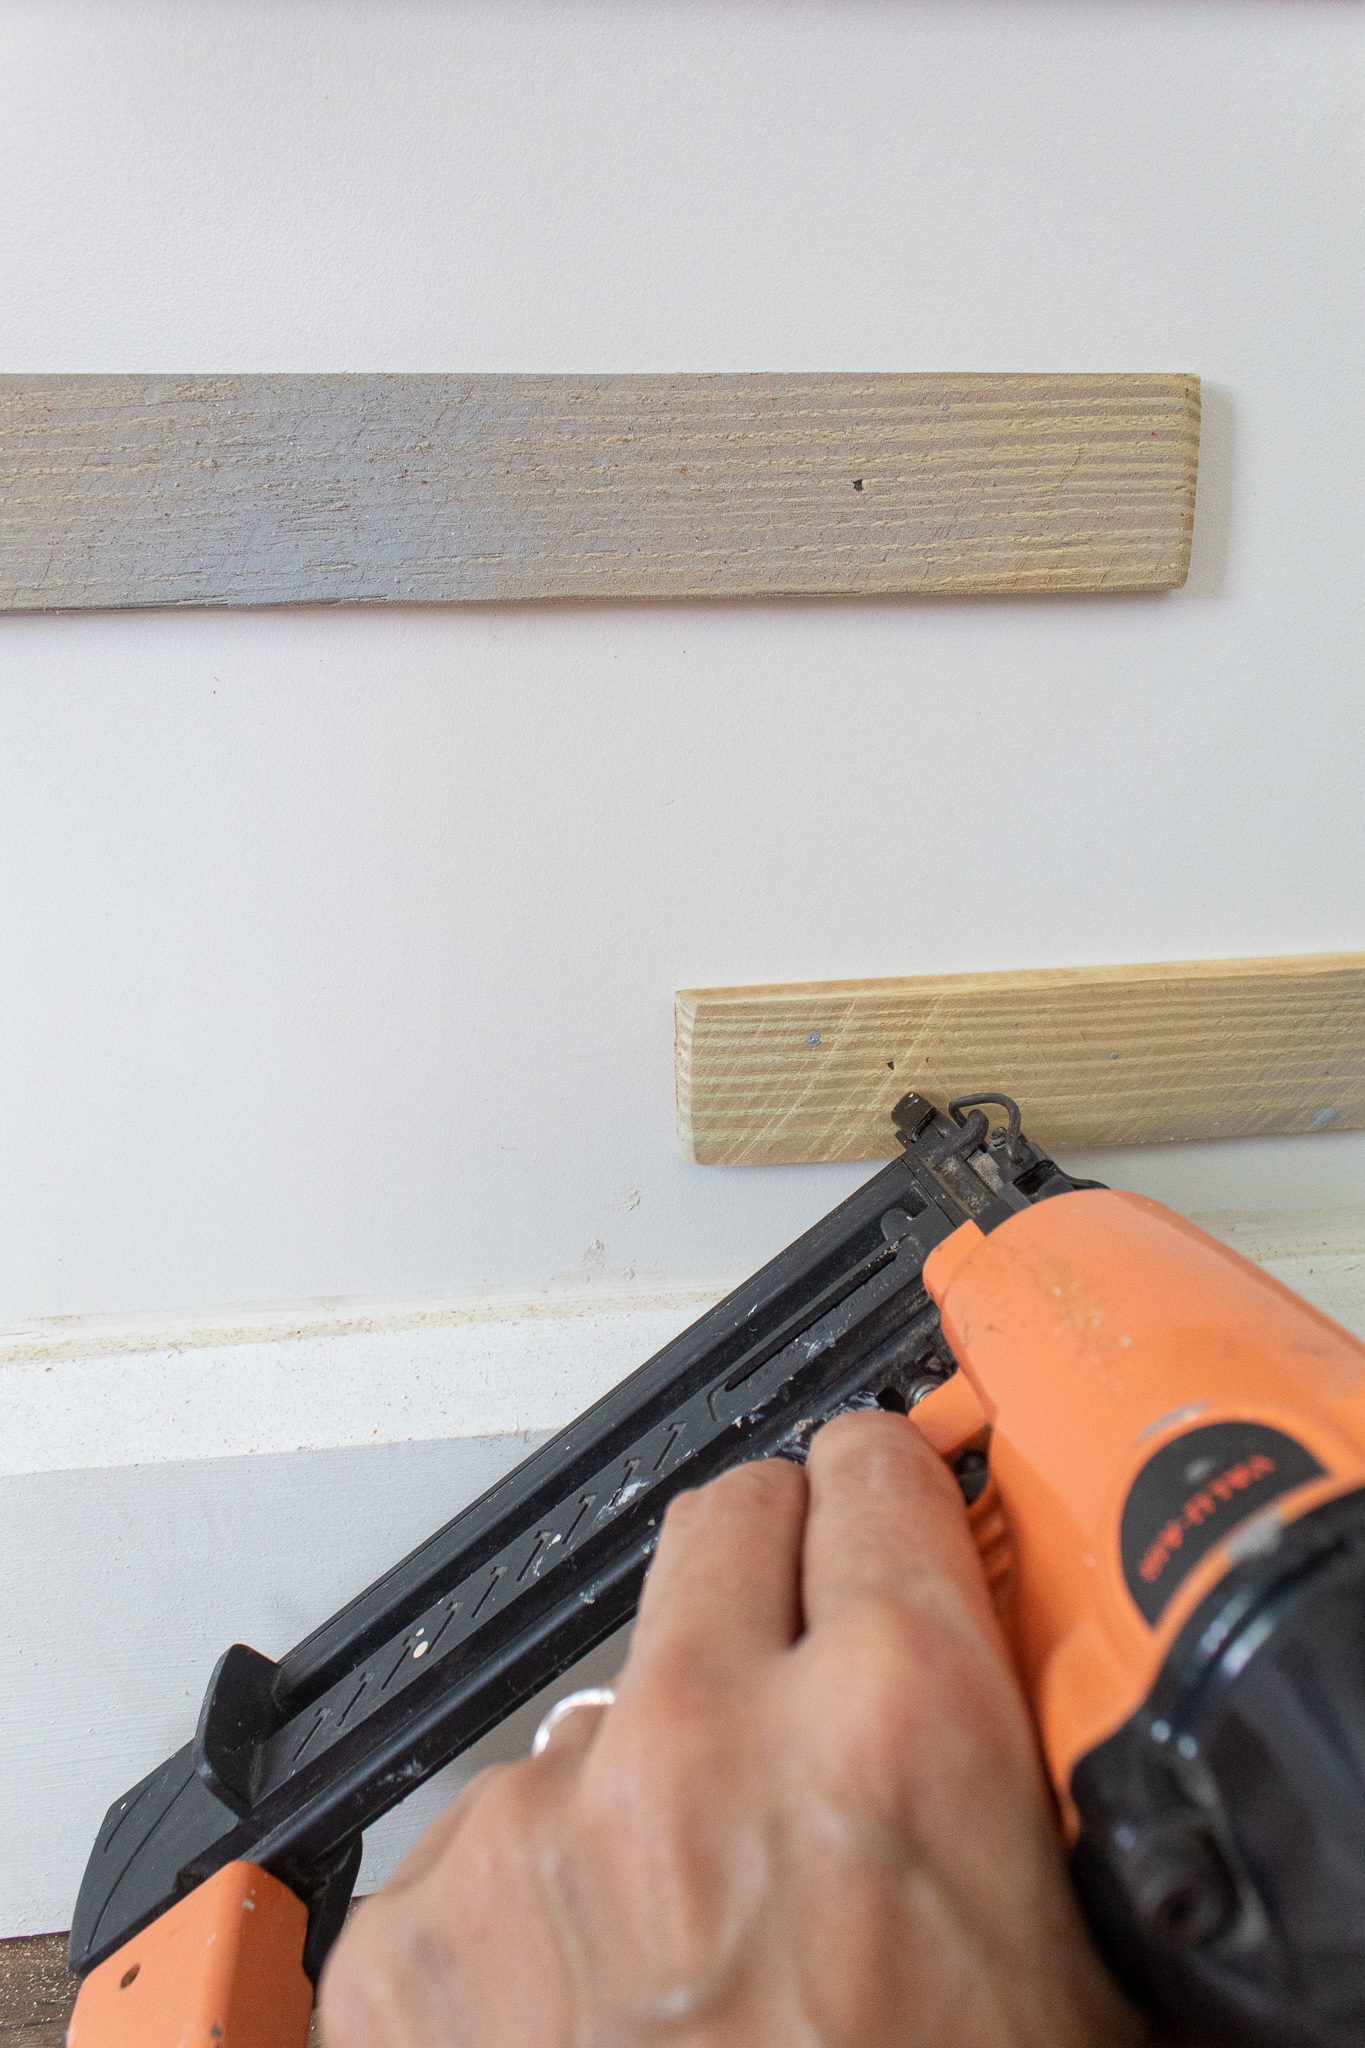
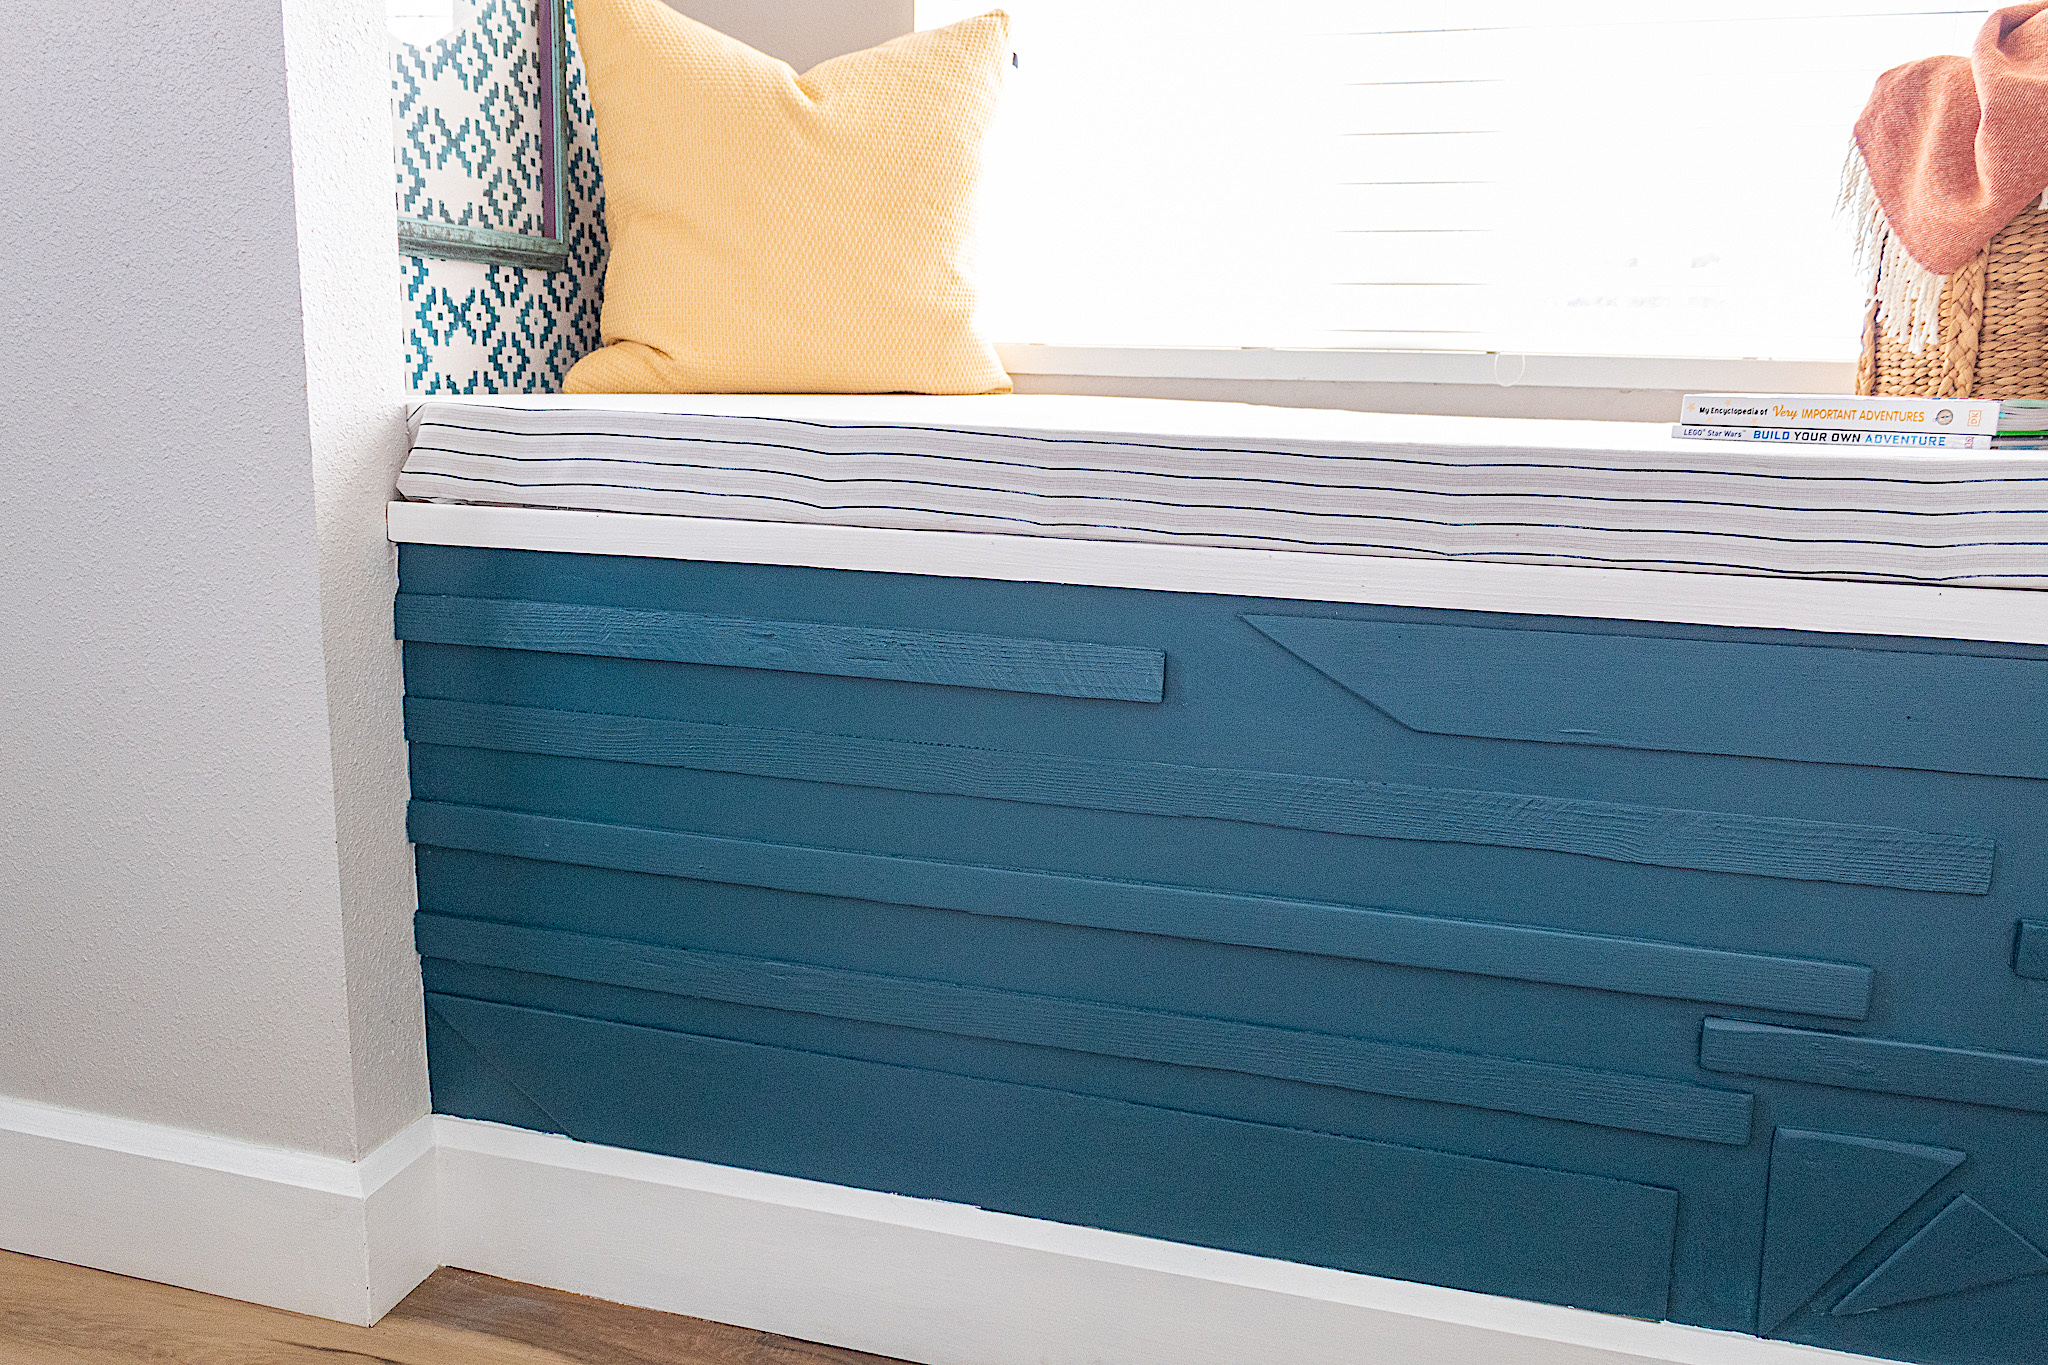
Before I began nailing my wood I laid all my pieces out in front of the window seat. I began holding pieces up to visualize what would be a pretty pattern for this surface.
This is where you can really create something fun and stylish using your wood pieces. You can go vertically, horizontally, diagonally. You can cover the entire surface or just make a statement on a corner. Have fun with the design.
I began nailing pieces and forming a pattern. This part was the most enjoyable part of the project! If you make a mistake, you can just pry a wood piece off, no biggie…
I used my level to make sure the pieces were looking straight.
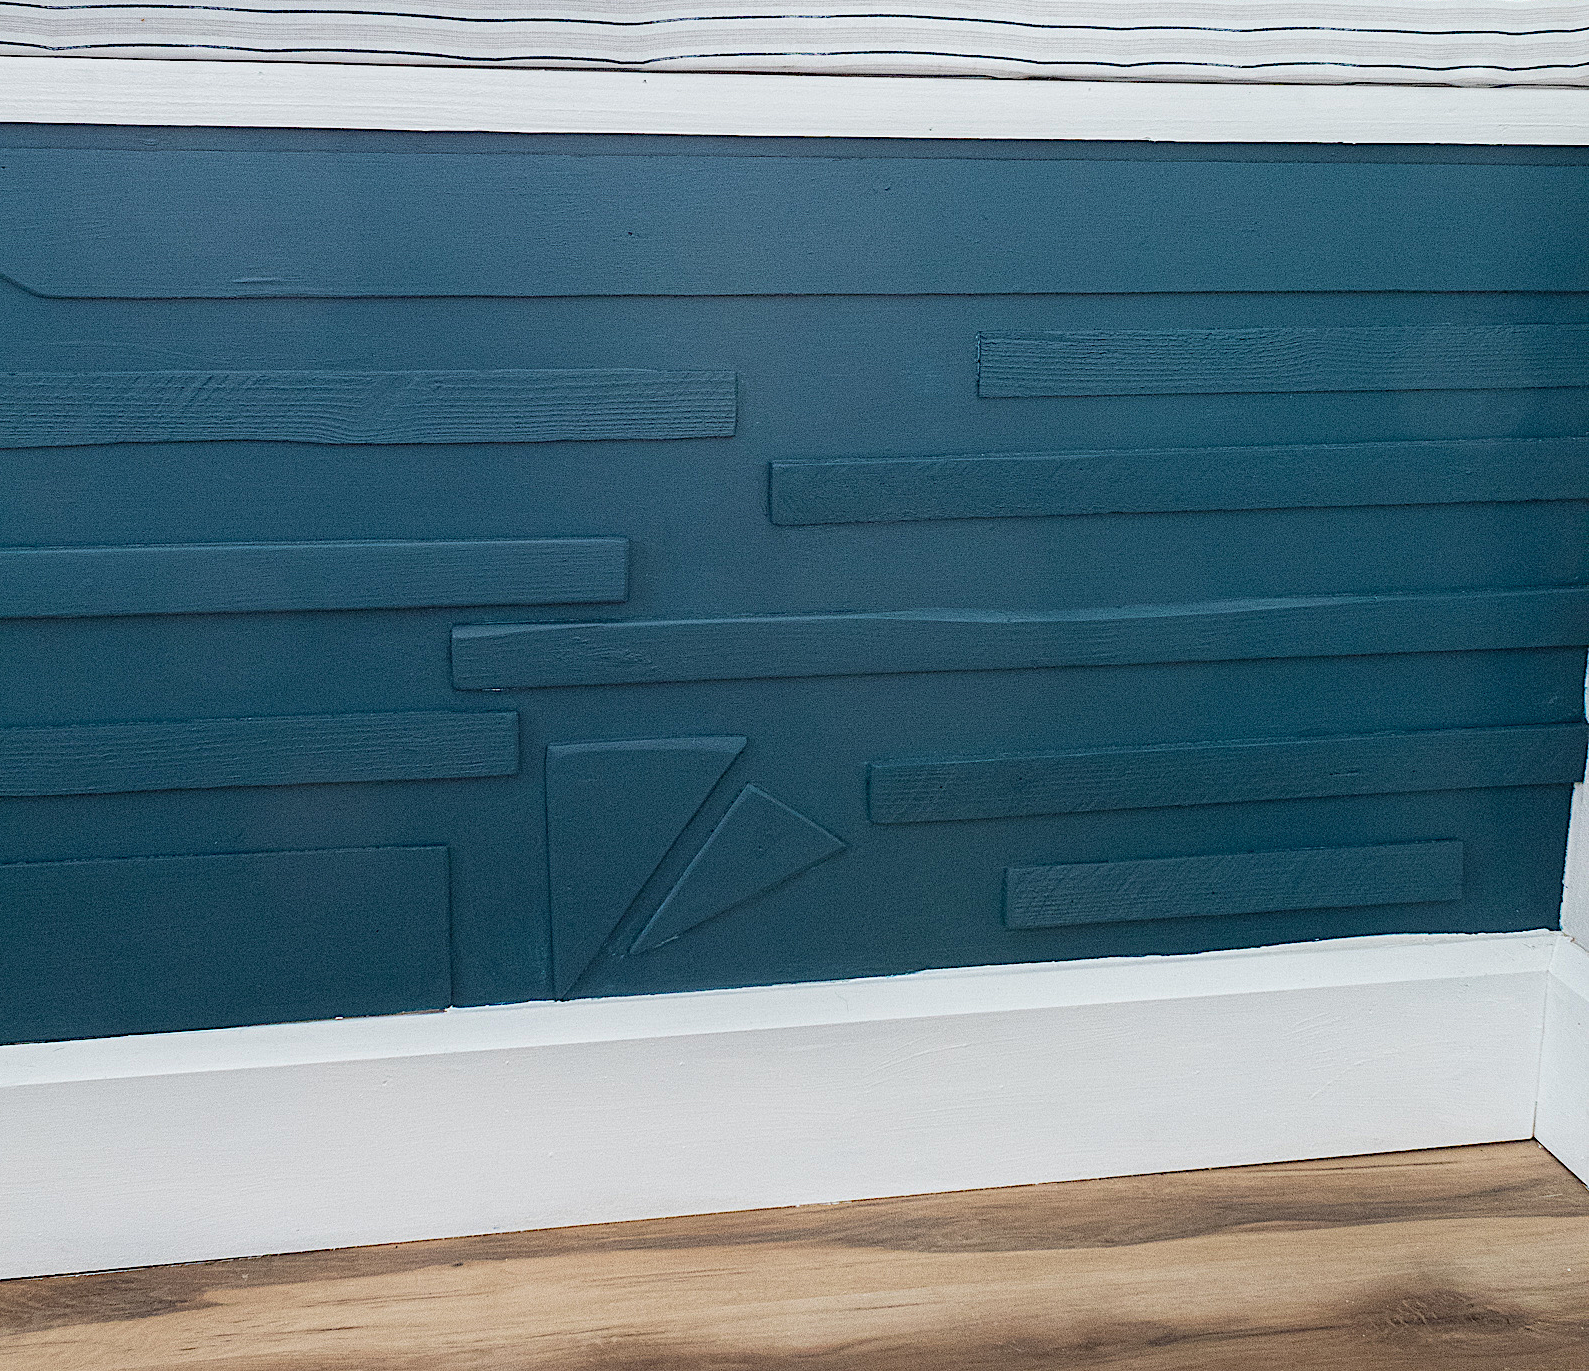
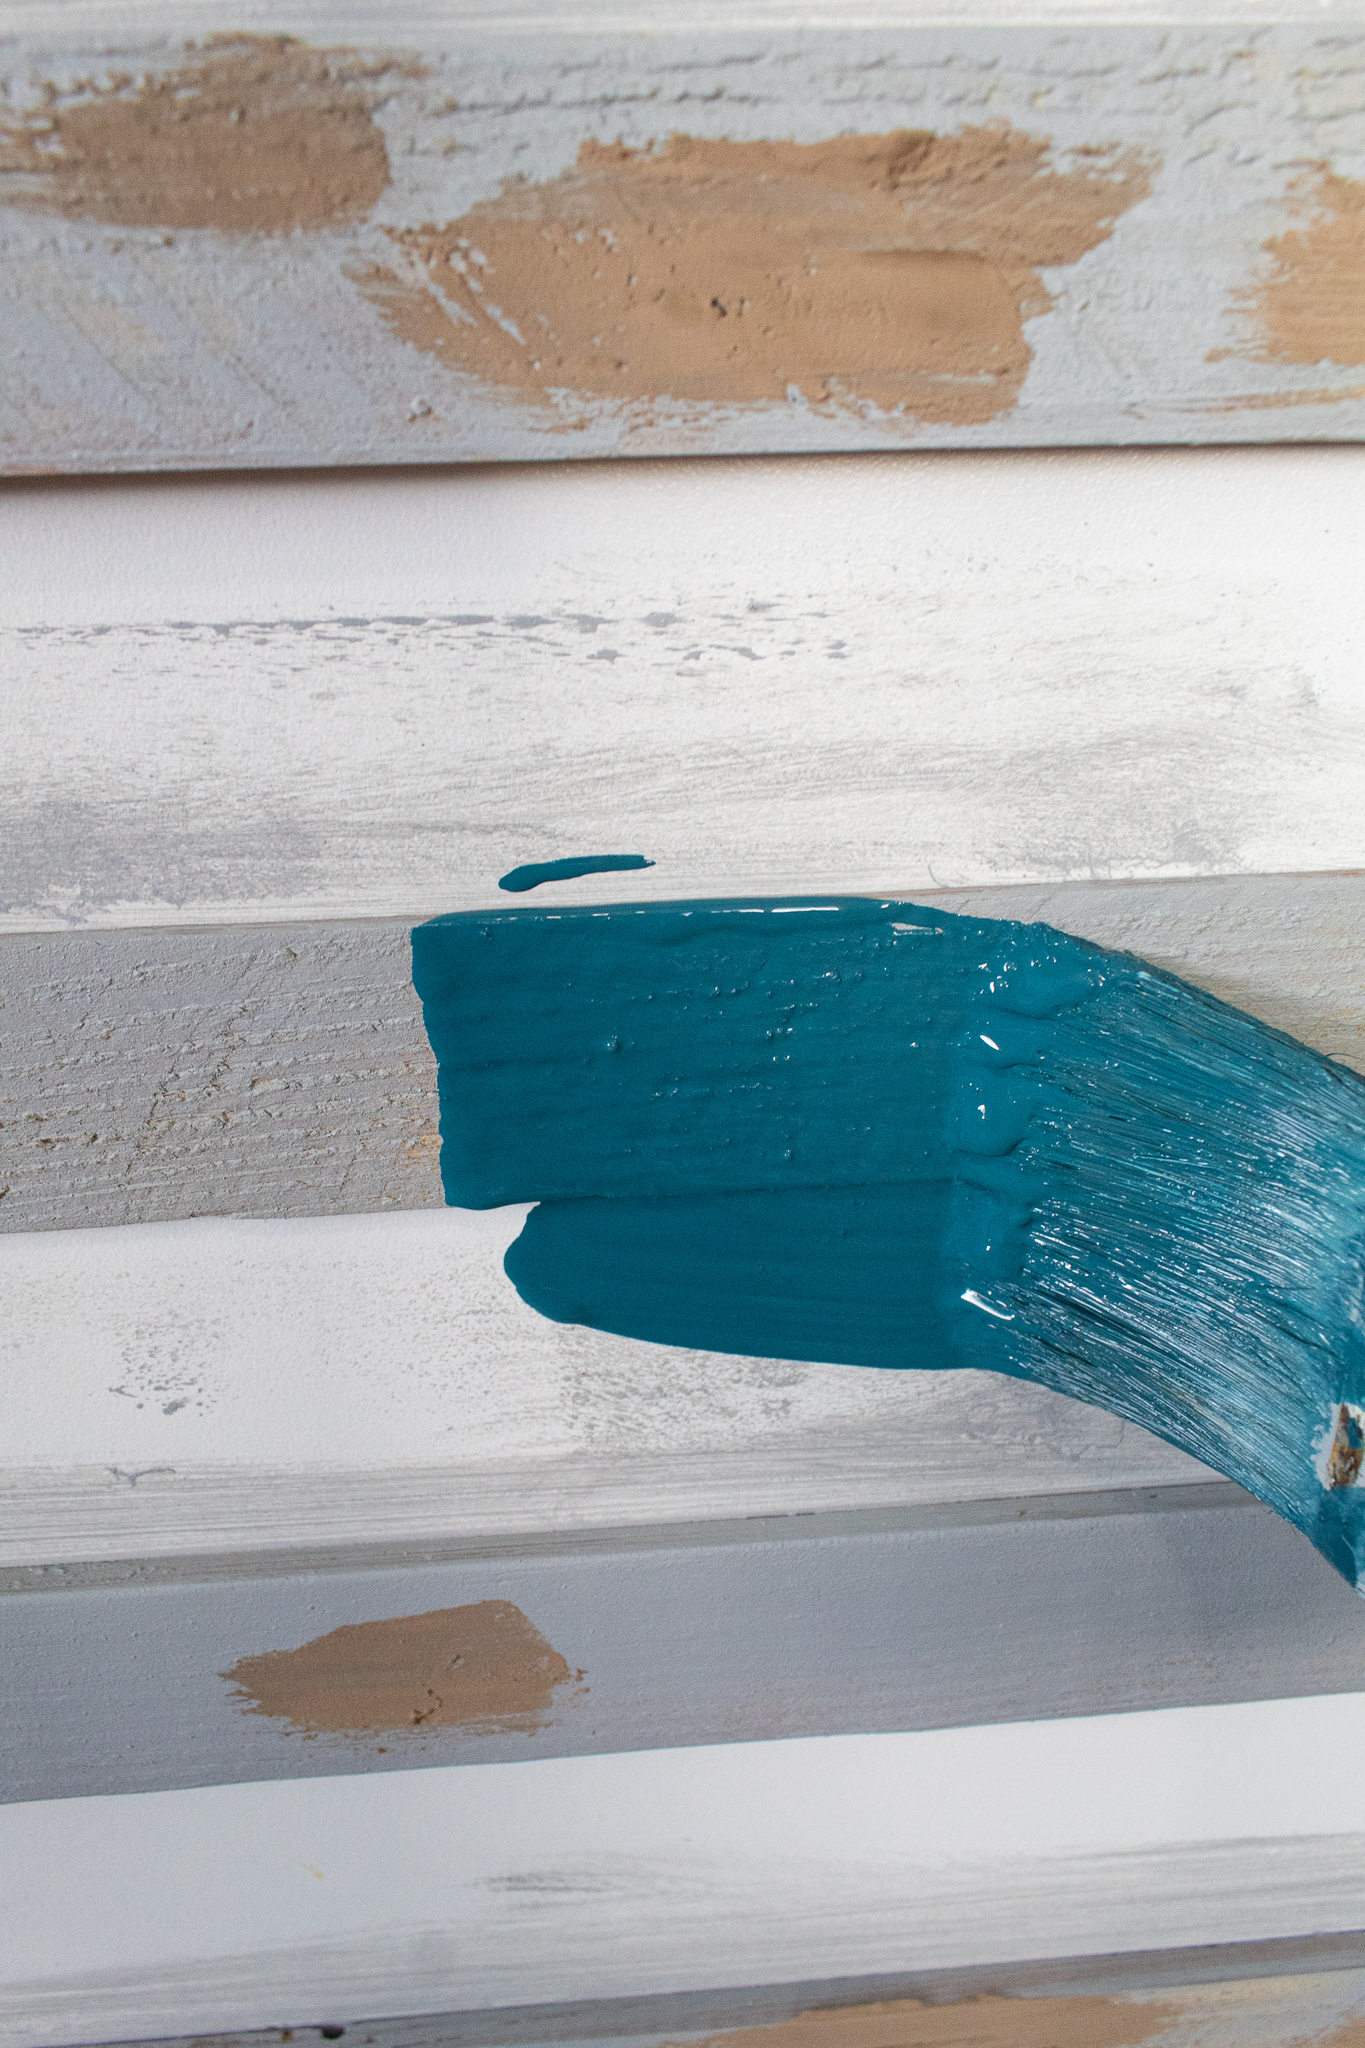
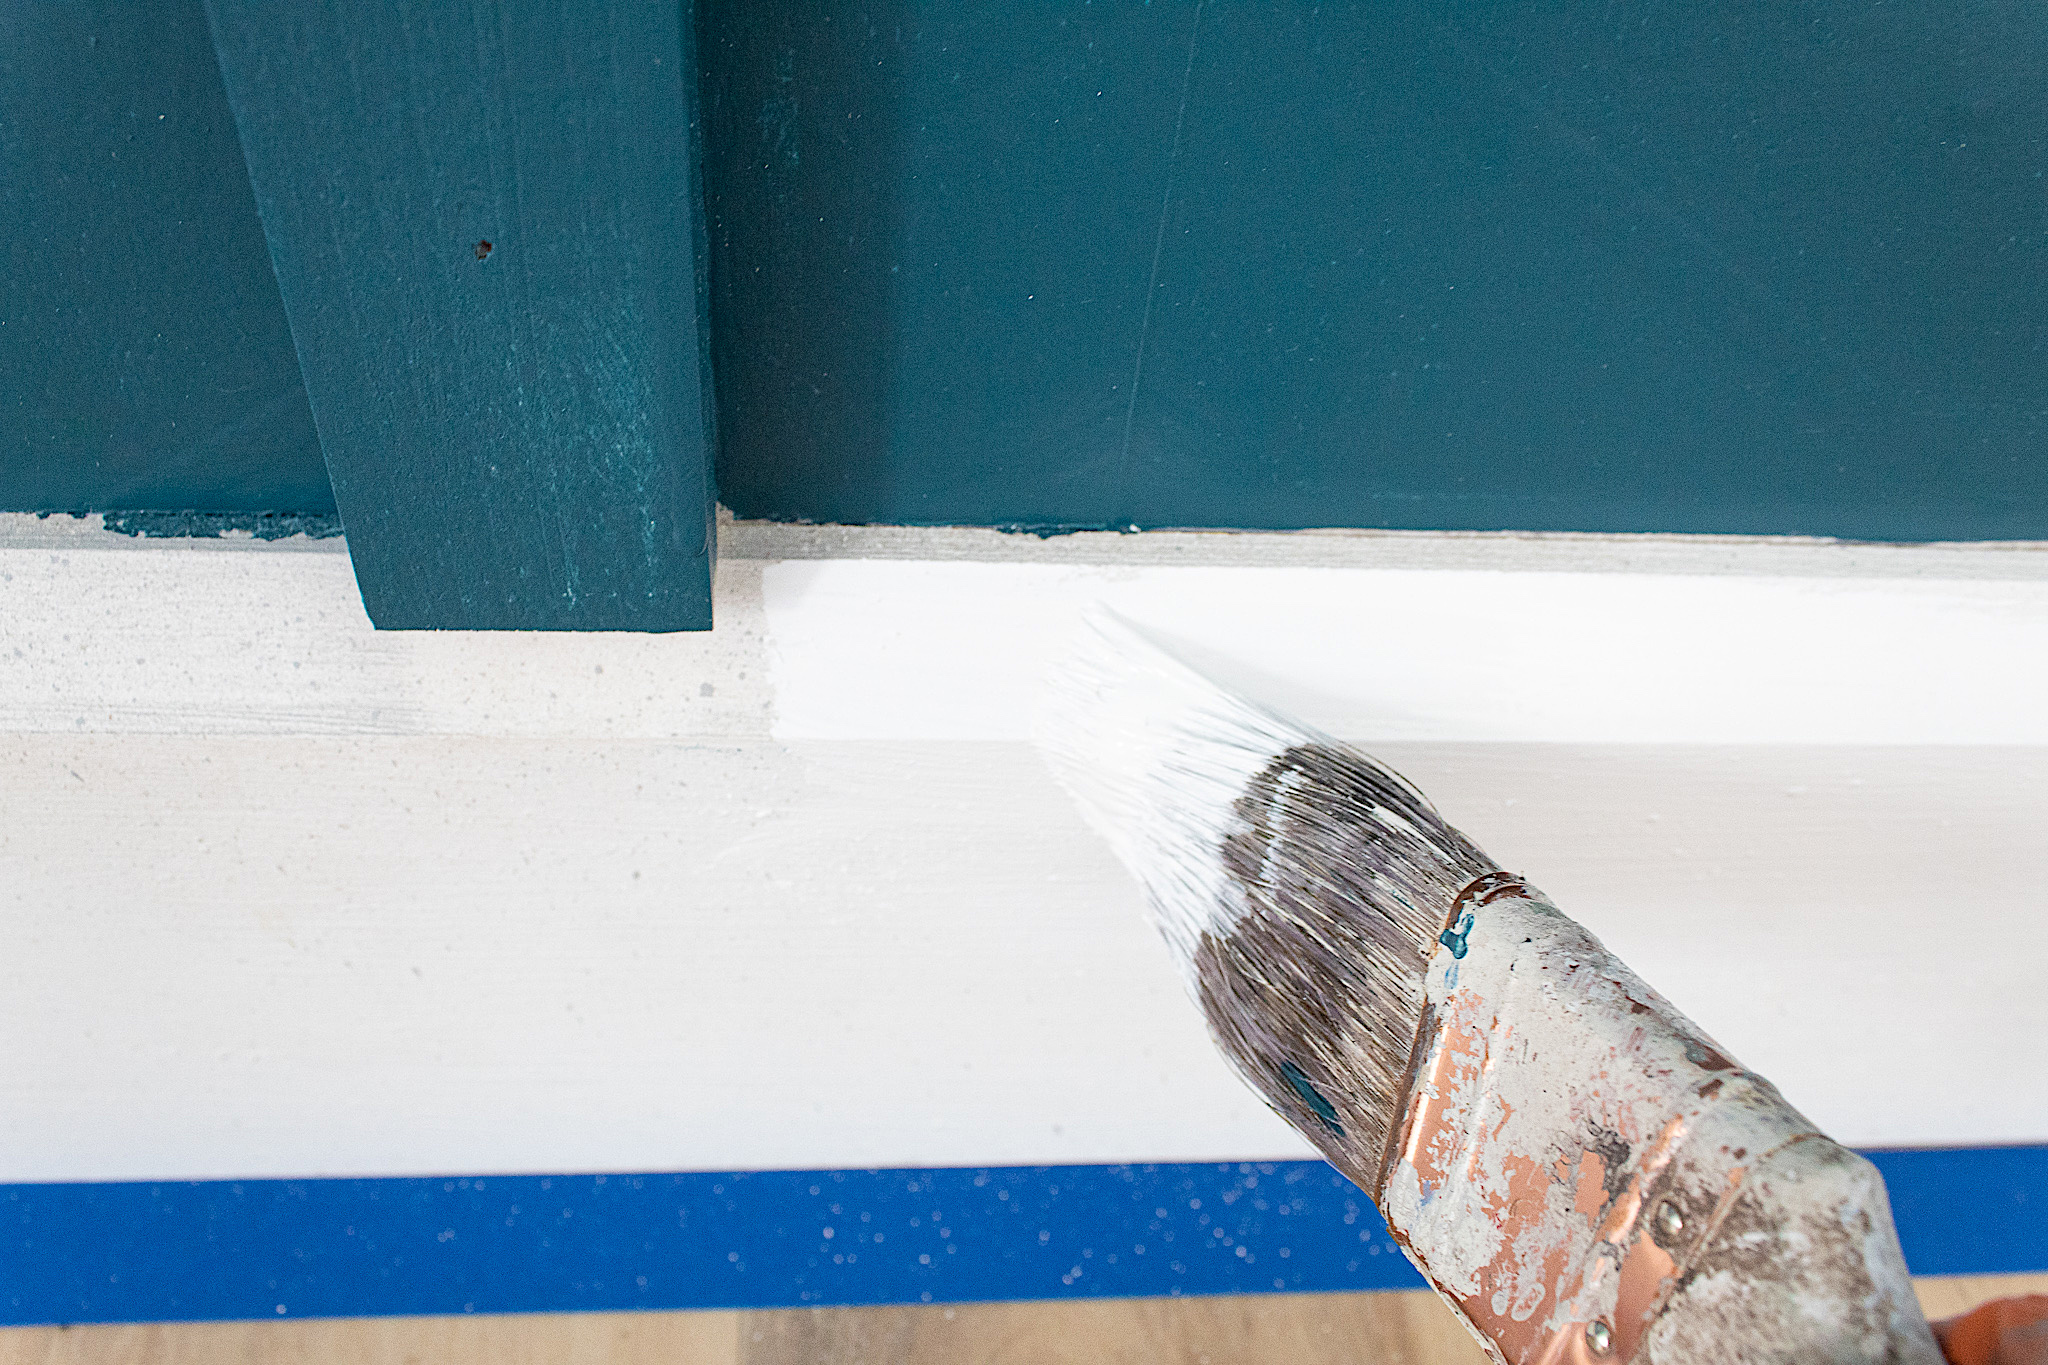
Step 4. Painting
I used wood filler to fill in my nail holes. Once dried I sanded down the filler. Then I primed and painted my newly trimmed surface.
The paint made everything come together magically. I even touched up the baseboards to make the teal paint pop even more.
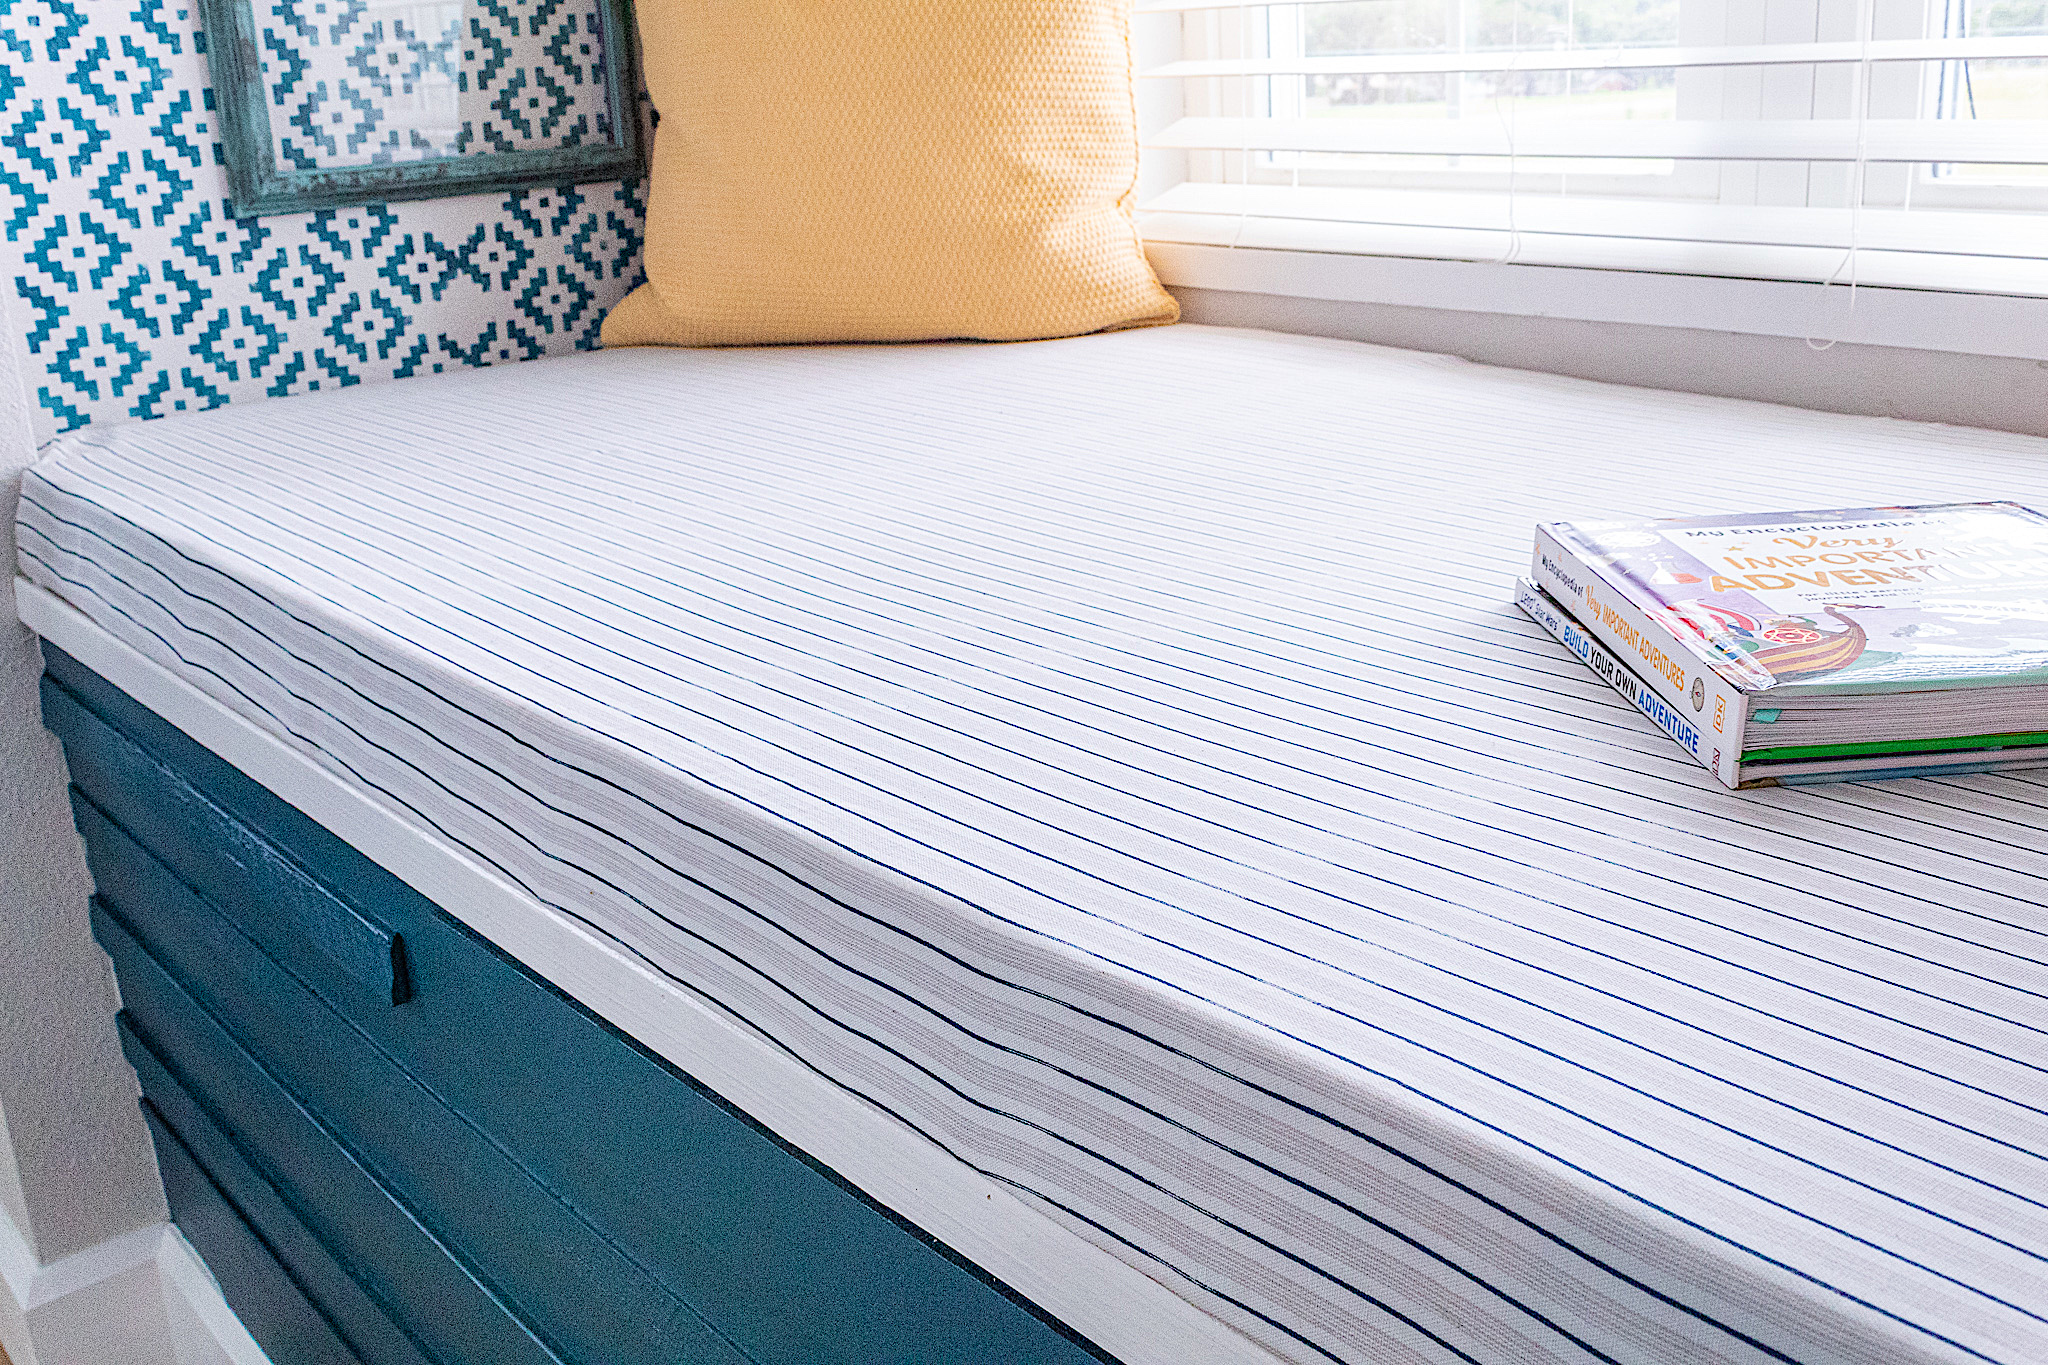
Updating the seat cushion
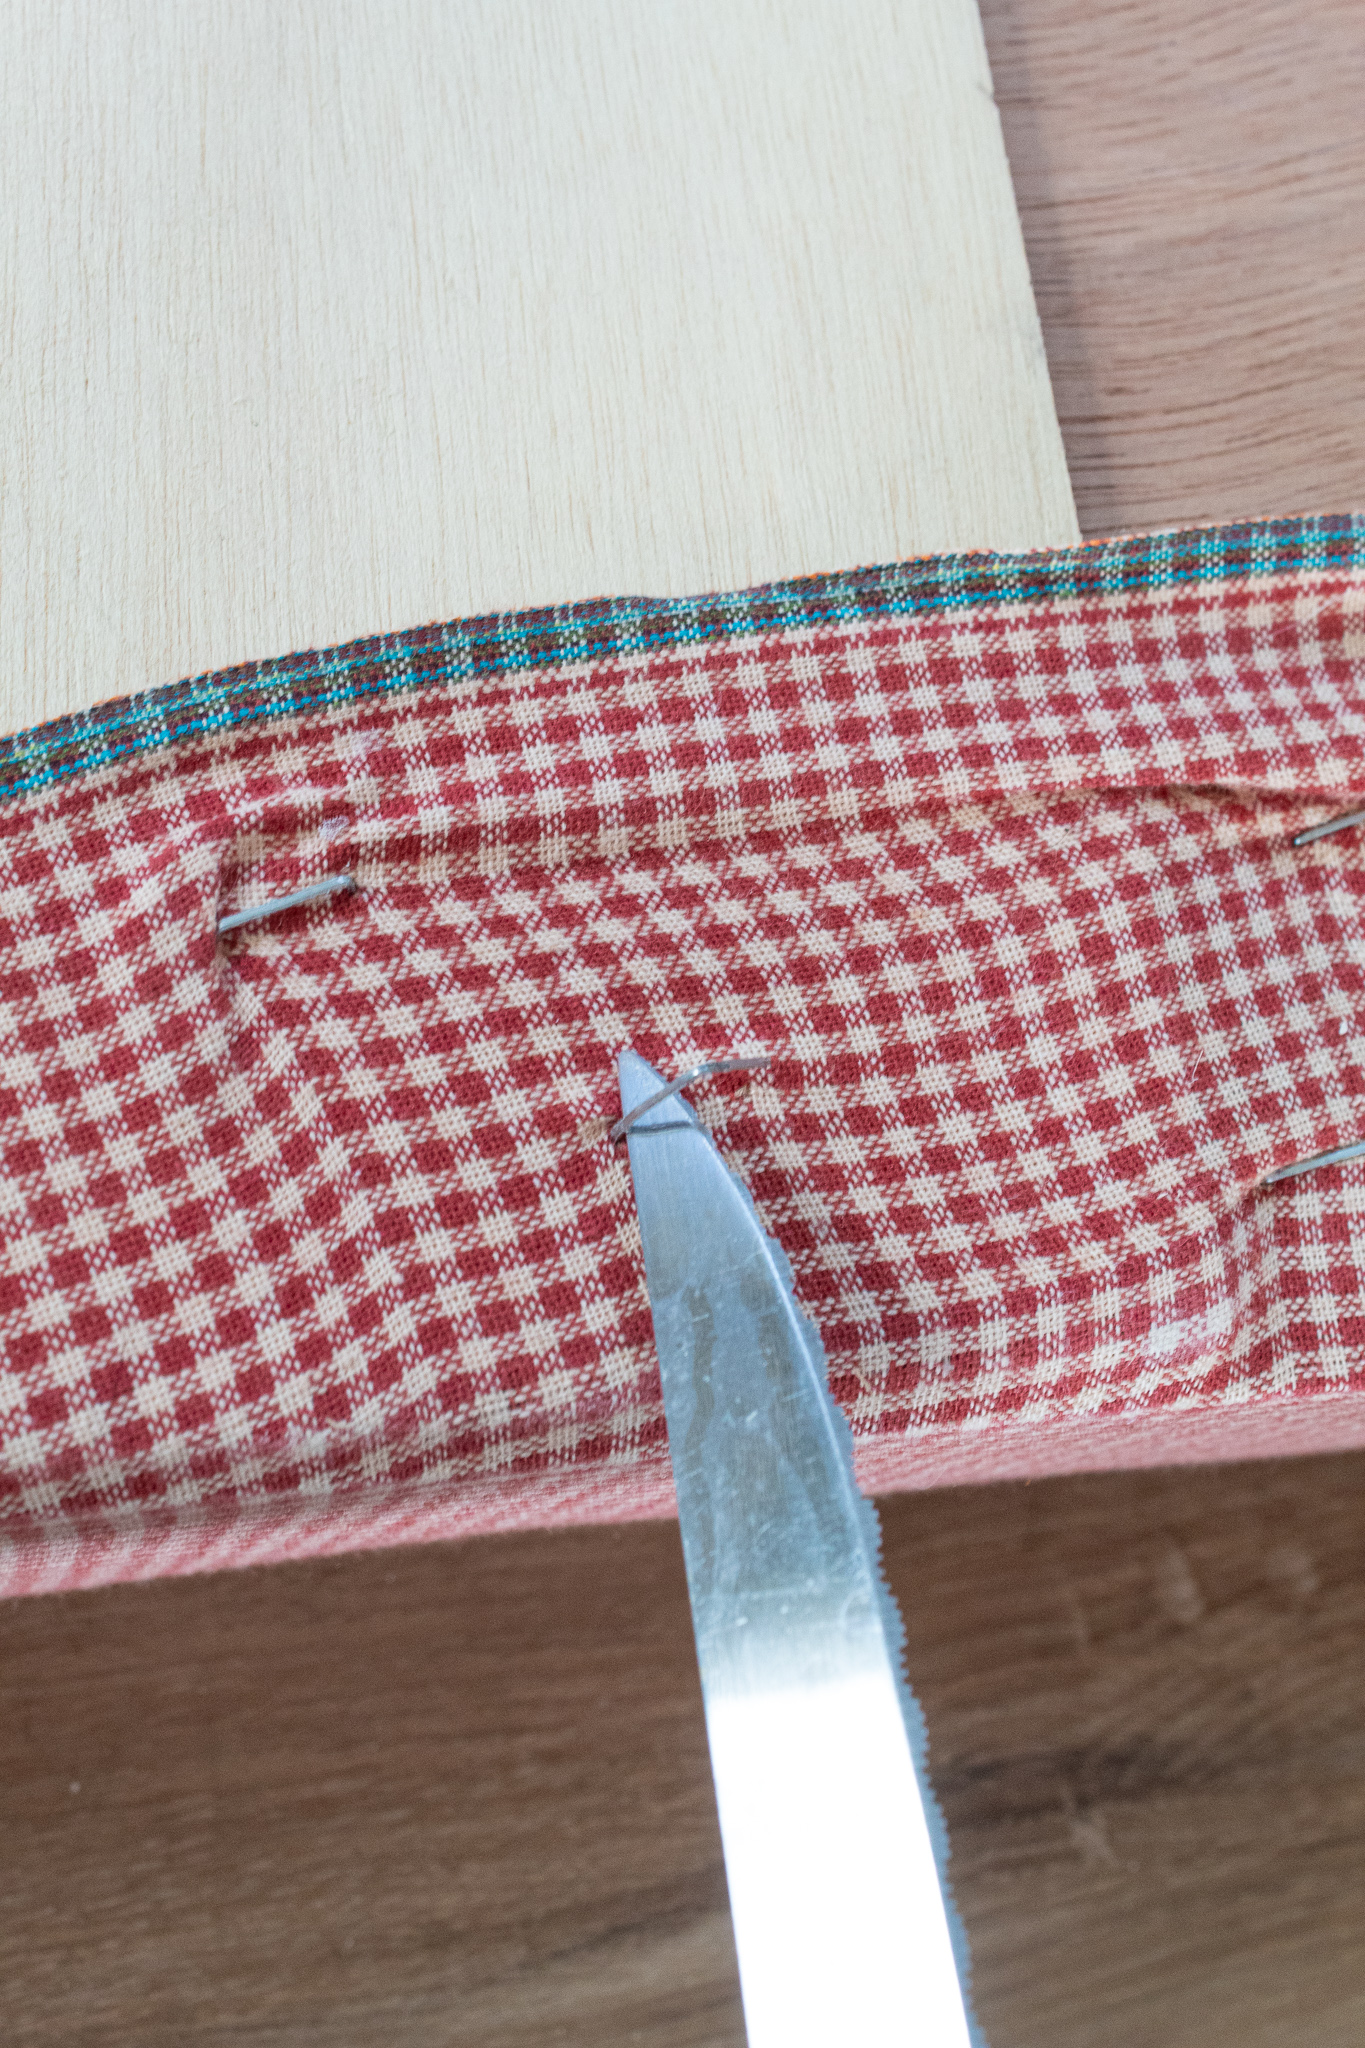
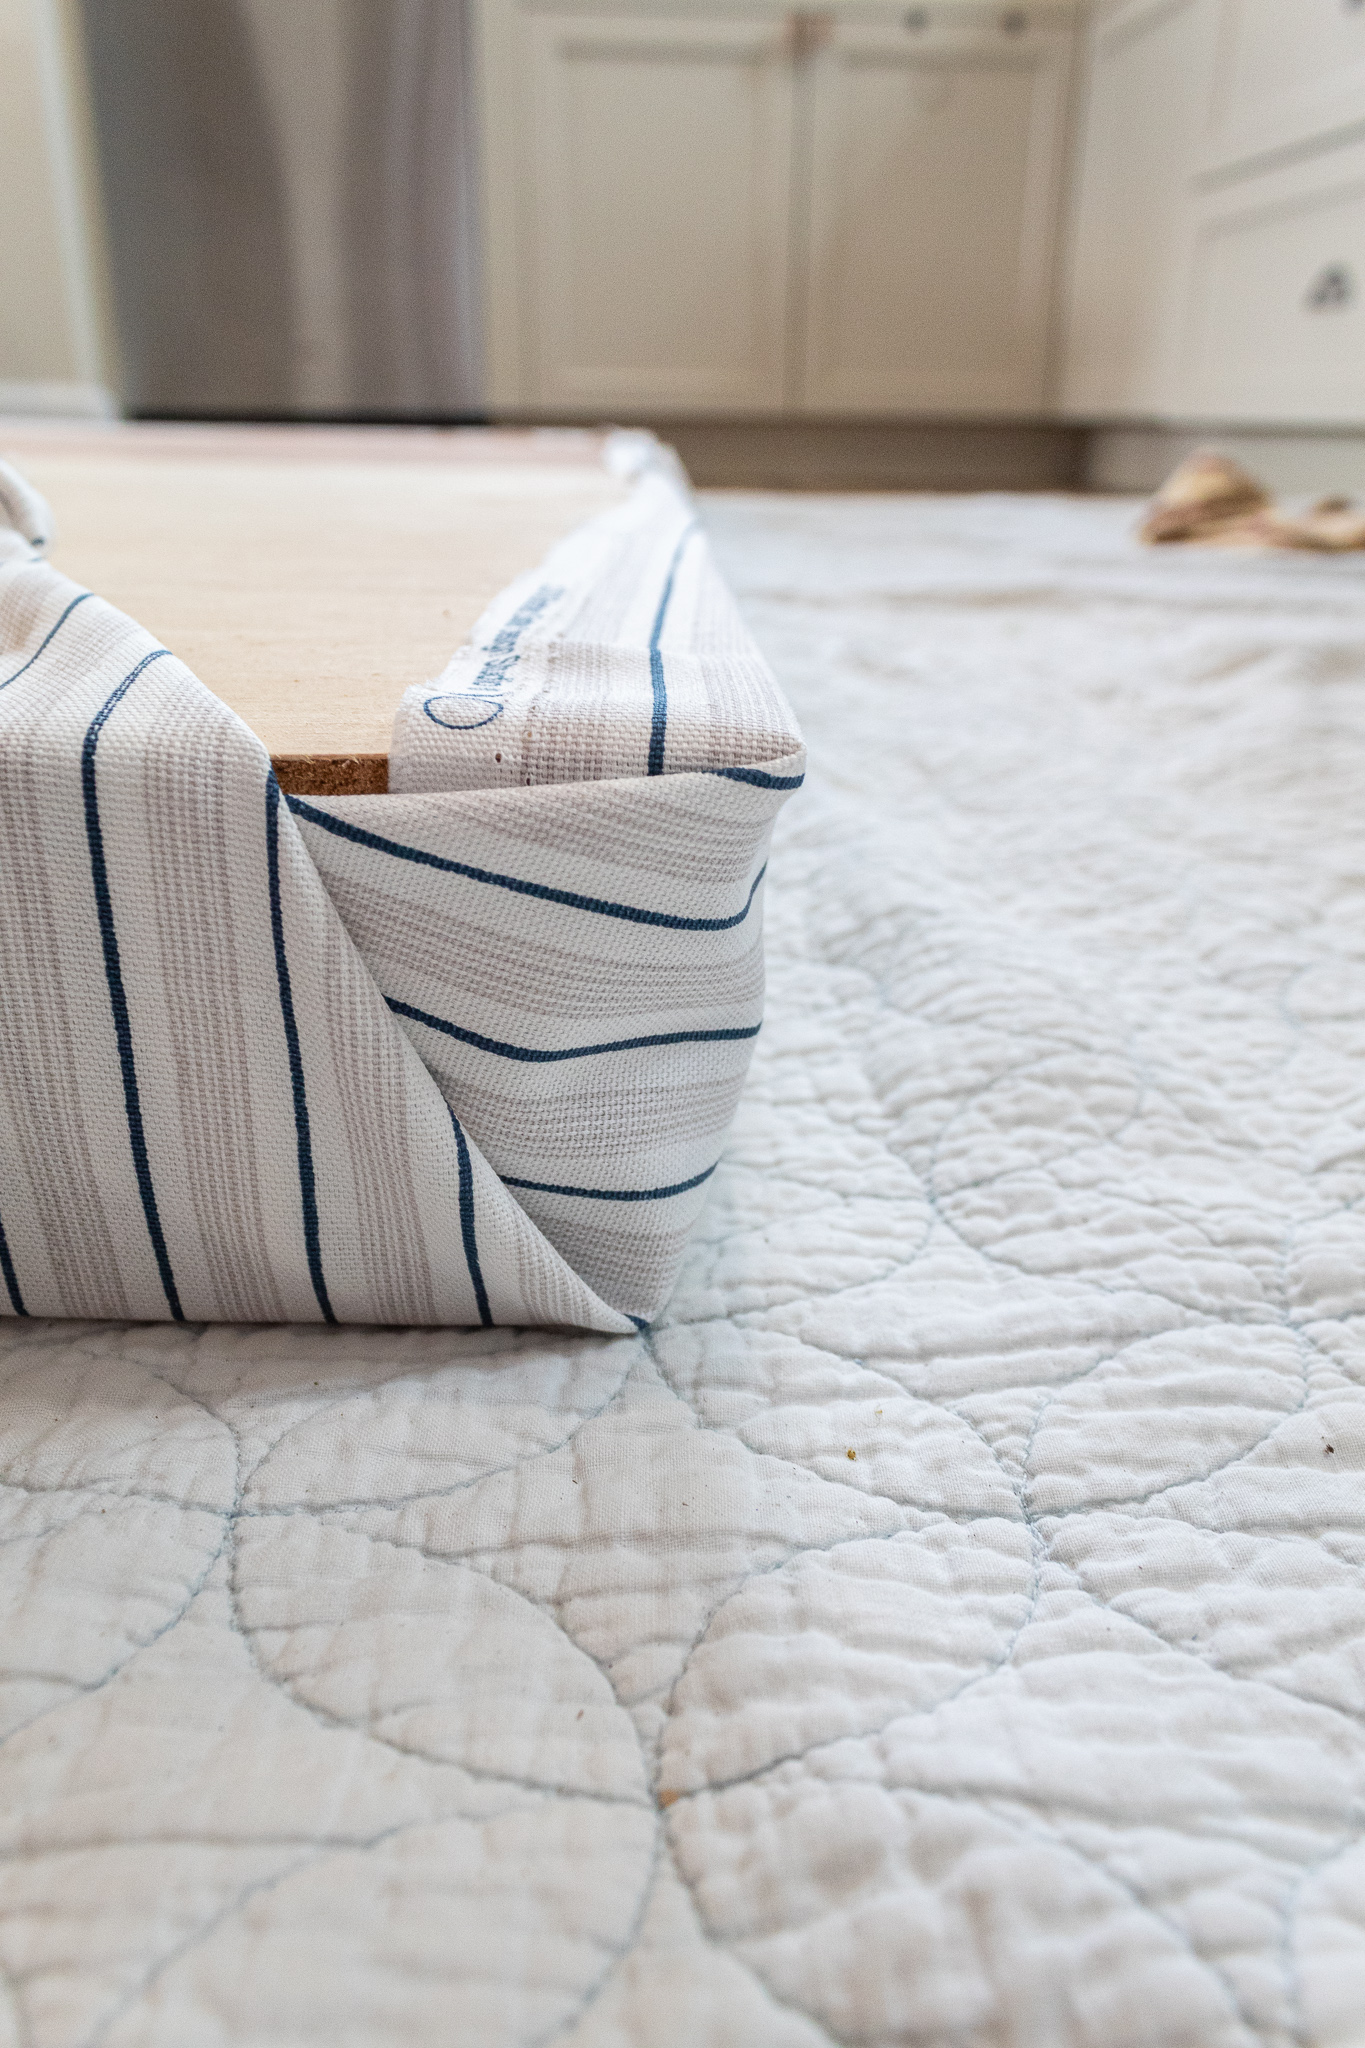
Another thing I did to freshen up the window seat was to reupholster the seat cushion. I removed the old fabric from the cushion using a pointy kitchen knife. Carefully sliding the knife under each staple, I wiggled them all out one by one.
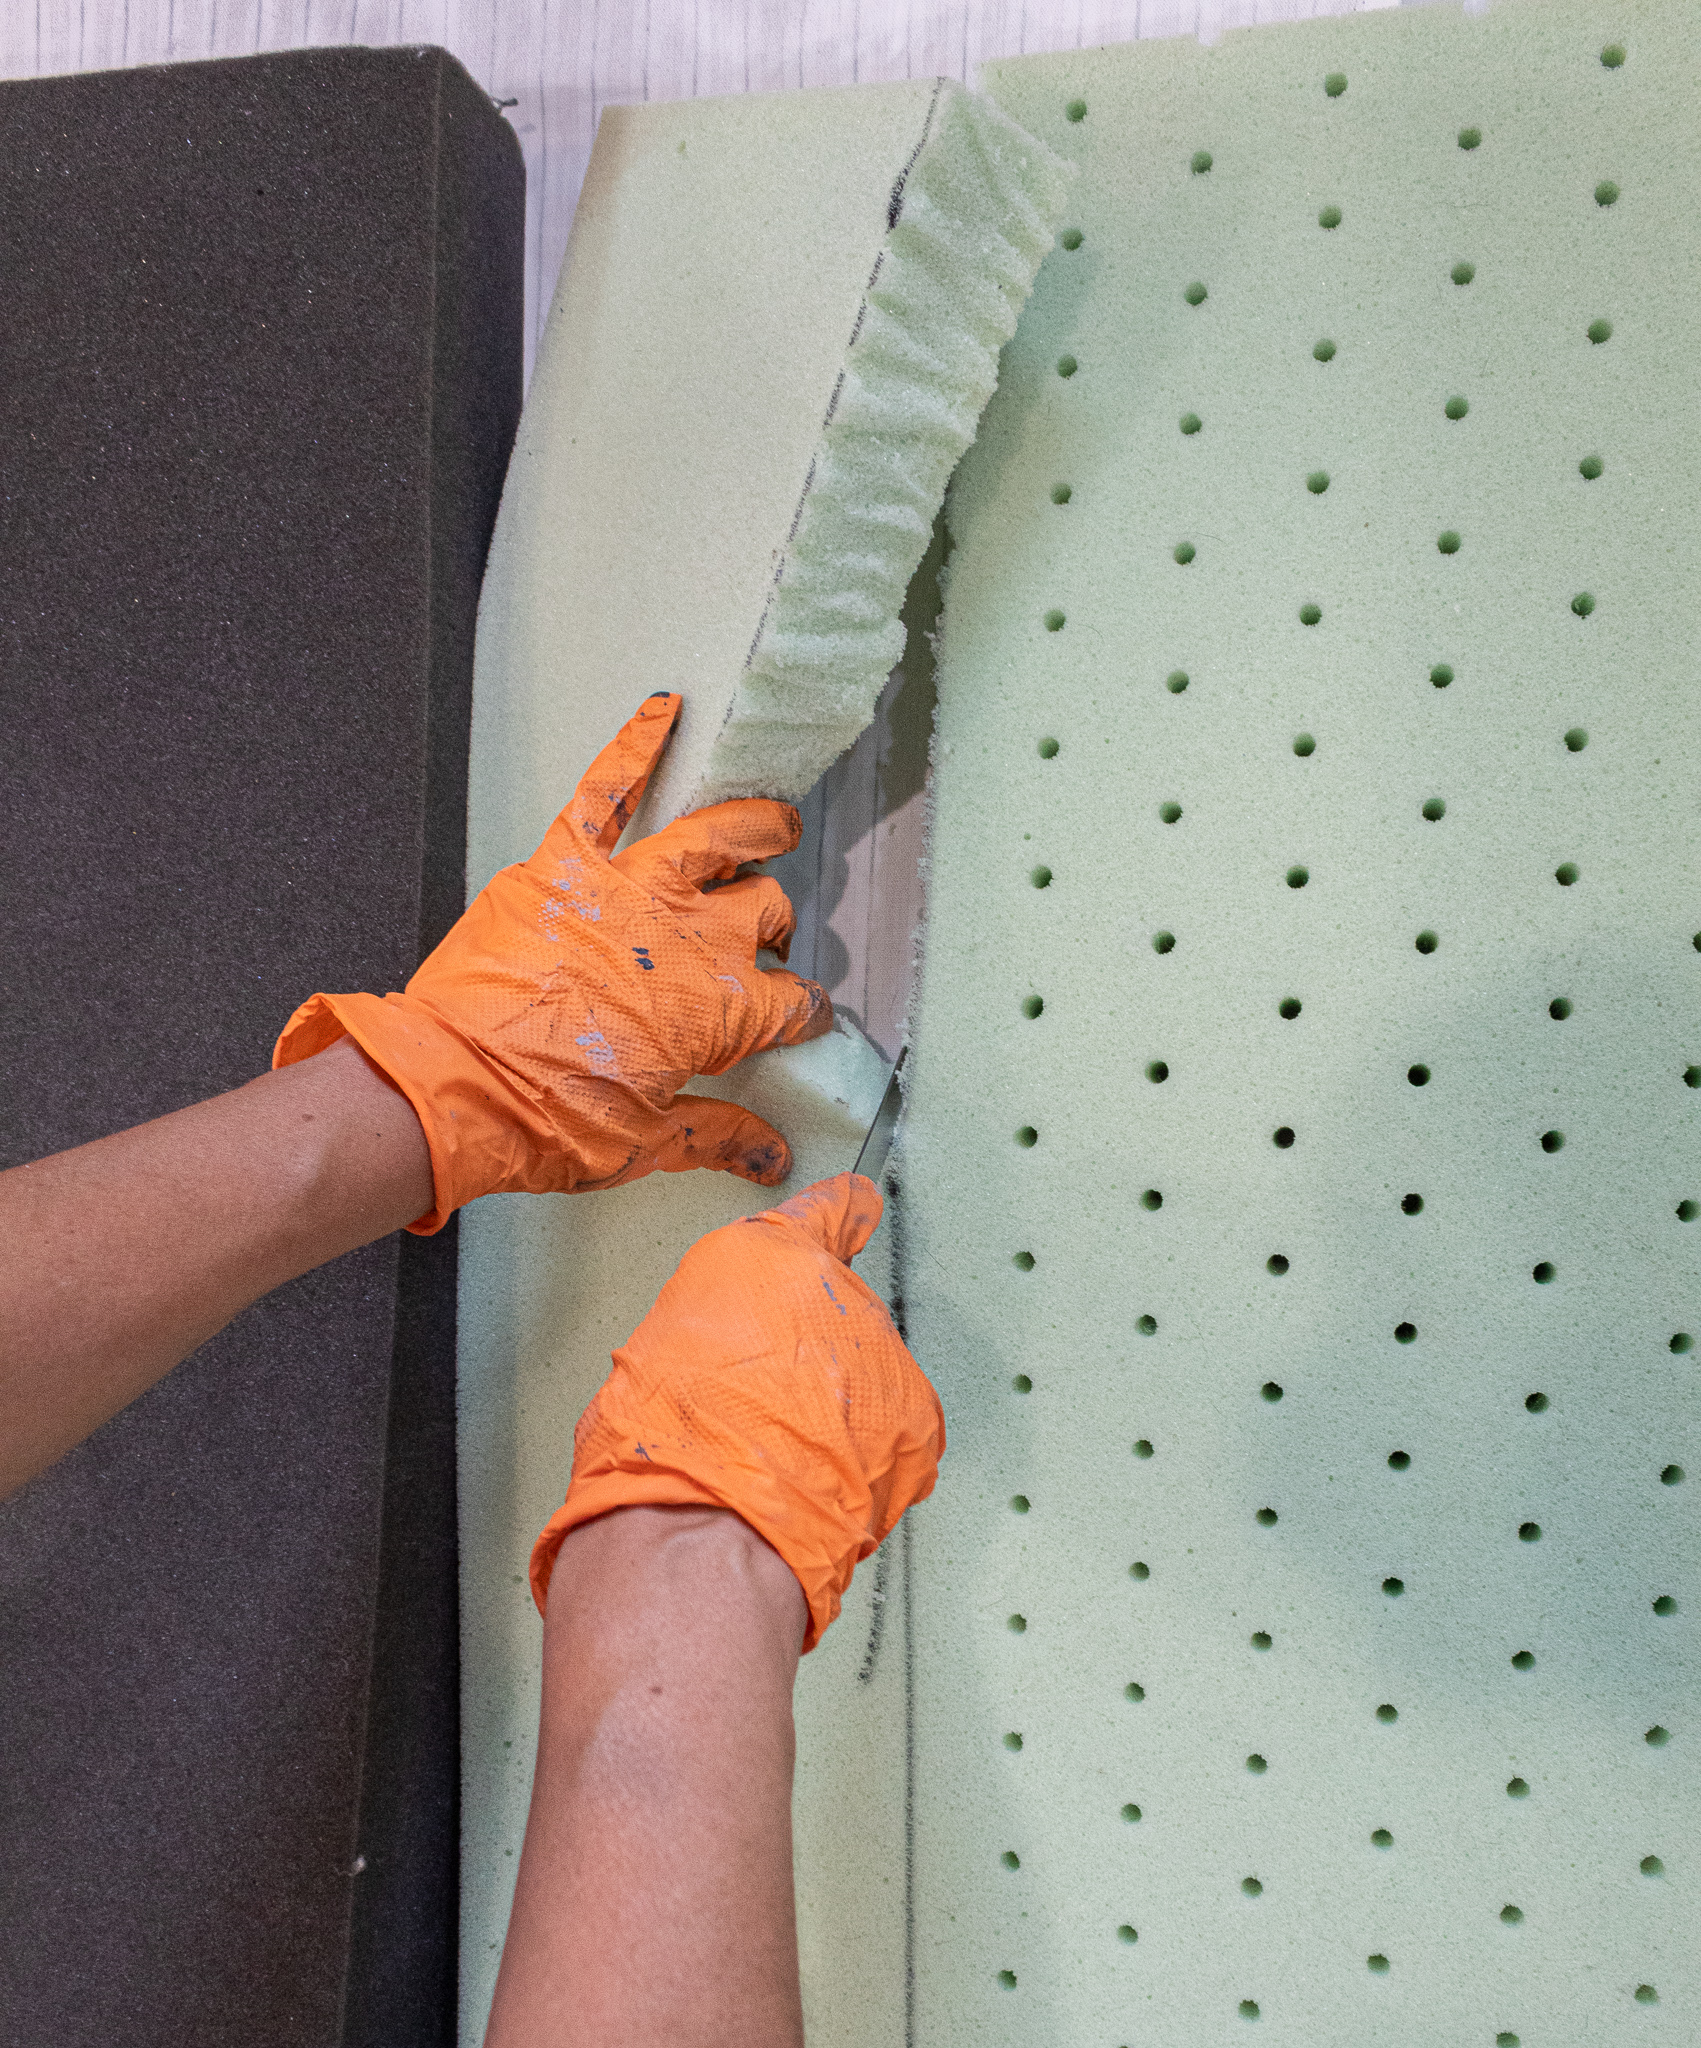
I needed to extra foam pieces to fill in some previous gaps. Using a sharpie to mark my cutting line, I cut my foam with a kitchen steak knife. I’m sure there are more sophisticated tools for doing this, but this is what always works for me.
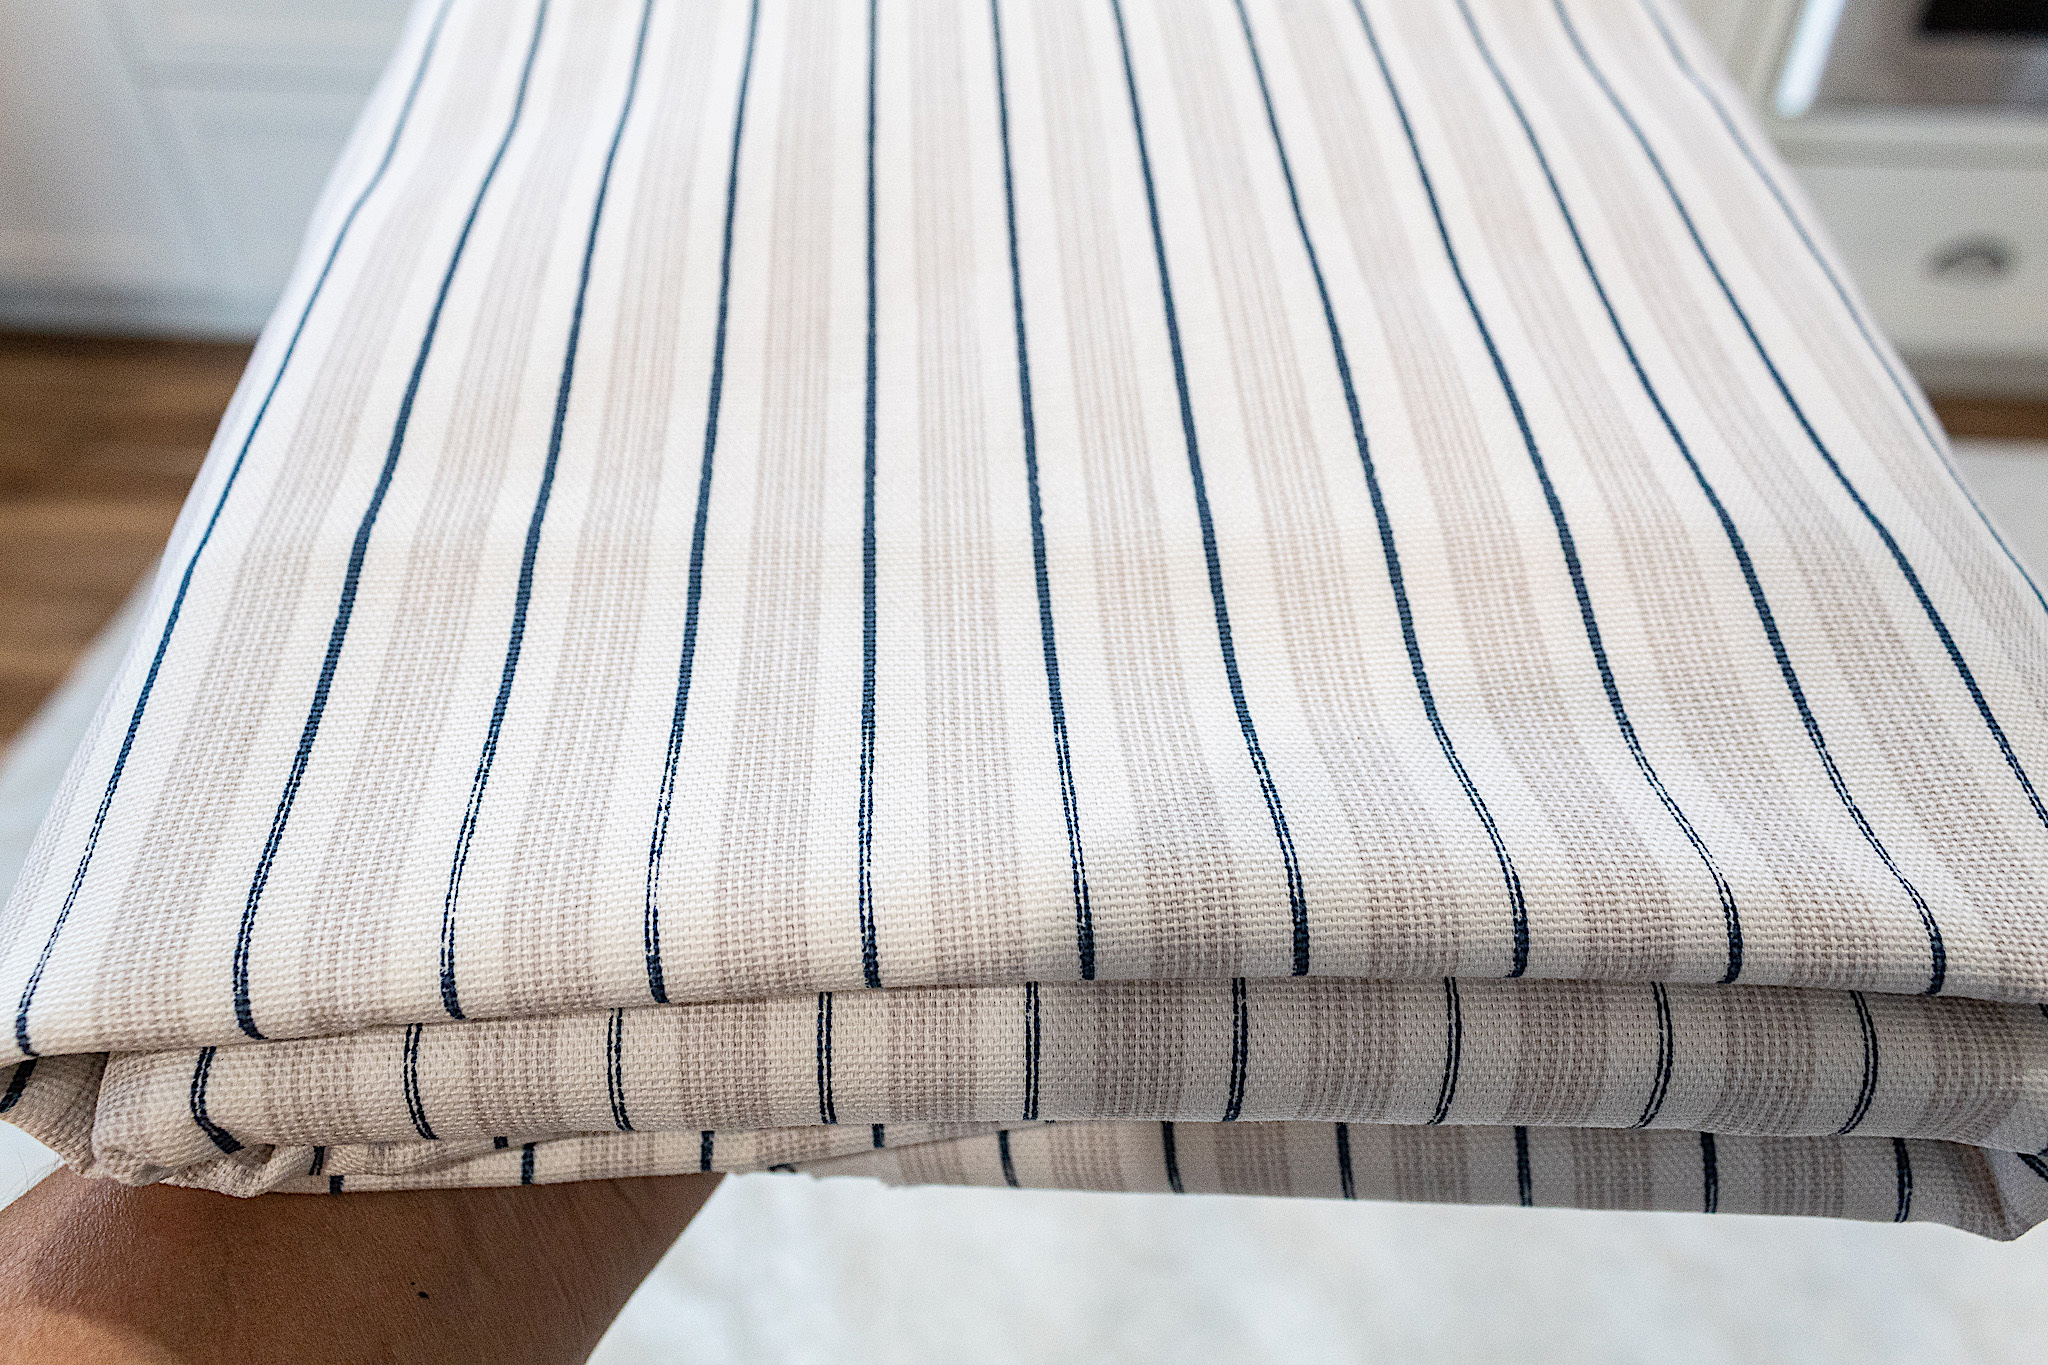
I bought a pretty fabric from Hobby Lobby with print that would match the new modern vibe in the room. The store attendants are always so kind in helping me figure out how many yards I will need for my project.
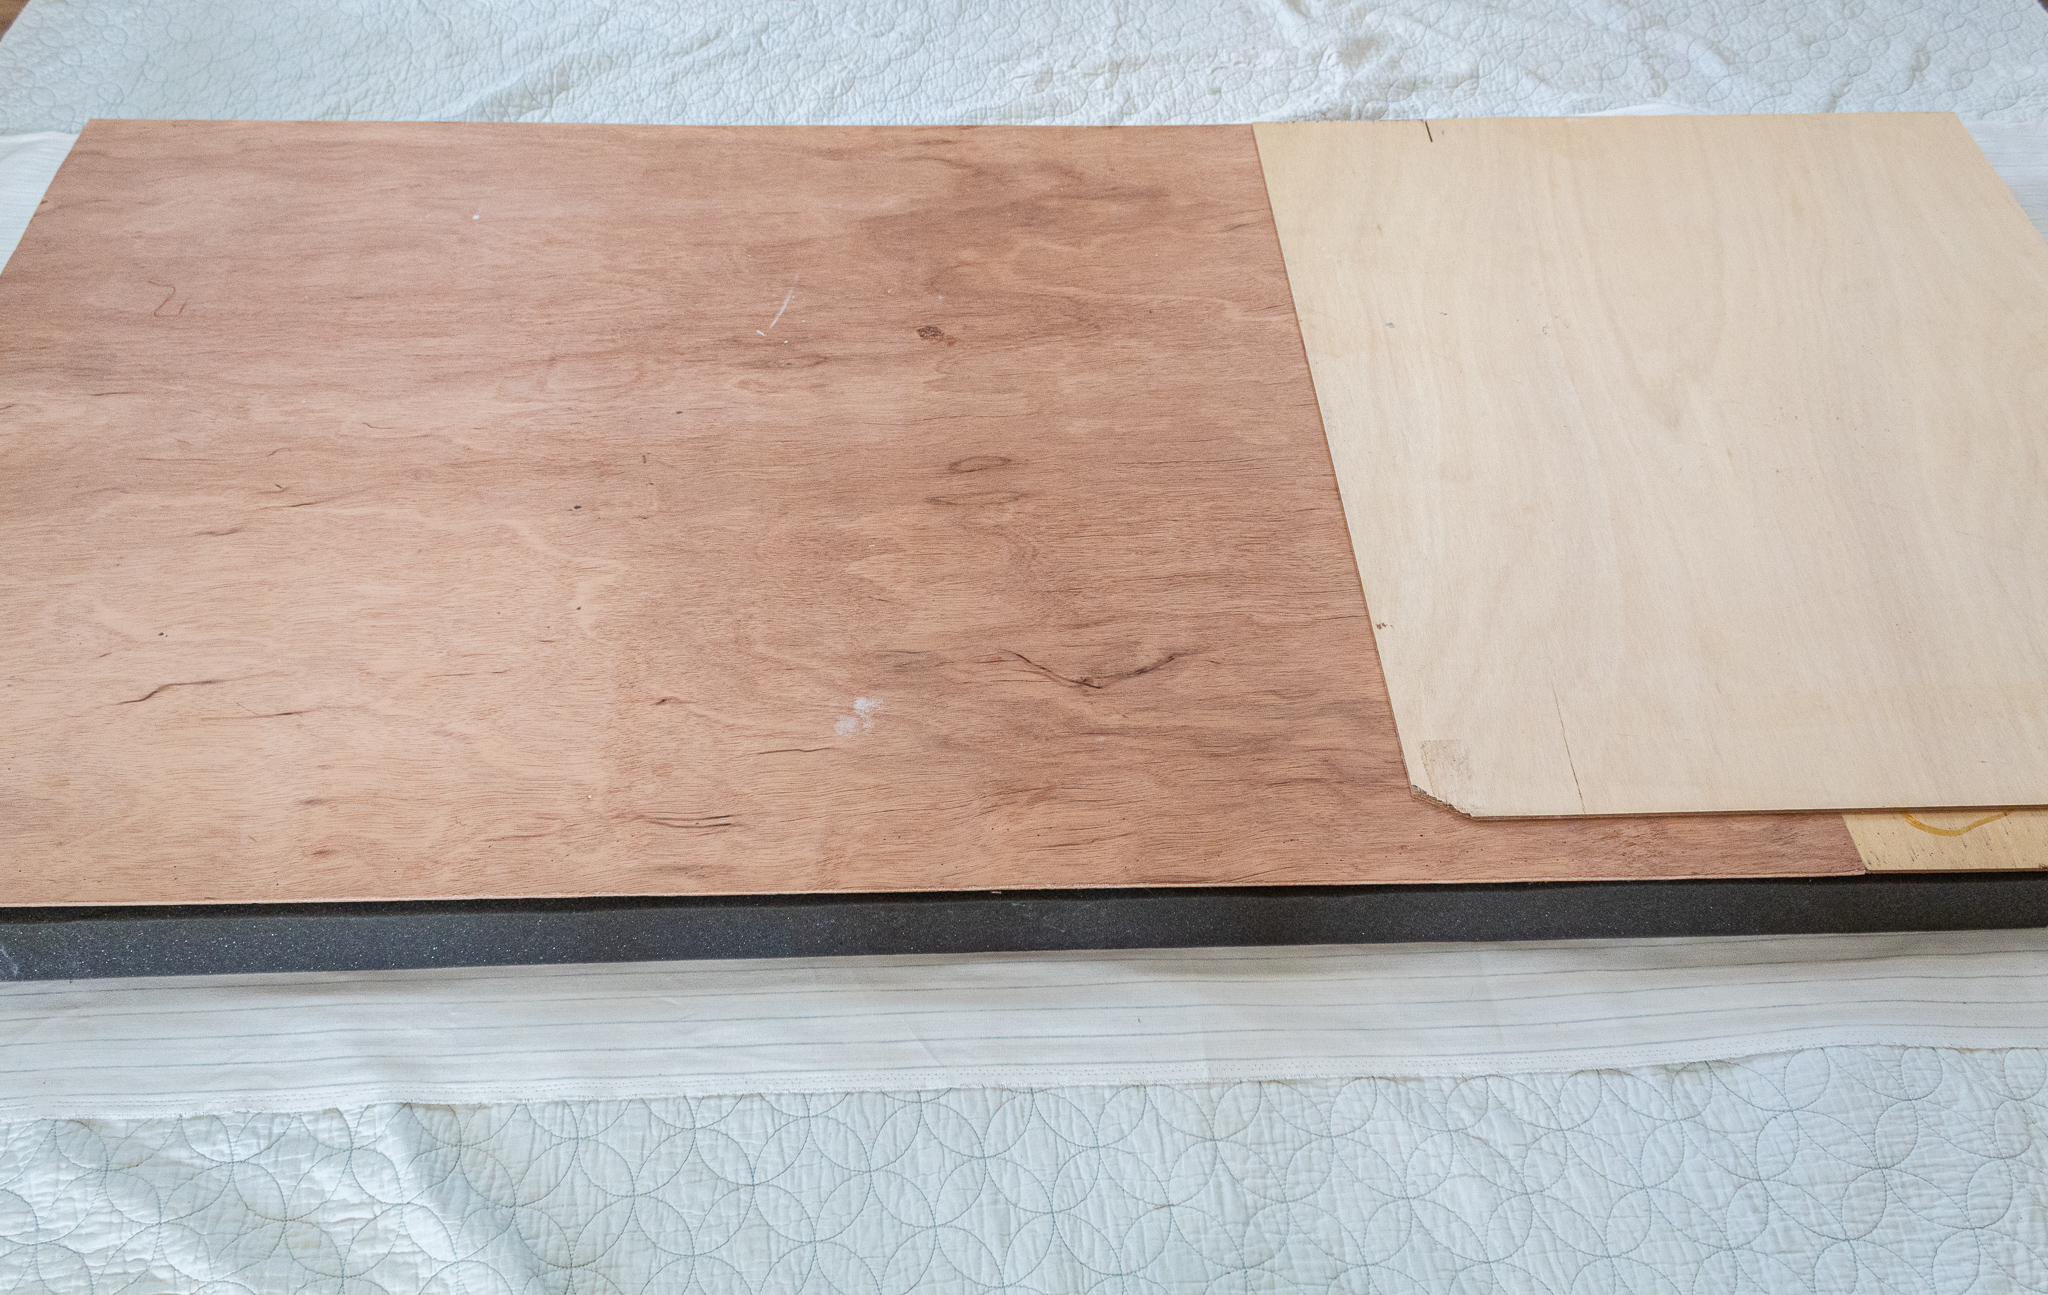
My husband had made the wood backing for the cushion when we first built the window seat. Cut your foam to be flush or just a tad bigger than your backing.
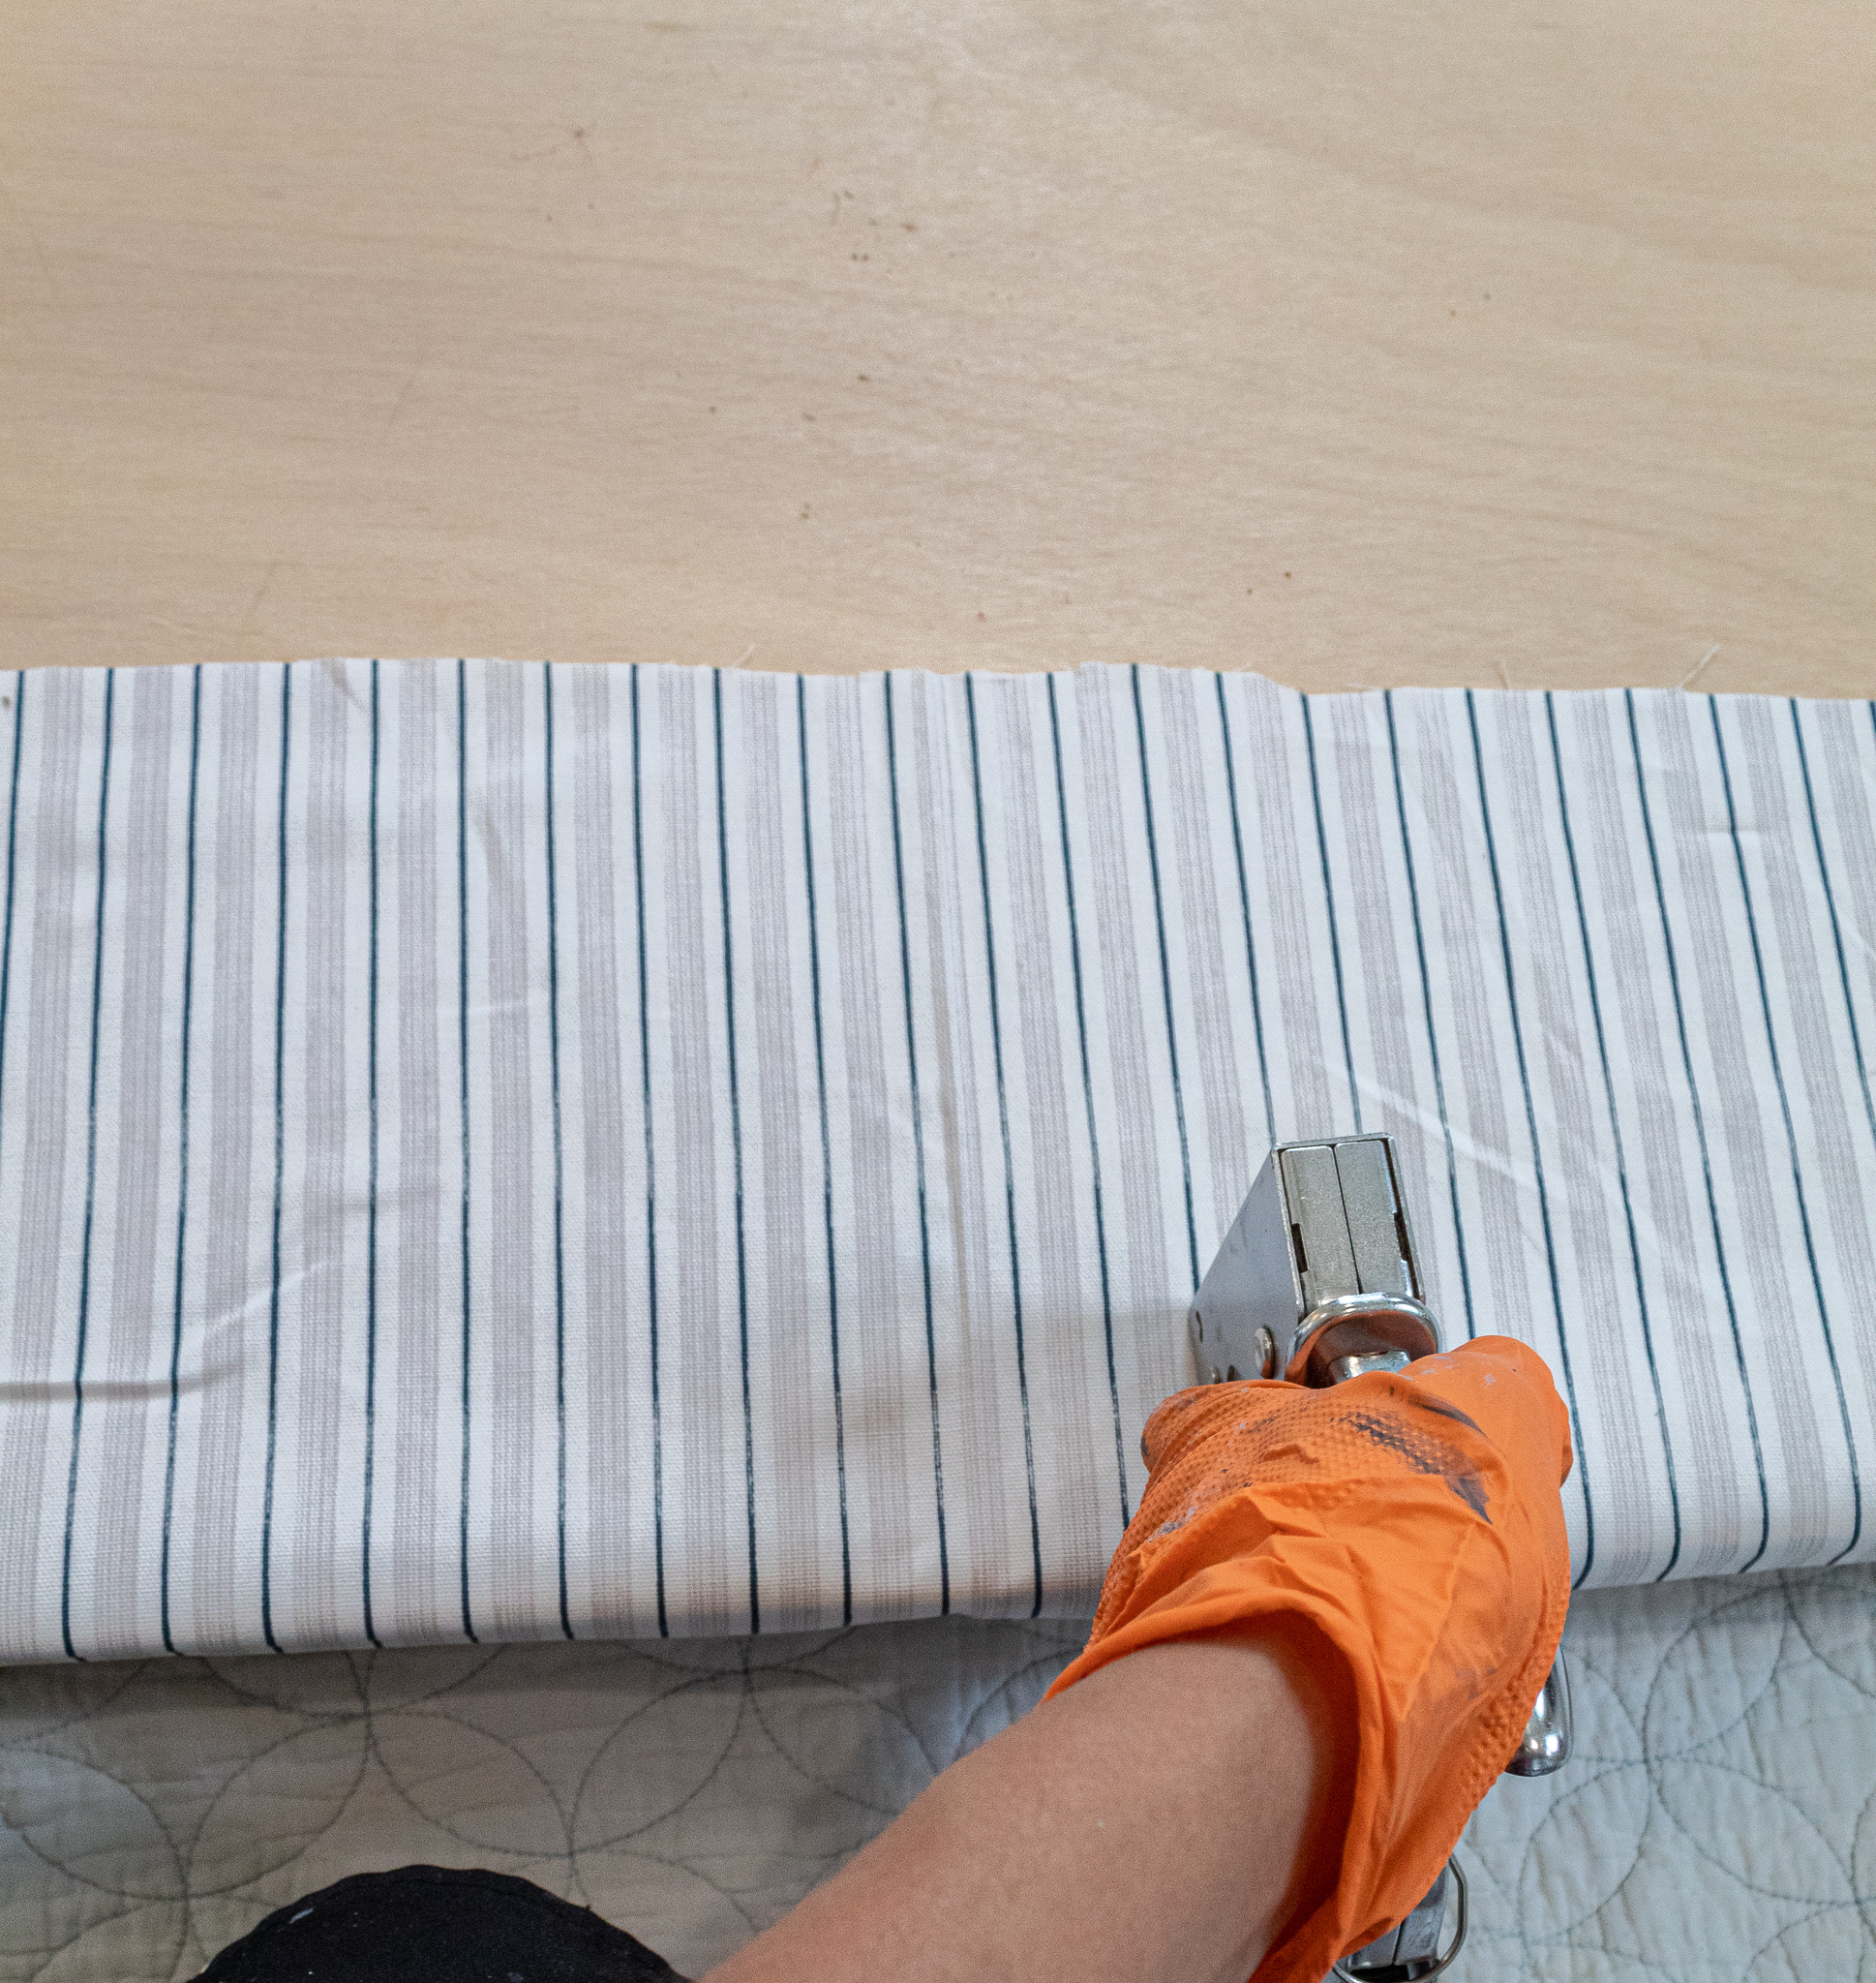
I like to lay the cushion centered on top of my fabric for stapling. I go around the cushion with my staple gun tugging on the fabric but not too tightly, just enough to get a nice, smooth fit.
Around corners I fold my fabric like I’m wrapping a present. Once I reach the other side I occasionally lift the whole piece to make sure everything is looking good.
One thing I would recommend that I didn’t do is to add a layer of batting between your foam and fabric. This adds a layer of dimension and if you have a light colored fabric, it helps to keep the foam color from darkening the fabric.
And Now...Enjoy your new window seat!
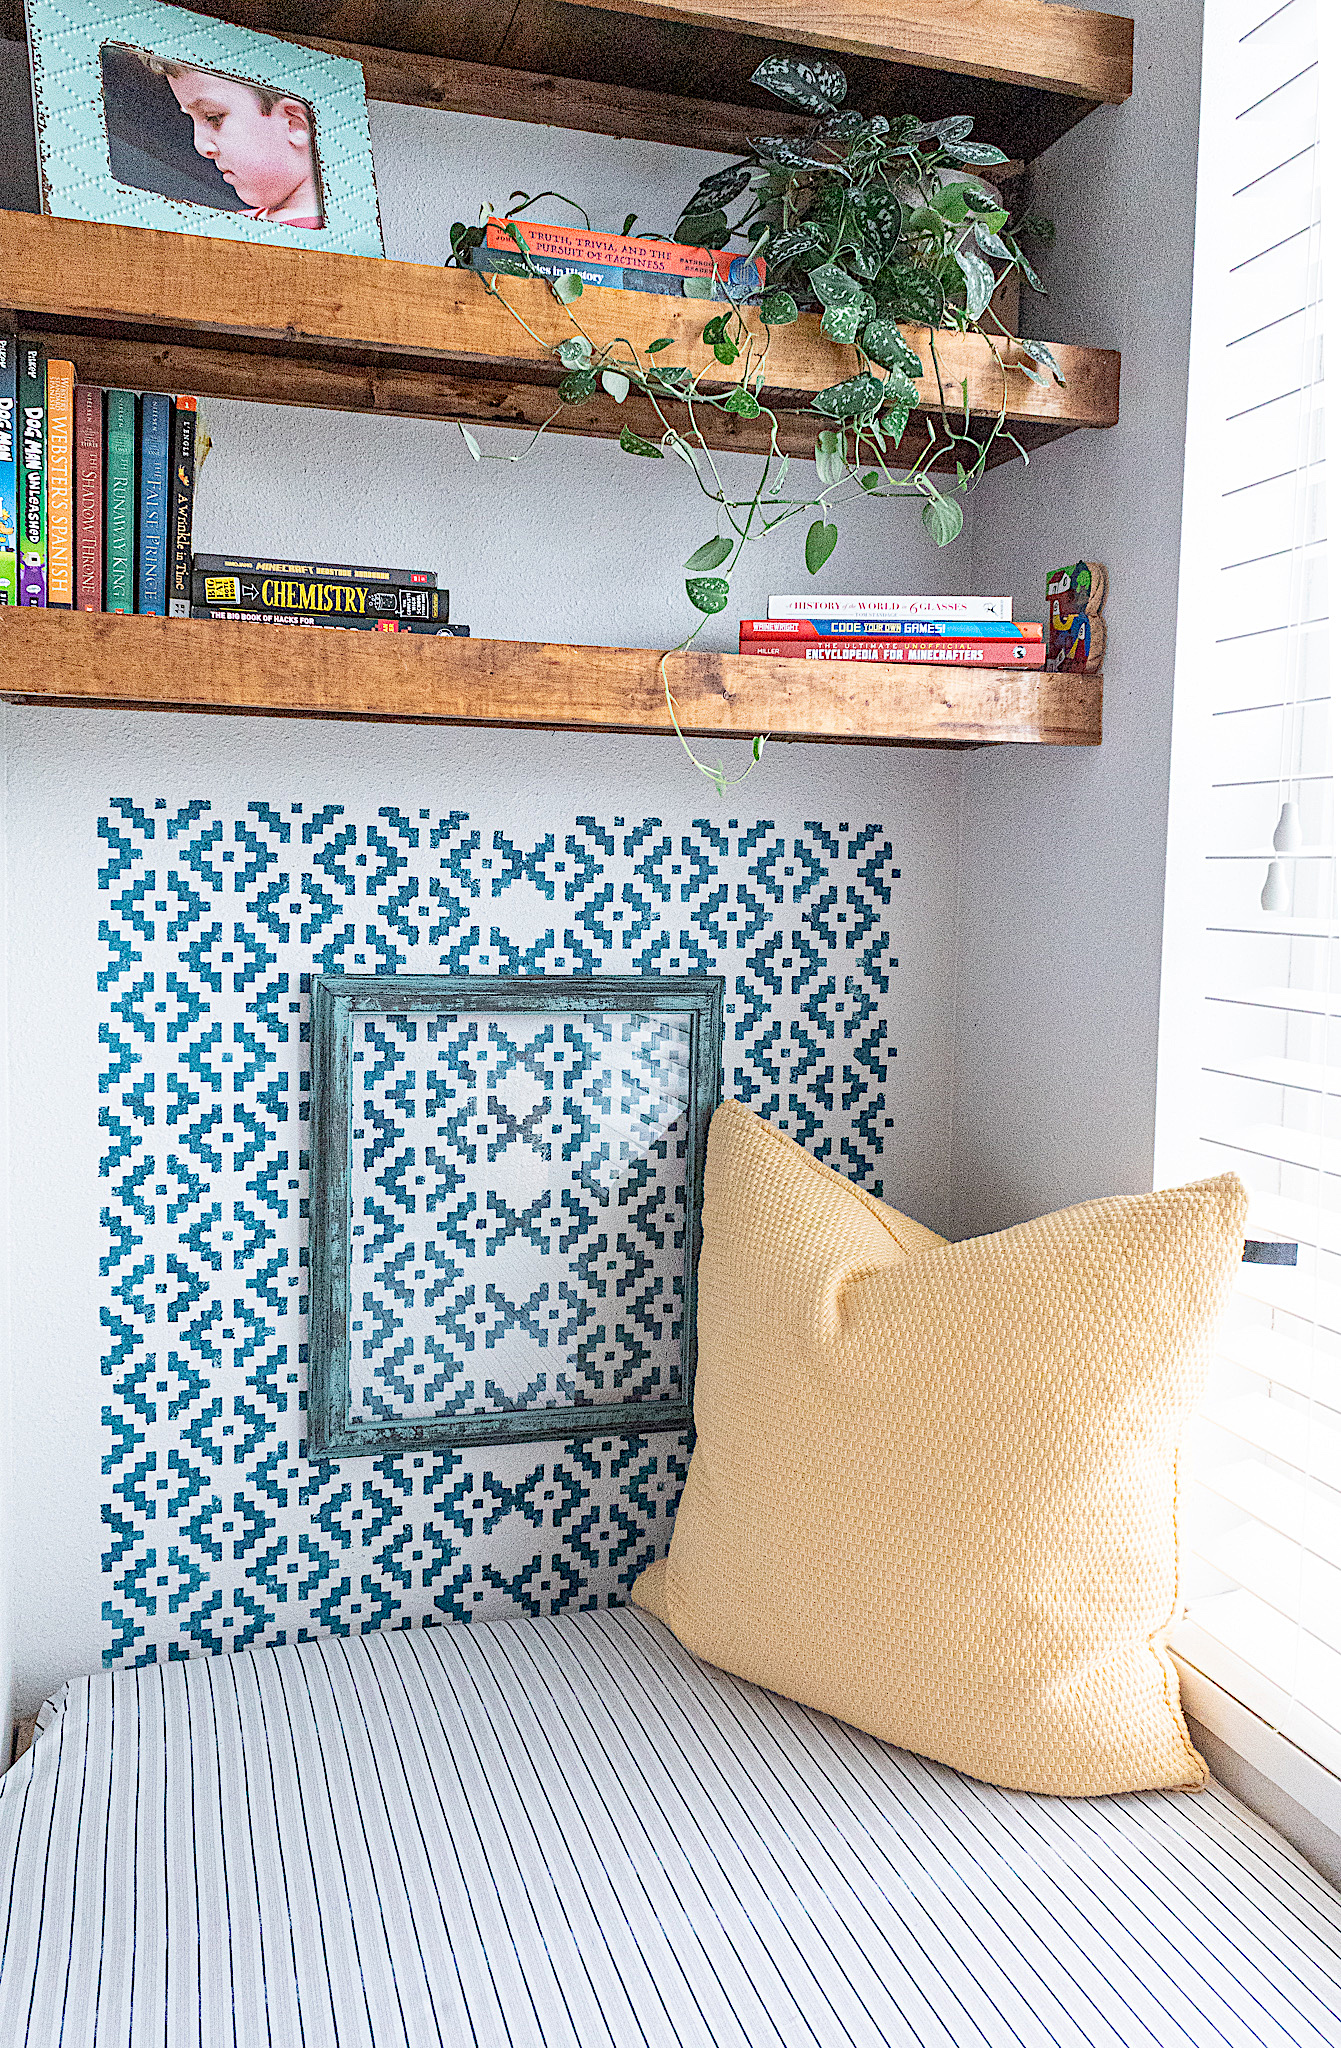
As a last minute detail I added a wall stencil to the window seat area and it turned out fabulous if I do say so myself! If you’d like to see how quick and easy the stenciling was, check out my Stencil Wall Decor tutorial.
Sweet readers, thank you for stopping by! Let me know if you liked this tutorial by leaving a comment. I always love hearing from you!