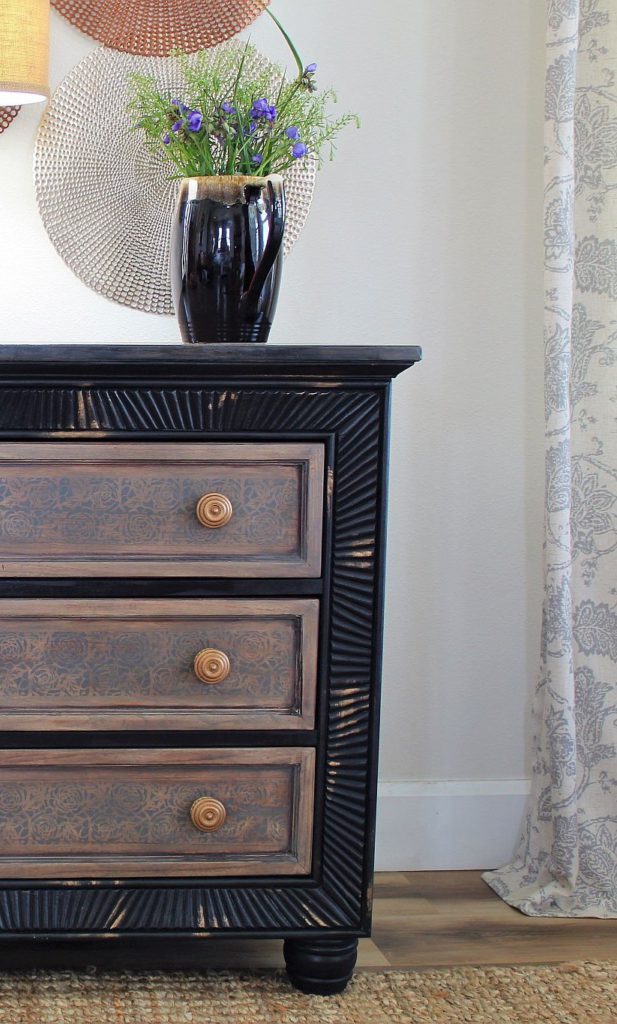
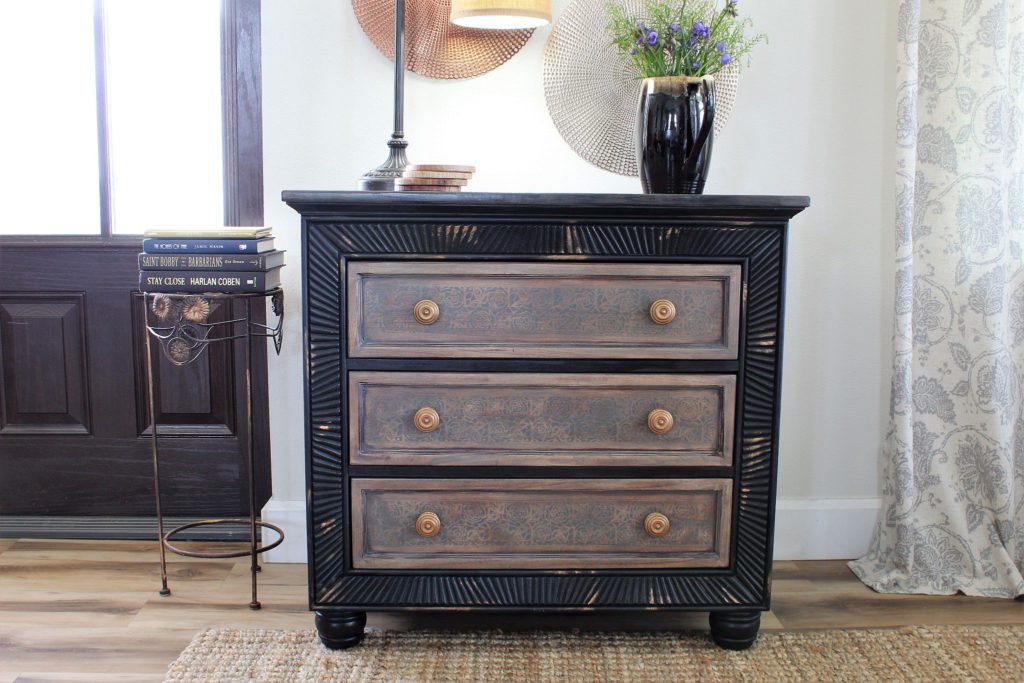
Happy Love Day everyone! I hope your hearts have been smiling surrounded by those special people or furry family members in your life. This 3 drawer table was so much fun to re-style. One of the things I cherish most about furniture renovations is the road of design discovery that each piece leads me down. It’s almost as if they have a mind of their own. I start with one vision and as we journey…well…it never fails, the piece metamorphoses into something different and much better than I had imagined.
Here she is before. I initially wanted to sand the entire piece down and do a primitive look incorporating some stencil art and some rustic white washing….but she wasn’t having it. She wanted dark sophistication and a little glam. So we comprised. The drawers would pull in that perfect detail of rustic.
After cleaning the entire piece with my Jasmine -vinegar solution, I sanded down the drawer faces with my brand new orbital sander (my new love). Even though my other sander had served me well for over 7 years, he was ready to retire. Check out this video to see just how marvelously this new EnterTwist sander works. It quickly sands down to the raw wood, really cutting down my sanding time. Here I’m using a 60 grit.
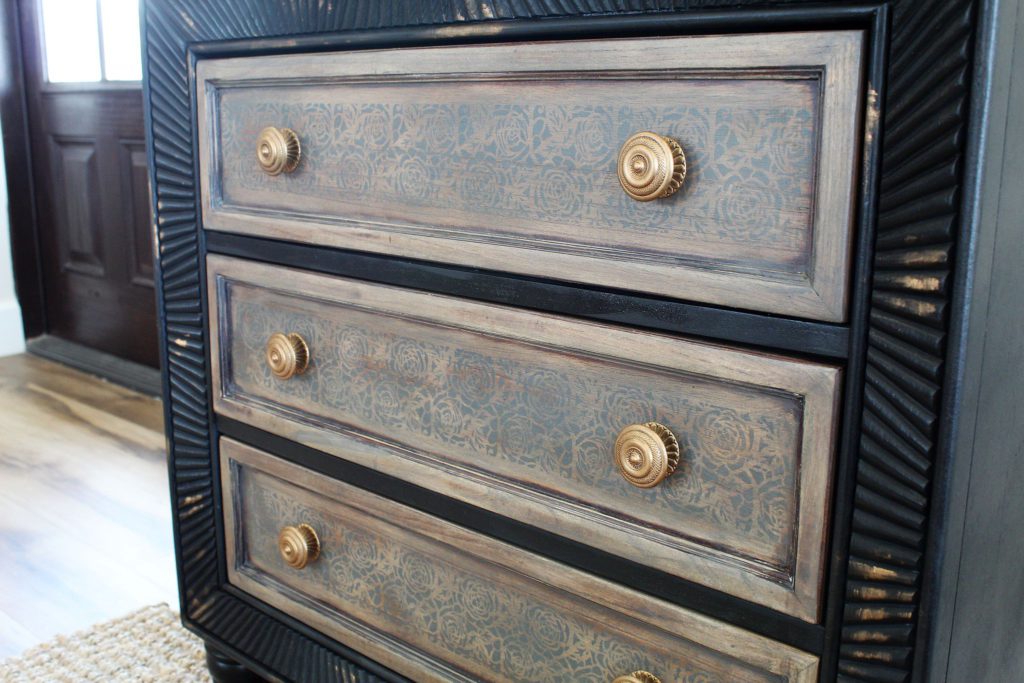
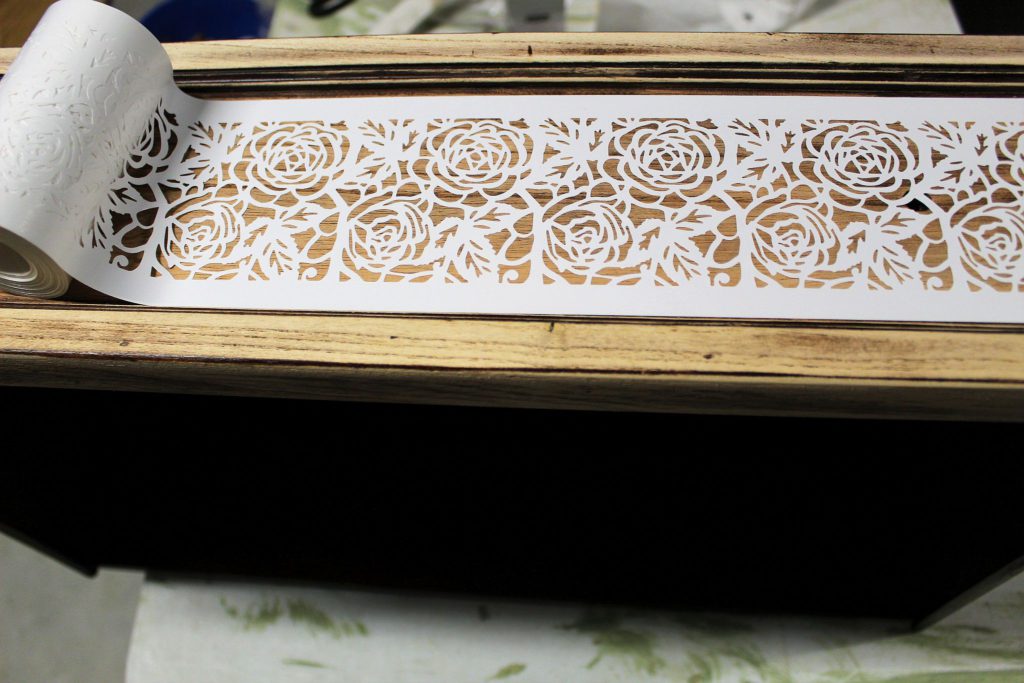
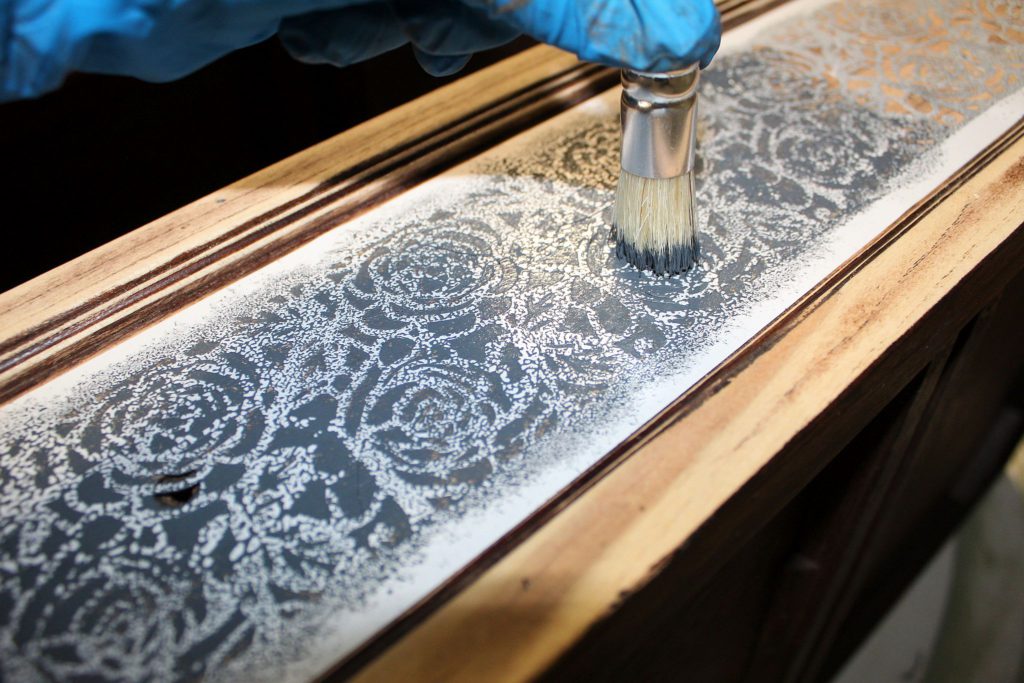
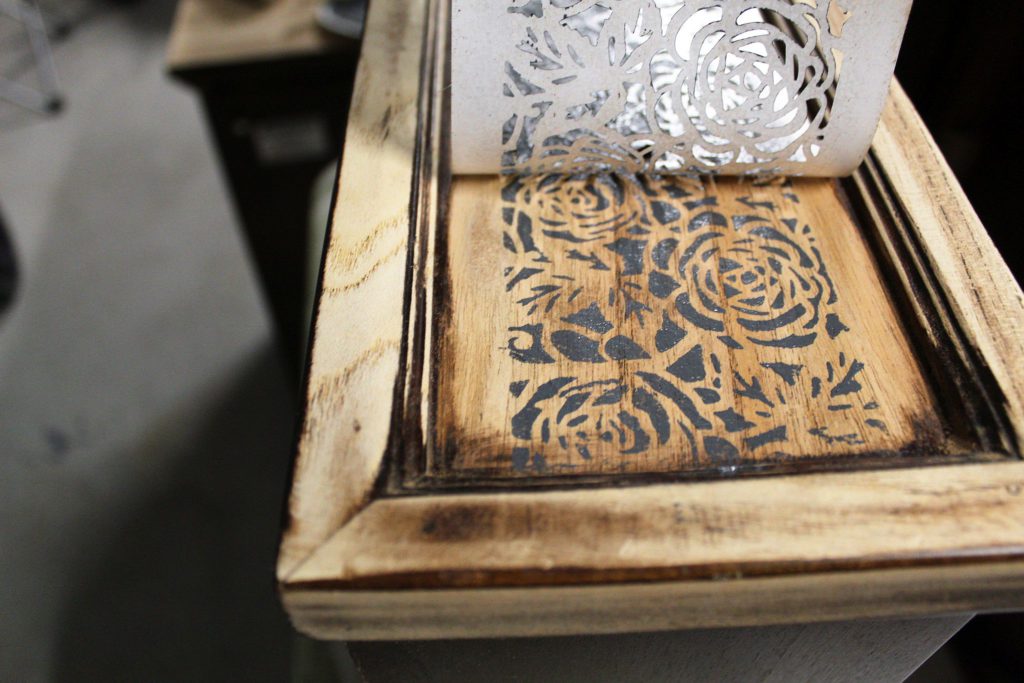
Once my drawers were sanded, I painted them with this really pretty Prima Stick & Style Tea Rose Garden Stencil. These self-adhesive stencils are genius—no mess, no smudges. You’ll get a clean, vivid result every time. I even used the same cut piece for all three drawers and it worked perfectly. Stick it on, dab up and down with a stencil brush, peel off, and voila!
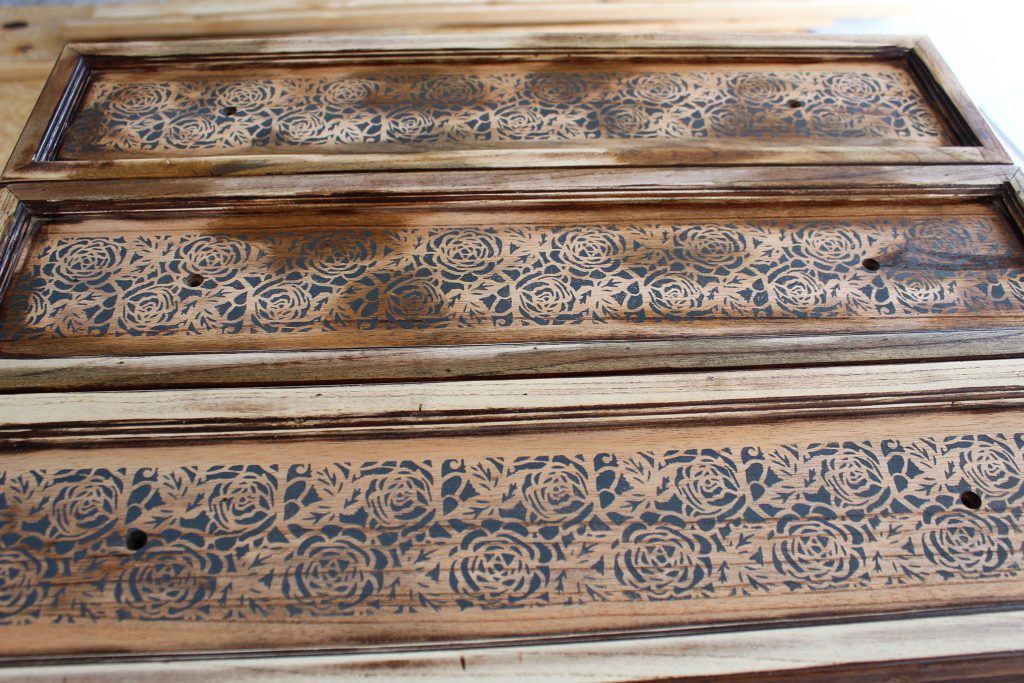
After my stenciled paint had dried, I played around a little with the look. I wanted more of a softened aesthetic—a hint of pattern on a worn, imperfect wooden backdrop. To achieve this look I first randomly applied my charcoal wax in circular motions using a paper towel. Then I rubbed some antiquing wax over the charcoal waxed spots. I was really just playing with the end color on the wood. The picture below shows two drawers with the random waxed spots and one drawer without. I know it looks a little weird at this point but I promise it gets better!
Next I took my cerusing wax and rubbed it all over the drawer fronts. This wax is great at softening and adding some really neat character.
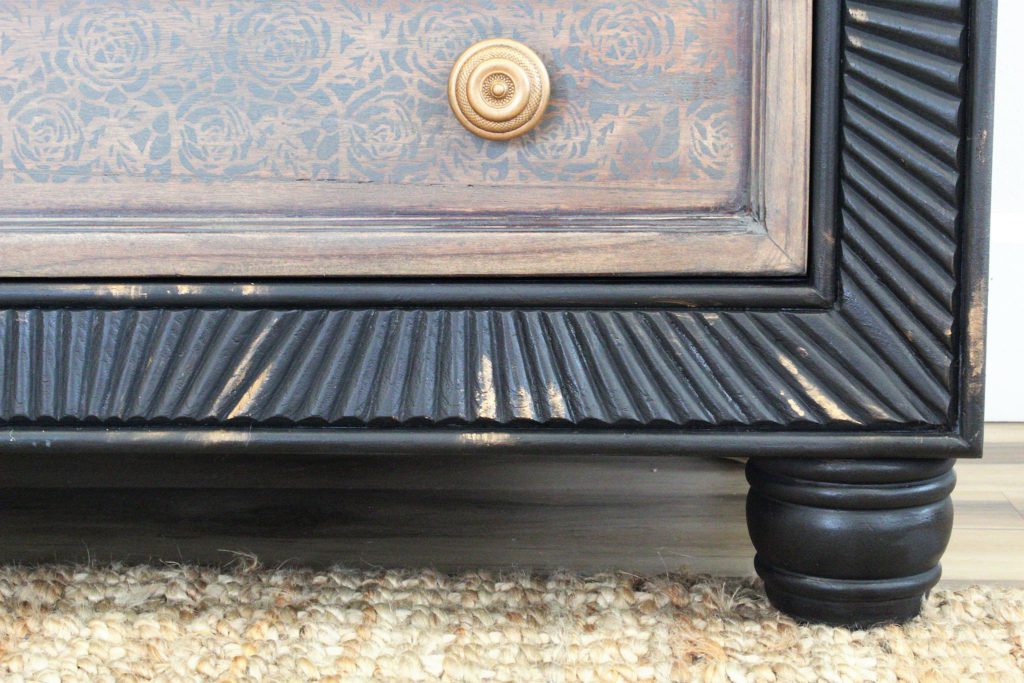
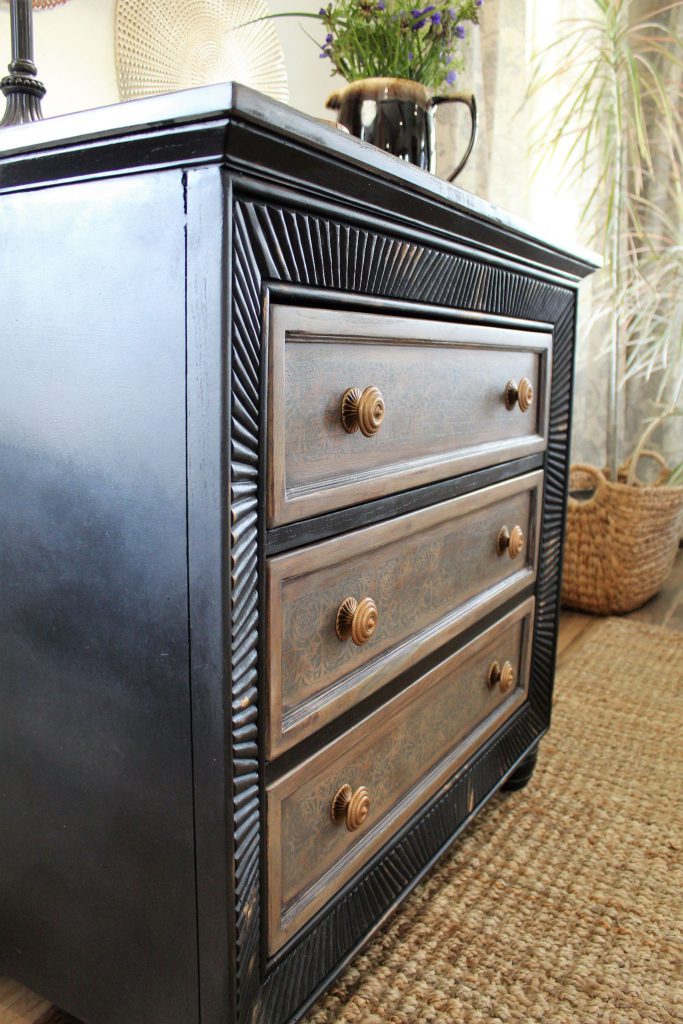
At this point, I REALLY liked the end result of the drawer fronts…but there was one problem. I put the drawers back into the table which I had already painted dark and it was too much of a contrast with light and dark on this piece. It’s important to observe each stage of your reno’s to make sure everything is gelling together cohesively.
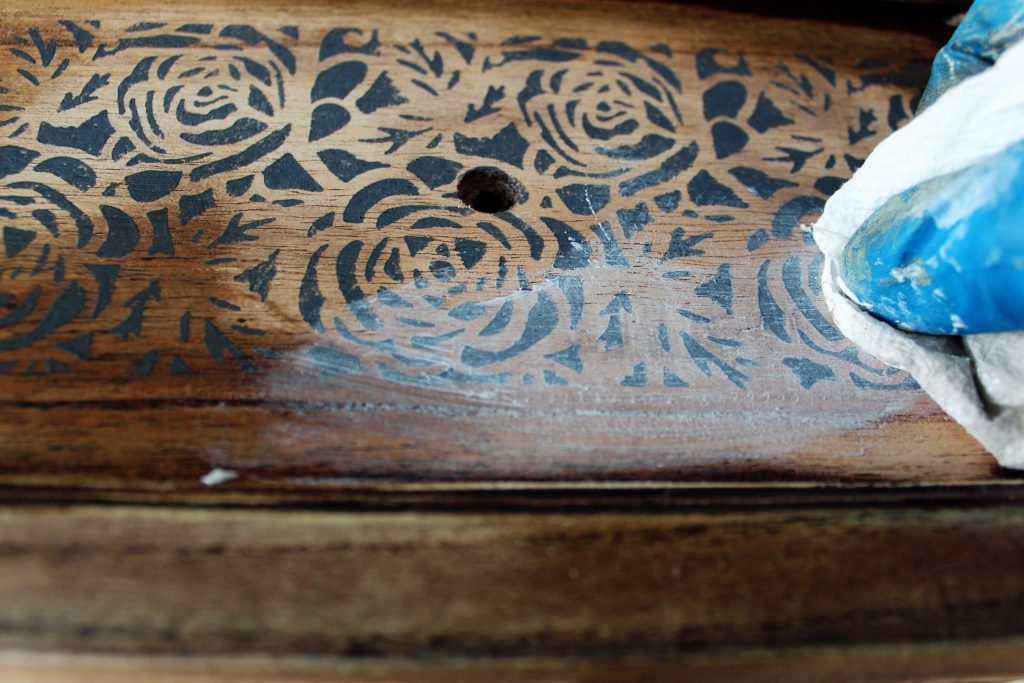
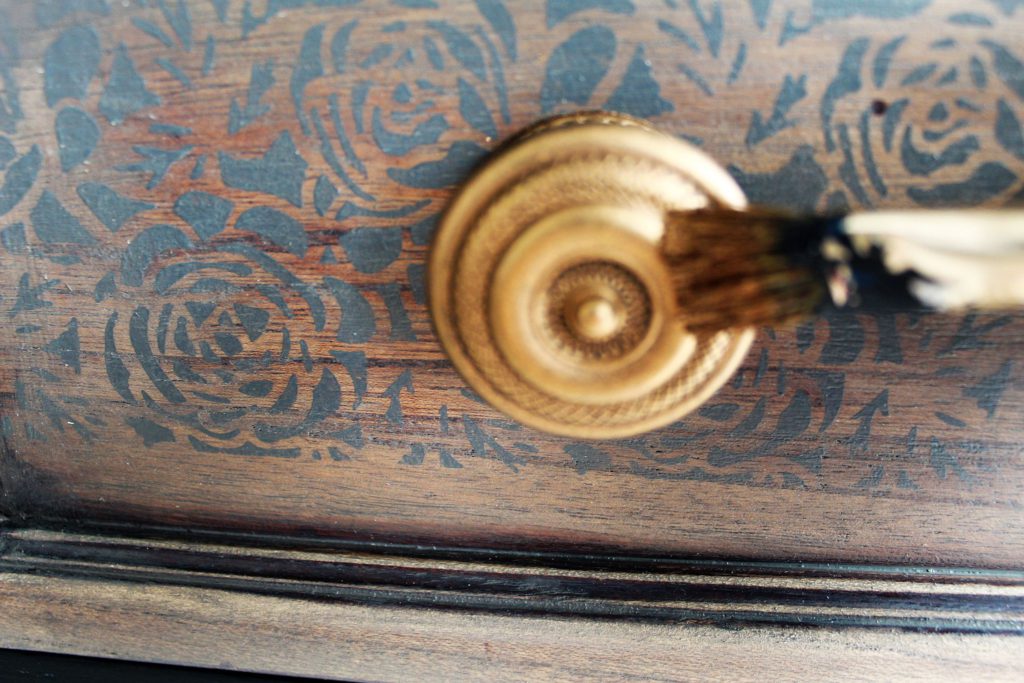
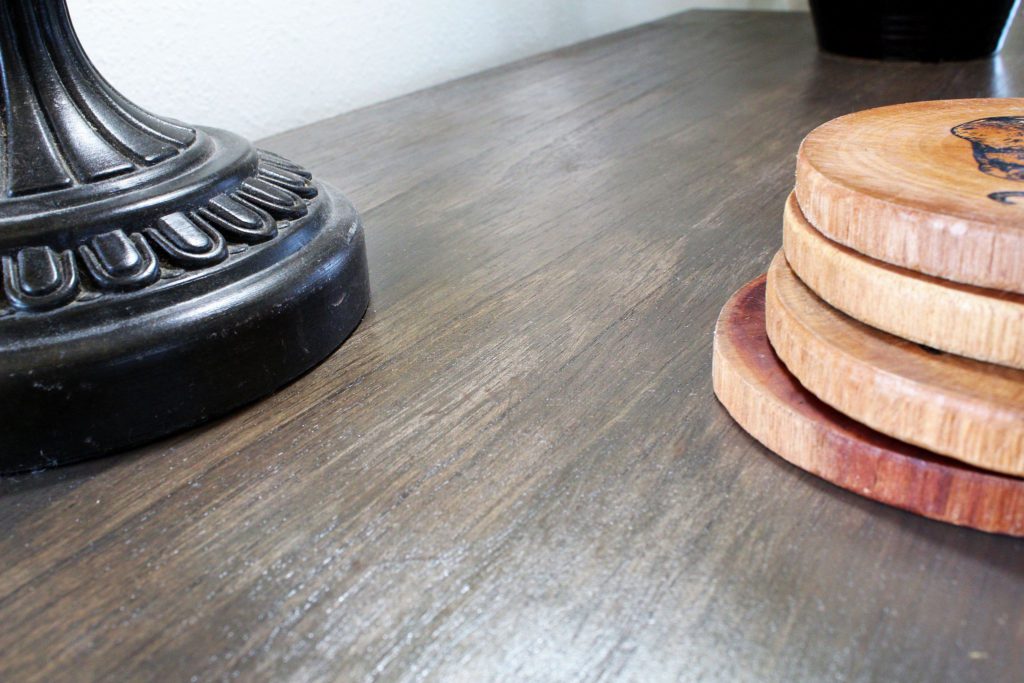
My solution to slightly darken the drawers was to rub on some of my Briarsmoke stain. I rubbed it on and shortly after wiped it off with a paper towel. With a waxed surface (although not fully dry yet) and with the wiping off of the stain, the wood absorbed only a minimal level of the stain which was perfect. Had I not done all the prior steps, the raw wood would have sucked in all the stain, possibly covering up all the stencil work. In the picture below the knob is out of focus but you can see the final color with stain and one layer of clear coat.
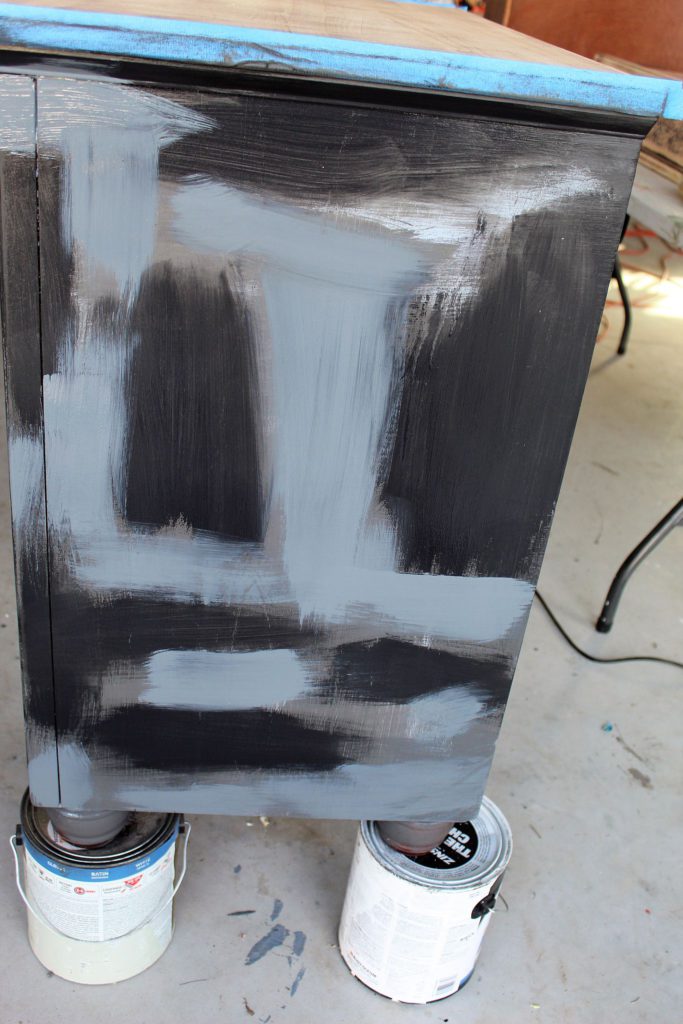
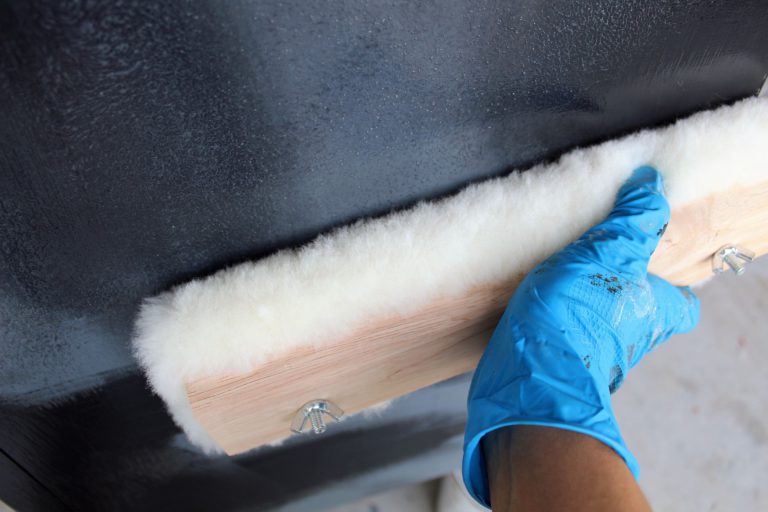
For the sides of the table I wanted to blend the paint, but in a unique way. TheReclaimedHeirloom has a beautiful video on how she used this wooster brush to blend on an armoire. What I love about using this tool is that the paint blends in such an artistic way. I don’t know exactly how to describe the effect—its smoky and aged and mystical all in one. AND it’s SO easy to do. After you have one coat of paint on, take your colors and slap them on in random fashion.
Wet with a spray mister as you go and press your wooster brush on and off all over. You will see how the paint blends together magically. I will say, my brush shed A LOT so I had to deal with that. Christina Anna from TheReclaimedHeirloom did not have that issue. Hopefully you won’t either!
Note: I started with these two colors pictured, but added a final layer with my brown and black, rather than blue and black.
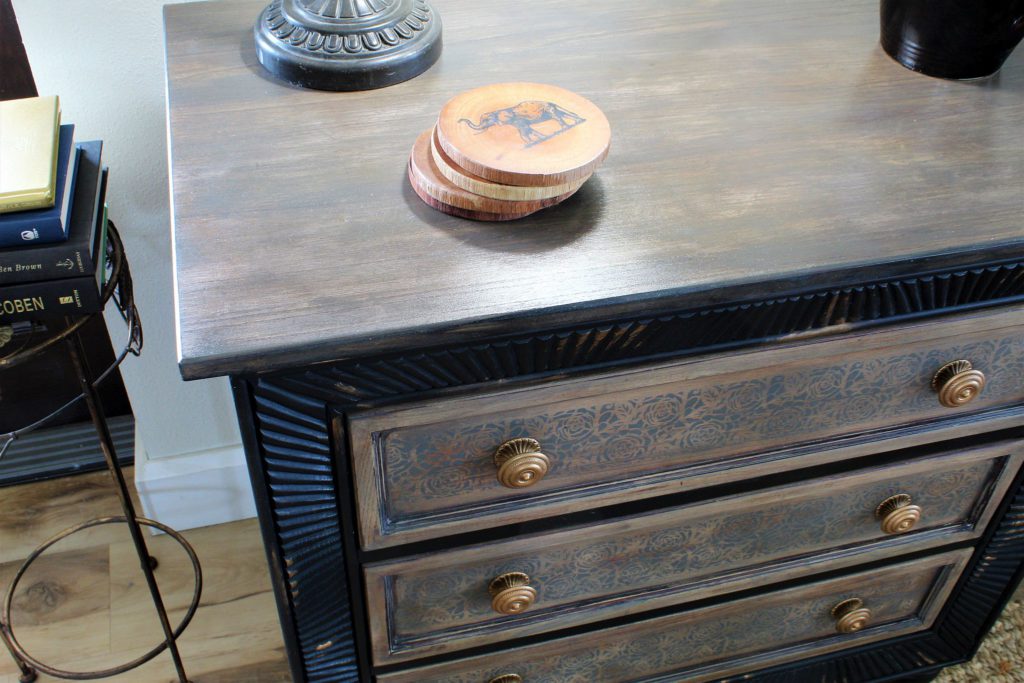
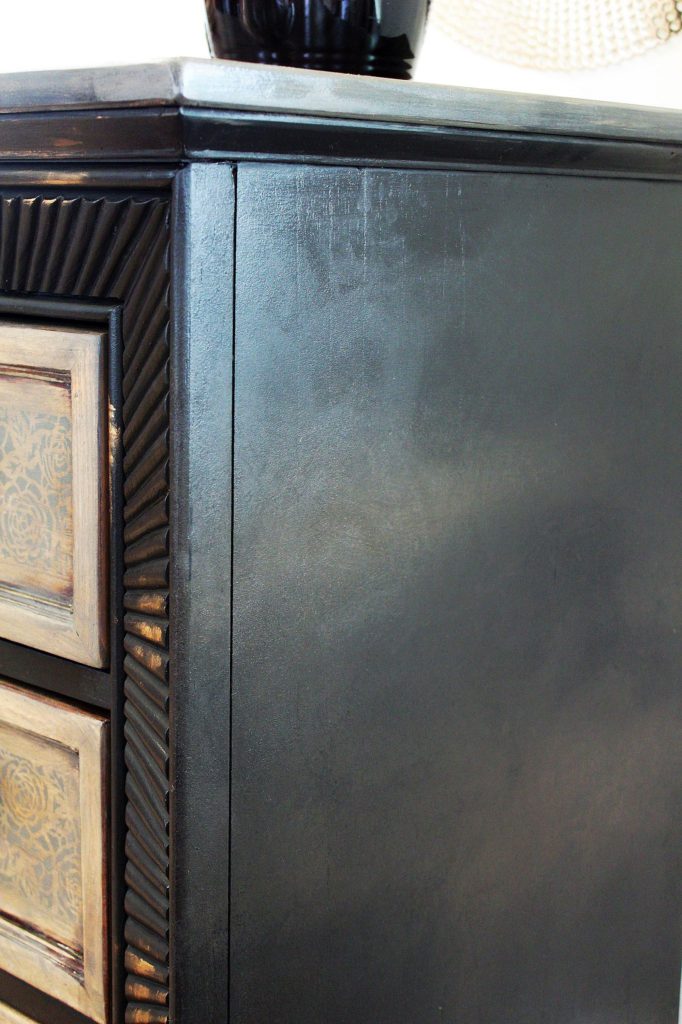
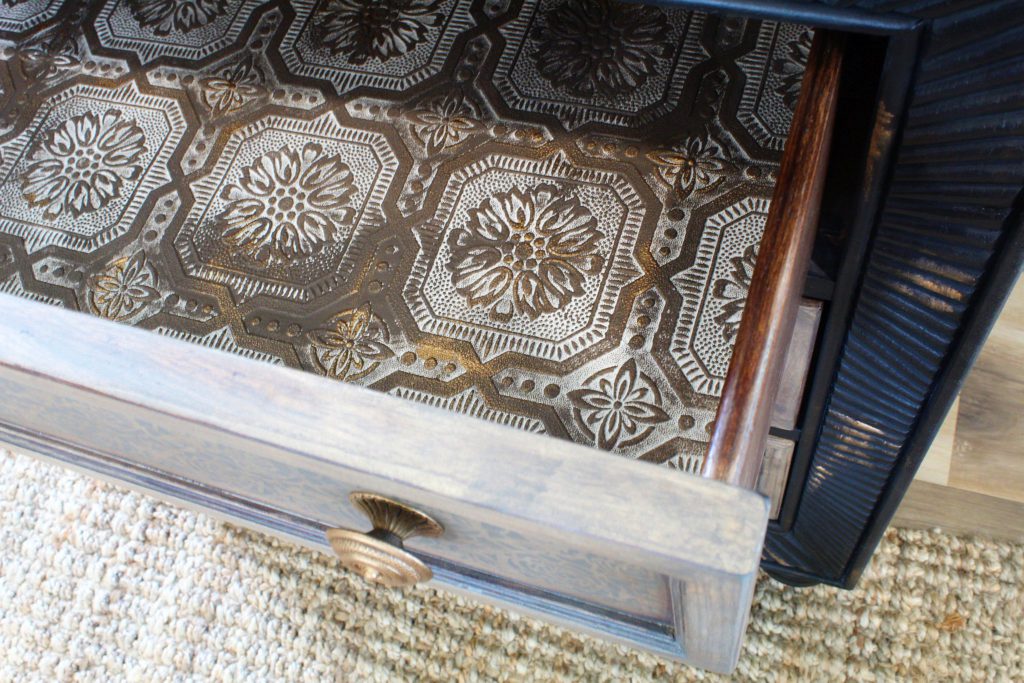
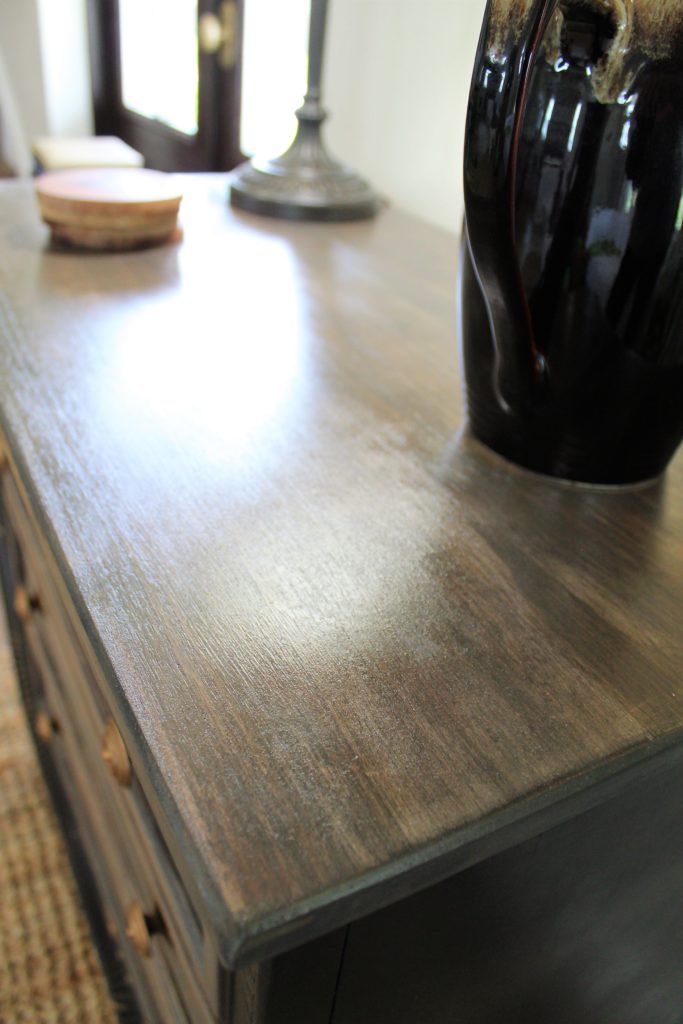
For the tabletop, I tinted my stain acceleratorwith Briarsmoke stain and applied one coat. I then gave it two coats of spar urethane. I painted the knobs and accented the front of the piece with aged brass metallic wax. (love, love, this stuff). I lined the top drawer with textured wallpaper which I brushed randomly with paint and detailed with my metallic wax. Finally, I waxed the piece with the charcoal wax for a richer look. What do you think? Isn’t this piece ready for a night out on the town with its rustic glam and elegance?!! This 3 drawer table is now available at my Etsy shop.