Hello NIB family. I’ve decided to let you in on my BEST SELLING FURNITURE RENOVATION LOOK! Each time I’ve refinished pieces with this look, they go fast!
Today I’ll walk you through each step of this renovation and show you how you too can leave your pieces dripping with vintage goodness.
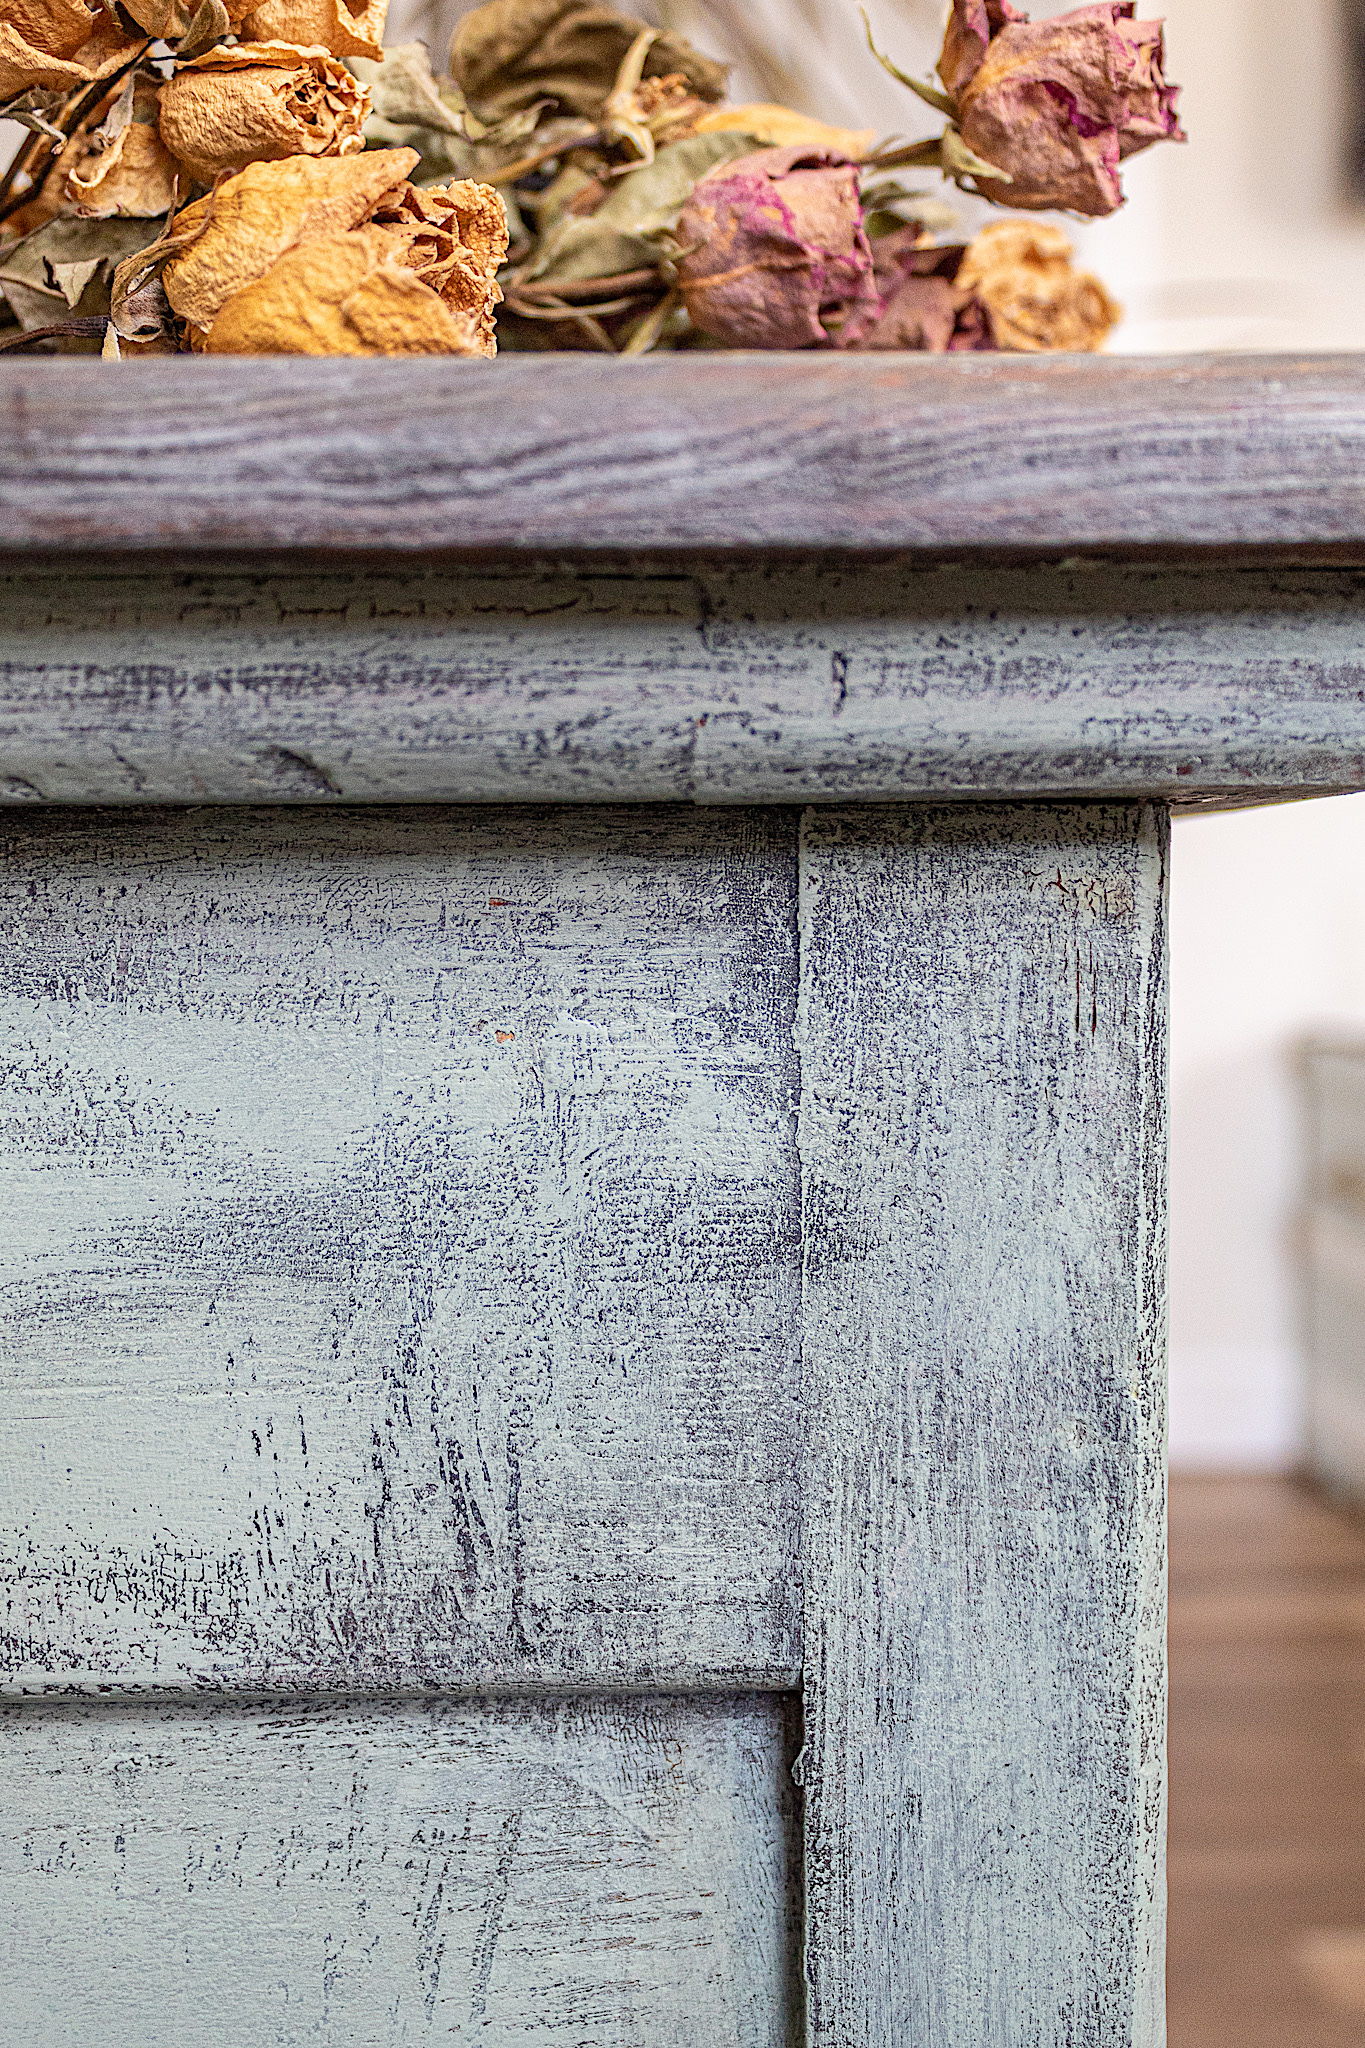
Be prepared as there are quite a few techniques and steps—all easy but do require some time. We’ll be antiquing the drawers, creating a vintage layered paint look, and doing something dreamy on the wood top.
Materials Needed:
**long list warning** although you need lots of materials, many of these last me for years and I use them on multiple projects.
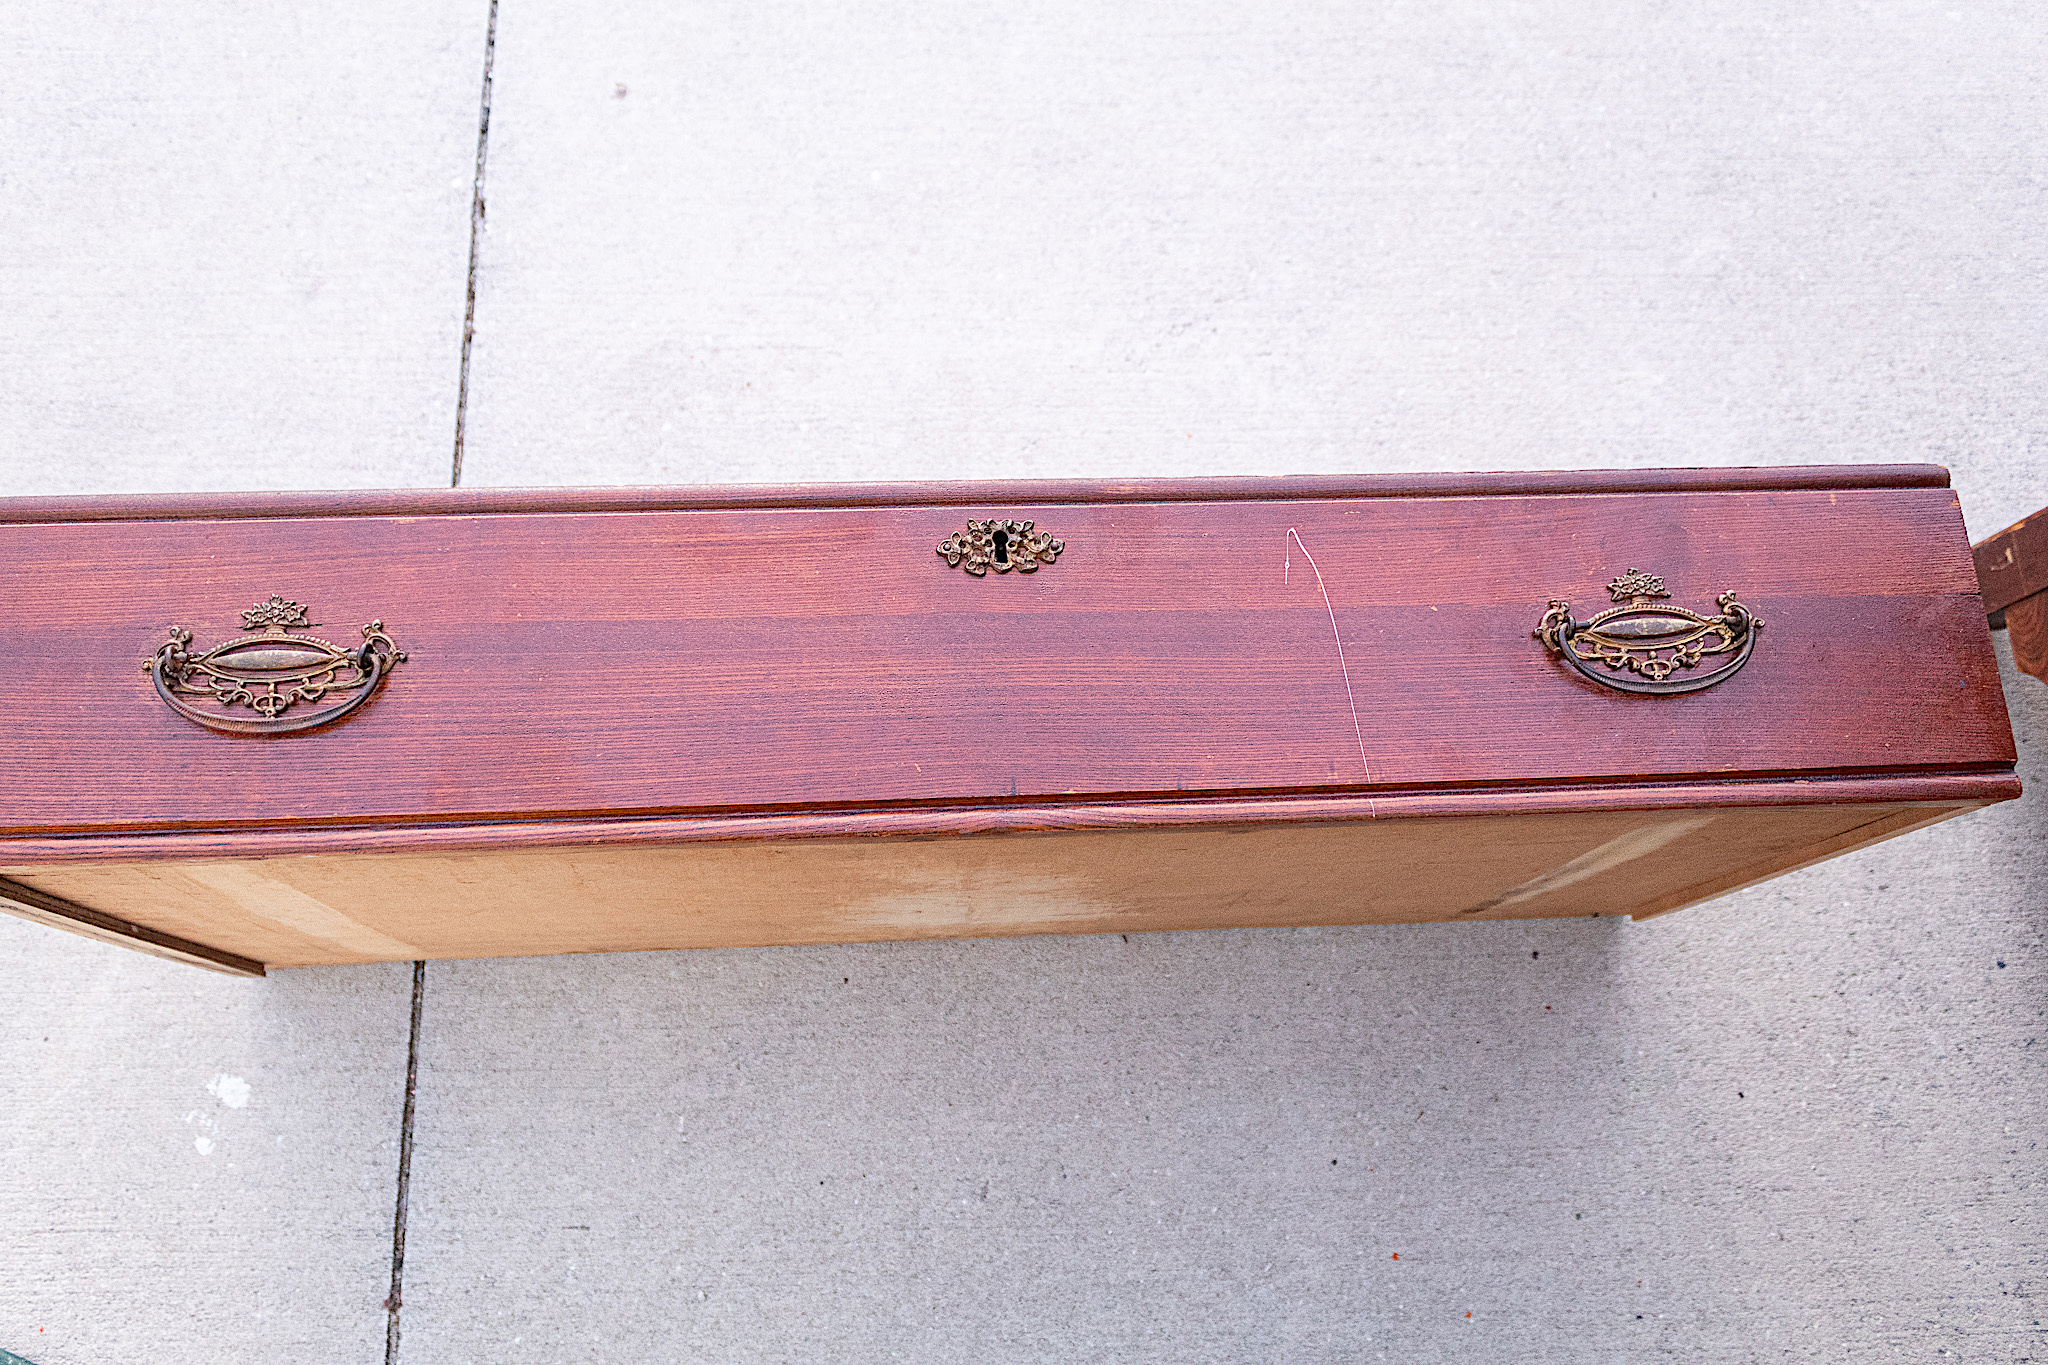
I neglected to get a proper before picture. But here’s a look at one of the original drawers.
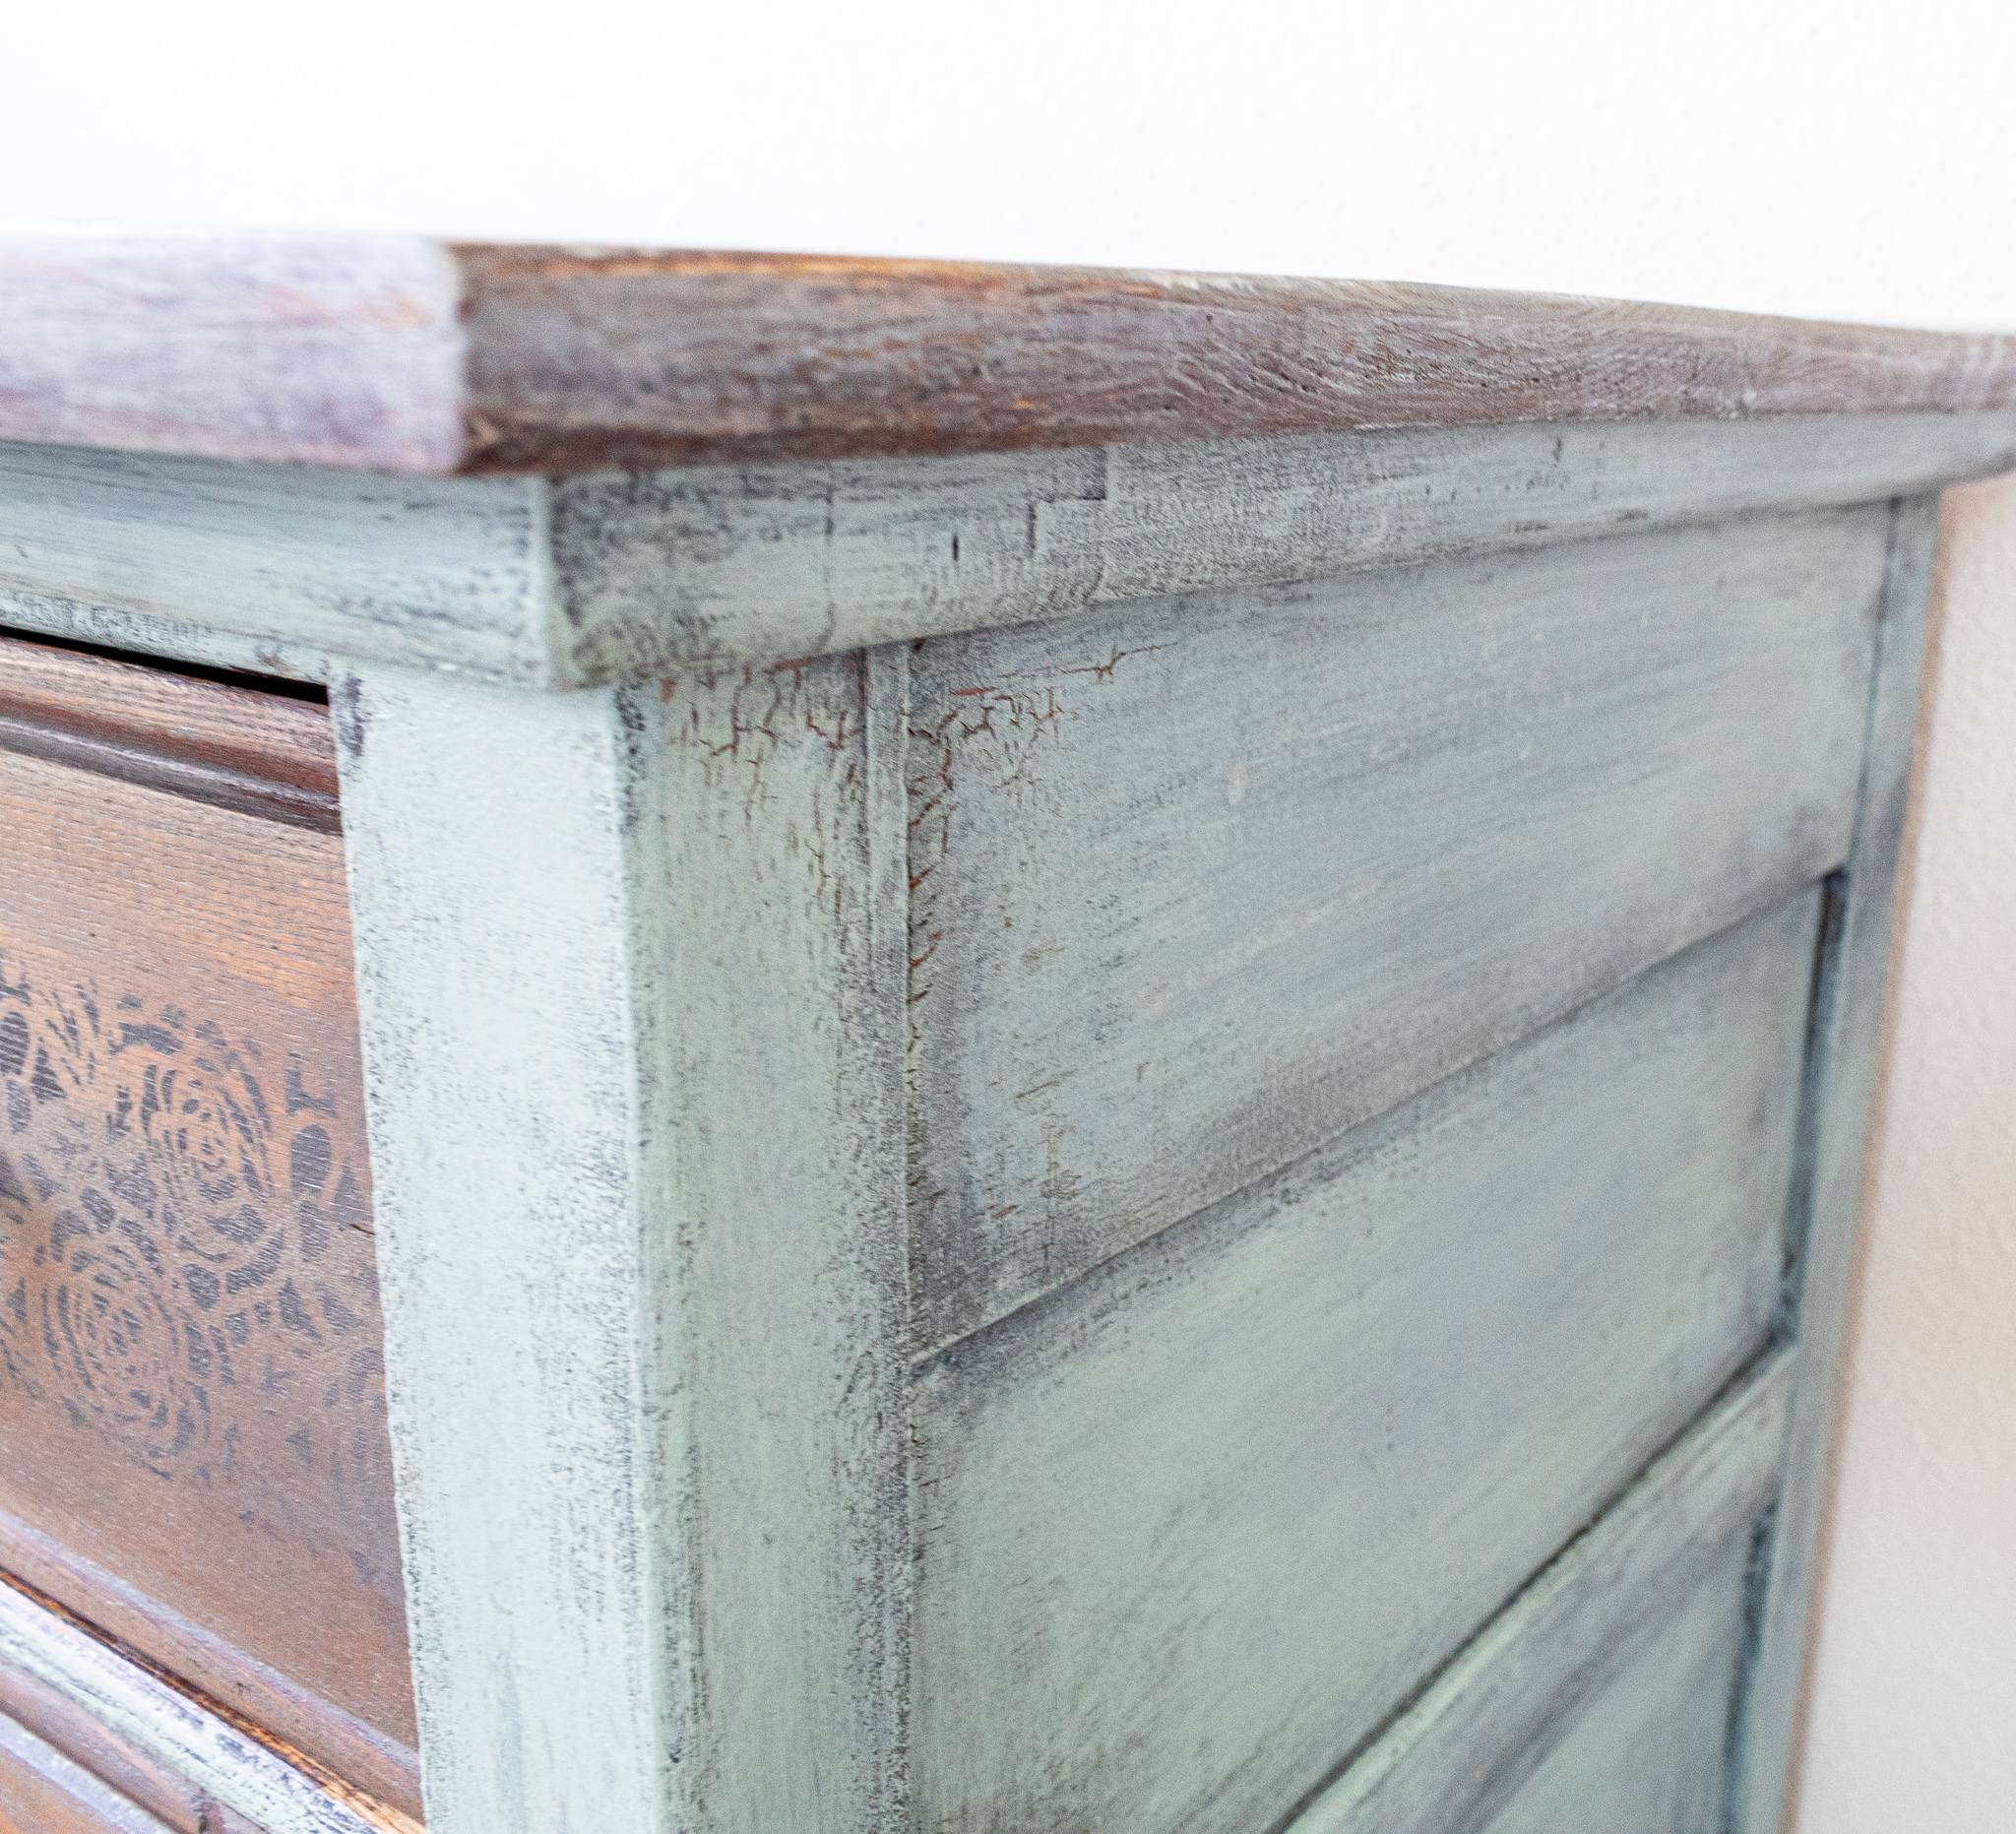
CREATING OUR RUSTIC STENCIL LOOK
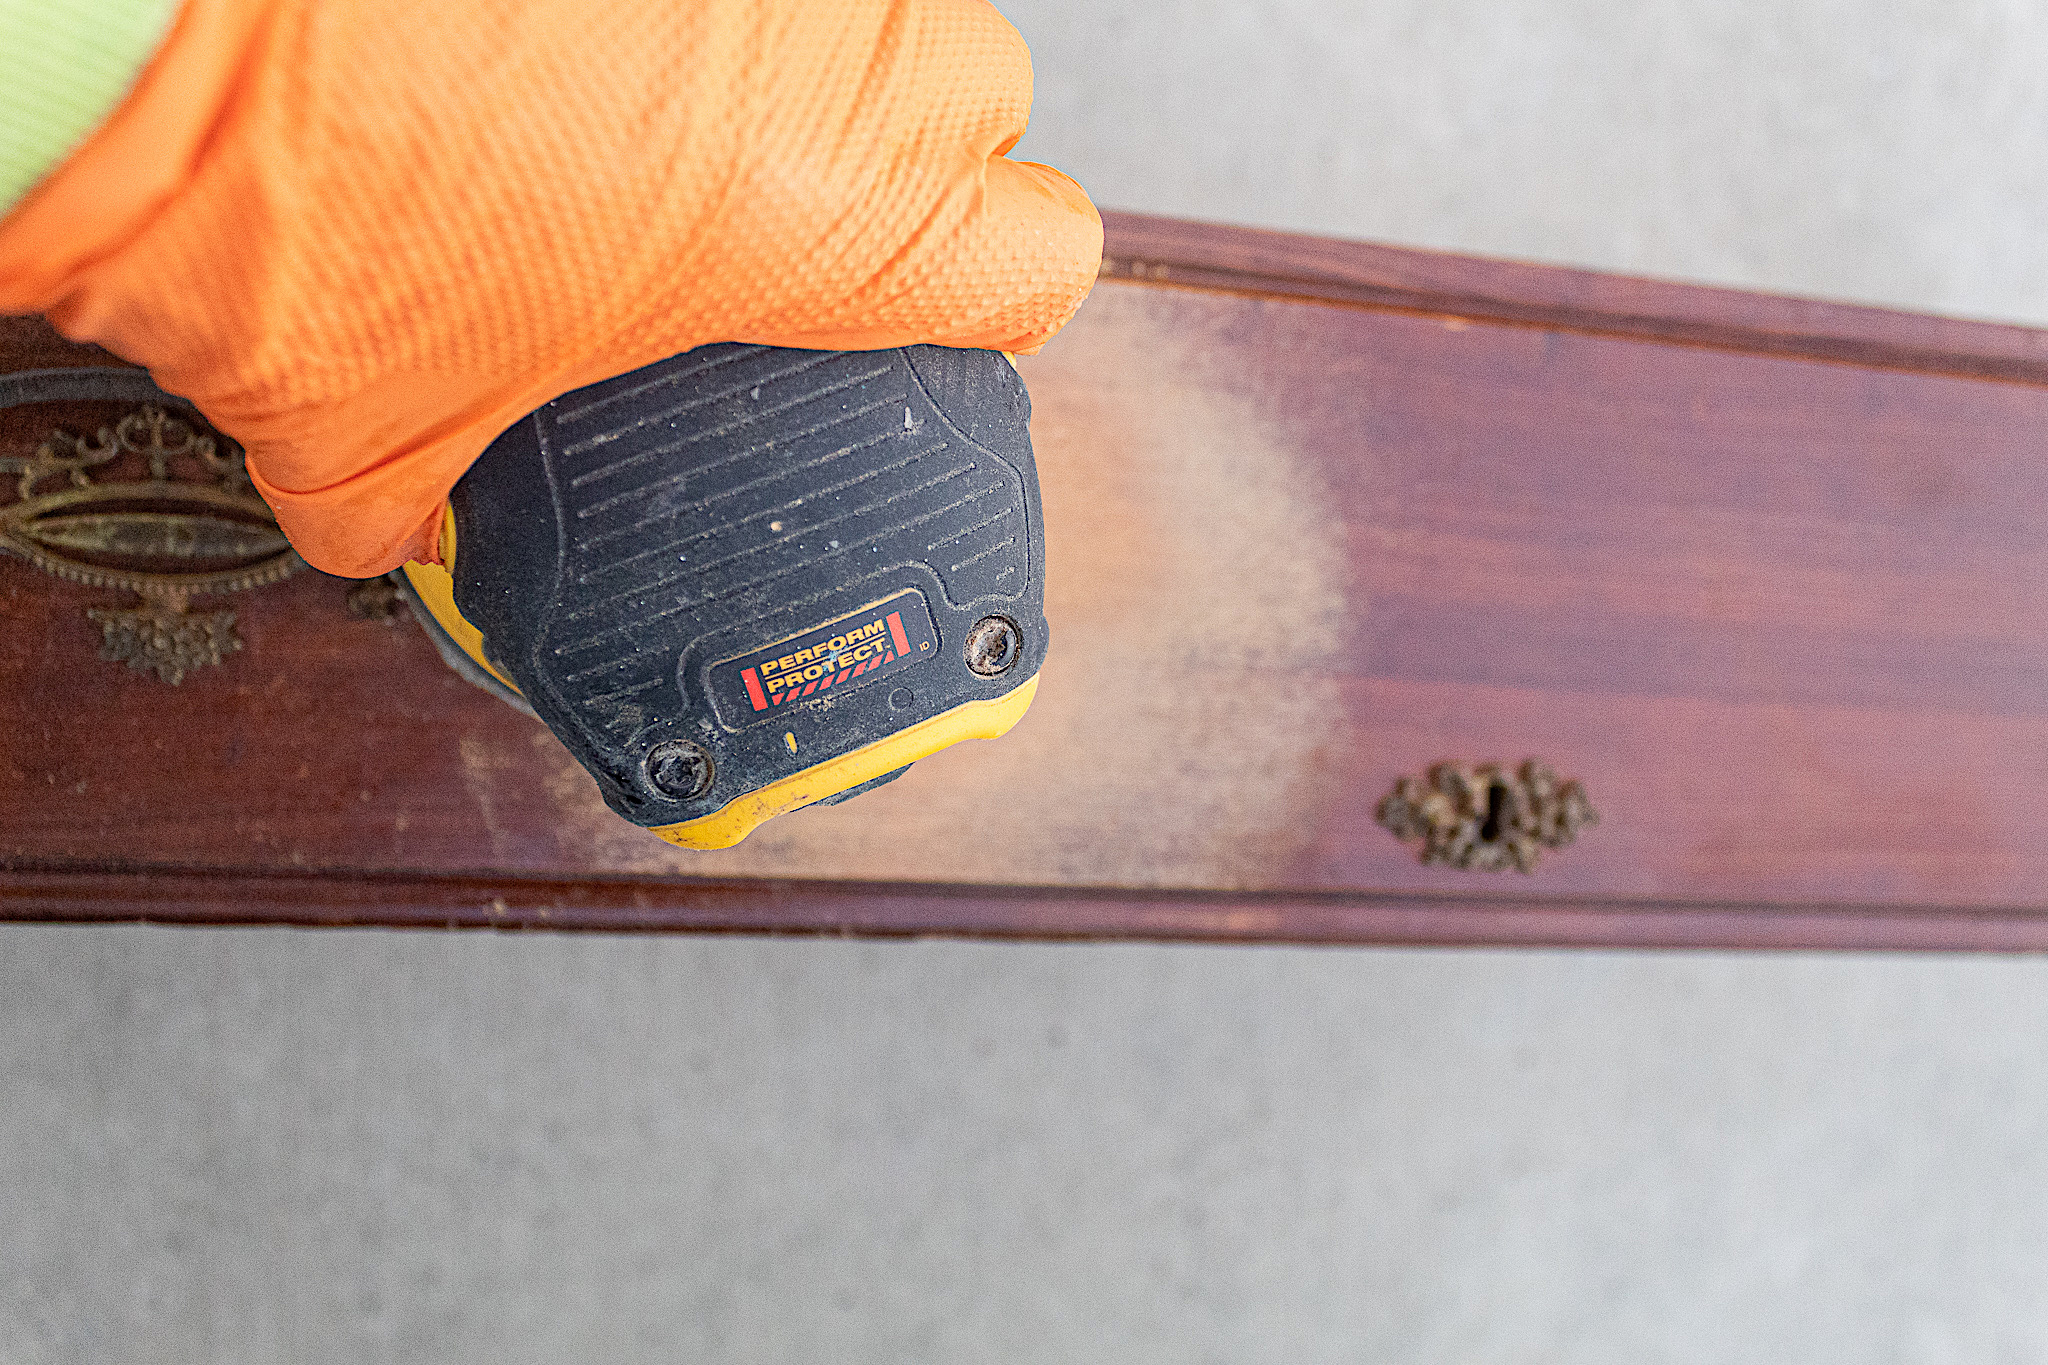
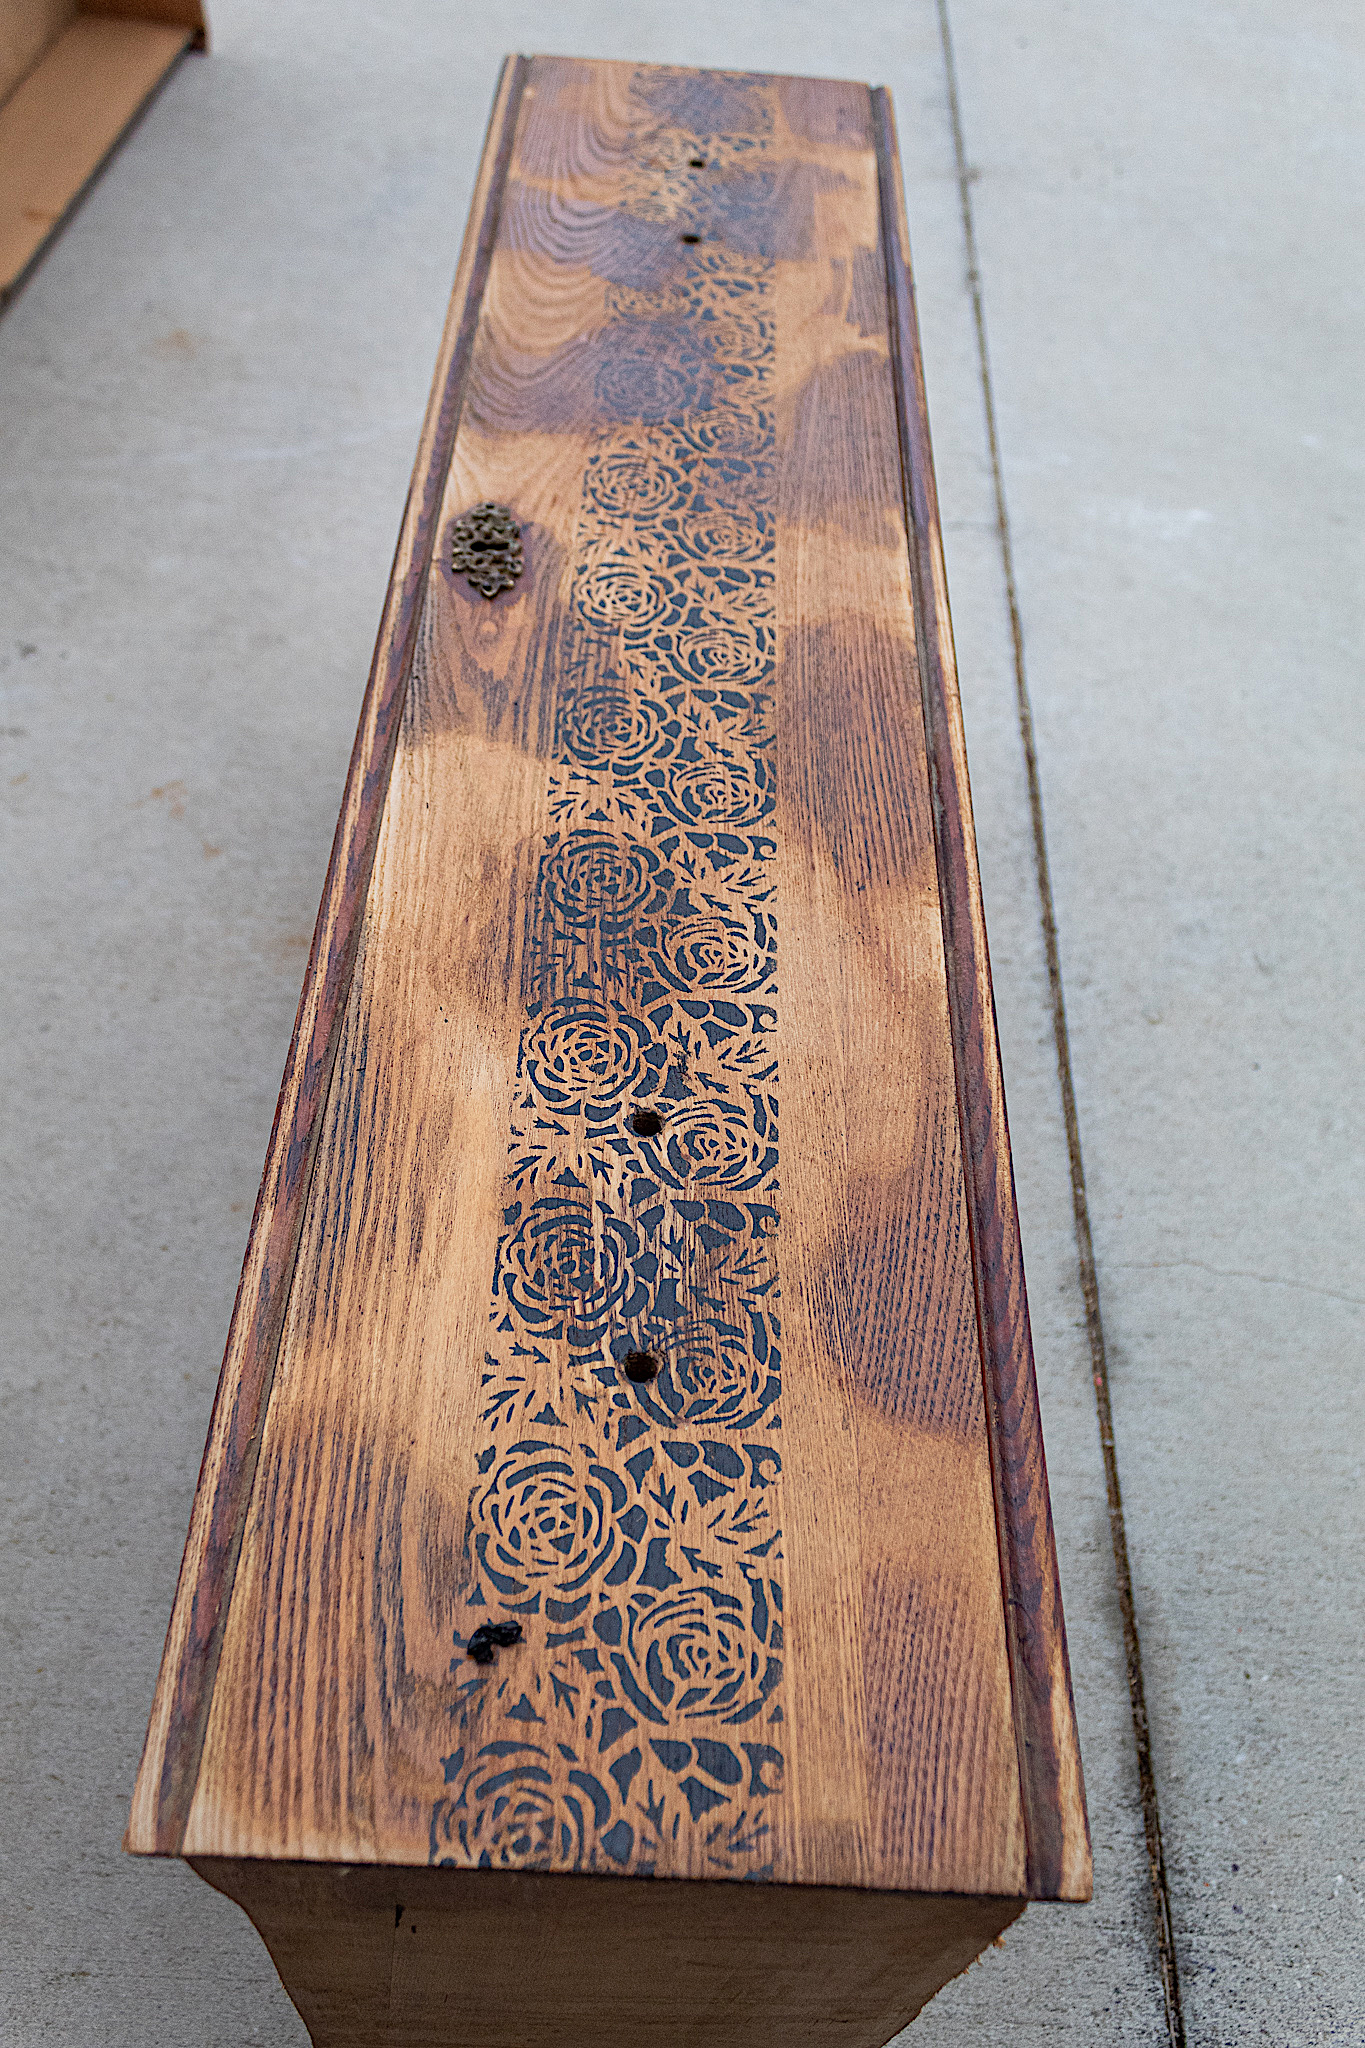
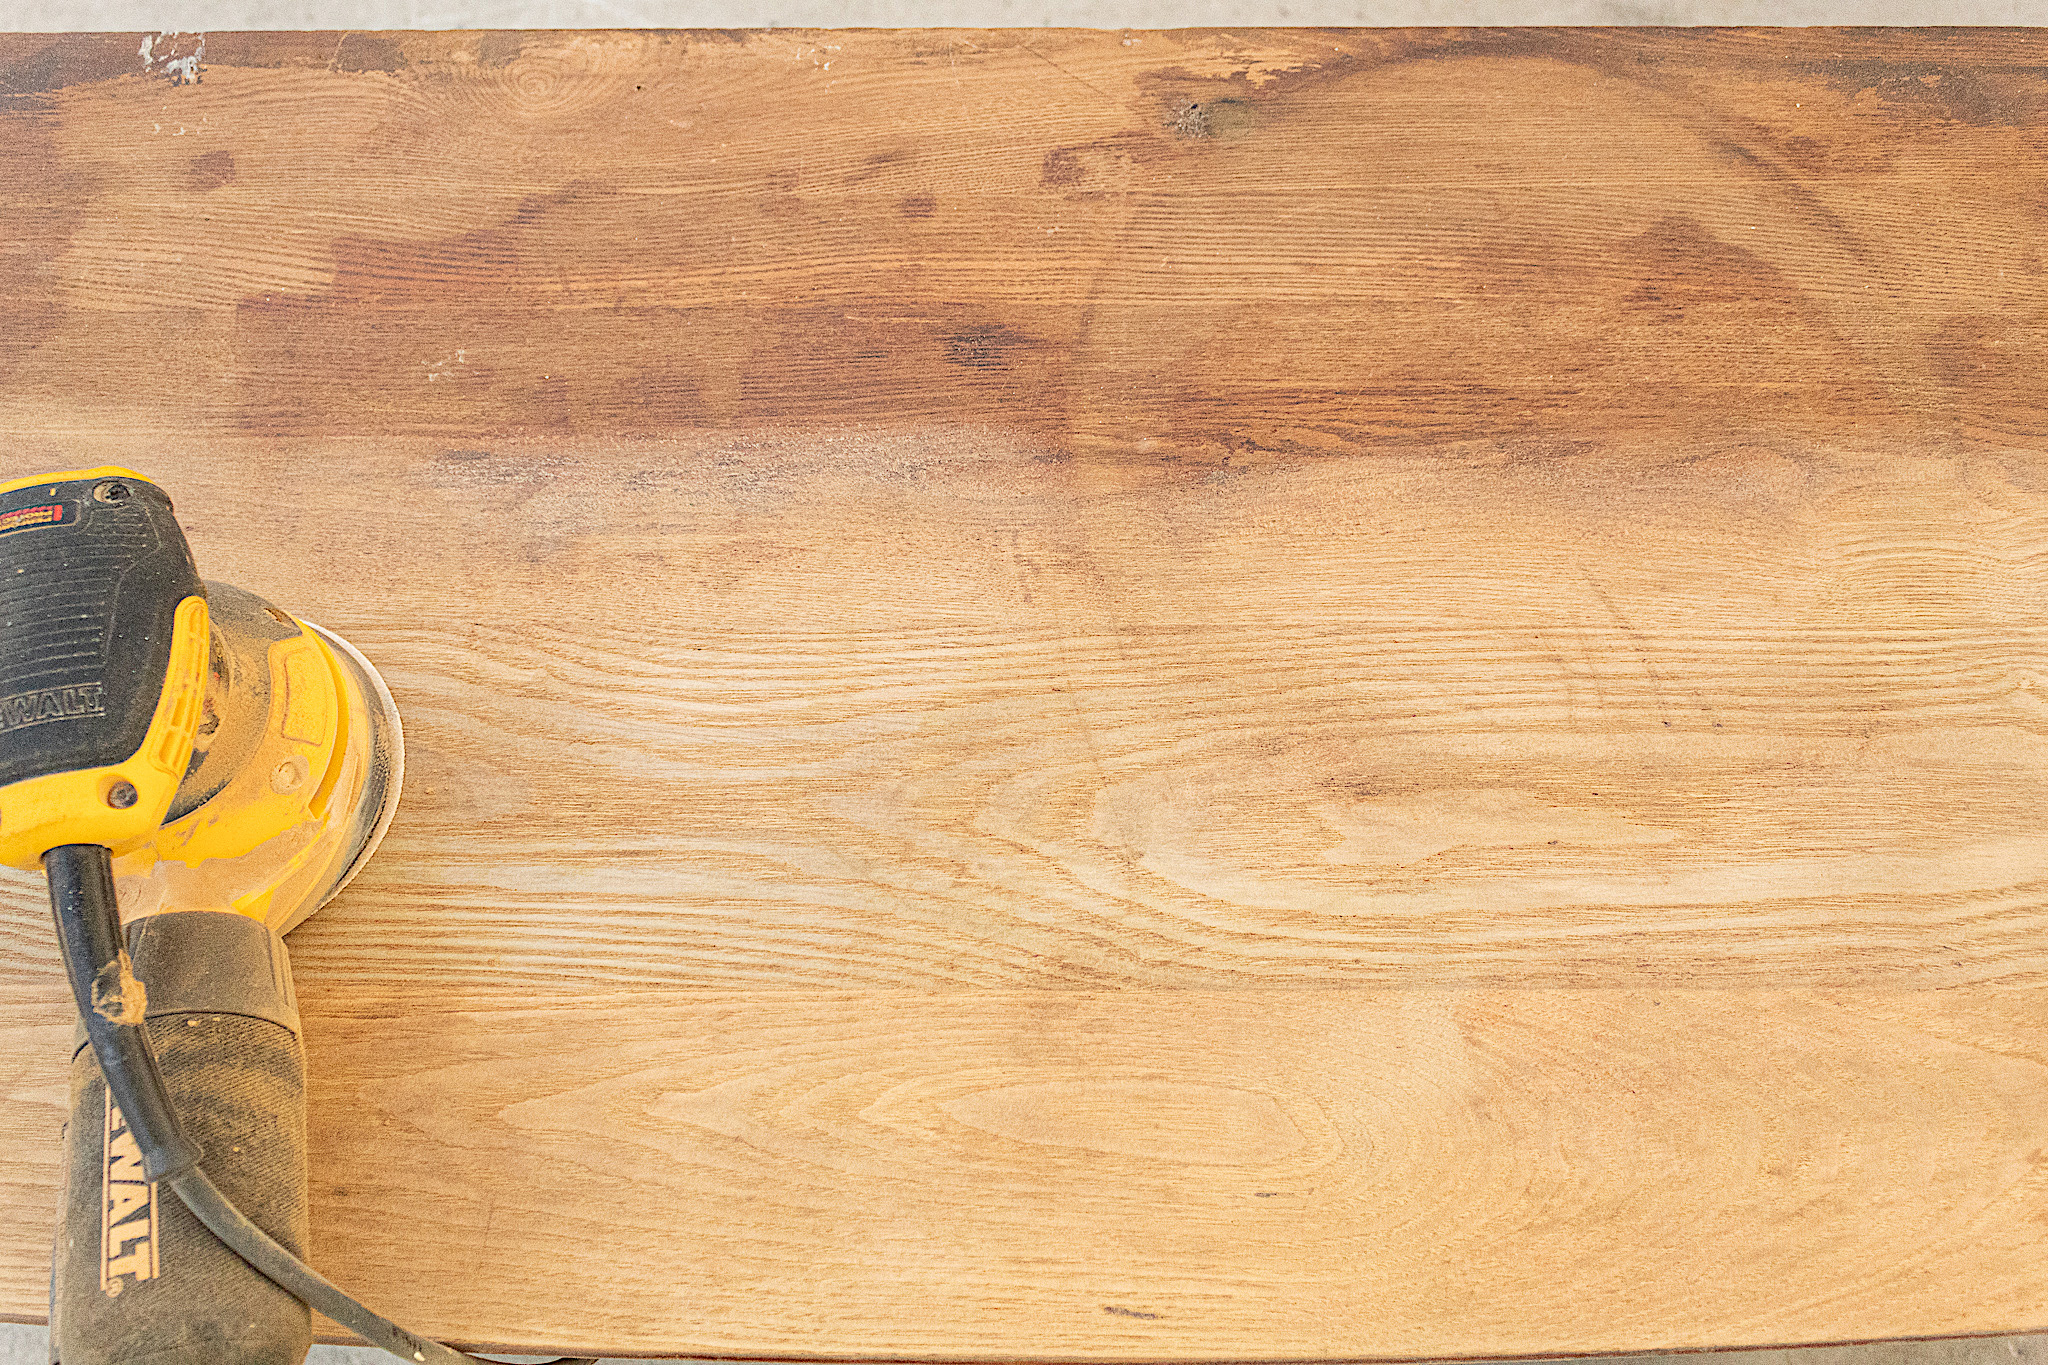
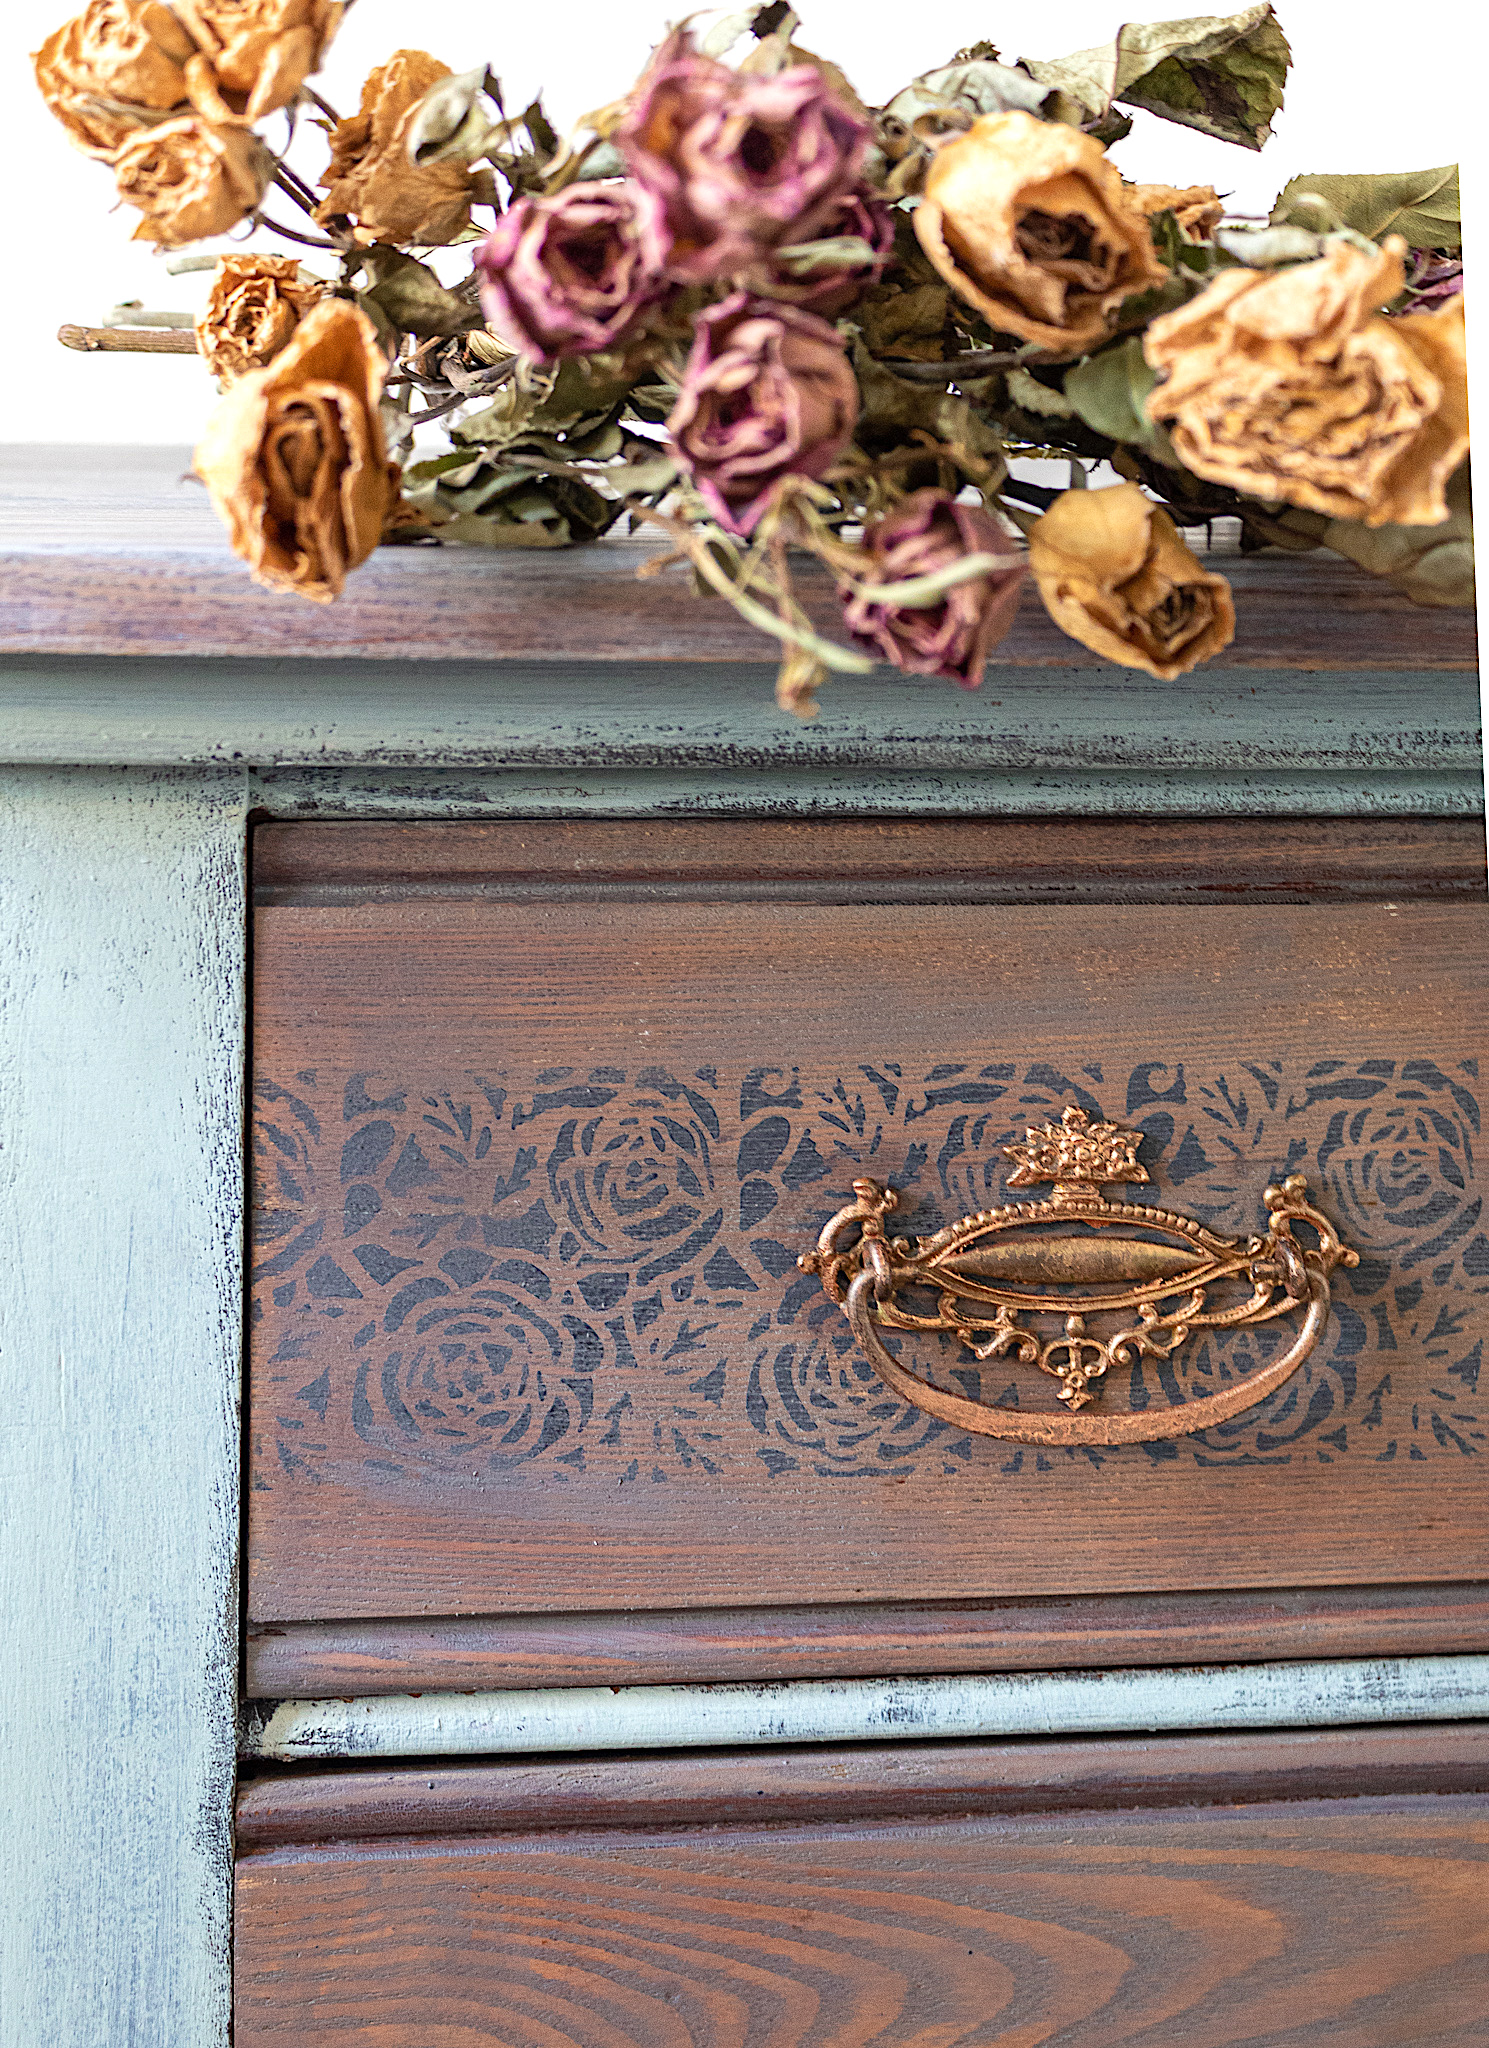
The technique I use on the drawer fronts creates the main allure of the piece. I achieve this primitive look in a few steps, starting by sanding down the drawer fronts to the raw wood. I typically use 60 or 80 grit sandpaper and my orbital sander.
Sand the drawer fronts
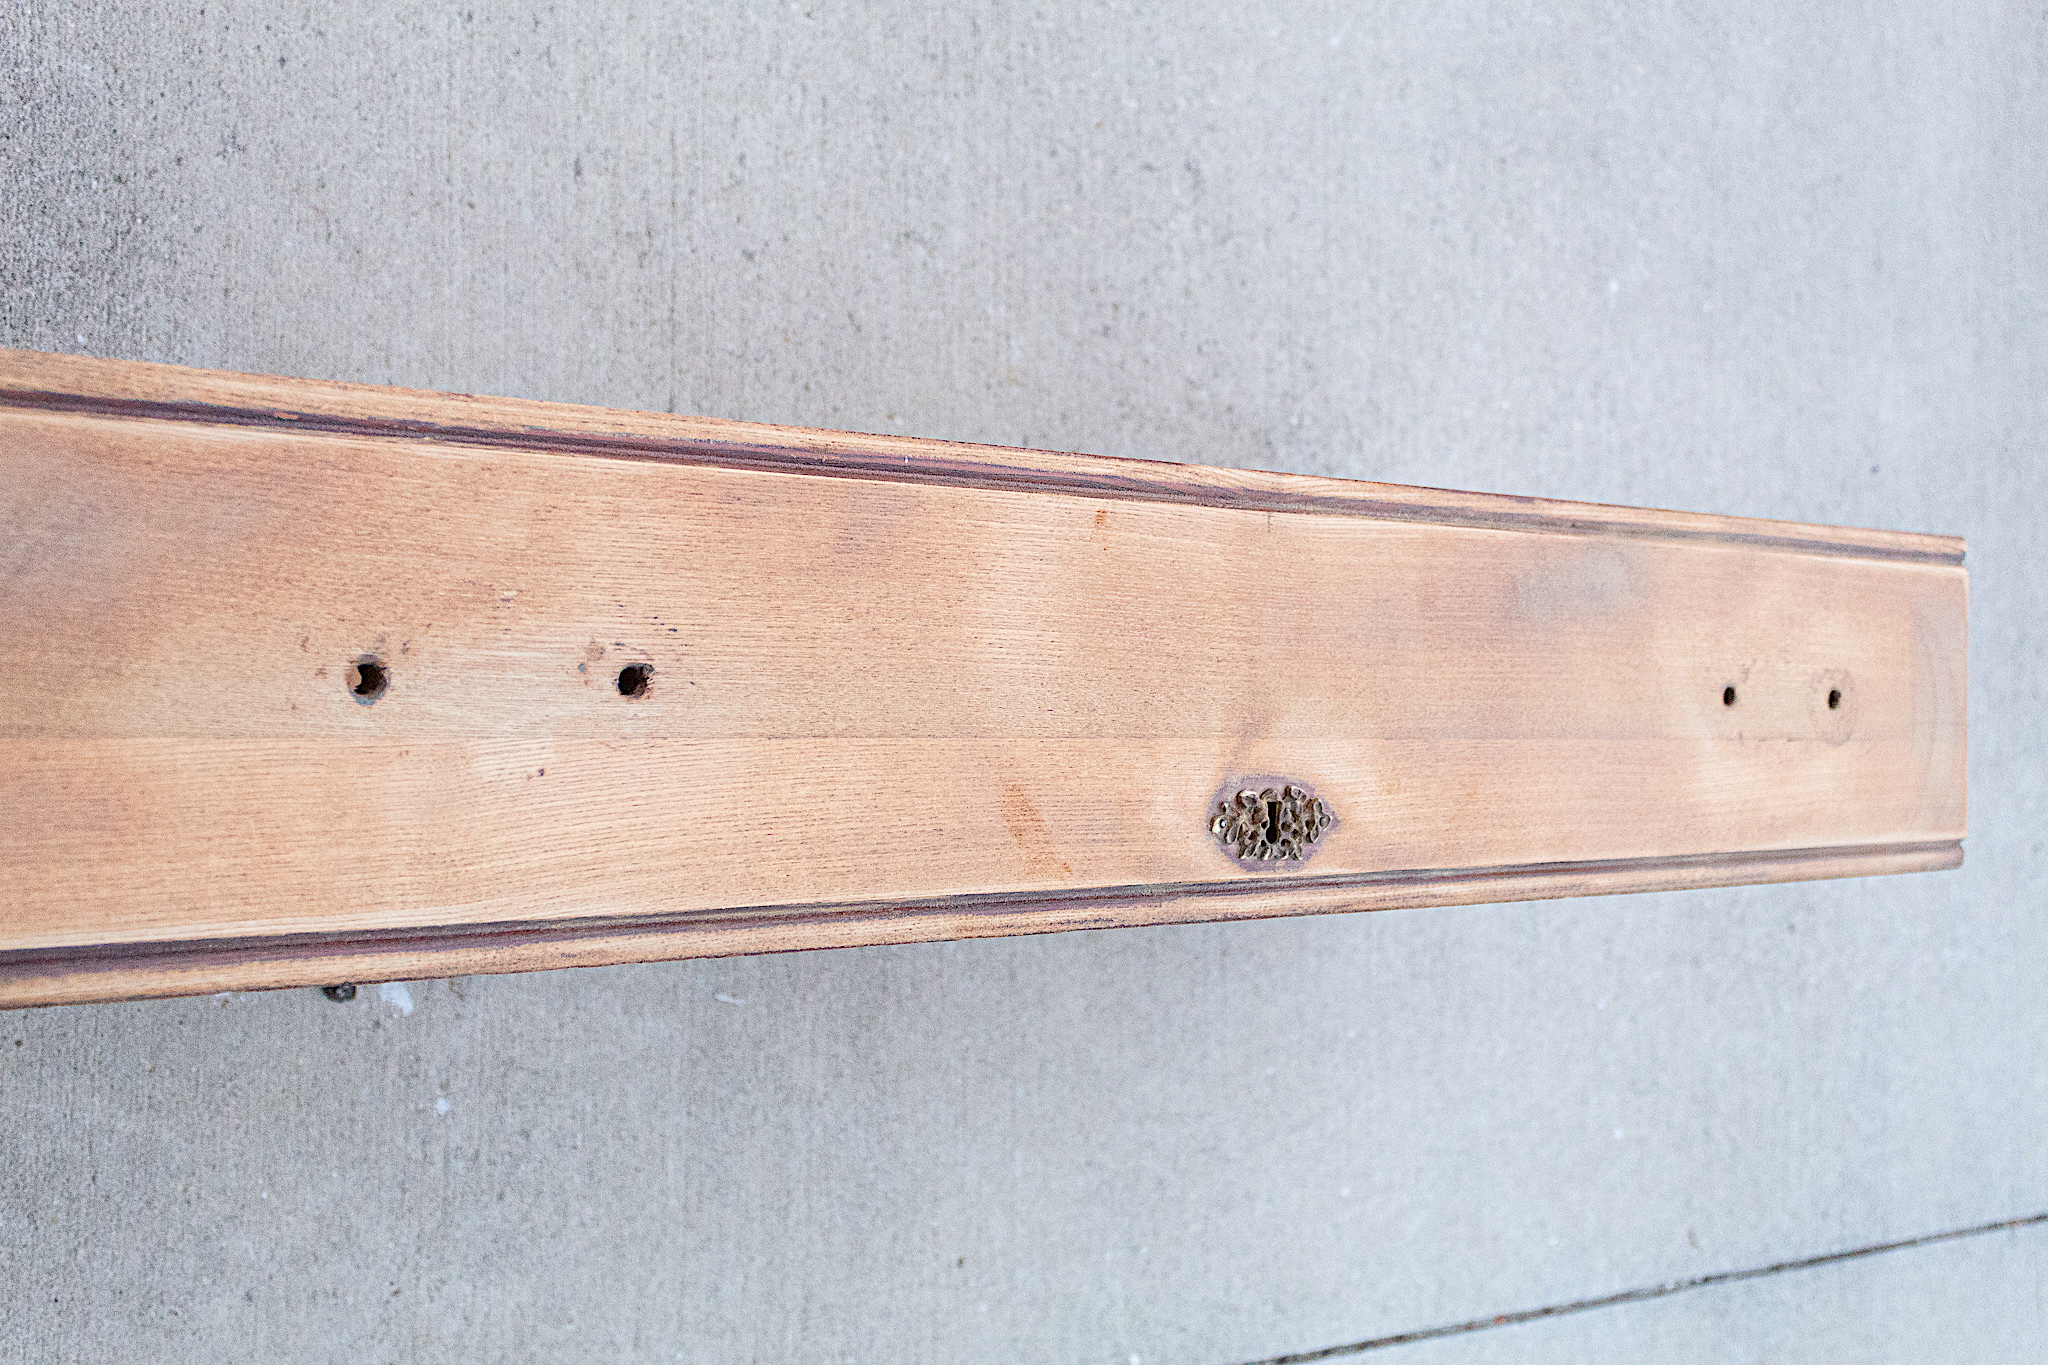
Here is what my drawer front looked like after sanding. It doesn’t have to be perfect. Just try to expose a good amount of the raw wood.
Disclosure: Some of the links provided are affiliate links. By purchasing through these links it supports this blog and the work we do and there is no extra cost to you. If you would like to read our full disclosure, click HERE.
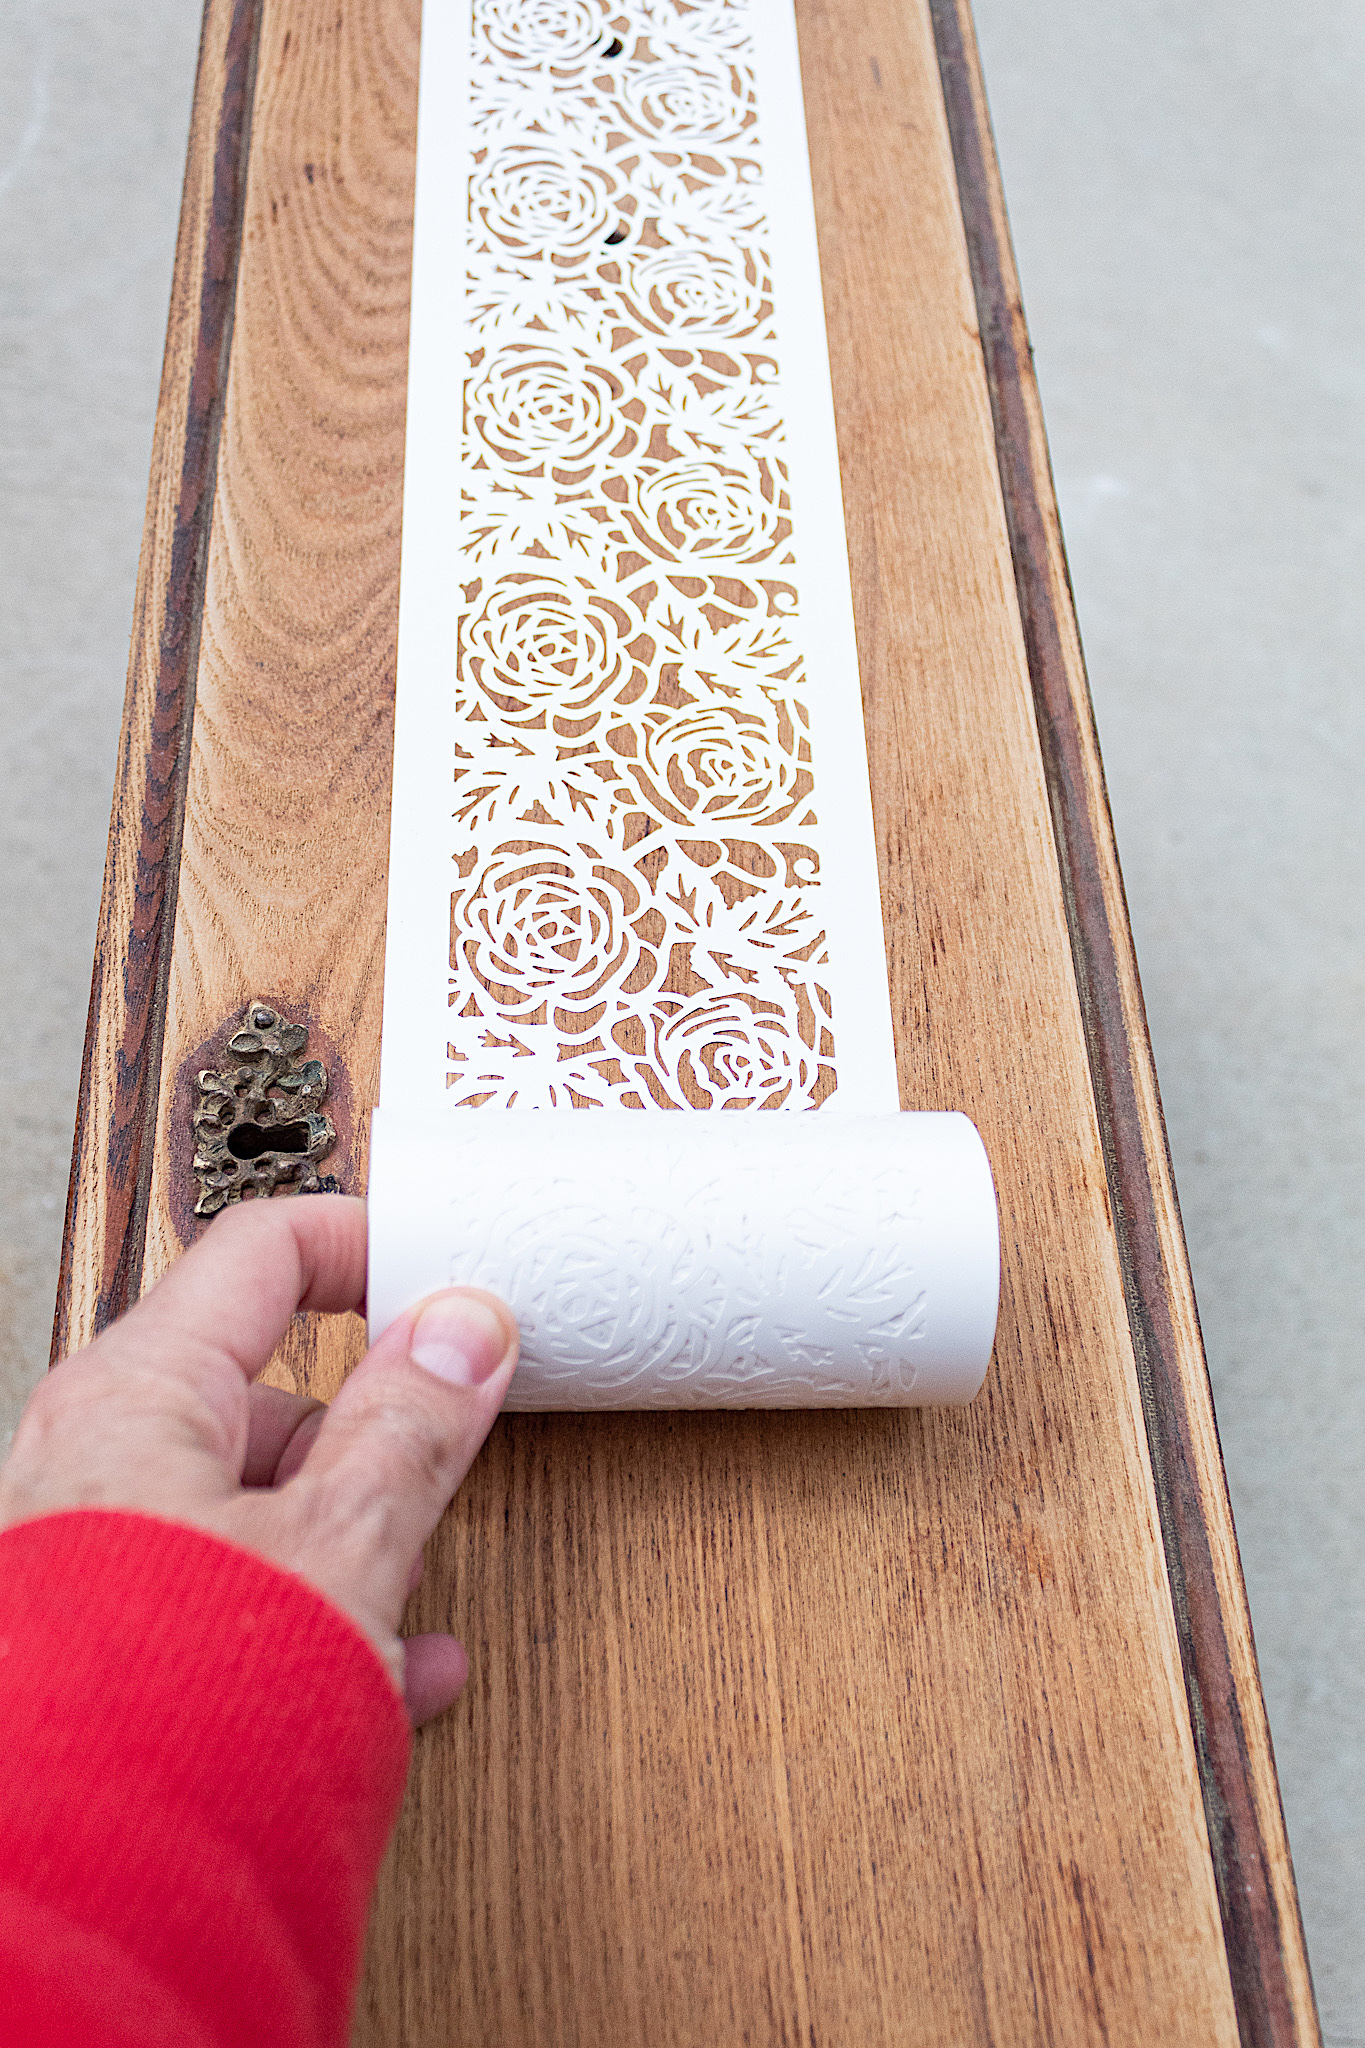
Ready to stencil!
Can I tell you how excited I was when these Redesign Stick & Styles stencils came out! No more having to hold the stencil in place as you paint.
To begin you unroll the stencil and cut a piece the length of the area you want to stencil. Make sure you have it in the right position before pressing it onto your surface.
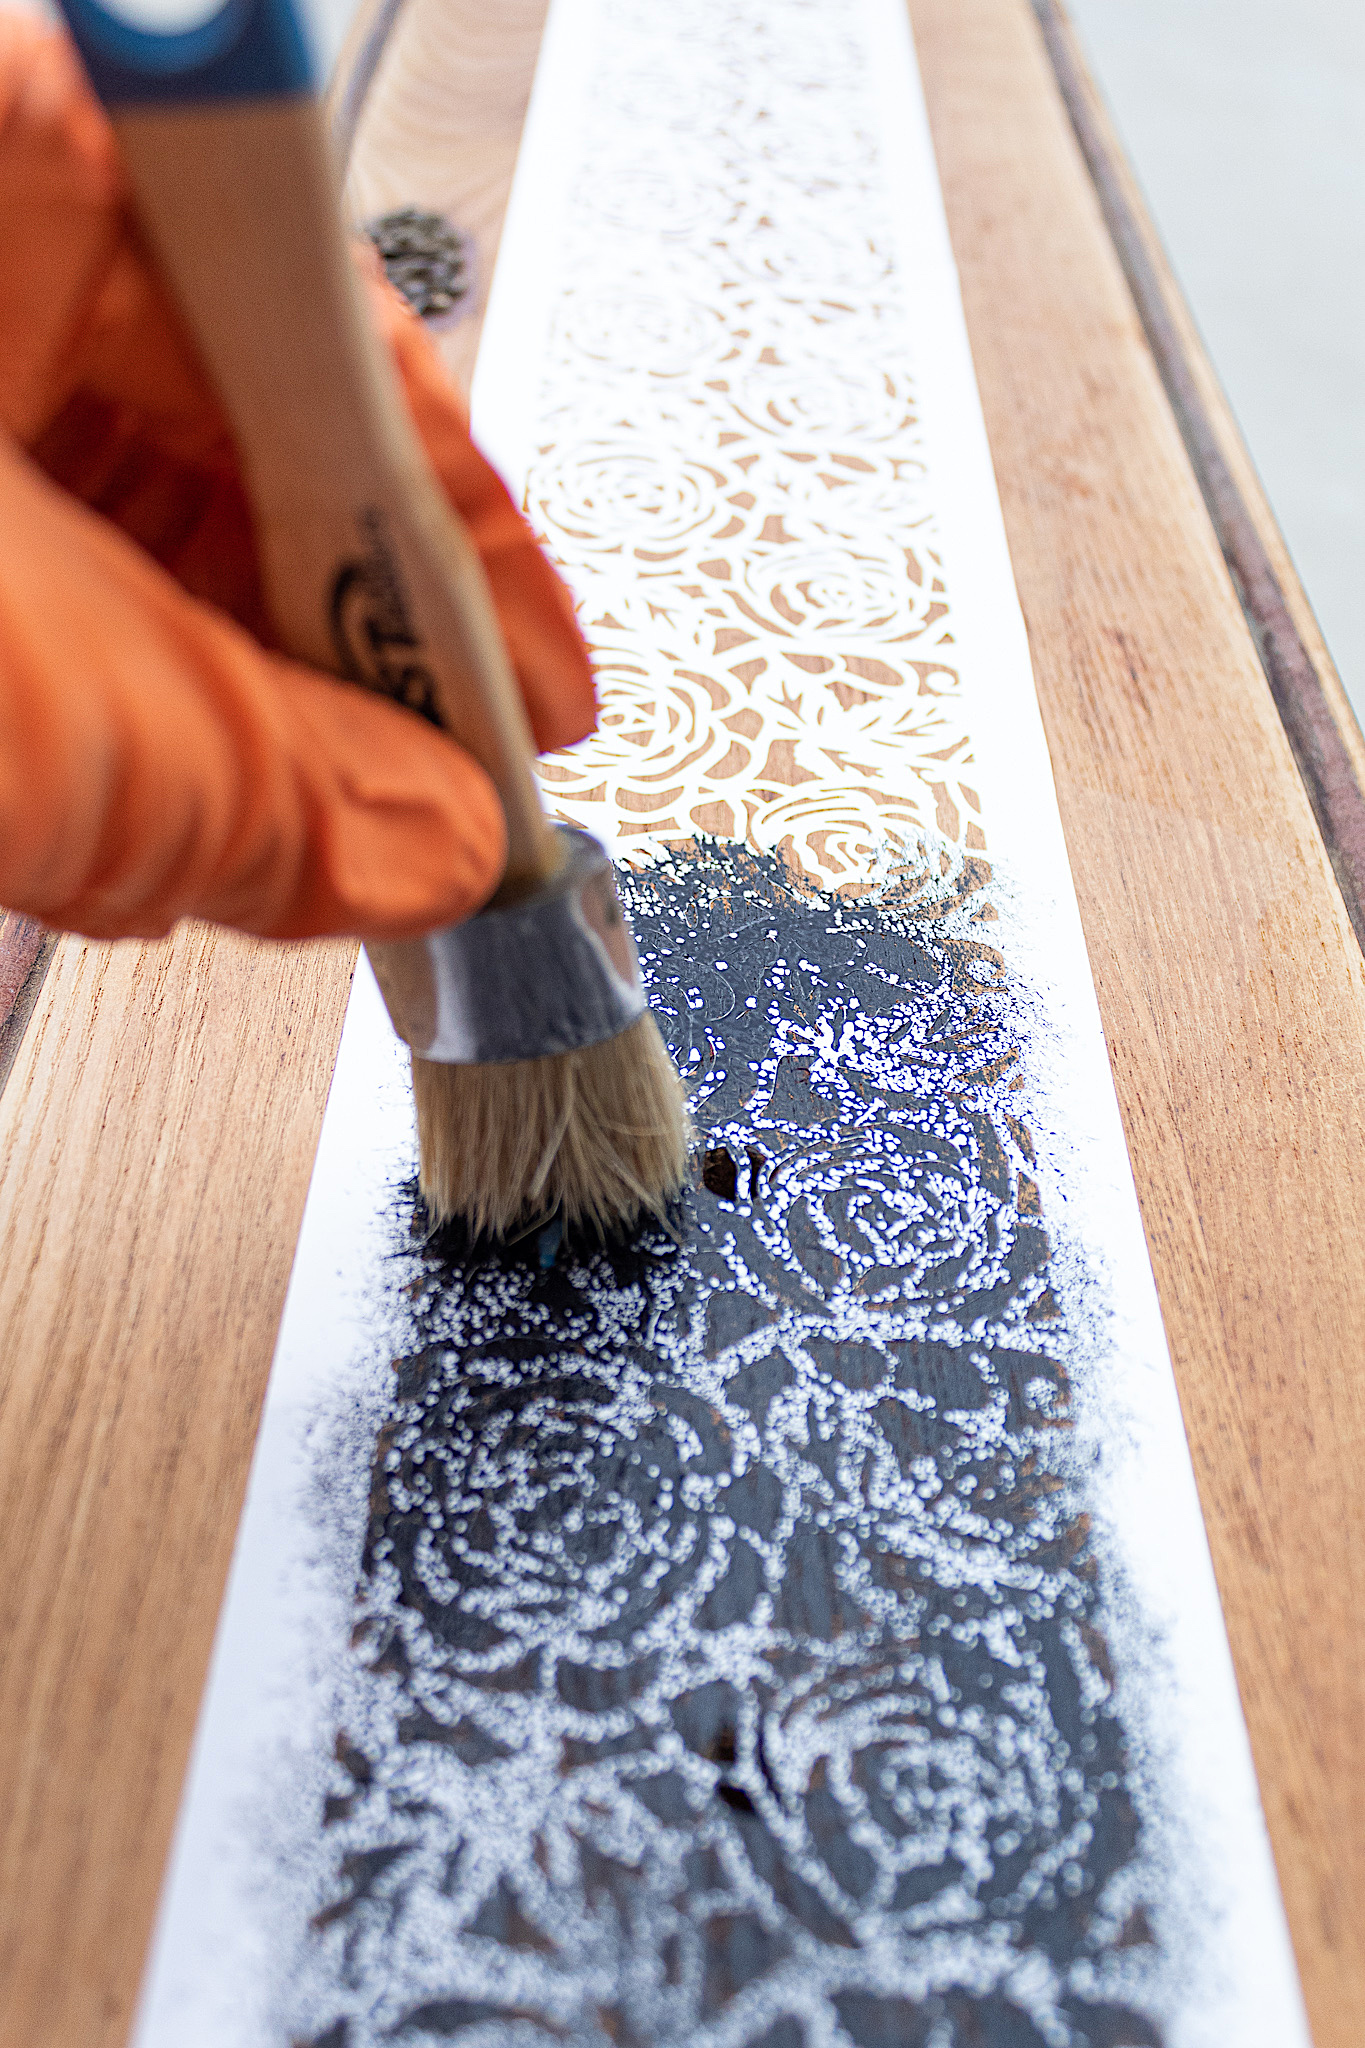
Using a stencil brush or a chalk paint brush with dense bristles, start applying your paint. I like using a dark paint for this look. It will stand out better once we stain the wood. I went with Behr’s Graphic Charcoal.
Make sure you don’t get too much paint on the brush at a time and that you apply it by dabbing the brush up and down over the stencil, not side to side.
Once you have painted over your stencil, slowly peel back to display your beautiful artwork.
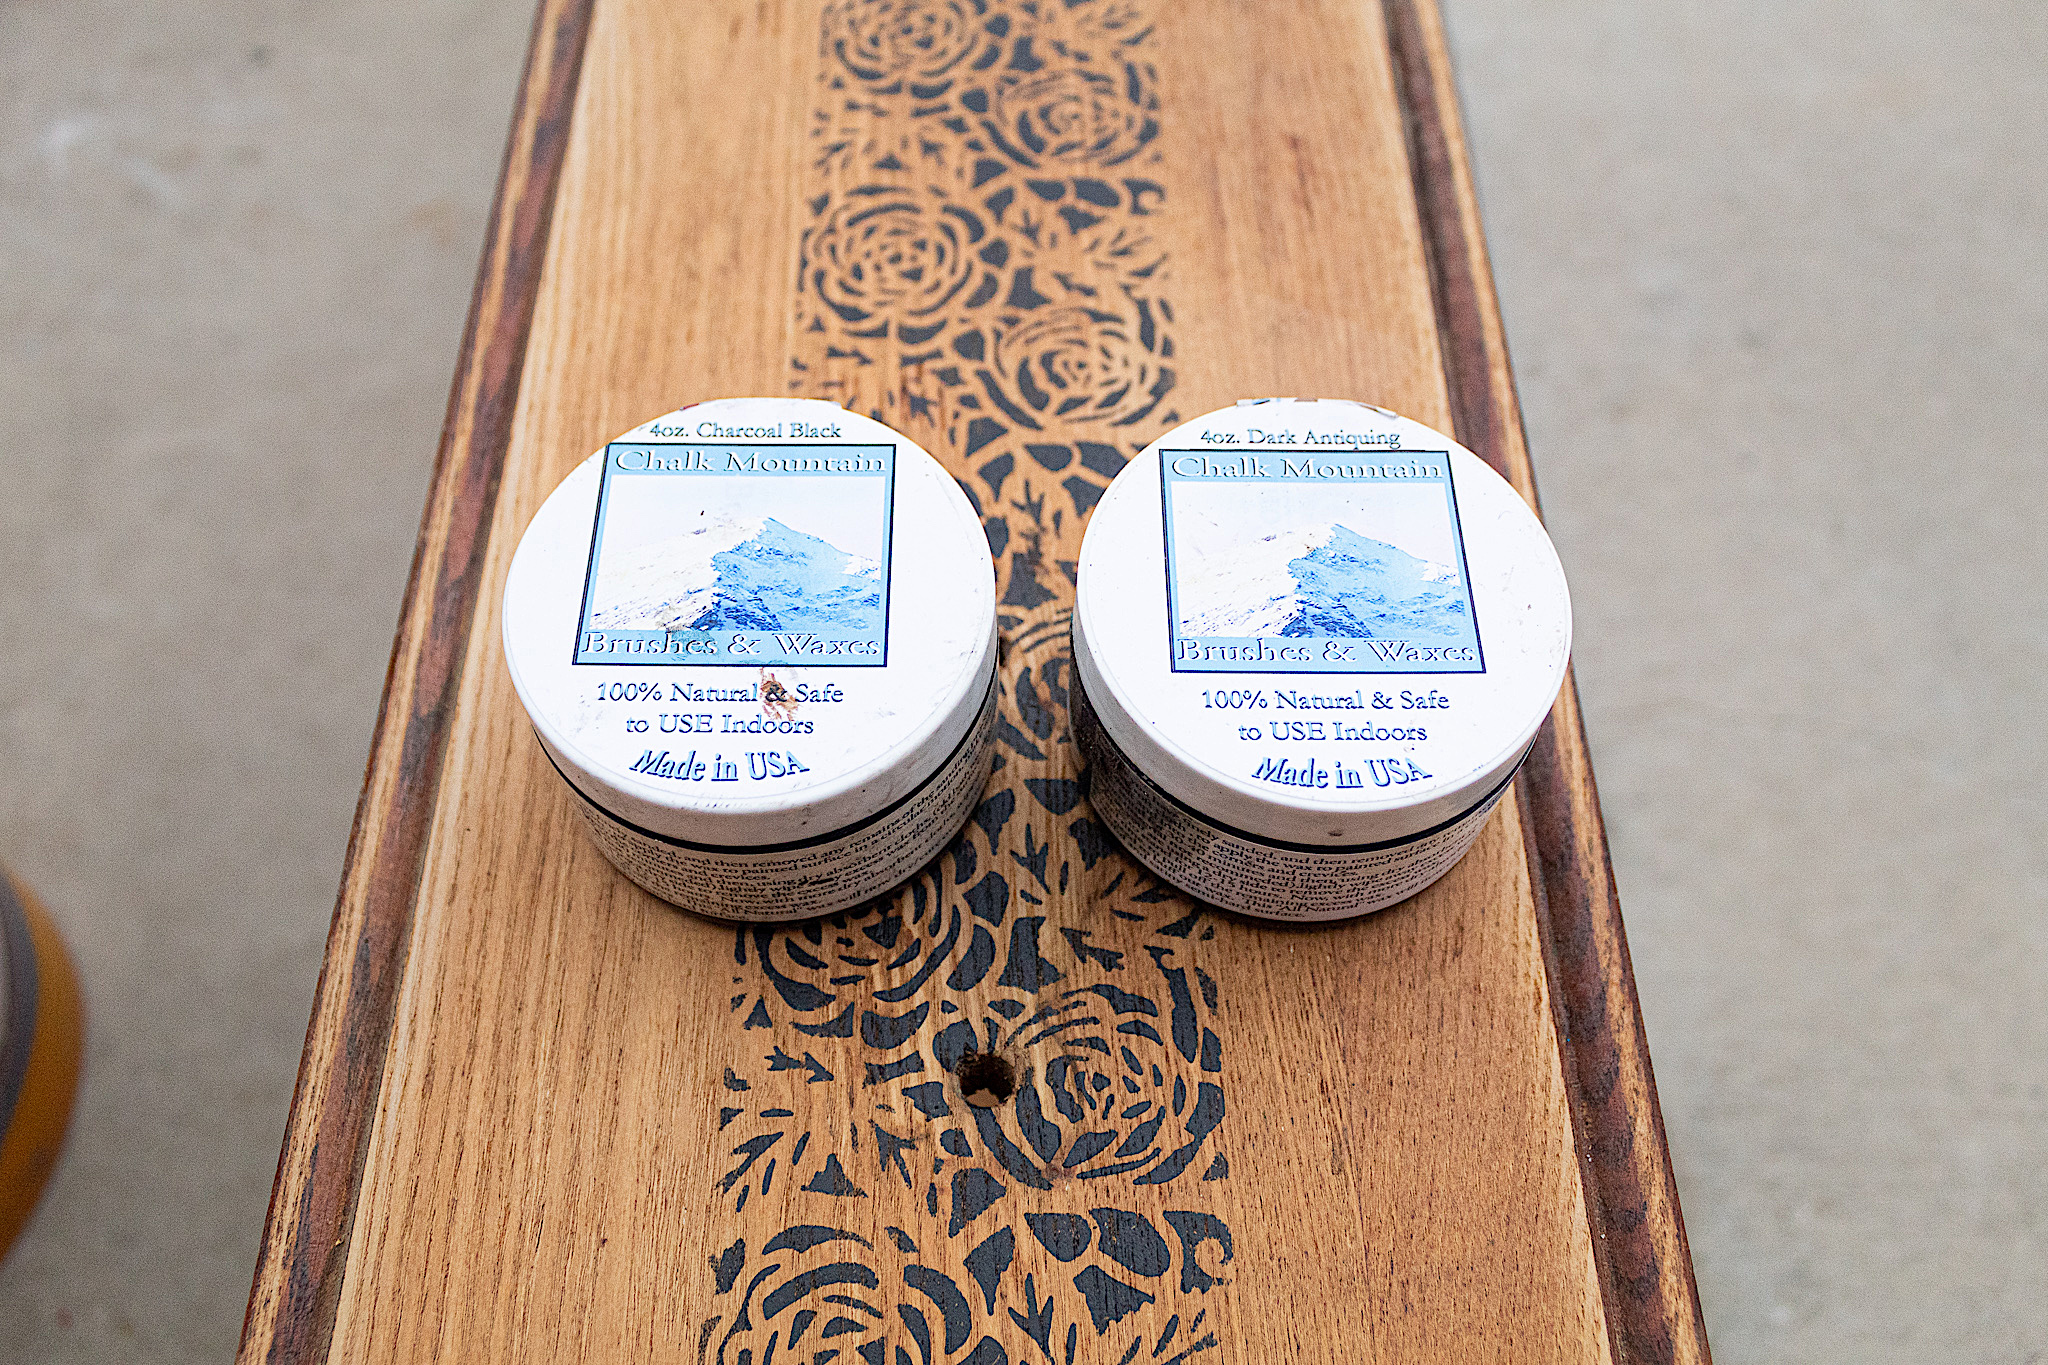
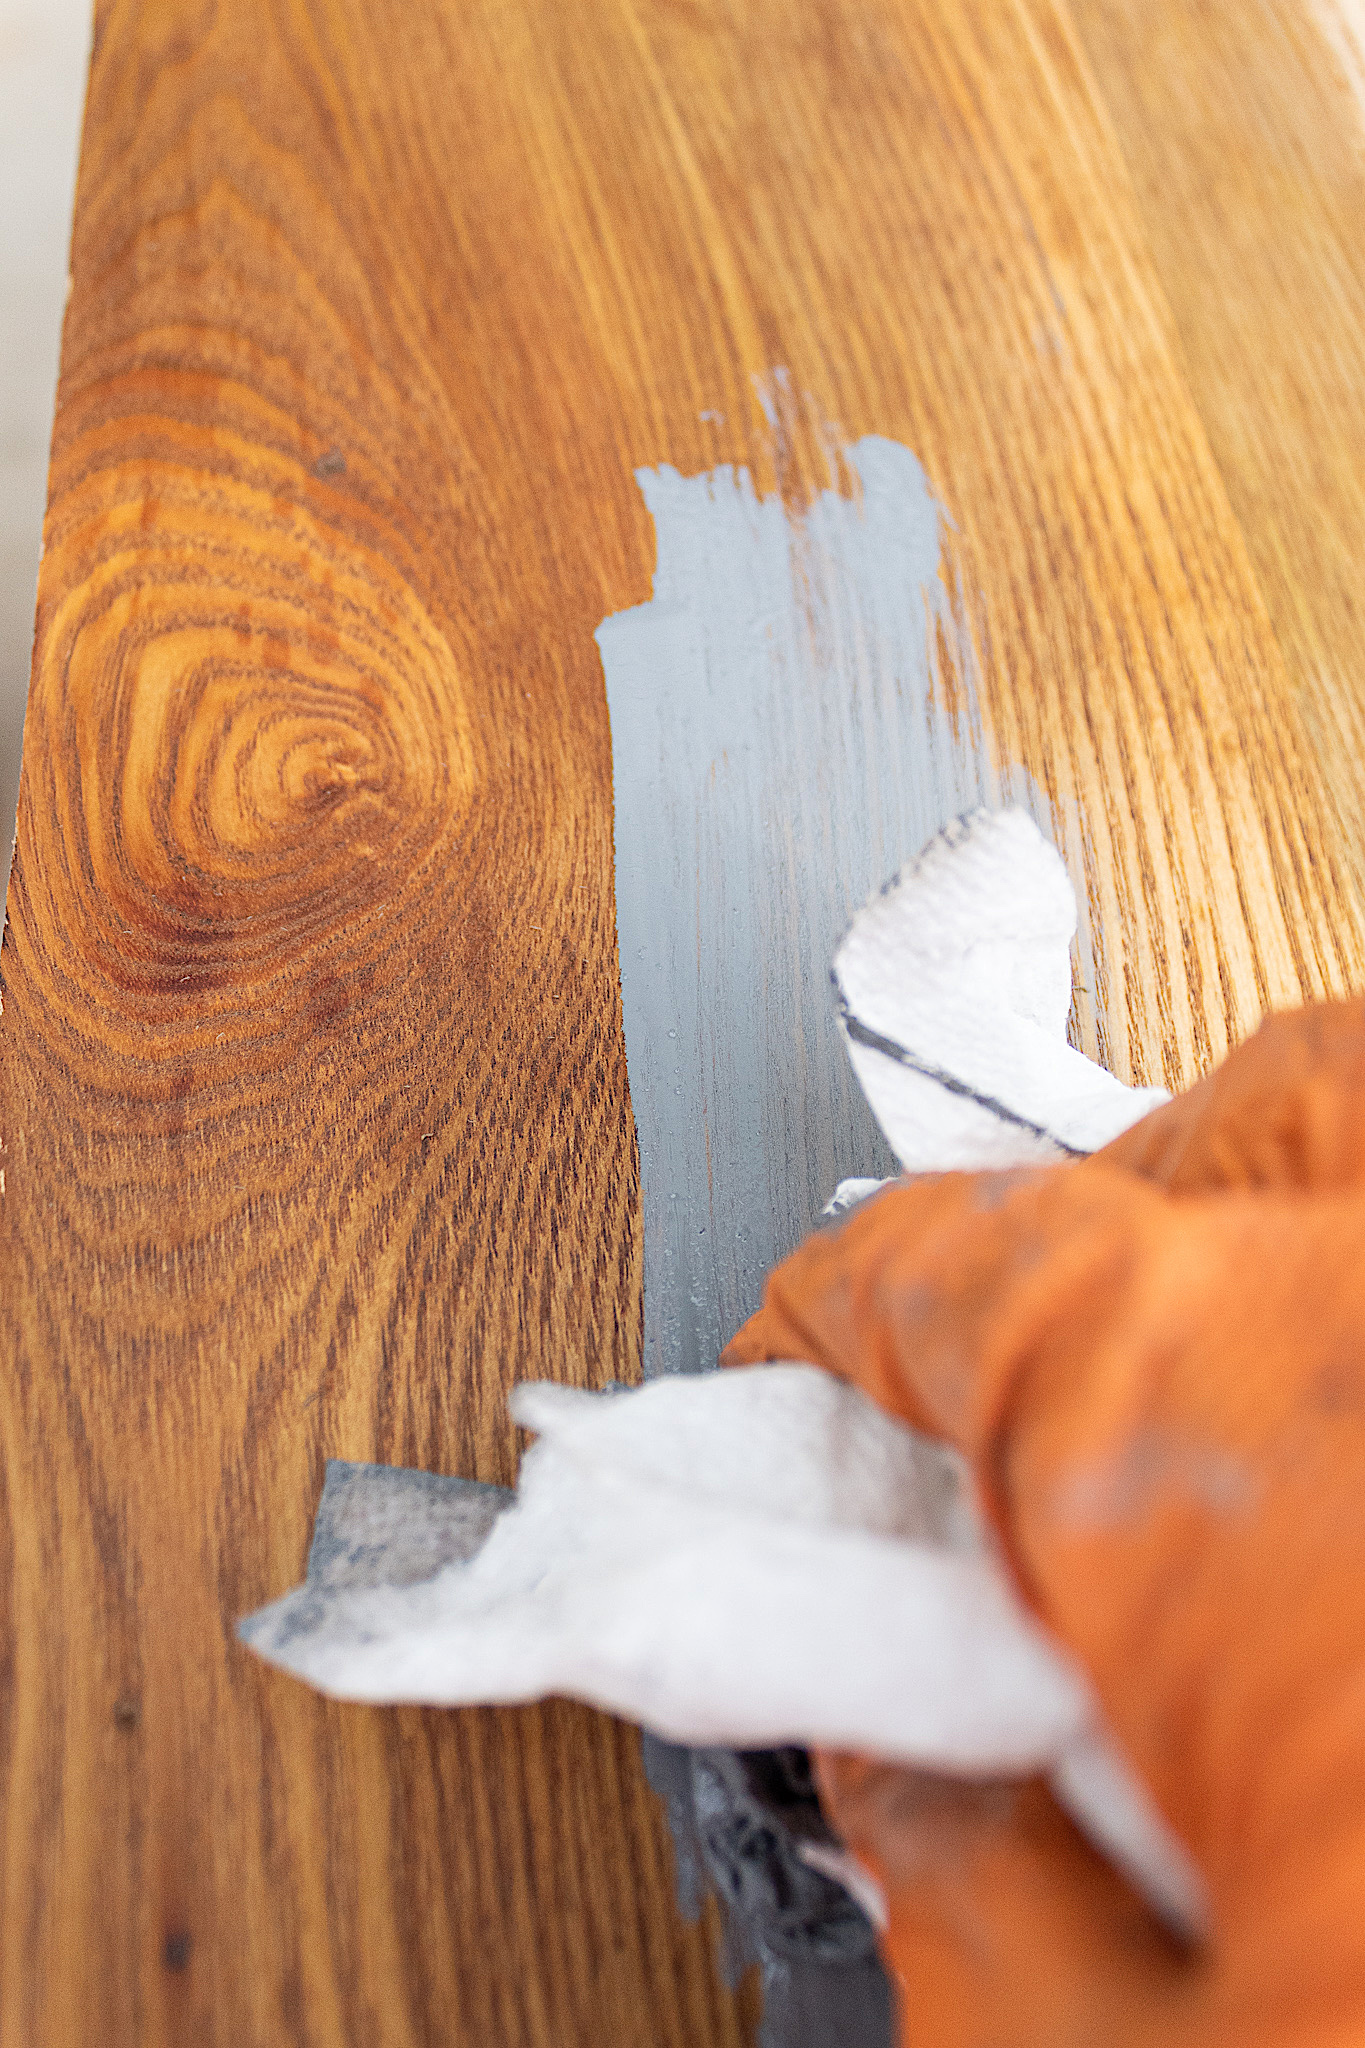
Apply decorative wax
I love these waxes by Chalk Mountain. I have a set of four and love playing with the different hues. For this piece I went with the Charcoal black.
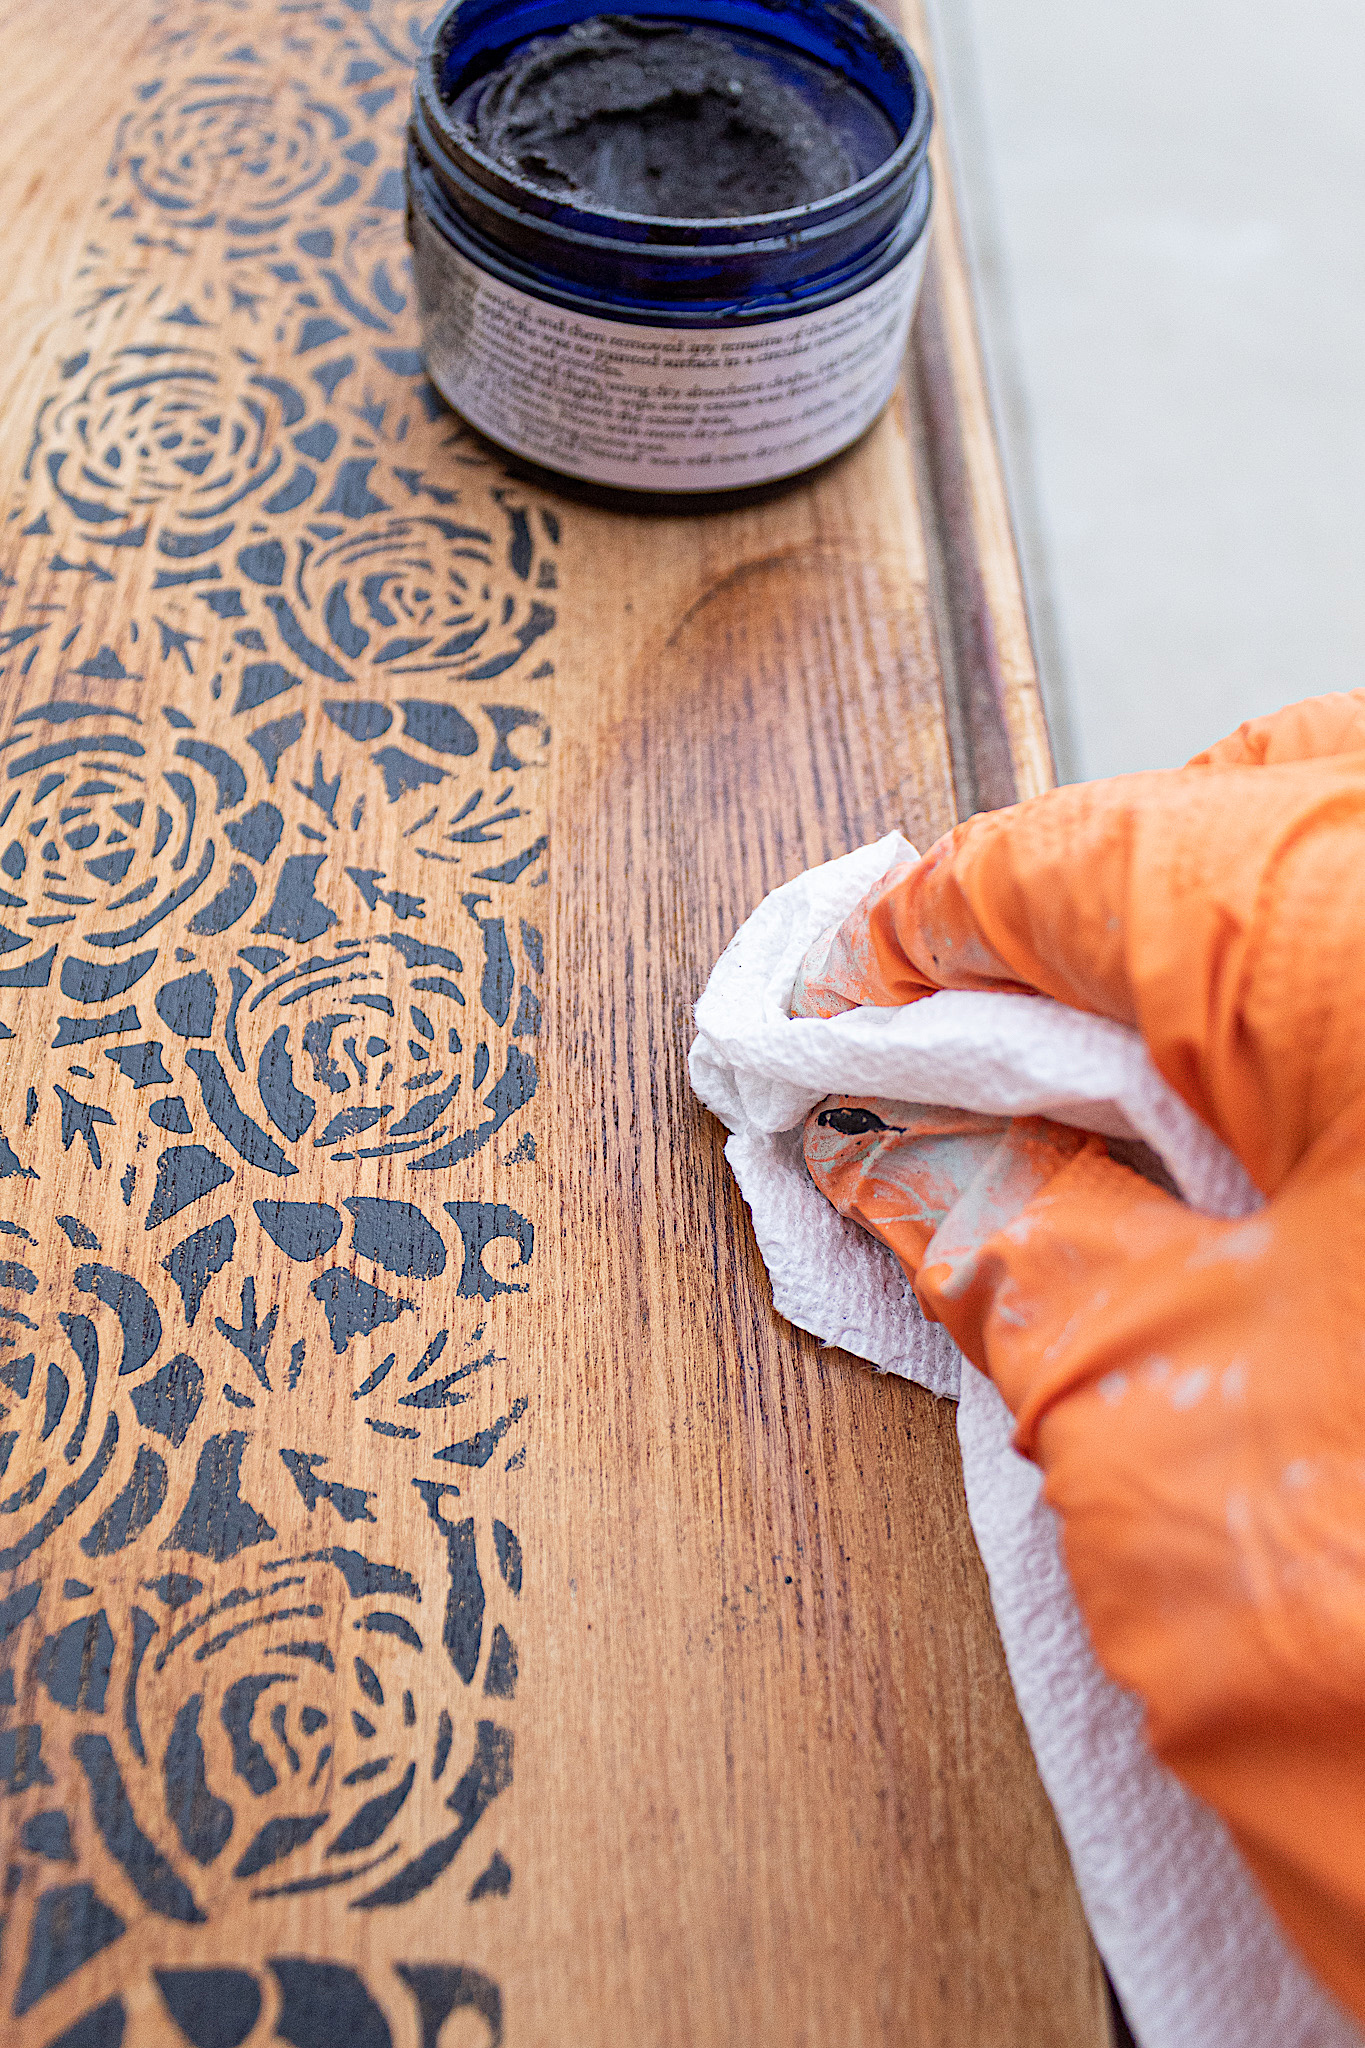
Using paper towels, I rubbed some on my drawer fronts in random parts making sure to leave a “blotchy” appearance. Doing so will give you different tones in your finish, creating dimension.
You might be nervous about applying the wax so unevenly, but trust me, it will all look amazing in the end.
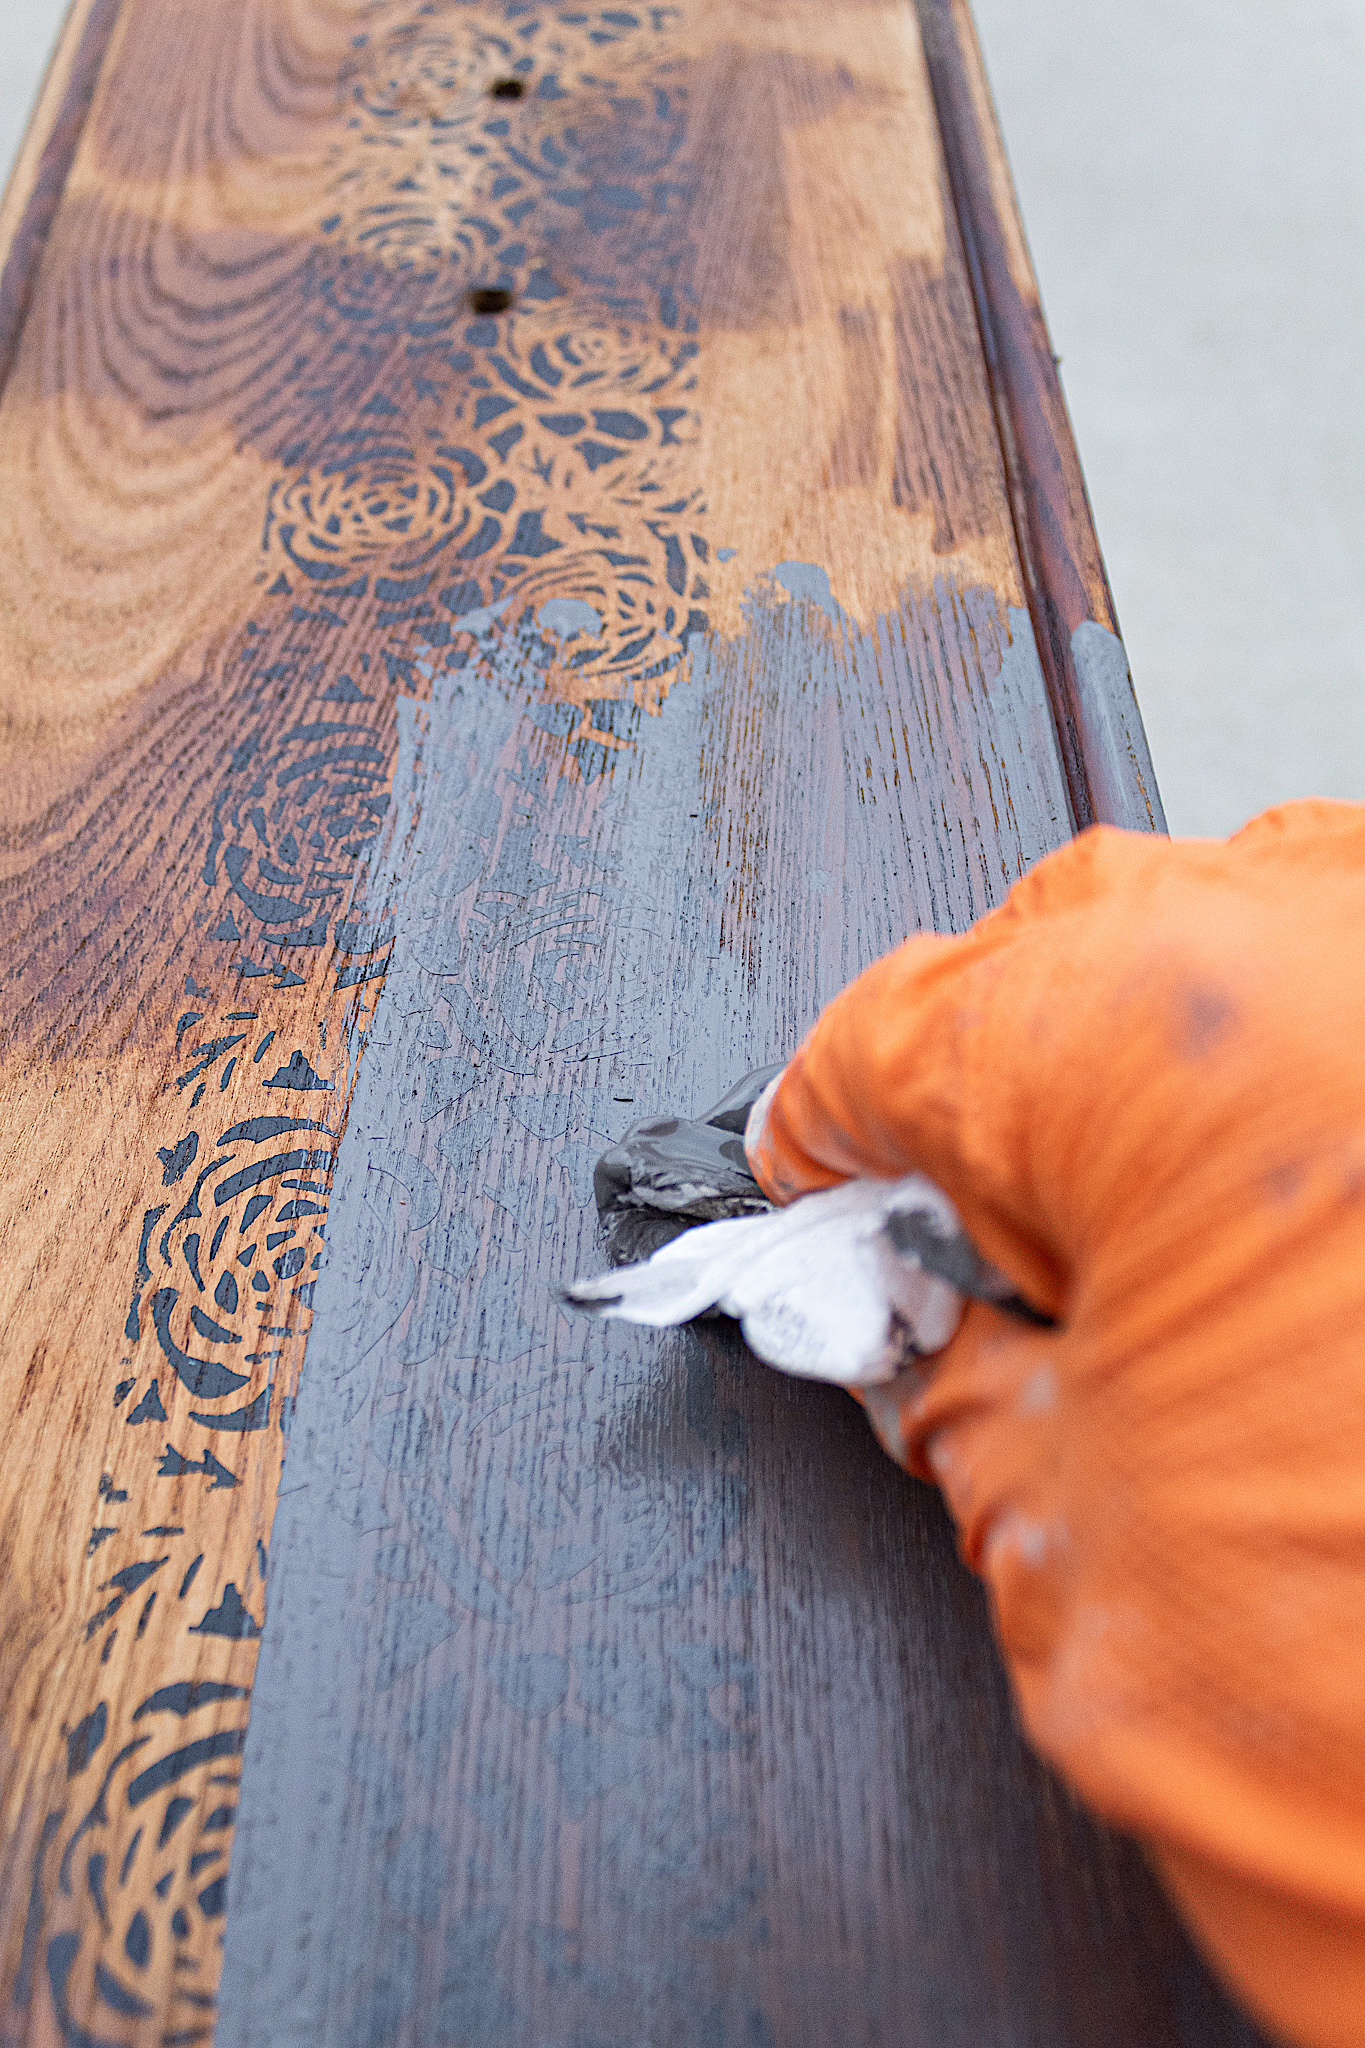
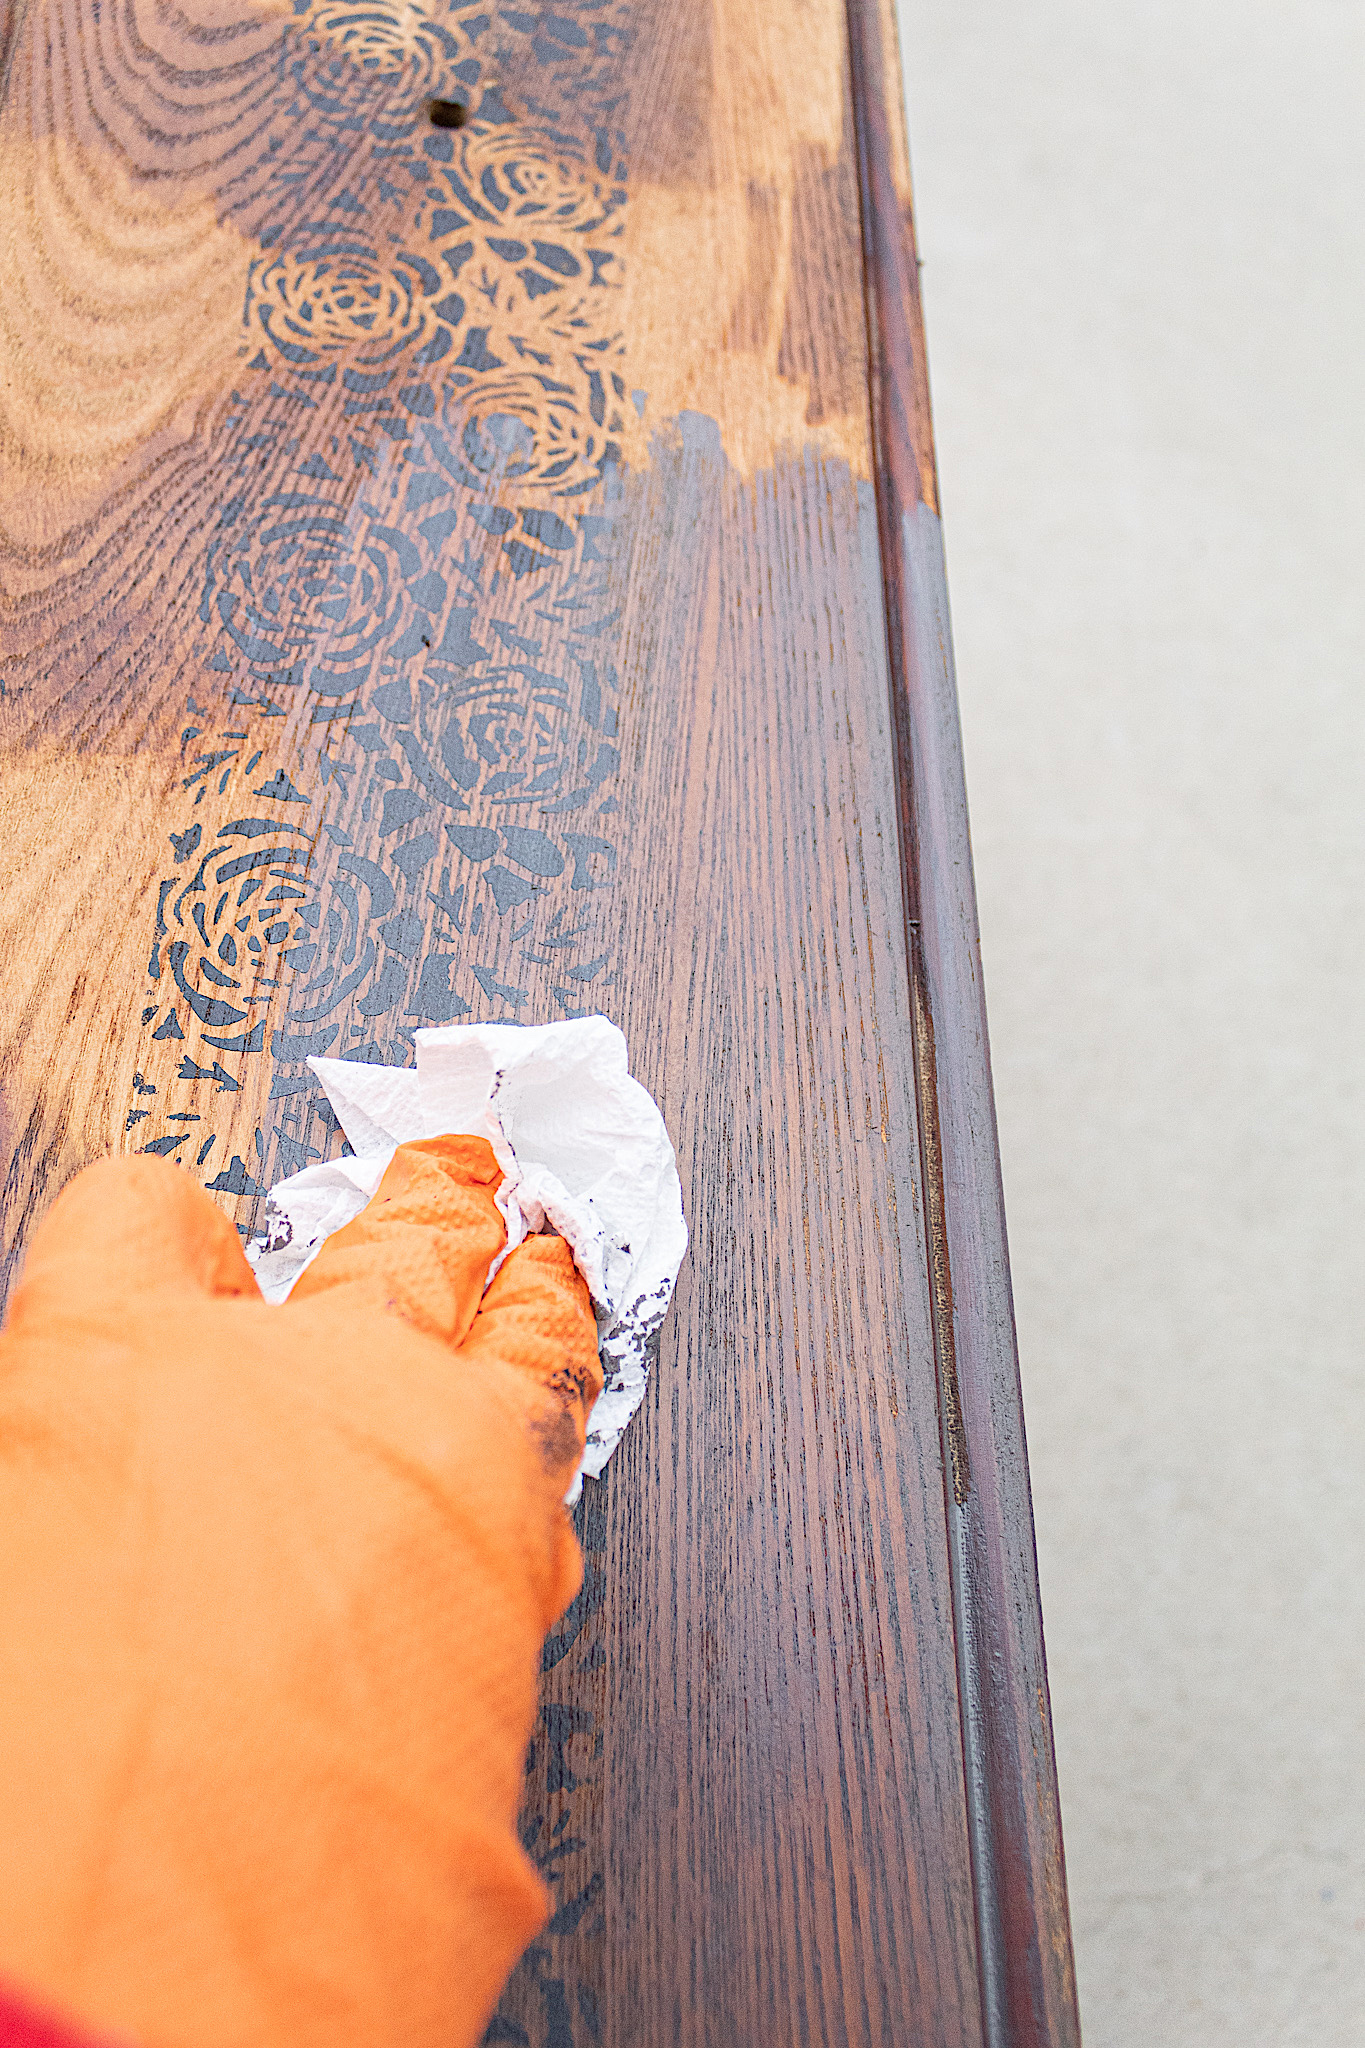
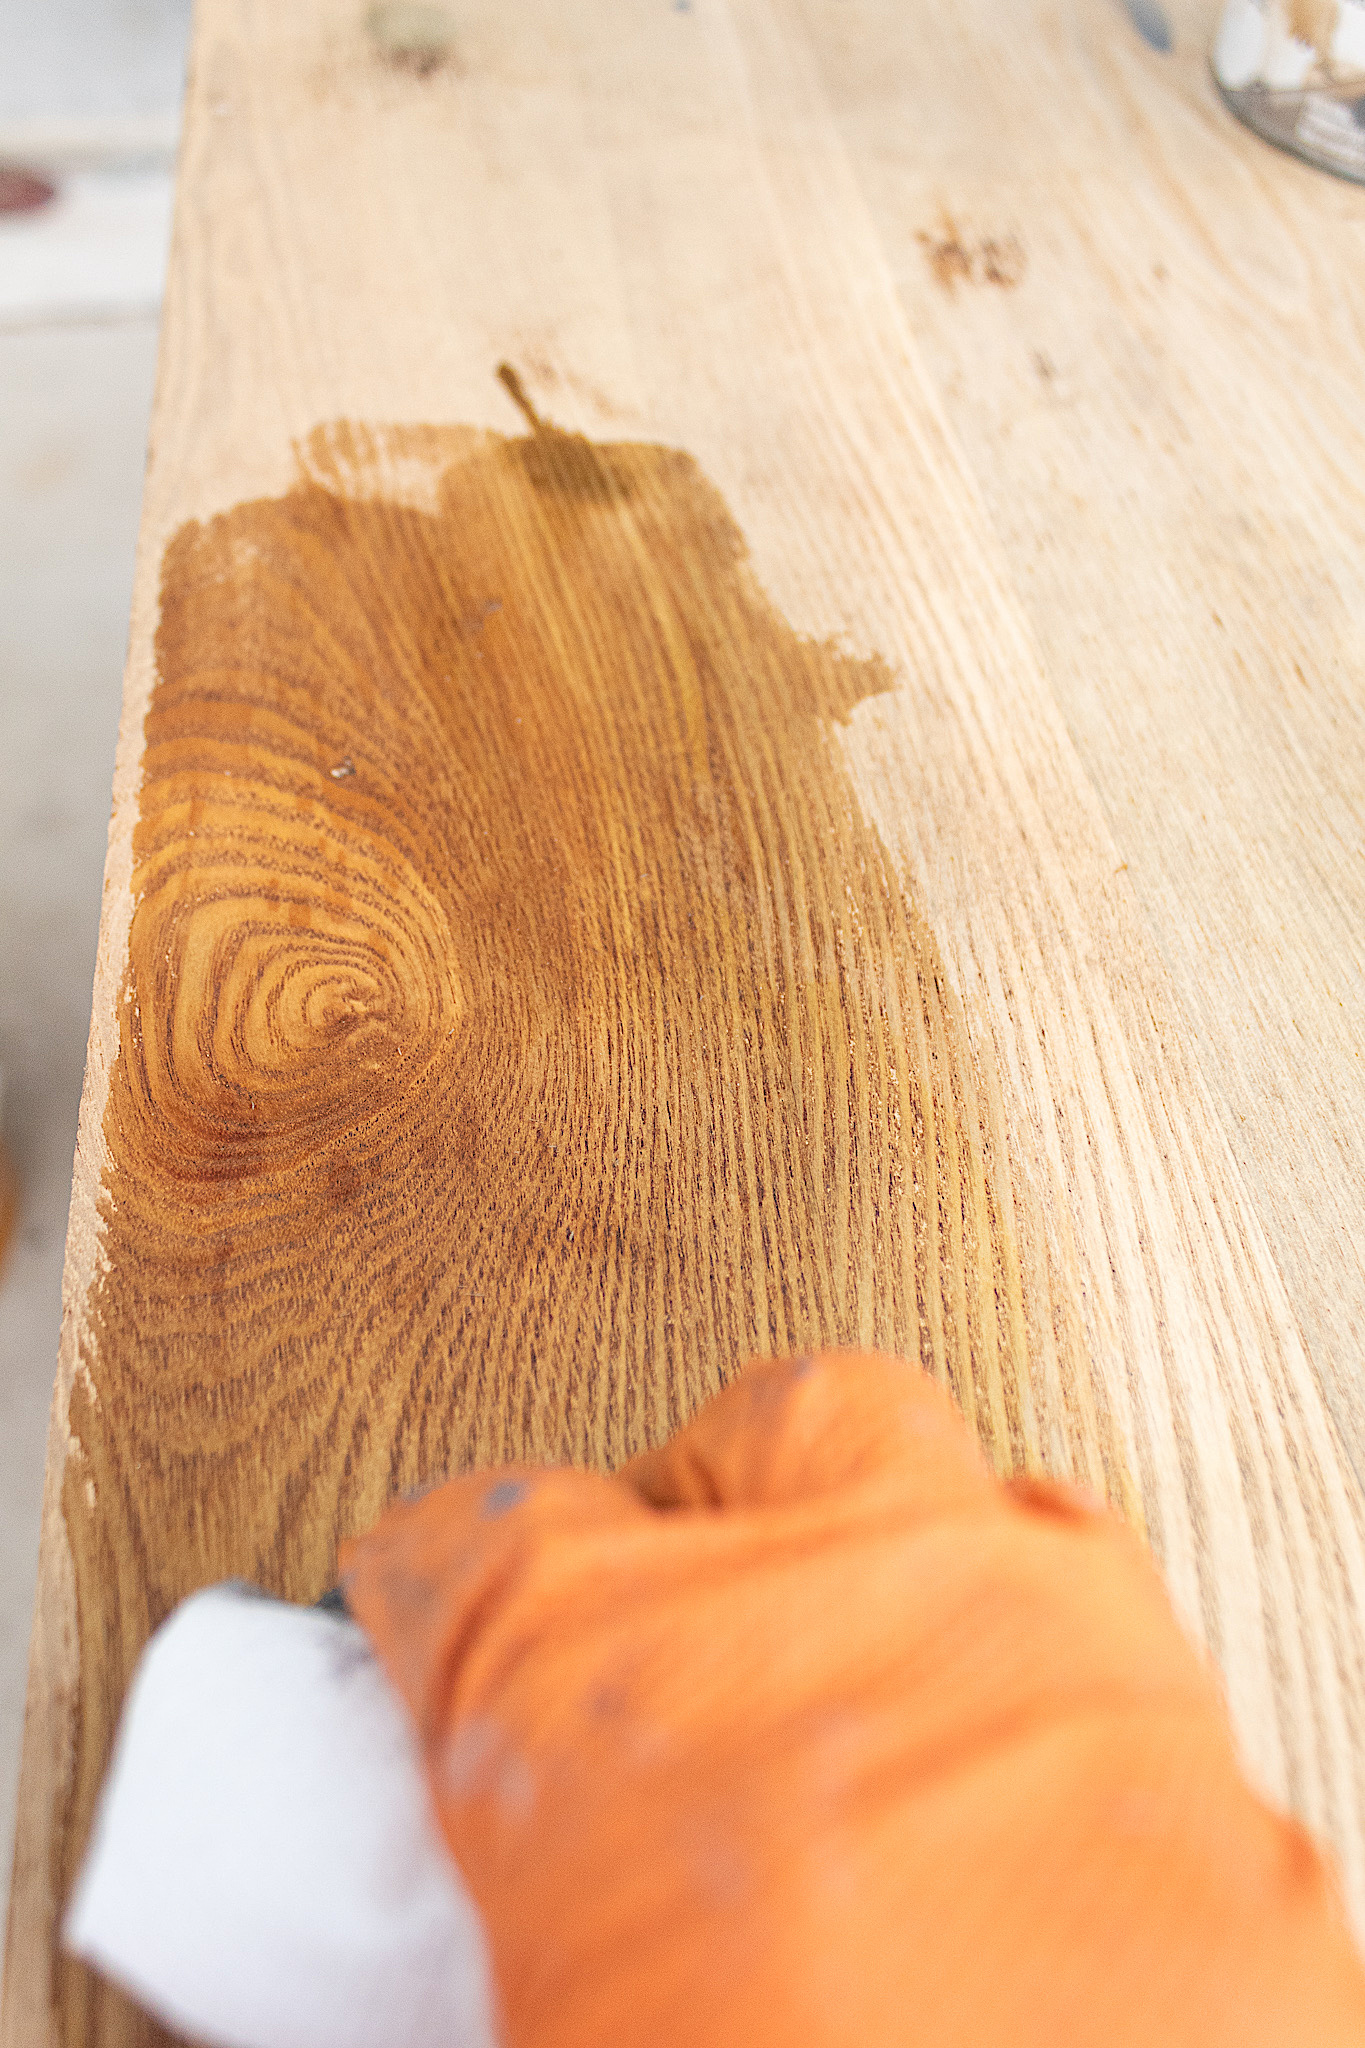
Next step, staining the drawer fronts
For my next step I use Rust-Oleum’s Weathered Gray stain. The gray helps to tone down the orange tannins of the wood. I first rub some on using a paper towel. Btw, I don’t really wait for the wax to dry. I just plop that stain right on. I’m not the most patient when it comes to drying times!
Once I apply the stain, I quickly rub it back with a clean paper towel, to slightly thin out the stain. One layer of stain will do magic to pull all the elements together—the wood, the waxed parts, the stencil detail. What results is a beautiful vintage look.
Now for a paint technique to make the drawers pop.
I make my own chalk paint using THIS RECIPE and it yields a lot of paint. For this reason you’ll often see me using combinations of left over paint colors on my pieces.
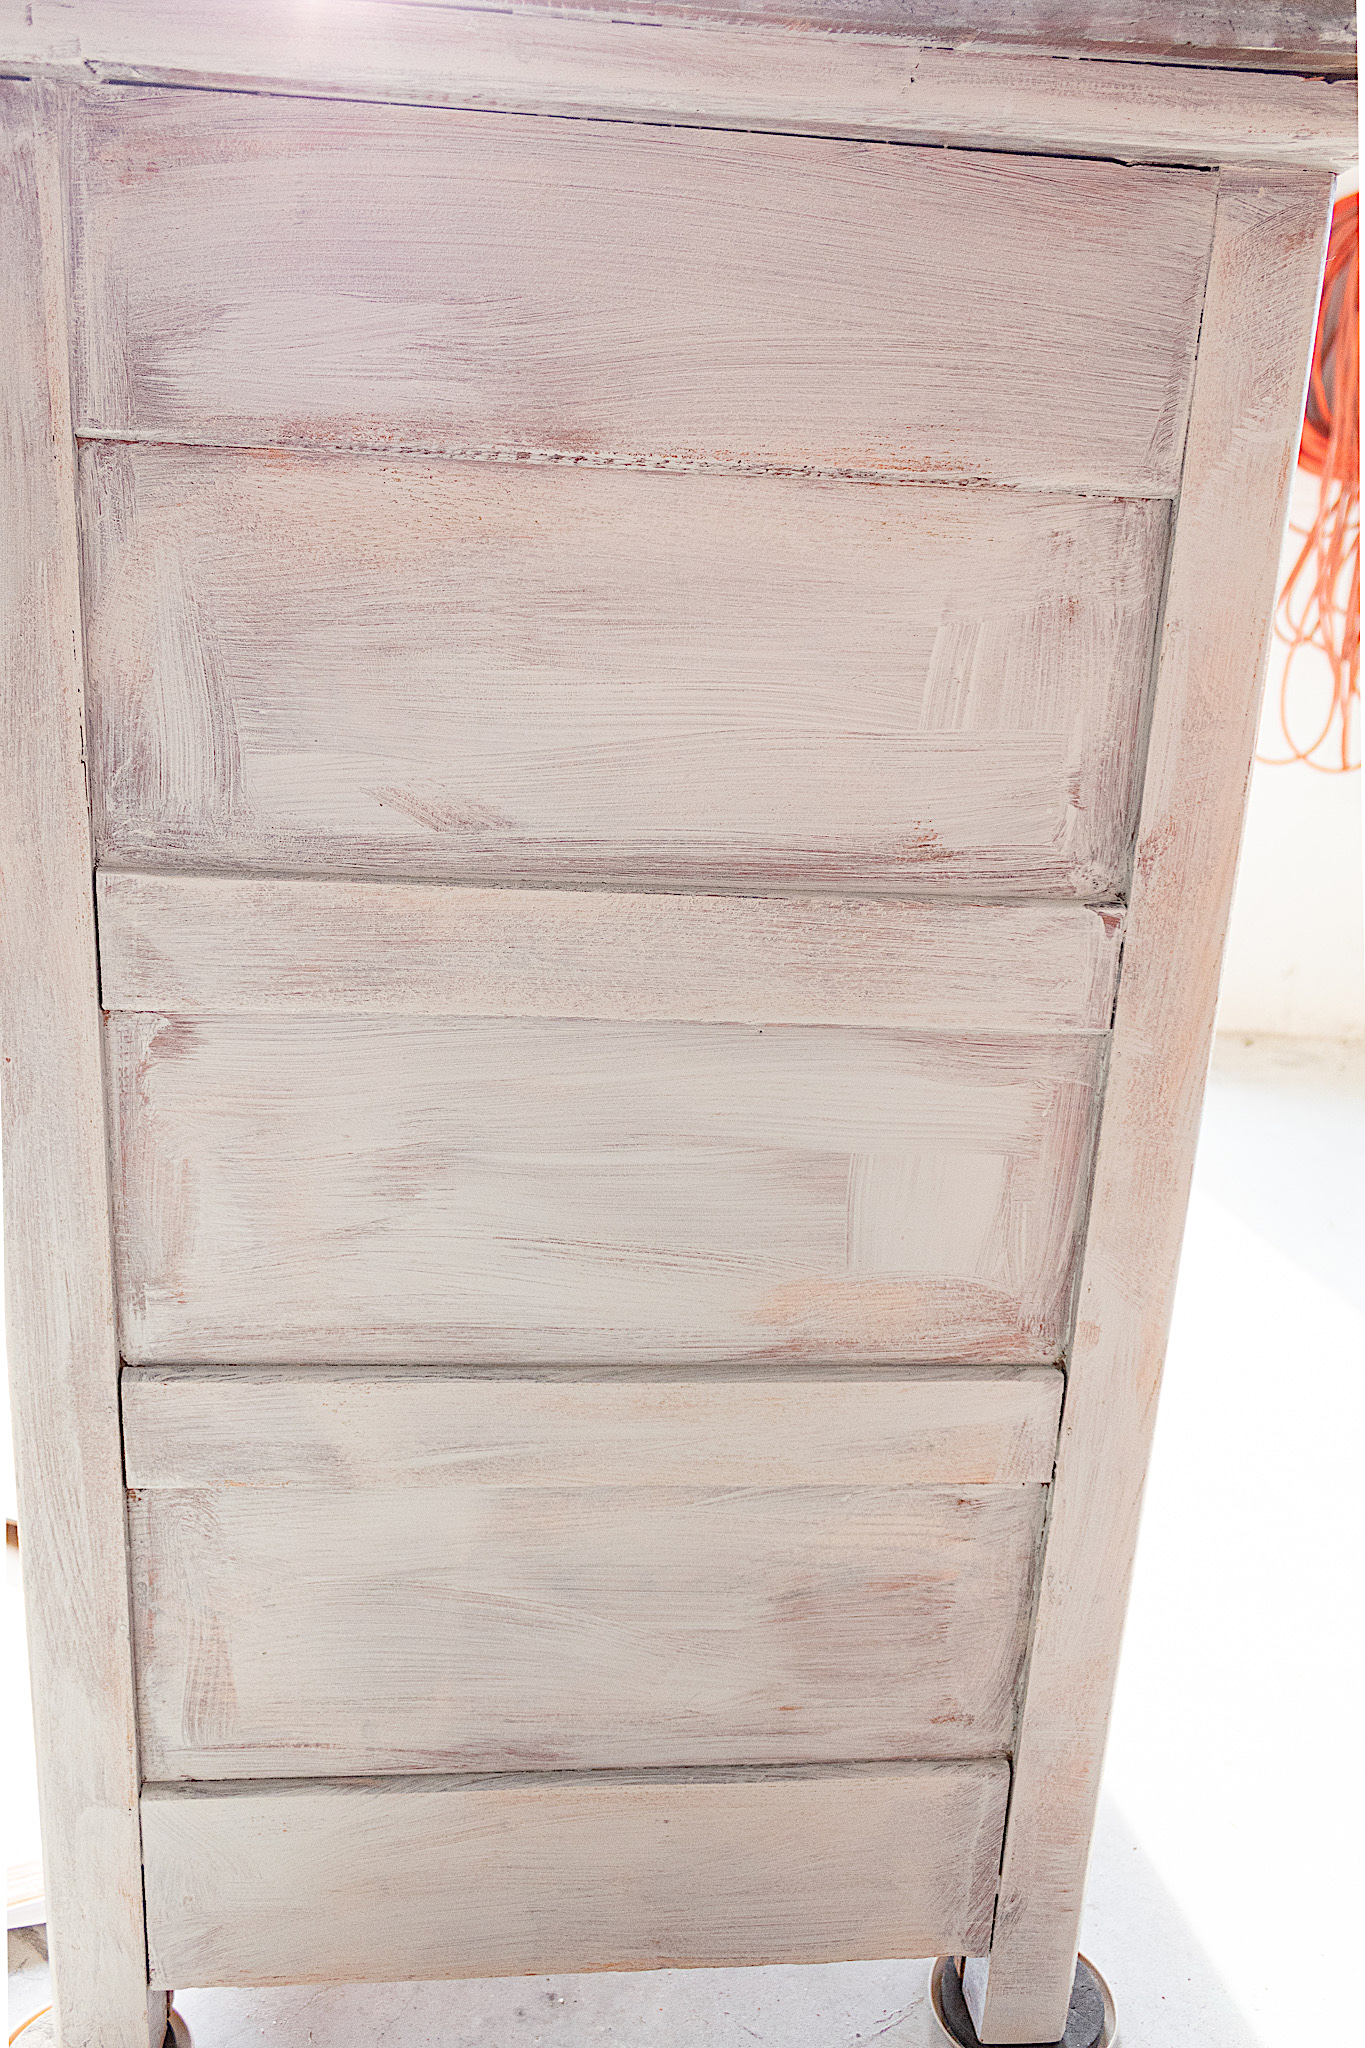
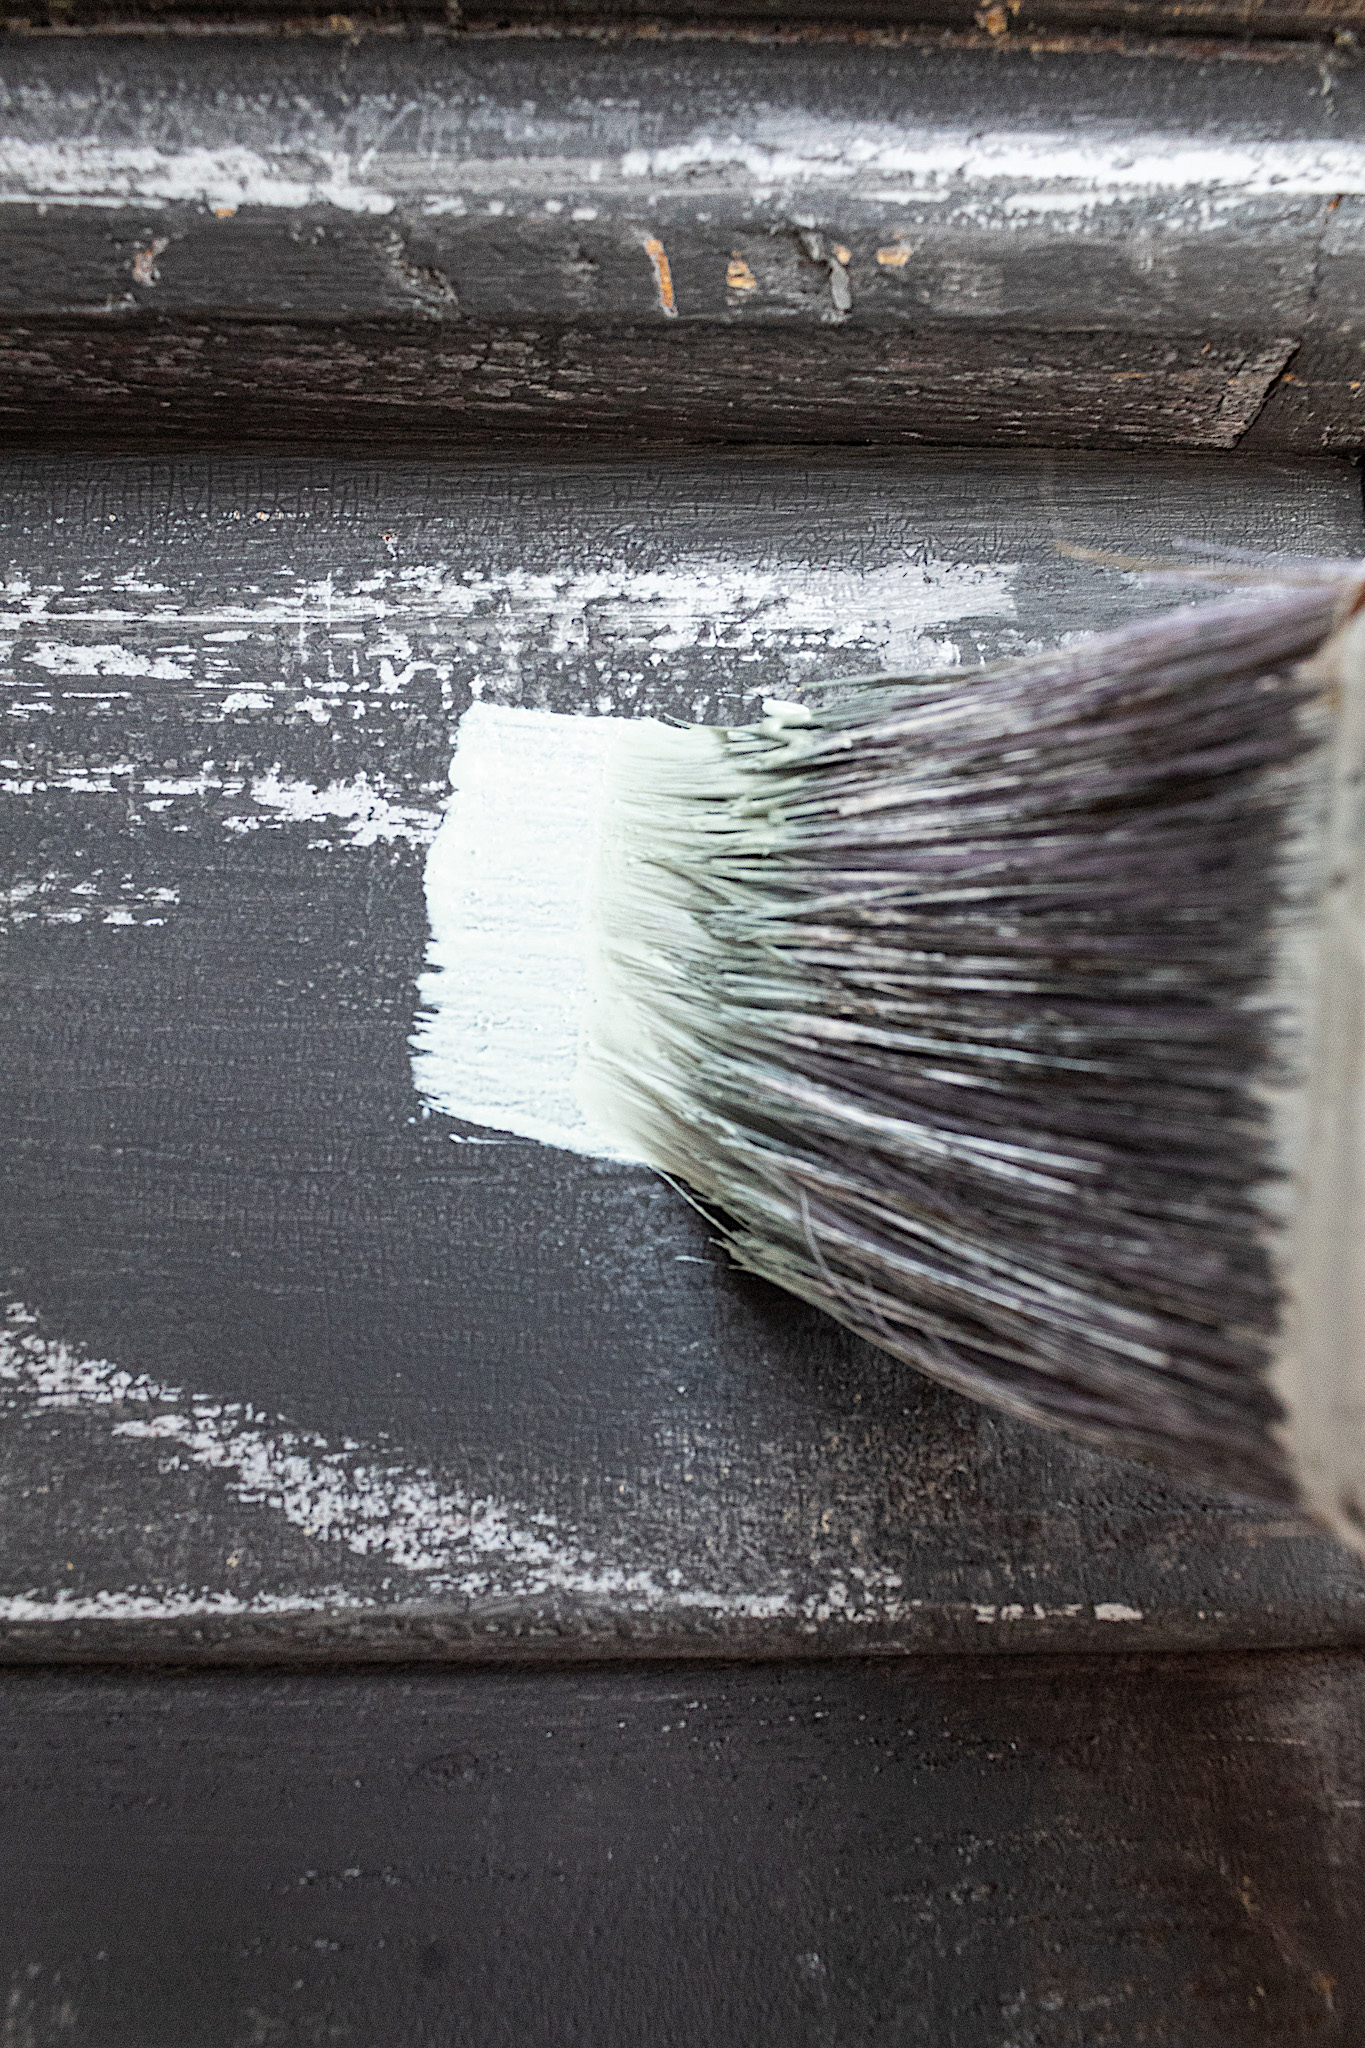
I only gave the chest a rough sanding before I applied my first layer of paint using Behr’s Weathered White. You can also use a white primer for your first layer. I like using this one.
We are creating age and character through paint layers so sloppy paint layers are perfect. Don’t worry if it looks messy at this point.
Let's get chippy!
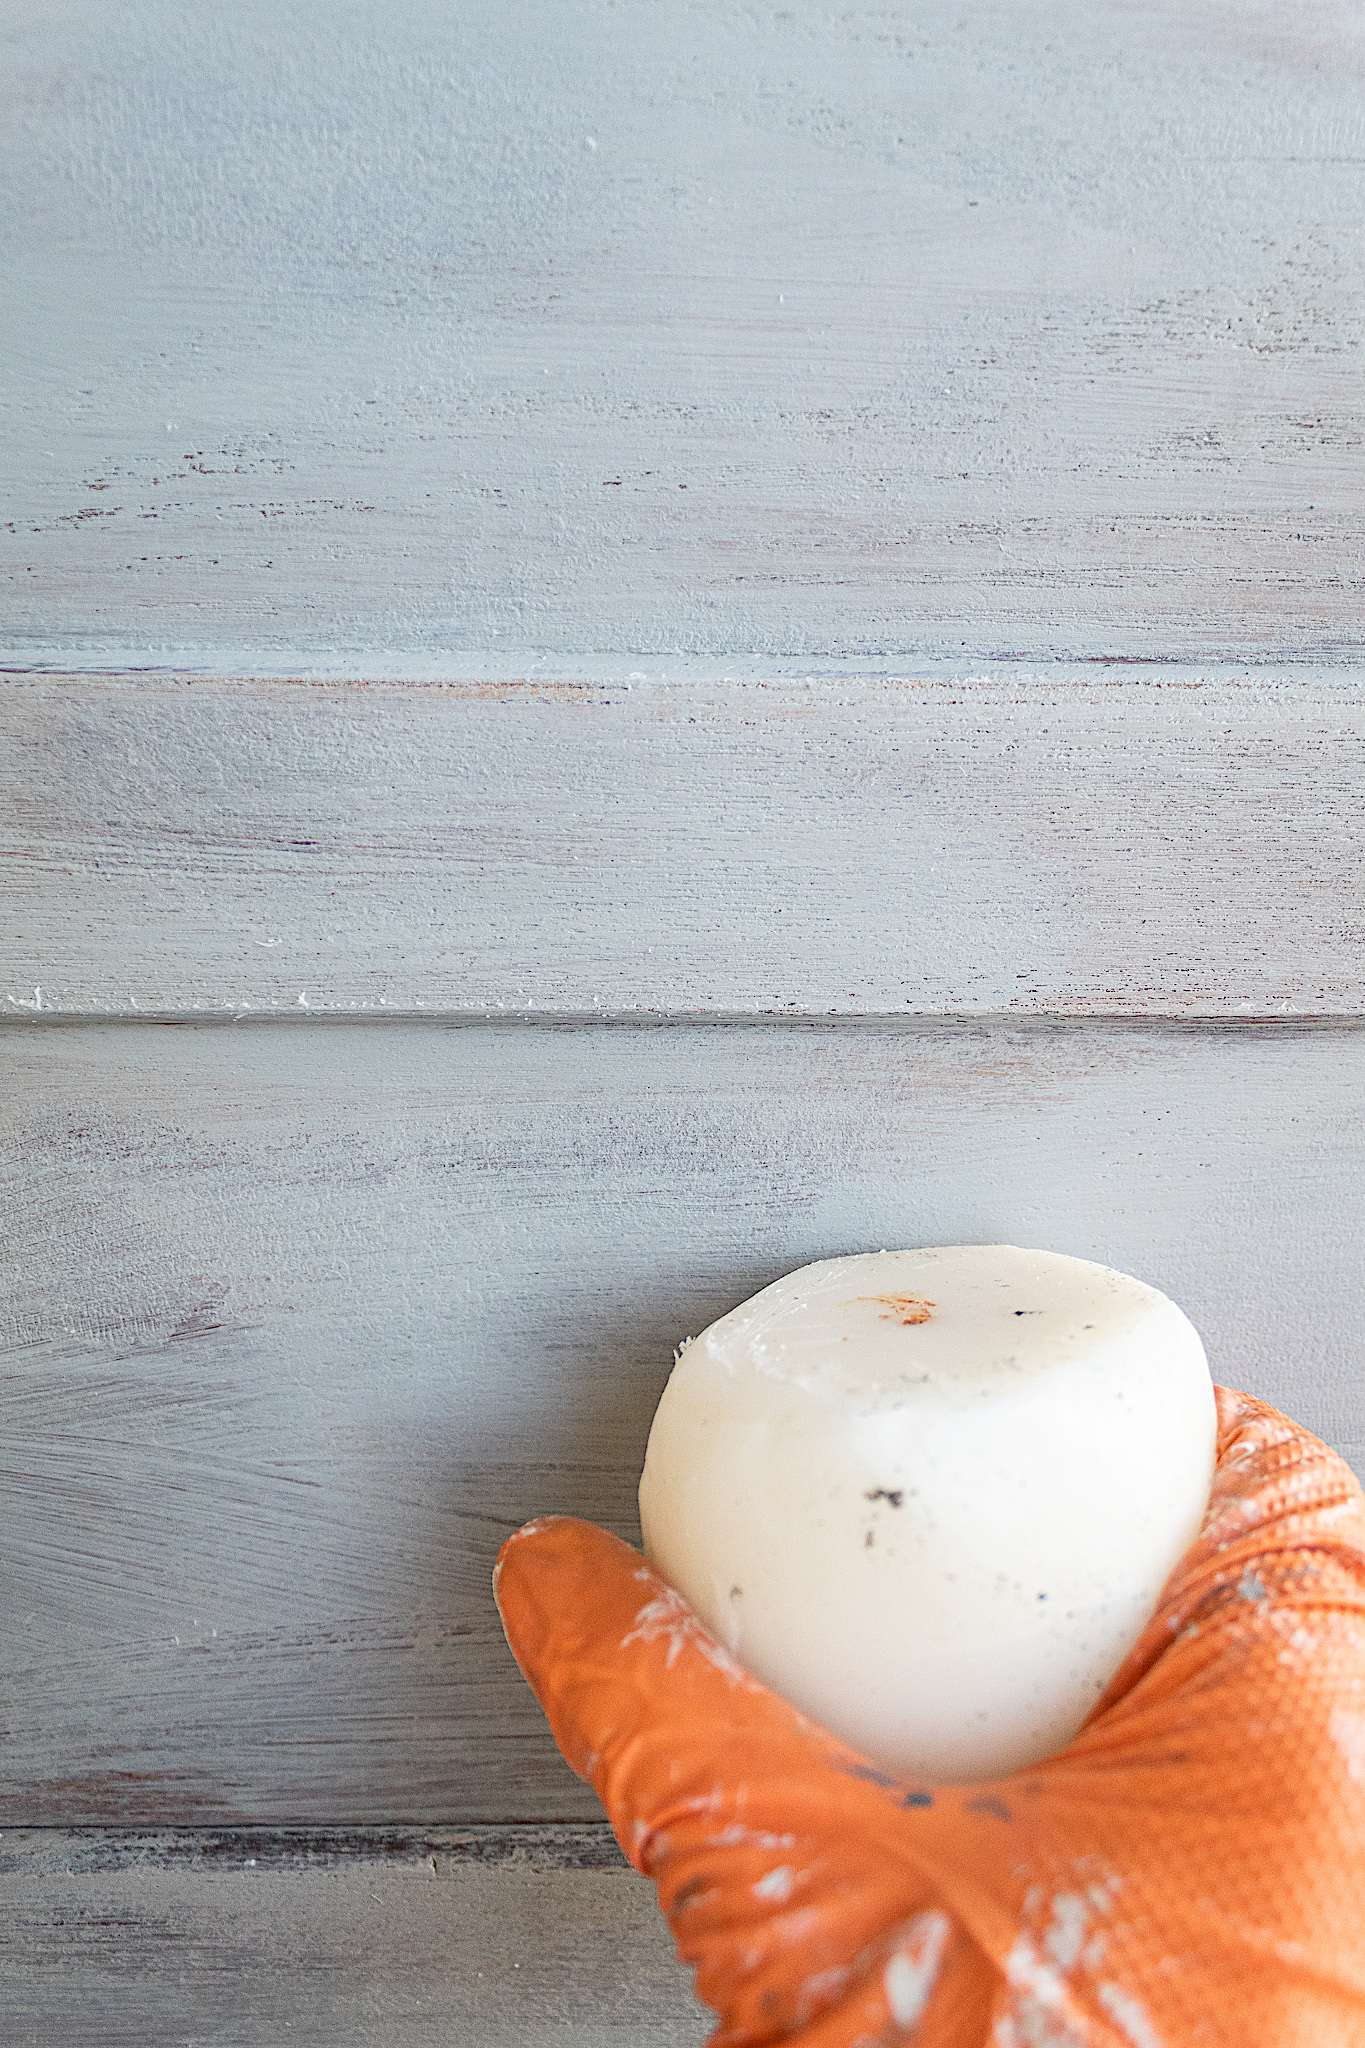
For some easy chippy appeal, I take a candle and rub it randomly over the surface that I painted white.
The wax will keep the next layer of paint from adhering in certain parts. This will give us a nice distressed finish.
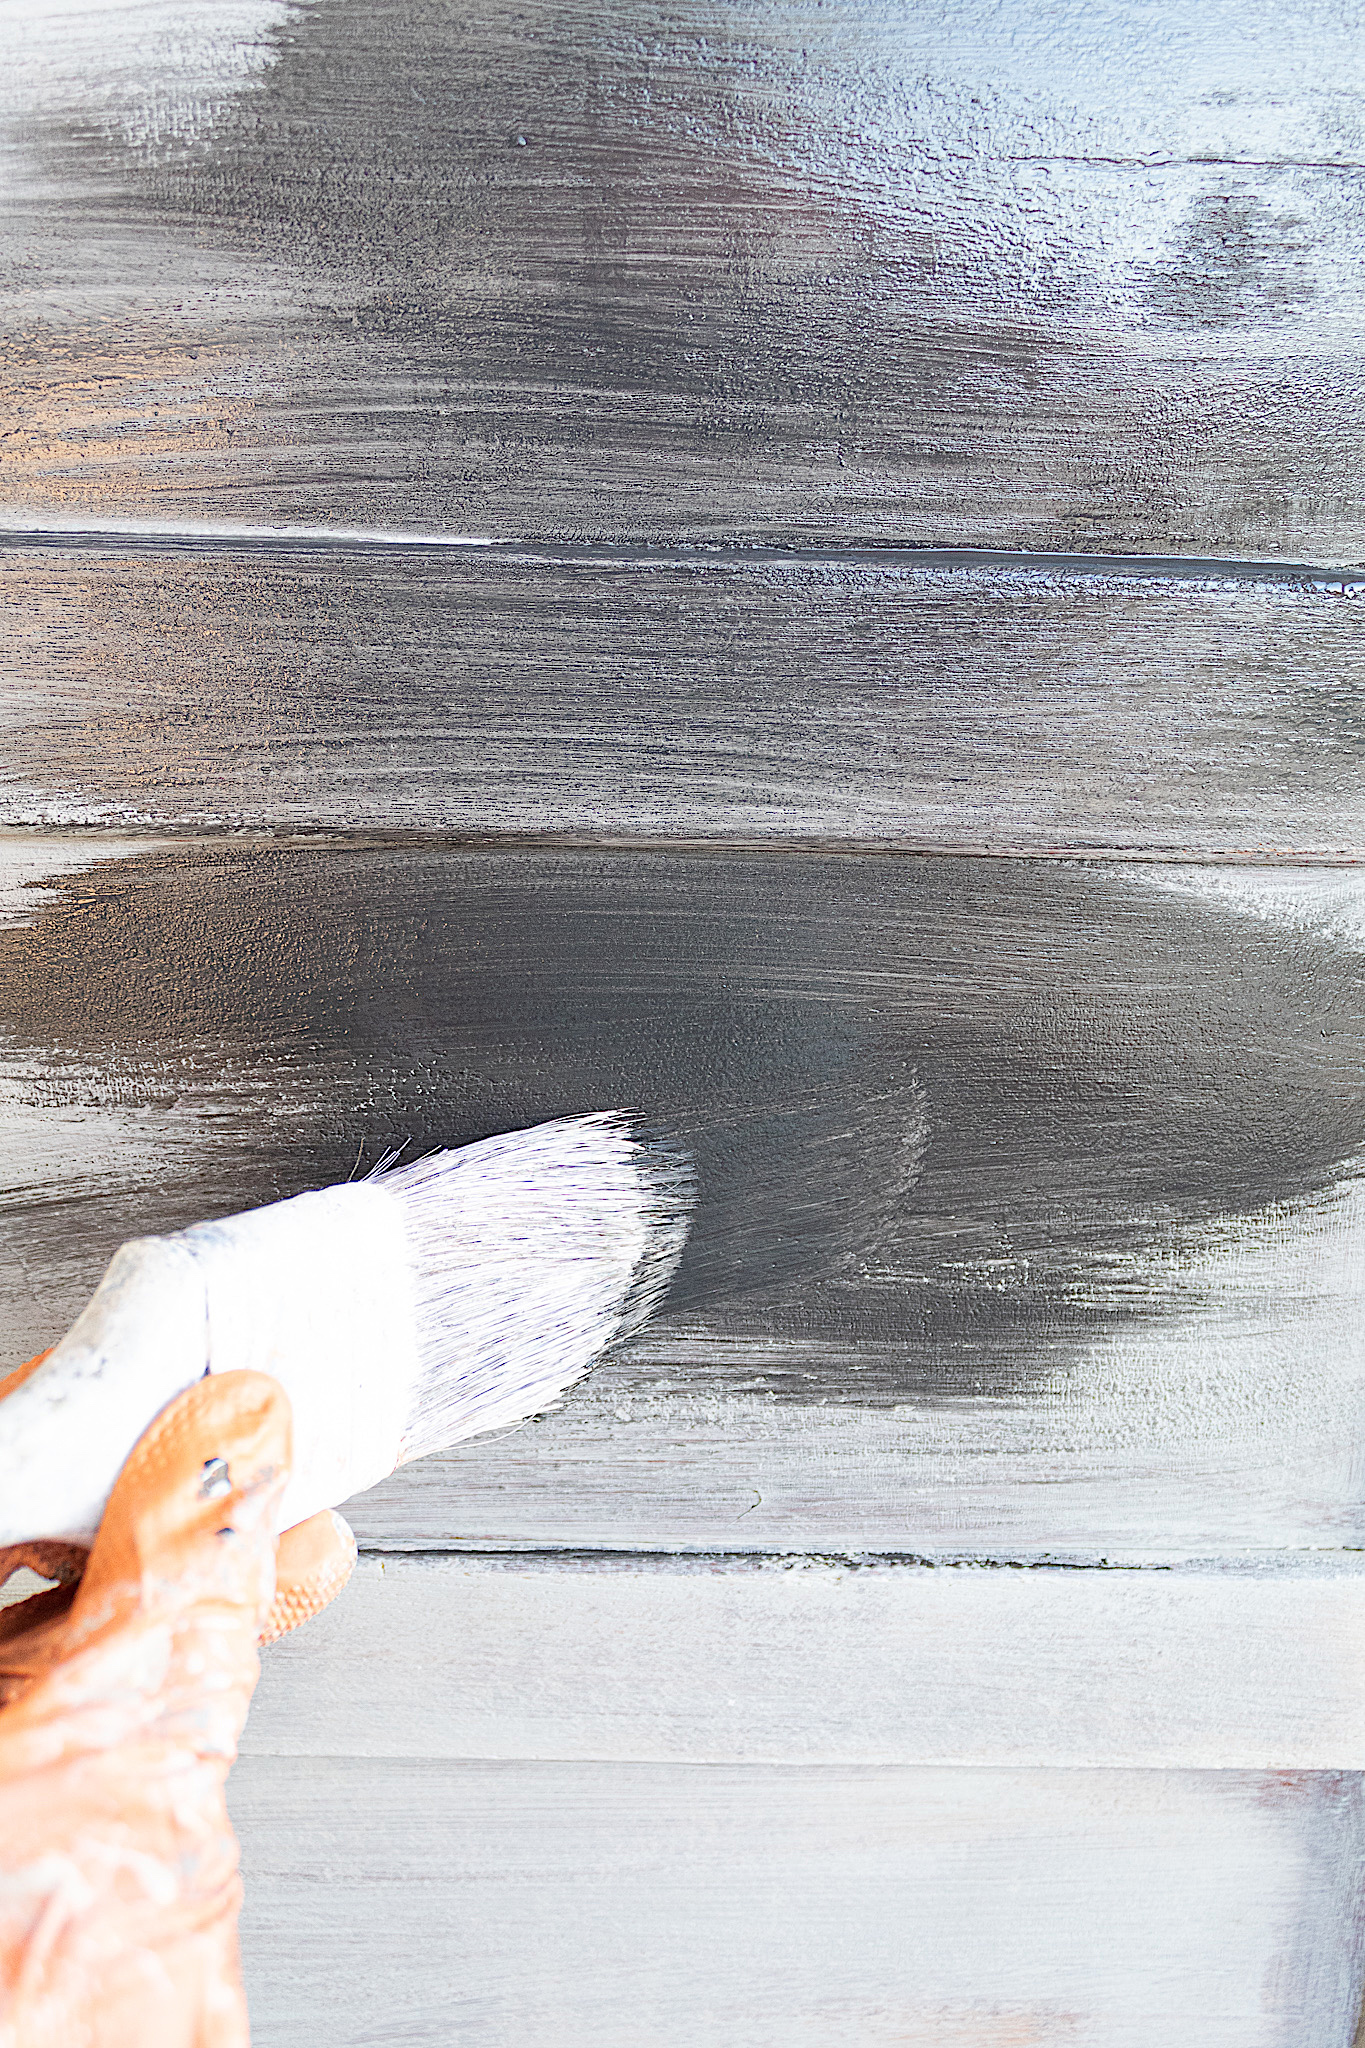
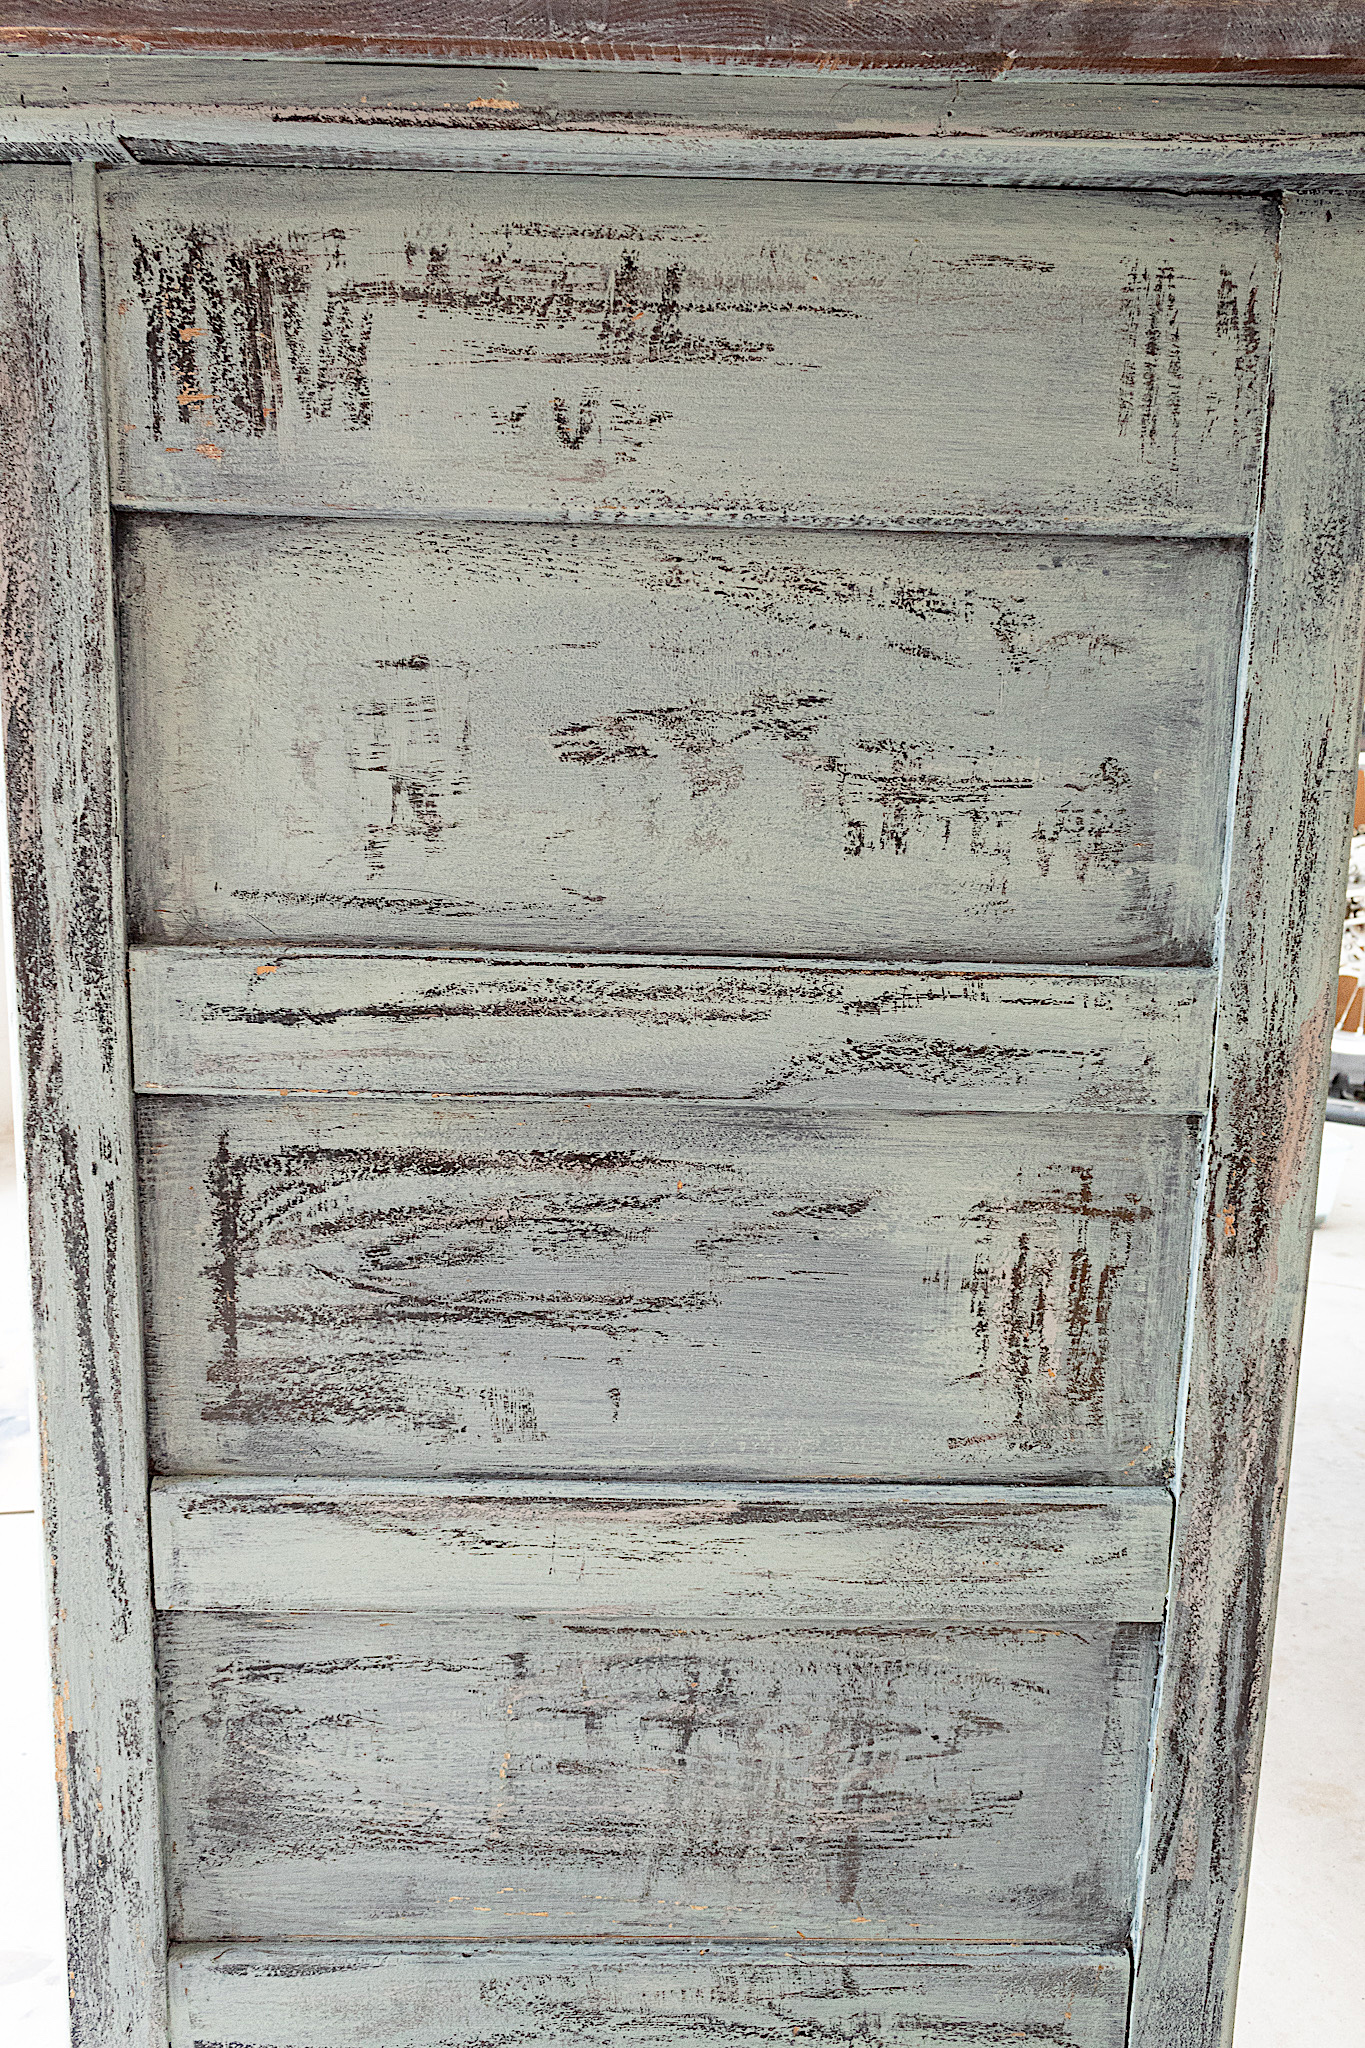
Next I add my second layer of paint, Behr’s Graphic Charcoal. I use my misting bottleto apply the paint more quickly. But I only do that on the first and second layers as I will want to dry brush to create texture on the final two layers.
The next picture shows how the chest looked after my second layer of paint. I know it’s a bit of an eye sore at this point, but I promise it gets better!
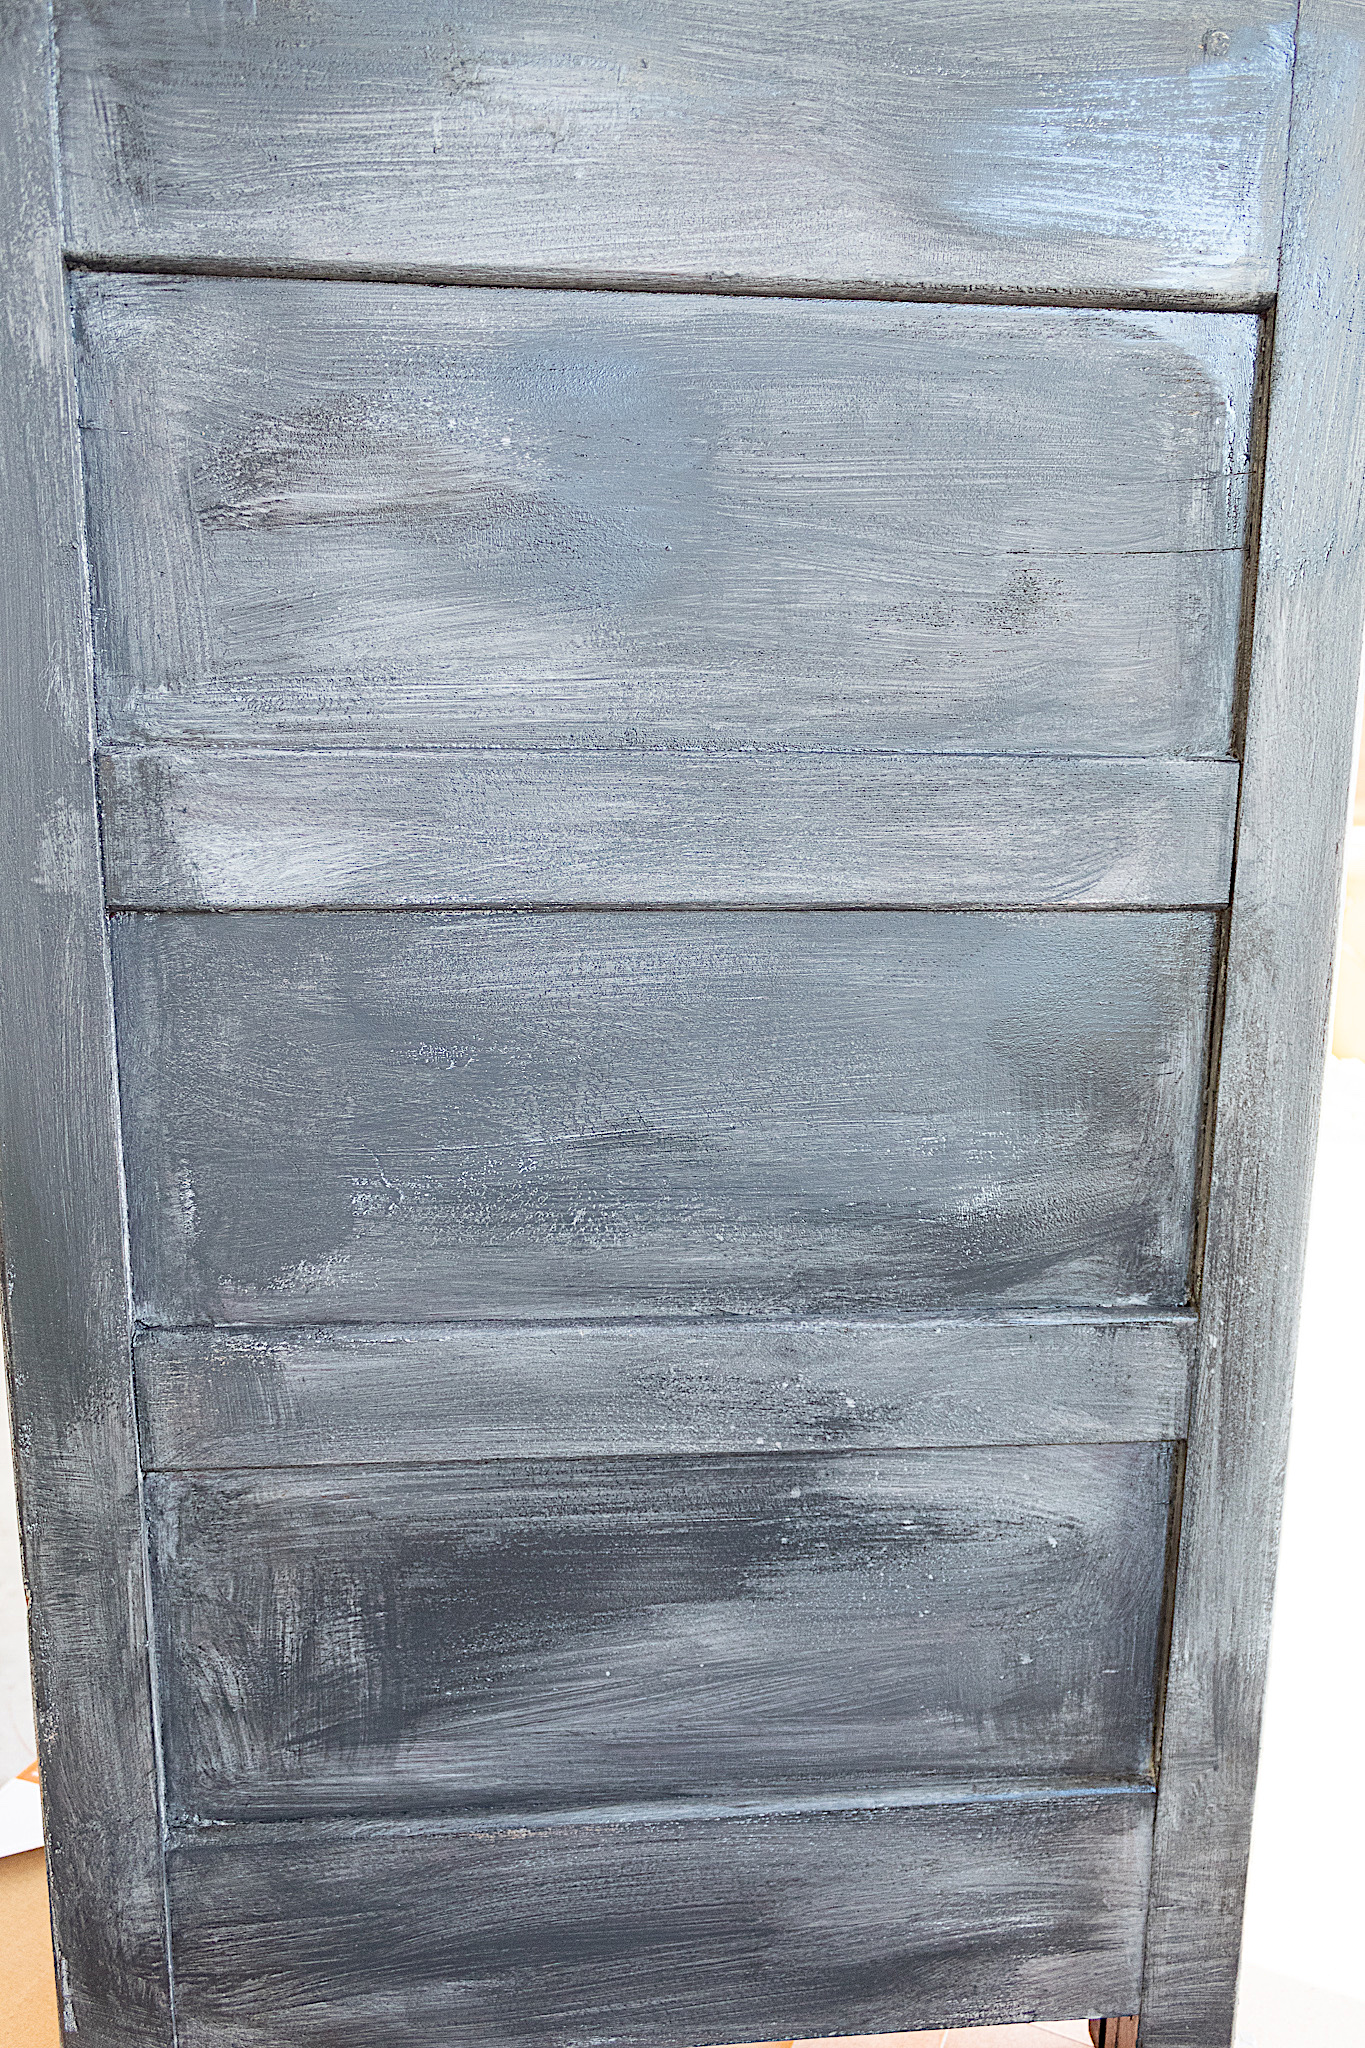
You can use a putty knife or a scraper for this next step. Gently scrape over the surface. You will see the paint chip off over the waxed parts. It is so satisfying.
Final paint layers
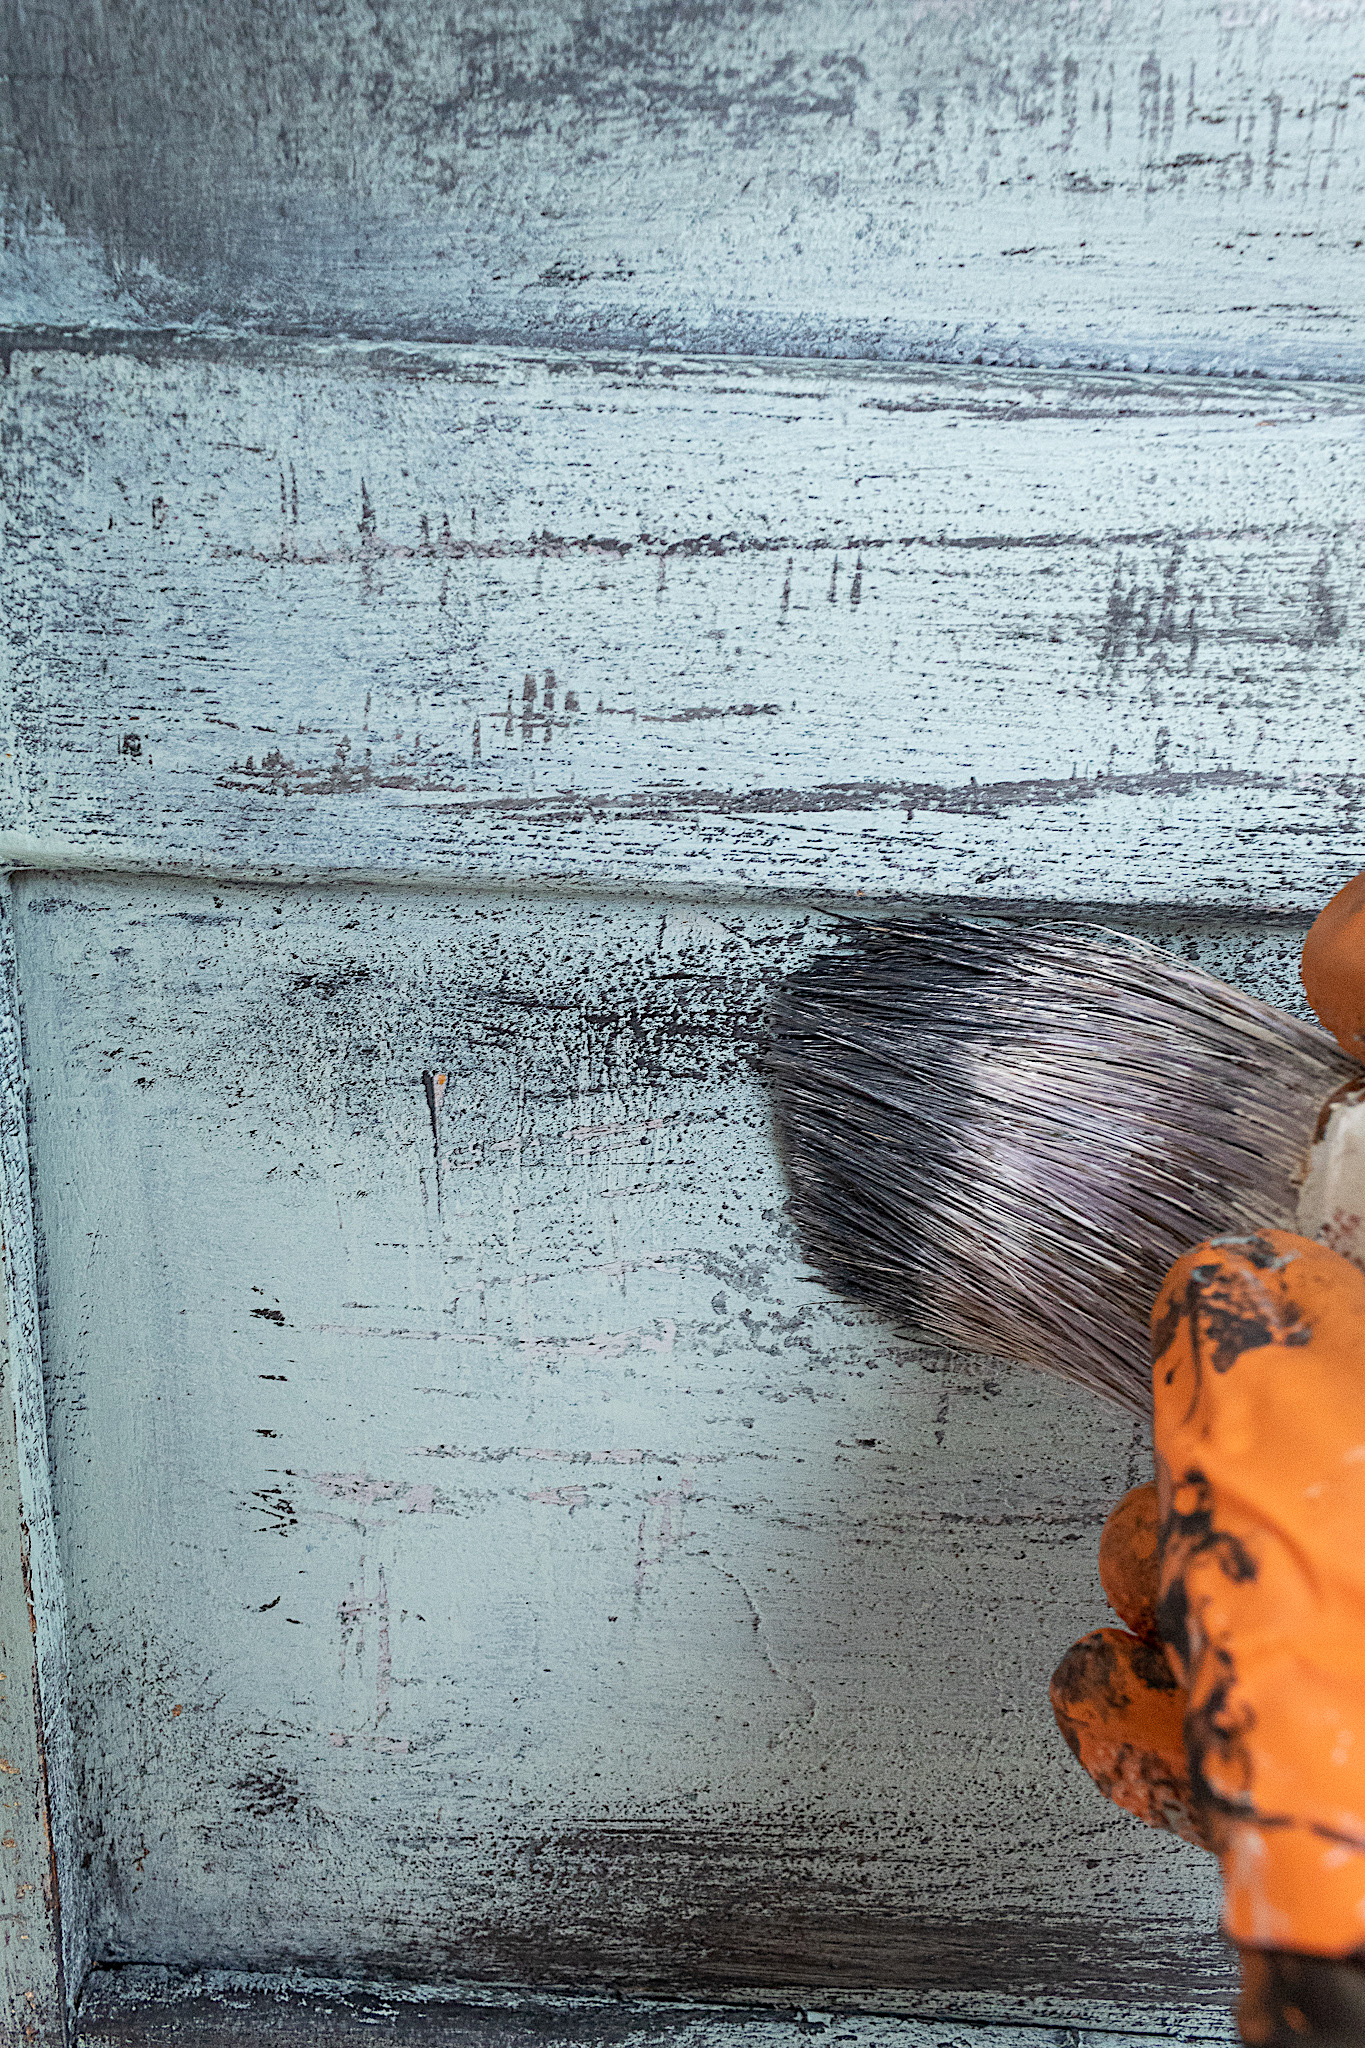
I next add my Inglenook color. It is a lovely delicate mint. Here is where I begin dry brushing, meaning I’m not wetting my surface or my brush. If you find you’re using a lot of your paint for this part, you can thin it out a little with water.
I use the paint to bring out the texture of the layers below. Don’t overwet your brush, just a little paint at a time. And keep brush strokes light and swift. You can leave parts of underneath layers exposed for extra character.
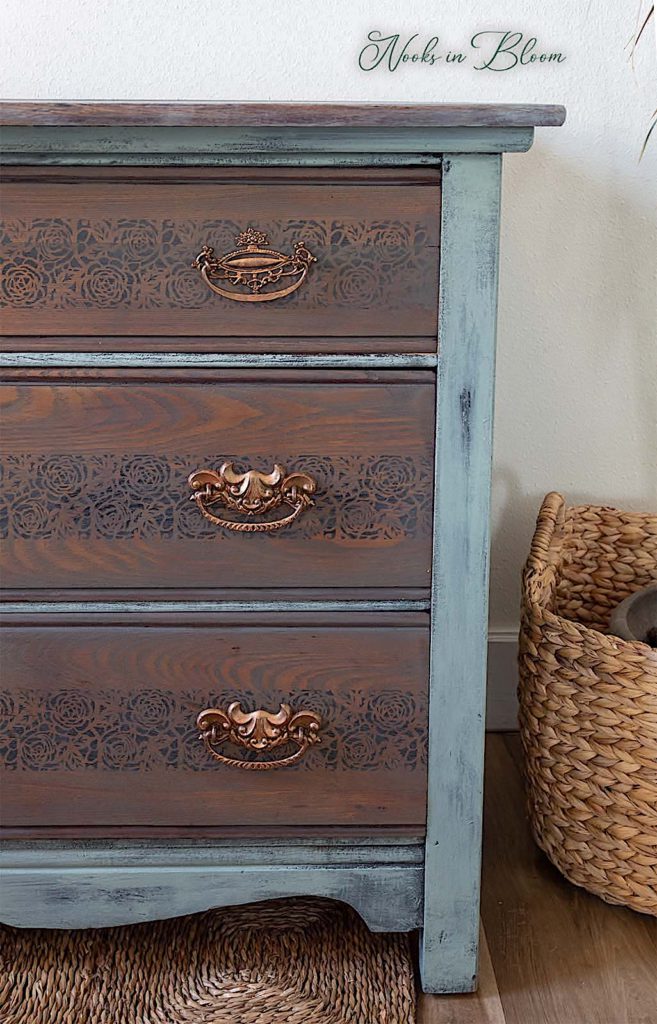
In the picture above you can see a mixture of hues. You see some wood grain I purposely scraped to expose, some of the white, and some of the black.
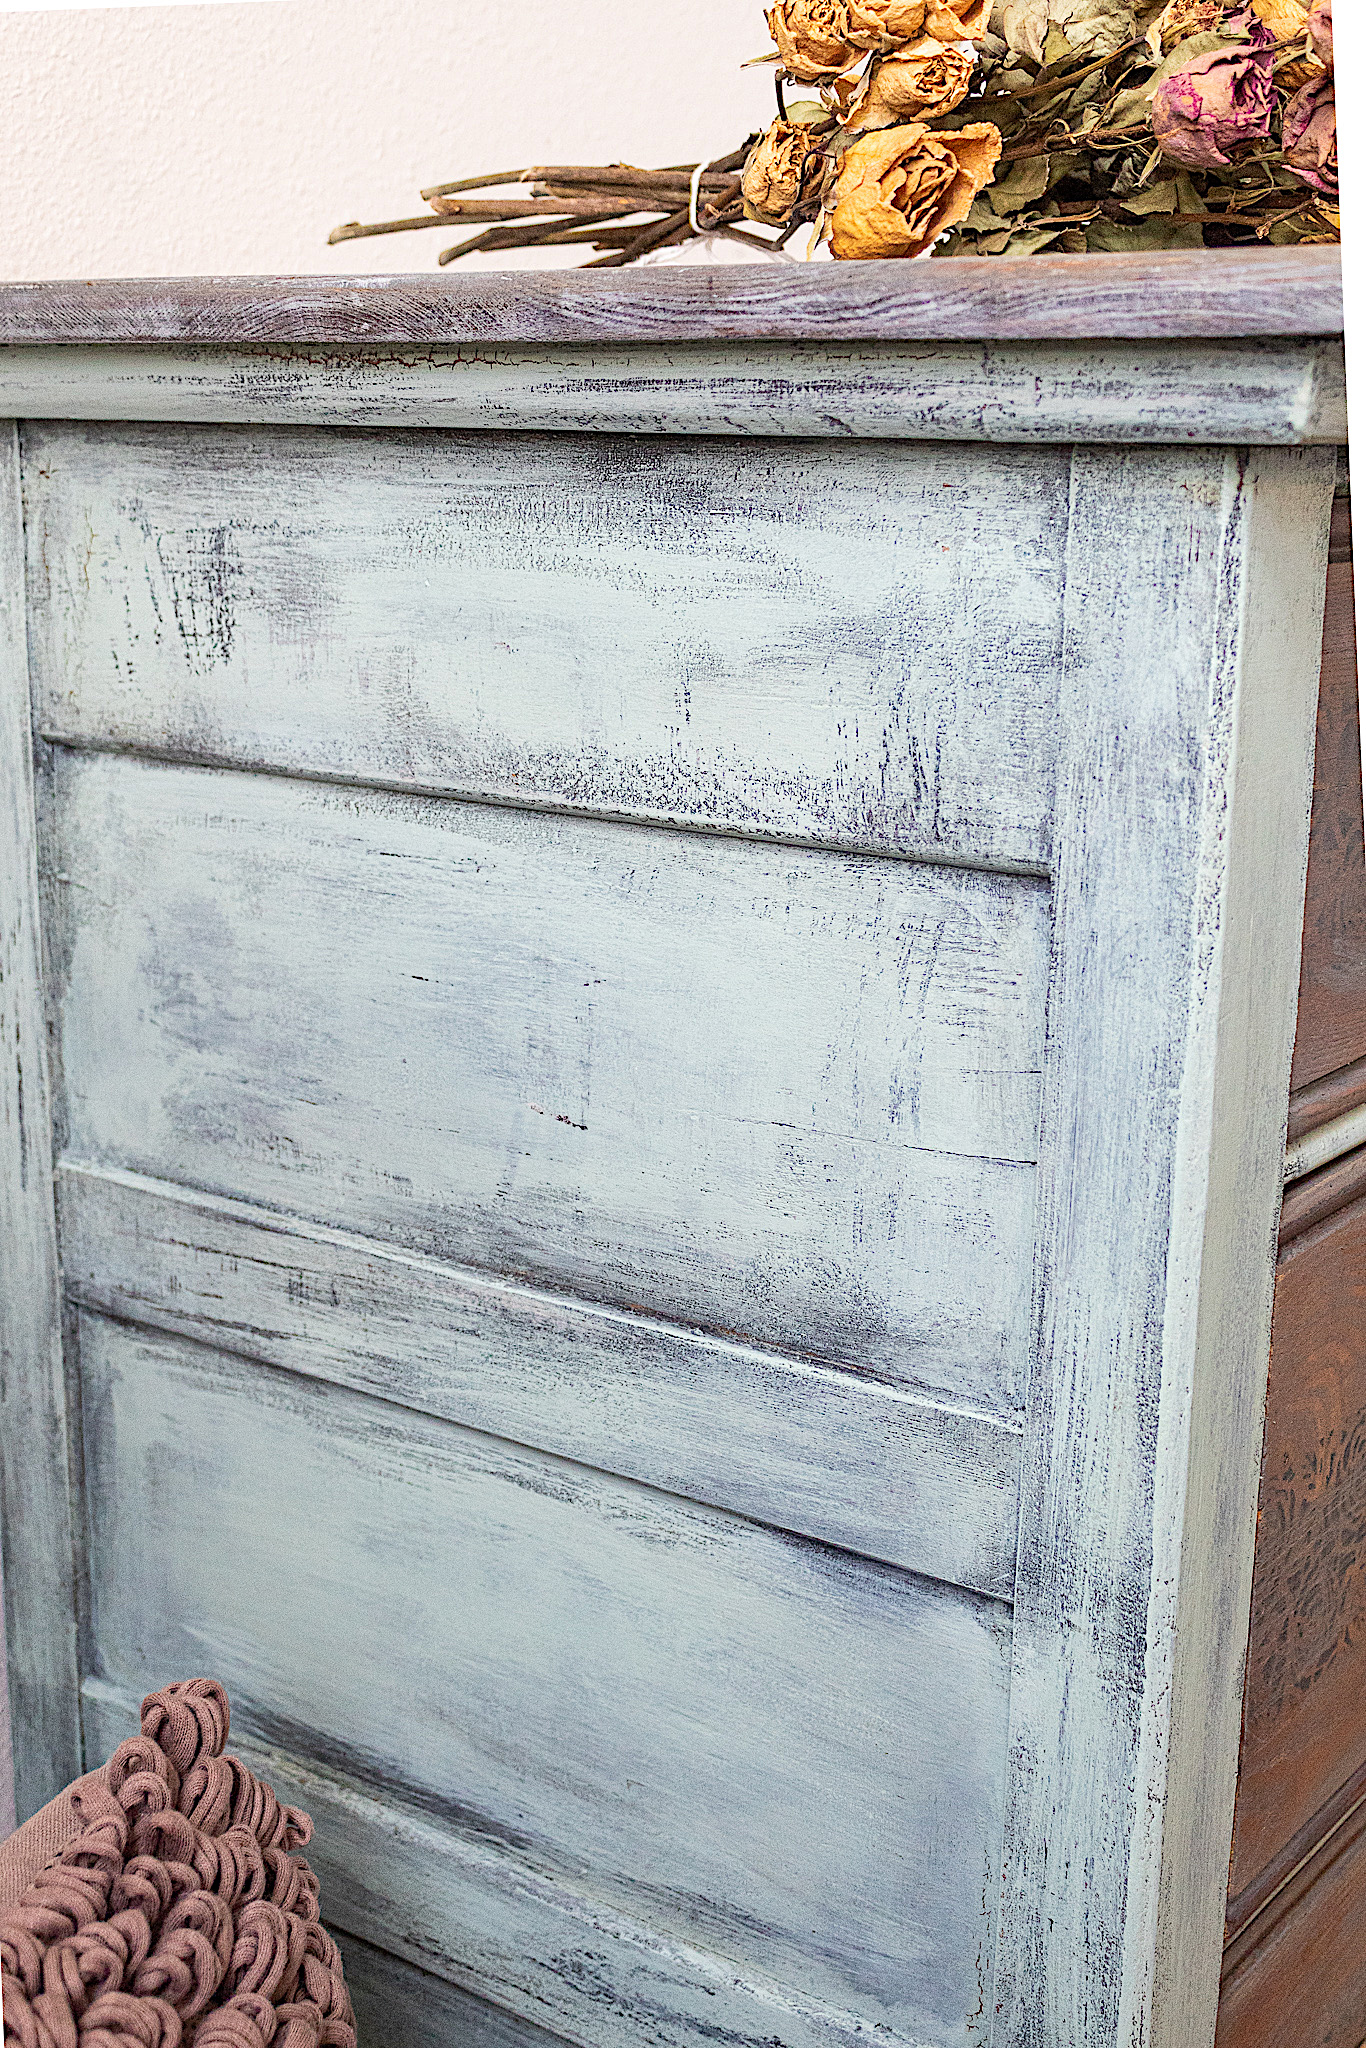
If you want heavy distressing you could stop here. I’m going to dry-brush on some more of my charcoal color in random parts (not a full coat), followed by a top layer of the mint color.
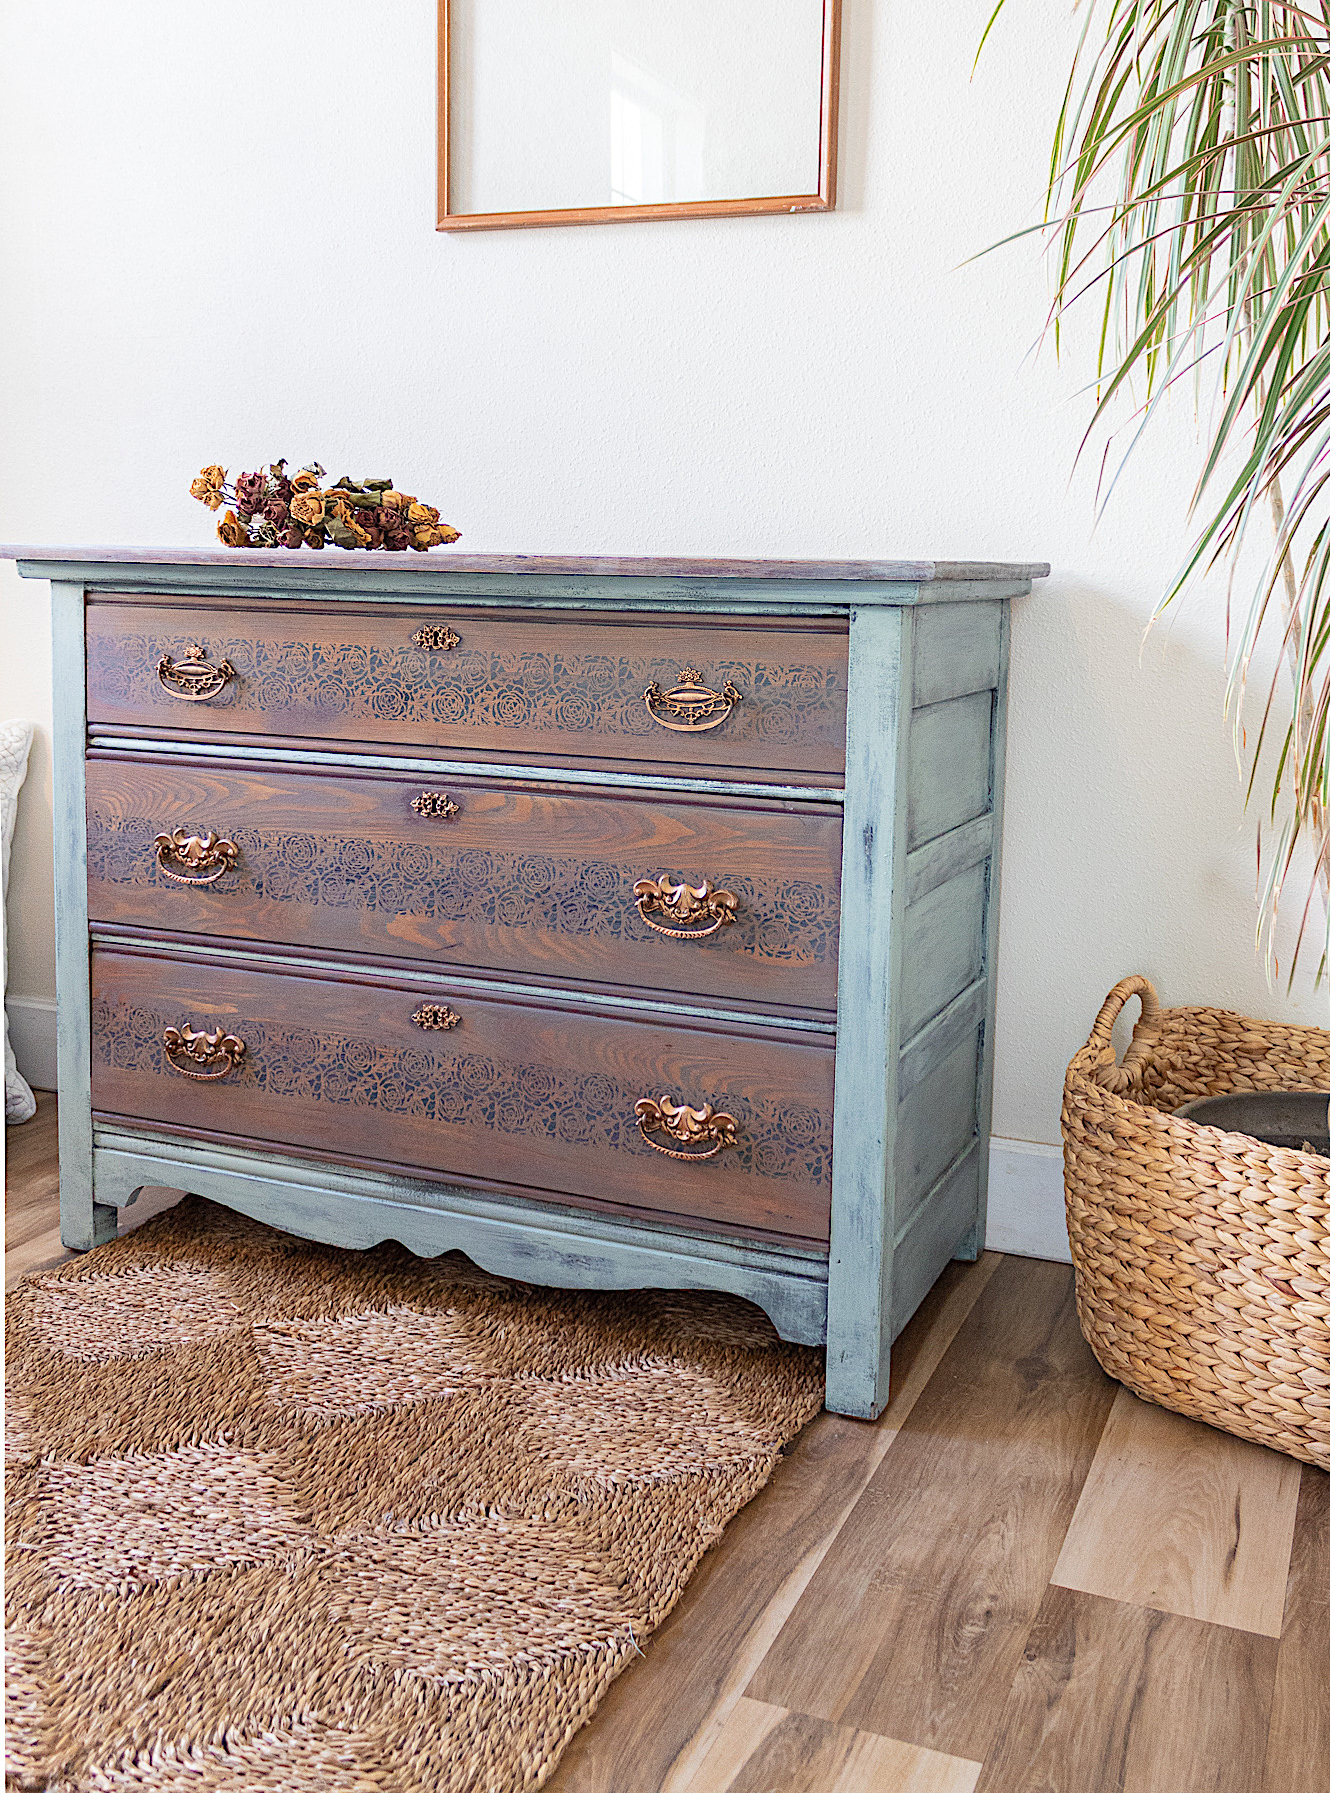
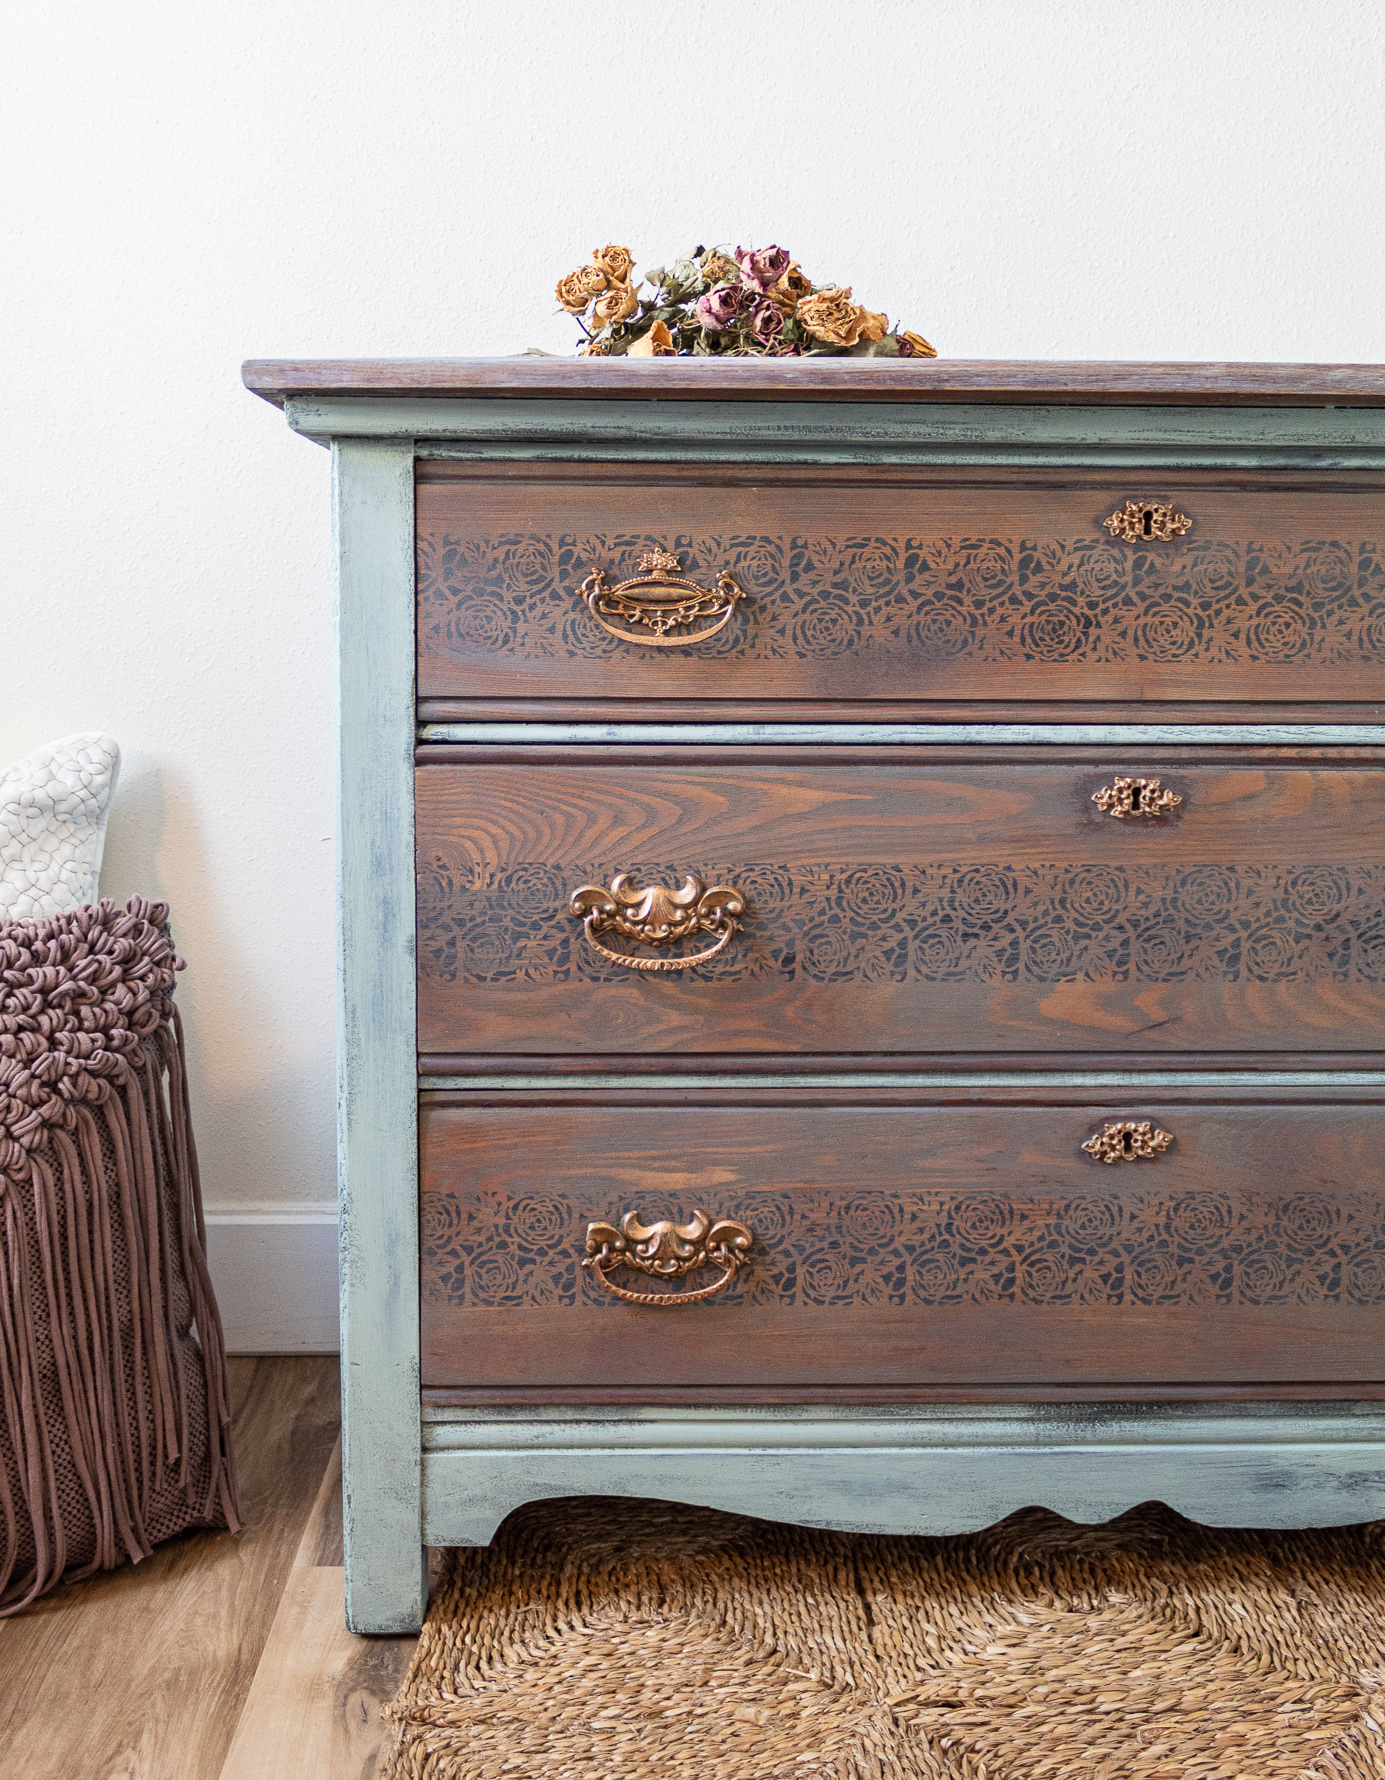
Vintage looks good on you!
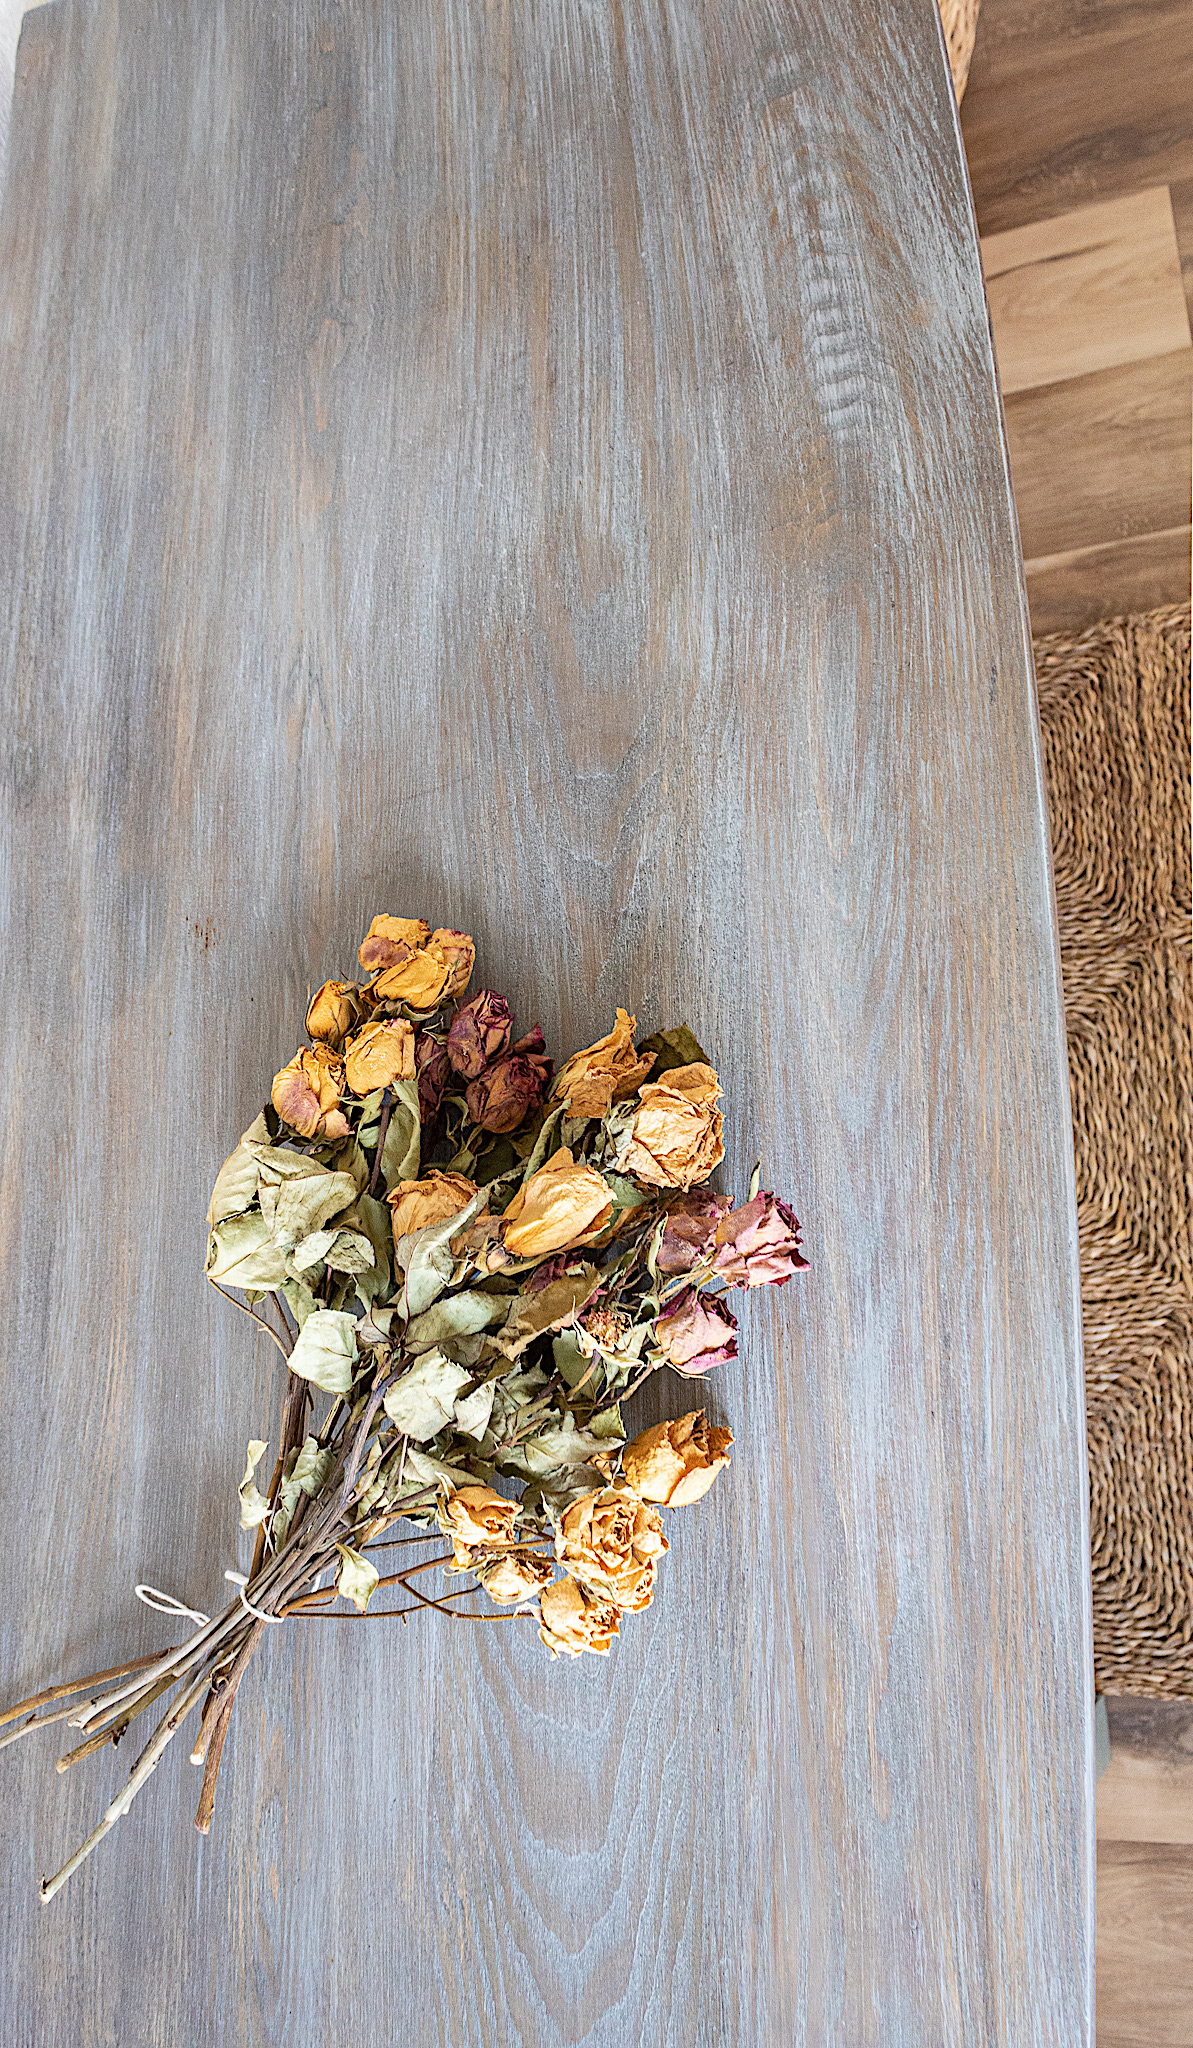
Let's create table top magic
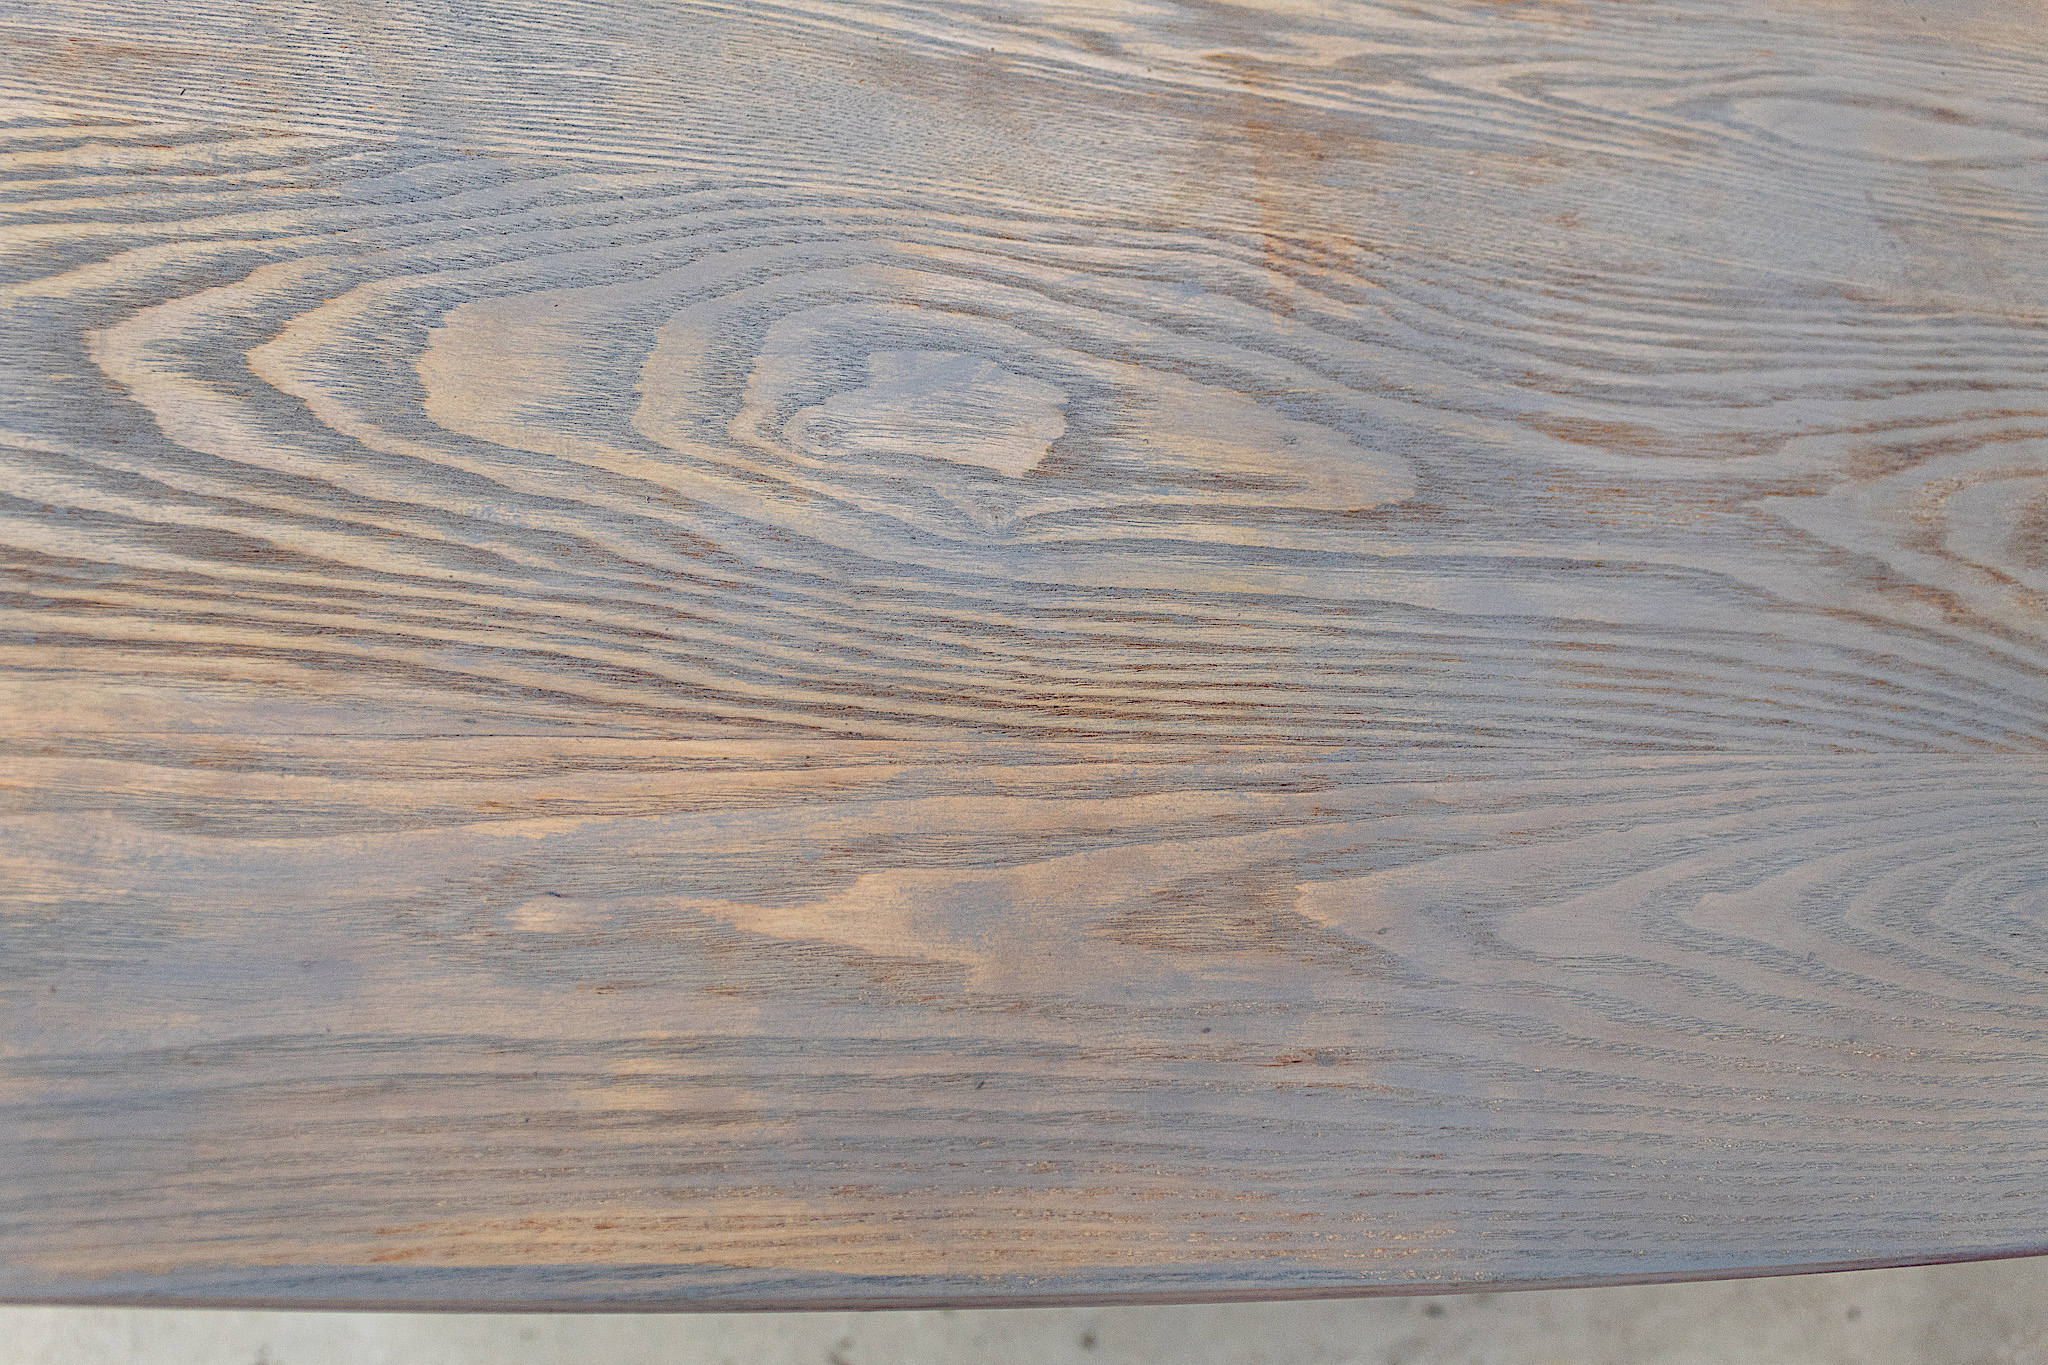
I start by giving the top of the piece a good sanding with my orbital sander. I use 60 grit to sand down the top layer and for a smooth finish I come back over it with 400 grit sandpaper.
Next I apply wood accelerator with paper towels. I work in small sections so that the accelerator is still wet when I apply my stain.
I rub on some weathered gray stain. The accelerator will help the wood quickly absorb the stain. This creates a beautiful wood grain look.
I also come back over the stain again with accelerator for more variation, but this is optional.
This is an antique piece. The older the wood, the more tannins that can show up. So using the stain helps counteract orange and yellow hues while the accelerator helps retain the wood grain look.
To pull the look together, I dry brush very minimal strokes of my Weathered White paint over the stained top. Without reapplying paint I go back and forth a few times to add texture. I also use a paper towel to soften some of the brush strokes.
Finally I take a piece of sand paper and sand in long directions over the wood, but only sparingly. The video below demonstrates these last couple of steps.
Table top video demo
FINISHING DETAILS
I sealed the top with two coats of my clear coat and I applied one coat everywhere else.
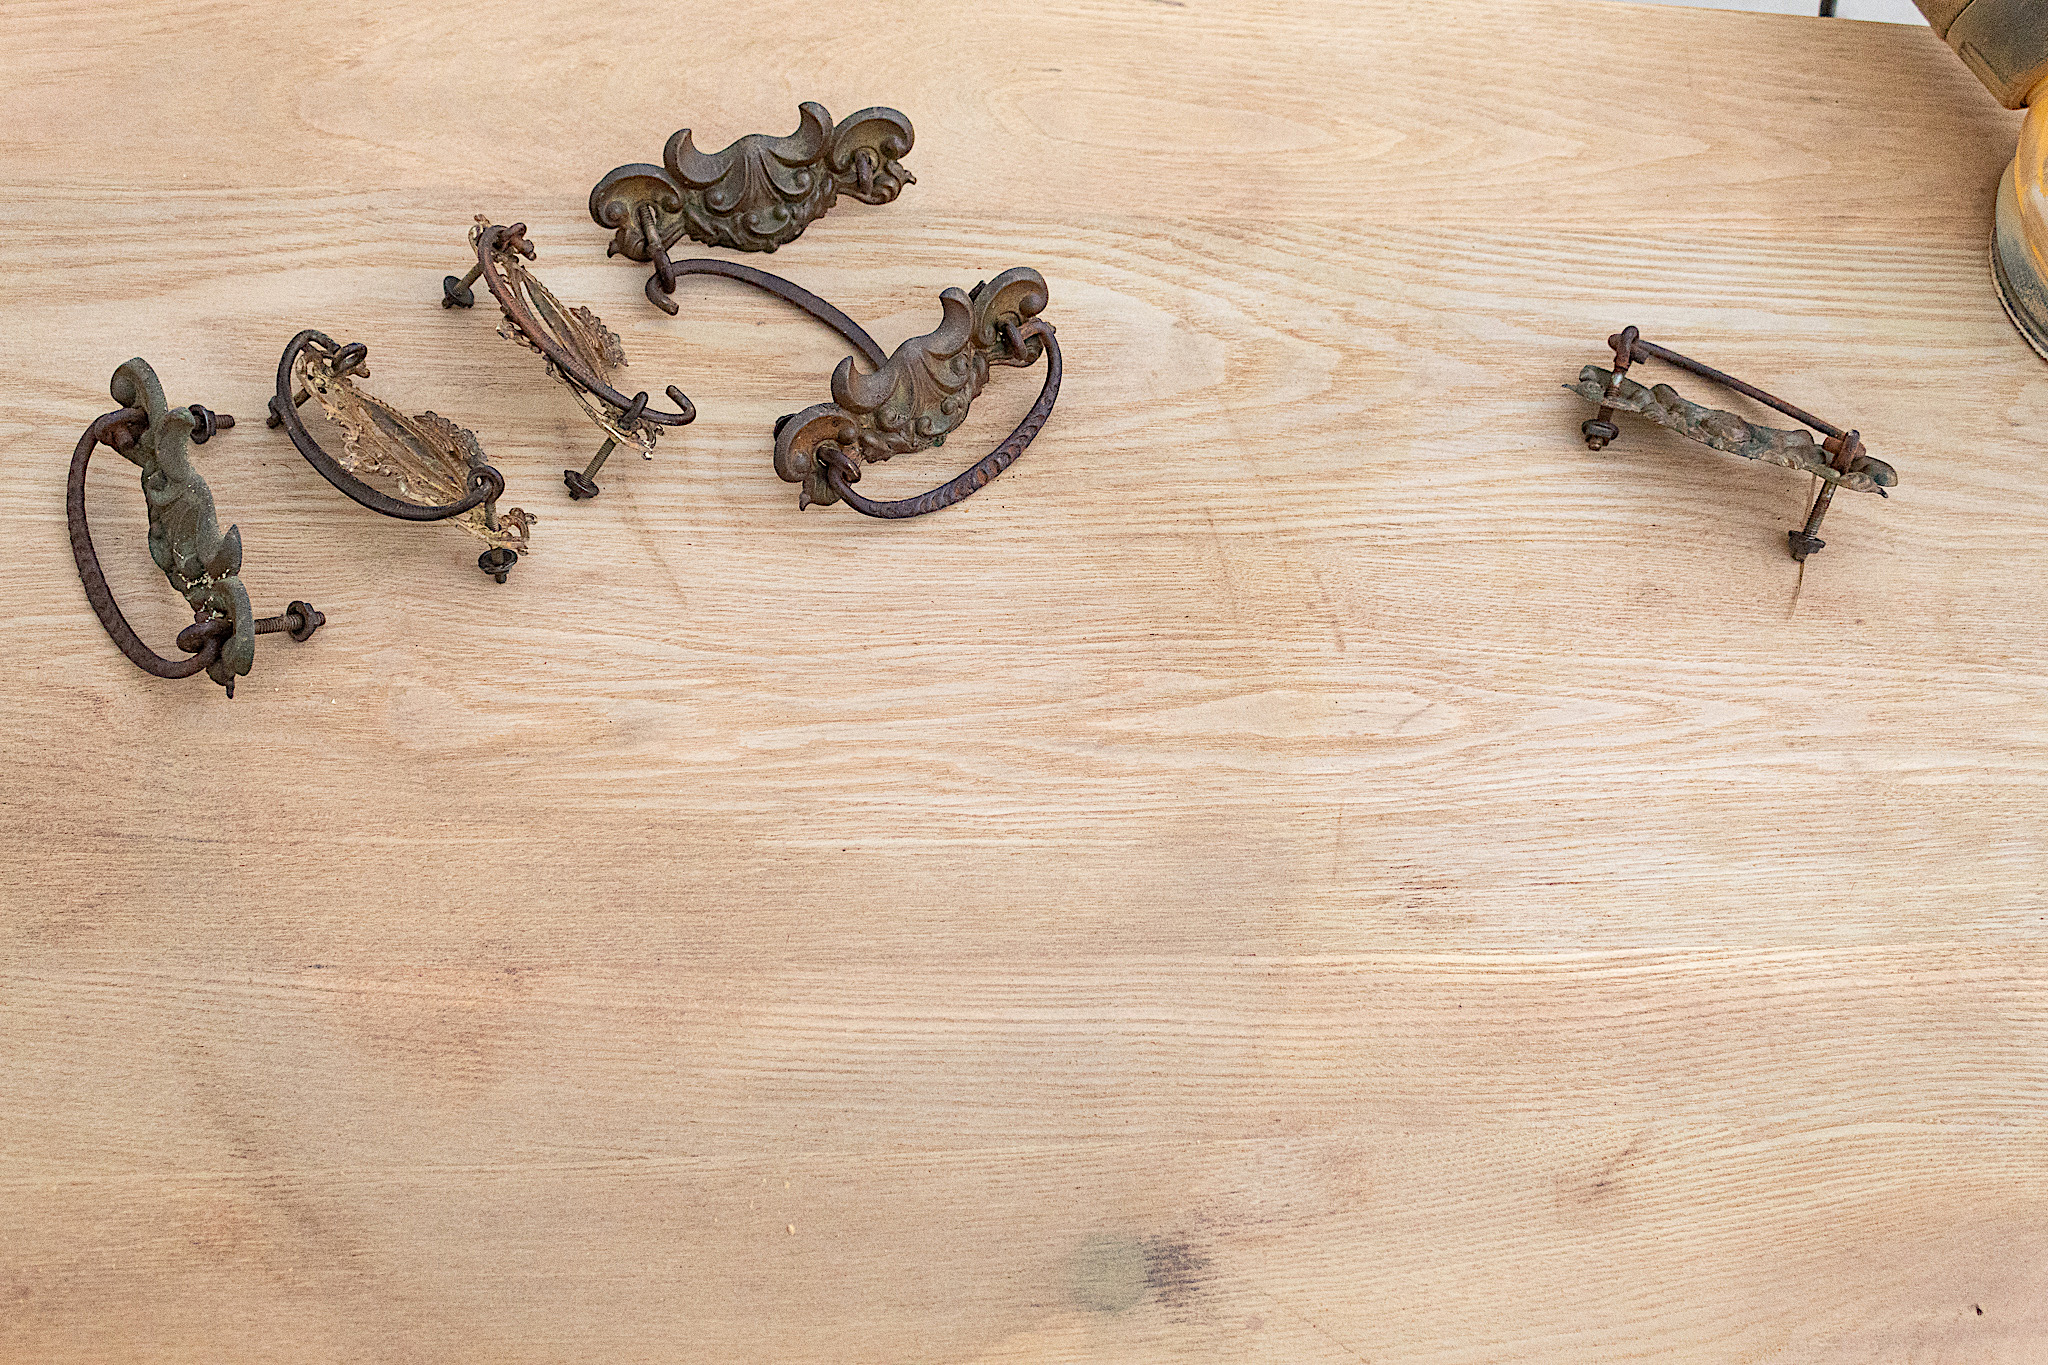
The original hardware was beautiful but needed some refreshing.
I applied two coats of Art Alchemy Aged Brass Metallique Wax to the hardware with my gloved finger and a small artist brush for the hard to reach crevices. The wax instantly revived the hardware with antique flare.
Sit back and enjoy the view!
You put in the work and the time into your creation. Now you can sit back and admire your artwork. This is always a rewarding feeling for me.
I lined the drawers with some peel and stick wallpaper. This is an economical way to dress up the inside of old drawers.
So my friends what did you think of this renovation? A few steps involved but isn’t it worth it! I’d love to see any variations you may try at home. Thank you for stopping by and be sure to SUBSCRIBE at the bottom of this page so you don’t miss a thing!