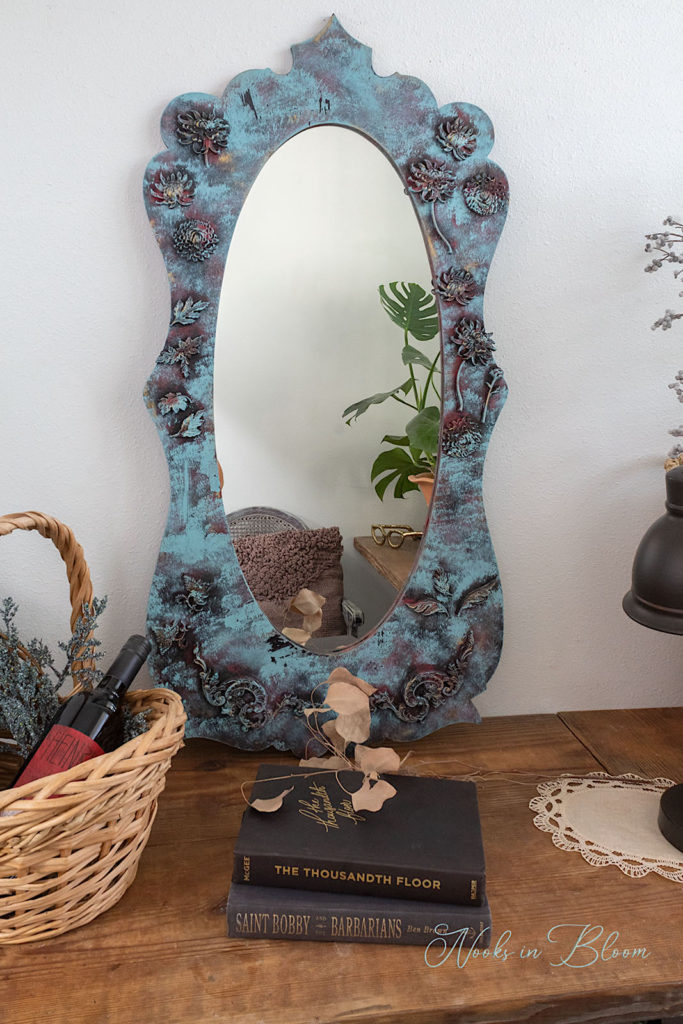
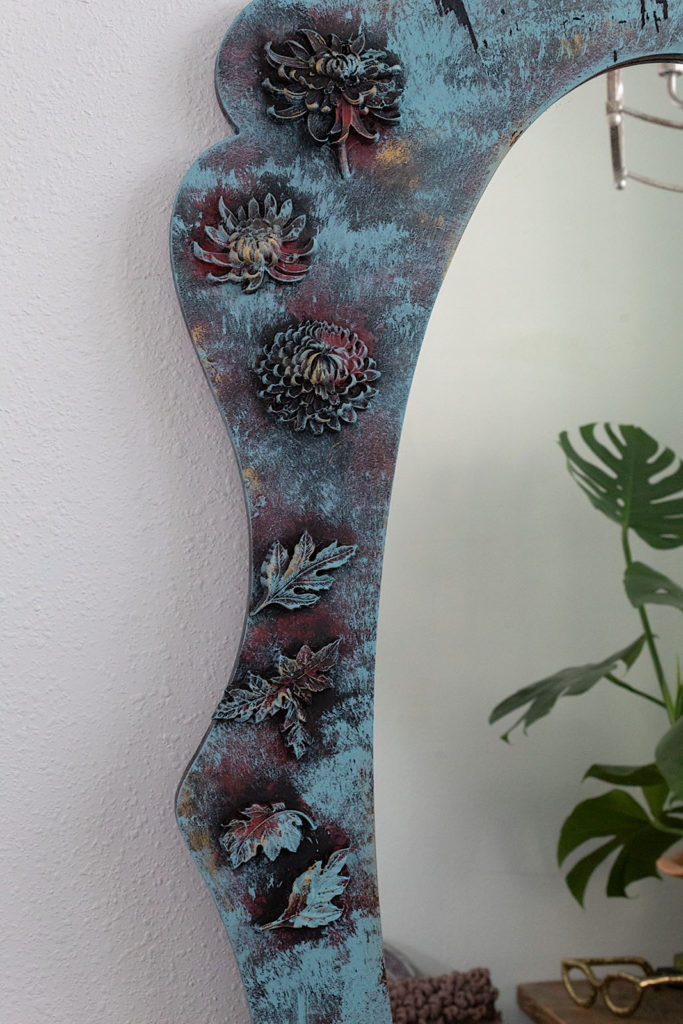
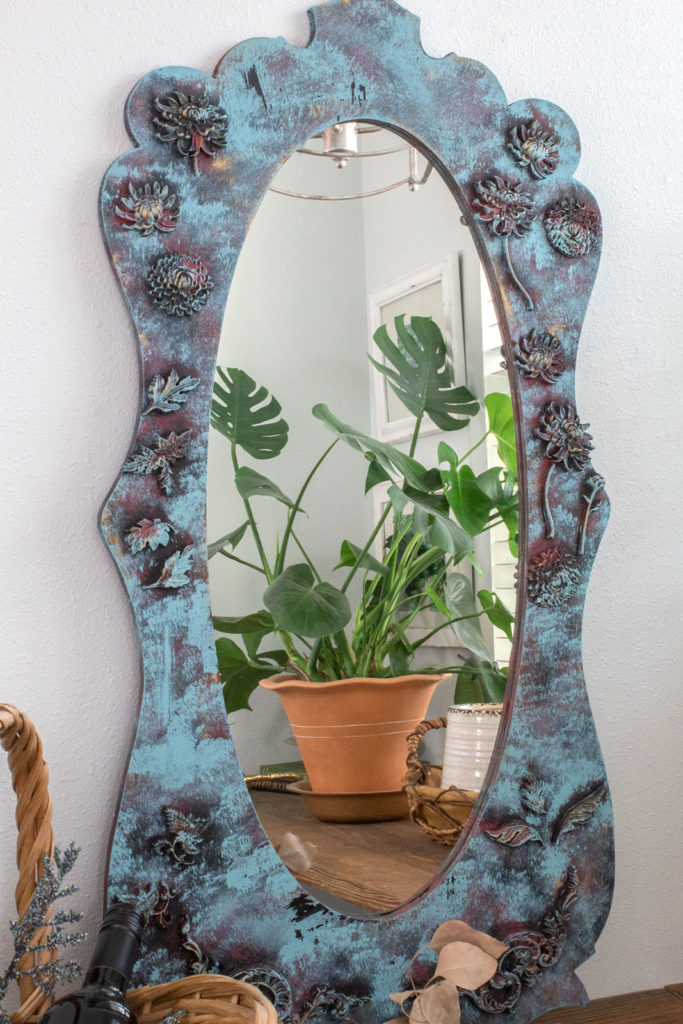
Salutations NIB readers. It is so good to see you again! I’m over-the-moon with this thrift store mirror renovation. Today I will show you how to make beautiful resin molds and create this stunning aged patina look.
This is a fun and easy technique that adds loads of character every time. You can transform large furniture pieces or small ones with this vintage aesthetic. So let’s get started with making our molds and creating this fabulous look.
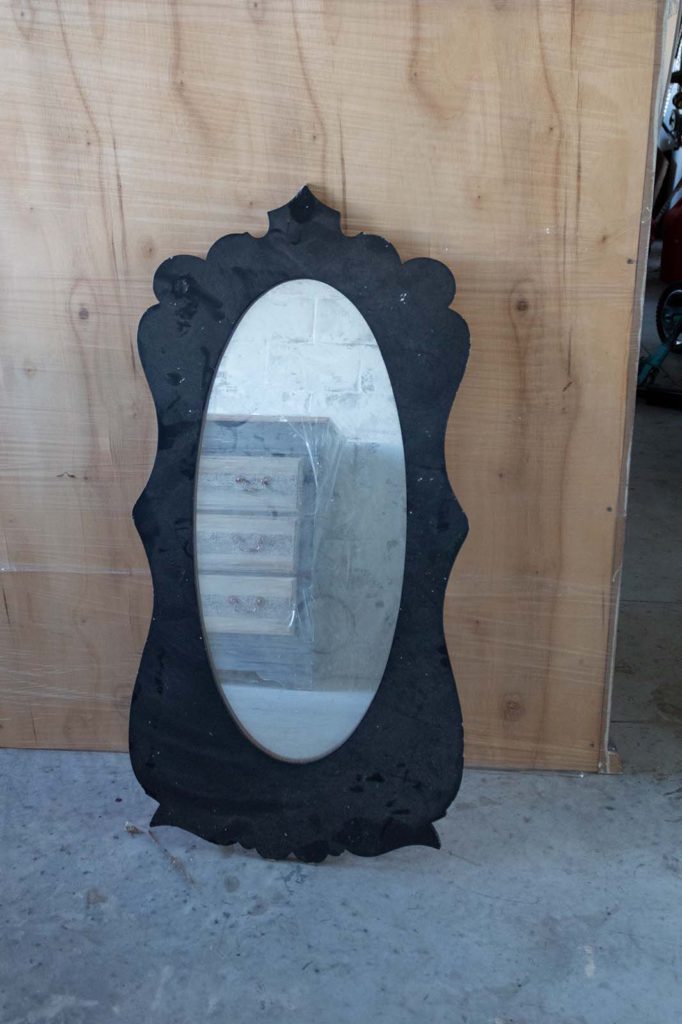
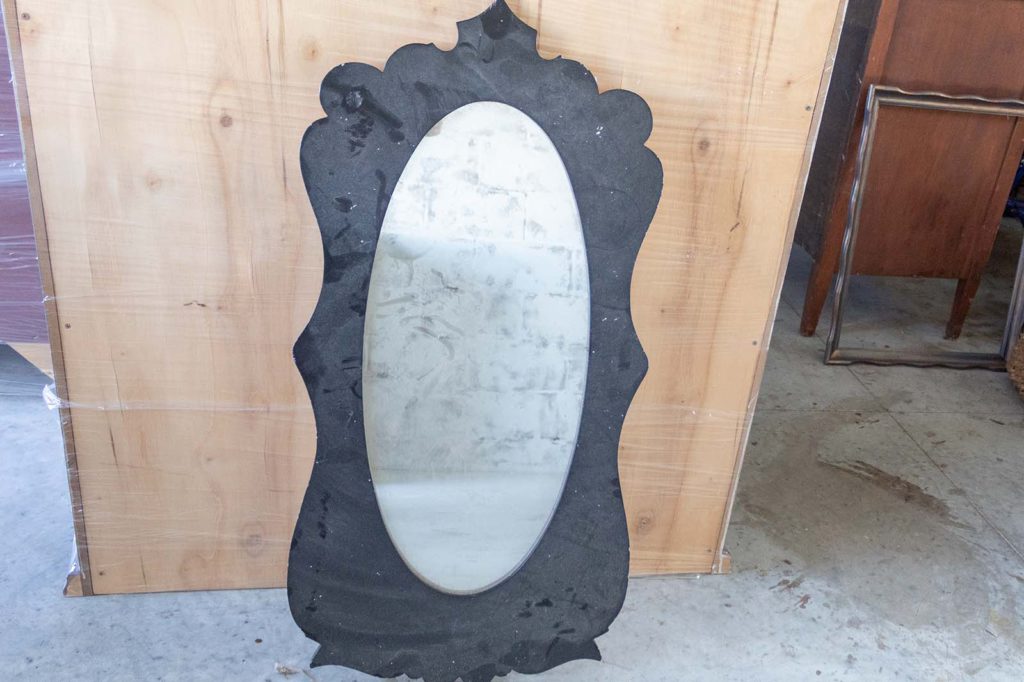
I picked up this mirror at a thrift store. It was dirty, scratched and the edges were scuffed. But its curvy details and oblong oval shape had me smitten. I knew I could make her pretty!
Disclosure: Some of the links provided are affiliate links. By purchasing through these links it supports this blog and the work we do and there is no extra cost to you. If you would like to read our full disclosure, click HERE.
Step 1. Clean and Prep
Not all mirrors make removing the glass easy. In this case, I was able to unscrew some metal plates and separate the glass from the frame. This is ideal when you want to paint. Another option to avoid painting the glass is to use Masking Liquid H20. Just paint this product on and it dries onto the glass. When finished painting, you simply peel the material off.
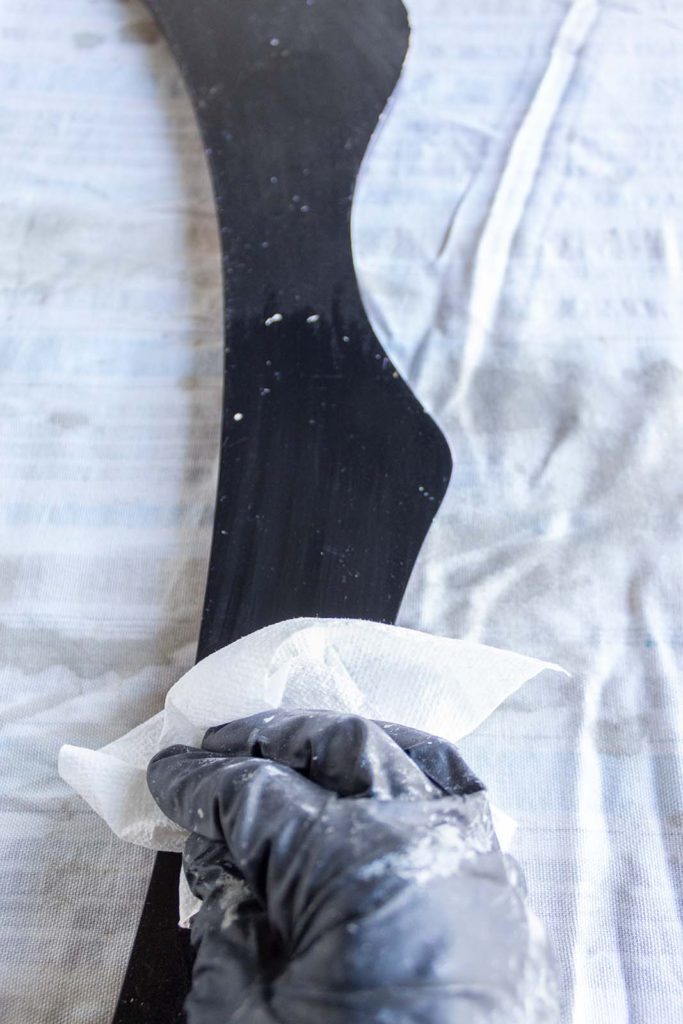
To prep the frame, I cleaned it well and gently sanded some of the scuffed edges.
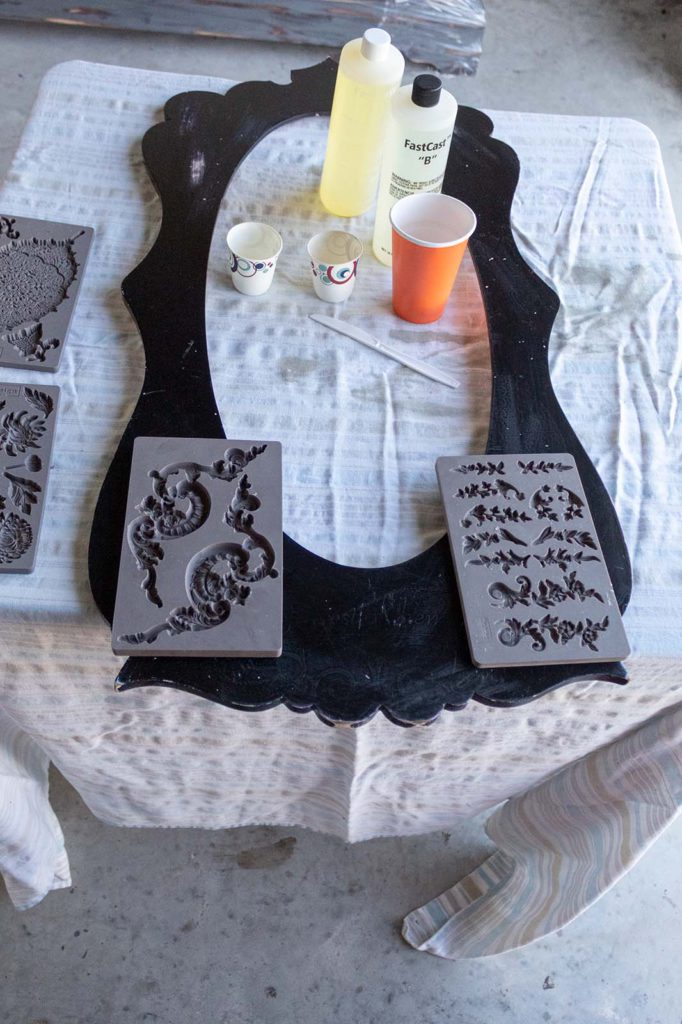
Step 2. Make Your Molds
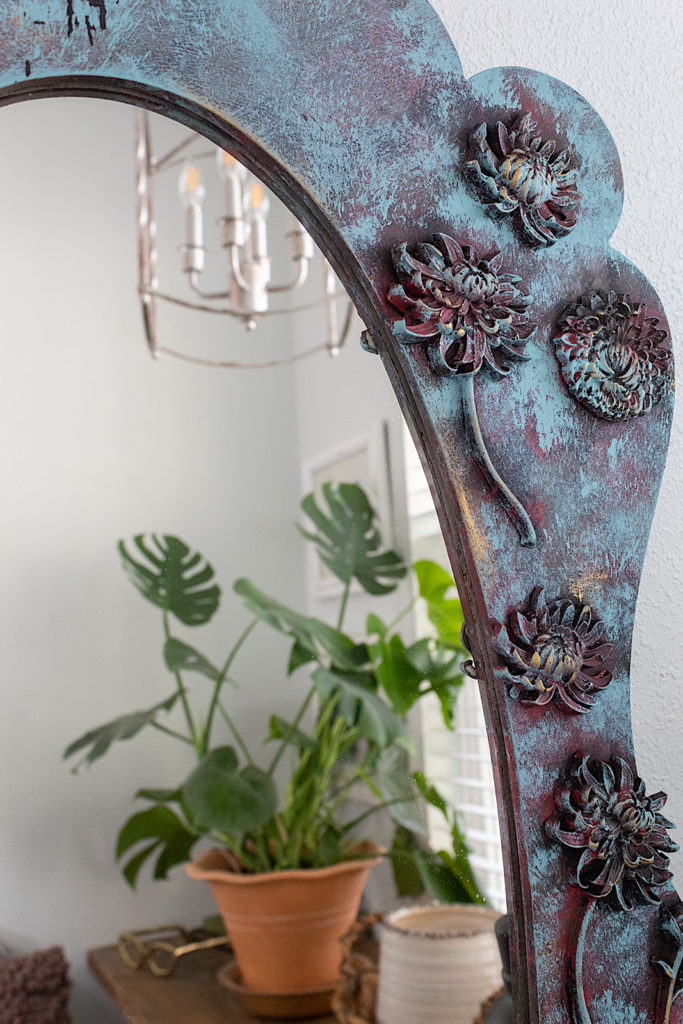
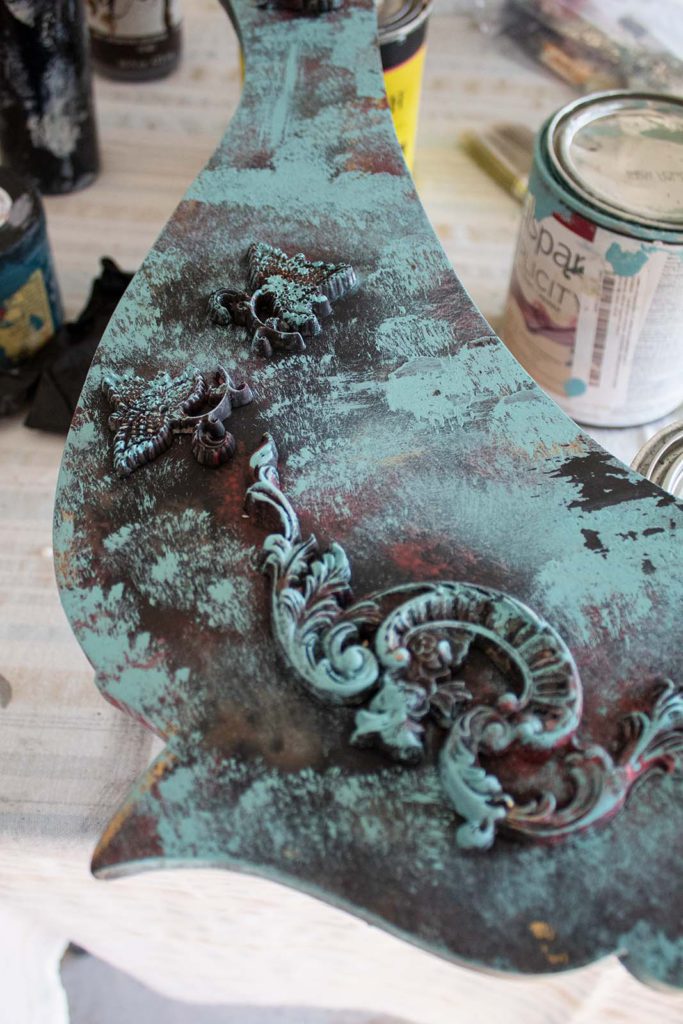
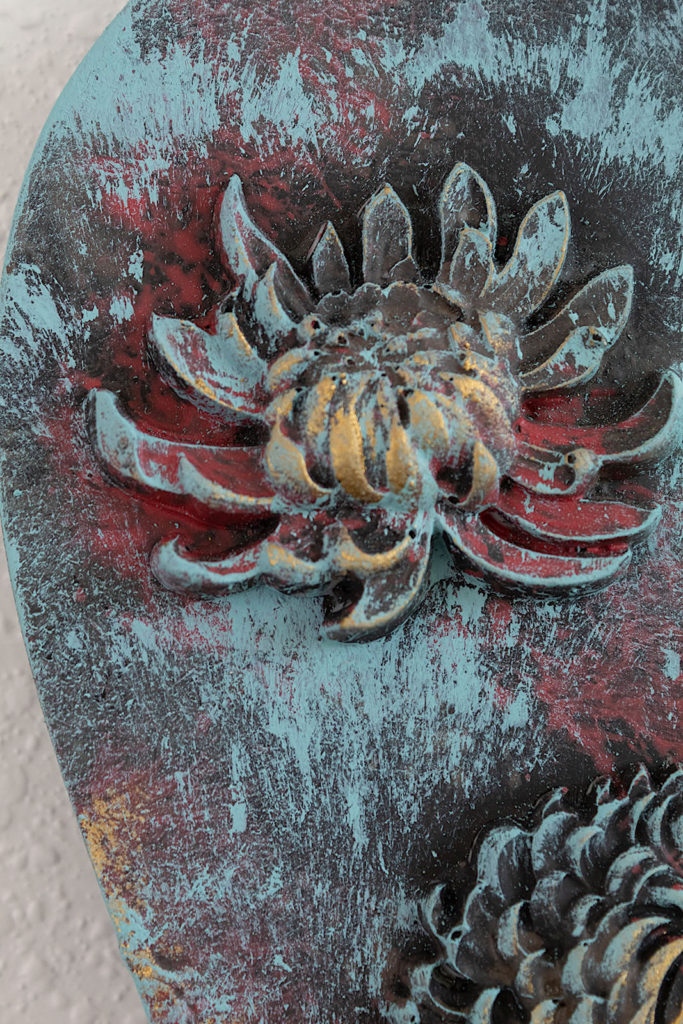
Before painting your piece, you want to make and attach your molds. I love working with silicone moulds from Redesign With Prima. I have a few, but today I’m mainly using the Etruscan and Botanist Floral moulds. These molds are of a thick material, very durable and I love all the beautiful styles.
Adding decorative molds to your furniture pieces takes things from plain to whoa! Once painted, the molds blend in with the piece as if the have always been there. They add amazing texture and beauty.
Let's Cast Our Molds!
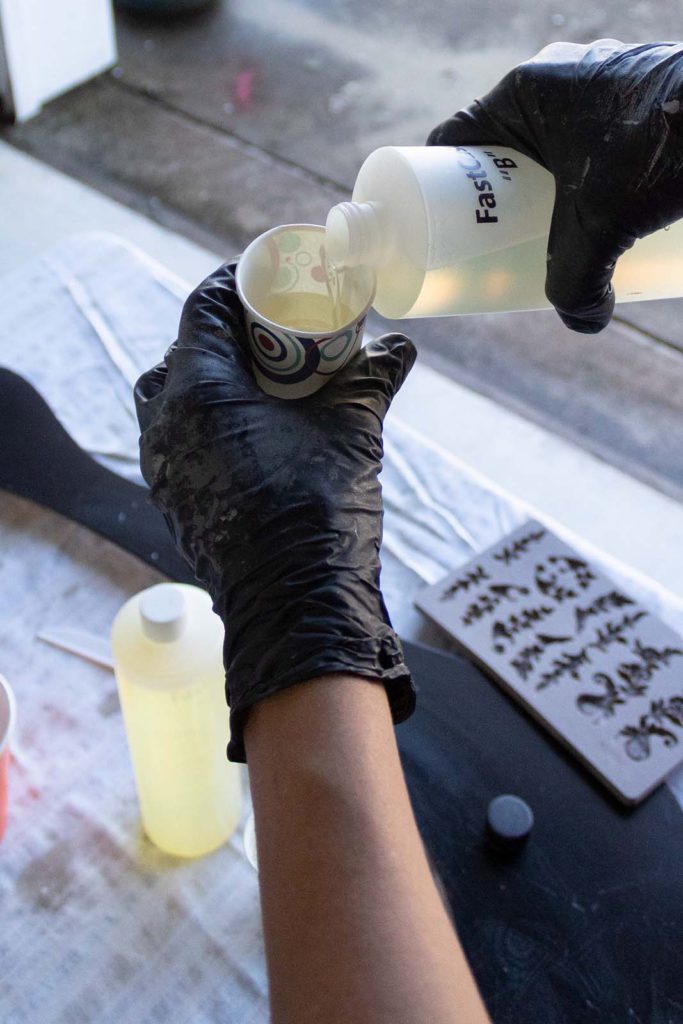
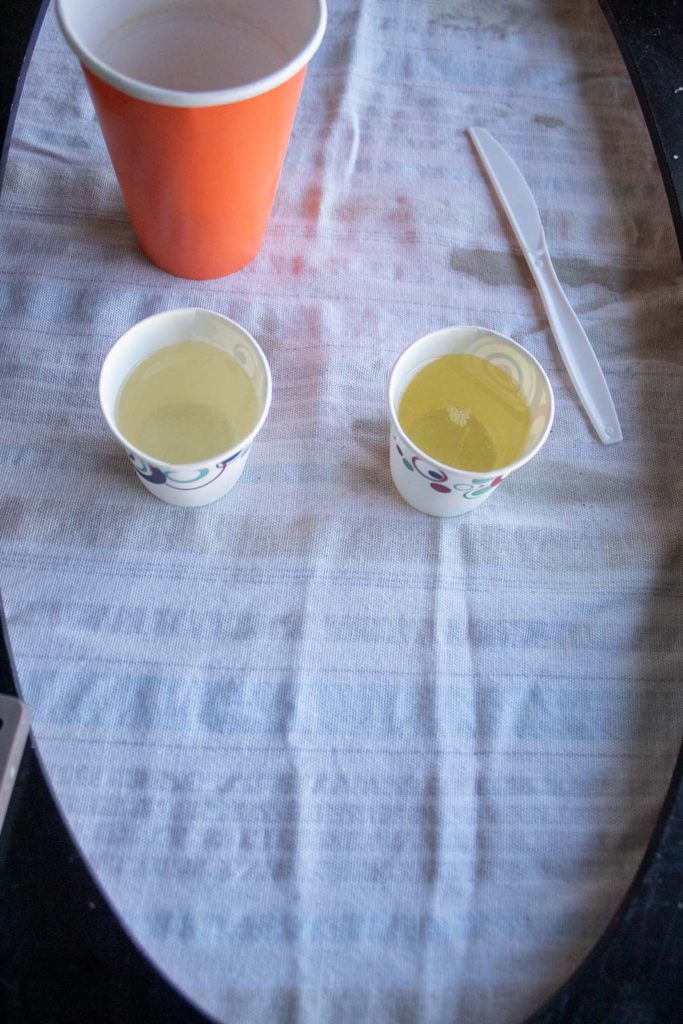
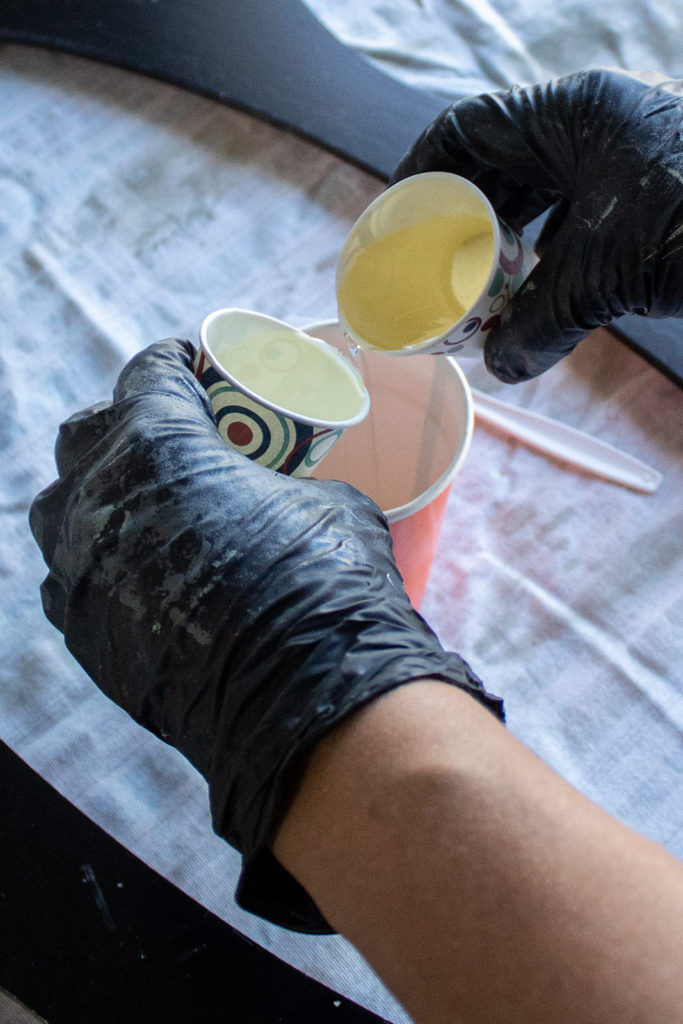
I like working with Amazing Casting Resin. It works wonderfully and I feel like you get the most bang for your buck with this product. The box comes with two bottles of liquid labeled “A” and “B”. Begin by pouring equal amounts of each bottle into a dixie cup or the cups that come in the box.
I don’t recommend using larger sized cups when casting. The casting sets up quickly and anything larger in size would be wasted because it will quickly start to harden.
Pour
Next pour the contents of your two small cups into a larger disposable cup.
Mix
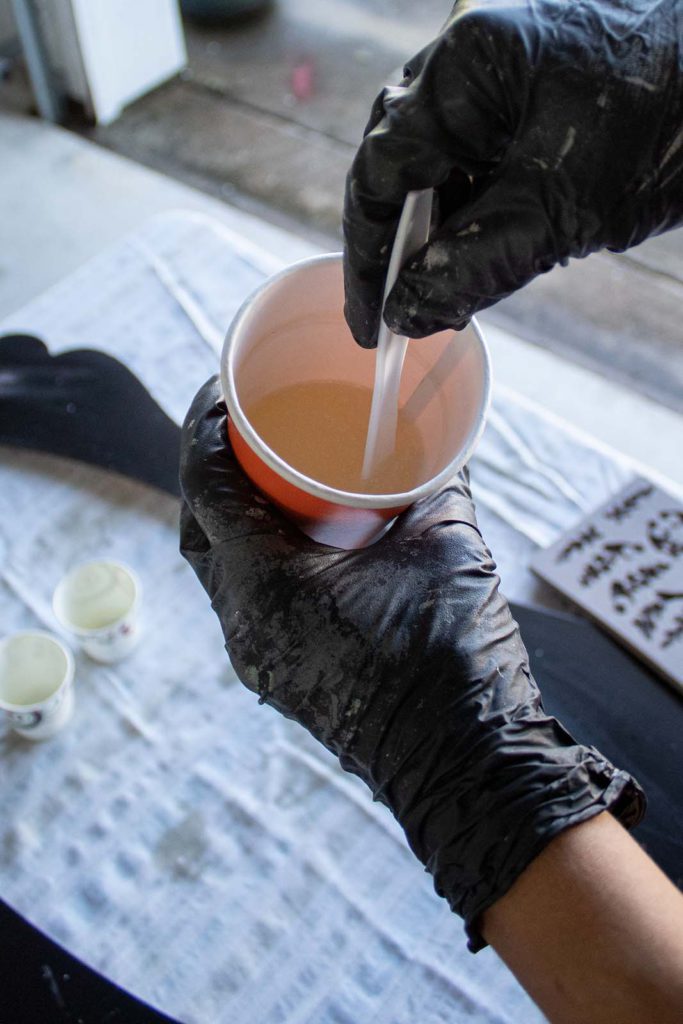
As soon as you pour the two liquids together, begin mixing with a plastic utensil or the stick that comes in the box. Mix for 30 seconds.
Cast
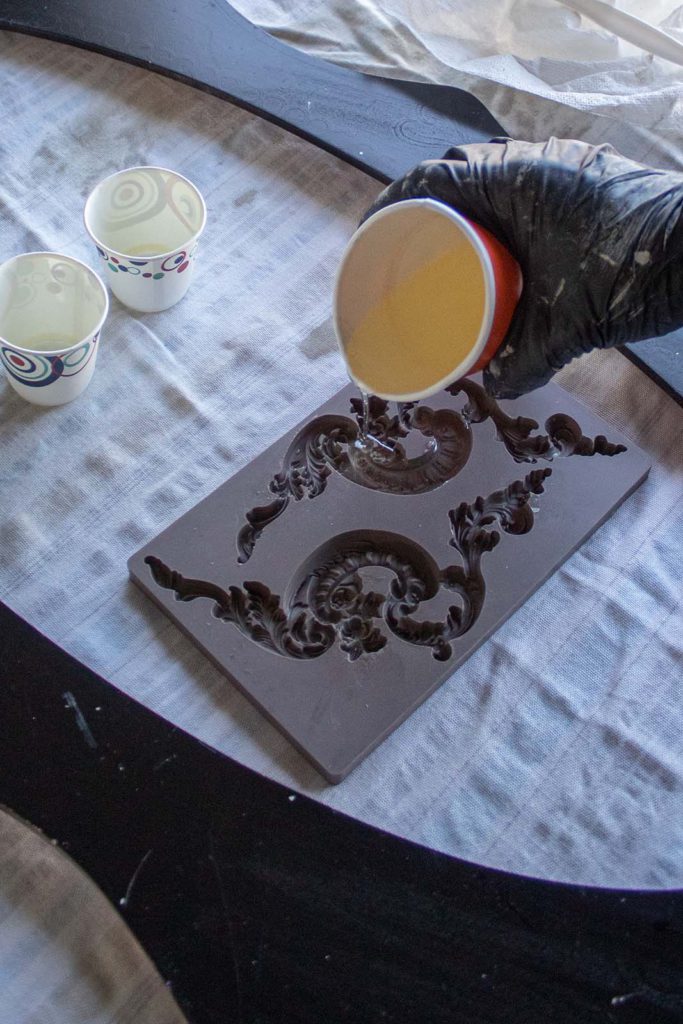
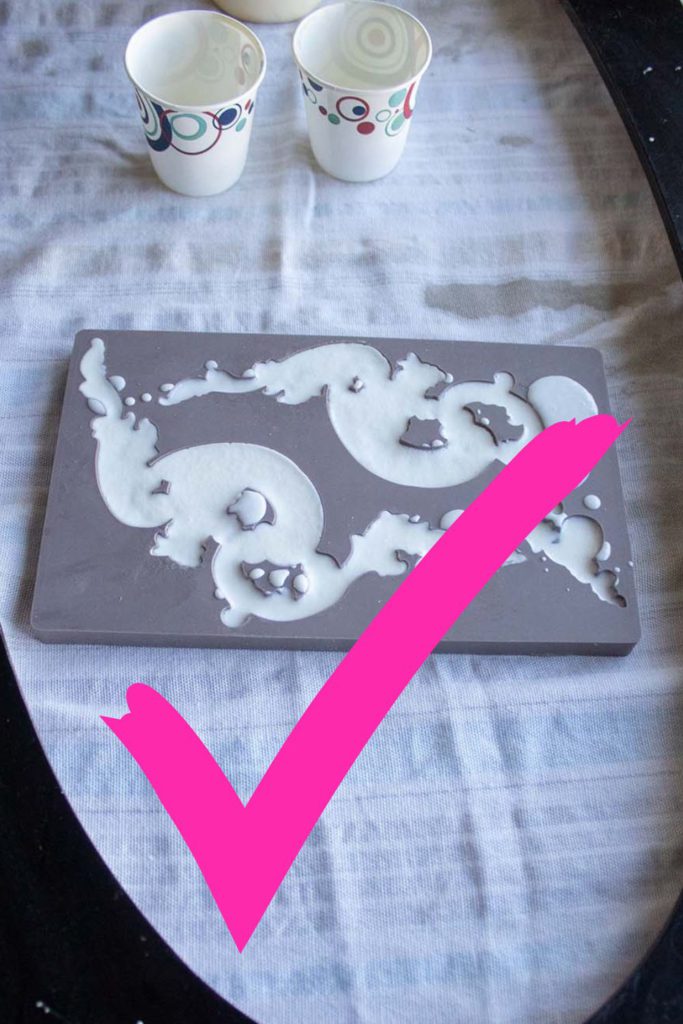
Immediately after stirring for 30 seconds, cast your molds. Pour the liquid into your molds steadily and swiftly, as the liquid starts to heat up quickly and harden. Make sure you get liquid into all the details of the mold.
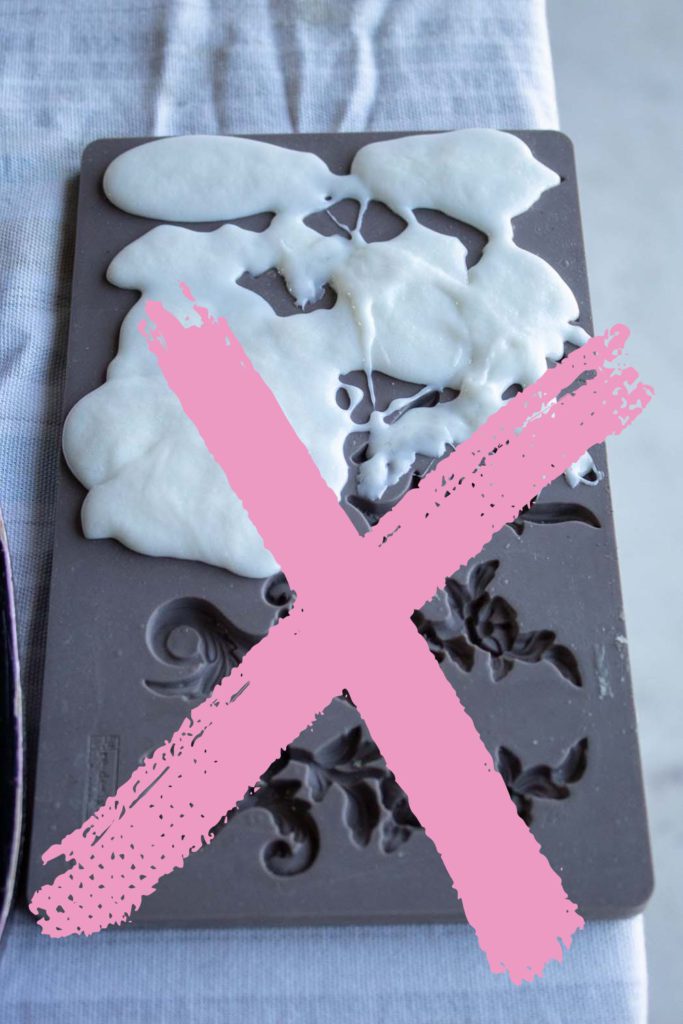
Don't Over Pour!
Don’t make the same mistake I did with these molds. I went too fast and the casting overflowed!
I had already filled two prior moulds and was trying to use up the rest of the casting on this mould. It was quickly hardening and I hastily poured it in.
You want to keep your casting flush with the top of the mold.
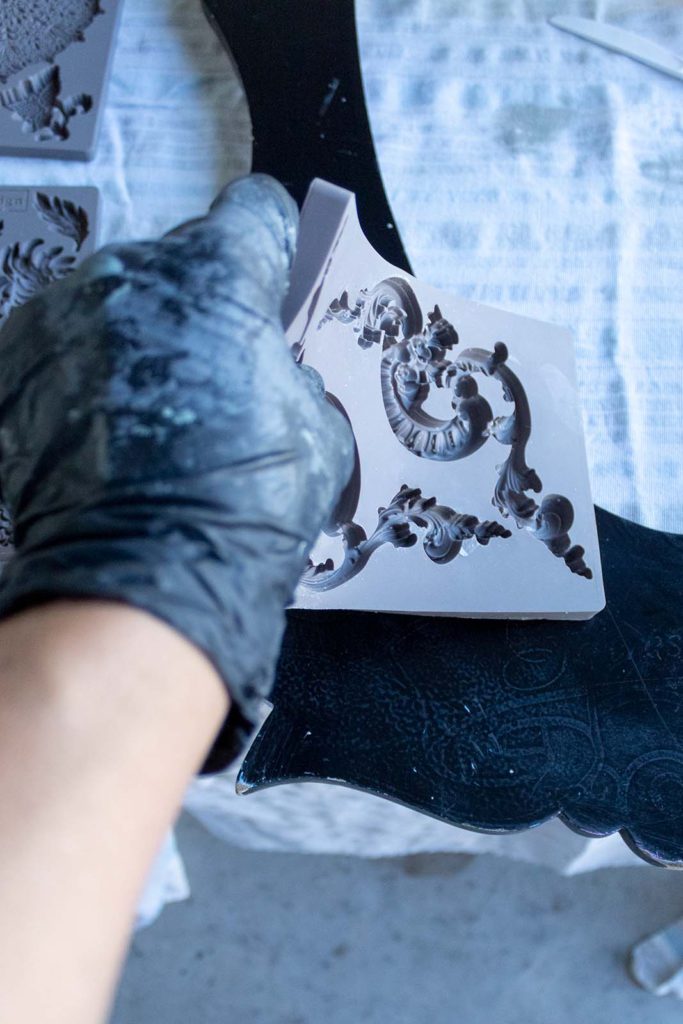
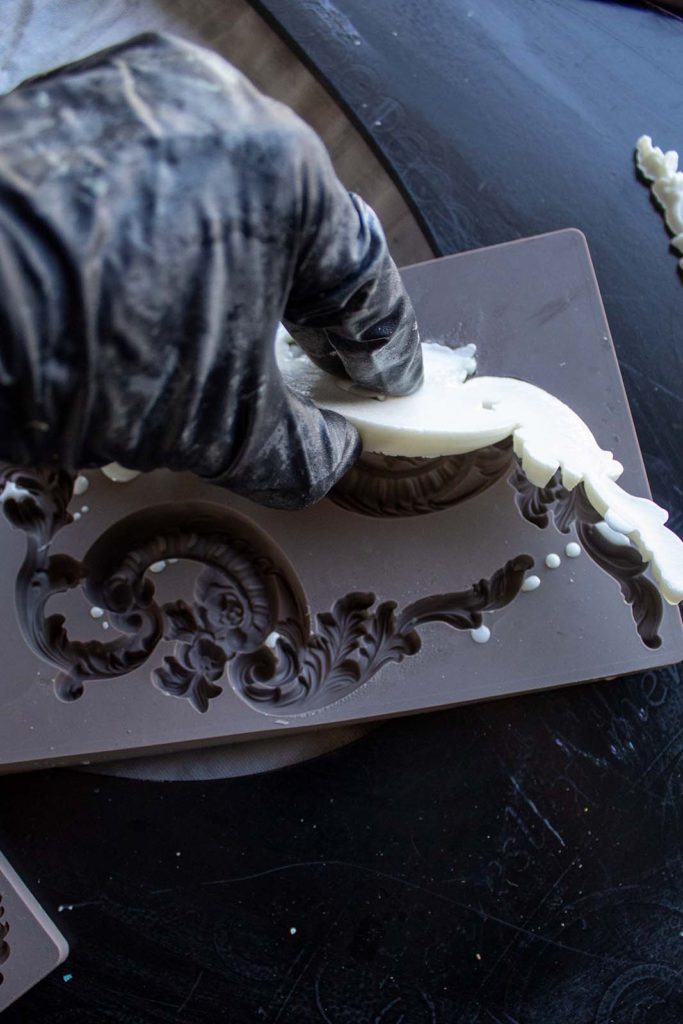
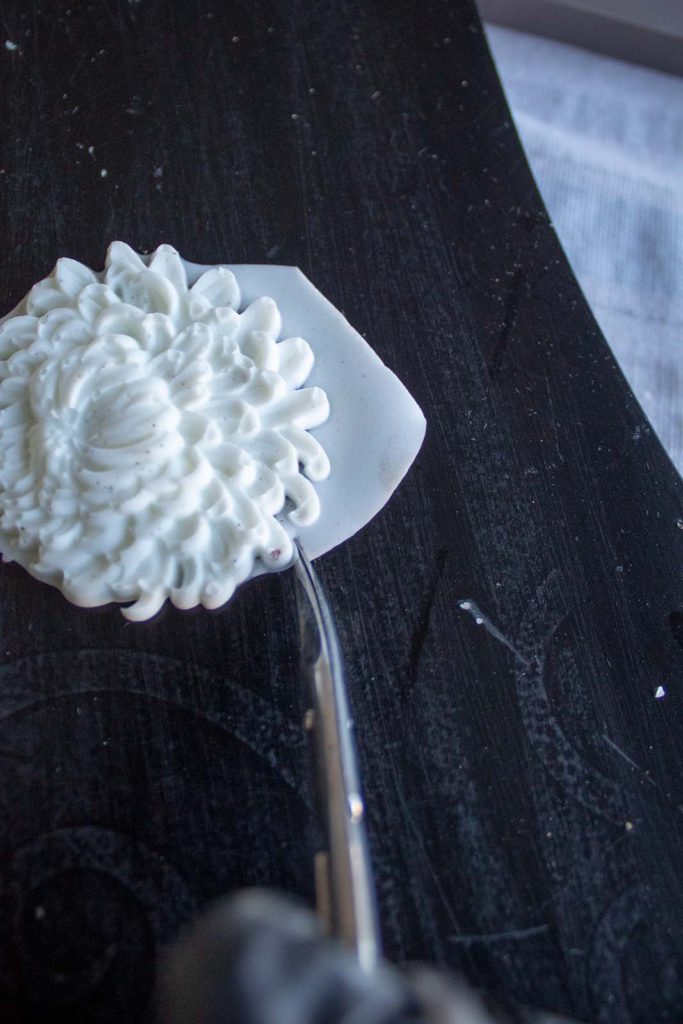
Remove Your Molds
The molds are ready pretty quickly after pouring. After about 10 minutes, test them by touching the casted mold with your finger. If it feels hard, it is ready. If it is a little tacky, give it a few more minutes.
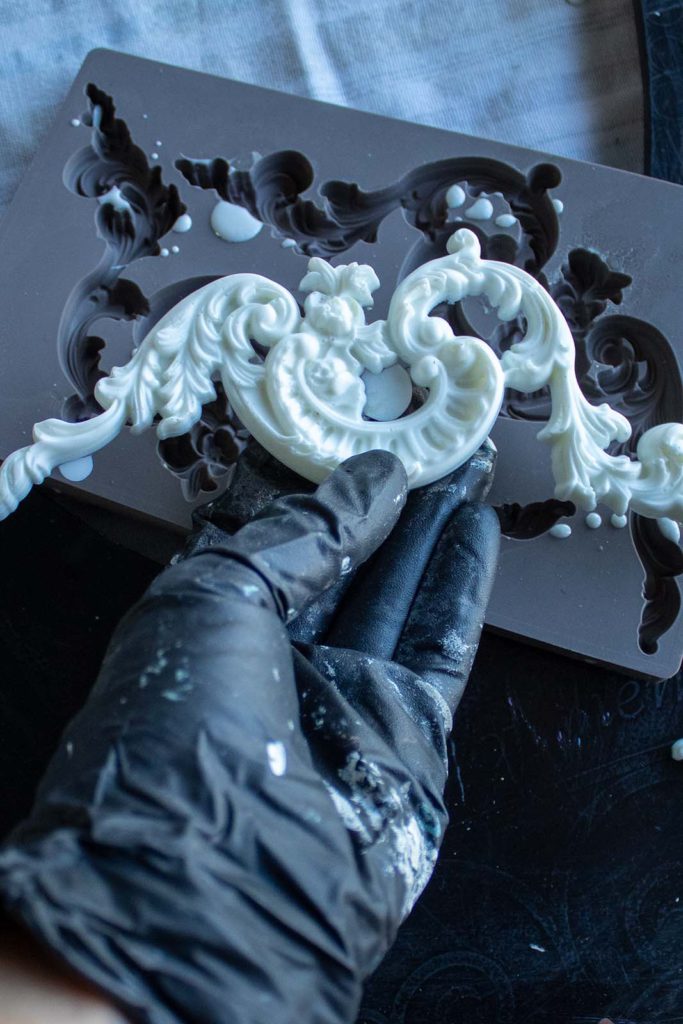
To remove the decorative molds, wiggle the silicone mould in different directions to loosen things up. Then you can pull or pop the molds out with your fingers.
If there is any excess casting material around the mold, you can cut it out carefully using scissors. I like using makeup scissors because they are small and curved and easier to maneuver around the molds. Just be careful, they’re sharp!
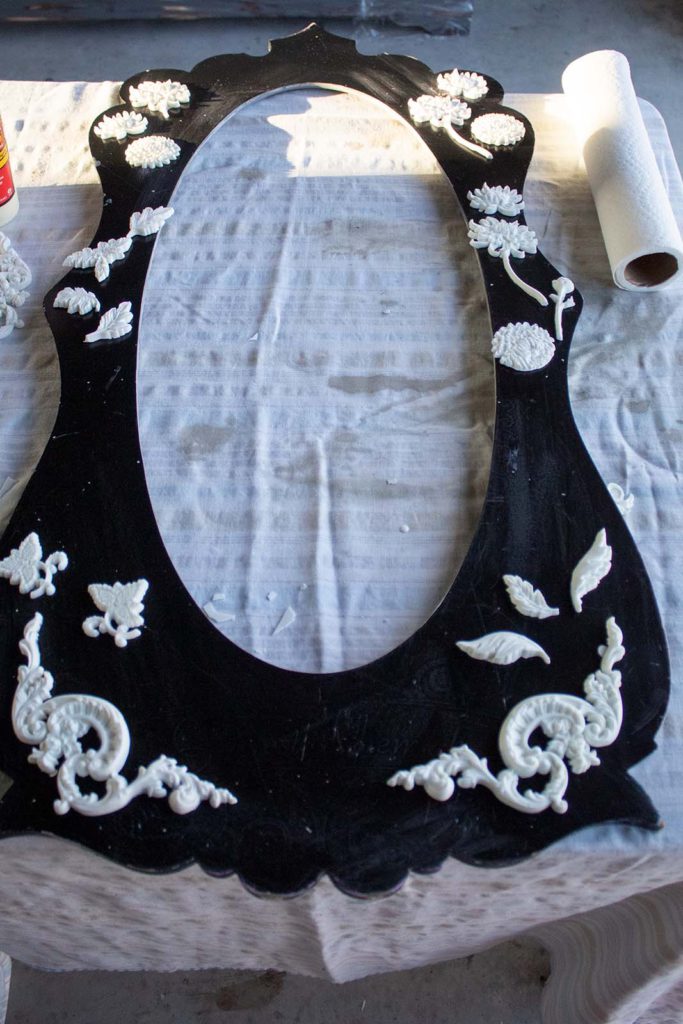
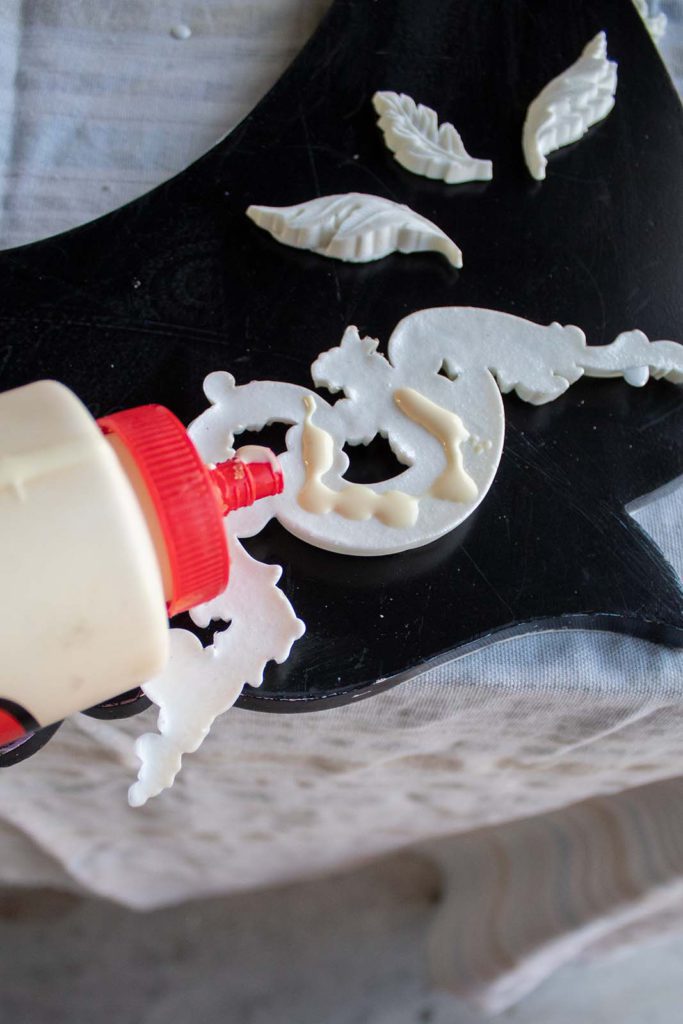
Step 3. Adhere Your Molds
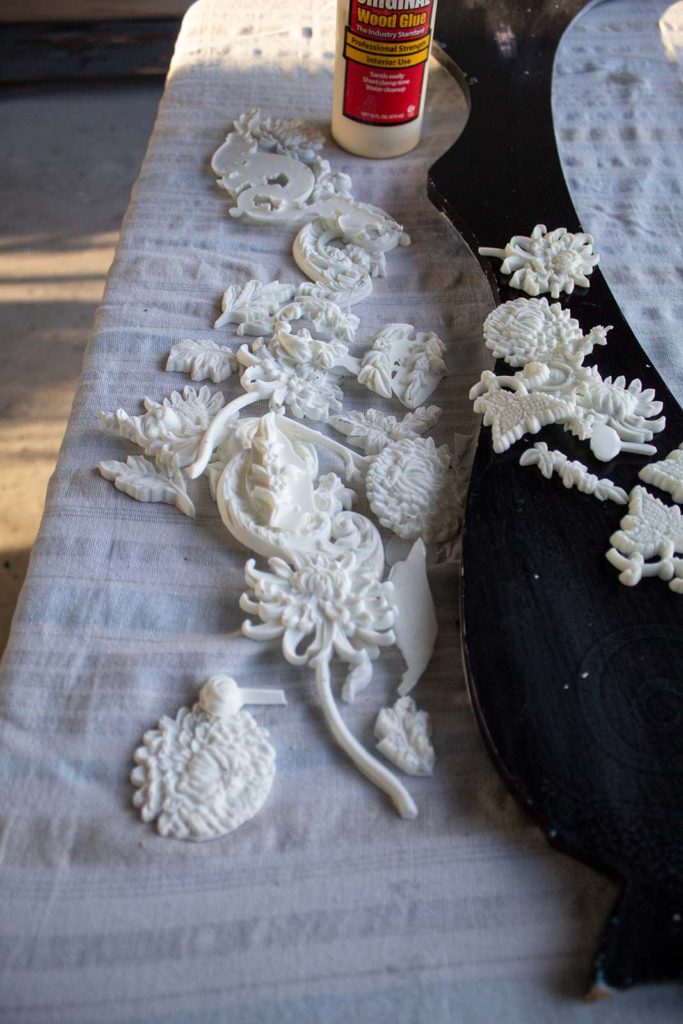
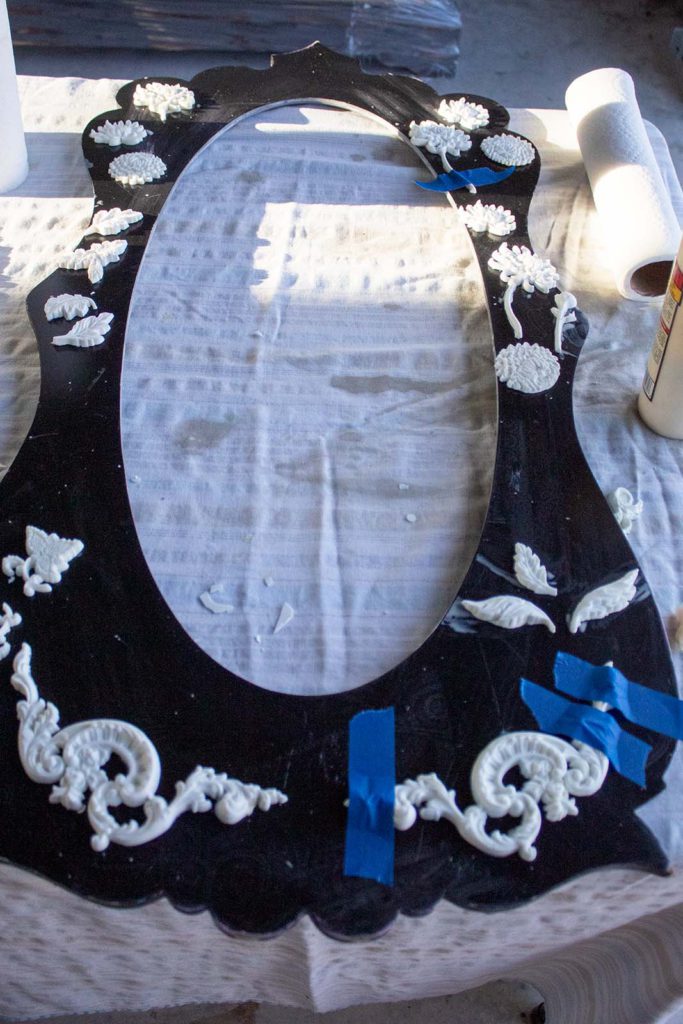
After casting a few molds, I placed my collection next to the mirror frame to begin visualizing the design. I suggest taking your time and trying out different placements for your moldings on your piece. Once they are glued it is harder to go back and change the layout of your molds.
Prior to gluing, I place various molds in different locations around the frame. Once I like the design, I step back for a final look to make sure things look cohesive.
Let's Glue
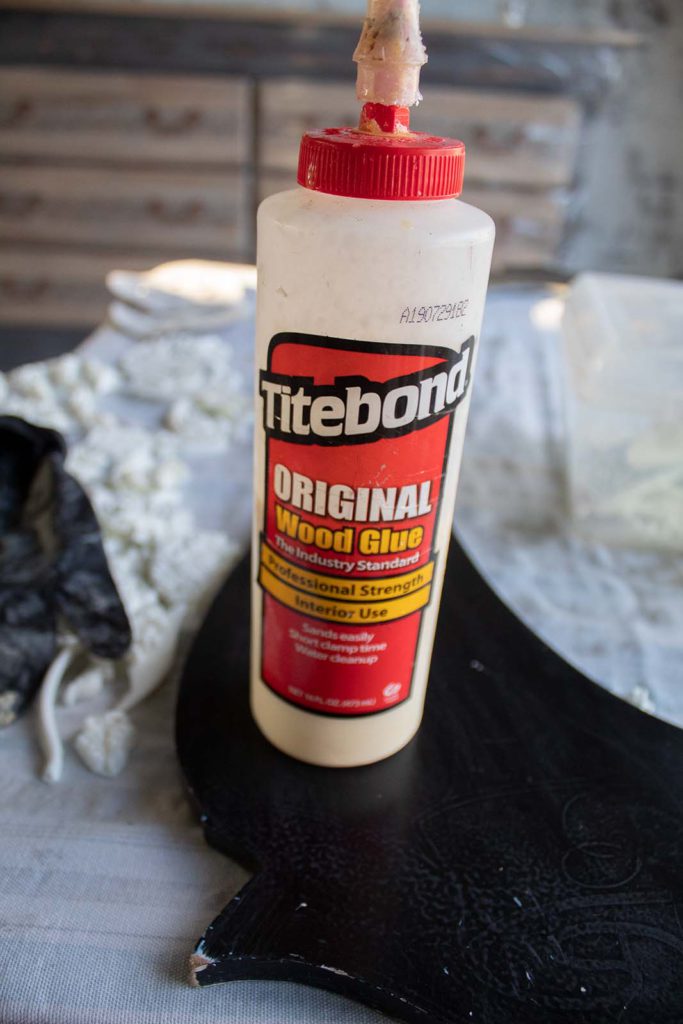
Titebond is a very strong glue once it dries. You only need a few drops of glue on each mold. If you pour too much glue onto the back of the mold, you will end up with a puddle of glue on the surface of your piece. Be sure to wipe excess glue off with a paper towel.
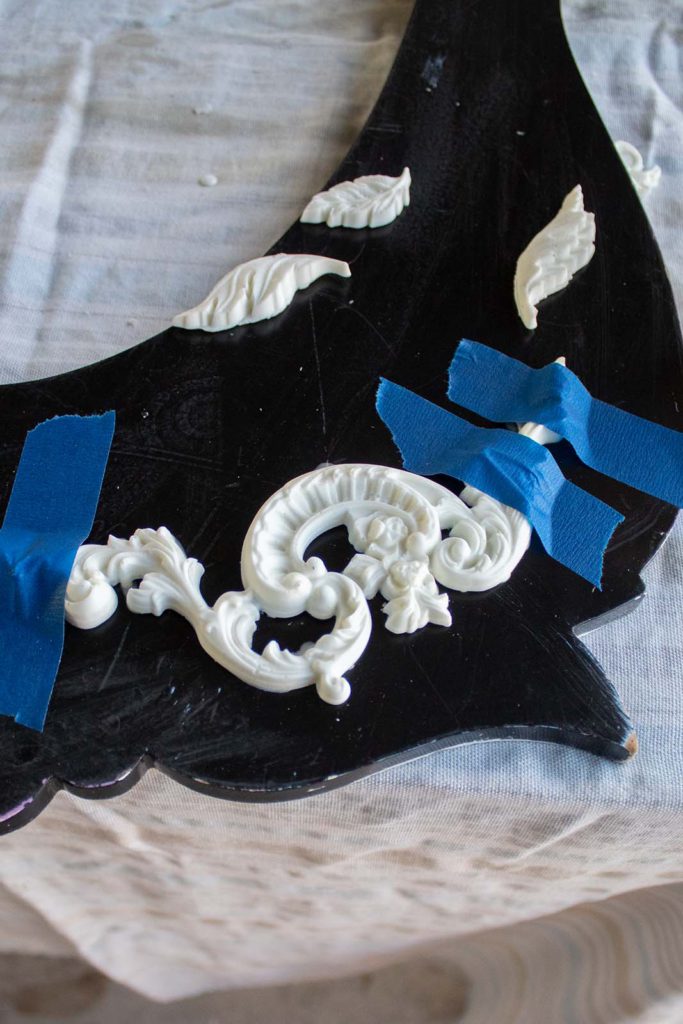
Sometimes the molds don’t lay flat on the surface. They may have some curvature to them that causes parts to lift. You can use painters’ tape to secure these parts and make sure they get glued.
Give your glue plenty of time to dry. I would suggest waiting at least 2 hours before checking to see if your molds move or not. I let my molds sit overnight before proceeding with painting.
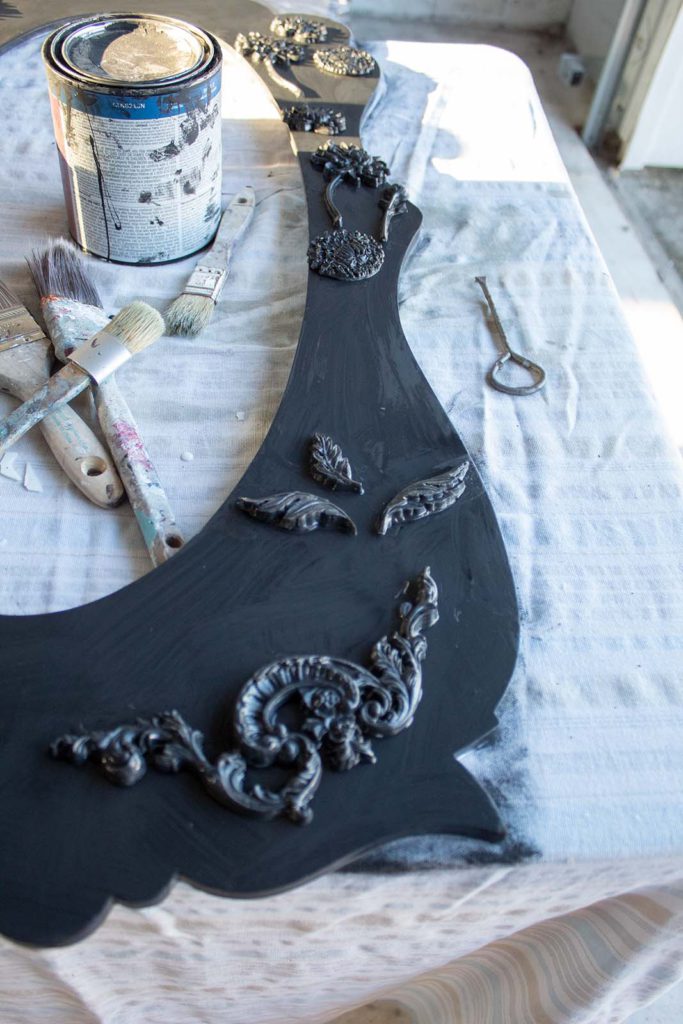
Step 4. Painting
To achieve the dimension and character of the painting technique I’m going to demonstrate, you will need chalk paint. Regular latex paint will not create the same effect.
I make my own chalk paint from paint I buy at Home Depot with this recipe. But you can use any chalk or mineral paint for this technique.
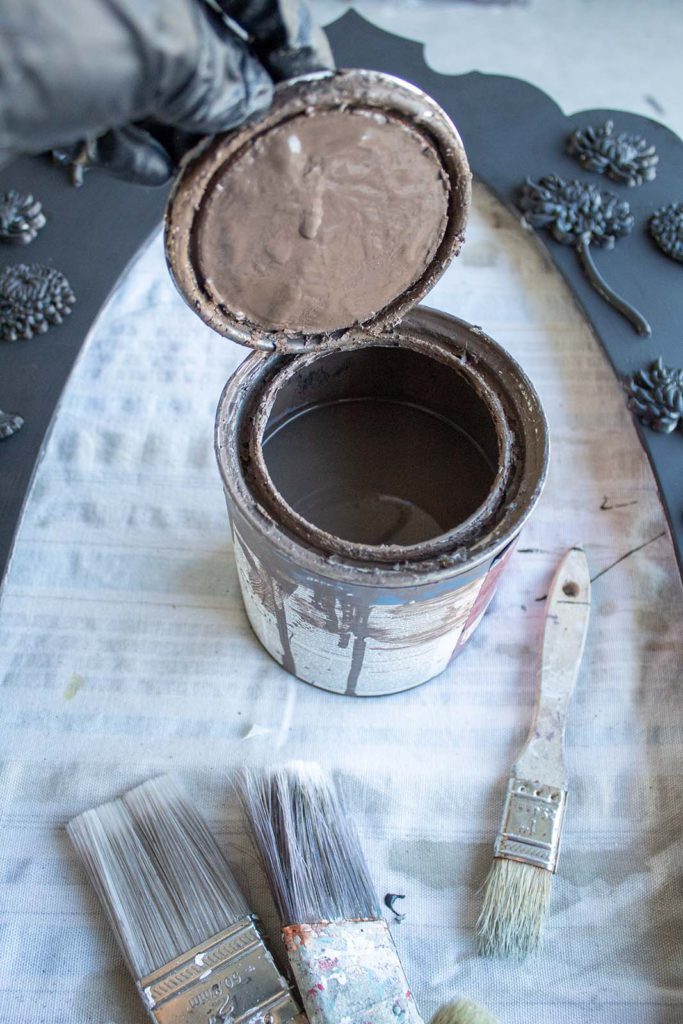
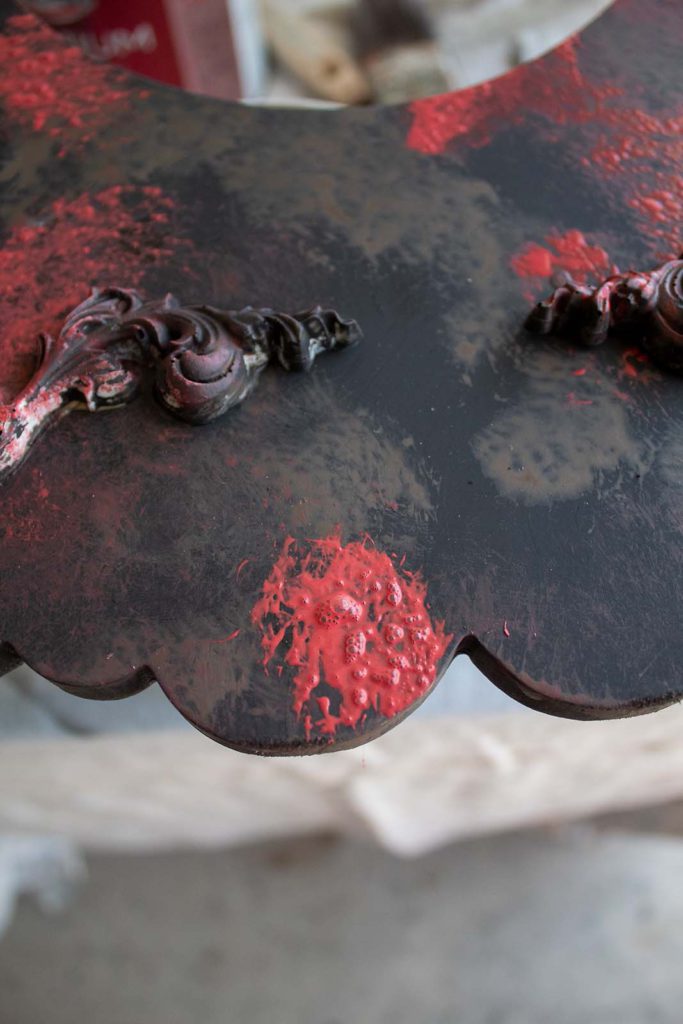
Black
We are going to be applying a few layers of paint to create an aged patina look on this mirror. I start by giving the frame one coat of Black paint by Behr. I use my purdy brush and my misting bottle to apply the chalk paint.
My first layer of paint, my foundation coat, is the only time I will use my misting bottle. The moisture will help move the paint and to get it into all the details of the molds.
In all the future layers I will be dry-brushing (simply applying paint with my brush—no misting). The dry-brushing technique helps to add texture that we need for our vintage look.
Chalk paint dries fairly quickly. I waited 30 minutes for my foundation coat to dry. The subsequent layers may only need 10 minutes of dry time or less since they are not as broad of coverage as the initial black coat.
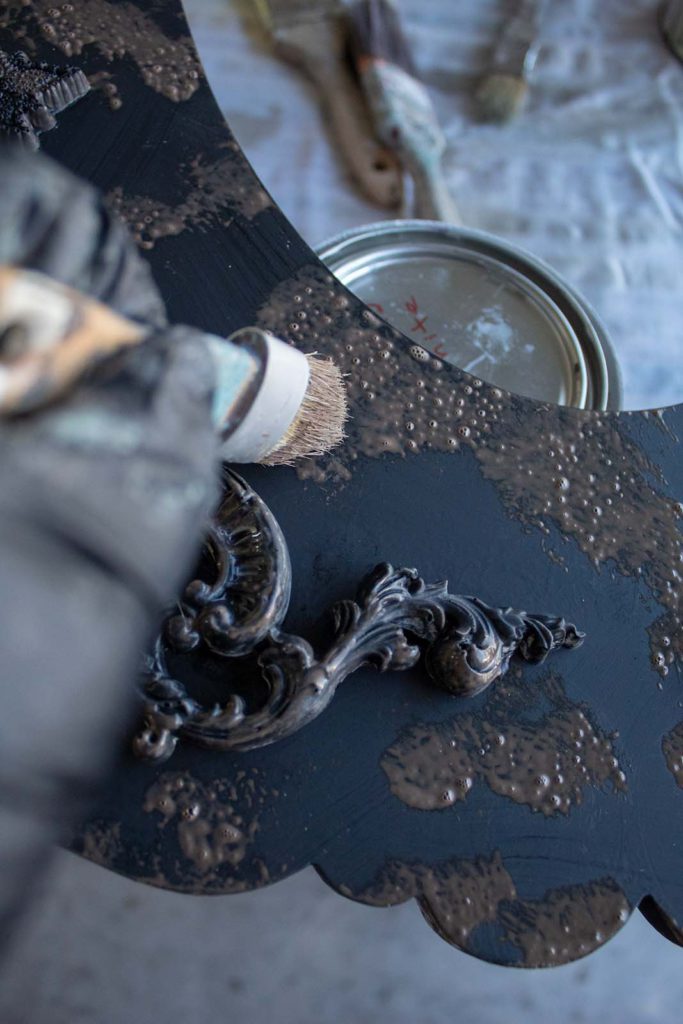
Brown
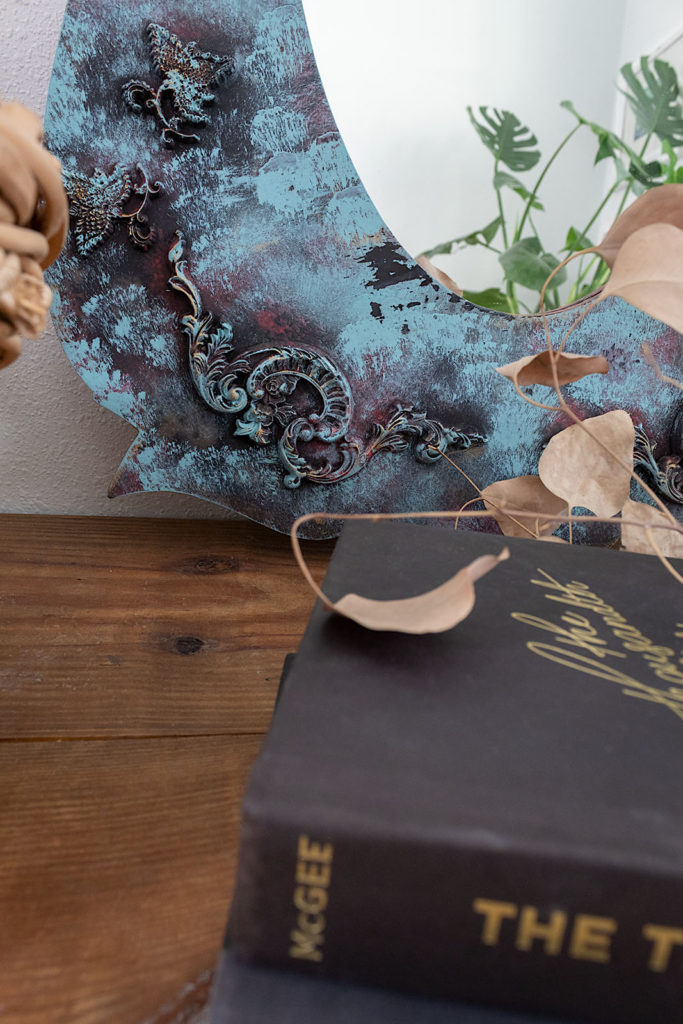
The next color I’m using to build the aged patina look is Chocolate Swirl by Behr. I love this creamy brown. This time I’m applying less paint than the black. I’m adding the brown in random parts, making sure to leave some of the black color underneath exposed.
To start creating textured layers, I dab my paint brush up and down over the surface and sporadically over the molds.
Don’t worry if you see bubbles in your paint. These will dissolve as they dry and the blotchy patches will be slightly textured—which is the goal.
Things will look pretty scary at this point but this is part of the process—not to worry!
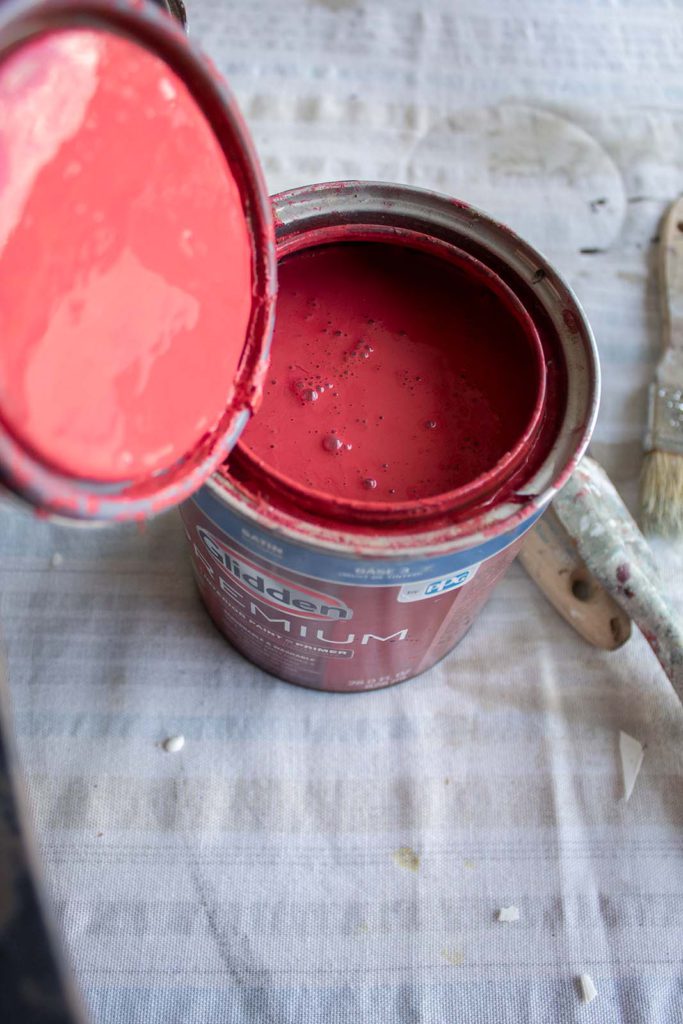
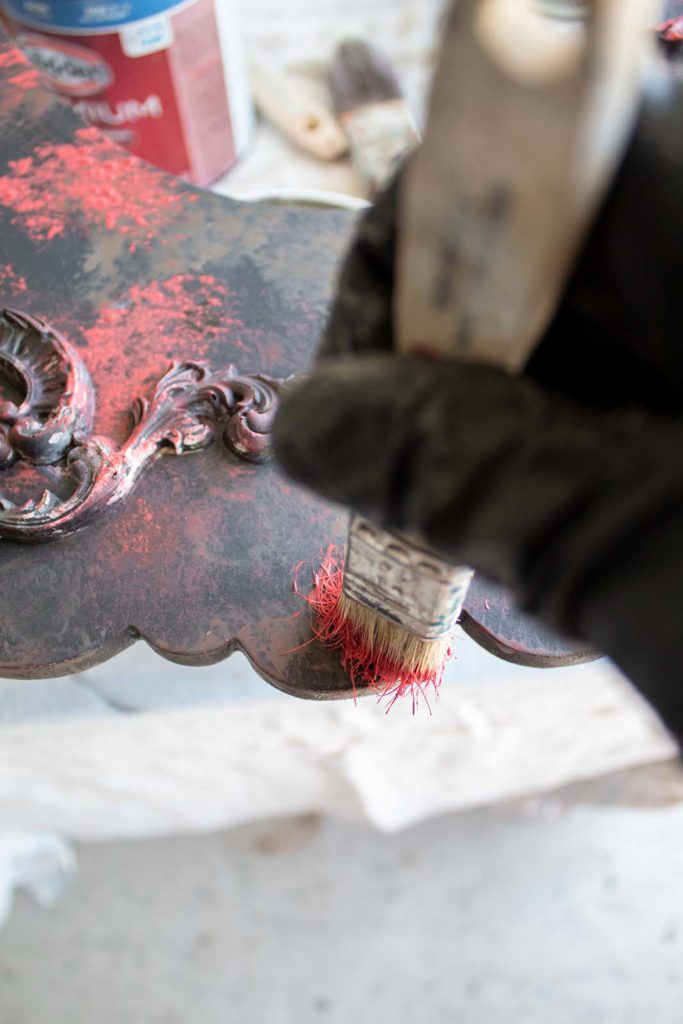
Red
I’m using No More Drama by Behr, a cheery red color, for my next layer. Again I apply it by hitting my brush up and down all around the frame in random parts. Make sure that you are also hitting parts of the molds when painting. All these layers will add beautiful dimension to the molds.
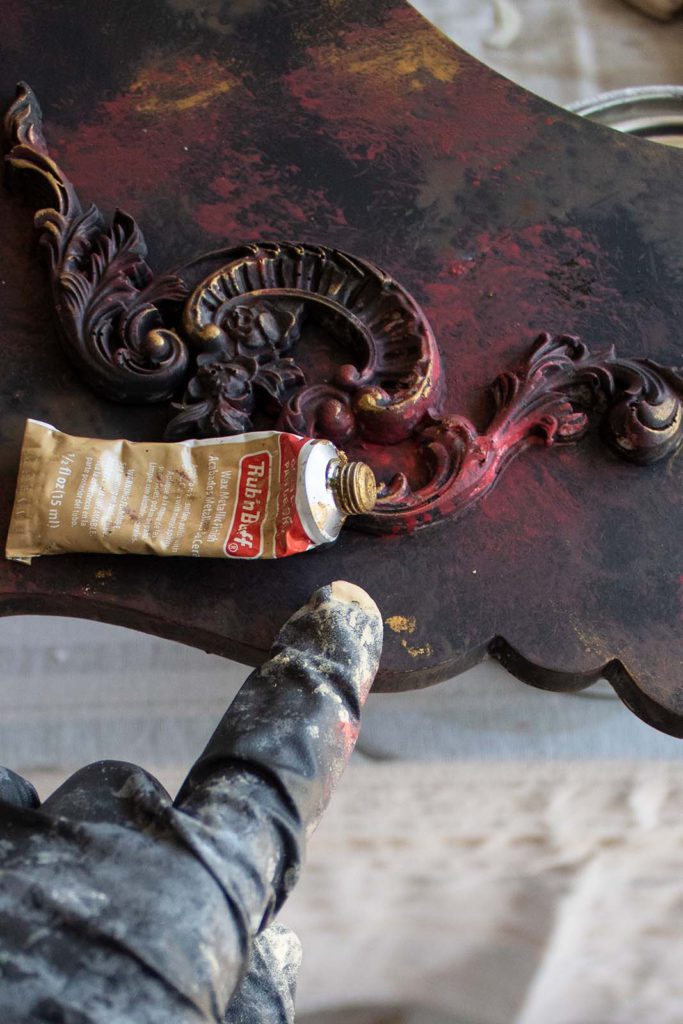
Gold
Before adding my final paint color, I apply Gold Leaf Rub n’ Buff in random places around the frame by rubbing on small amounts with my gloved finger. I also use the wax to define some of the details of the molds.
The gold will add another level of dimension and it will contribute to the look of oxidized patina.
Things are starting to take shape but the look is not quite cohesive yet. The final color will pull everything together.
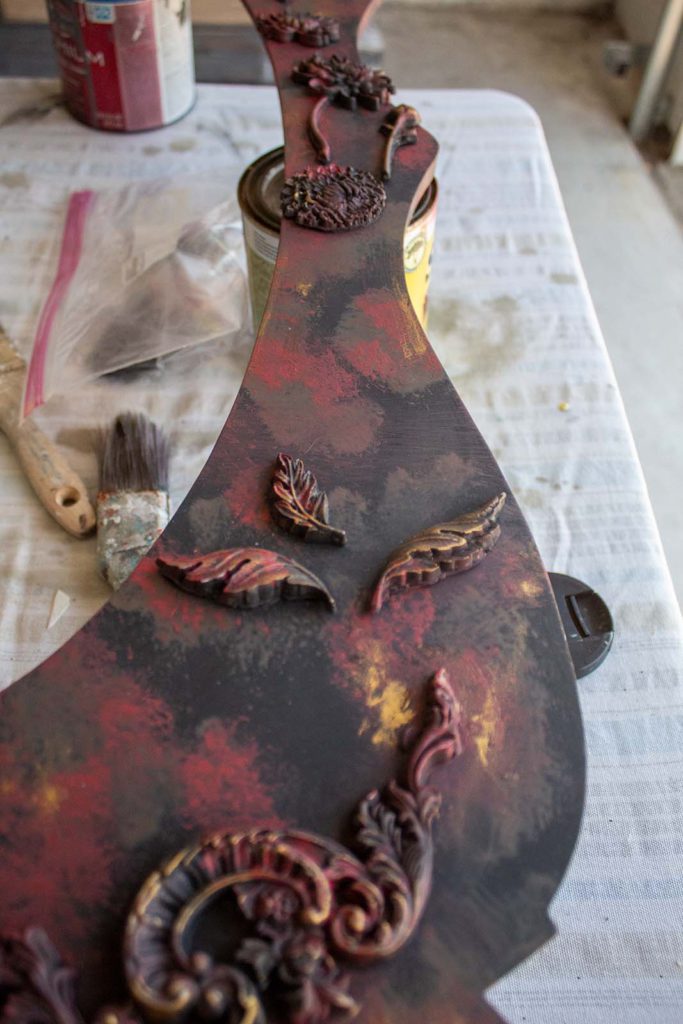
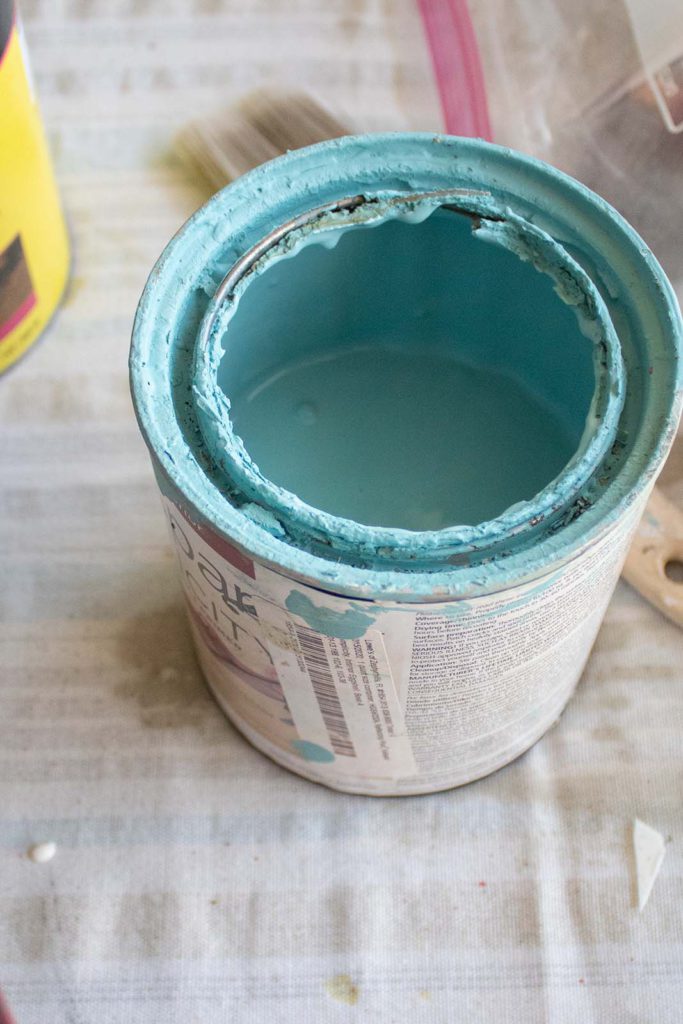
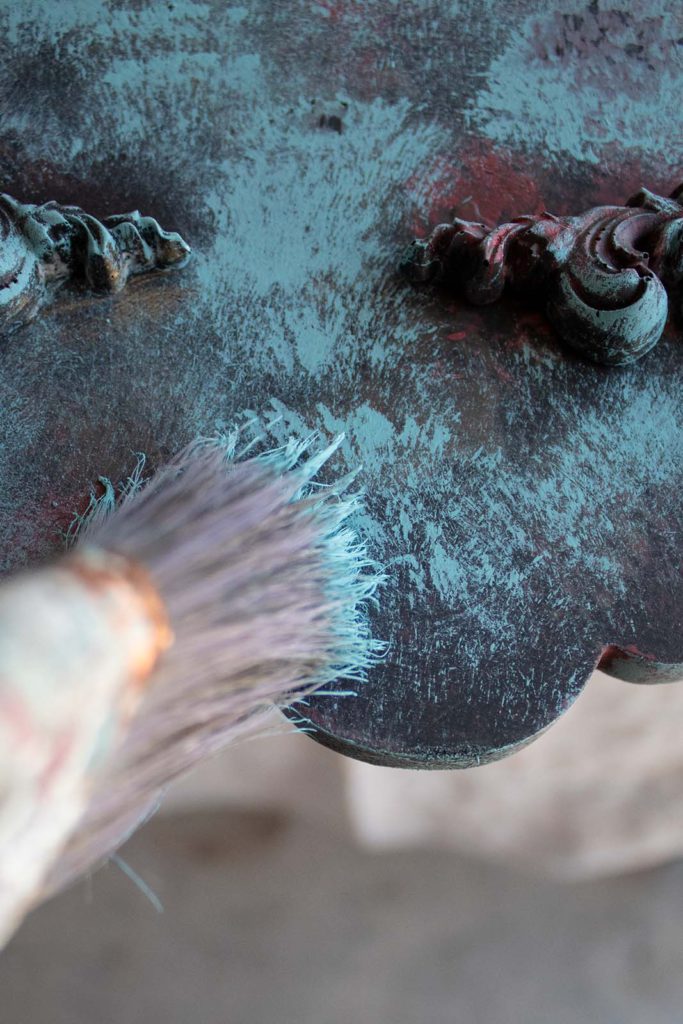
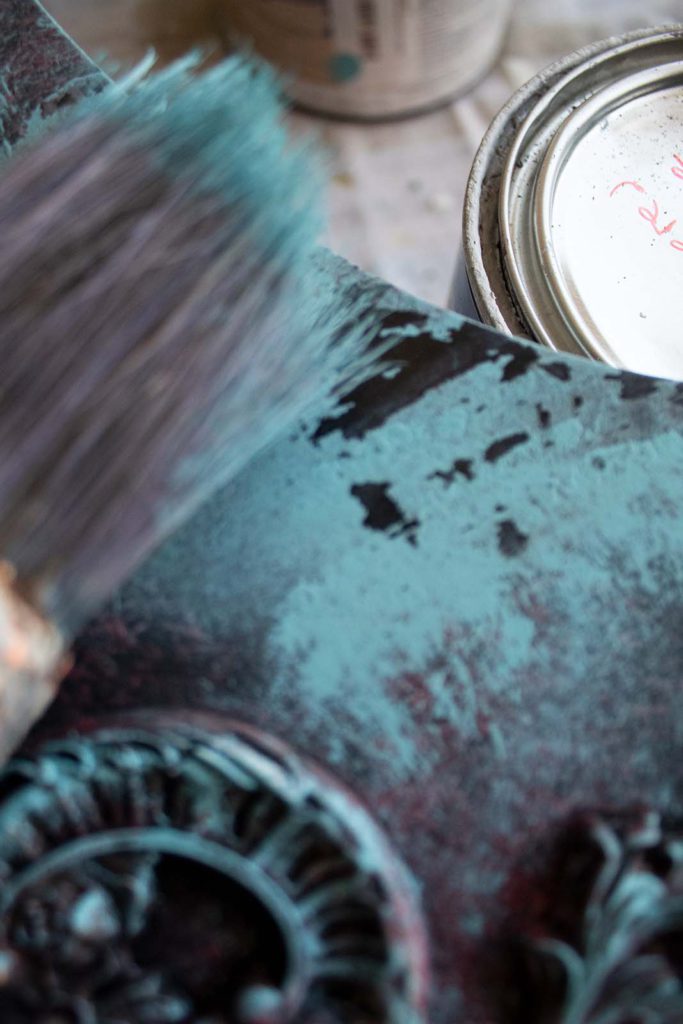
Aqua
To achieve a patina aesthetic, I recommend using tones in the turqouise and teal family, along with your moodier, darker colors. When you envision old, rusted, and oxidized metals, the colors can vary but it is common to see tones of greens and even blues.
I’m using Reflecting Pool by Sherwin Williams (a vibrant aqua color) to make my patina statement on this piece. Again I will apply the paint by dabbing the brush up and down to create lots of texture.
When paint layering, I like my final color to be the dominant color-the one that pulls all the layers together. To do this I apply more of the aqua than the previous two paint colors, leaving only subtle parts of the colors underneath exposed.
Go slowly with adding your final color so that you don’t over do it. The layers of color underneath coming through the aqua, are what are going to create that visual illusion of depth and age.
In some parts where I’ve added the aqua, I go back over them with my paint brush (without adding paint to it) and I use my brush to distress some of the paint.
I do this by applying pressure and rubbing over the painted area. The hard, dry bristles pull off some of the paint for an additional time-worn detail.
Once I’m happy with the amount of the aqua color, I add a few more touches of the Gold Leaf Metallic Wax. This last step is optional but I like how it enrichens the final look.
I find this paint layering technique so satisfying! The way in which the paint colors begin to work together, the more layers you add, is simply magical.
When the top color contrasts with the darker undertones, all this yummy vintage appeal unfolds before your eyes. And I love that there are no two pieces that will come out identical. Each time you are surprised with a new aesthetic.
Sweet friends, I hope that this tutorial was something you enjoyed! I am working on some more renovations that I can’t wait to share with you. So be sure to stay connected.
In the meantime, I will leave you with one more view of the before and after of this mirror. Let me know what you think in the comments below!