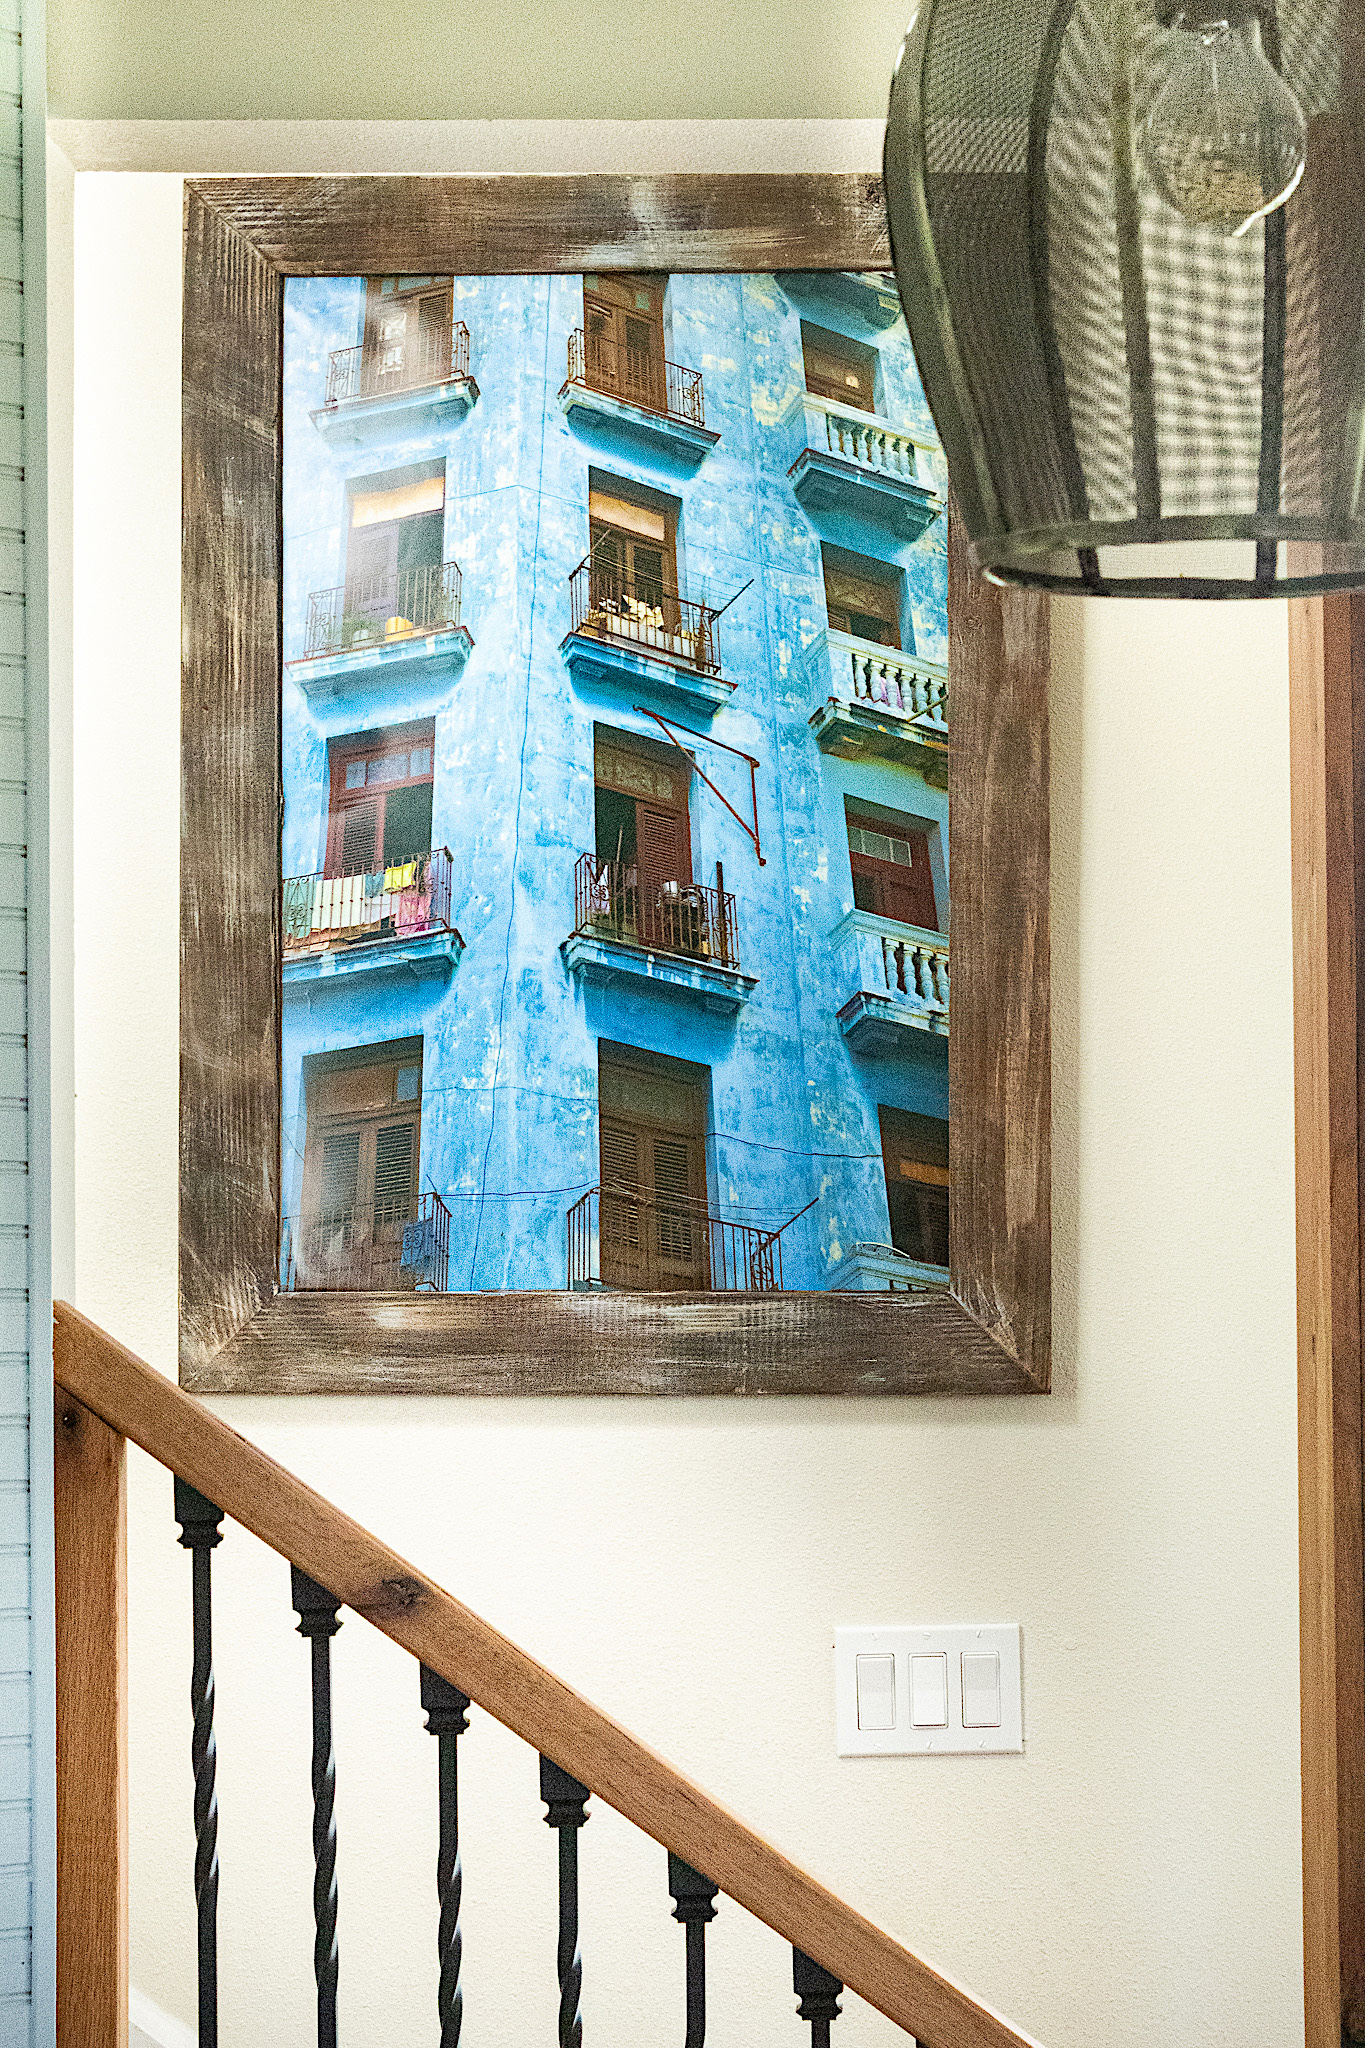
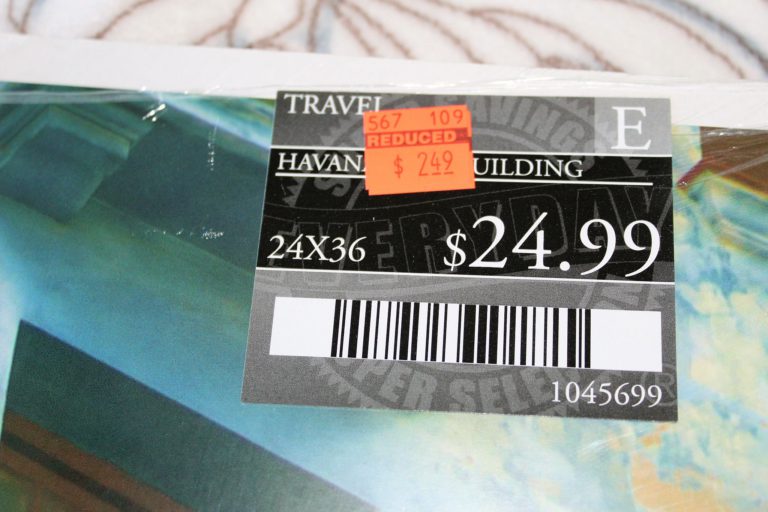
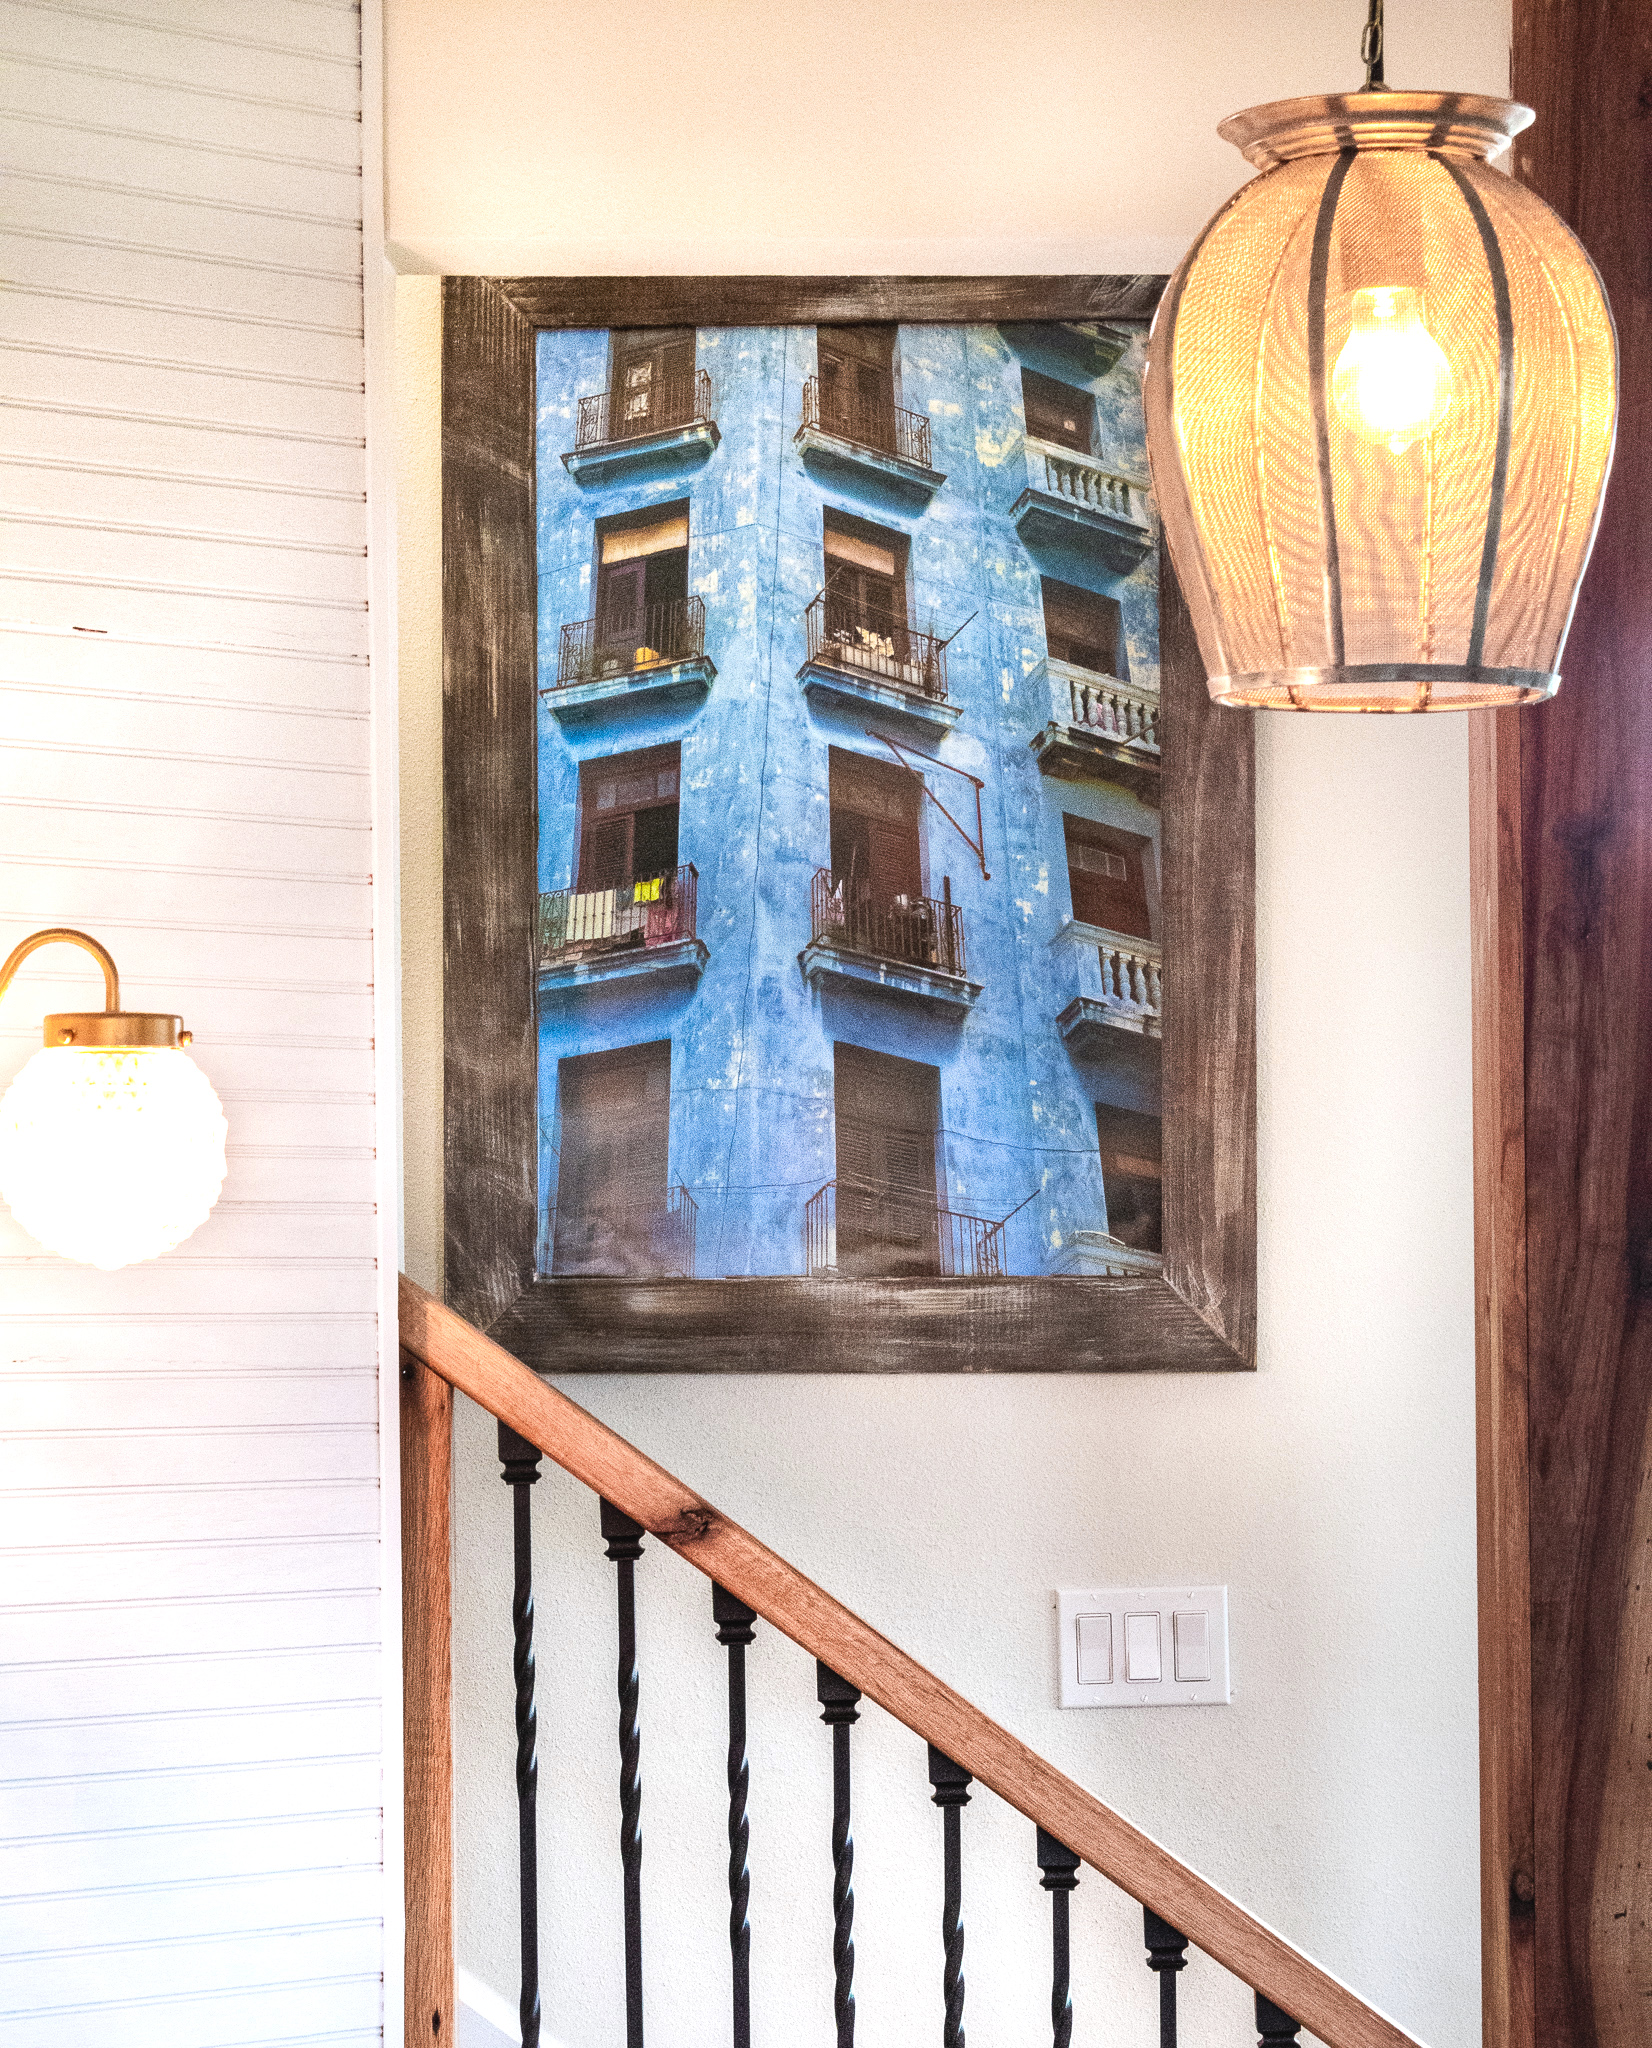
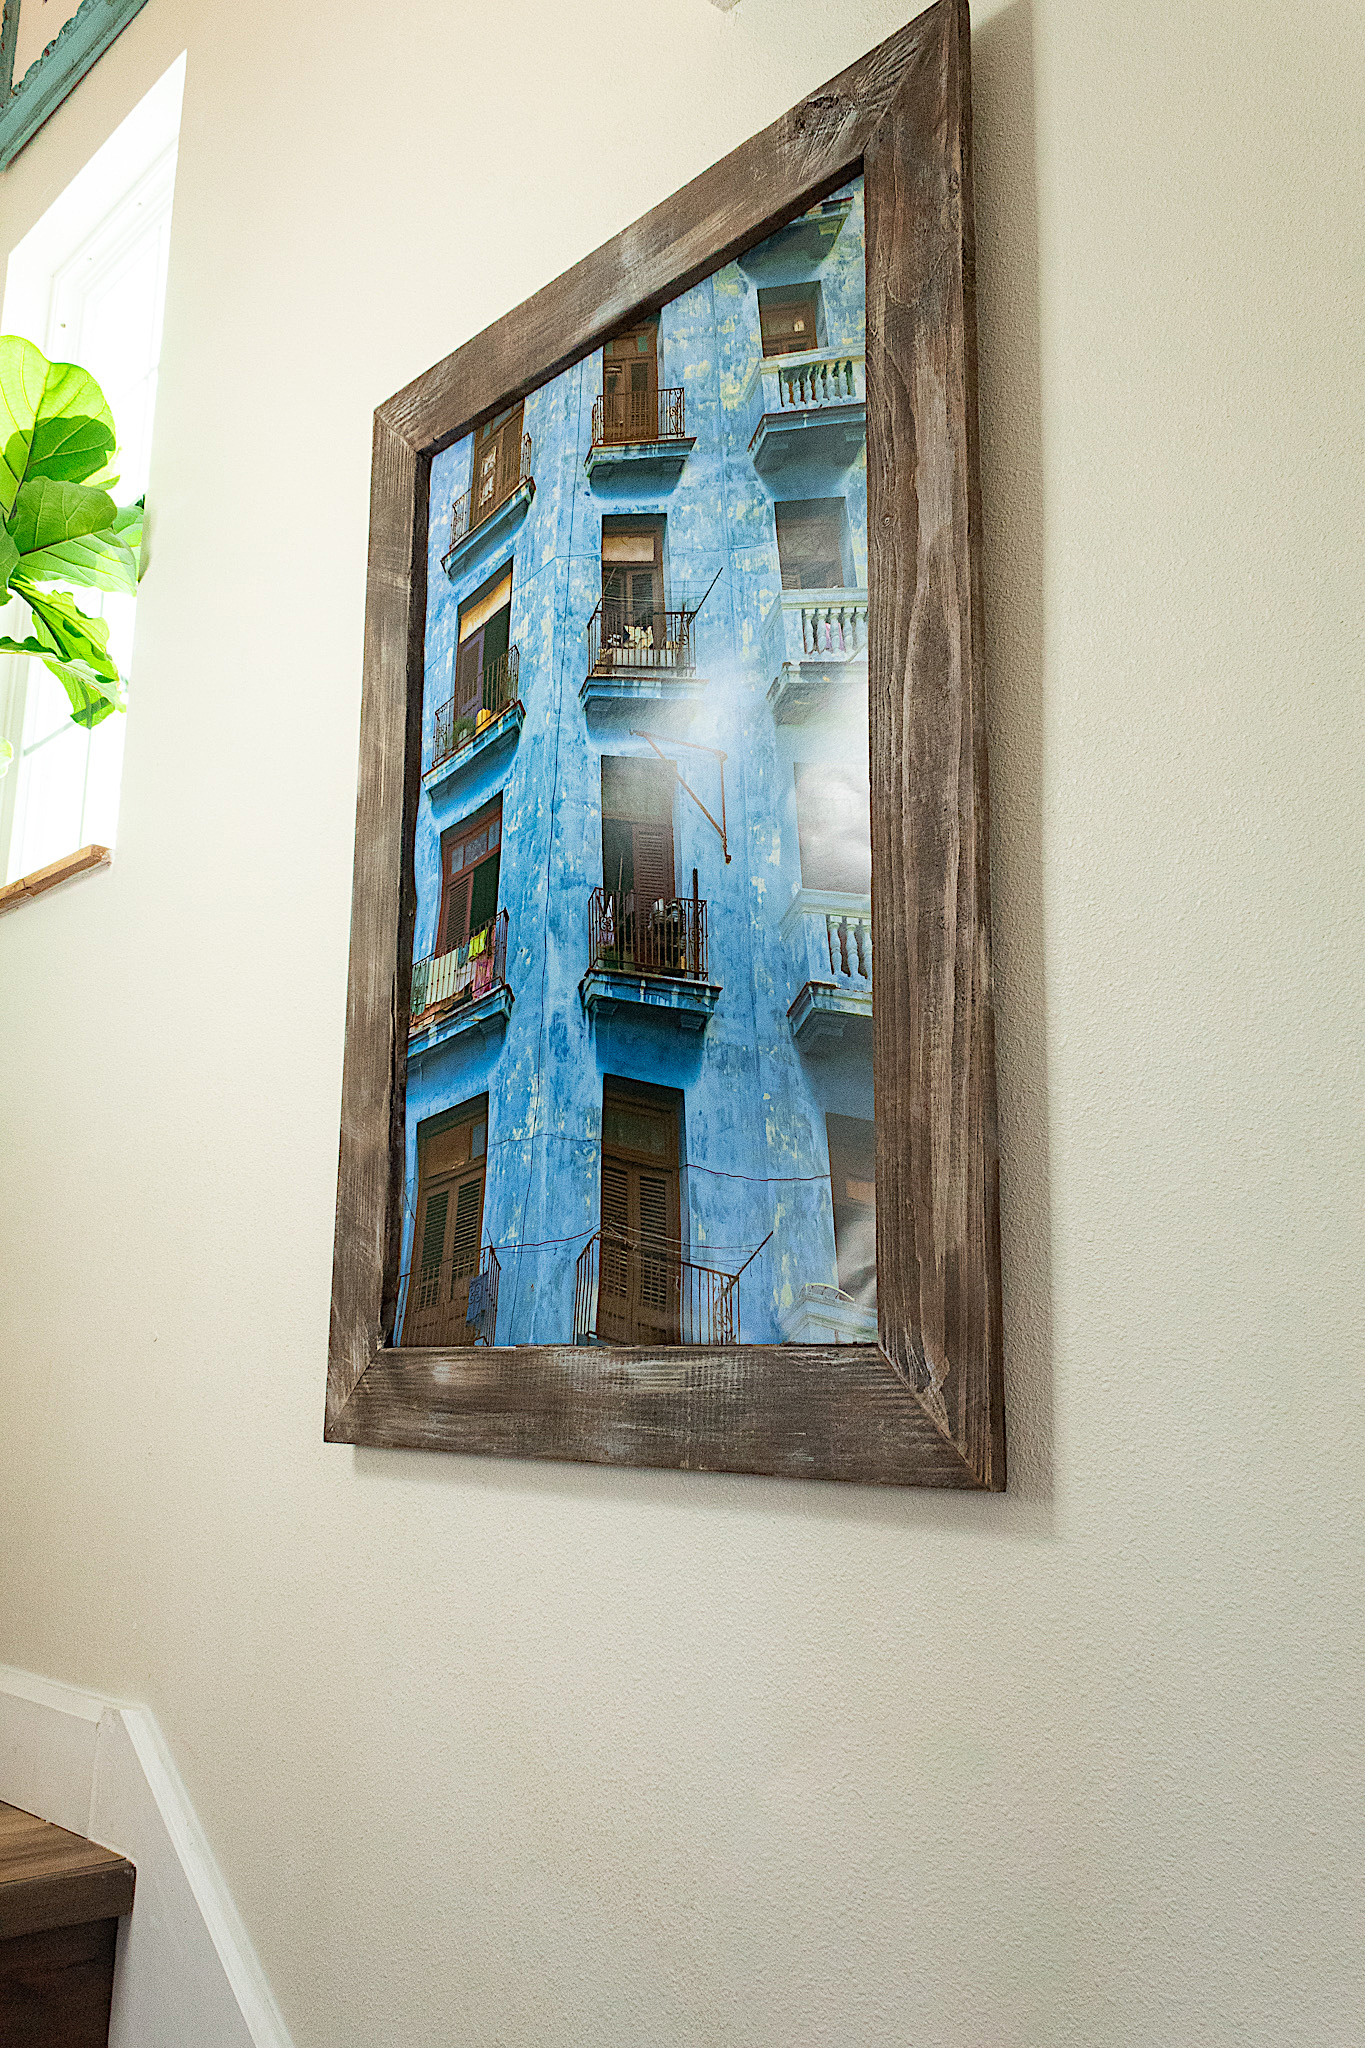
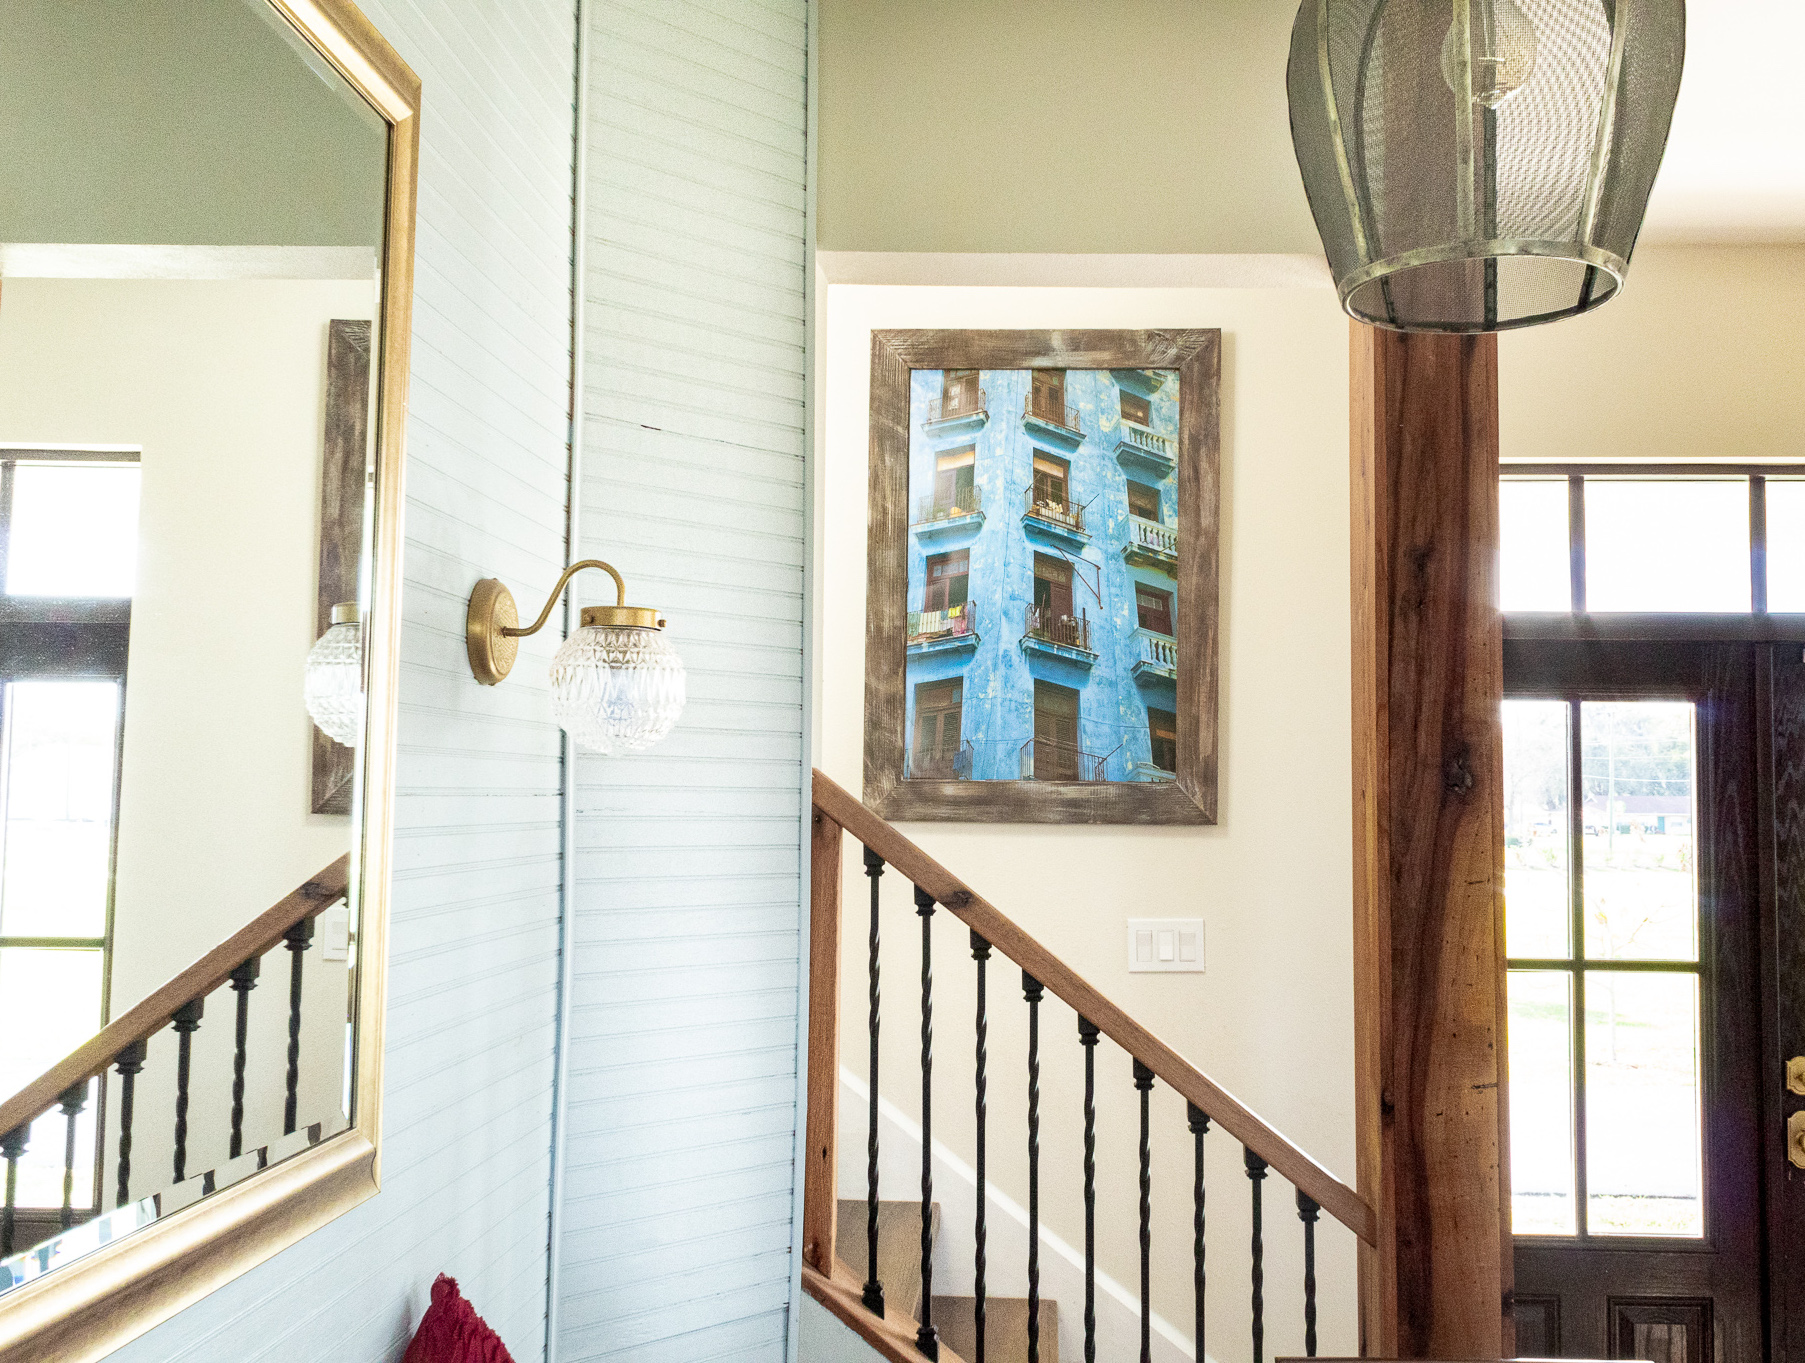
As I was strolling through Hobby Lobby the other day a beautiful poster caught my eye. It was of a tall blue apartment building with intricate details. I’ve since learned this is a building in Havana, Cuba. It really is a captivating scene. I’d been wanting a statement piece for the base of our stairwell. At a 90% mark down—it was a no-brainer. Problem was I didn’t have a frame that large. I spent the whole drive home thinking of a way to make my own picture frame. This is what I came up with!
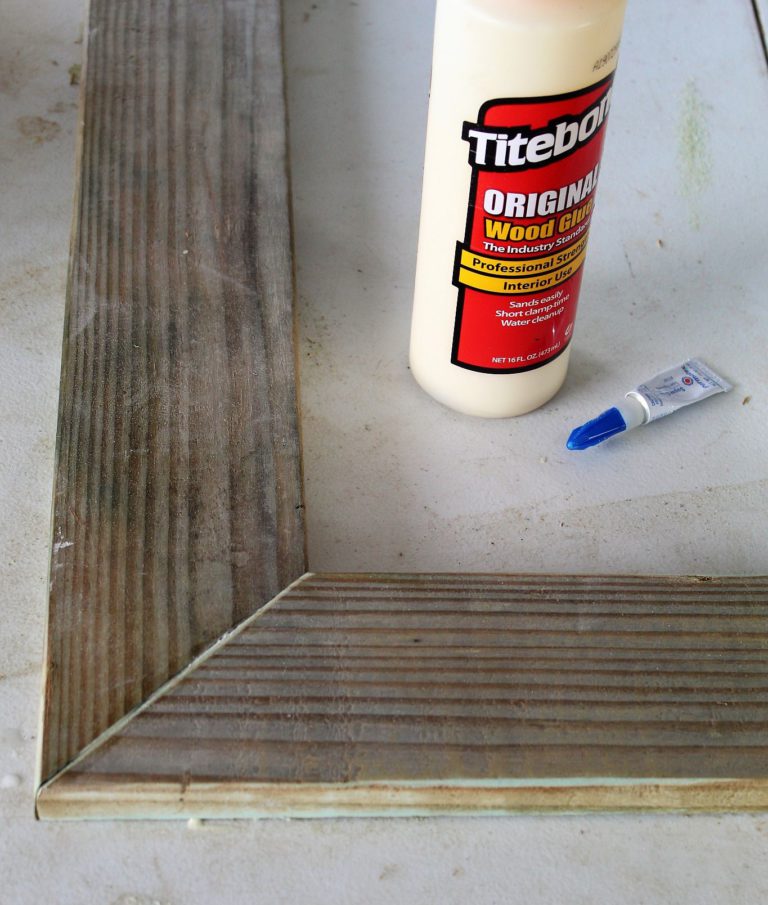
My husband Ronny was instructed to gracious enough to miter cut 4 pieces of a 12 foot piece of 1″ x 4″ we had around the house. We measured the size frame we would need and cut four pieces. The corners were cut at a 45 degree angle. To glue the pieces together I used titebond which is super strong.
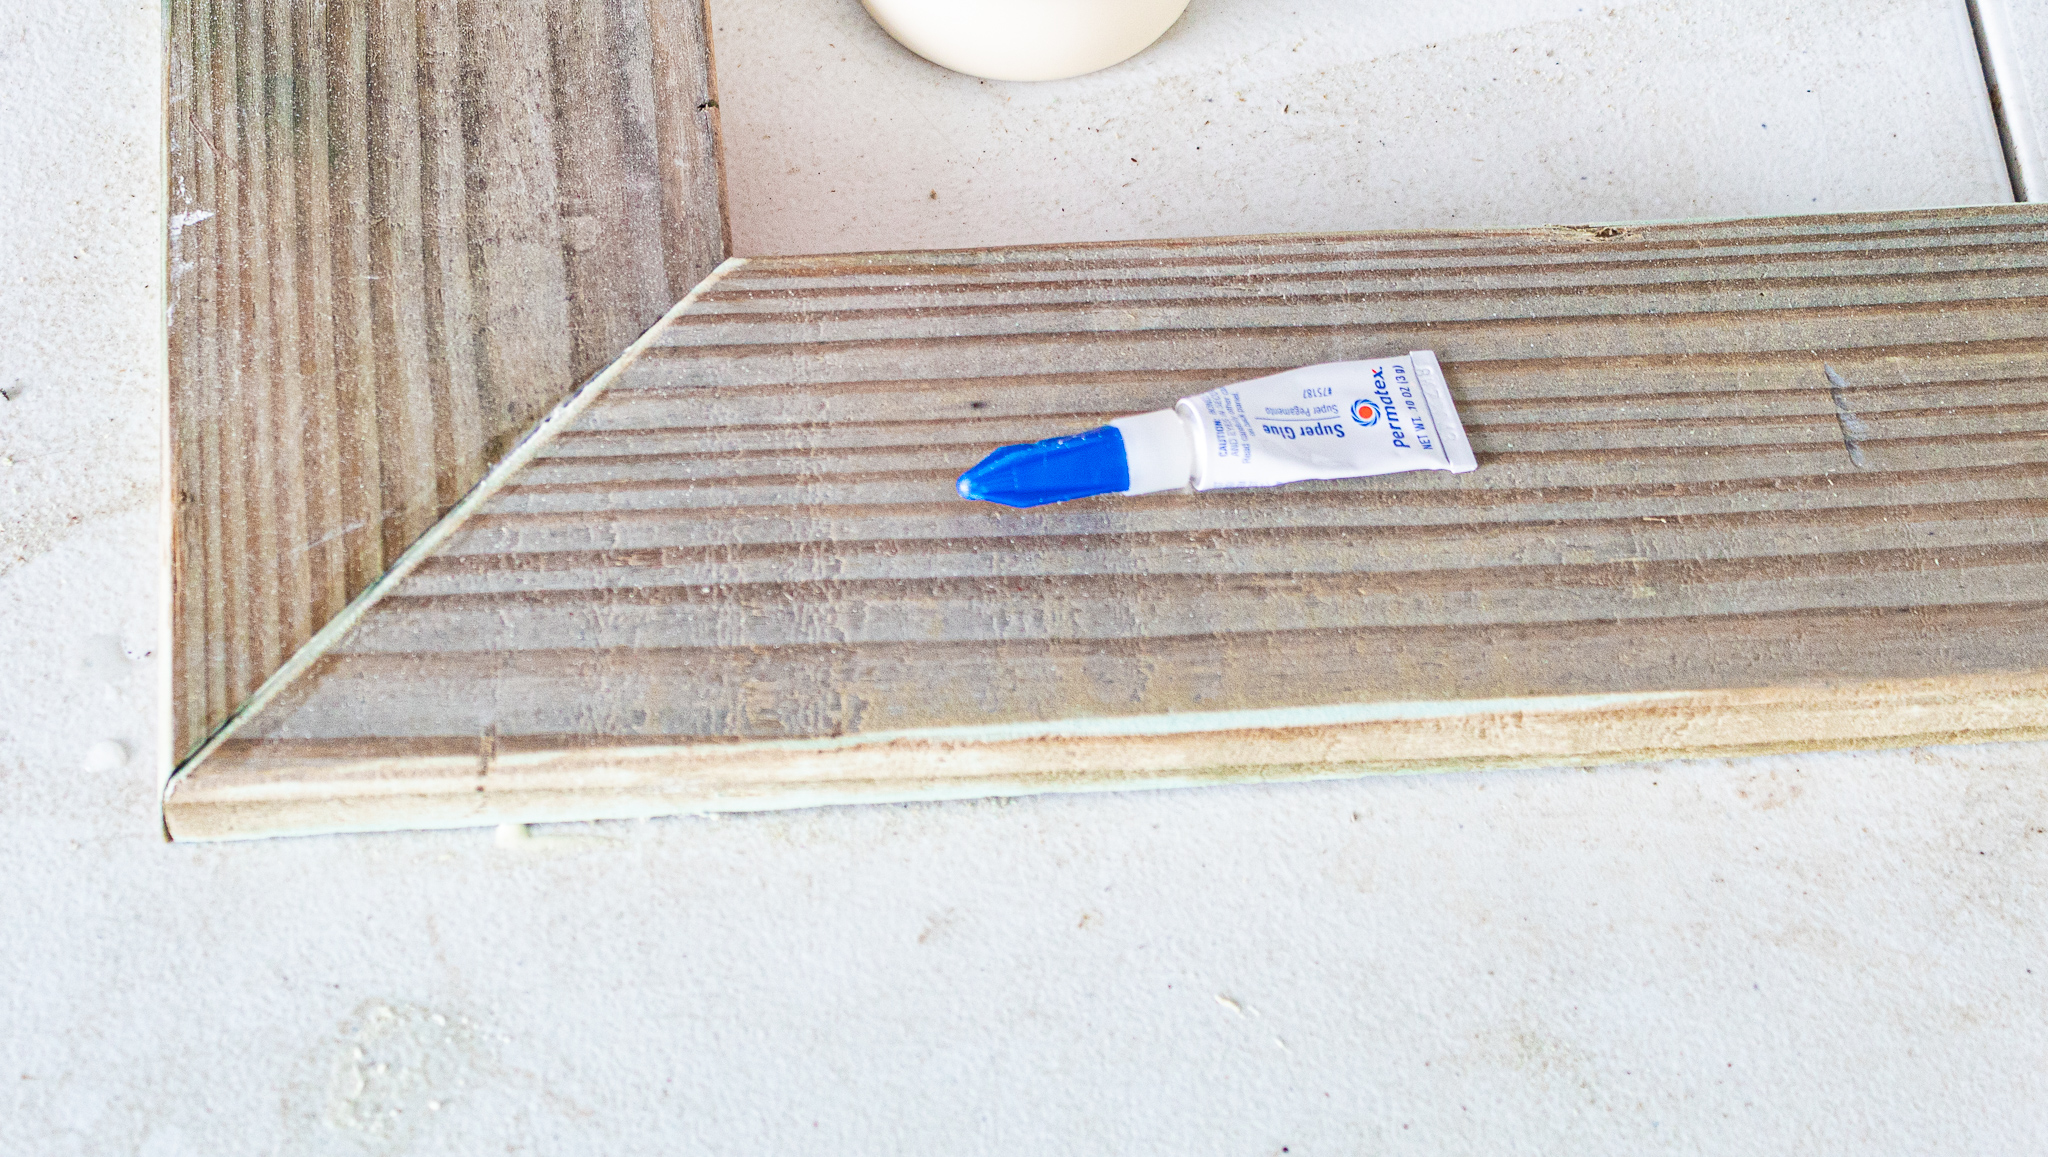
Since titebond takes a while to set and since I didn’t have the right clamps to hold the pieces together, I used a handy trick: Dabble the titebond wood glue on the edge of one of your pieces leaving a couple of spots open for super glue. Apply super glue and quickly connect two corner pieces at a time and hold together for about 10 seconds. The super glue keeps everything connected while the wood glue dries.
2. Create a weathered look
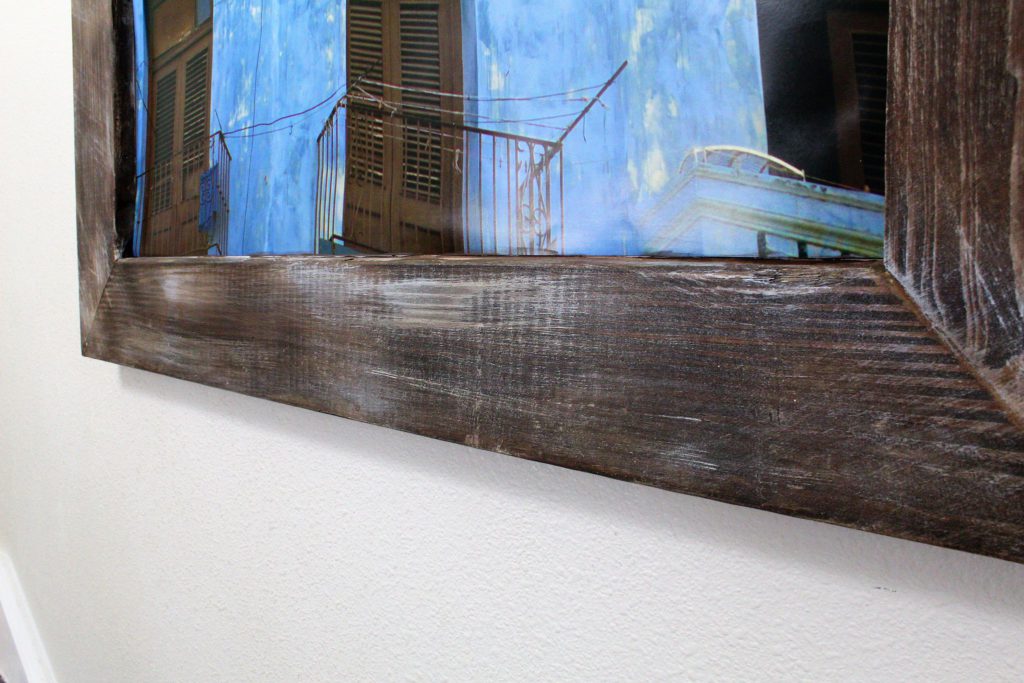
The picture is so vibrant and colorful that I wanted the frame to be simple but to also have some character. I’ve used this weathering technique many times on wood and it always comes out gorgeous. And the bonus is that it is fool proof! You really can’t make a mistake. The first step is to stain your wood pieces. I used Minwax Dark Walnut stain.
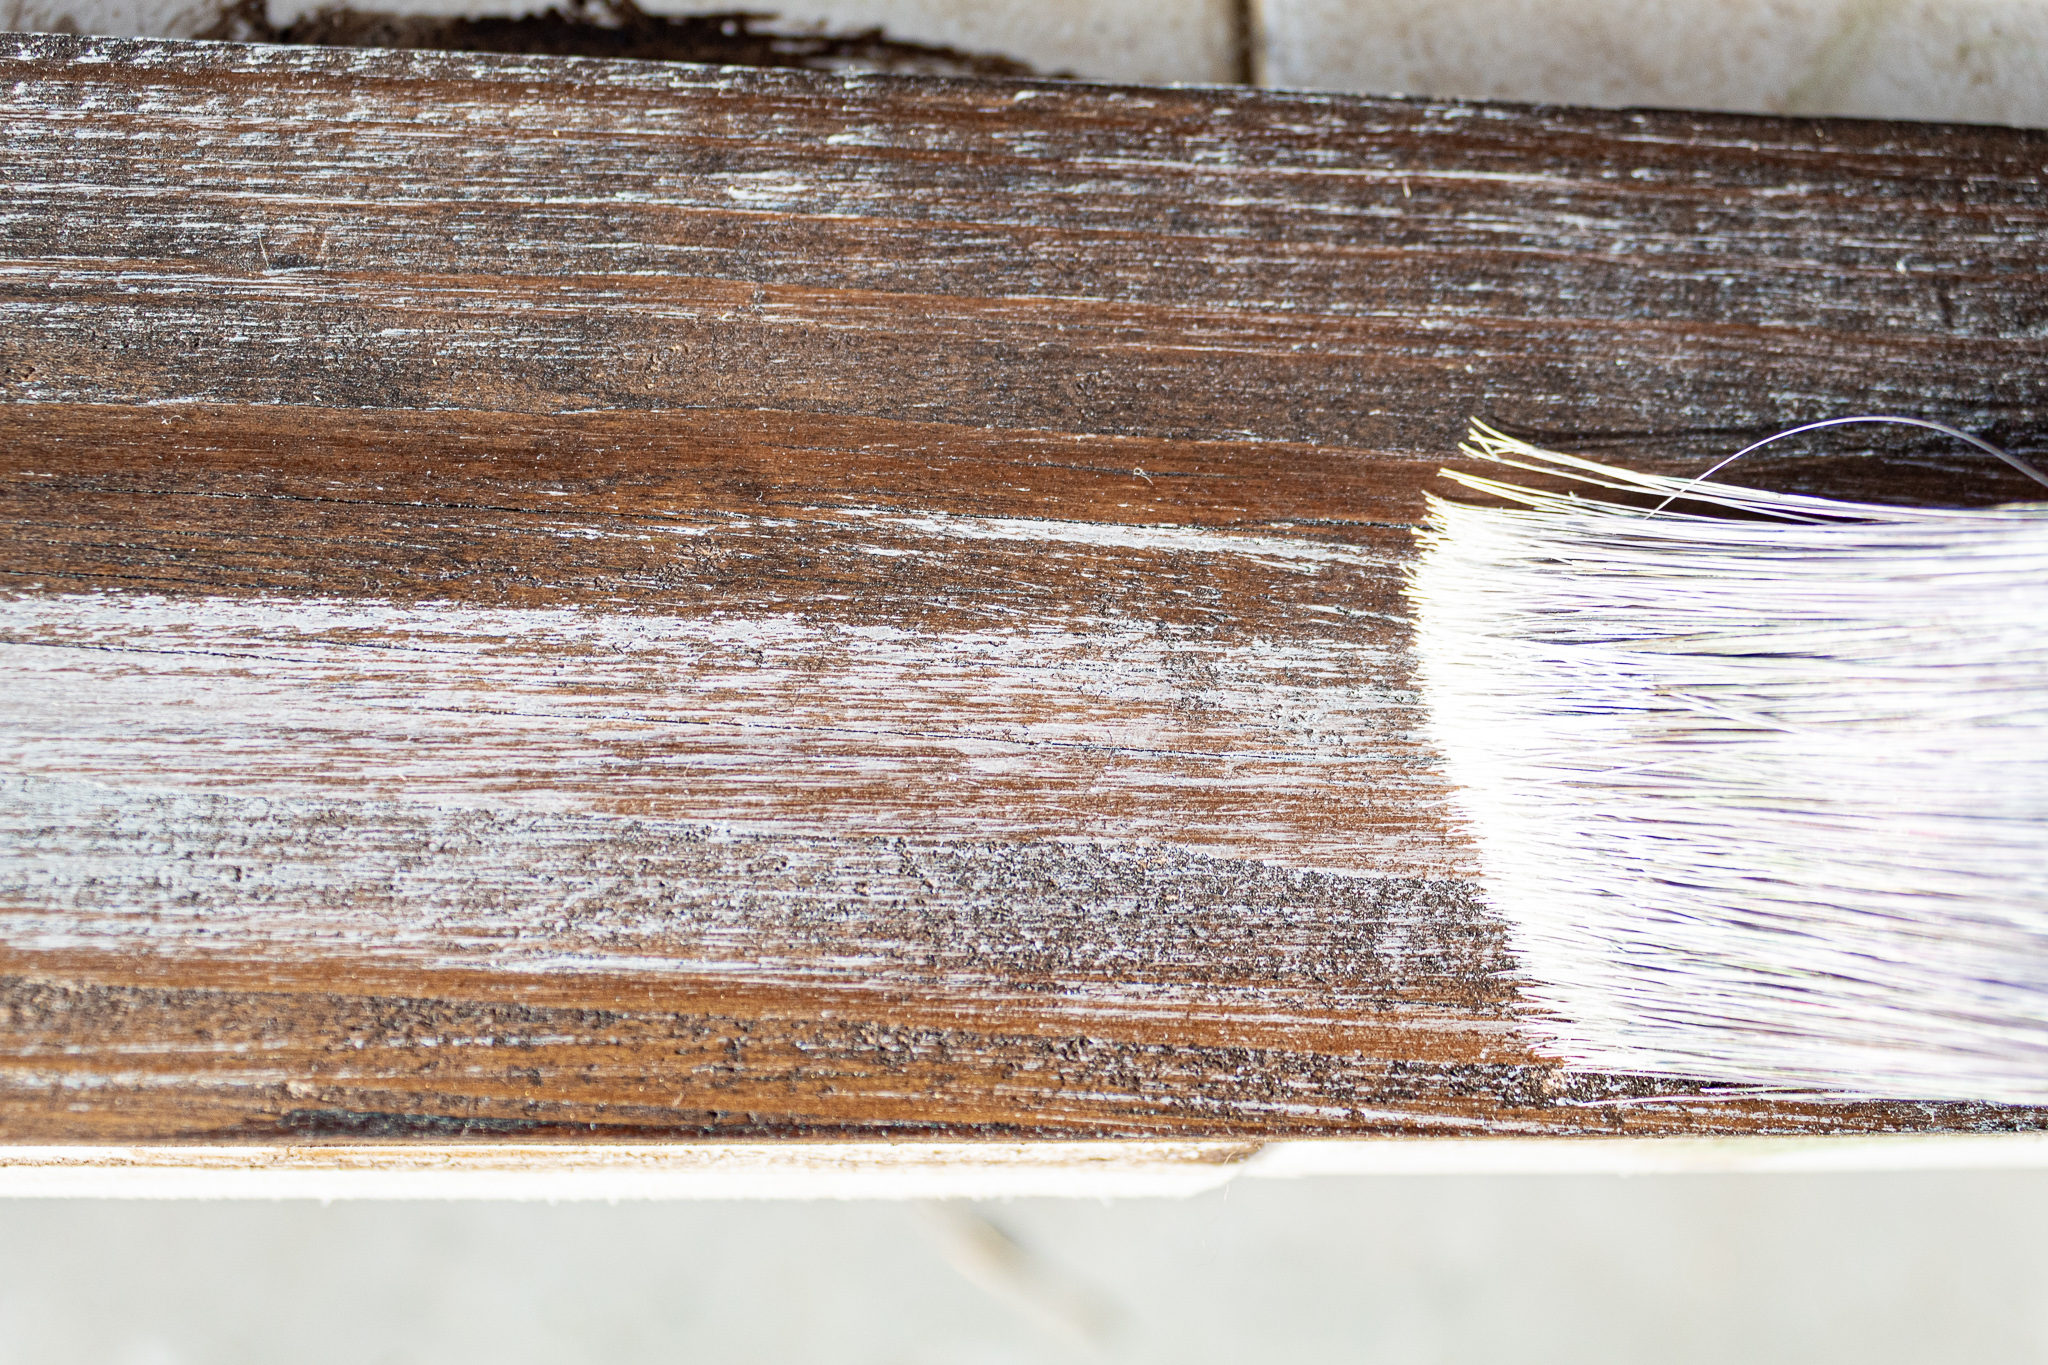
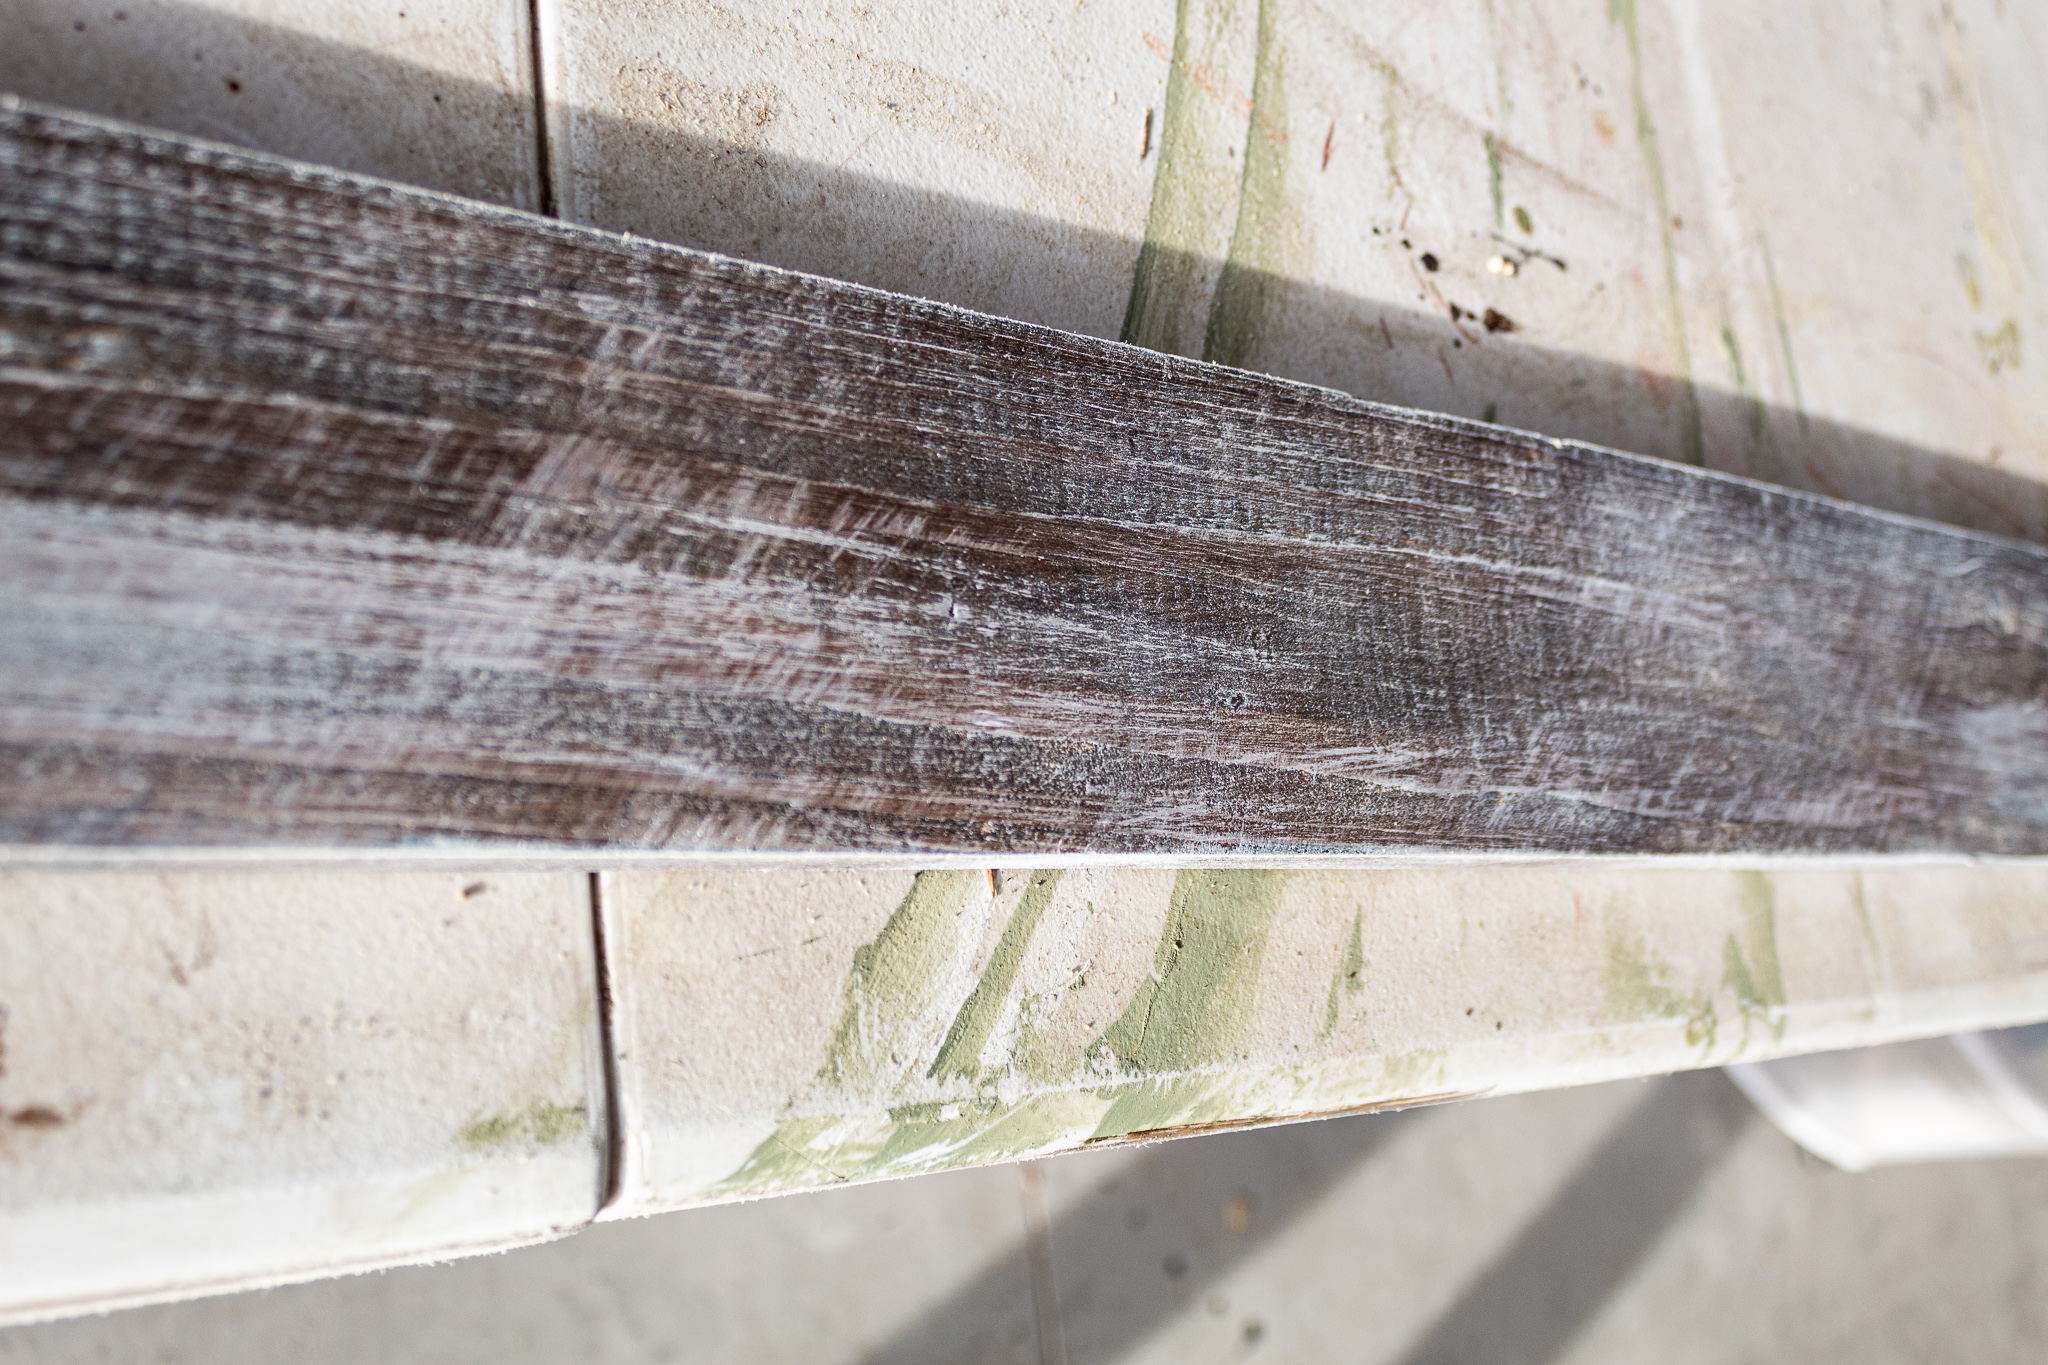
Once the stain dried I dry brushed some leftover white paint I had onto the wood pieces. I put just a smidgen of paint on my brush and made some long and some short strokes in line with the length of each piece of wood. I added just a few short horizontal strokes.
To add character and dimension I blended in some stroke marks and in other parts I left the brush strokes for a more vivid look. To blend or soften the stroke marks, I simply stroked some paint on, waited about 30 seconds and then rubbed the paint in with a paper towel.
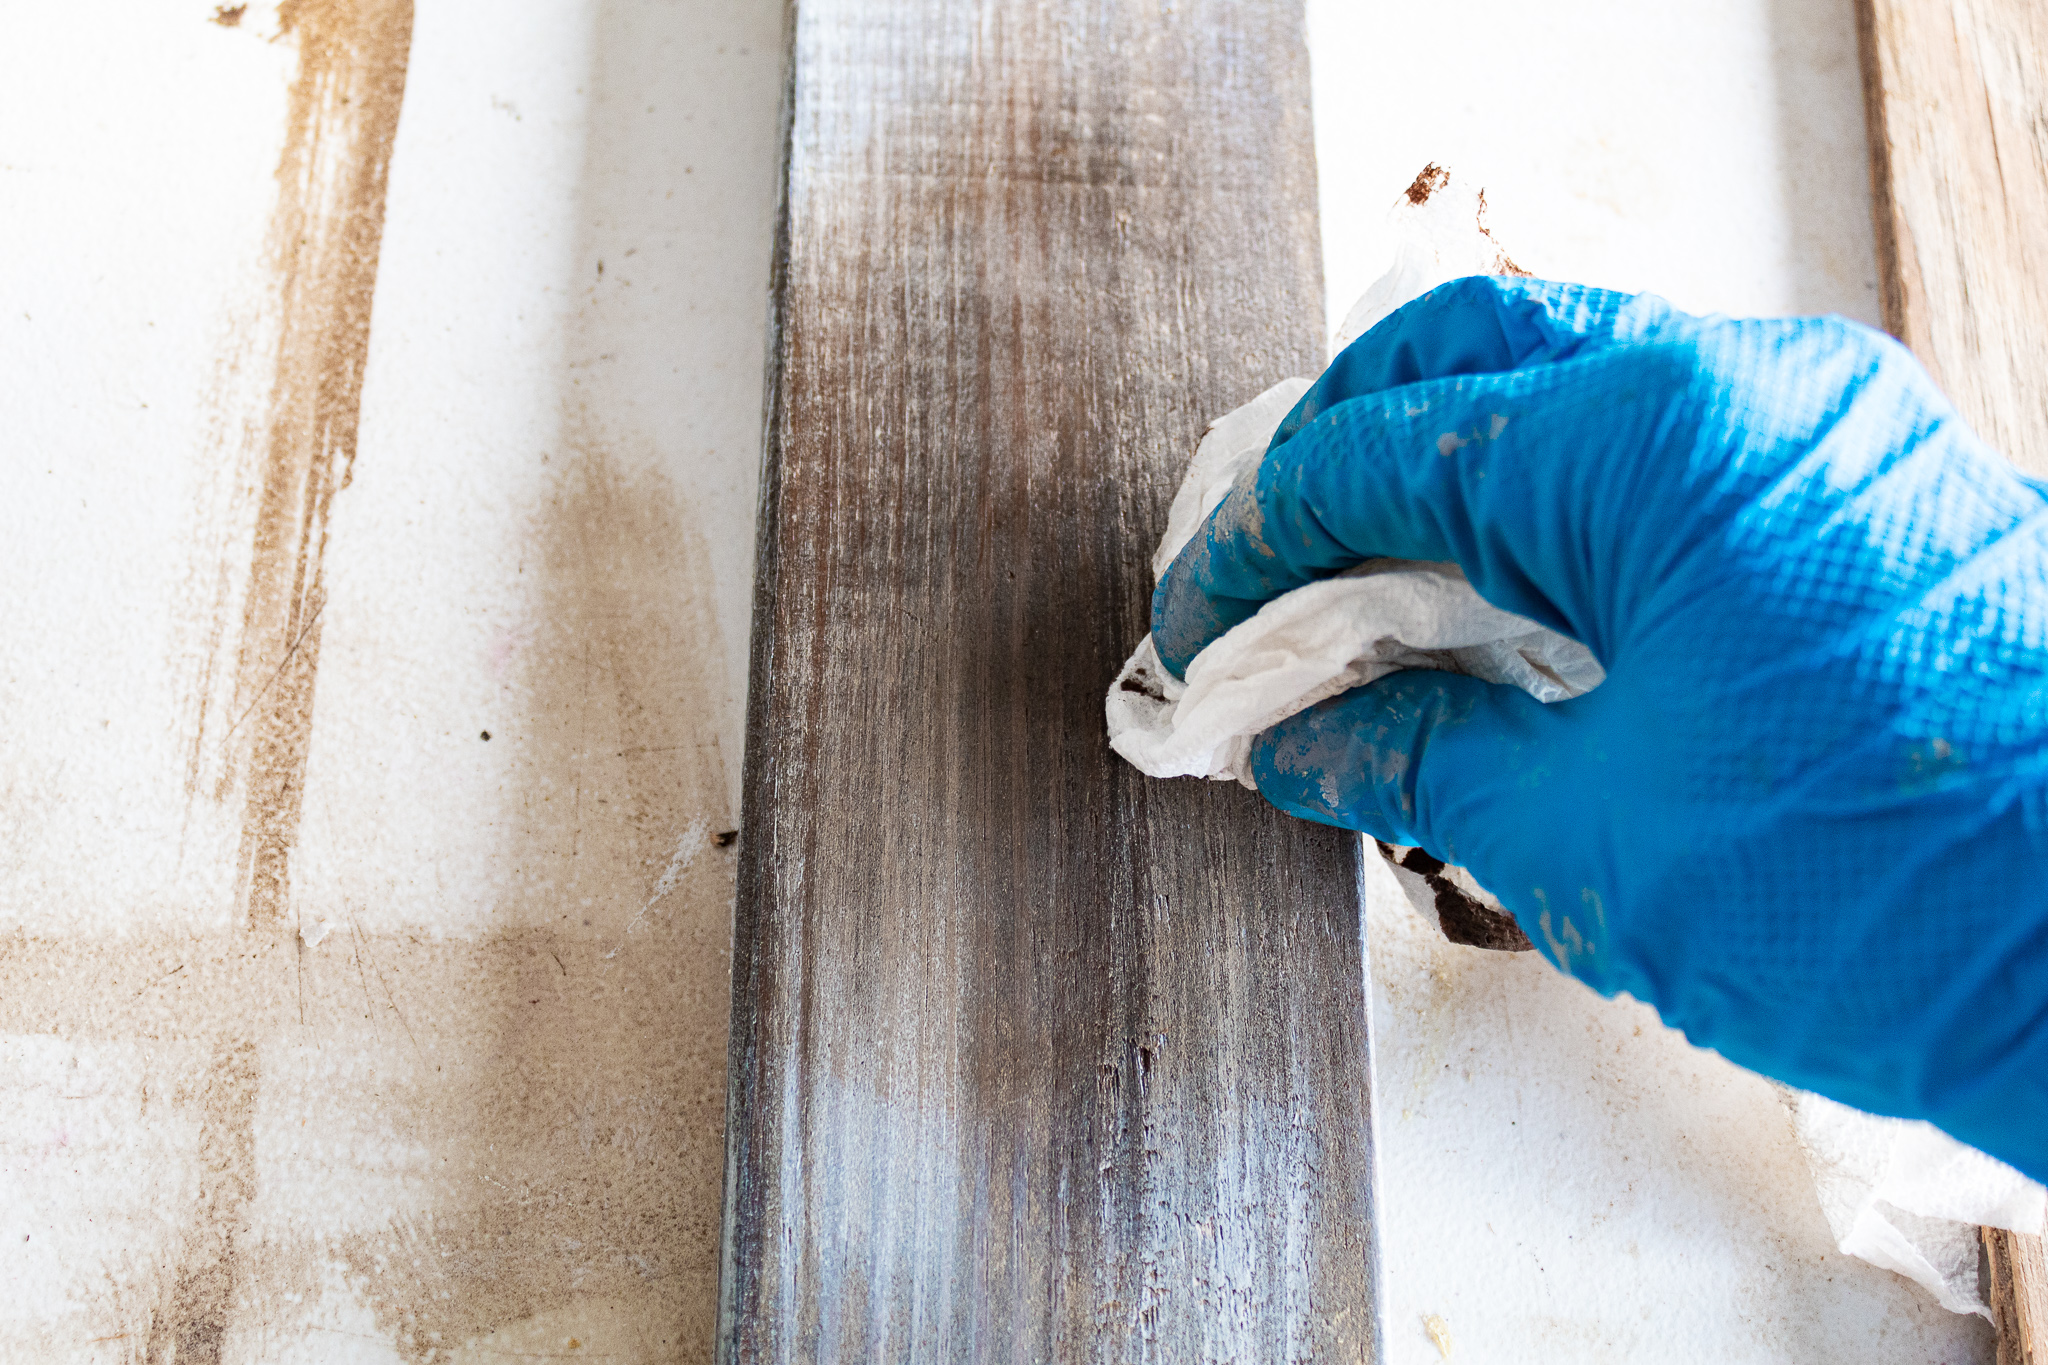
The finishing step for this weathered look is very important. It seals the wood and it helps create a rich finish between the stain and the paint. Using my favorite antiquing wax, I put a little on a paper towel and applied it all over each piece of wood in circular motions. I didn’t even wait long for the paint to dry before adding the wax. Usually I do this last step within a half hour after painting.
I just love this technique. It creates a unique look every time. And you can use it on newly bought wood and it will transform it into something that looks aged and weathered.
3. Create a backing for your frame
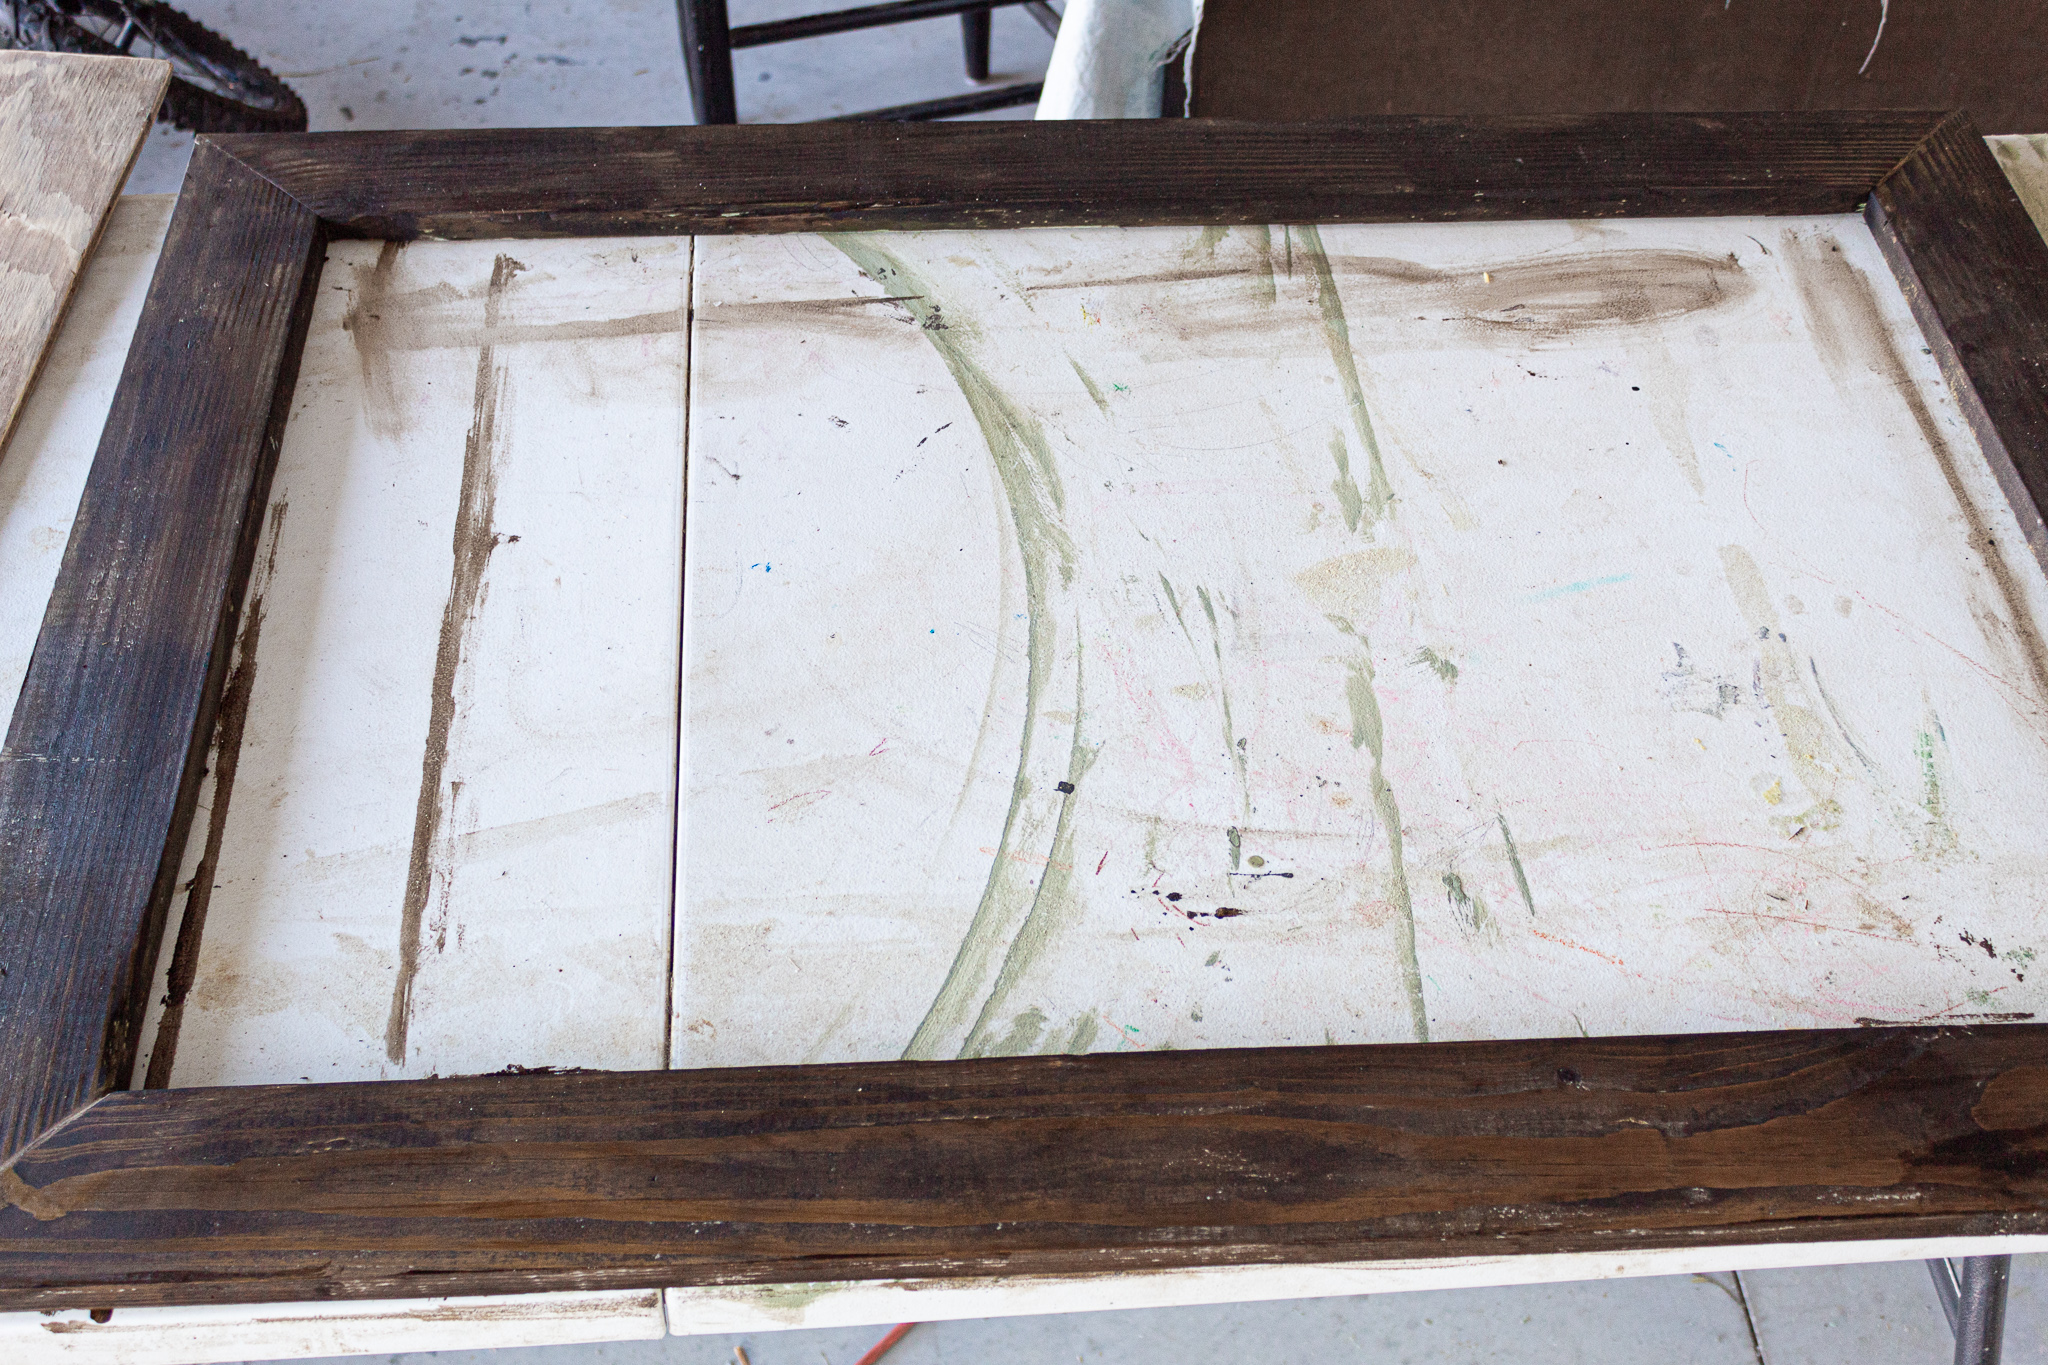
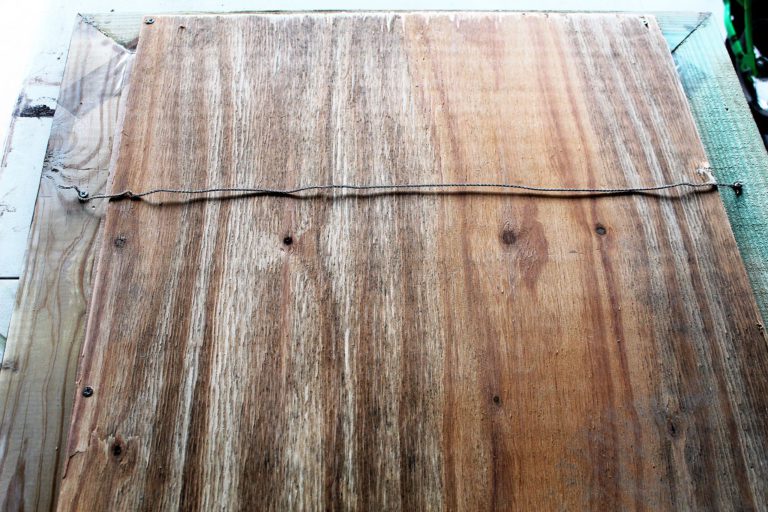
The backing for the picture frame was concocted by me in a practical but definitely not professional manner. I simply took a piece of scrap plywood we had in the garage and drilled it onto the backside of my assembled frame using some small screws.
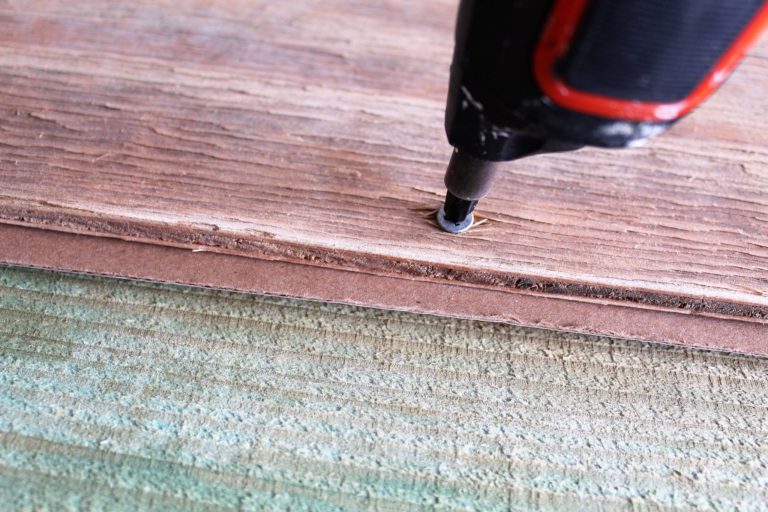
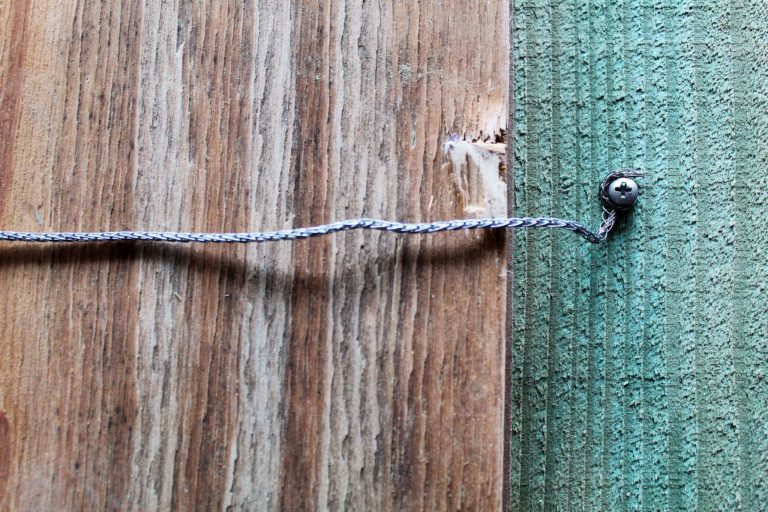
For the hanging mechanism I half-way drilled two screws positioned midway down the plywood backing—one on the left side and one on the right. I then wrapped a metal cable around the base of each screw. Then I used my super handy drill and tightened down the screws onto the cable. Again, probably not the most professional technique but it worked fine for this purpose. I did not have a glass piece to insert into this frame and once hung you can’t tell the difference. Adding glass or having glass cut to size would be another option.
And that is how I created this beautiful picture frame using only a few materials. The picture has now been adorning our stairwell for almost a year and it gets so many compliments. I love how it came out and how much money I saved in creating this wall feature. I hope you enjoyed this tutorial my friends. Thanks for visiting!


It looks amazing with that picture! Great job!
Thank you Pia for your kind words!❤️❤️❤️