Hello friends! So excited to finally be revealing the new look in our powder room. I went for a moodier aesthetic with a ravishing new paint color. I blended elegant touches with farmhouse features for a timeless feel.
In today’s post I’ll show you how I transformed this space into my new favorite room in the house and the DIY projects that kept the renovation within budget.
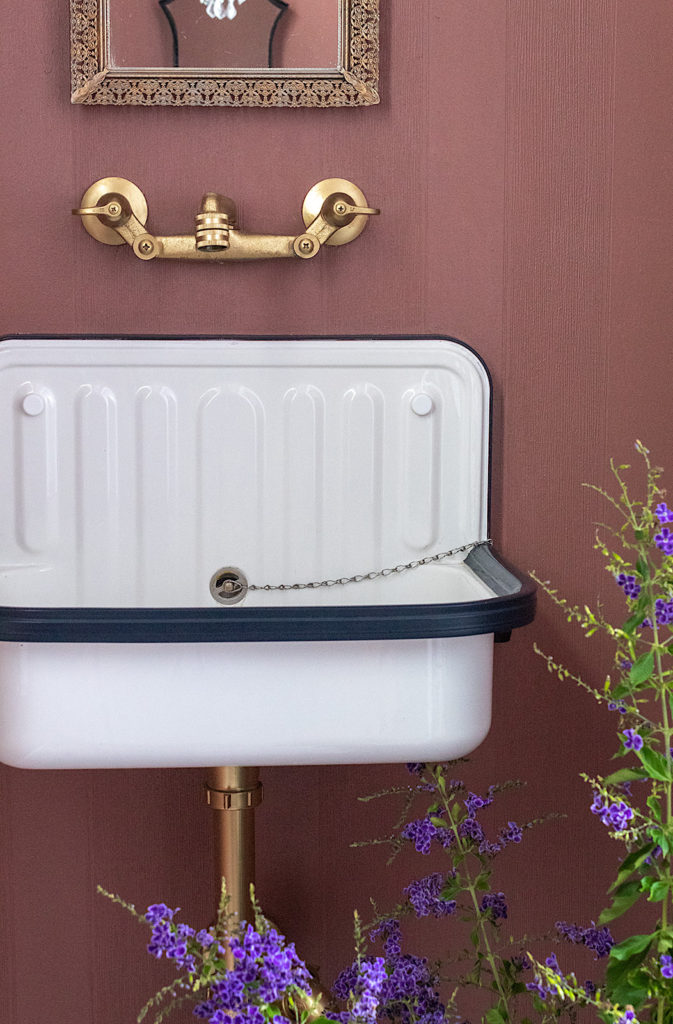
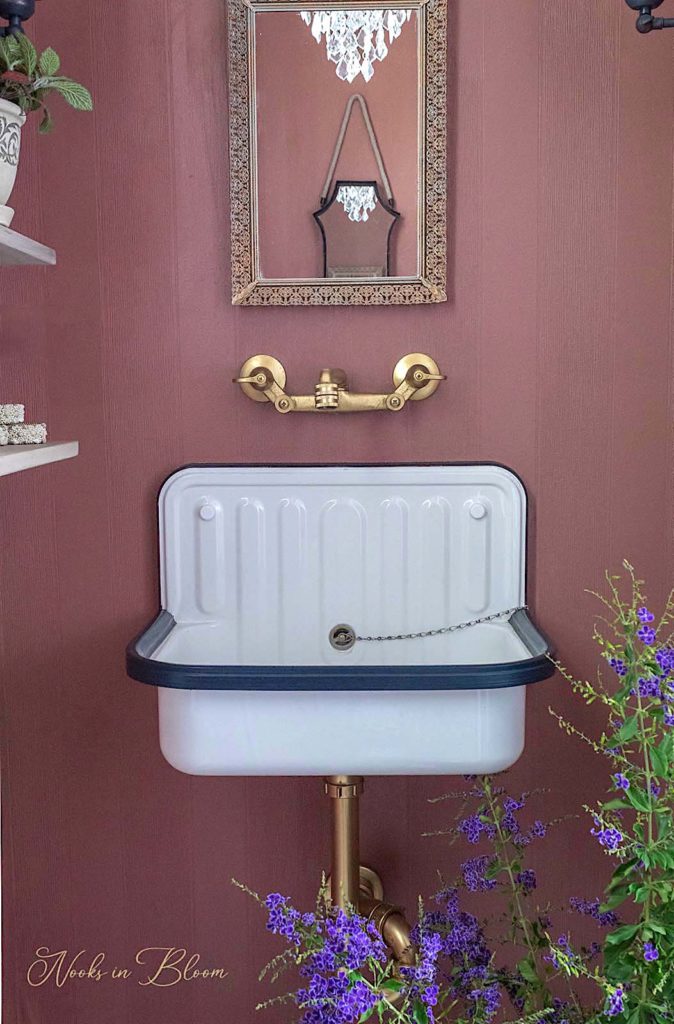
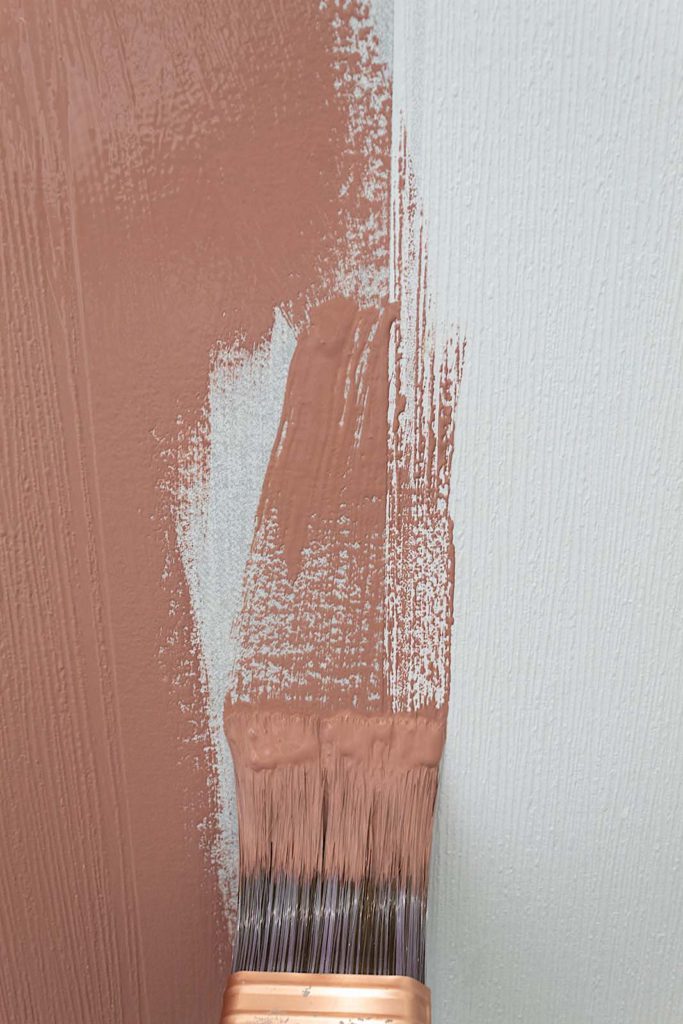
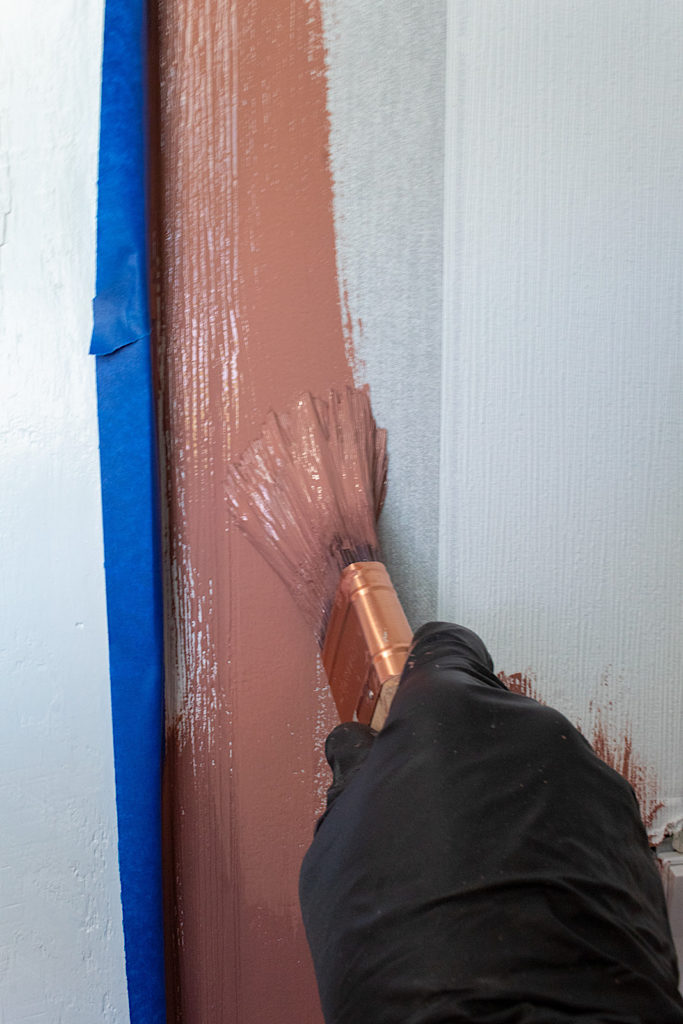
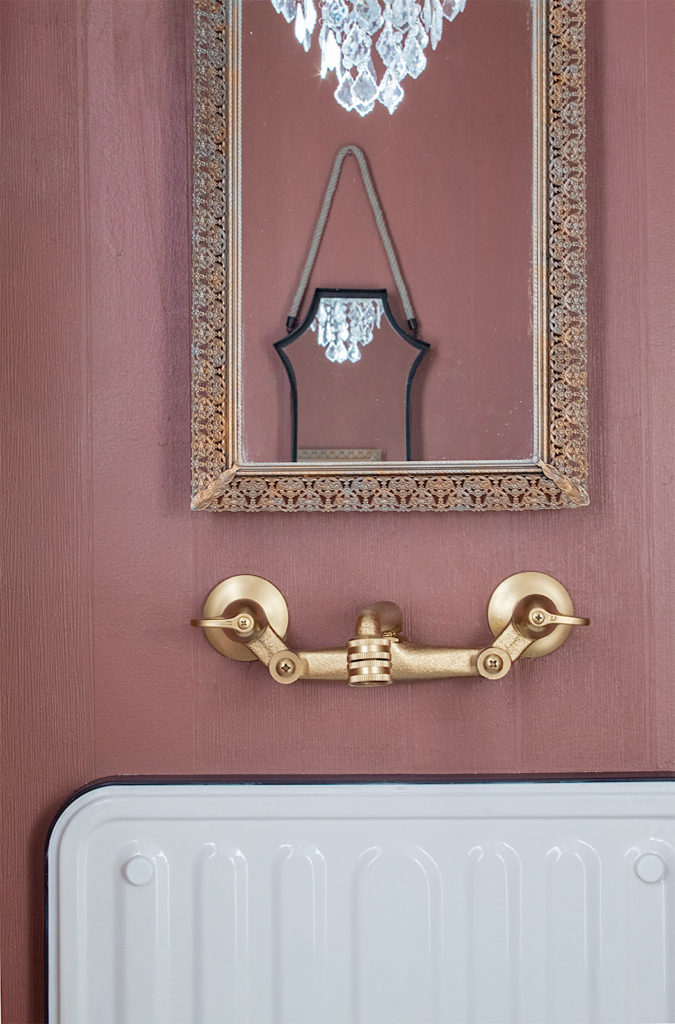
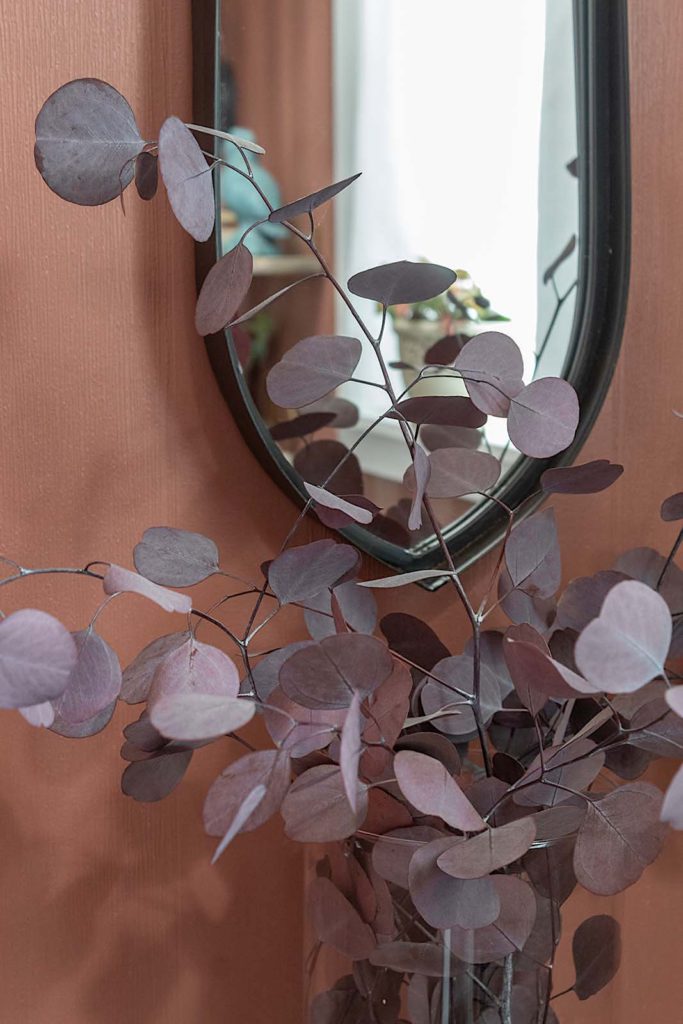
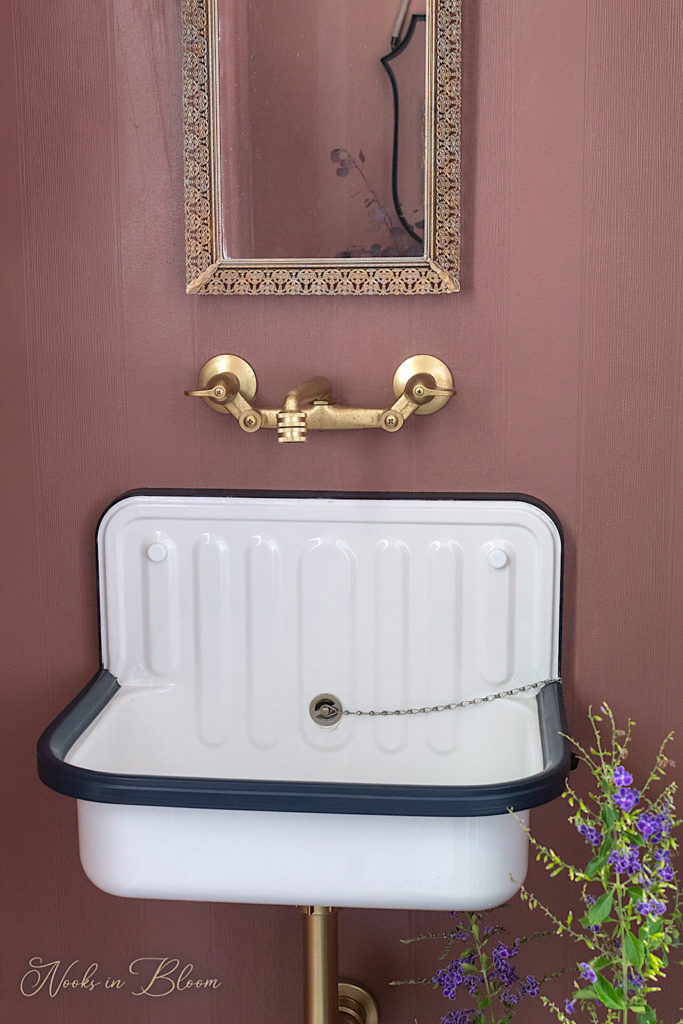
The new color, Reddened Earth by Sherwin Williams added instant wow factor to the powder room. I am in love with it. It is sophisticated and classic.
Brinjal was my original thought for this space. It is such a gorgeous color. I hesitated however, feeling it would be too dark for the bathroom.
When I saw a furniture piece on Instagram that had been painted Reddened Earth, I knew instantly it would be perfect for the powder room.
I originally designed the powder room with a French Countryside feel. I chose muted striped wallpaper, a bucket sink, tile with a classic pattern and pretty wall sconces. It was so lovely. For three years I relished in the charm of this space.
Over time, however, and thanks to my destructive children, the wallpaper had lost its appeal. Tears, marks, dirt encrusted in the textured wedges. I could no longer scrub it enough to revive it.
Aside from the wallpaper, my design taste is constantly evolving. I don’t know if this is a curse or a blessing but making a radical decor change in the powder room was stirring inside me.
When we first built our home, light and bright farmhouse was the theme. Slowly I’ve been making changes around the house, leaning more into color and vintage inspiration. I’m still drawn primarily to European decor styles, but I find myself transitioning into moodier aesthetics with timeless character. I’m loving texture, deeper colors, warm metals, and aged pieces integrated with European Farmhouse features.
I love to decorate so I embrace the restlessness when it comes to my constant house projects. Come along as I share with you how fun it is to create your dream bathroom and tons of pictures of the new look!
Disclosure: Some of the links provided are affiliate links. By purchasing through these links you are supporting this family blog and the work we do and there is no extra cost to you. If you would like to read our full disclosure, click HERE.
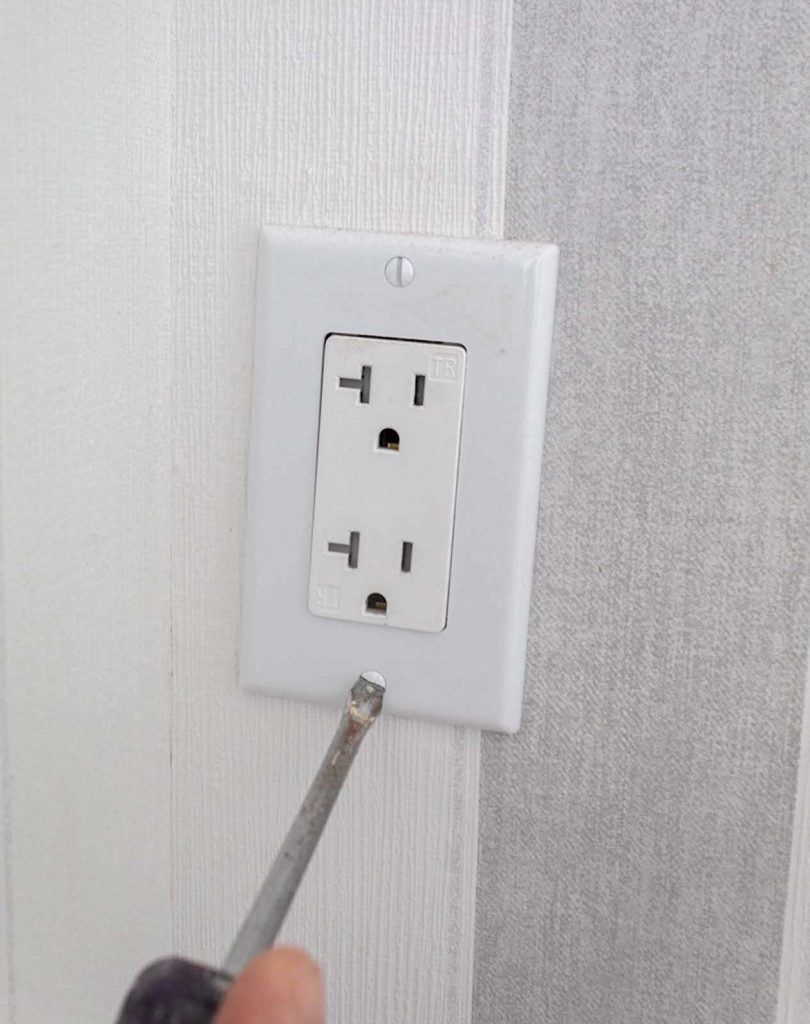
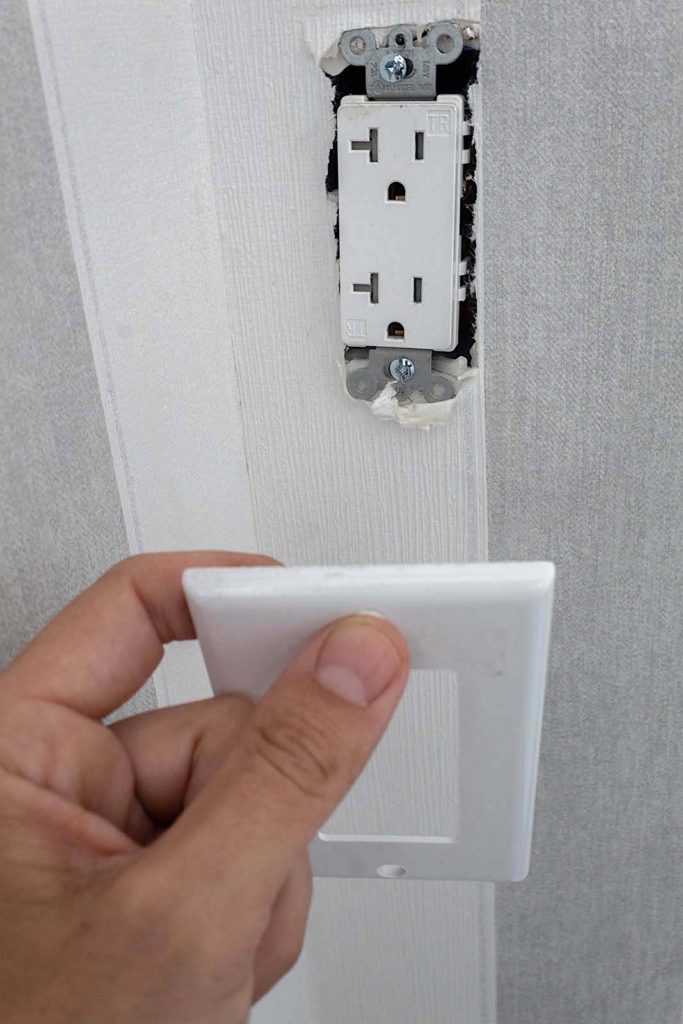
Before you begin any painting project, it is important to properly prepare your space. I removed all outlets and light switch plates as well as anything which could be easily removed from the walls.
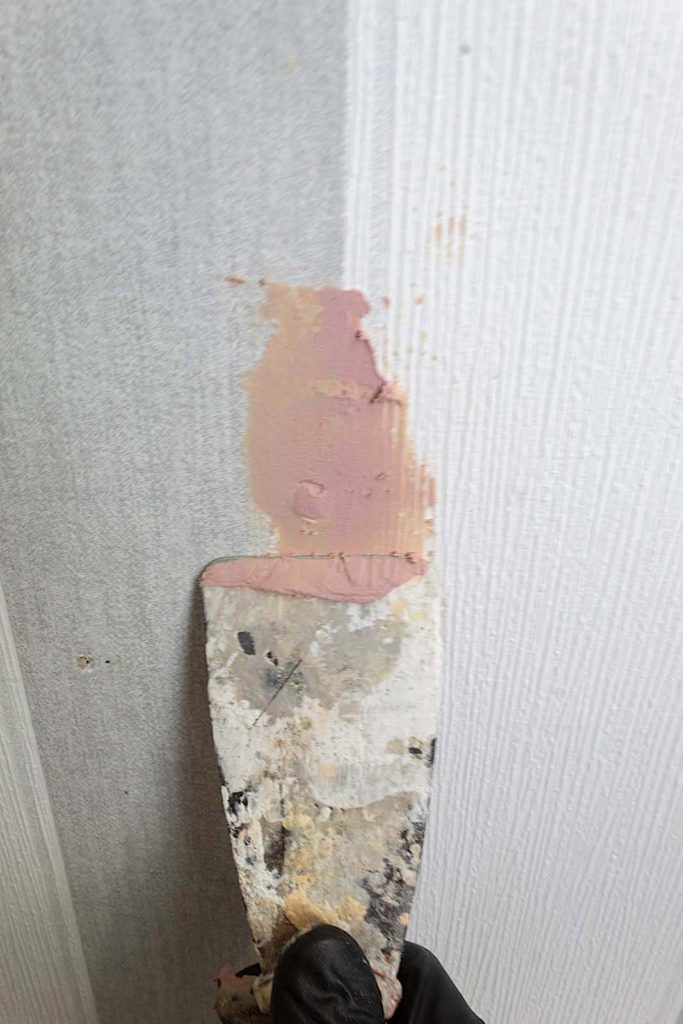
I covered any unnecessary screw holes with wood filler. I applied the filler with my putty knife and once dry, I sanded the area flush with the wall.
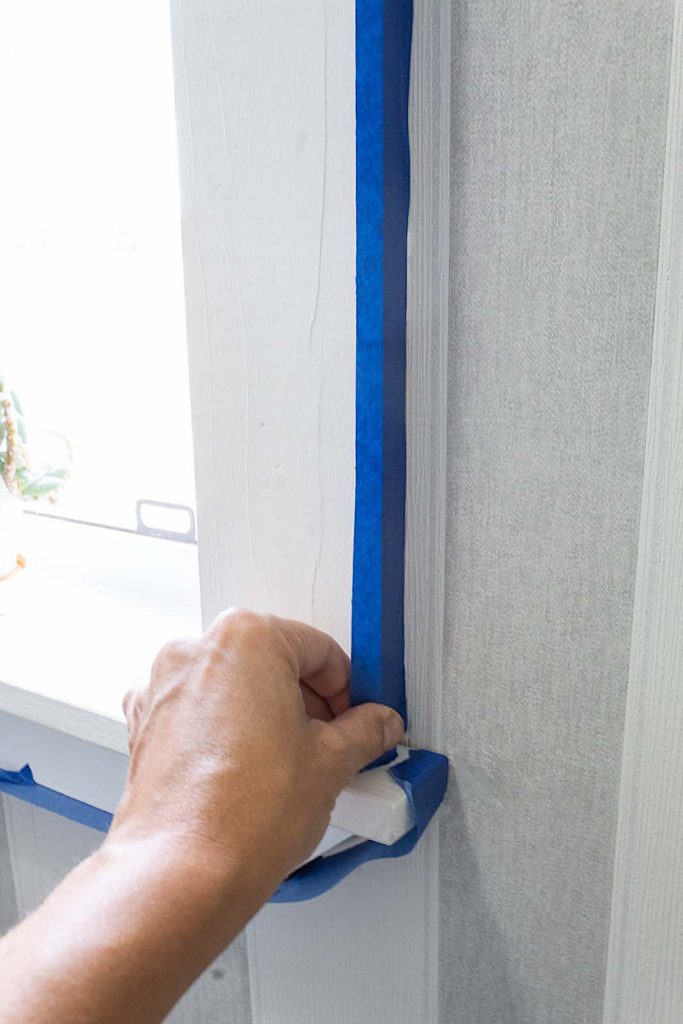
I also applied painter’s tape along edges to avoid painting over the trim and baseboards.
The Woes Of Wallpaper
I want to talk about wallpaper for a moment. Prefacing with the fact that I adore it. Wallpaper has the ability to create a beautiful story in a room. It can set a mood, add glorious pattern, and transcend generations. Grandmillenial design style is a perfect example of this. Wallpaper from our grandmother’s era is now back in style.
sandbergwallpaper.com
Having said that, I don’t see much wallpapering in my decor future. Knowing myself and my constantly changing taste, wallpaper is simply too permanent. Yes, of course it can be taken down, but the process is painfully tedious. As more quality peel and stick wallpaper becomes available on the market, that will certainly be an option, but for now I will stick to paint and creating faux effects.
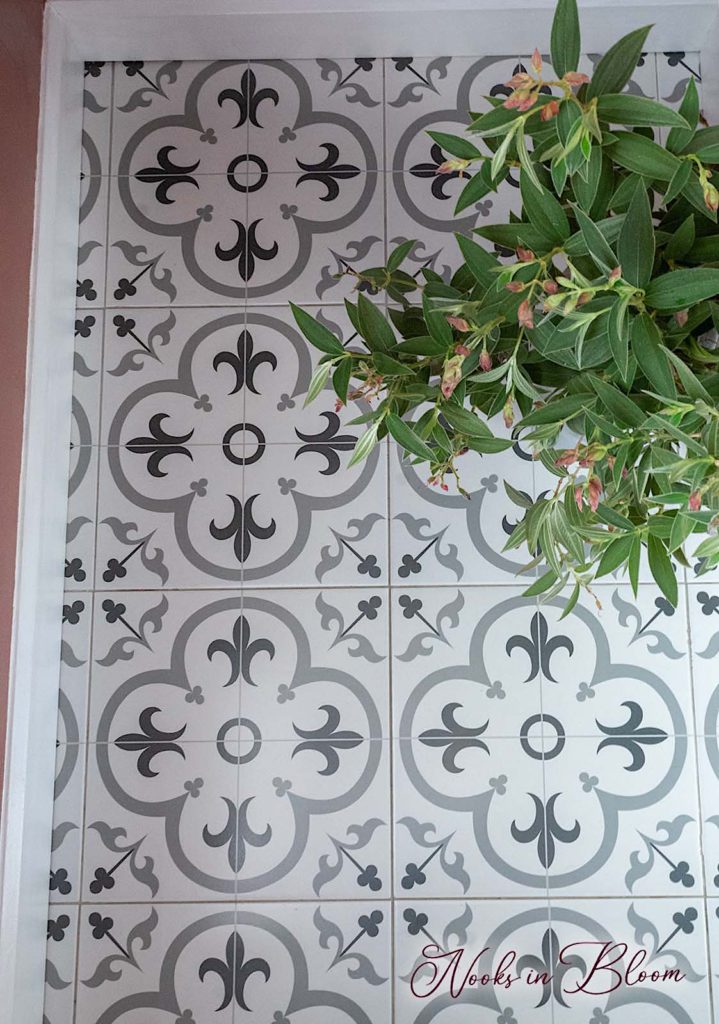
If you crave texture and pattern, there are other beautiful ways to achieve that without having to glue paper on the wall. I’m still loving the Italian-inspired accent wall in our kitchen. If you missed that post, here is a picture of the “aged stone” wall I created using Saltwash and paint.
Fixture Fix
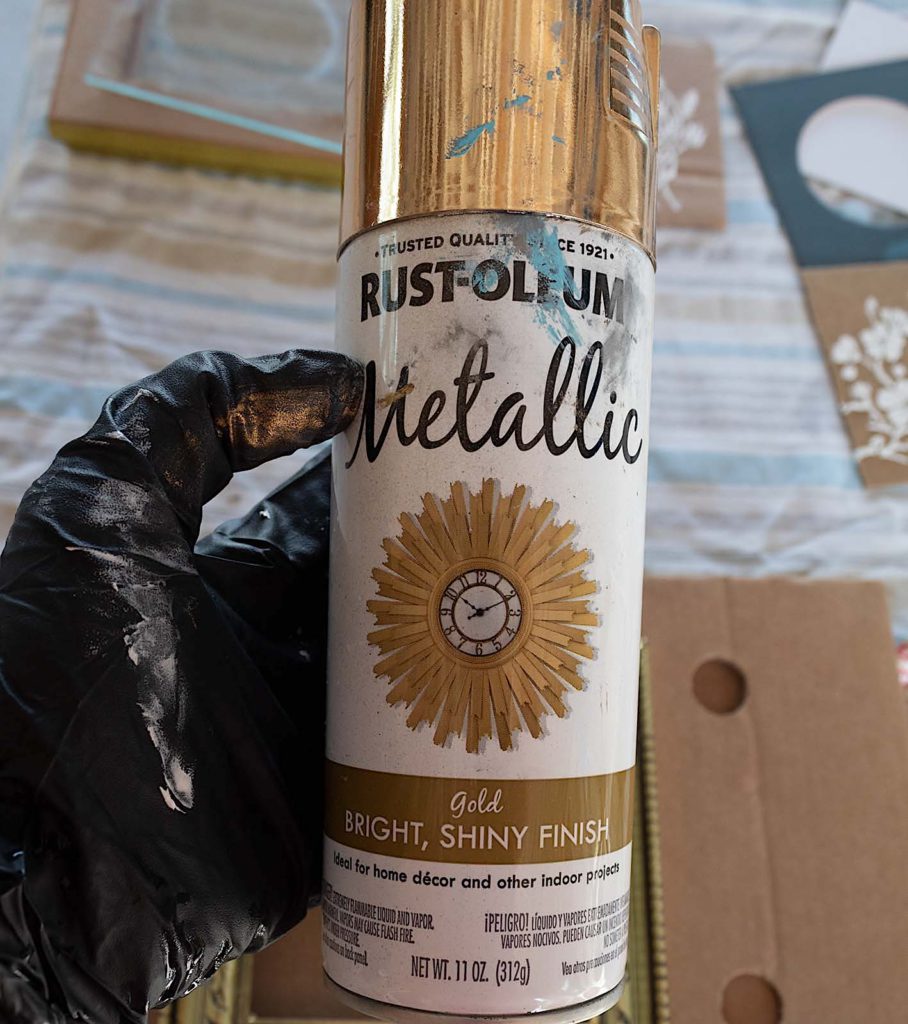
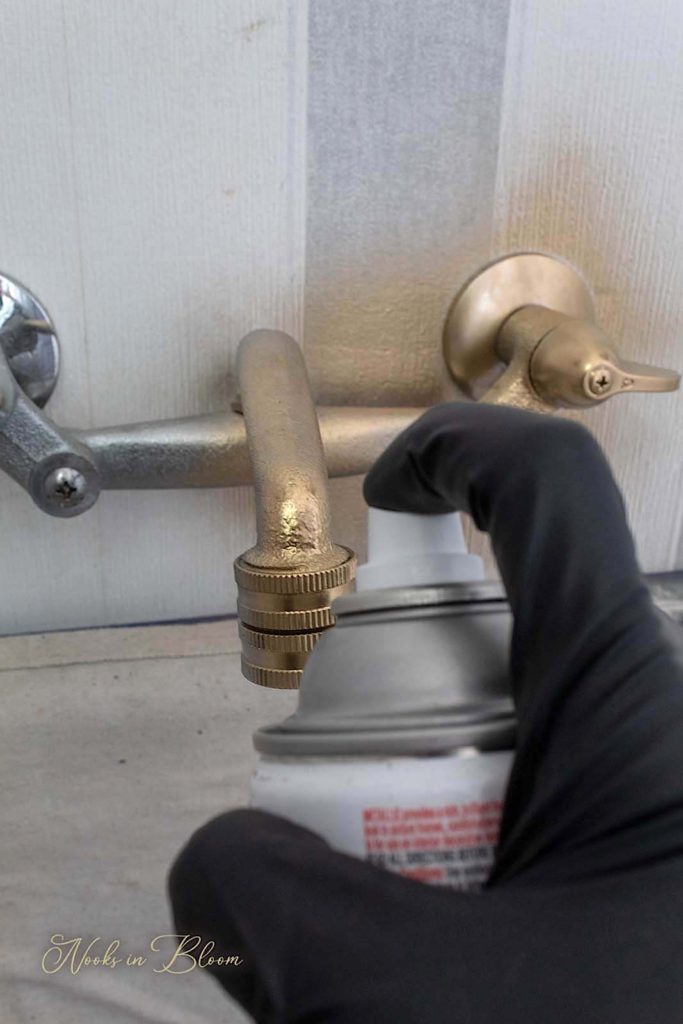
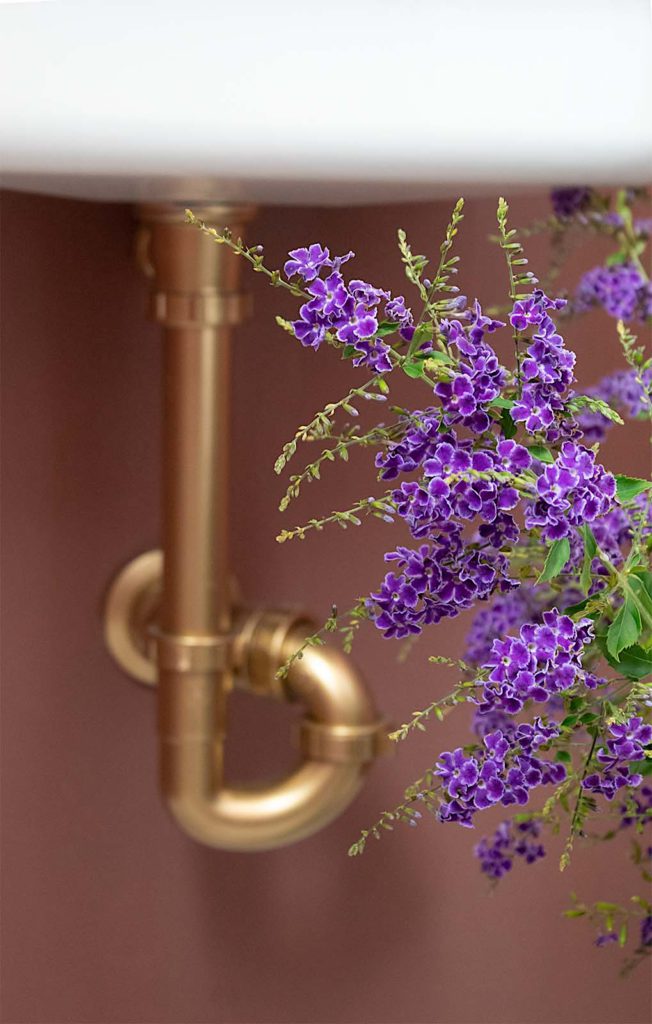
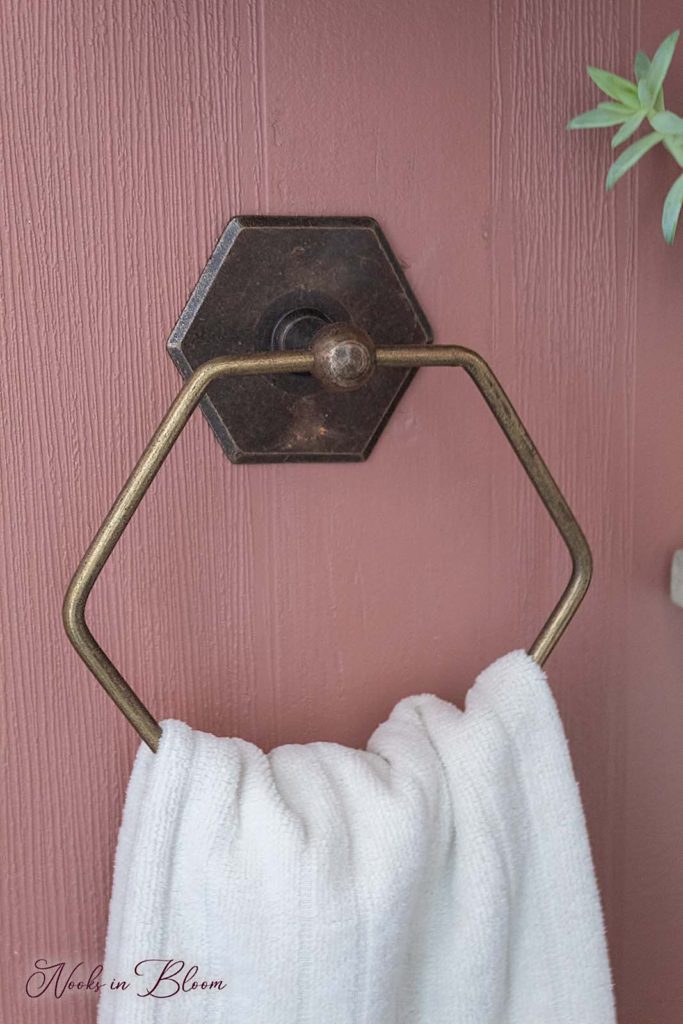
Prior to painting I realized that the silver sink fixtures in the bathroom would clash with the new paint color. Or maybe not clash, but a gold color would create a more elegant combination. To fix the situation I used spray paint.
Two coats of Rustoleum Gold and the faucet, as well as the plumbing under the sink were transformed into a silky gold.
Tip** Remember when spray painting to avoid spraying too close to your surface. This will prevent drip marks or crinkling. Also keep coats light and thin. You can always add more coats.
"In nature, light creates the color. In the picture, color creates the light.”
- Hans Hofmann.
I decided to paint over the existing wallpaper in the powder room for two reasons: One, I was too lazy to take it down! And two, I felt painting over the texture of the wallpaper would result in something even better.
Rather than using a paint roller to apply the paint, I hand-painted the walls with my Purdy brush. This allowed me to get the paint easily into all the textured grooves and to apply my paint thickly, thus getting away with only one coat application.
There is always a DIY project involved whenever I do a house project. There is nothing like adding personalizing your home’s aesthetic. Plus, it’s a great way to save money and create exactly what speaks to you.
In this powder room renovation, I did a few DIY projects to help create my new look.
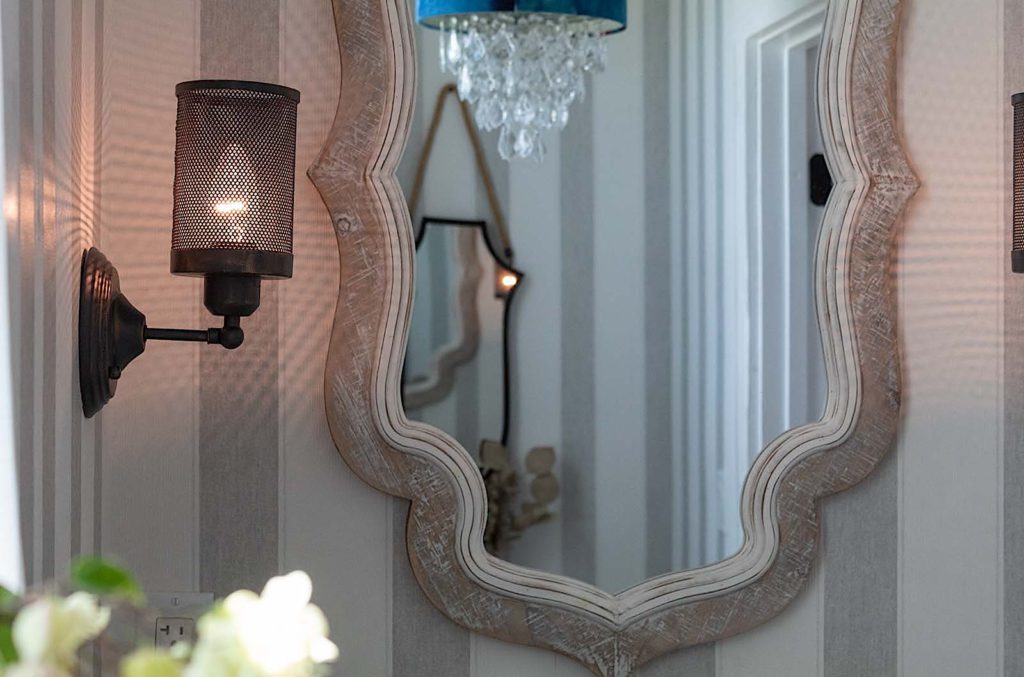
Mirror, Mirror On The Wall...
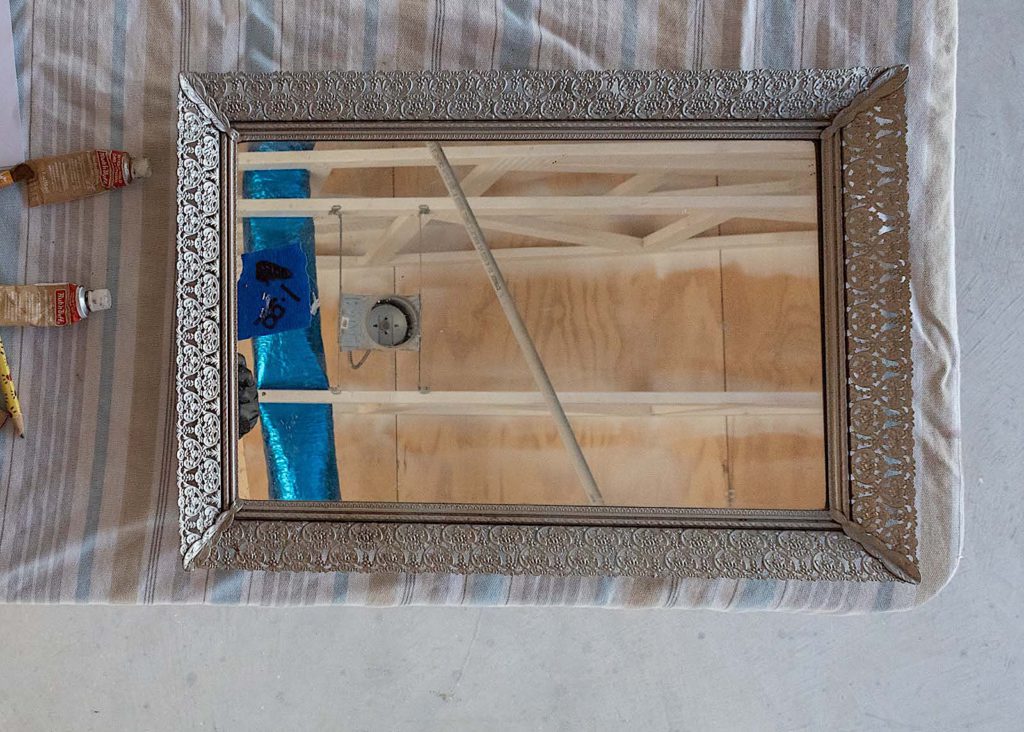
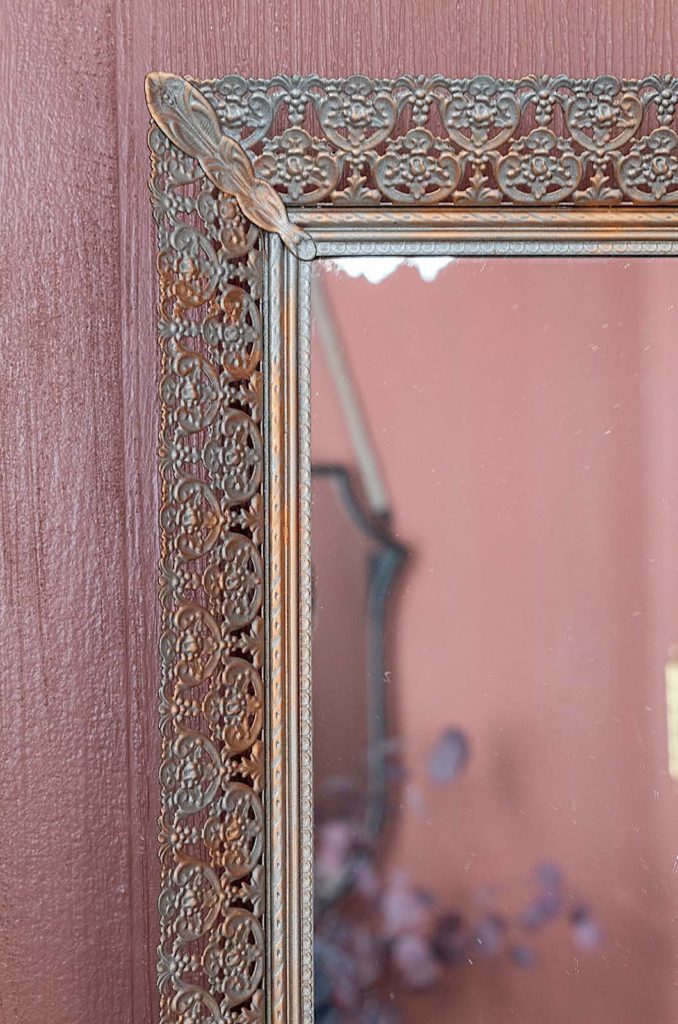
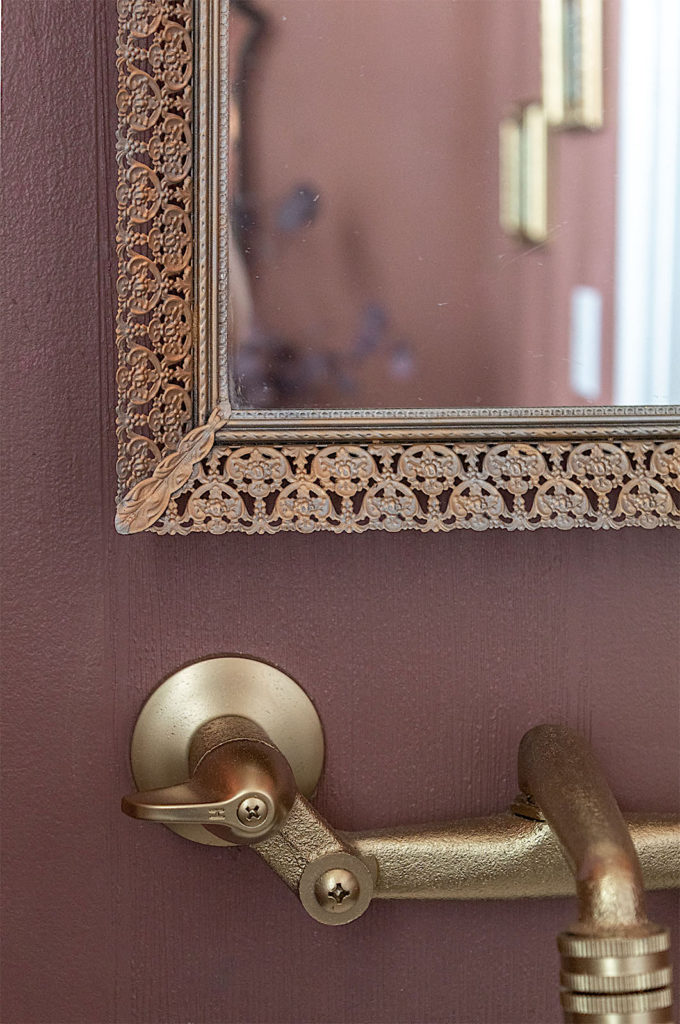
The mirror from Hobby Lobby that had been hanging over the sink in the powder room was so pretty. I struggled with making it work for the new, more stately feel in the room. Its distressed wood features were a little too rustic for the look I was going for.
I envisioned something smaller, more delicate. I found the perfect mirror at a yard sale for $1. It wasn’t a mirror per se, but a makeup tray. It was old and needed work, but it was just the right size and the frame had beautiful ornate details.
I cleaned the mirror and used Rub ‘n Buff to bring out the intricate details of the frame. Applying the gold wax minimally around the frame, while preserving undertones of the silver helped create more dimension on the small piece.
Sometimes it’s the small changes that make the most impact. Once hung on the wall, the yard sale mirror rose to the occasion. The gold tied in brilliantly with the faucet and the small stature of the mirror made a stunning design statement against the vast, reddened backdrop.
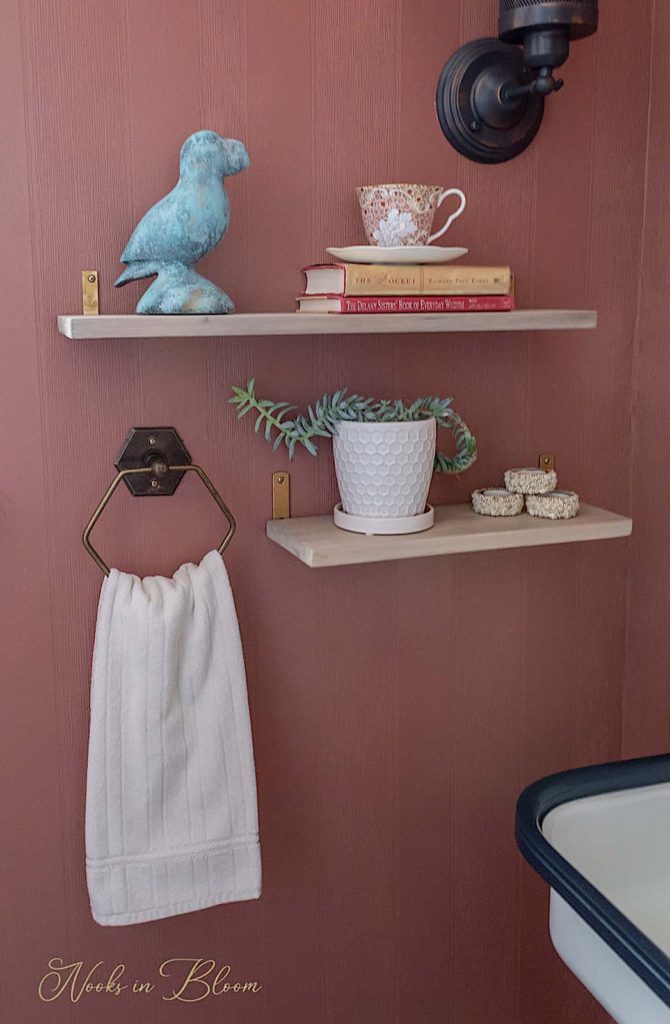
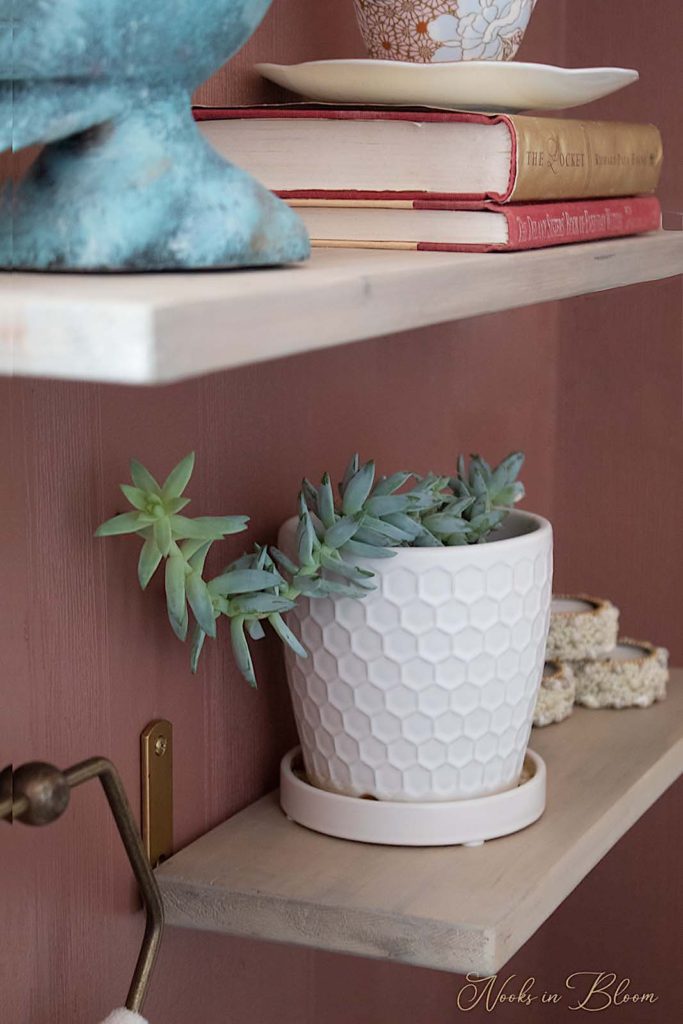
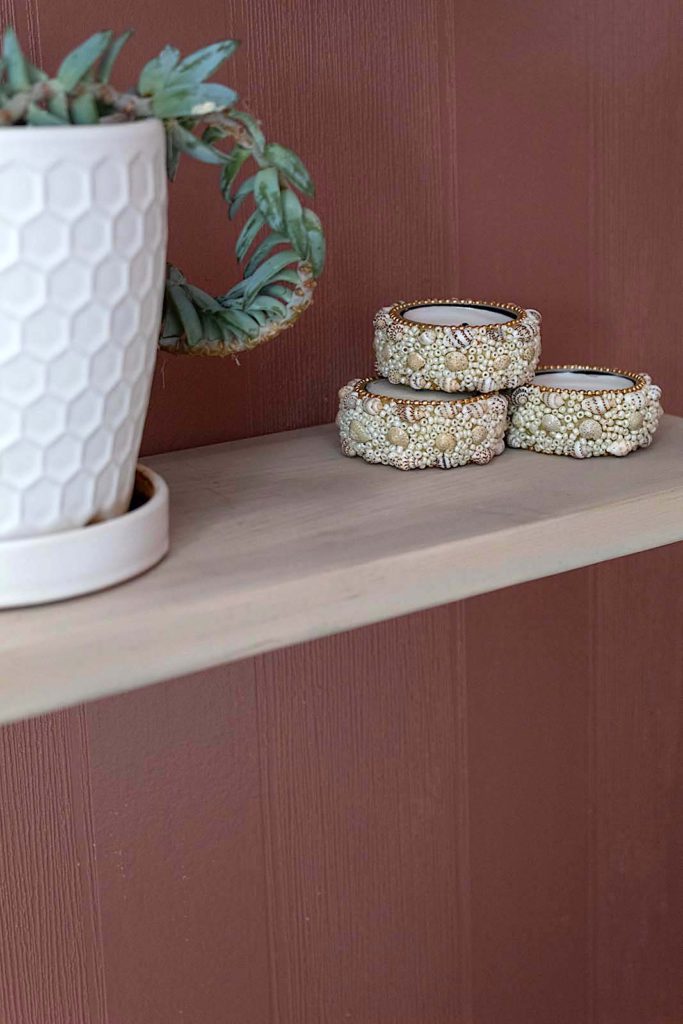
For added function in this modest space, I made some shelves. Leveraging usability when designing is a bonus. In absence of a vanity, the decorative shelves double as storage for hand soap and toiletries. I’ll be posting the tutorial on how to make these super easy shelves soon.
Adding old pieces in with new ones creates an old world feel. I like to house shop for pieces that may have lost their luster and can be refinished with a new look.
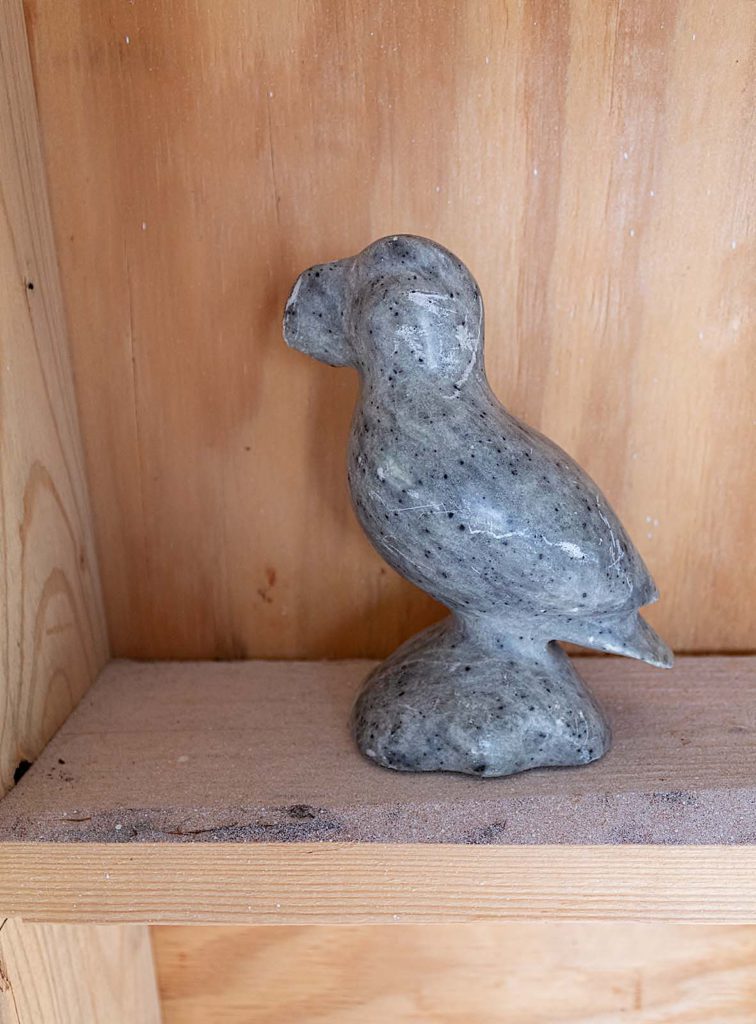
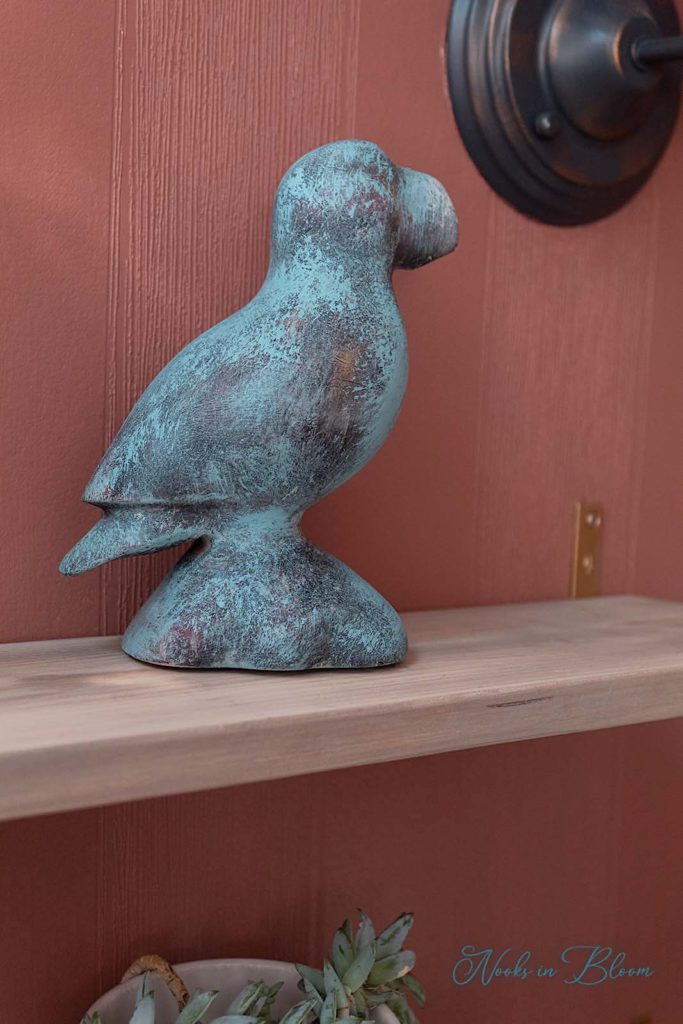
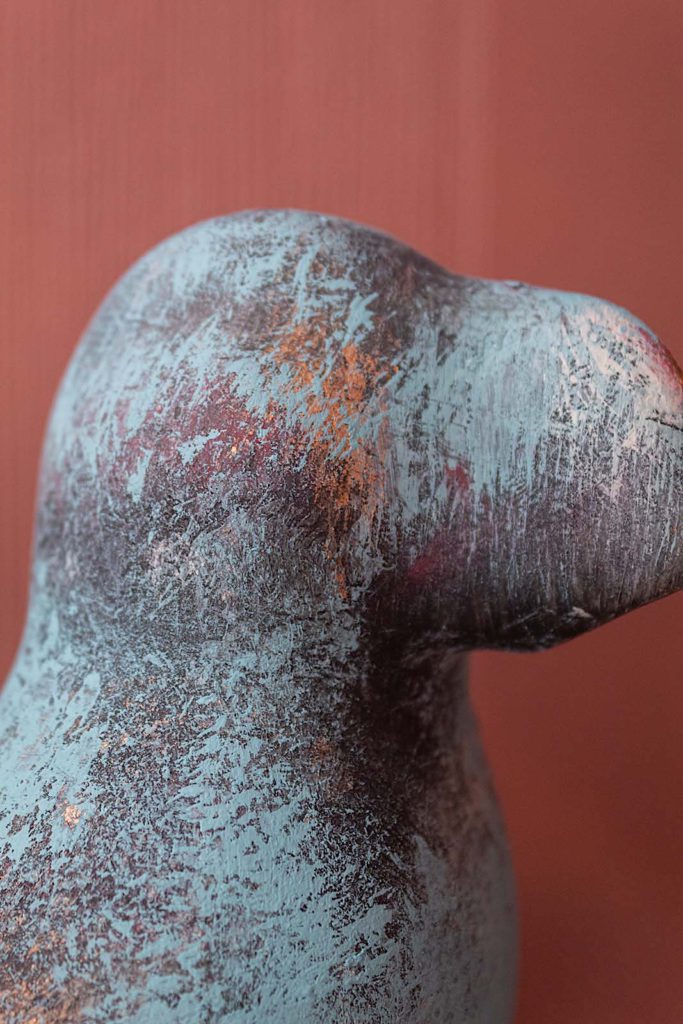
This marble puffin had seen its better days, having been dropped from the shelf several times.
A paint layering technique, which I will share with you later, gave this piece a new lease on life. Perched on the new shelves in the powder room, the painted puffin adds color and character.
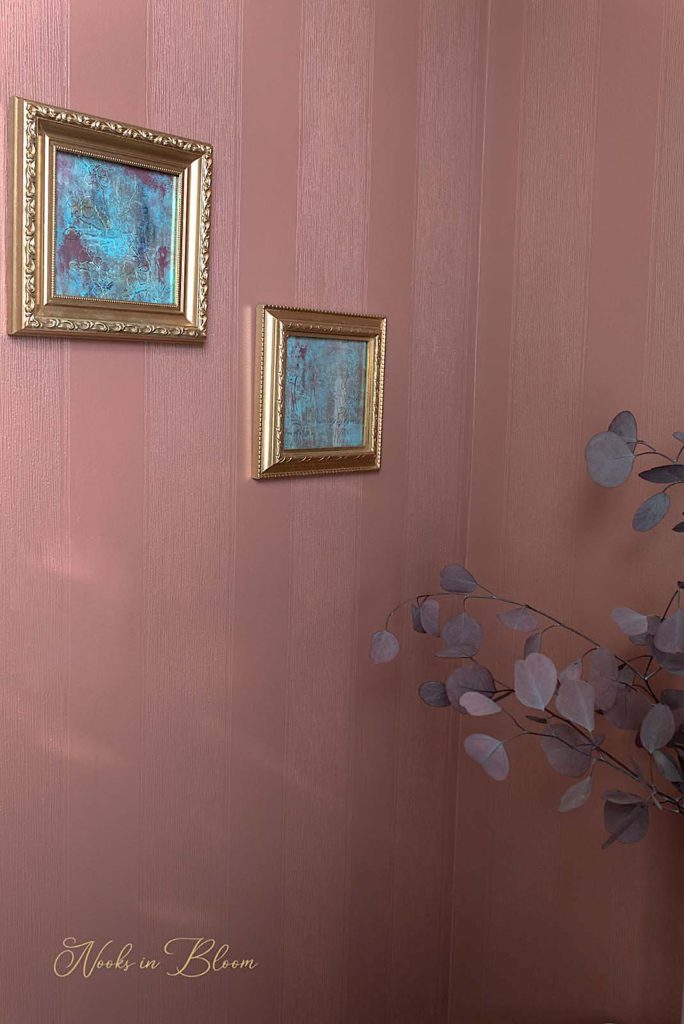
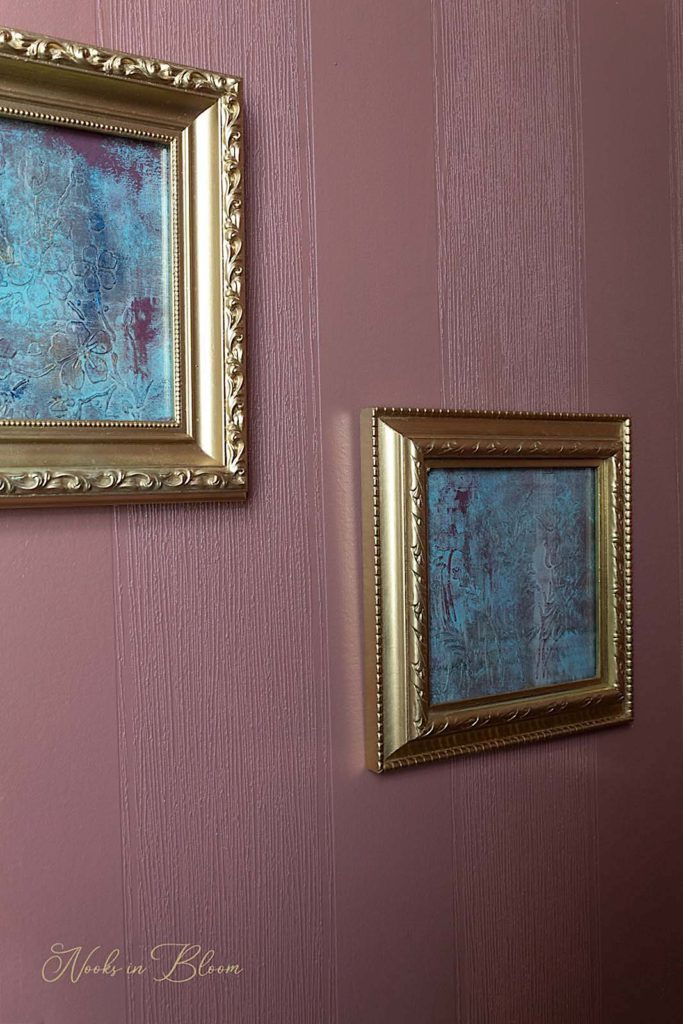
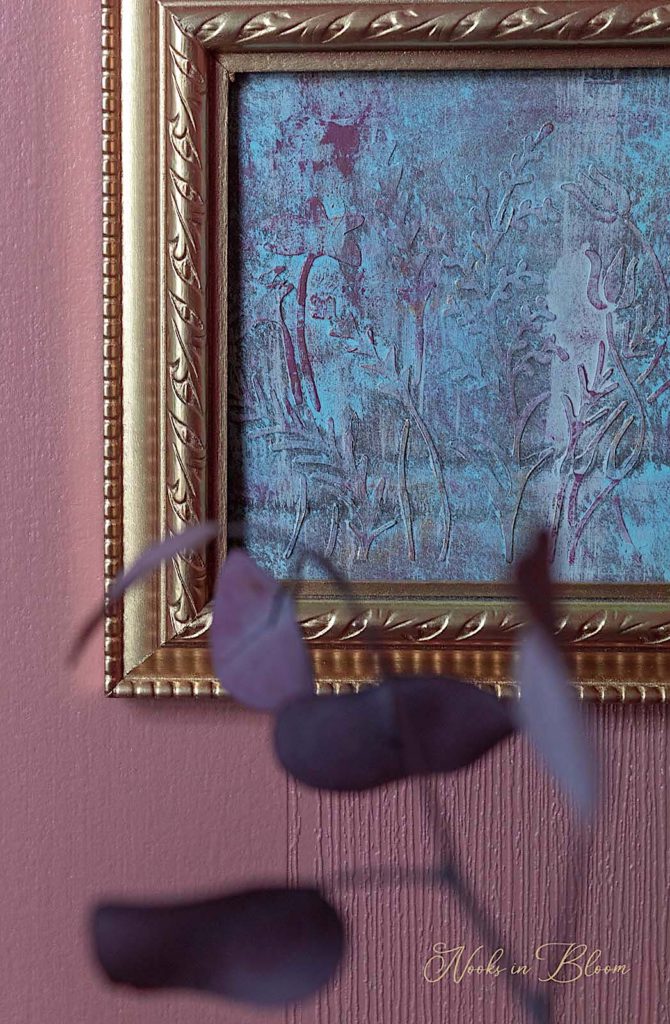
Weave Similar Colors Throughout The Tapestry of Your Space
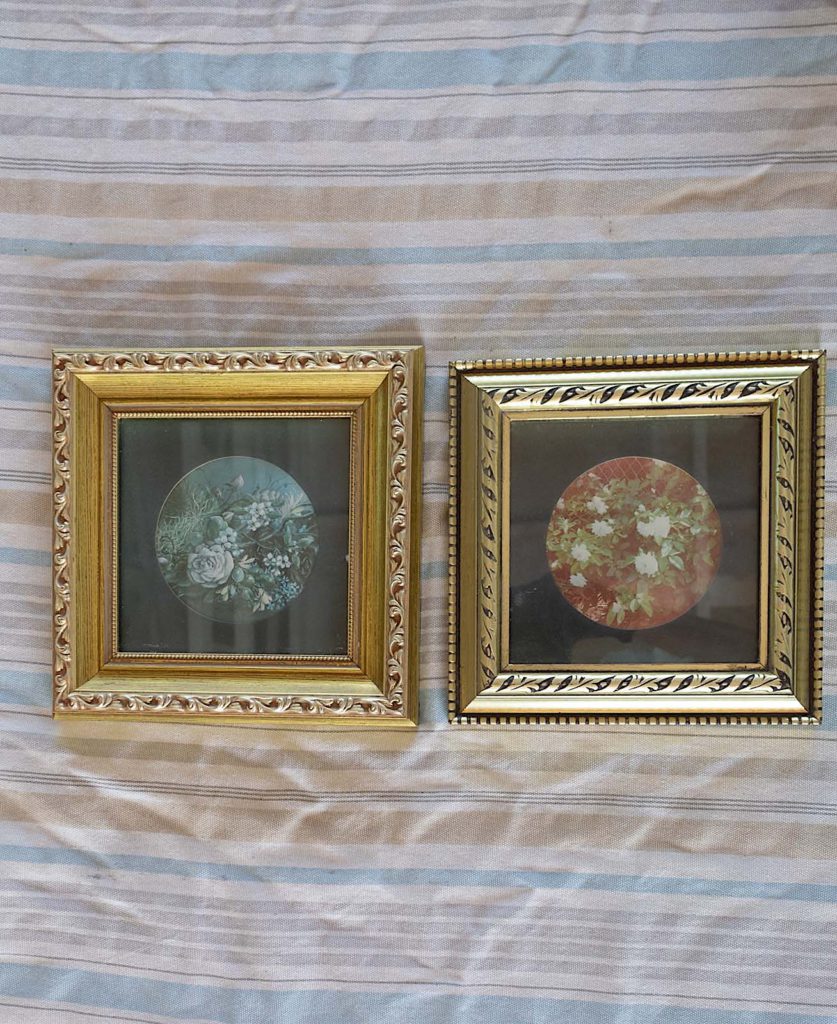
On the opposite end of the powder room I hung my flipped thrift store picture frames. Tying colors of a similar palette throughout the room keeps things in harmony and provides unity.
I searched for small frames that would serve simply as a small detail on the wall. I found these cheap frames and knew that I could transform them into wallart with a take on both modern and vintage styles.
This was a DIY project I thoroughly enjoyed. It was inexpensive and quick. The result was beautiful. The thrift store frames now display captivating abstract art in shiny gold frames. The ornate details add a vintage touch.
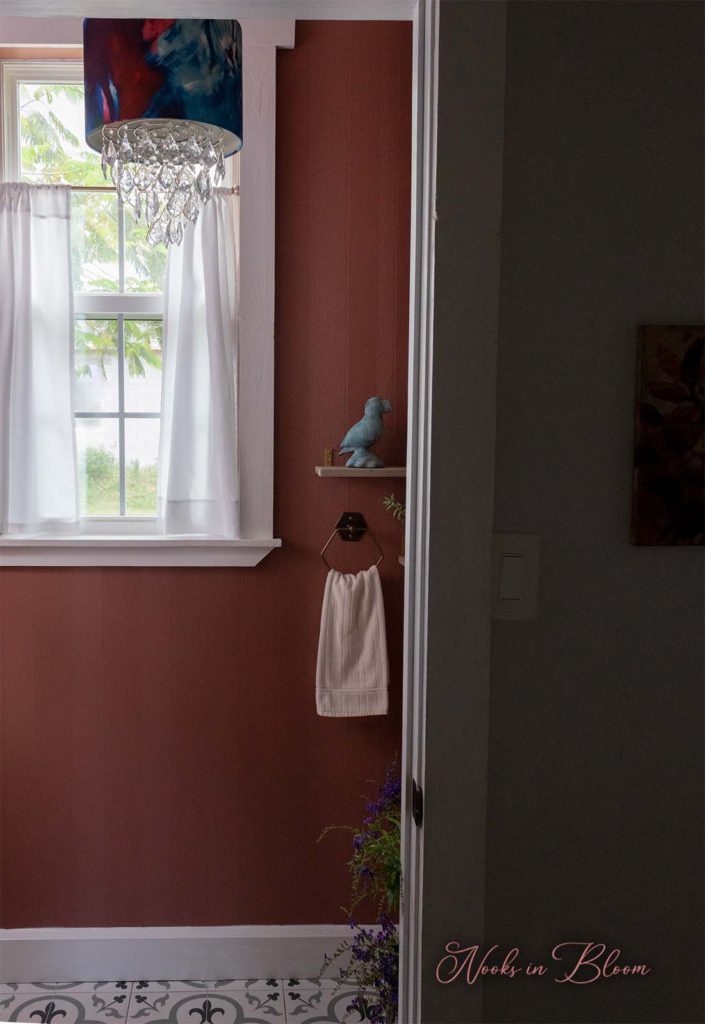
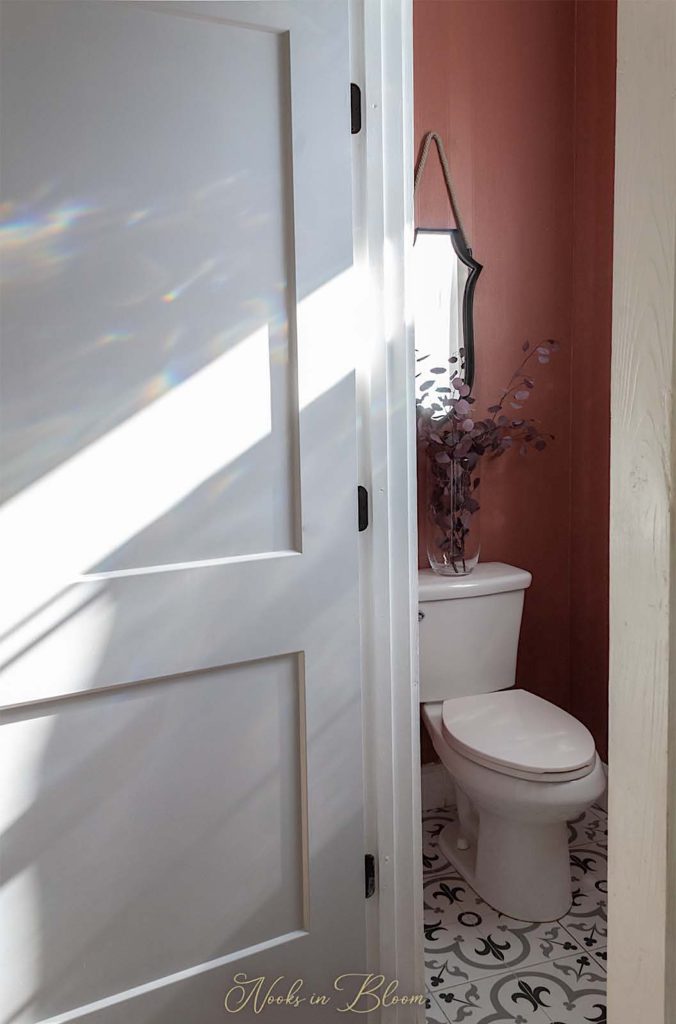
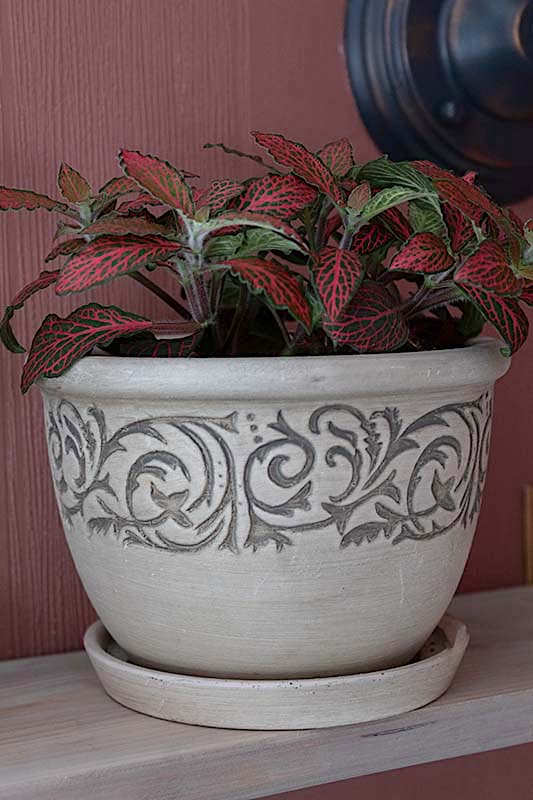
I love incorporating plants, both faux and real, in my decor. I did an entire post on How To Decorate With House Plants. In the powder room I picked plants that could bring in texture and color that would play off the reddish hues of the walls.
I always try to create some level of contrast and avoid picking exact colors so they don’t blend into the background.
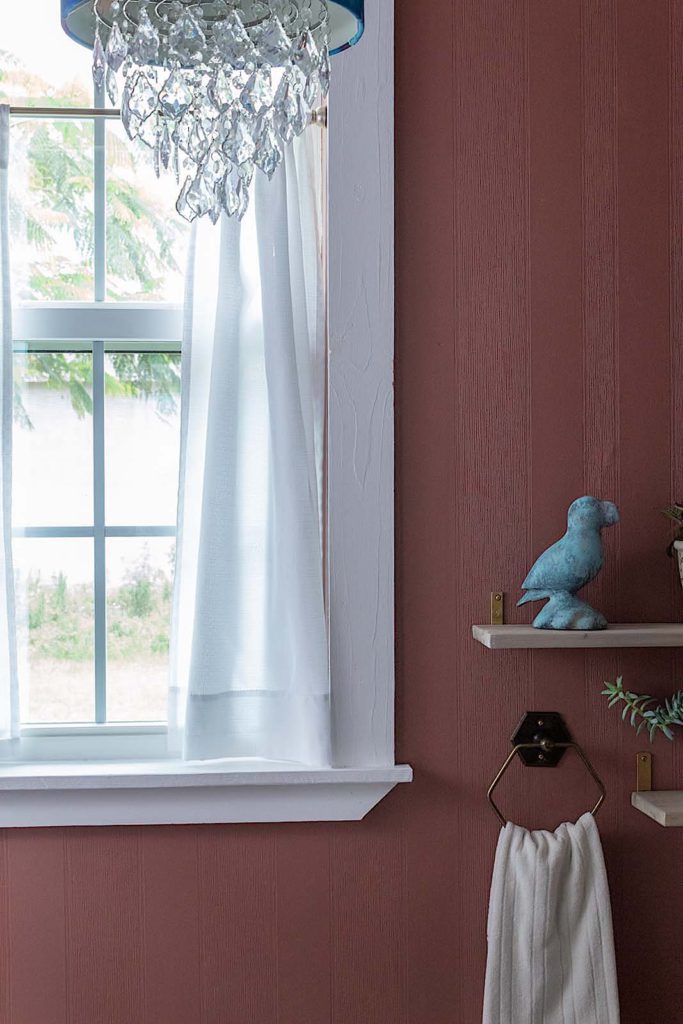
Keeping our Moonkist Sconces in the slate color I had originally painted them helped balance out colors in the space. I felt painting them gold as the other features would have been overkill. I really like how the deeper bluish color looks against the wall color.
Our Alape bucket sink is one of my favorite features in the bathroom. It is sleek and minimalist, perfect for this small powder room. And the farmhouse aesthetic adds a casual feel that I like to weave throughout our home.
Watch The Video Of My Powder Room Makeover
So dear readers, what do you think of the new look in our powder room? I hope you enjoyed the tour. Let me know what you think in the comments below. Stay tuned for more home decor posts by subscribing at the bottom of this page!