Well, it’s official. The holiday season is here! Crisp air. Festive gatherings. Christmas music and yummy treats. I look forward to this special time all year. How about you?
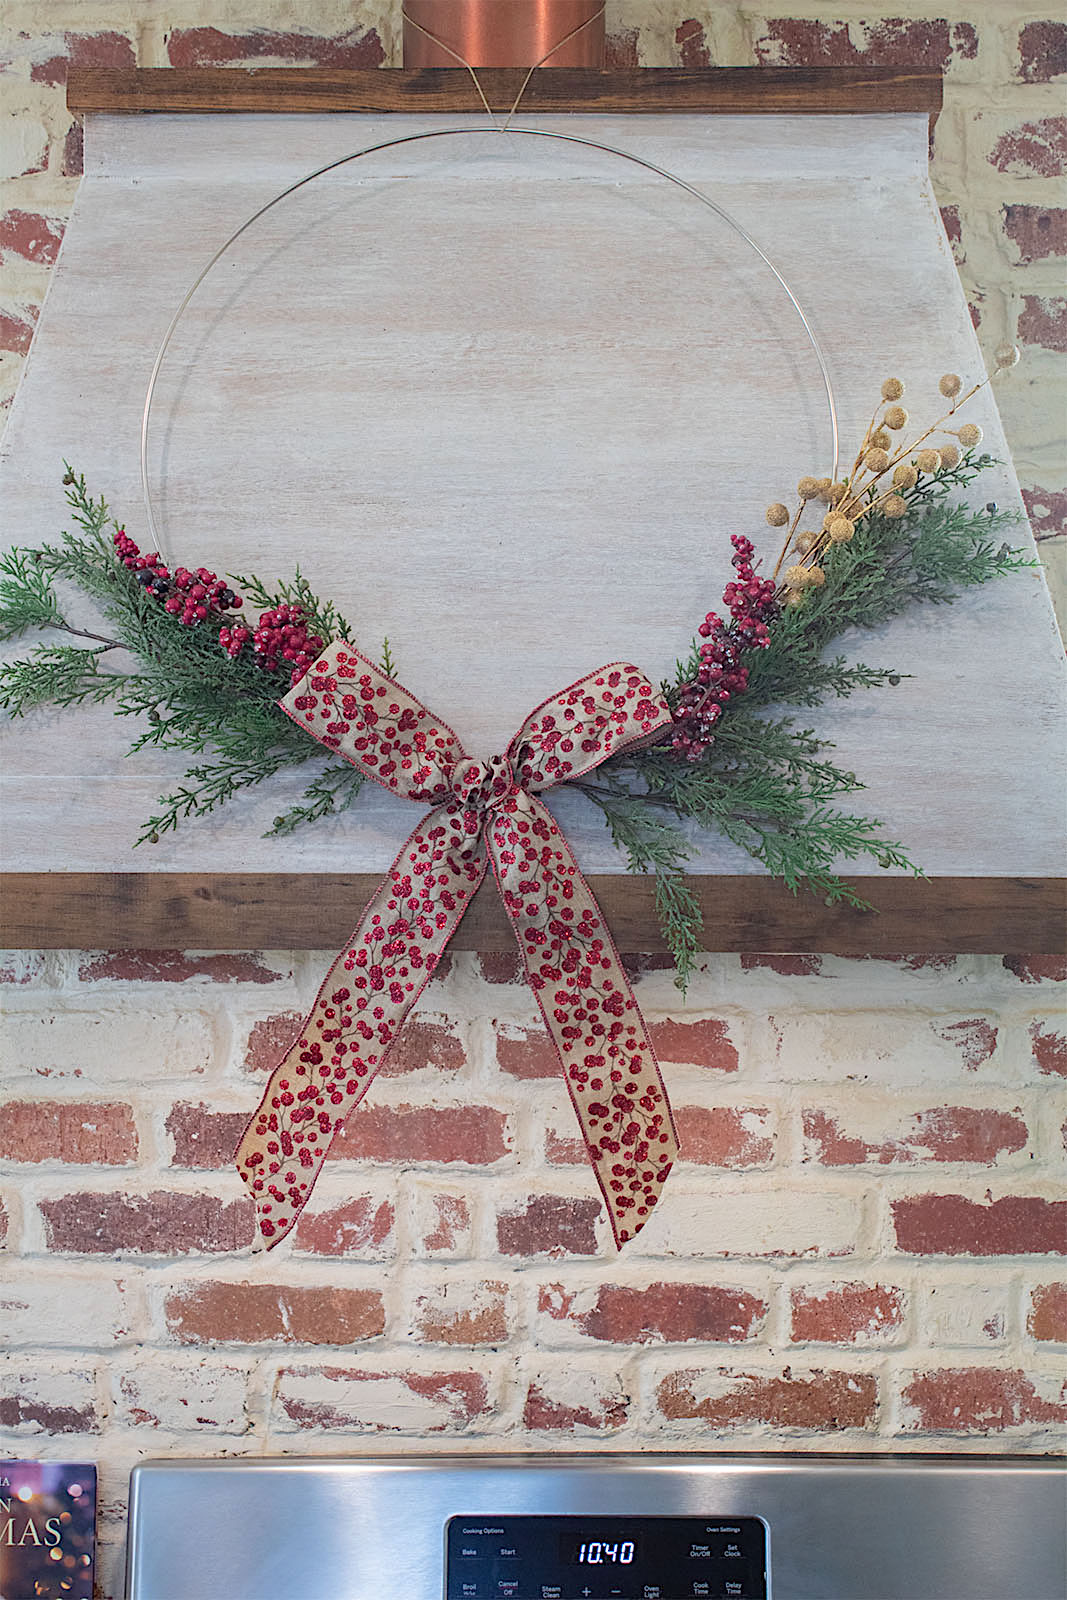
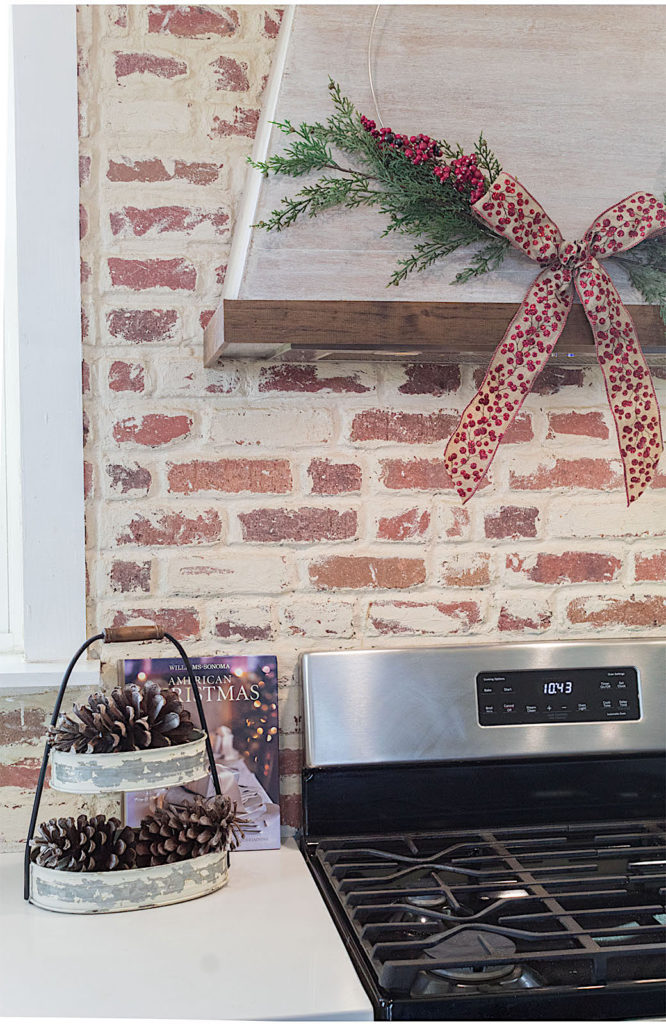
Today I’m re-posting this lovely hoop wreath I made last year. It was SO easy to make and it really brightened up our home.
I’m excited to share how effortless it is to put together a wreath that is simple yet creates a lovely statement anywhere you hang it. So let’s dive in!
Disclosure: Some of the links provided are affiliate links. By purchasing through these links you are supporting this family blog and the work we do and there is no extra cost to you. Full disclosure HERE.
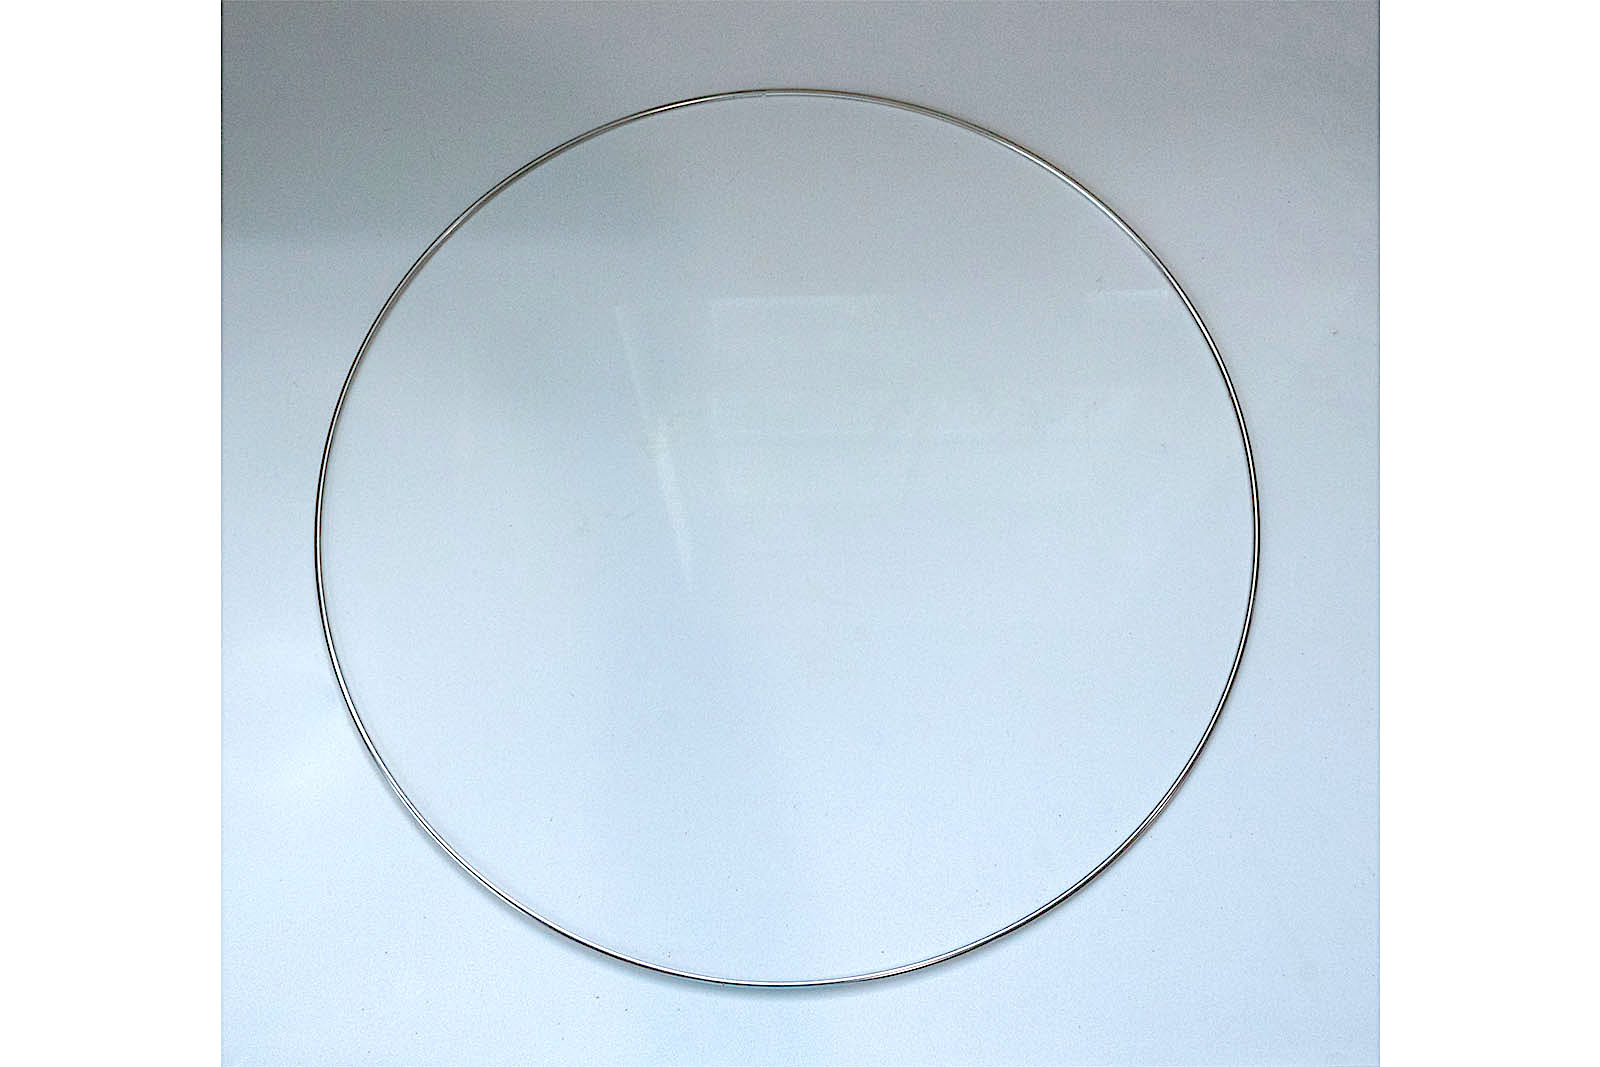
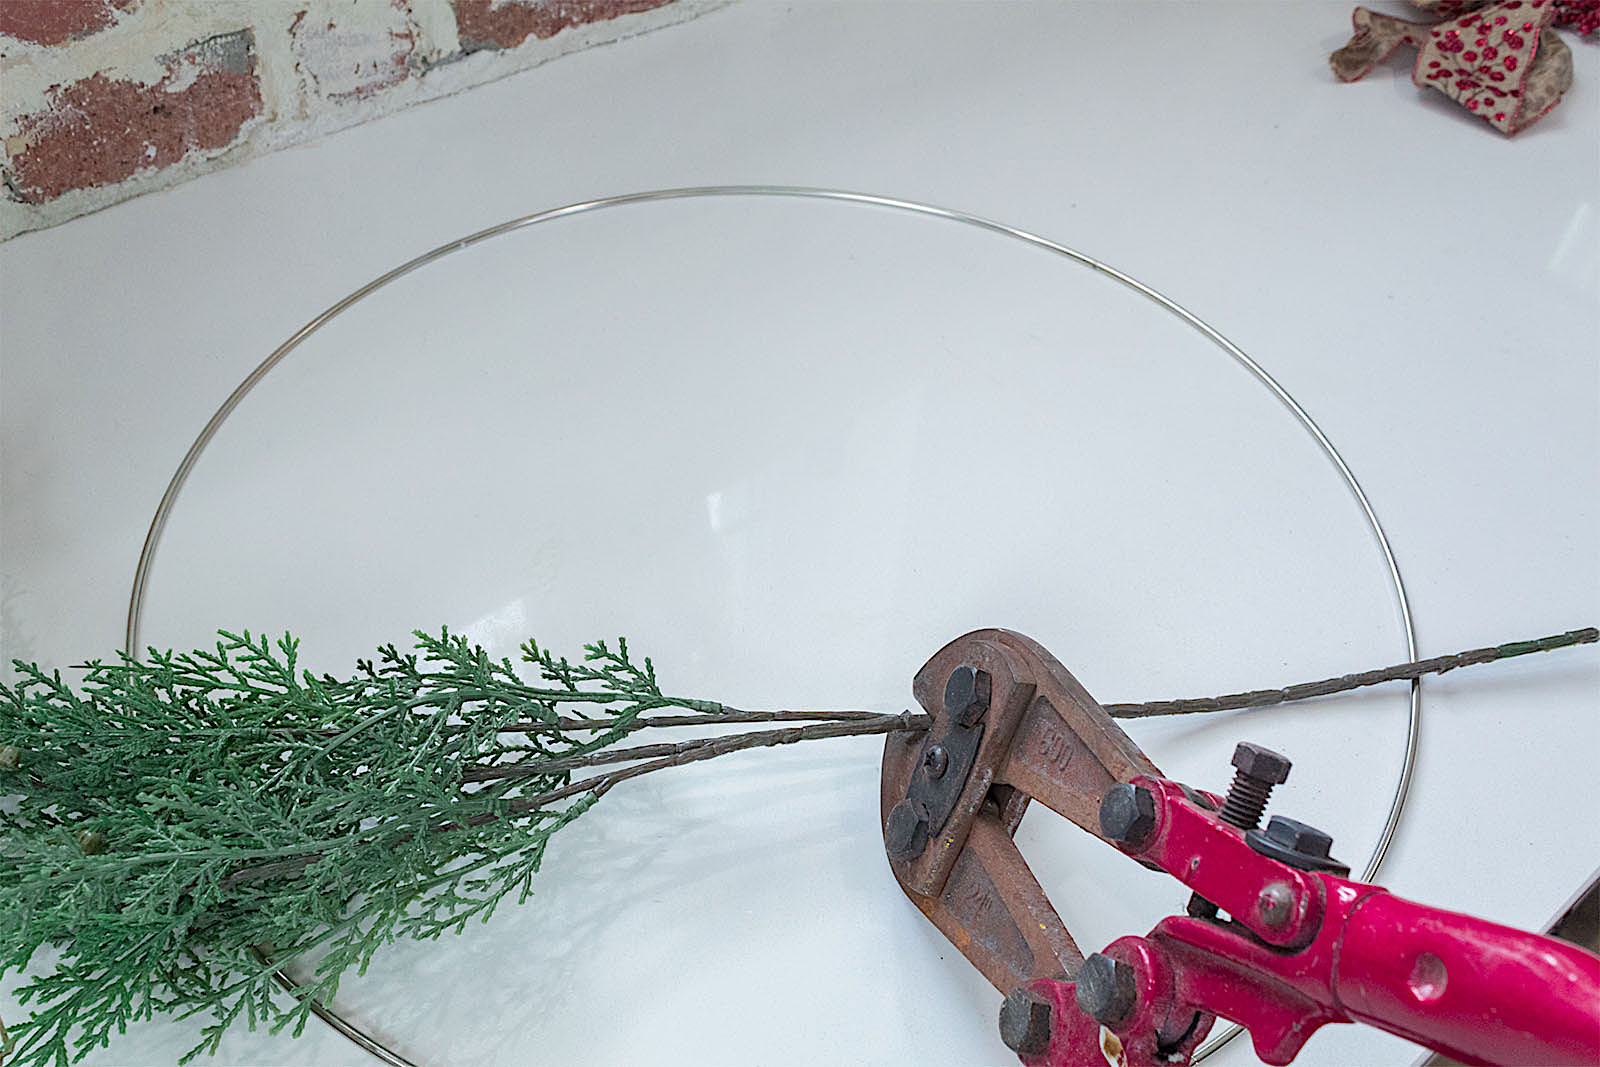
Because I didn’t want the stems of my greenery sticking far out from the ring, I trimmed them down. I used my heavy duty cutter which worked perfectly. Some strong scissors or garden clippers may also be used.
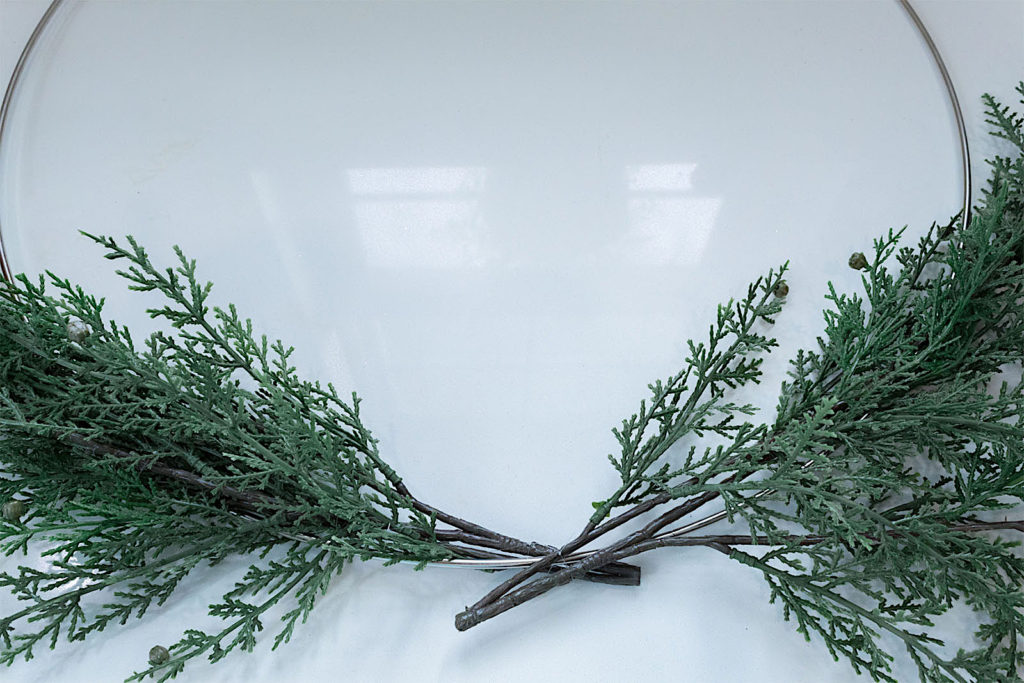
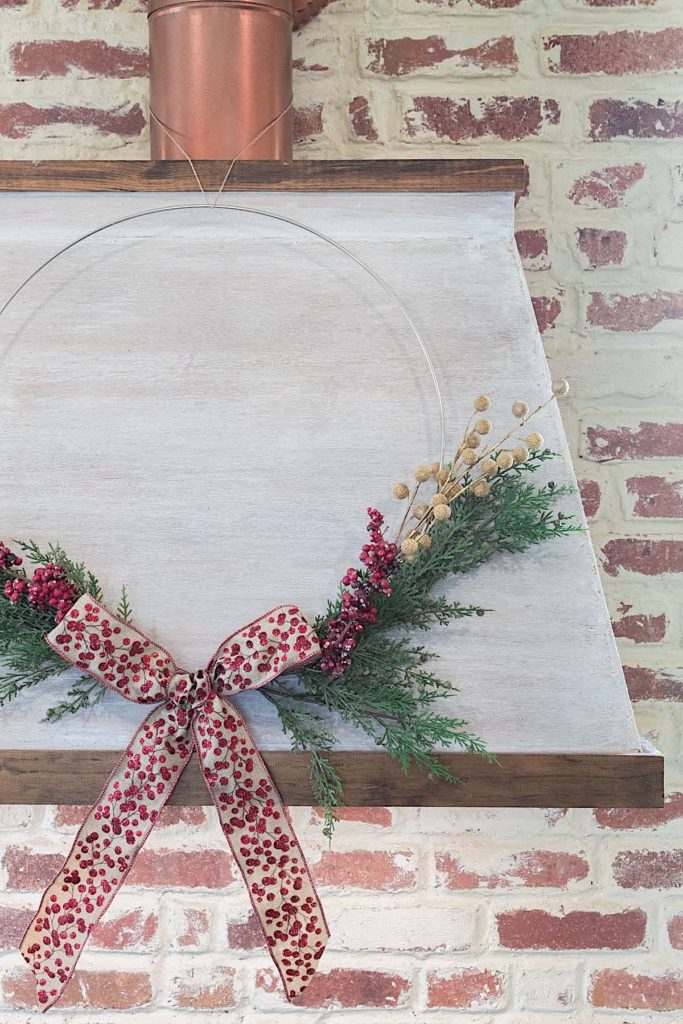
3. Add your greenery
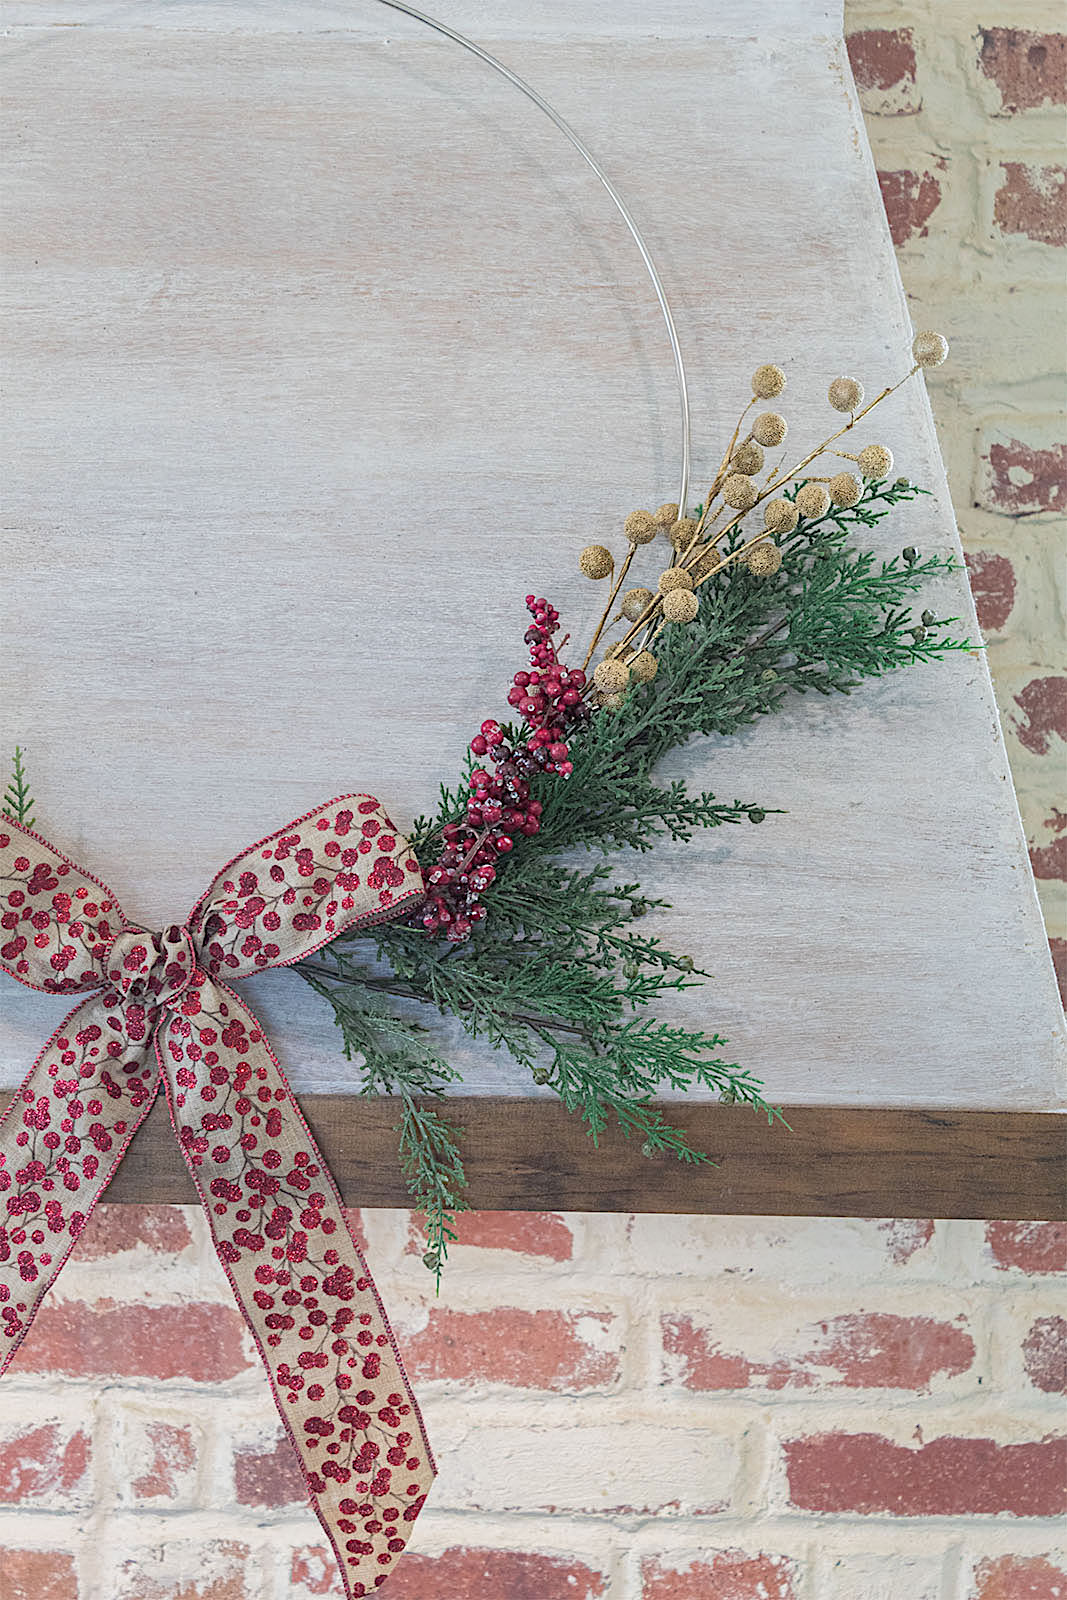
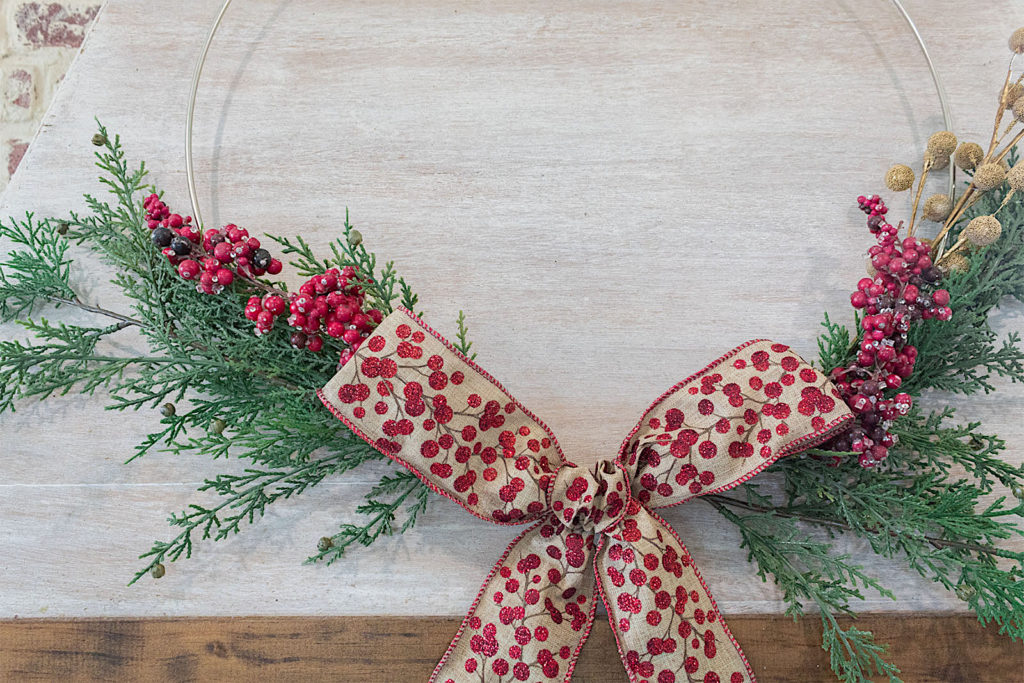
Position both pieces of greenery at the base or bottom of your hoop centered. It is okay if the ends stick out an inch or two. We are going to tie those together. Just make sure they overlap instead of leaving a gap between the two.
Use clear fishing line to tie the two middle stems onto the ring. Make sure you add fishing line in several spots so that the greenery is nice and secure.
Continue looping the line through the greenery leaves and around the ring, adding lots of ties. You don’t want your stems to fall off or droop.
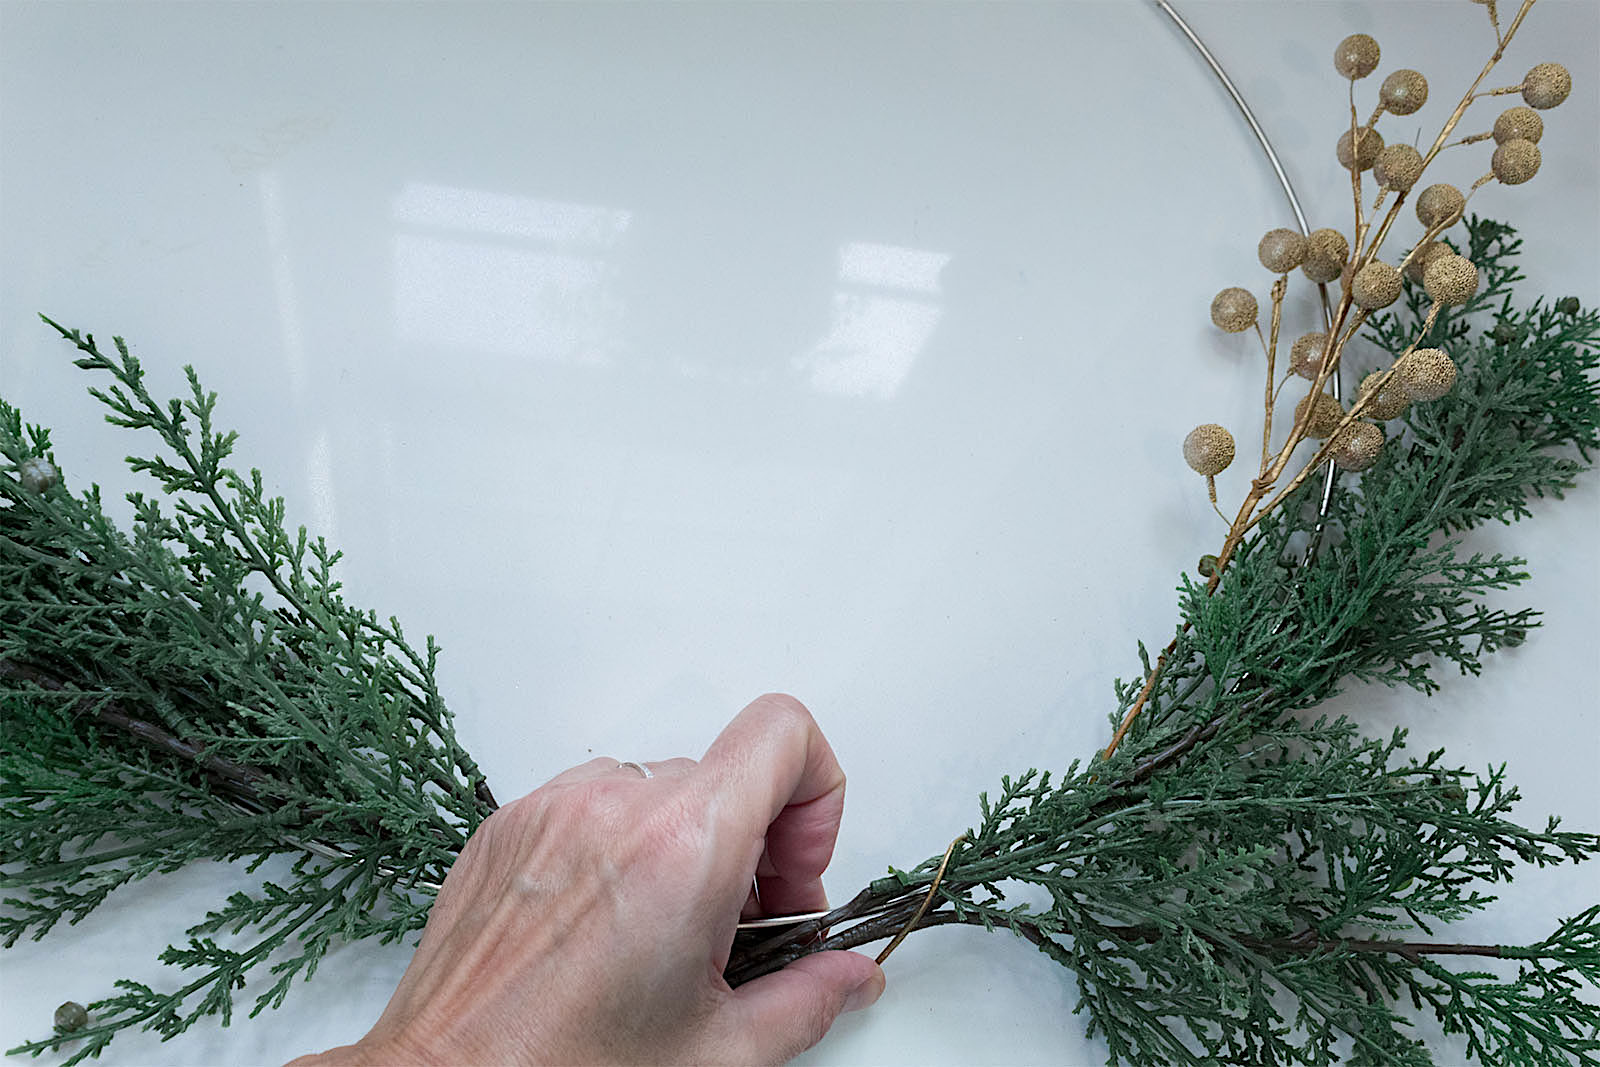
4. Add some gold sparkle
I chose to use a single stem of gold berries as a sparkly accent. To give them a little more punch, I spray painted them with gold paint.
To secure the gold berries onto the wreath ring, I twisted the wire stem around the greenery and the metal ring. I also reinforced it with fishing line in a few additional spots.
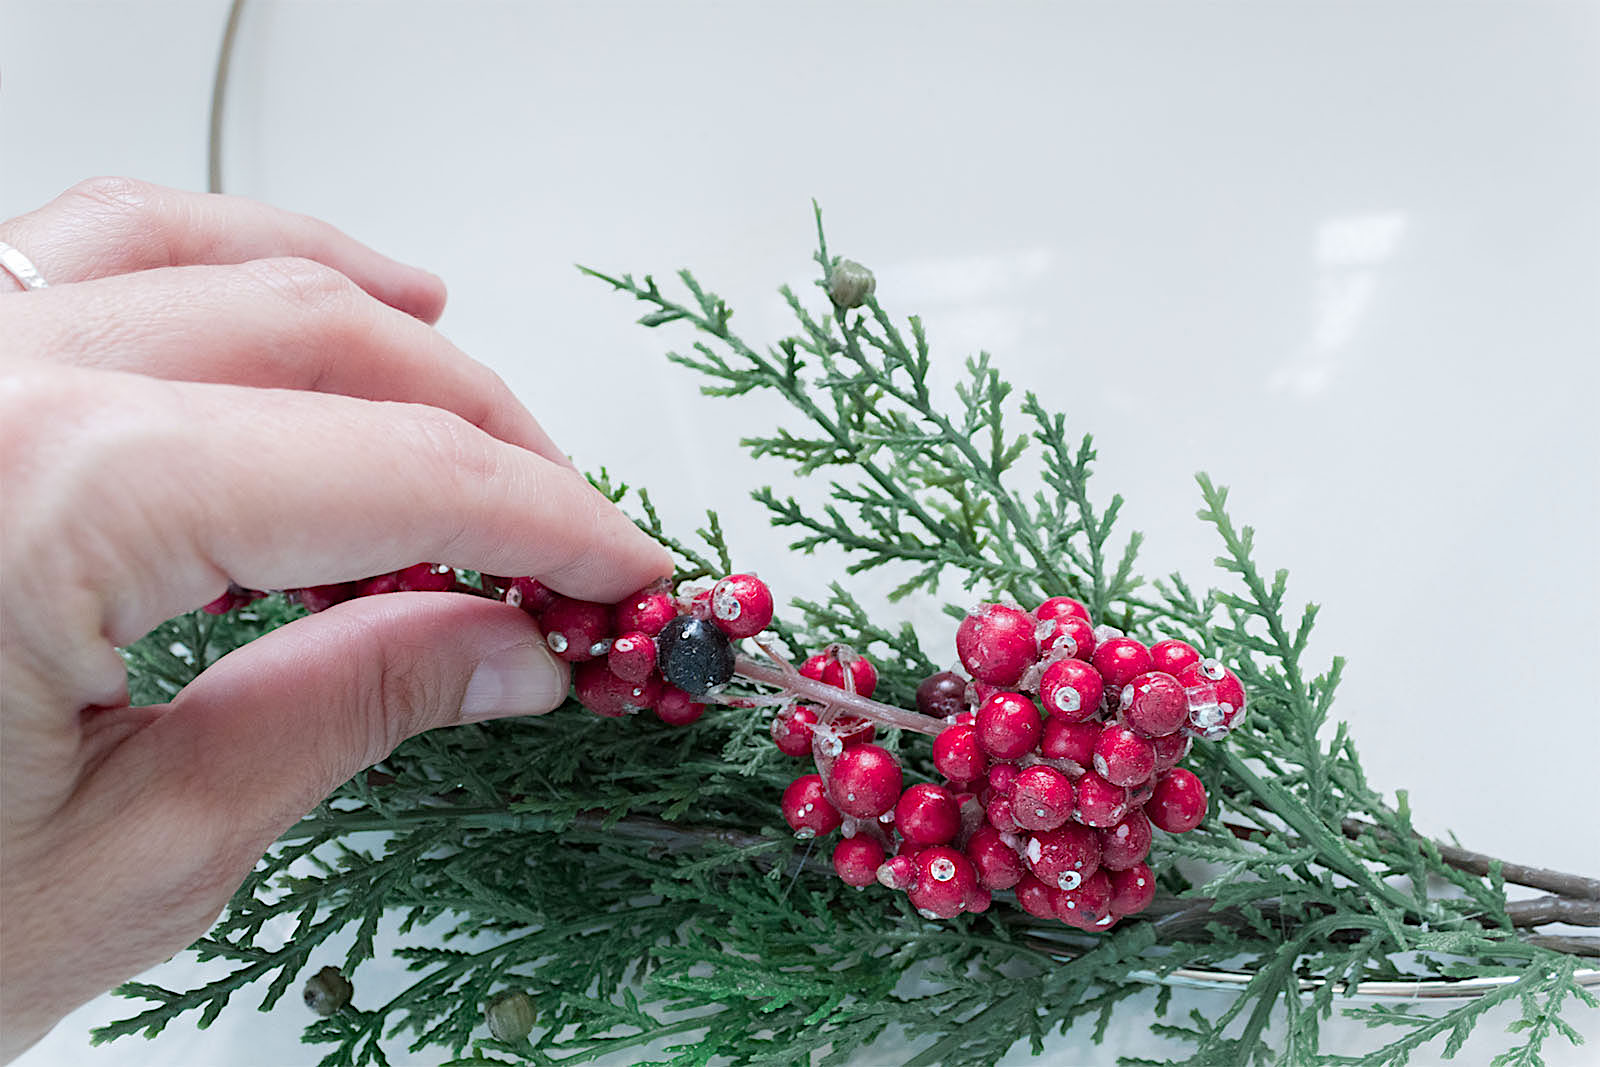
5. Sprinkle in some red
I nestled my red berries in each of the greenery pieces. I used fishing line to tie them in. Everything on this wreath is made to be a simple gesture—some texture here, a burst of color there…simple yet noticeable.
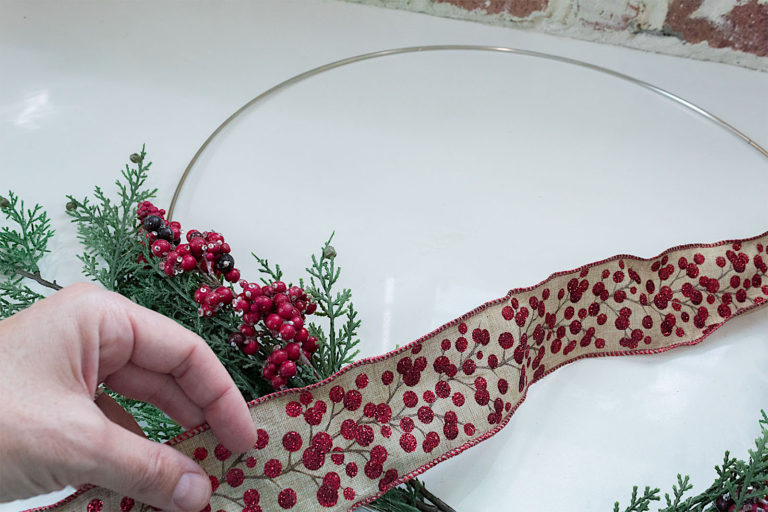
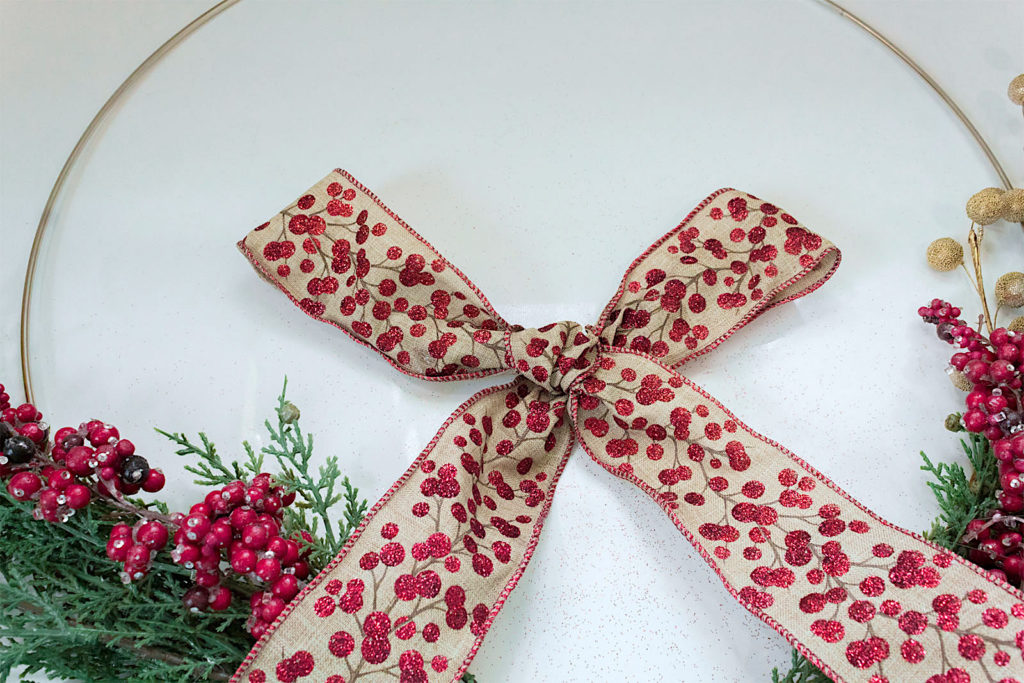
6. Lastly, seal with a bow
Confession: I am not an expert bow maker by any means! Good thing this wreath is meant to be simple, not over-the-top and a little rustic. Tying the burlap ribbon in a shoe lace form was perfect for this look.
To attach it to the wreath I threaded fishing line through the loops of the bow and then around the ring. I did this a few times to get the bow in the right position since it kept wanting to be lopsided.
Watch The Video Demo
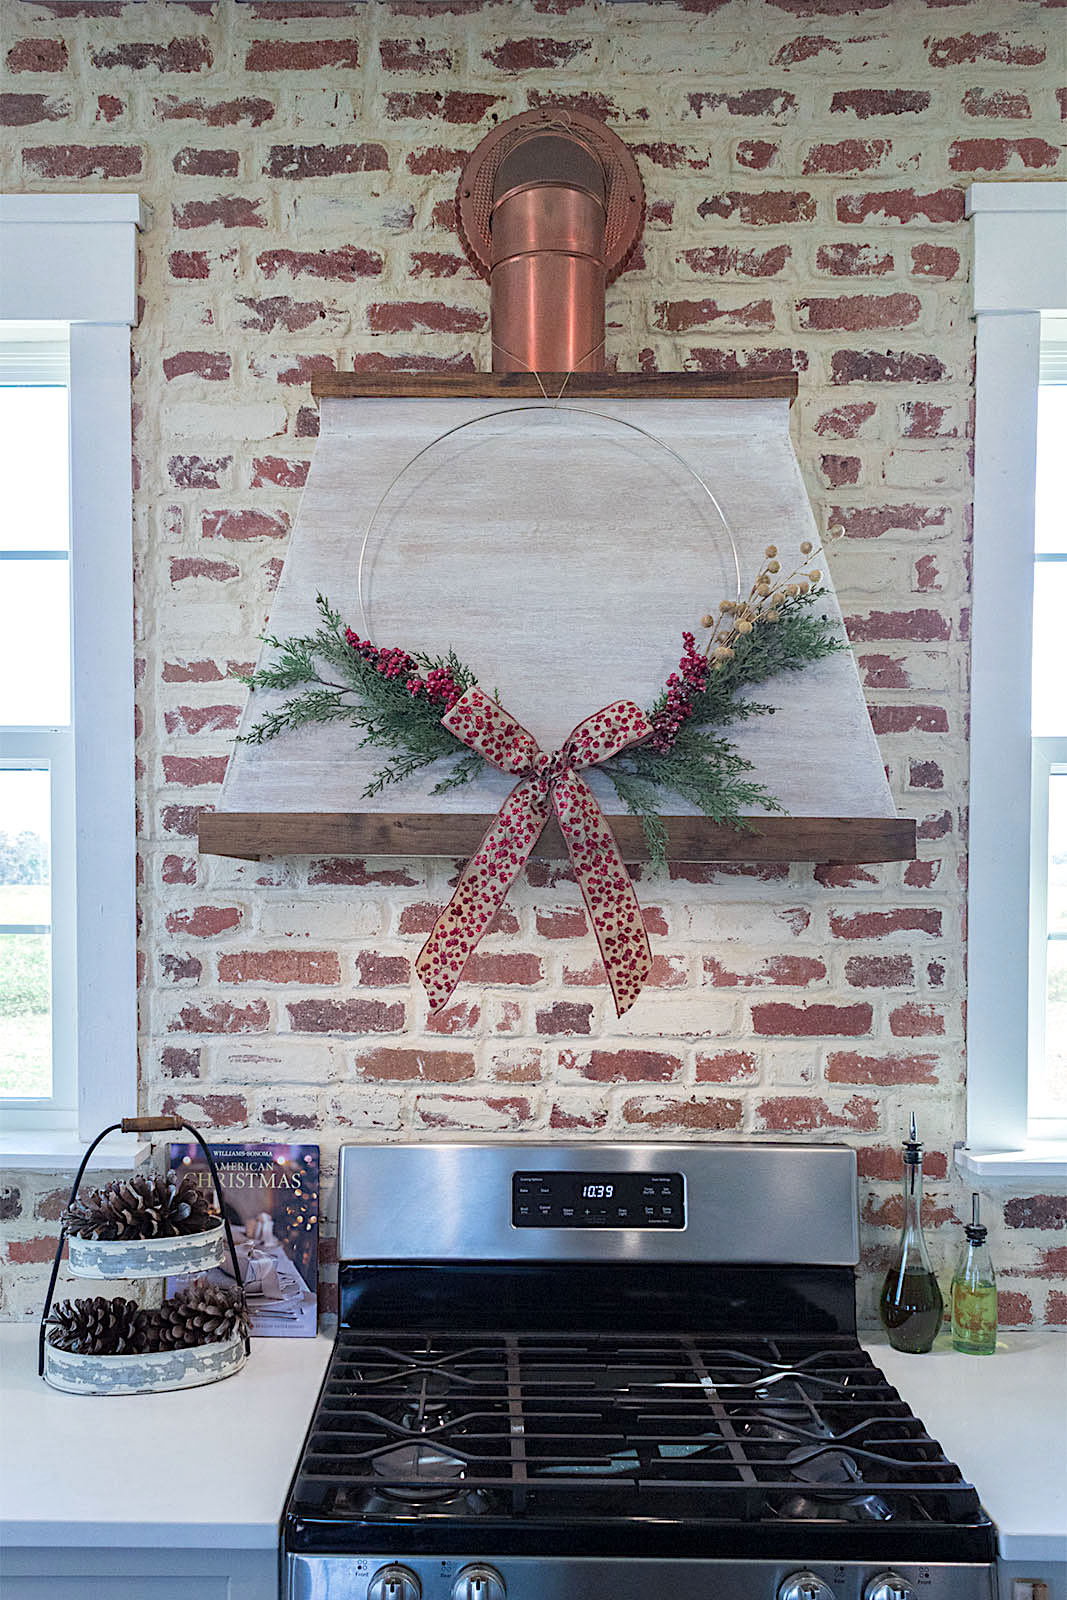
Time To Hang Your Wreath
Whatever it is that brings you joy this time of the year I hope that it warms the heart and fills you with butterflies of excitement.
I’m so very grateful for the support from each of you this year. Taking the time to read my blog means SO much and it wouldn’t be anything without each of you!