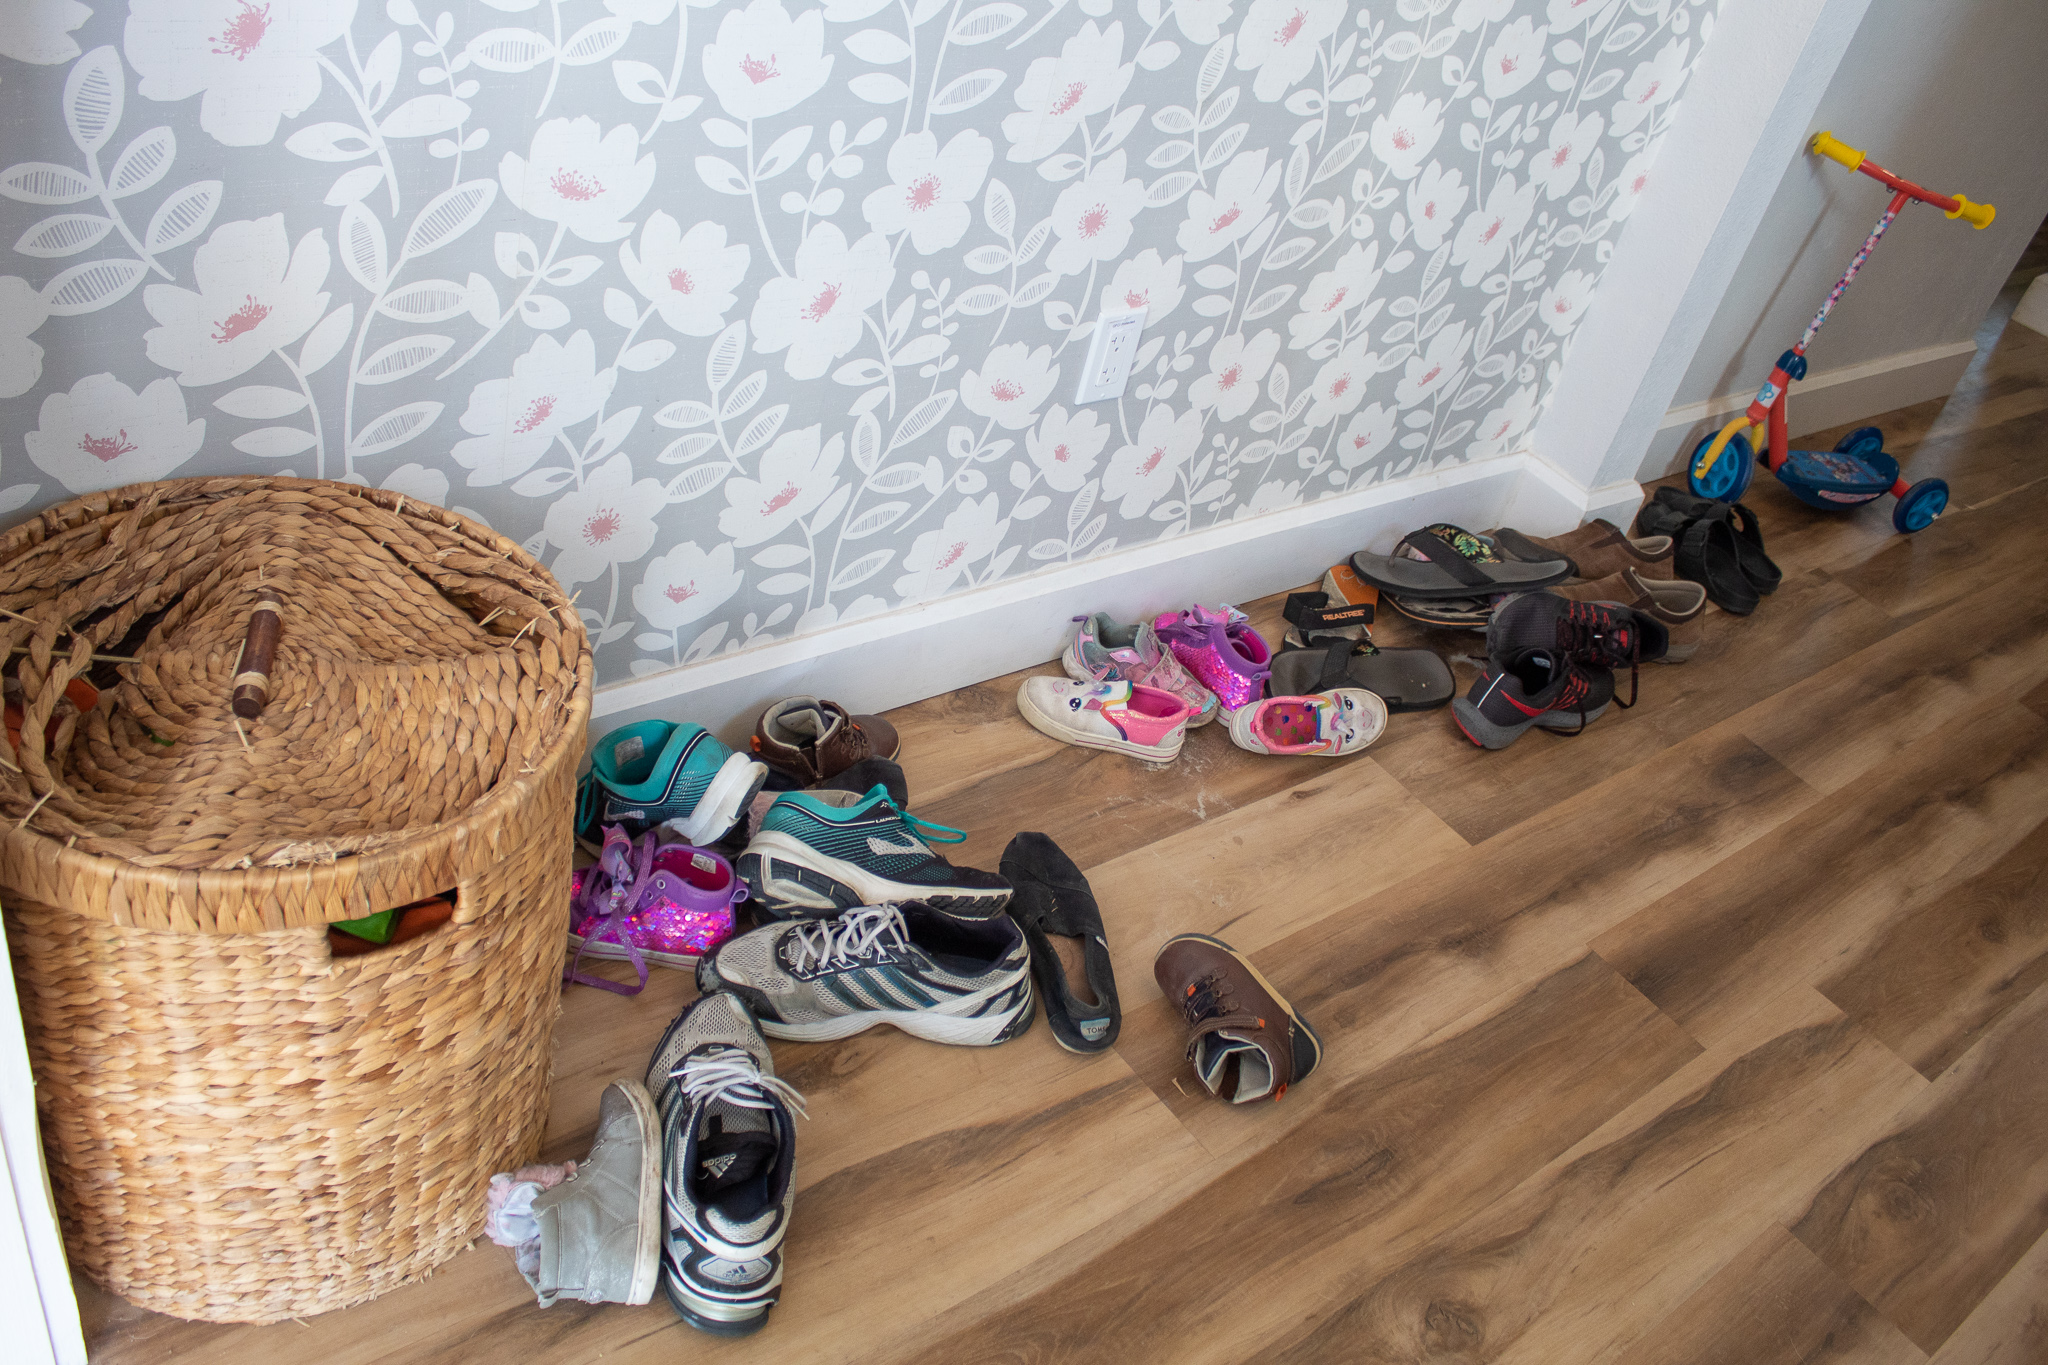
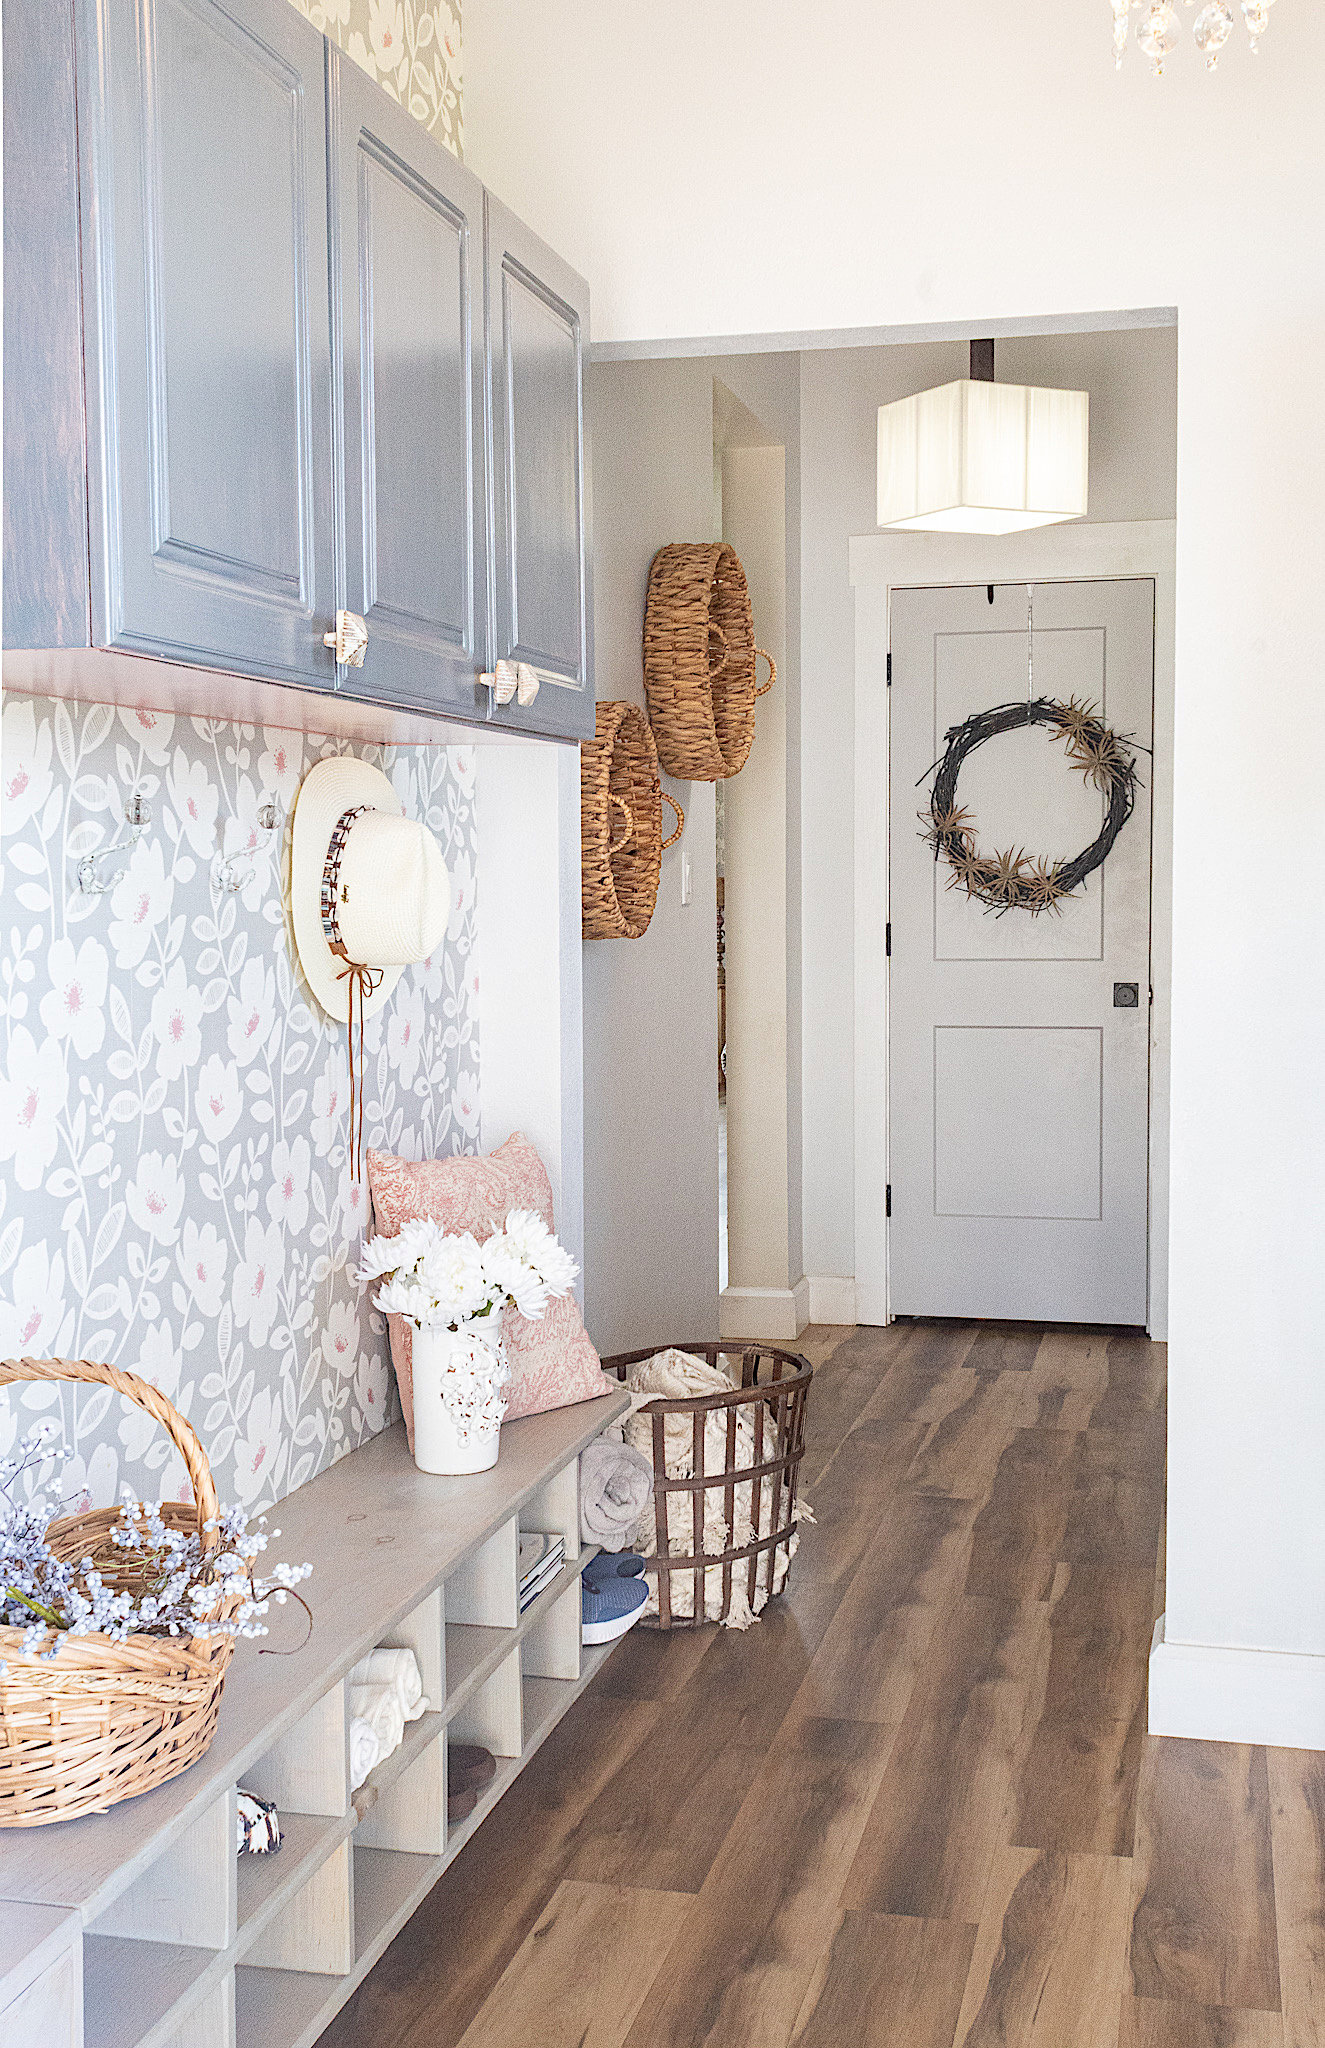
Is your mudroom an eyesore? Could it benefit from some organization?
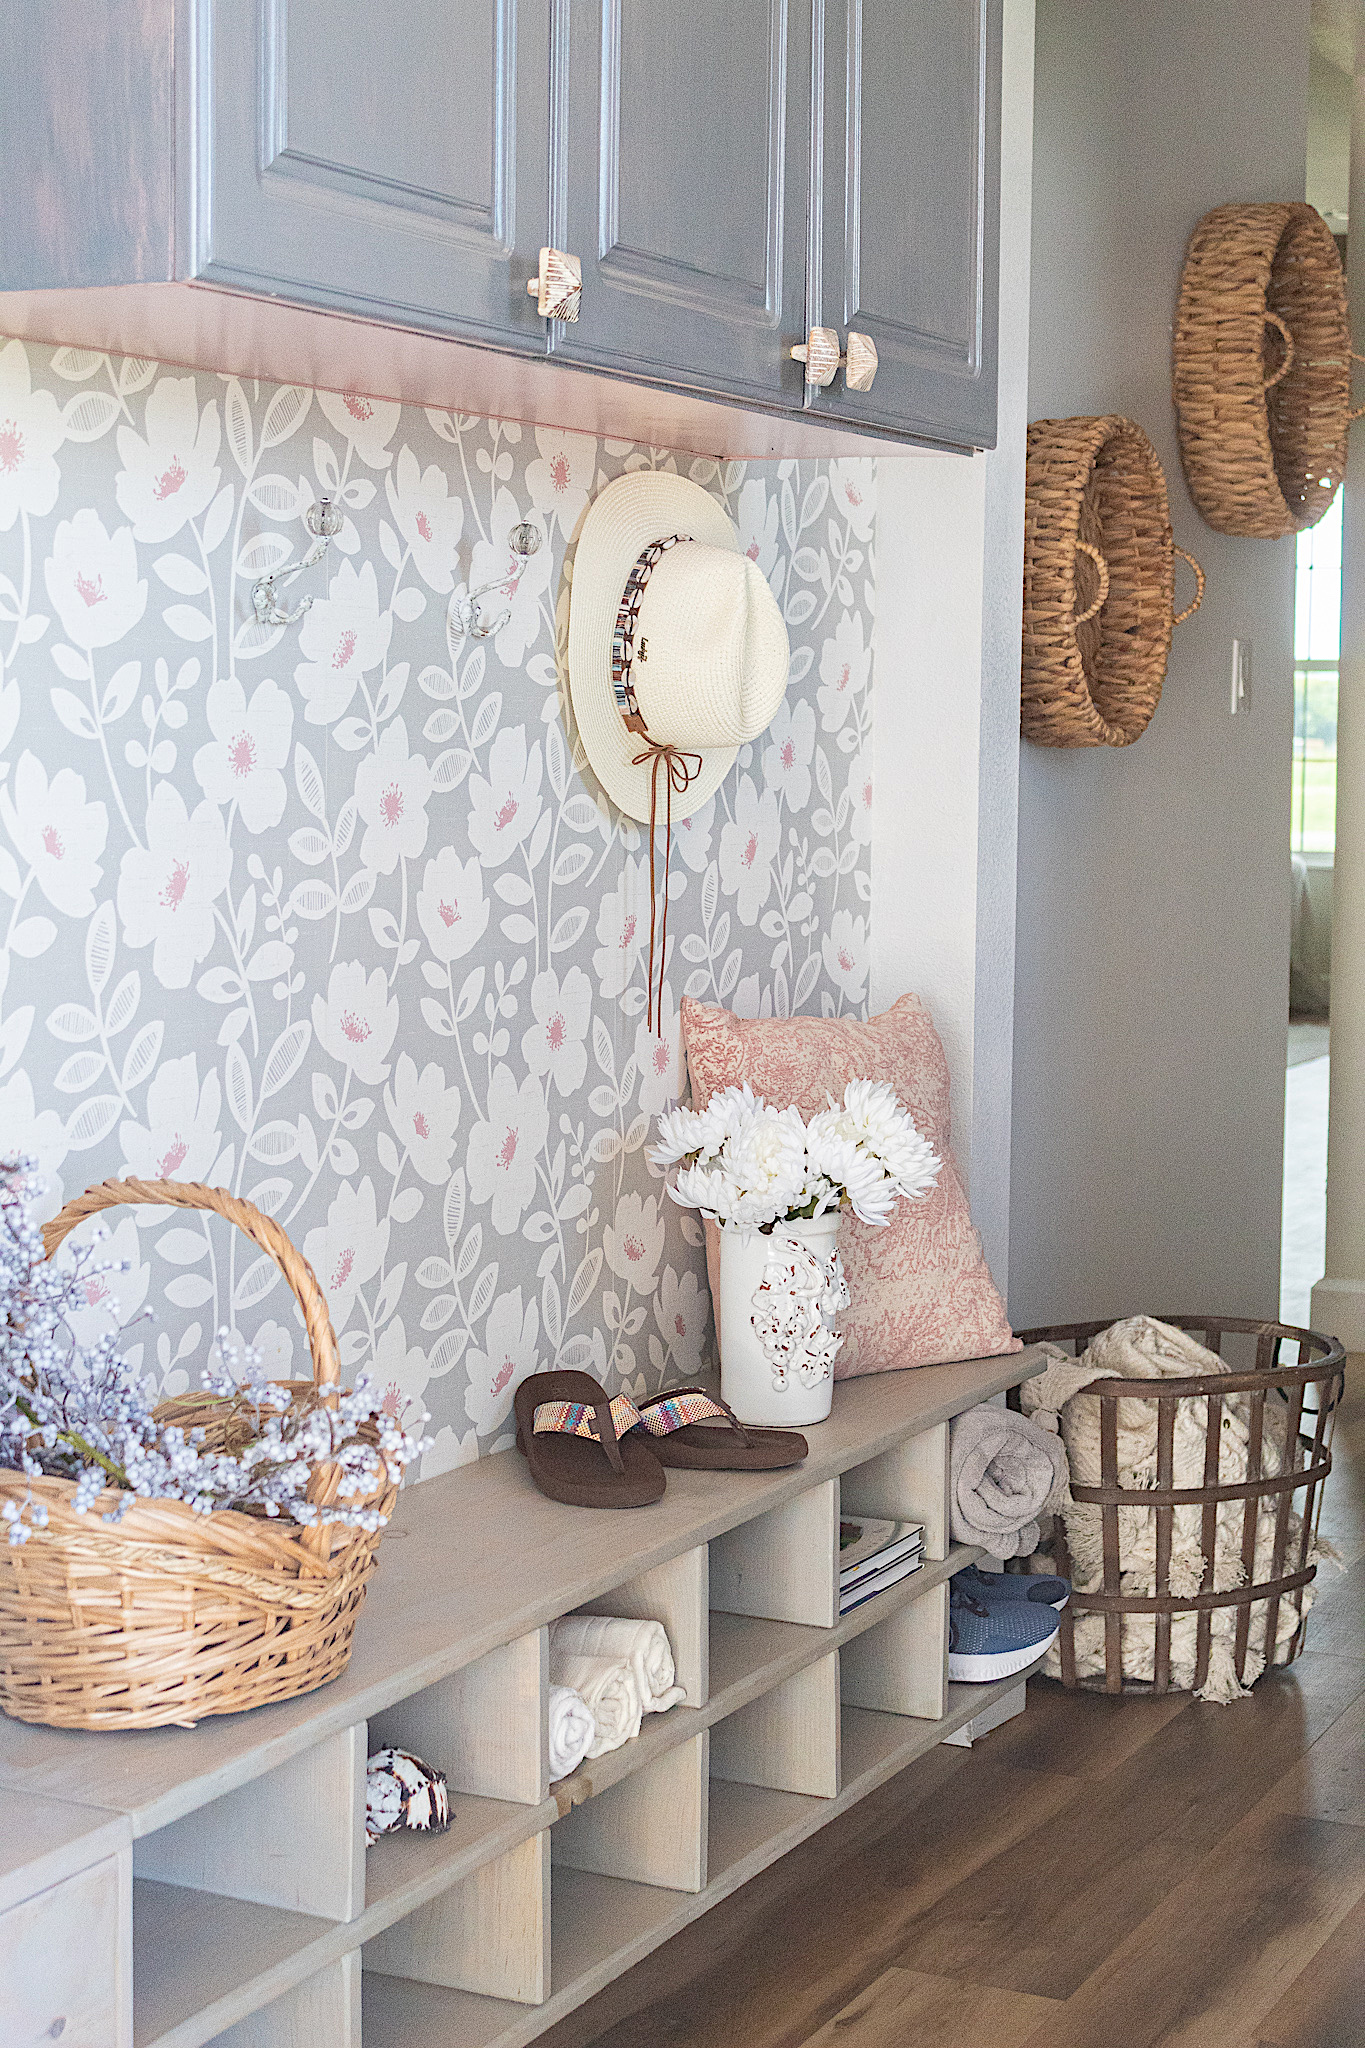
Our mudroom/laundry room is the first thing you see when you enter our home since everyone uses the back entrance. I was so tired of tripping over shoes and things looking chaotic.
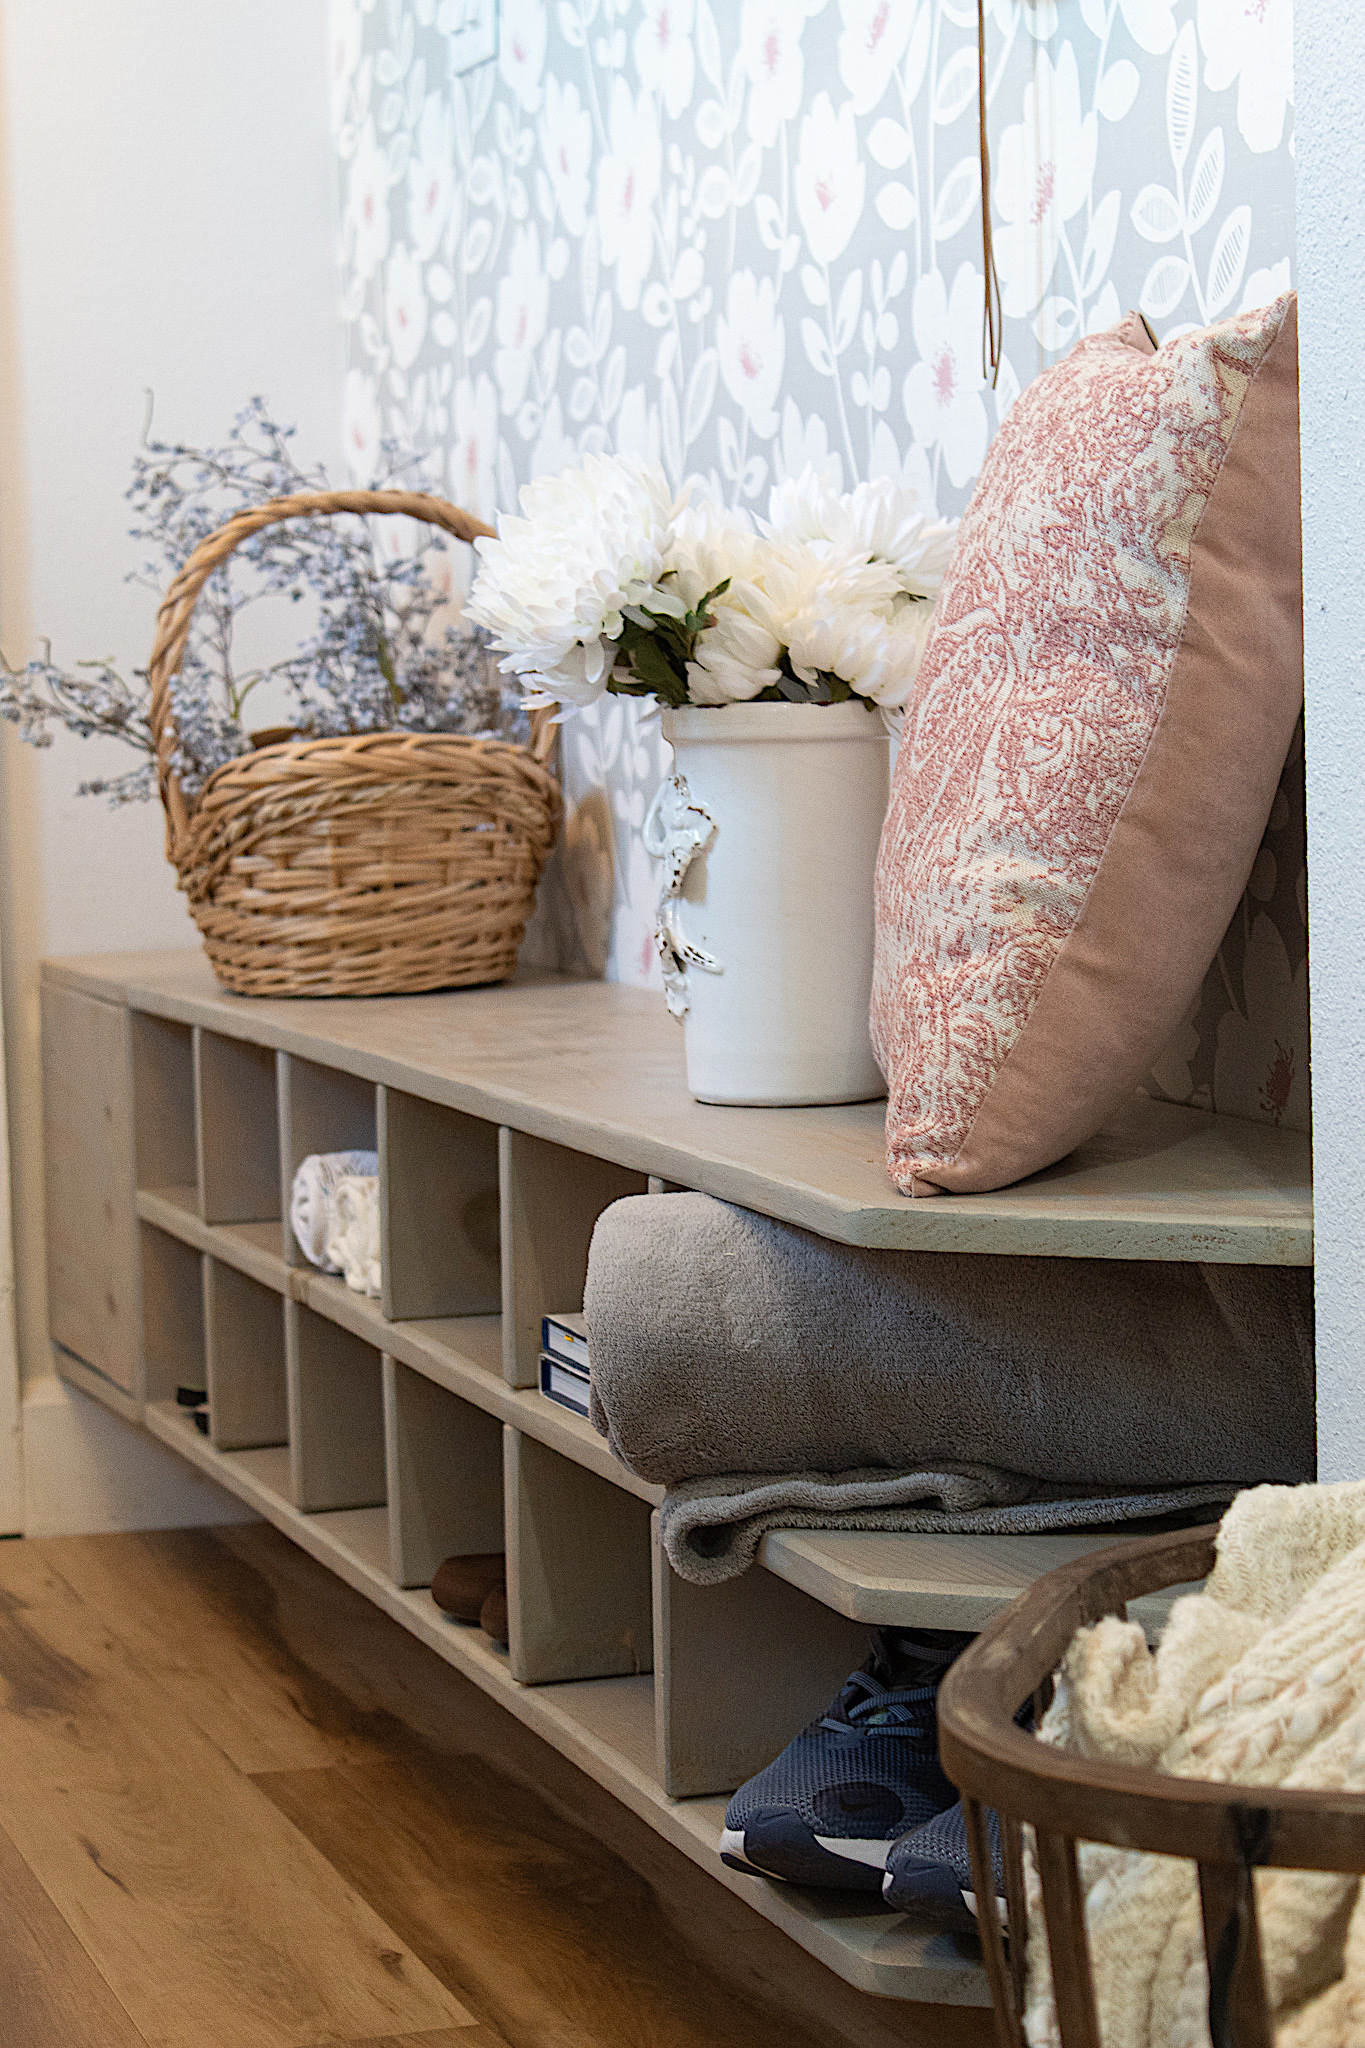
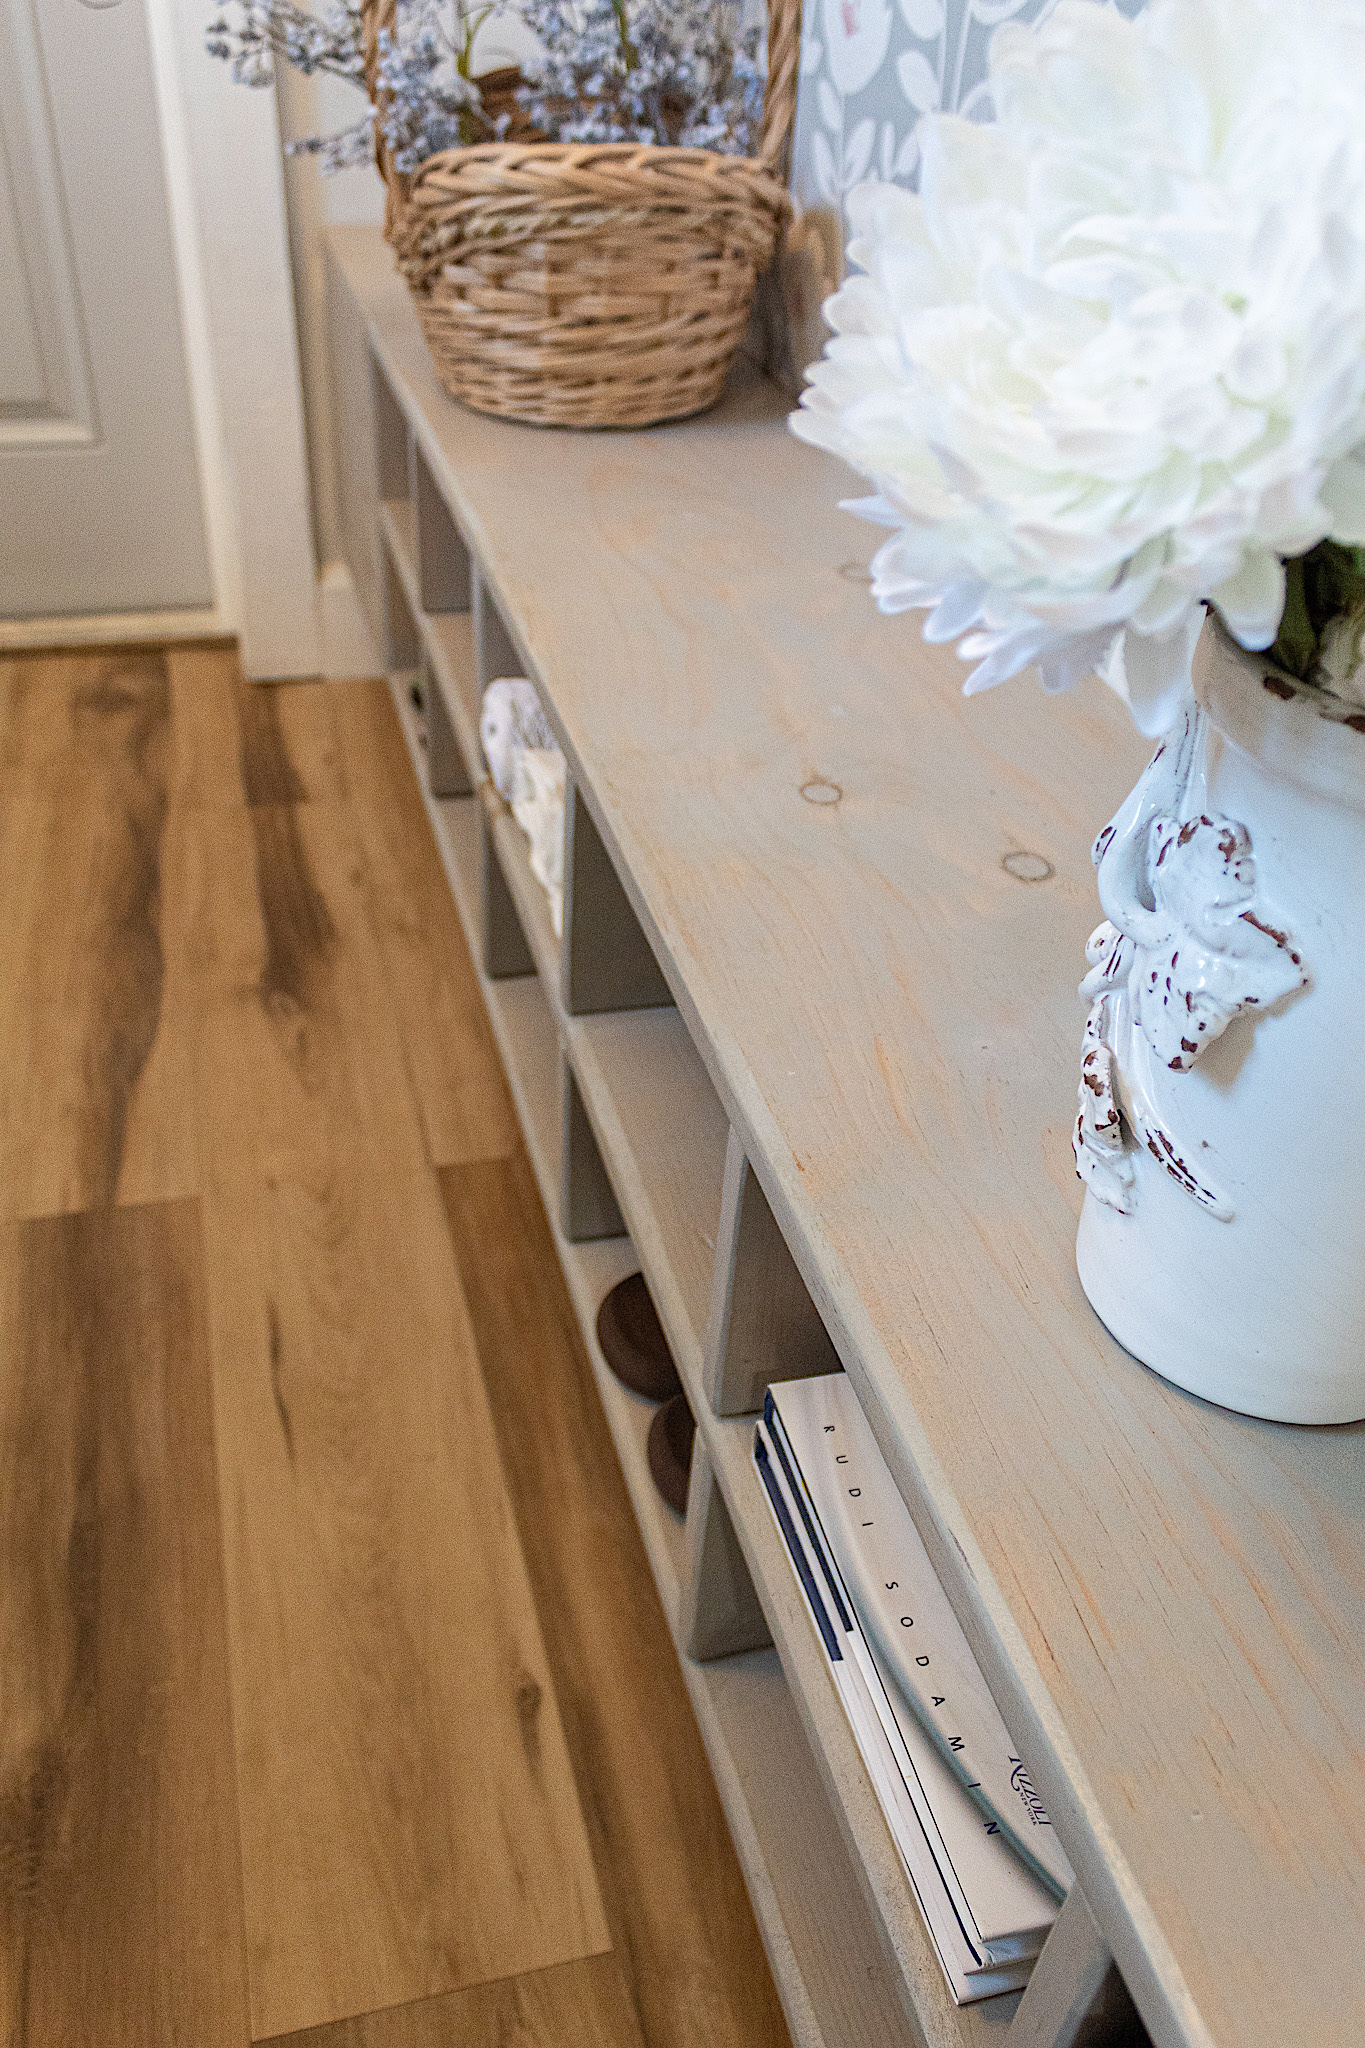
So my husband and I built a shoe rack that doubles as a bench and it changed EVERYTHING! I love how it is functional and looks stylish too and does not take up much space. In this tutorial we will walk you through how we built this life saver!
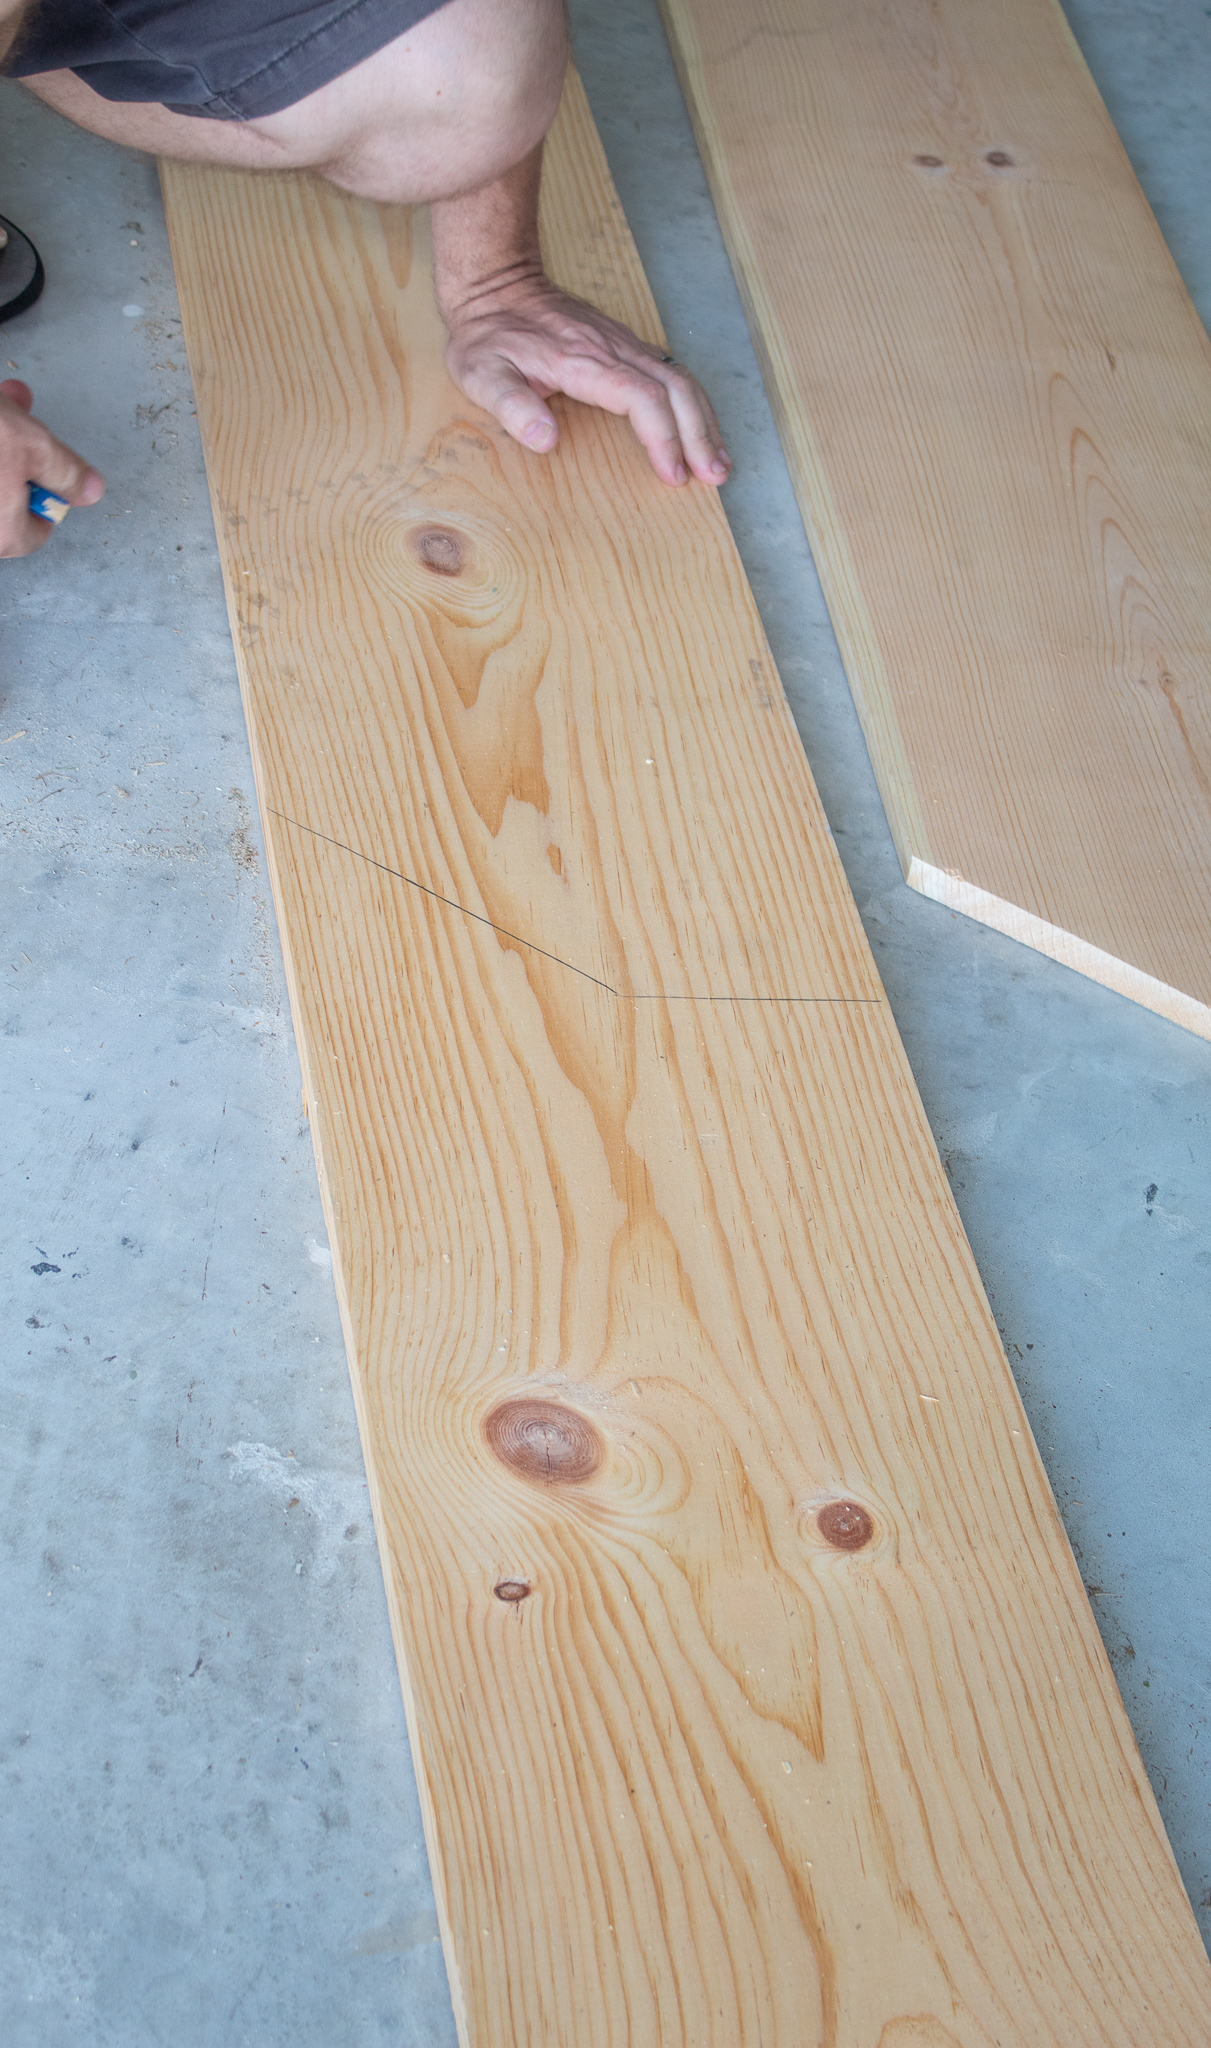
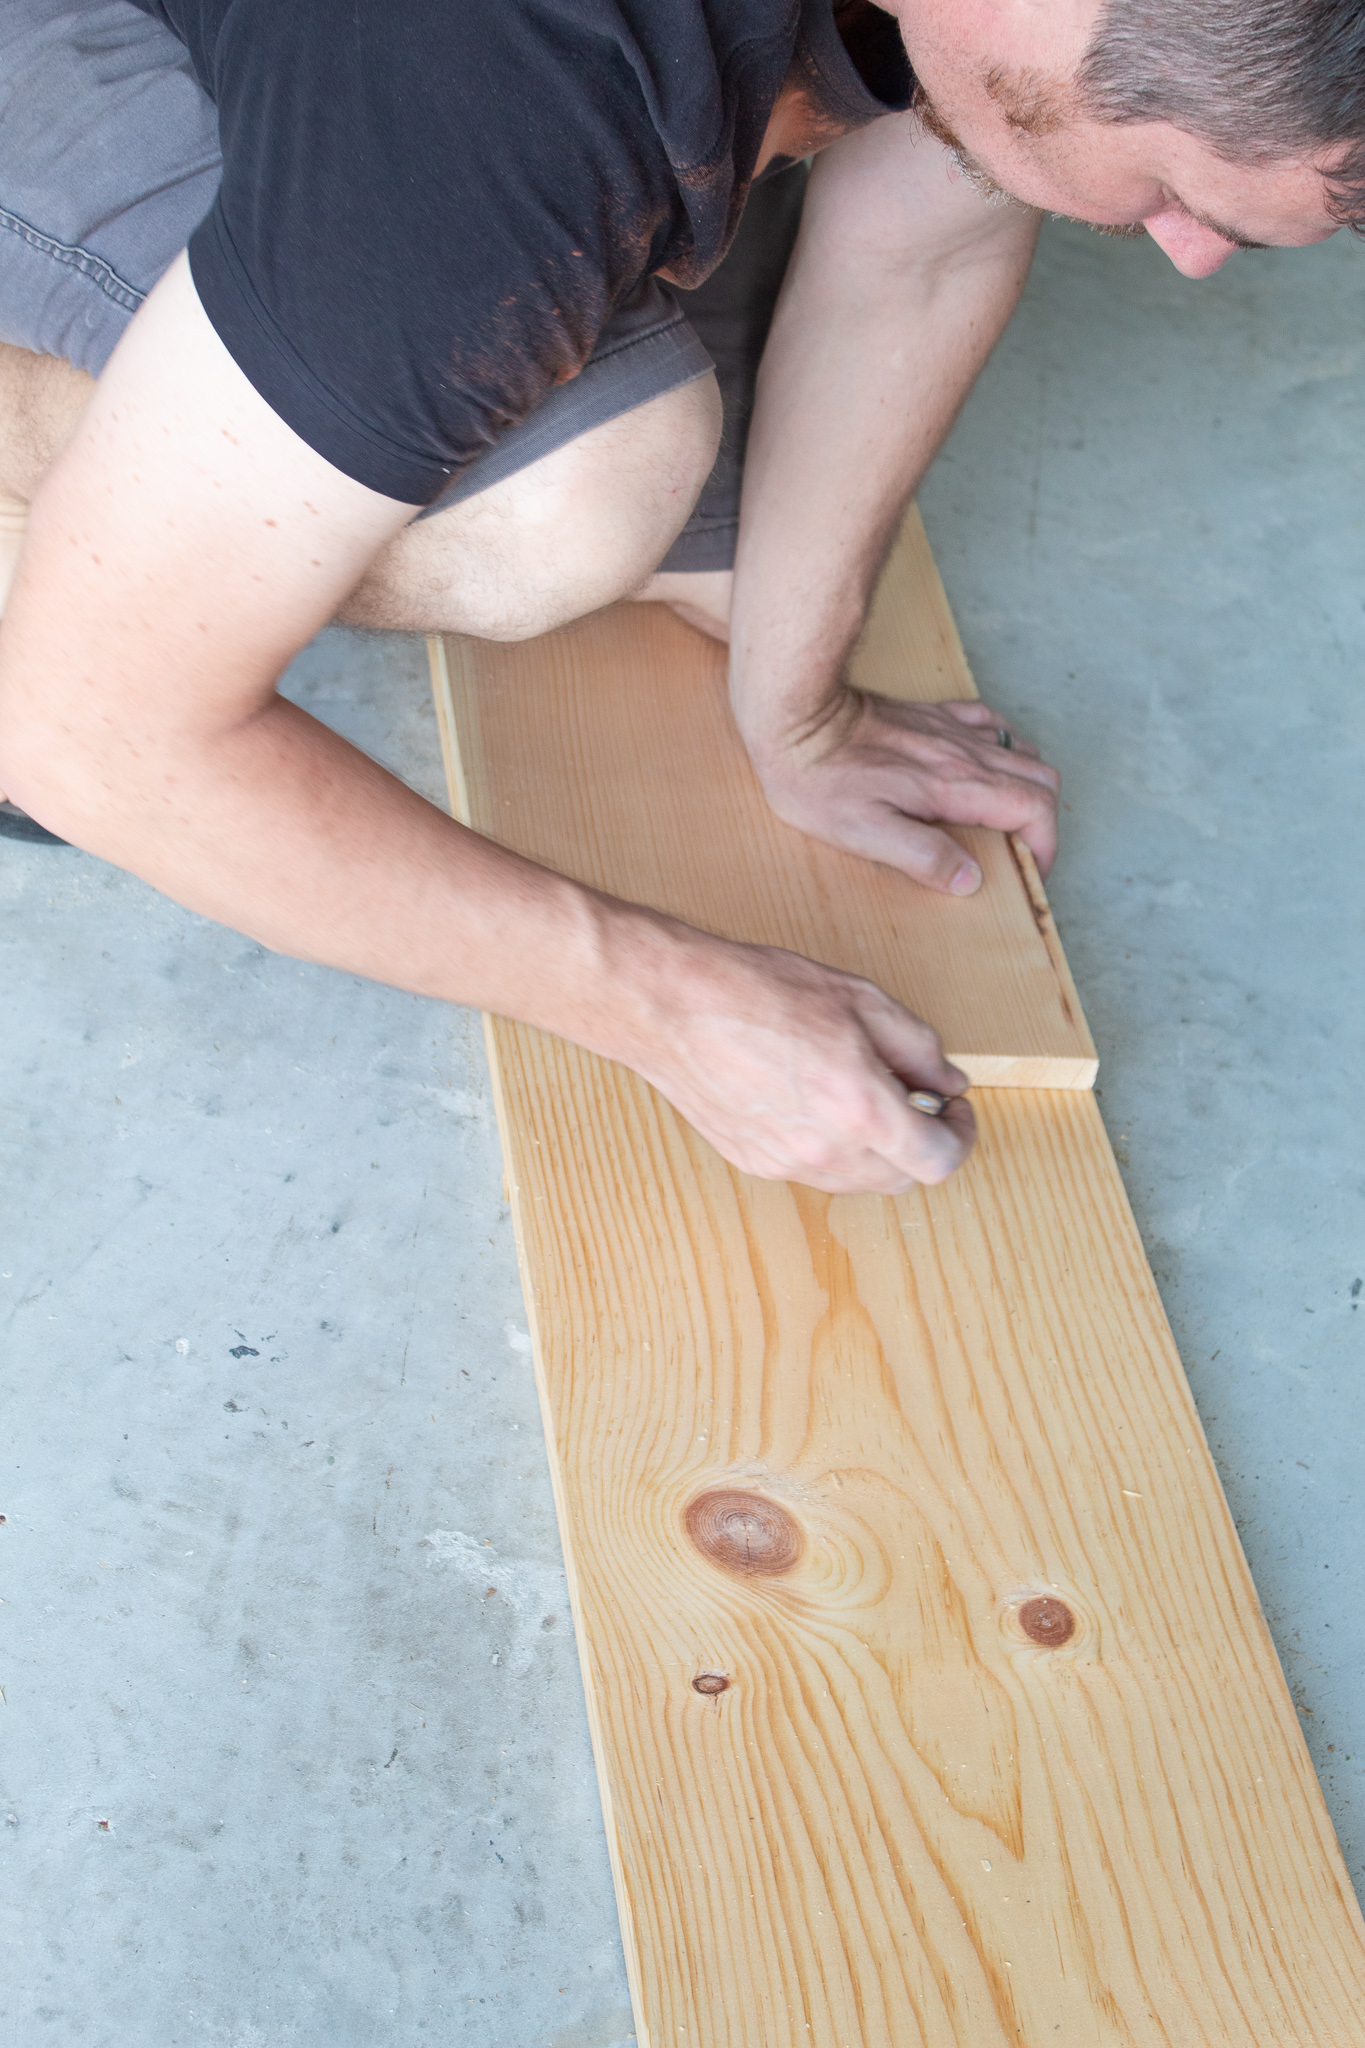
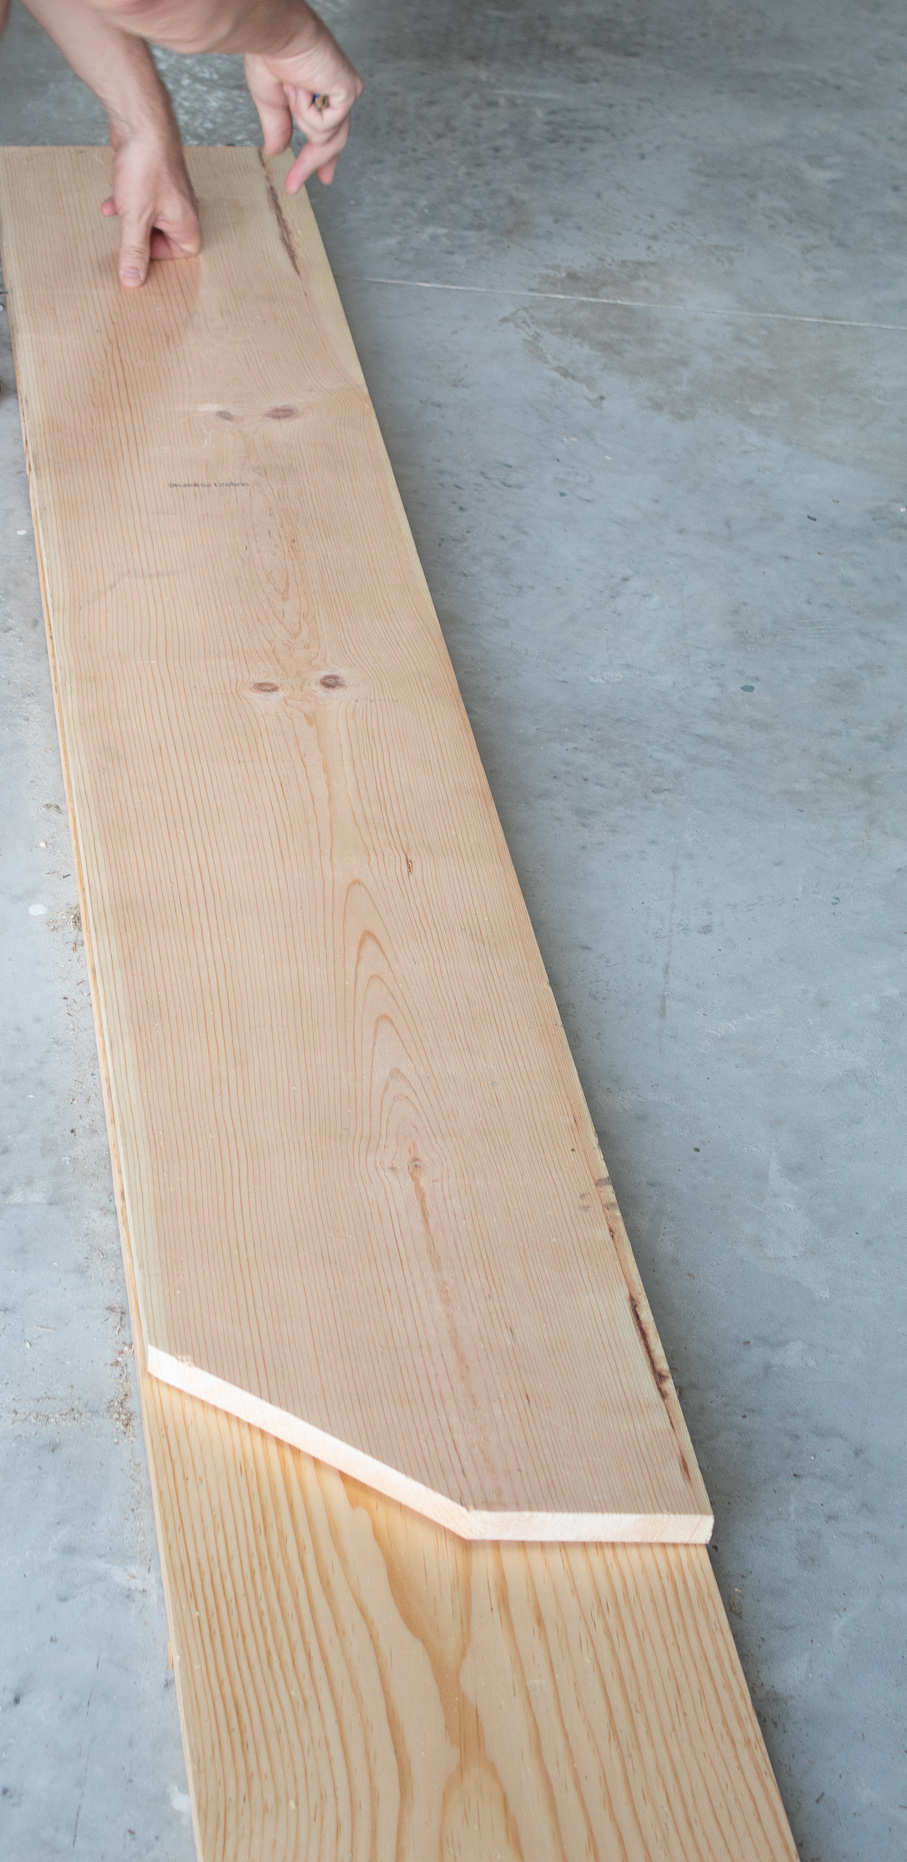
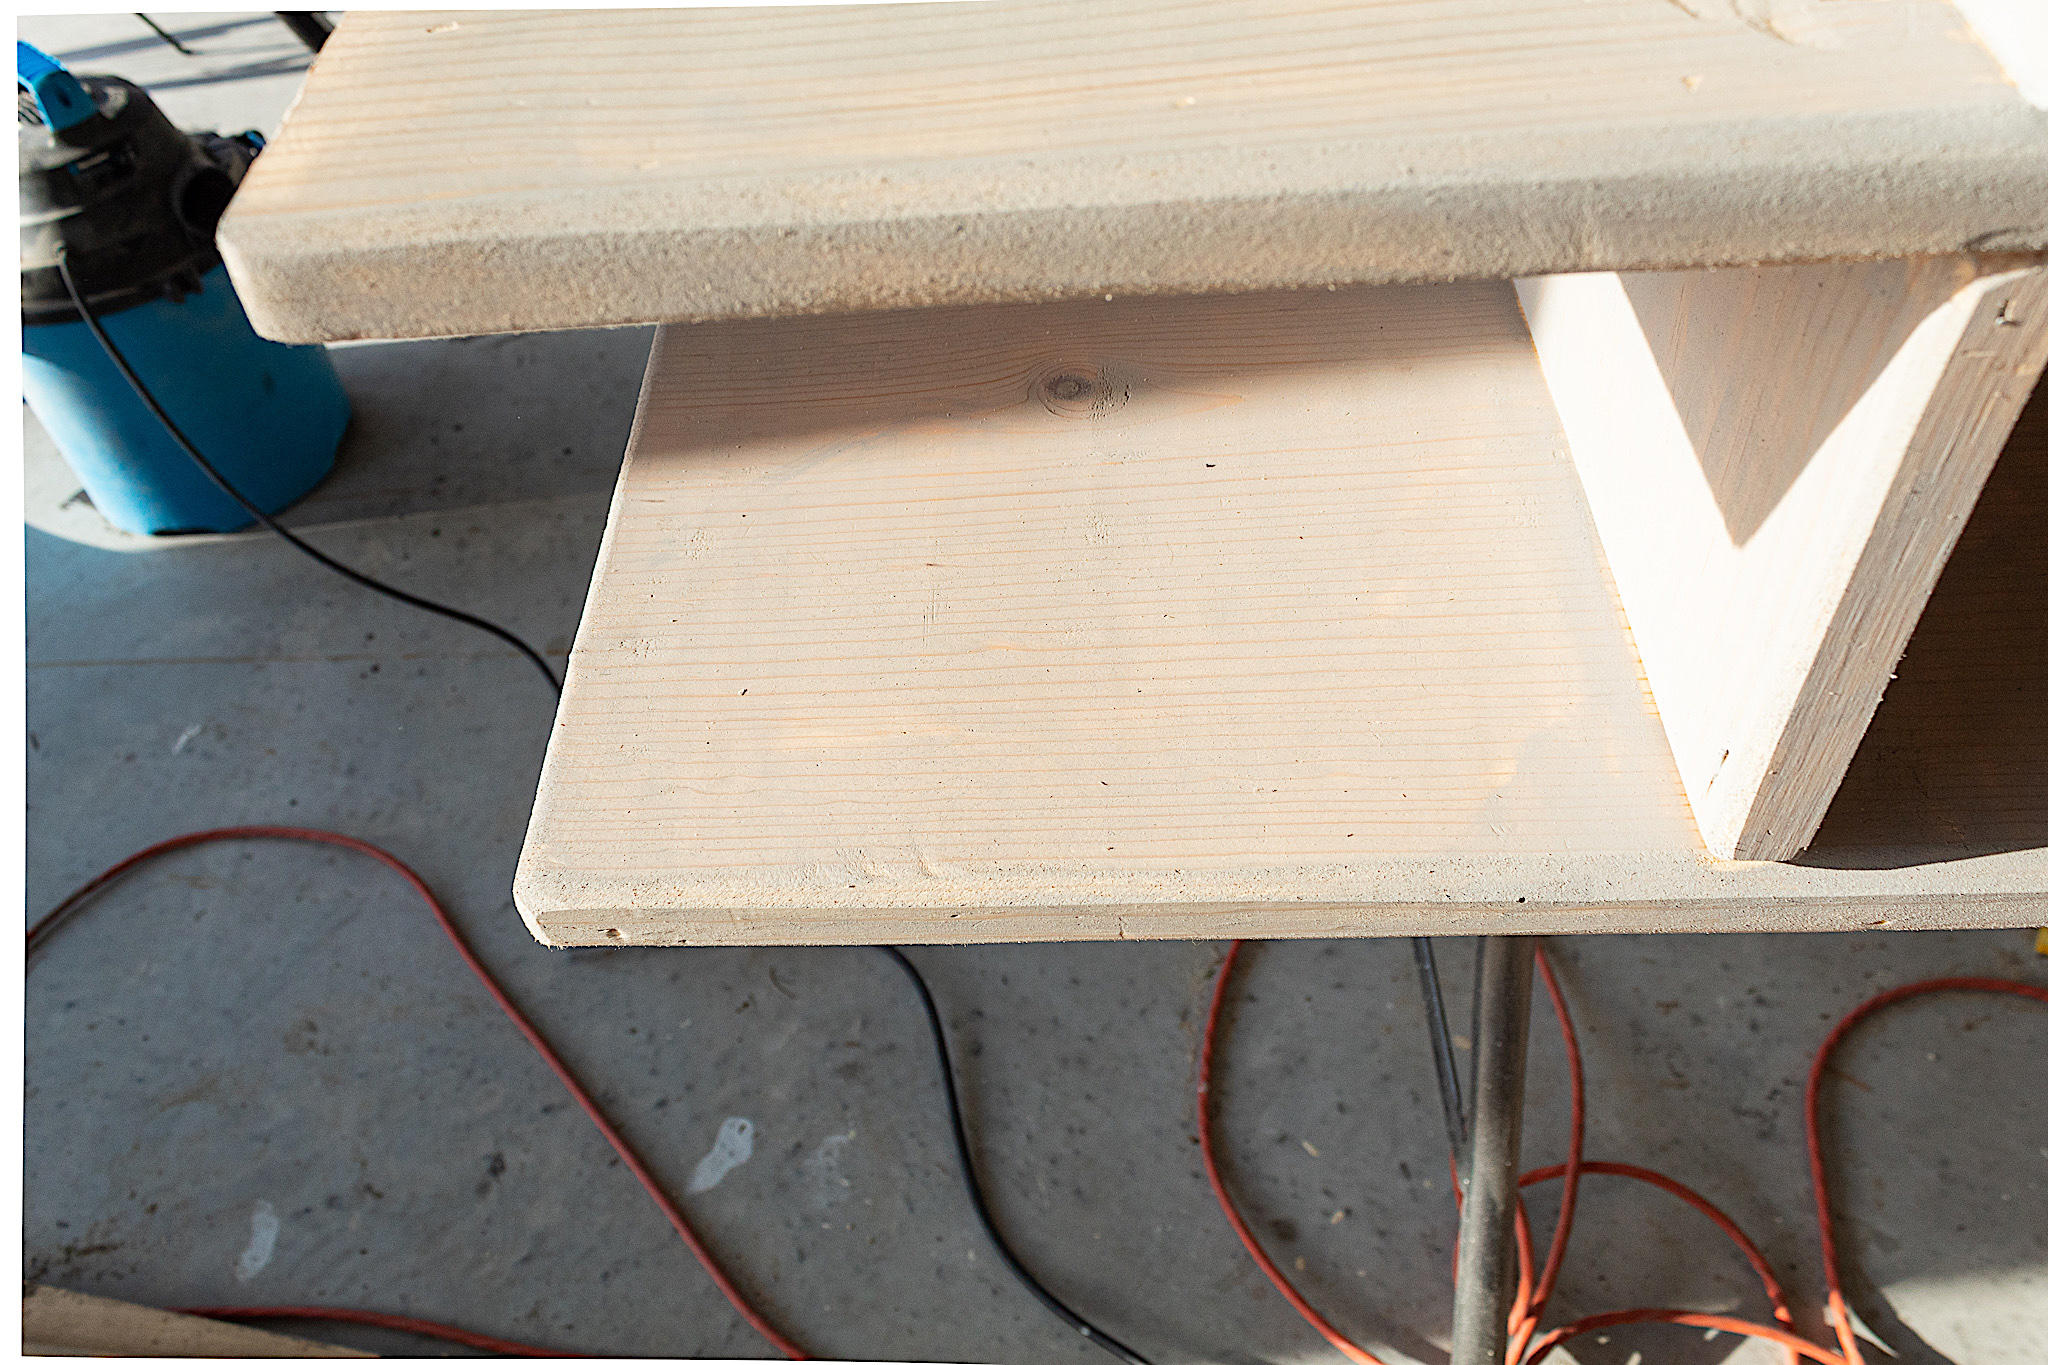
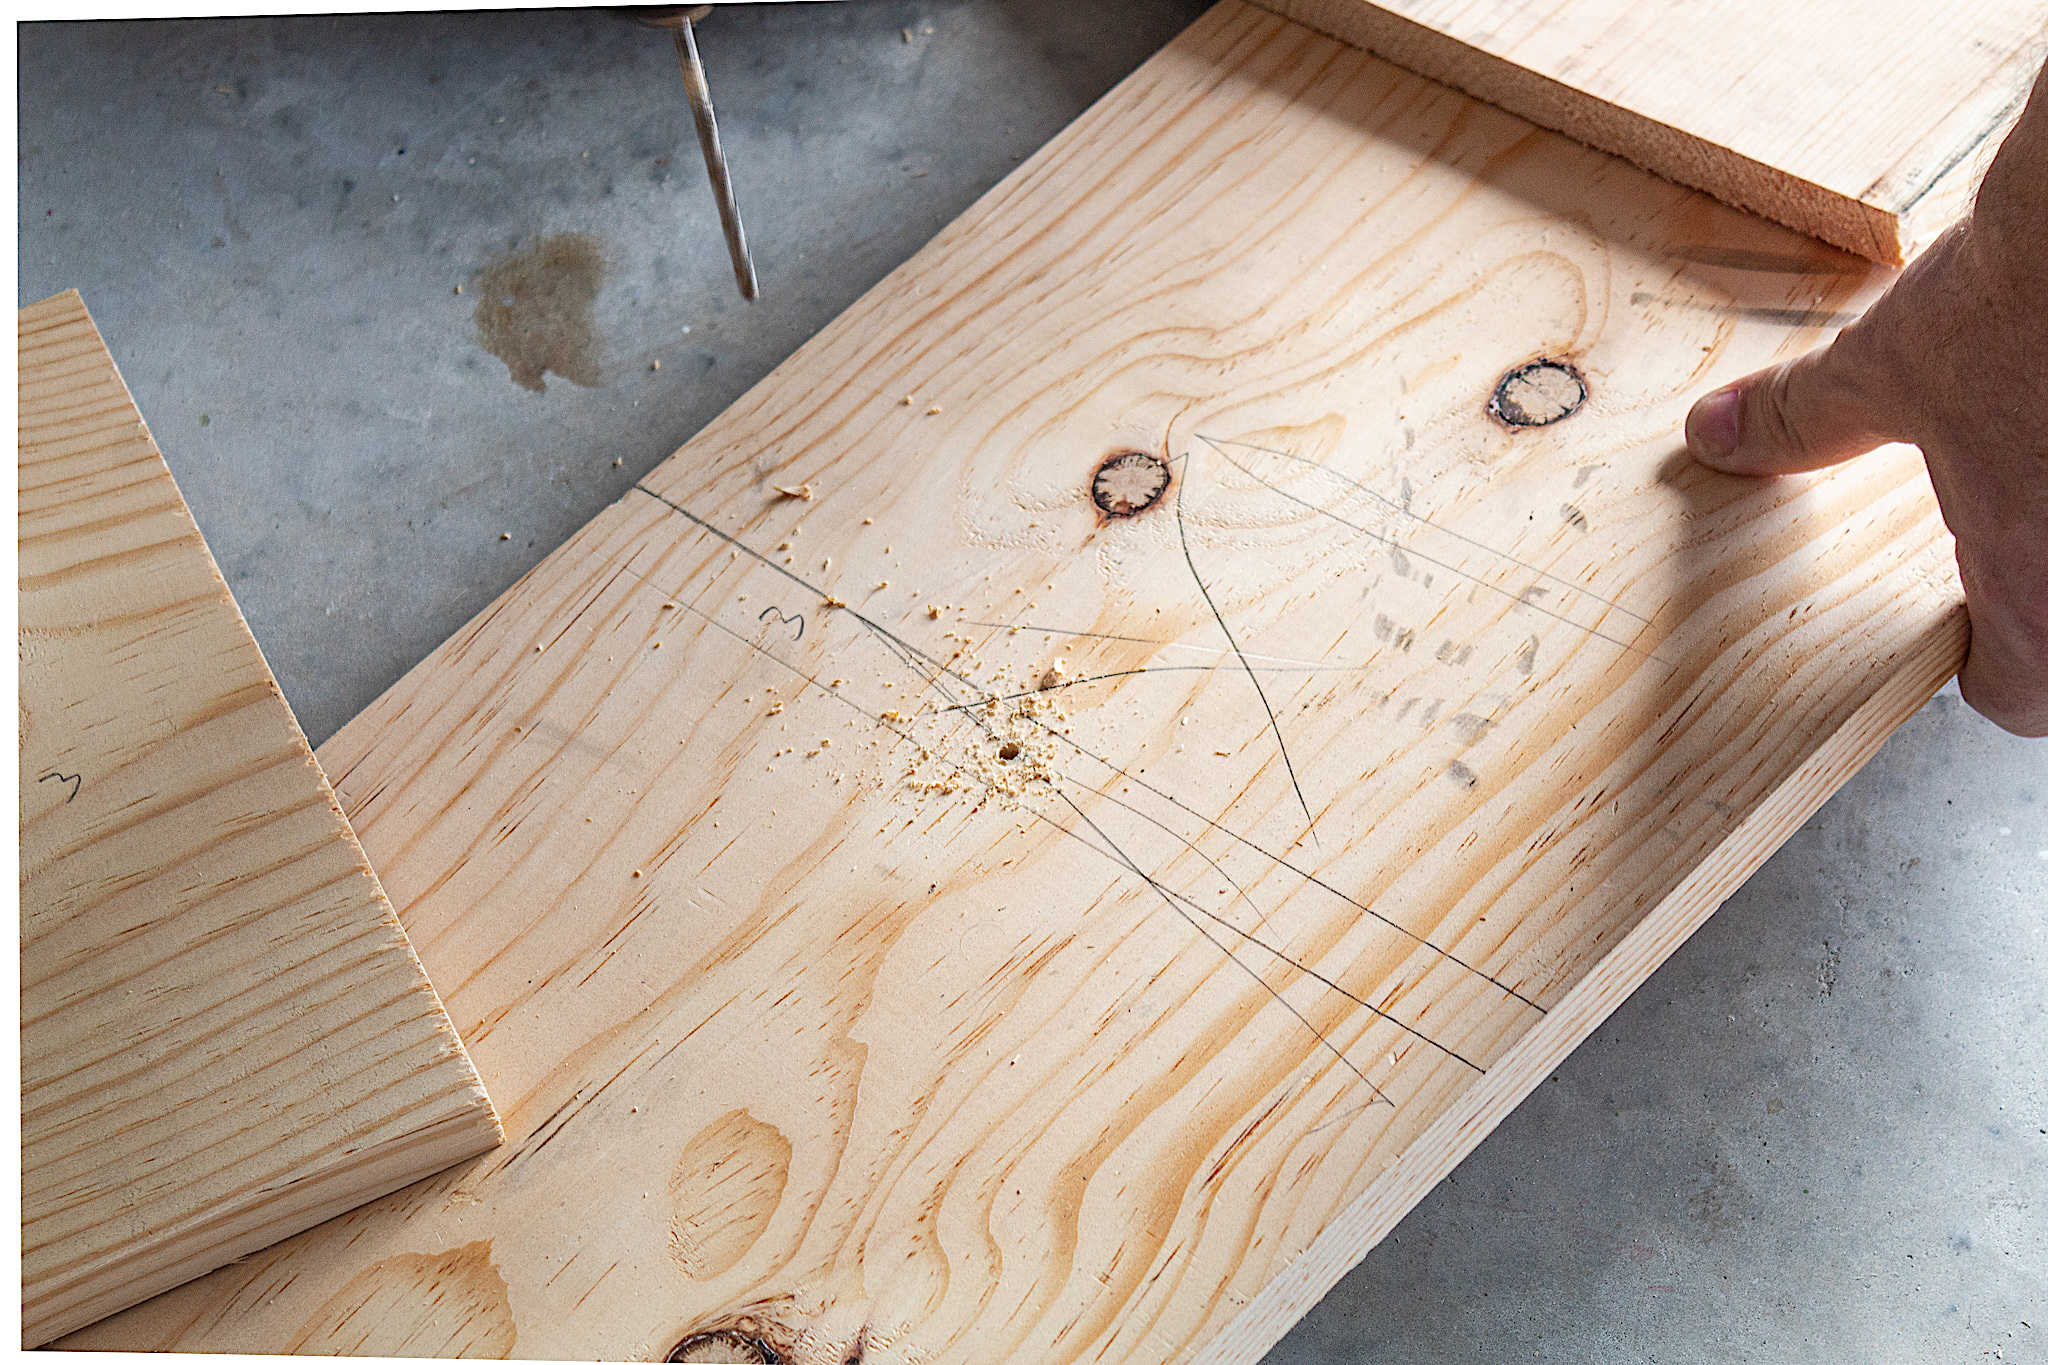
For the first step, cut your 10 feet boards down to the size of the length of your shoe rack. In our case we made it 7 feet long. My husband Ronny cut the right ends at an angle. This made a nice angled opening for the shoe rack. But you could also opt not to have the angled look and mount the right end flush to the wall.
Use a ruler and pencil to draw out your desired angle.
Disclosure: Some of the links provided are affiliate links. By purchasing through these links you are supporting this family blog and the work we do and there is no extra cost to you. If you would like to read our full disclosure, click HERE.
Cut the same angle for all three boards.
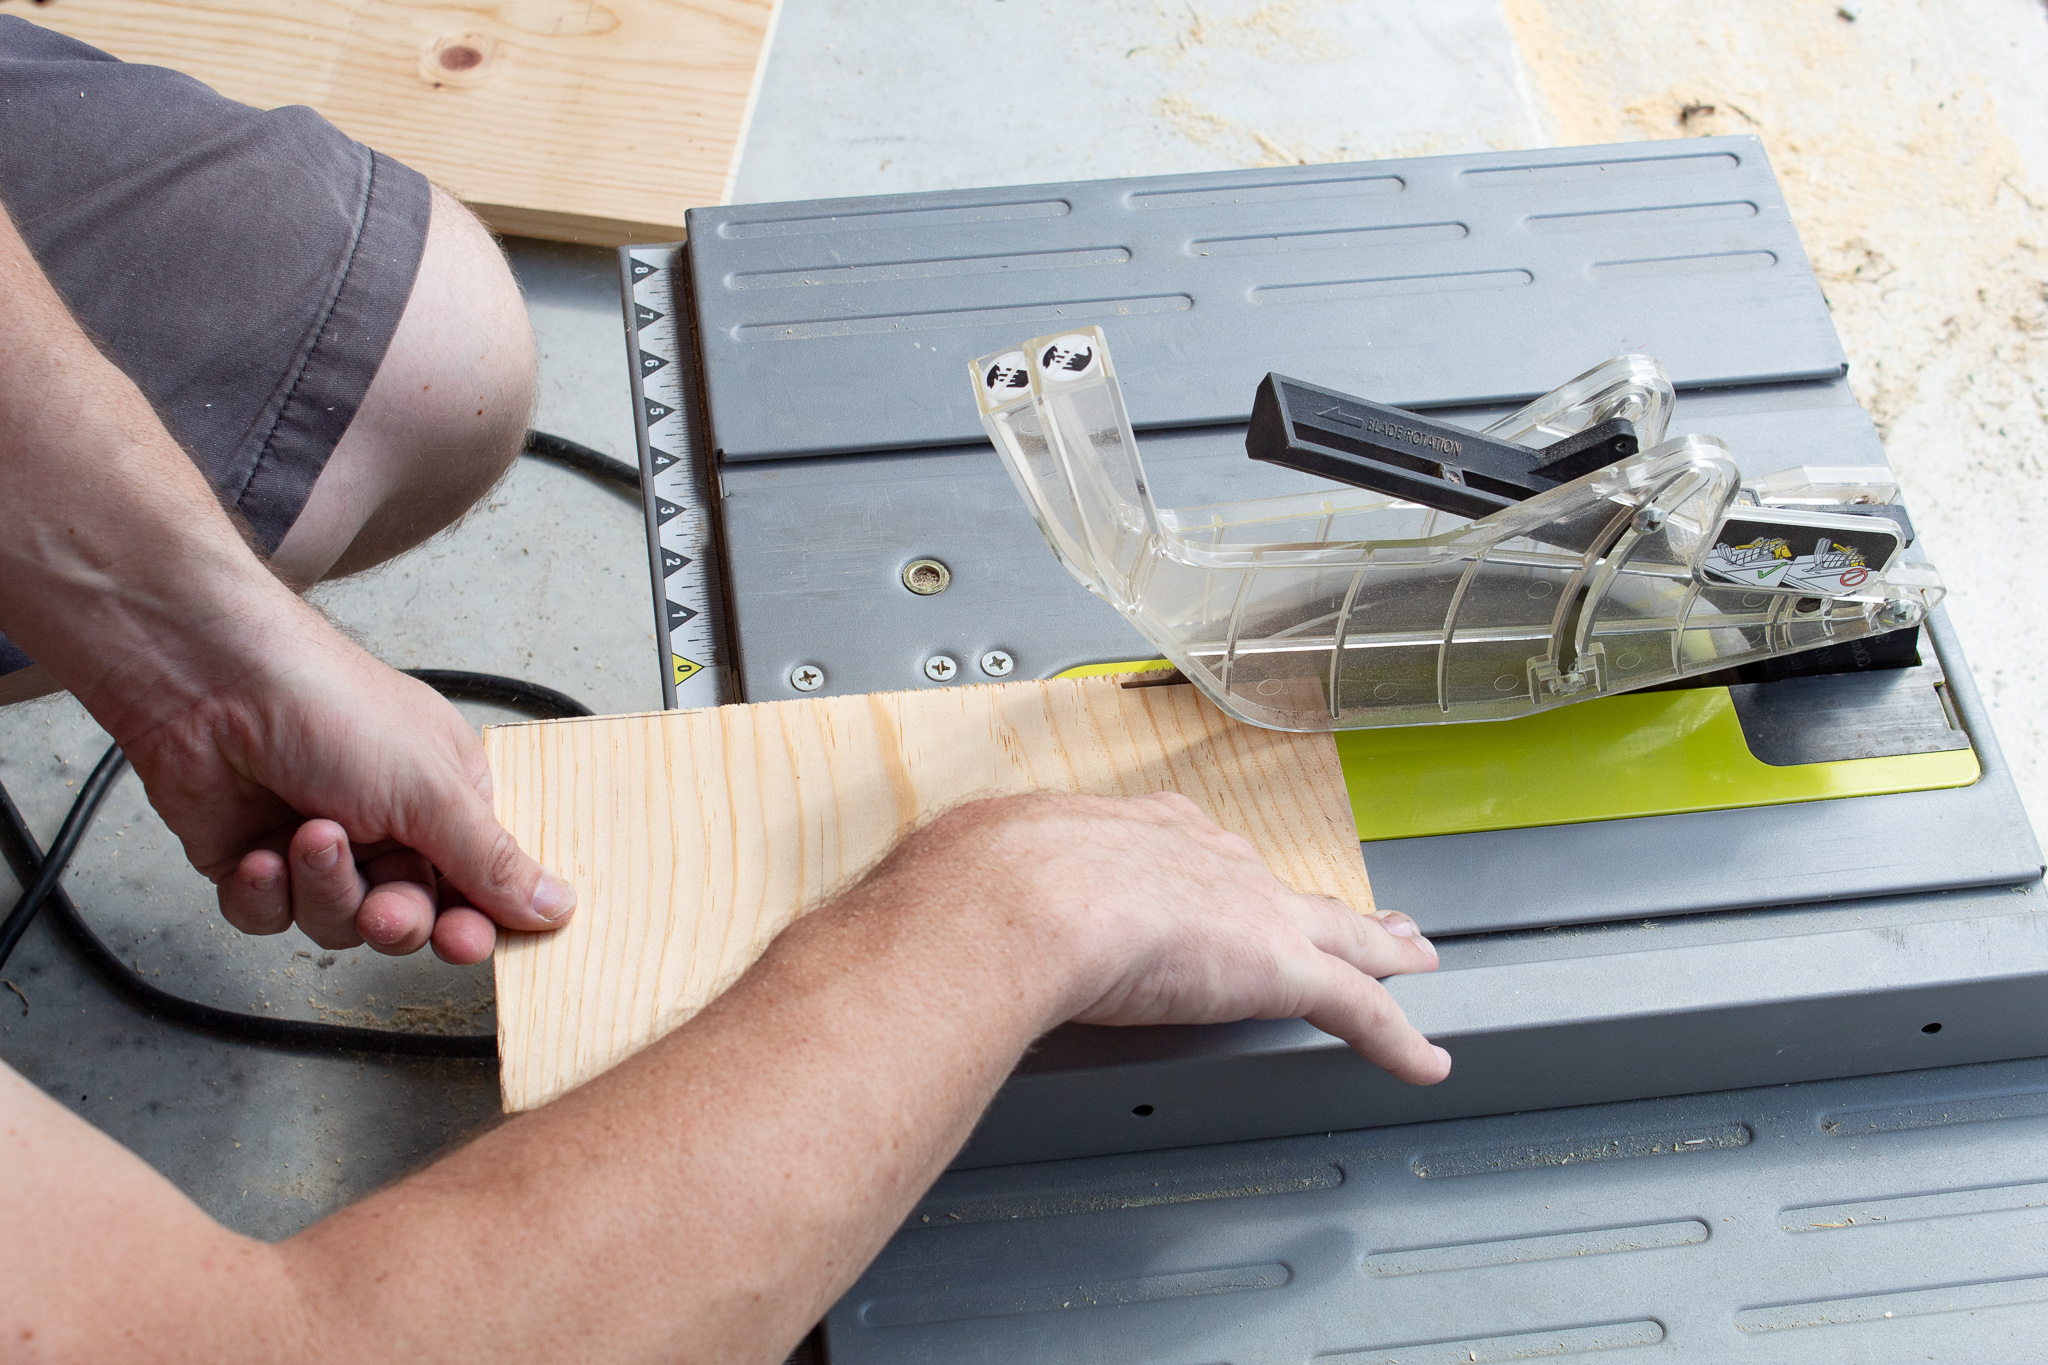
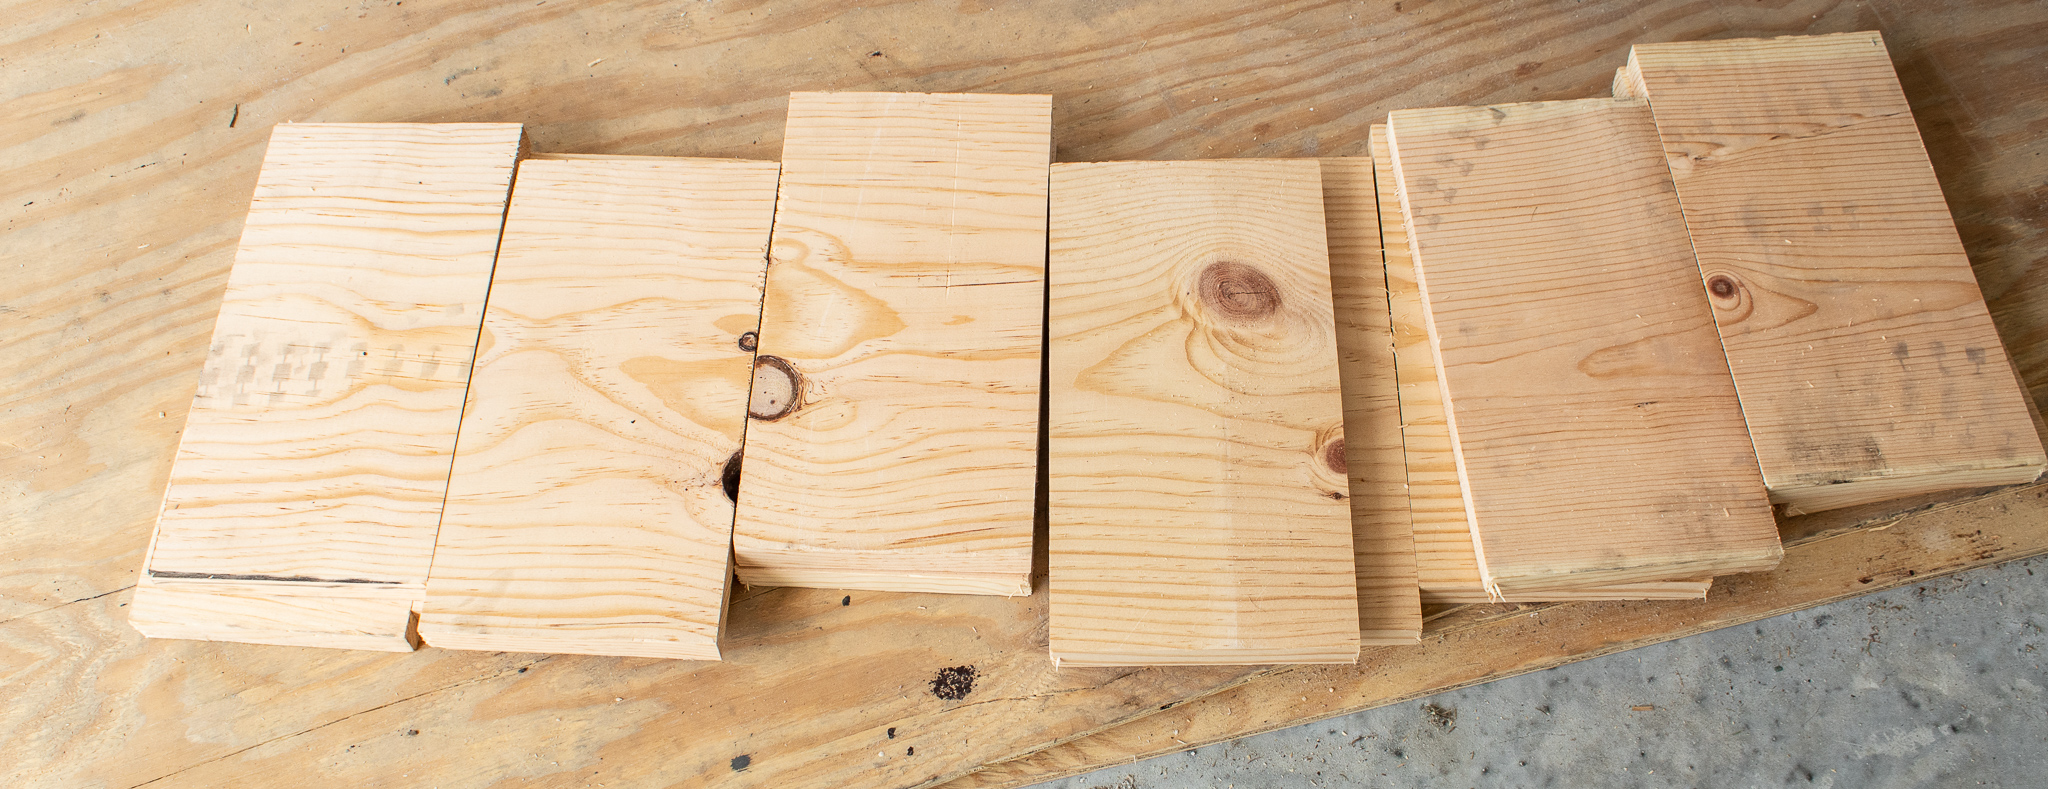
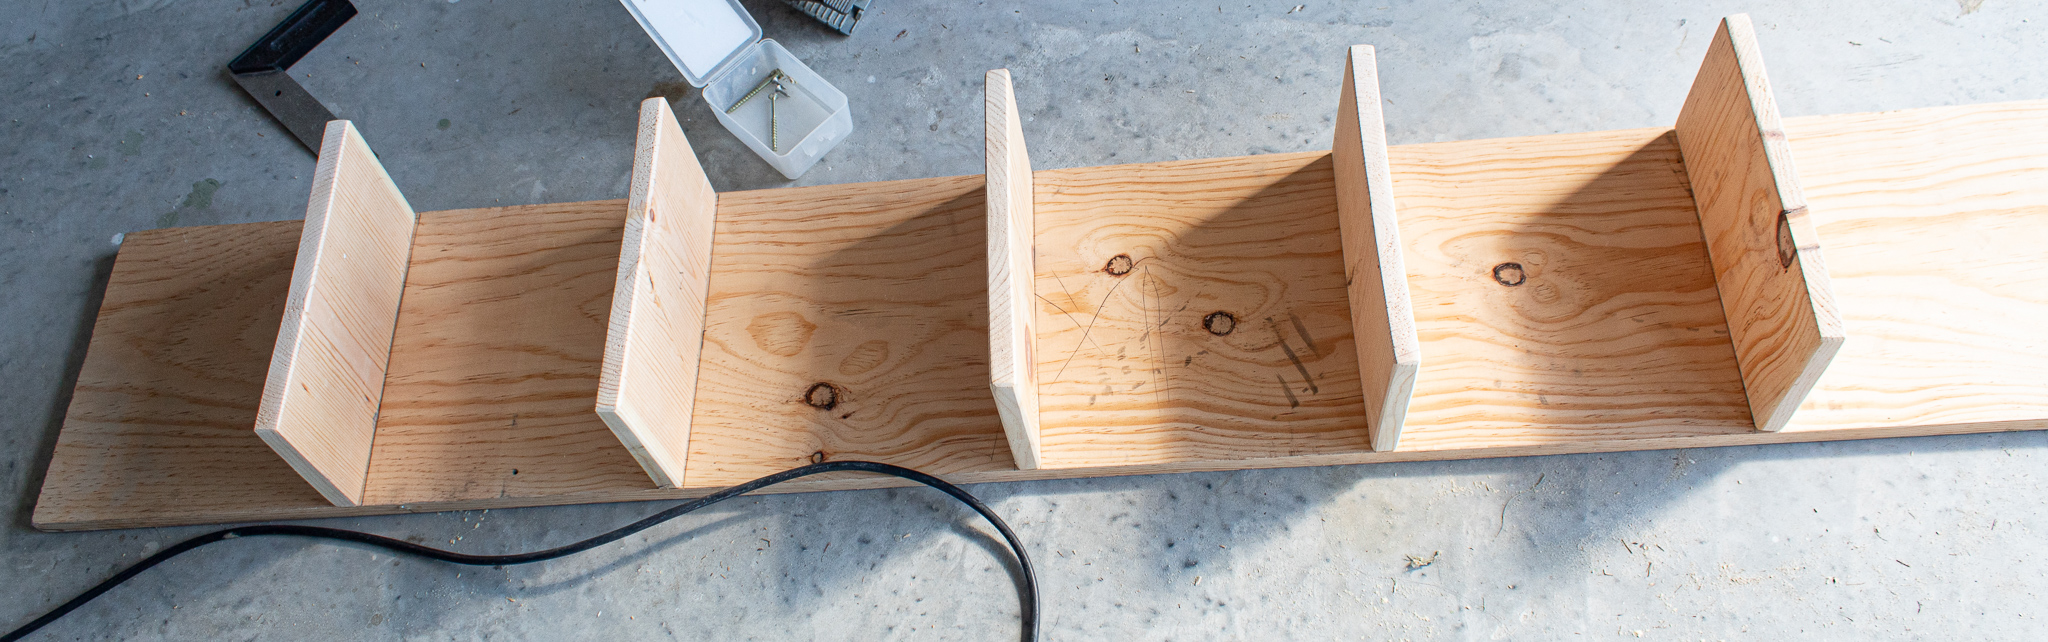
2. Cut your dividing boards
Next we cut the boards that will go in between (perpendicular to) the long boards. These will create the cubby spaces for shoes and things. Using the table saw Ronny cut 15 of these pieces each measuring 5.5″ x 12″.
The dividers
3. Sand your boards
Before you connect all your boards it is a good time to sand and stain them (see step 5 for my staining technique). I used my orbital sander with 400 grit sandpaper for a smooth finish.
To give edges a nice beveled look I ran my sander at an angle over the edges and around corners. This step is optional but I felt it made things look a little more professional.
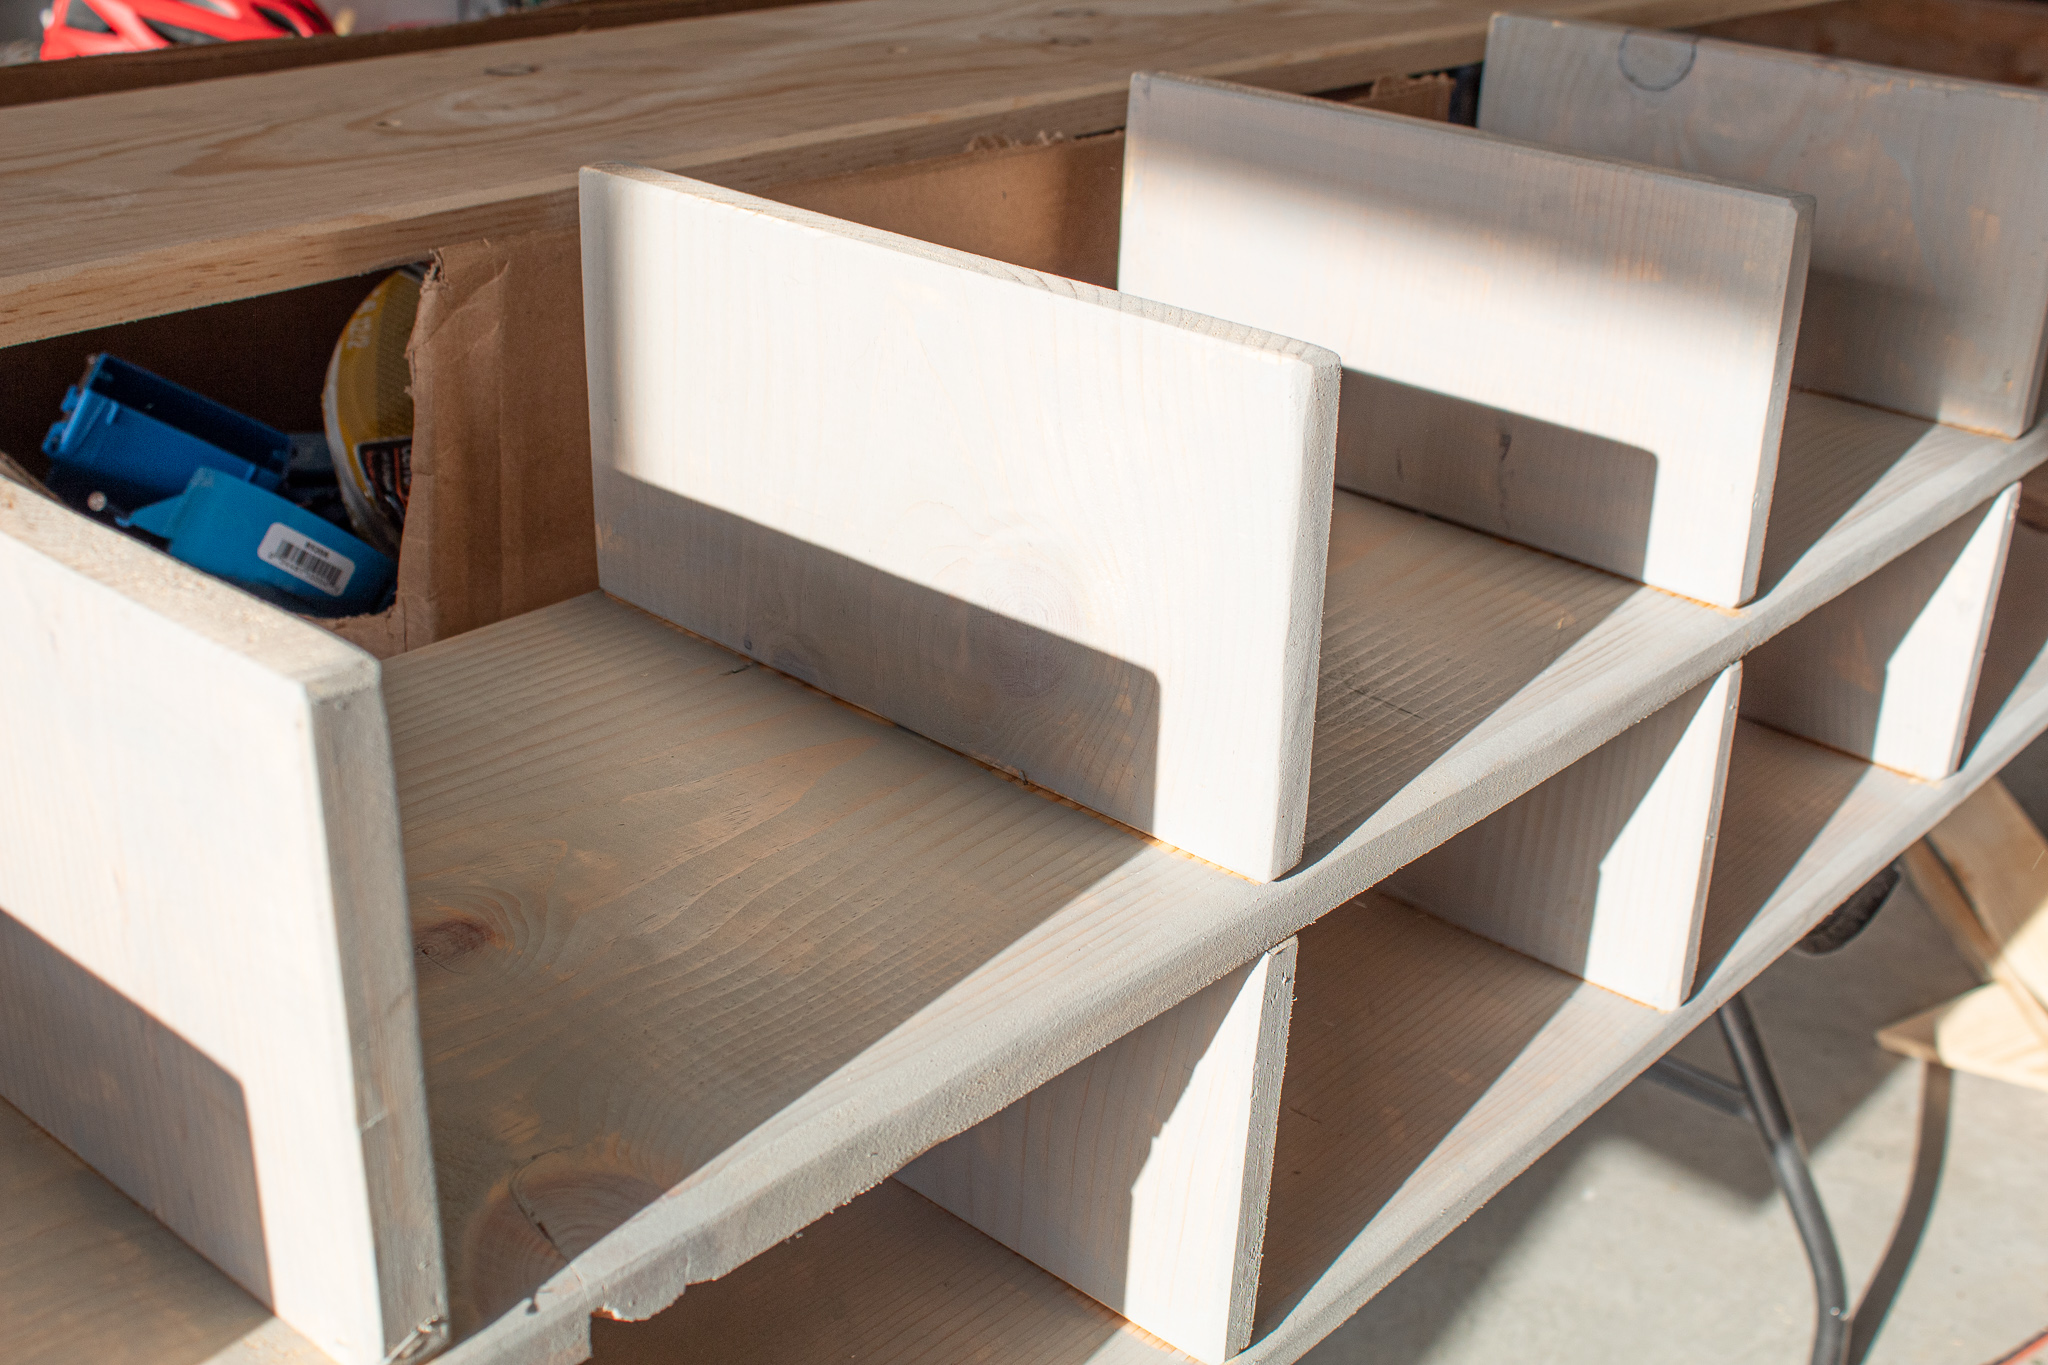
4. Assemble your shoe rack
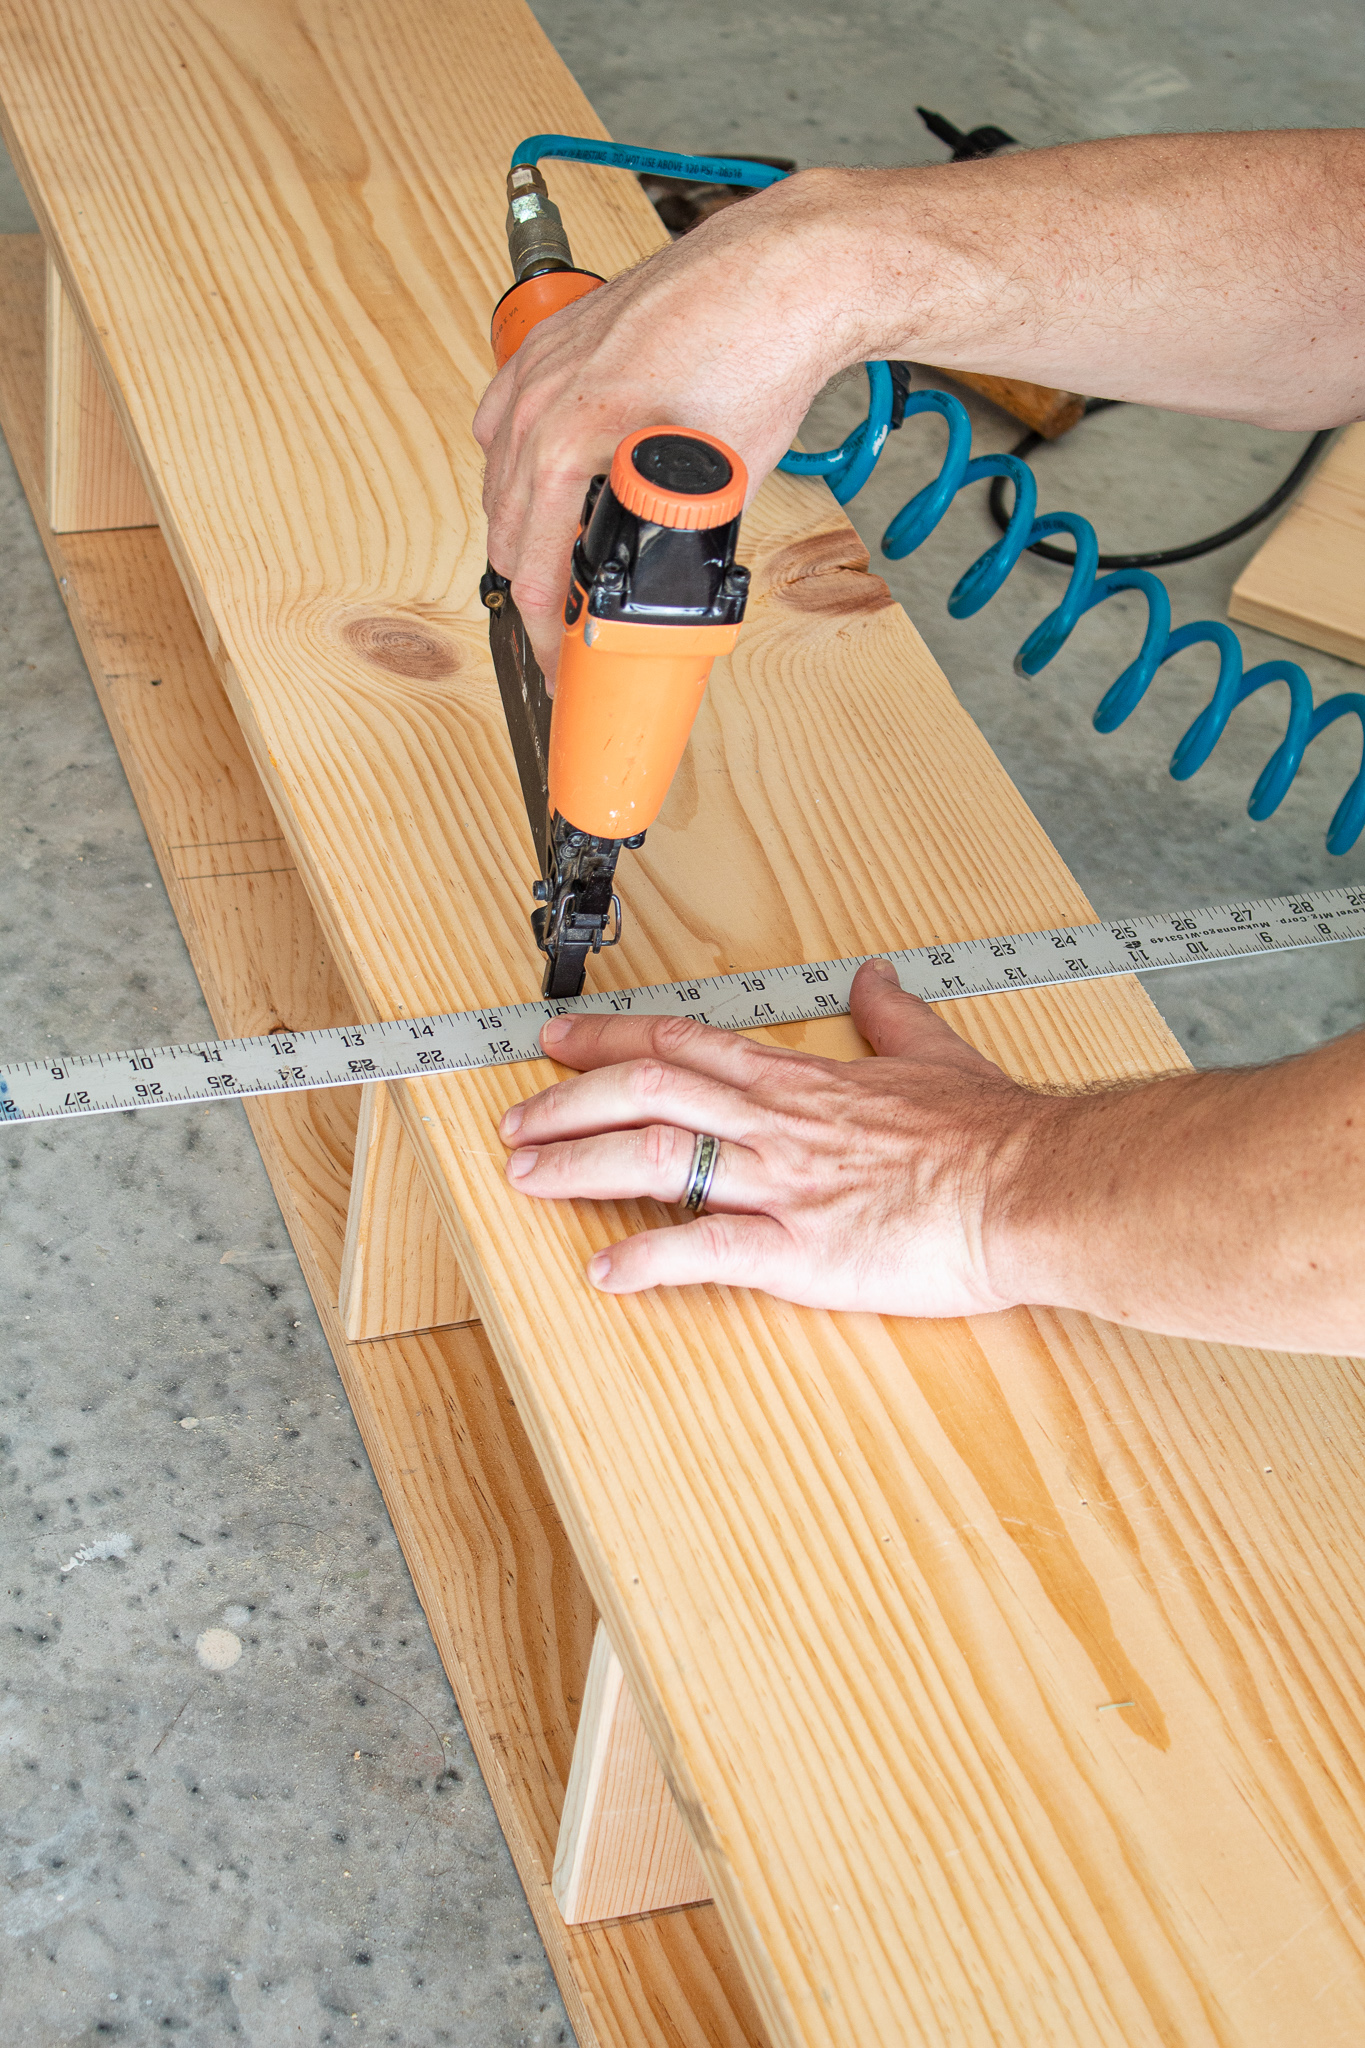
Ronny used the nail gun to attach the dividing pieces onto the bottom board (board closest to the floor), spacing them each 10″ apart. Don’t worry if they’re a little wobbly. We will secure them with the other boards later.
Next Ronny took the middle board and attached it to the mounted row of dividers.
Next came attaching a second row of the 5.5″ divider boards on top of the middle board.
Make sure to stain or paint before assembling
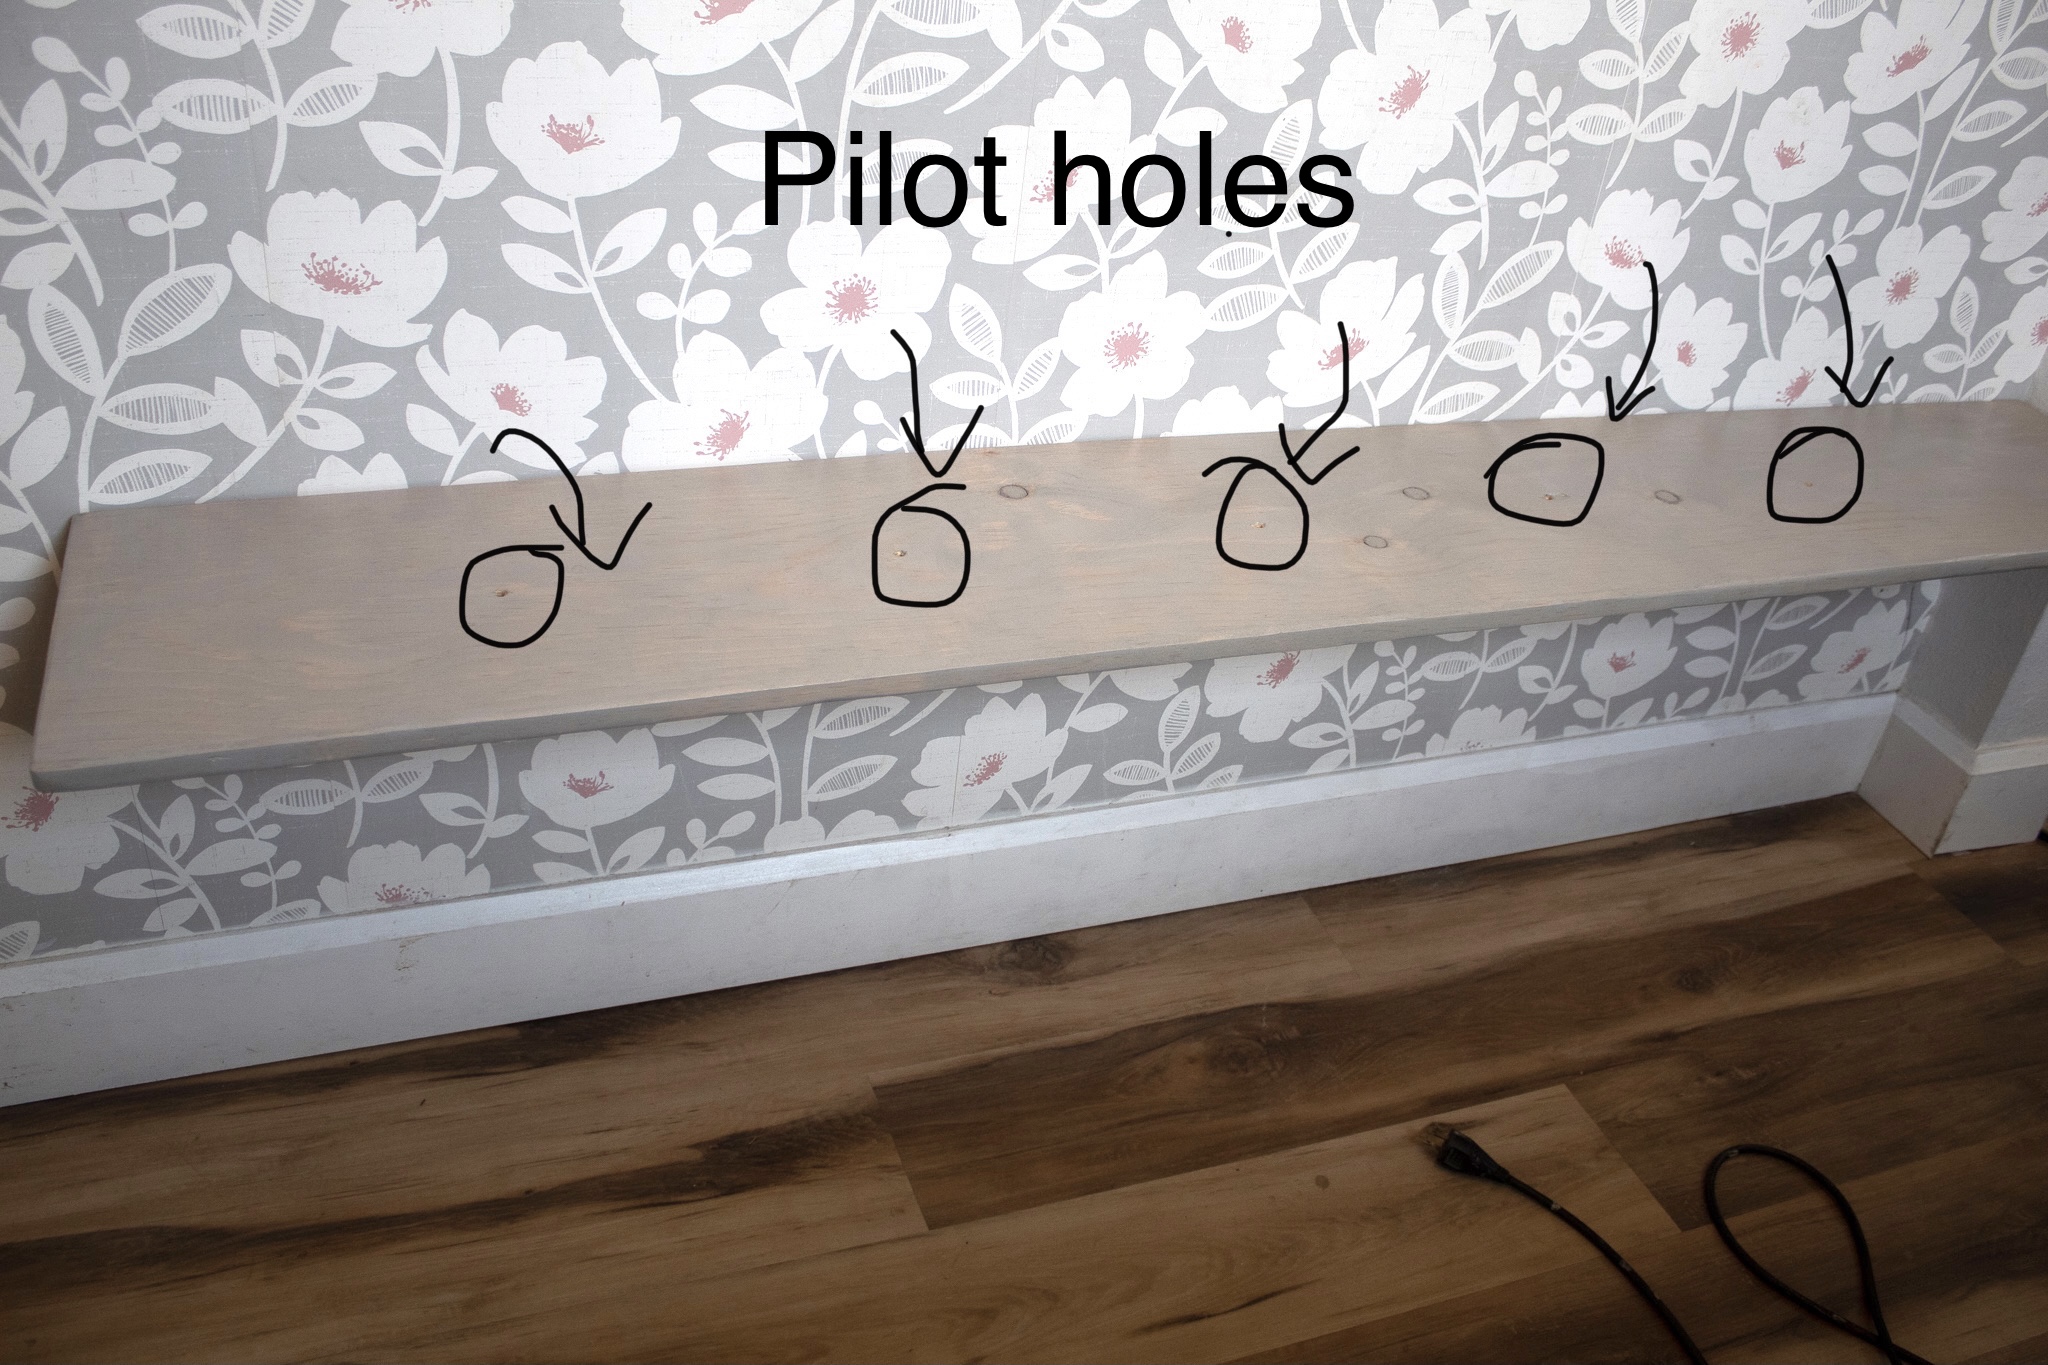
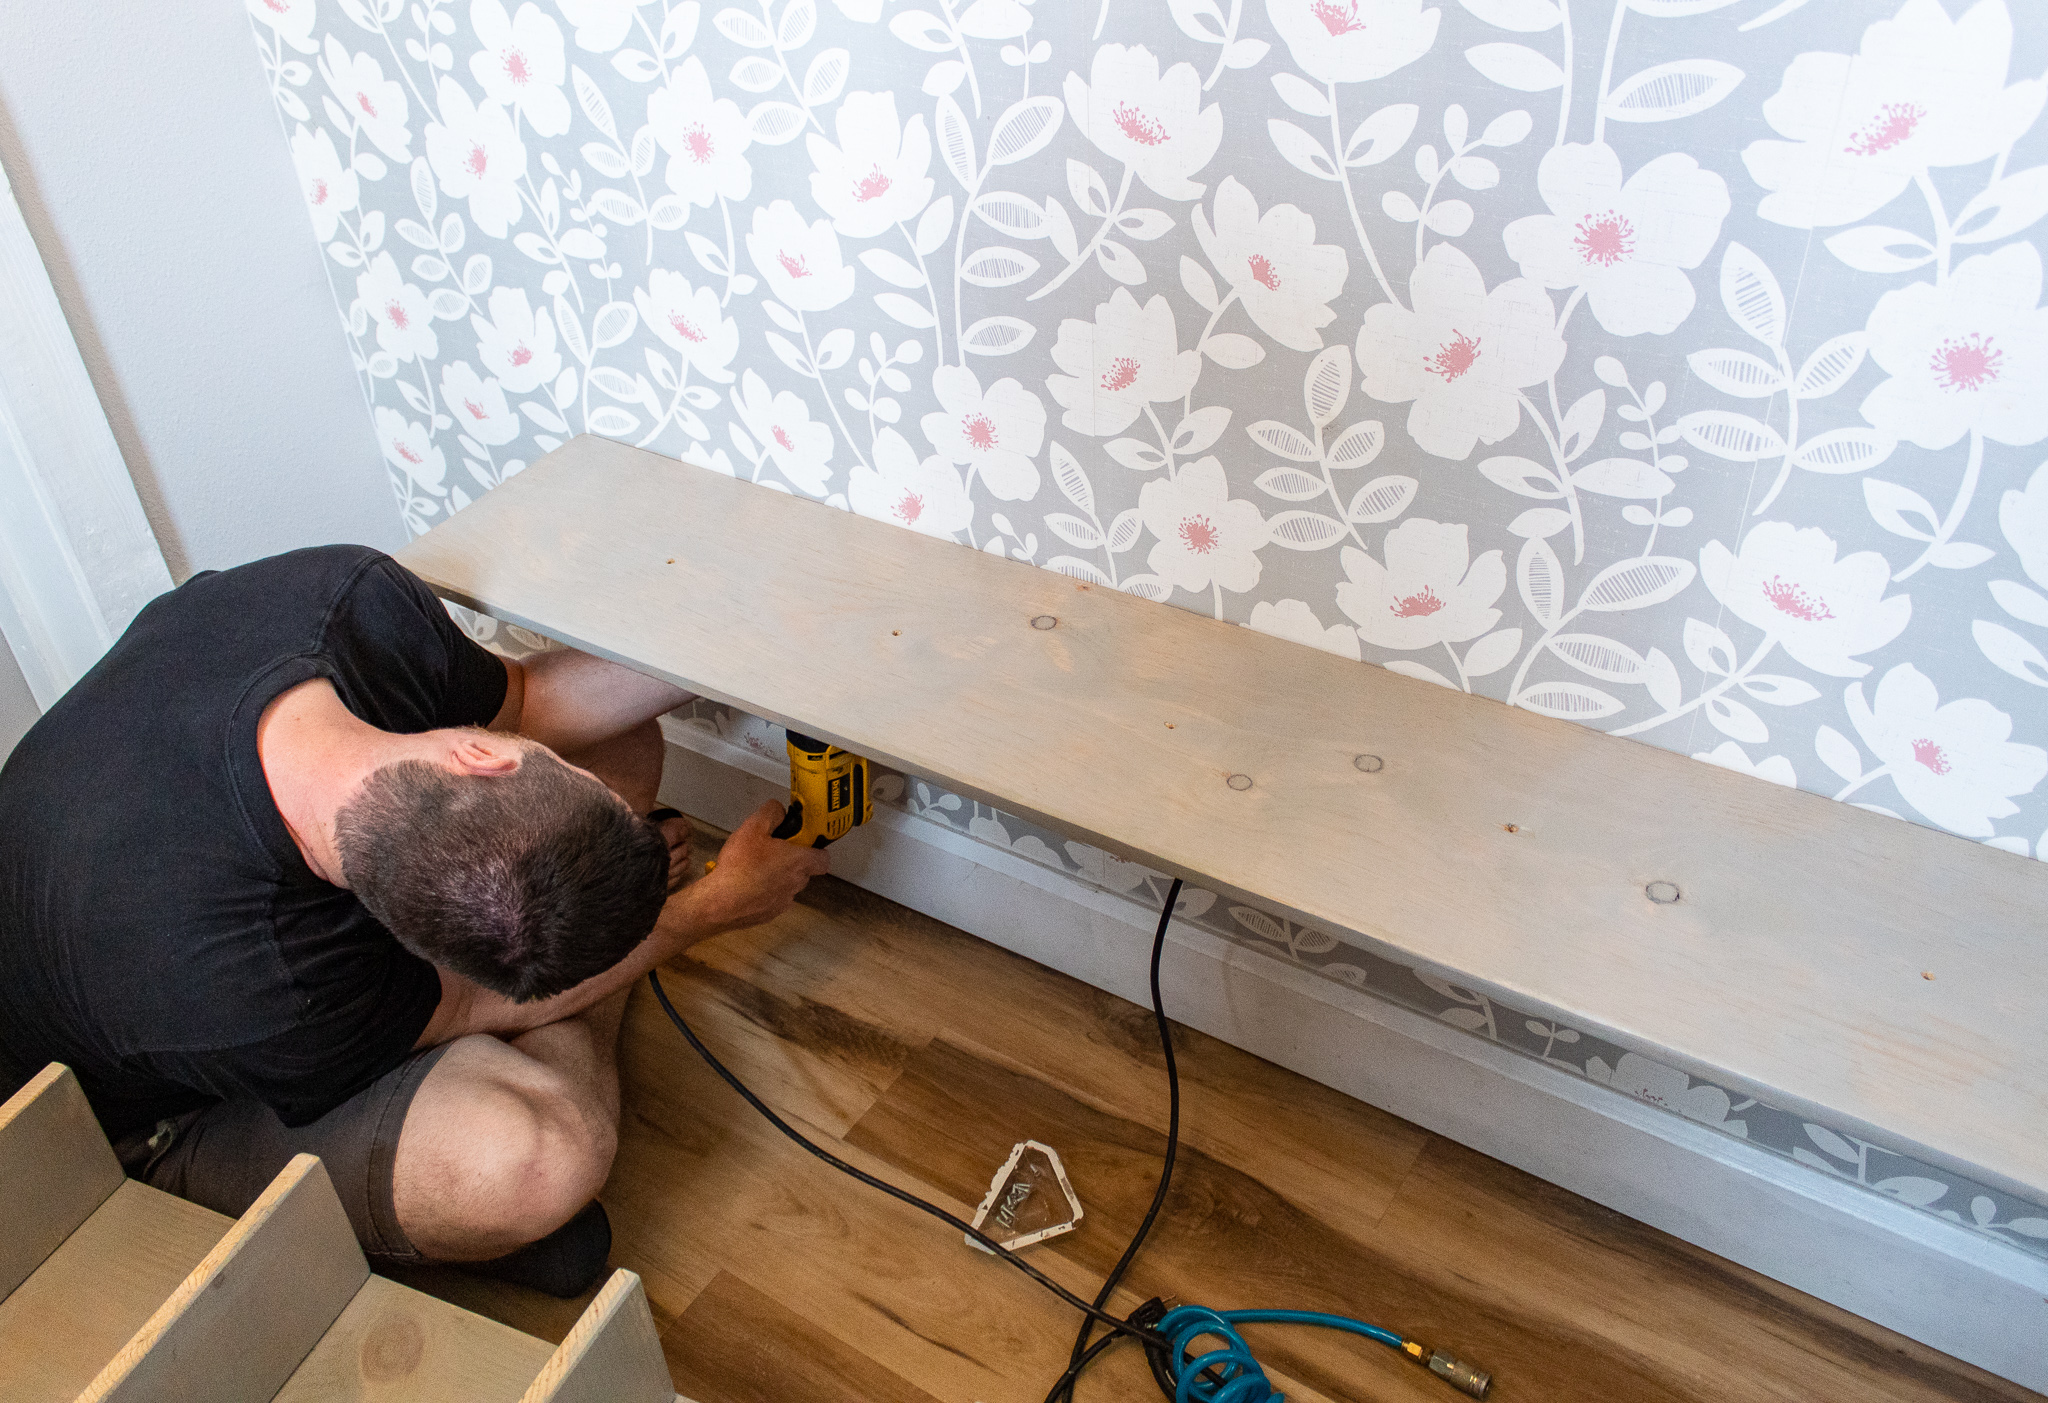
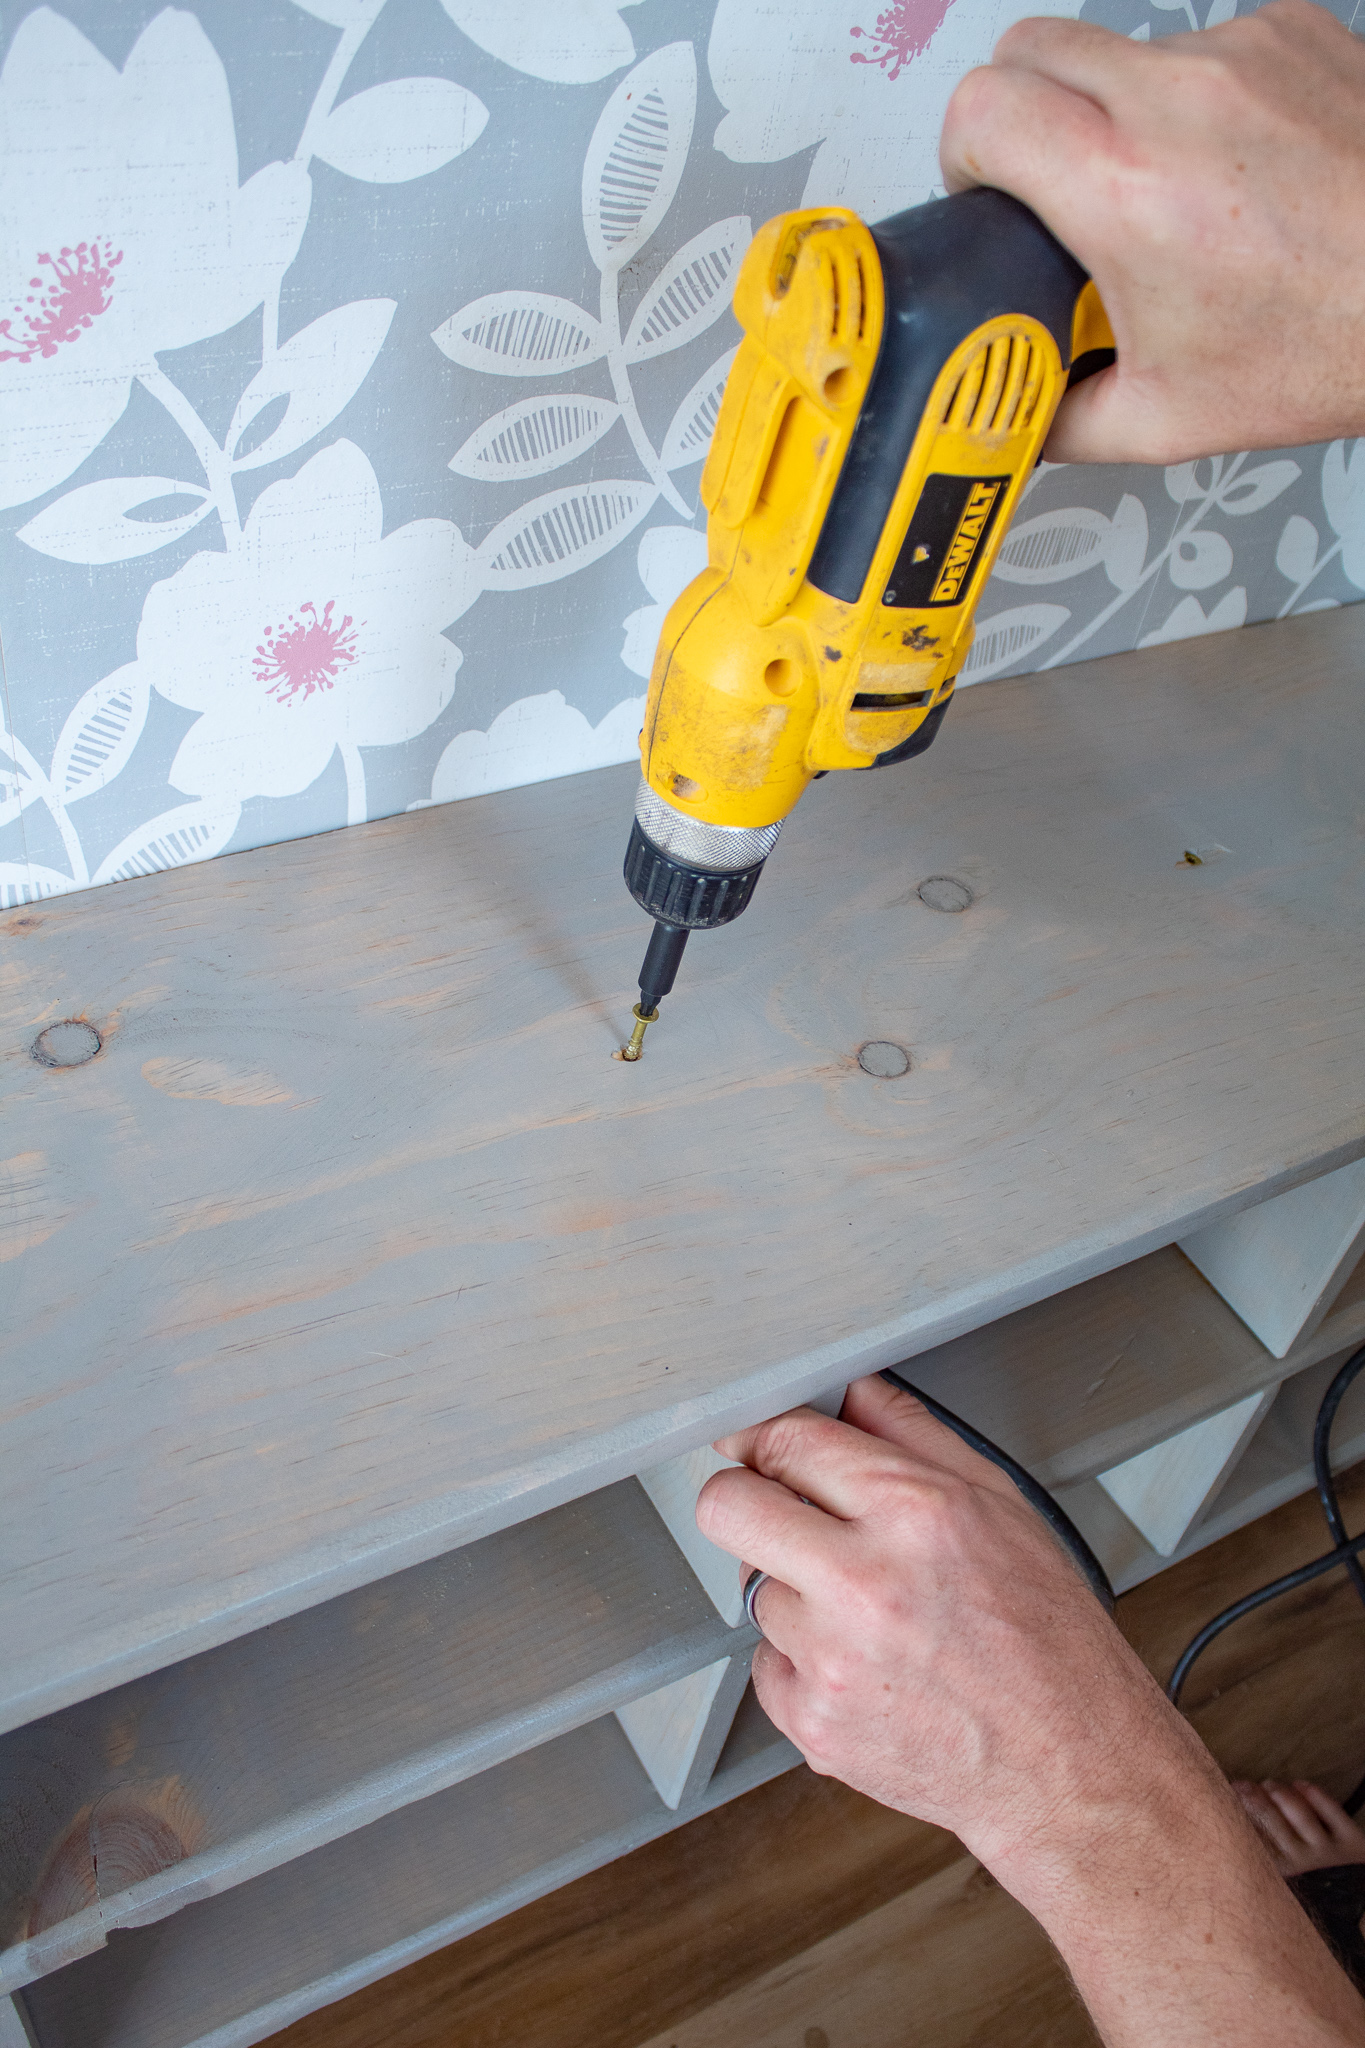
Prior to mounting on the rack on the wall Ronny drilled pilot holes on the top board (the board that will be the actual seat).
Pilot holes and markings on the underside of the top board
The holes are to be used as guides once we screw the top board to the row of dividers on the middle board to ensure each screw goes into each divider.
Make sure you measure the distance of your dividers on your top board and mark these spots prior to drilling. You can also use a scrap piece of wood to mark the width of a divider board. That shows you how much space you have to drill in your hole.
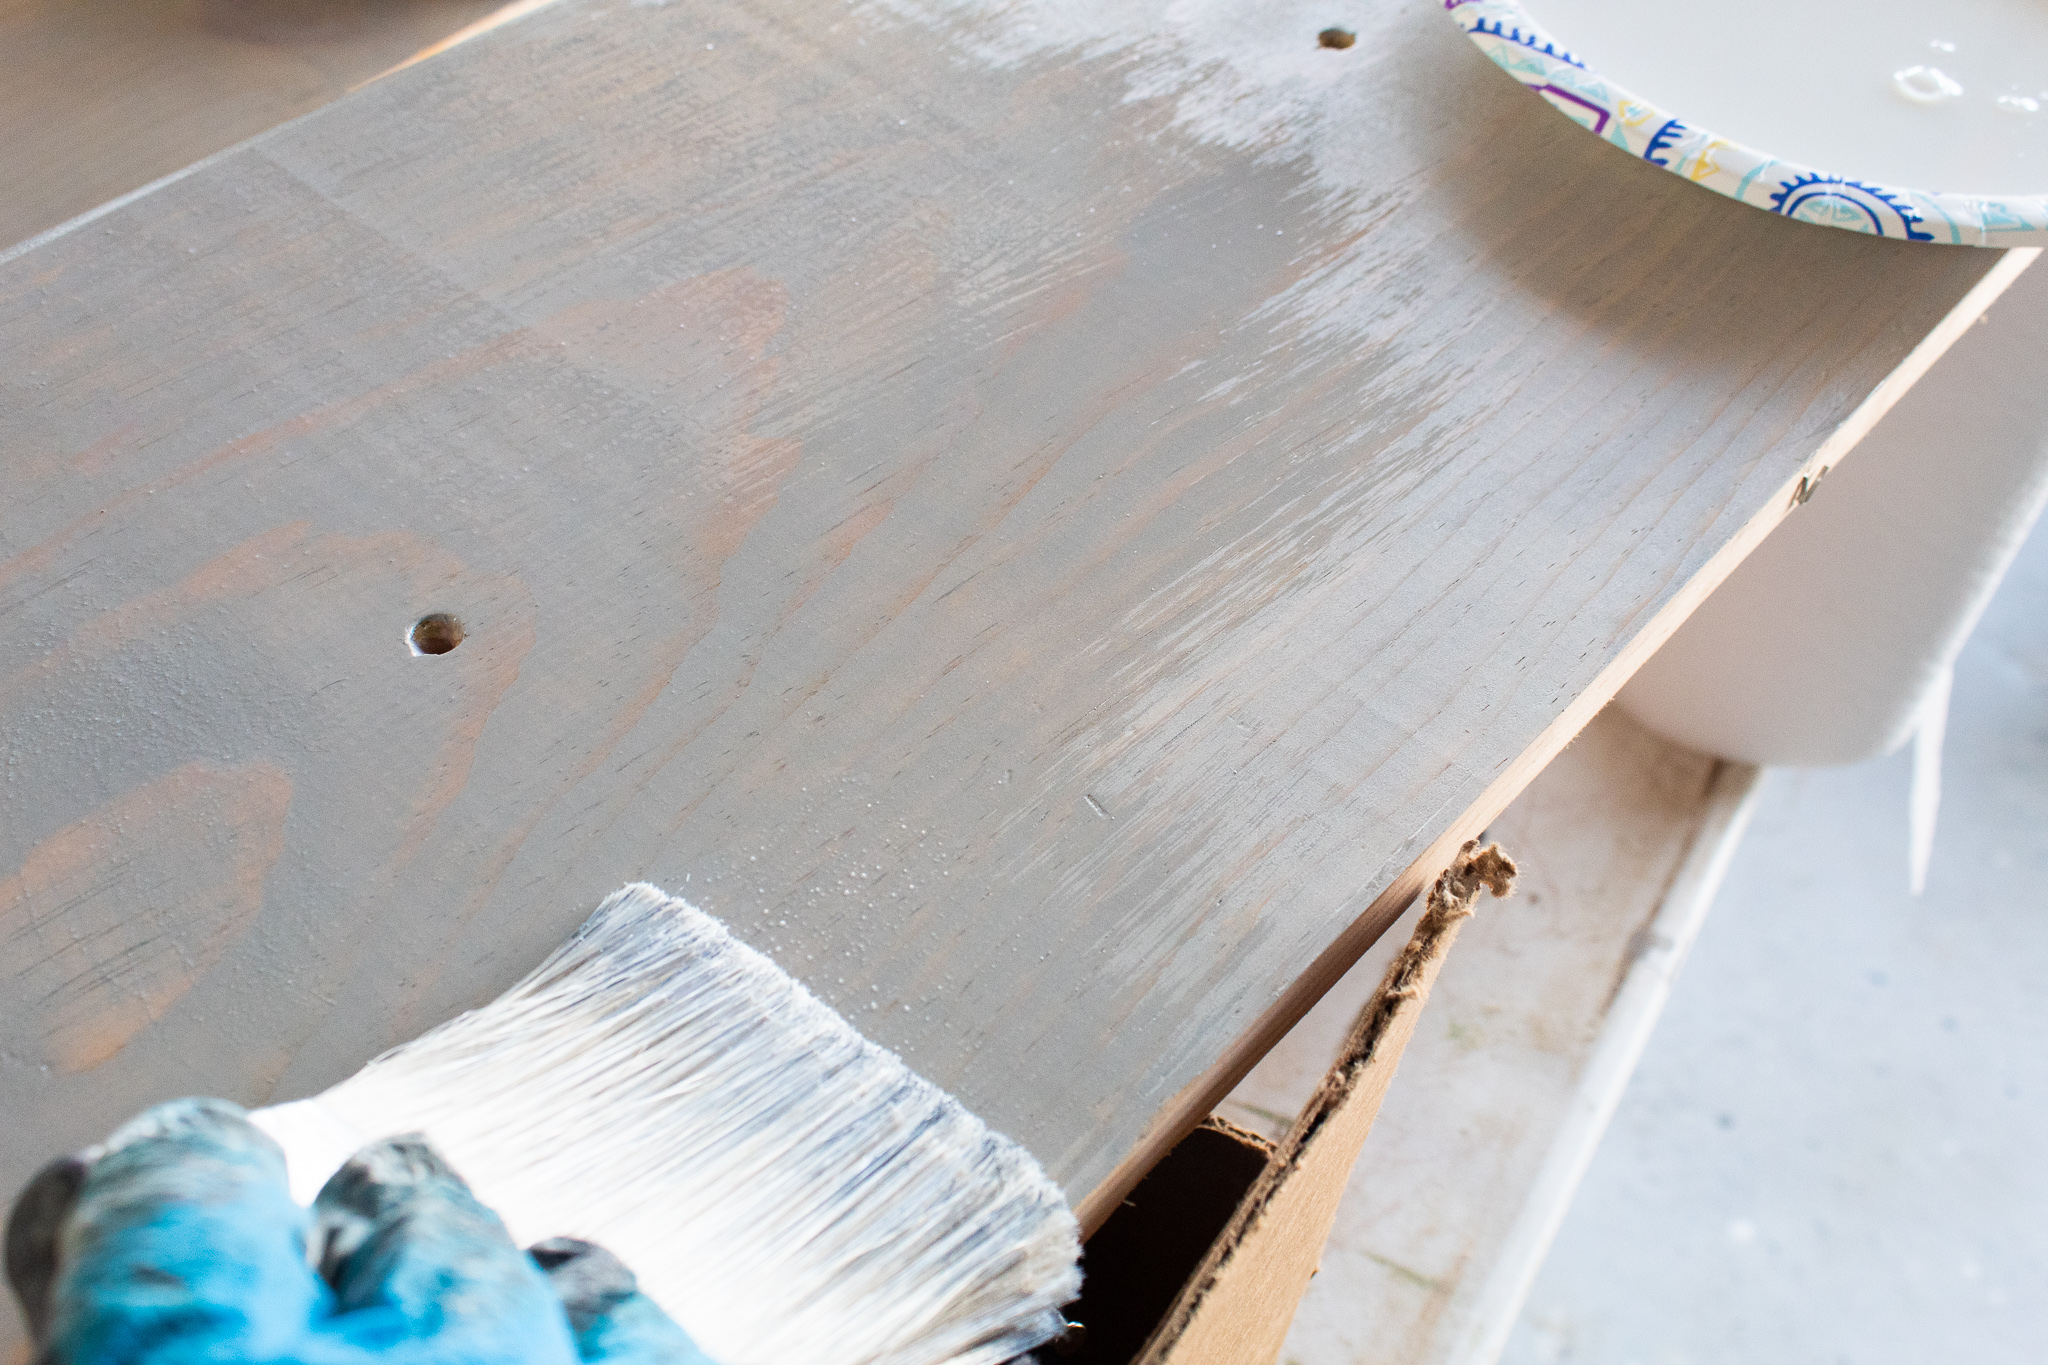
5. Staining and sealing
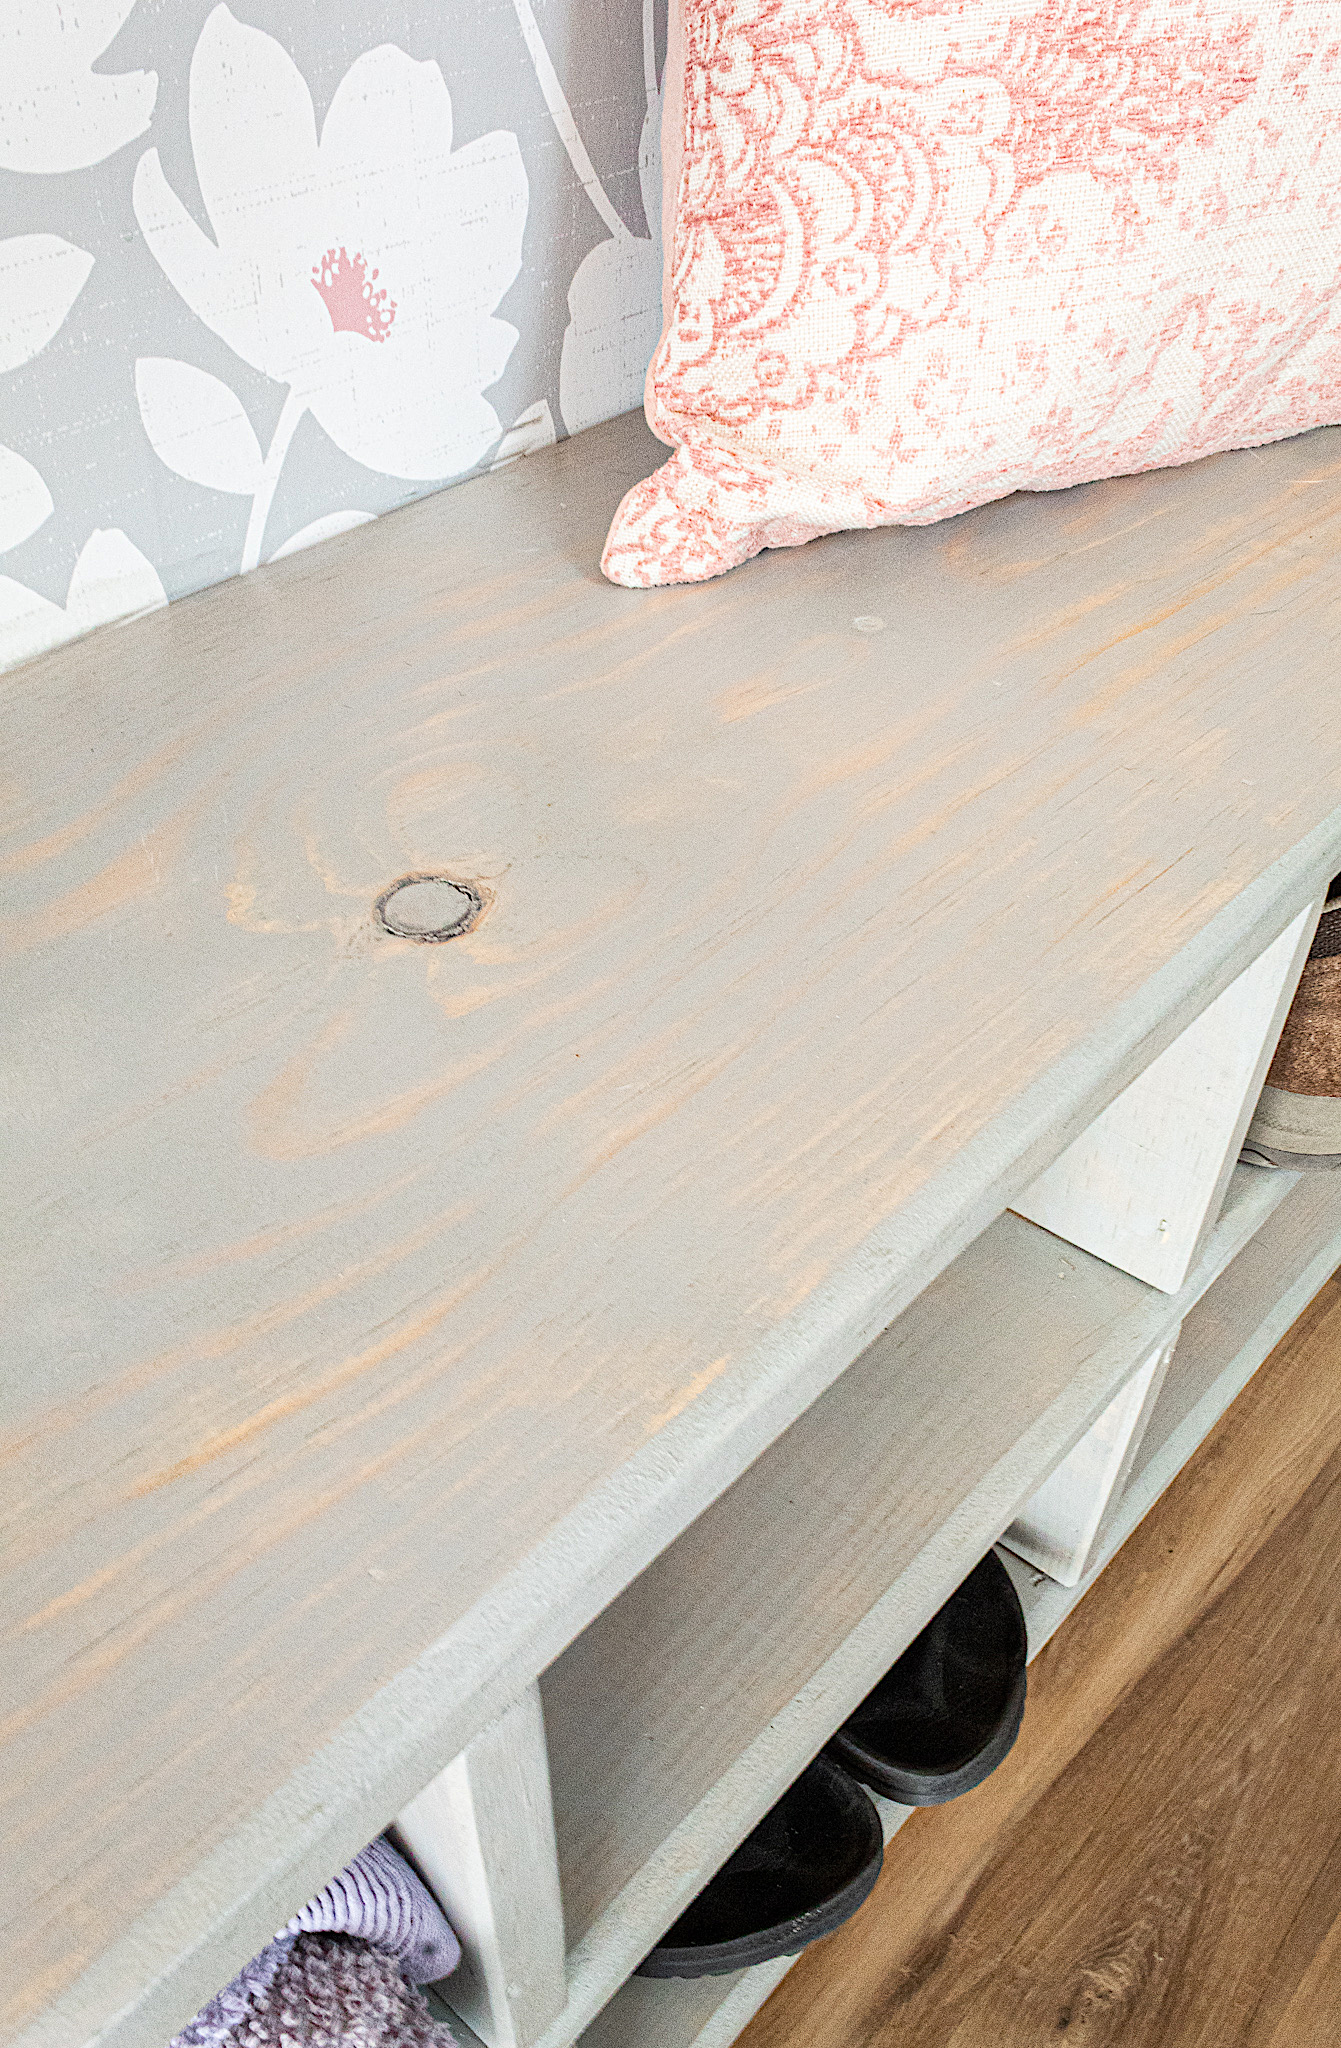
I wanted to give the shoe rack a rustic, coastal vibe without losing the beautiful grain of the wood by painting it. I chose Sunbleached stain and loved the results! It gave the wood a beautiful gray weathered look. You can add multiple coats depending on how dark you want it. I used an old rag and applied two coats and sanded back in some parts to expose more of the wood grain.
**Note: The only board I did not stain at this point was the top board. I stained this one once mounted since I would have to wood fill the screwed in areas on the top board to hide the screws. After the wood filler dried, I sanded the spots and stained the entire board and sealed it.**
I used my go to polyurethane to seal the entire shoe rack. Using some type of top coat is important for sealing the wood. It also makes it easy to clean the surface later. I applied two coats on the top board and one coat everywhere else.
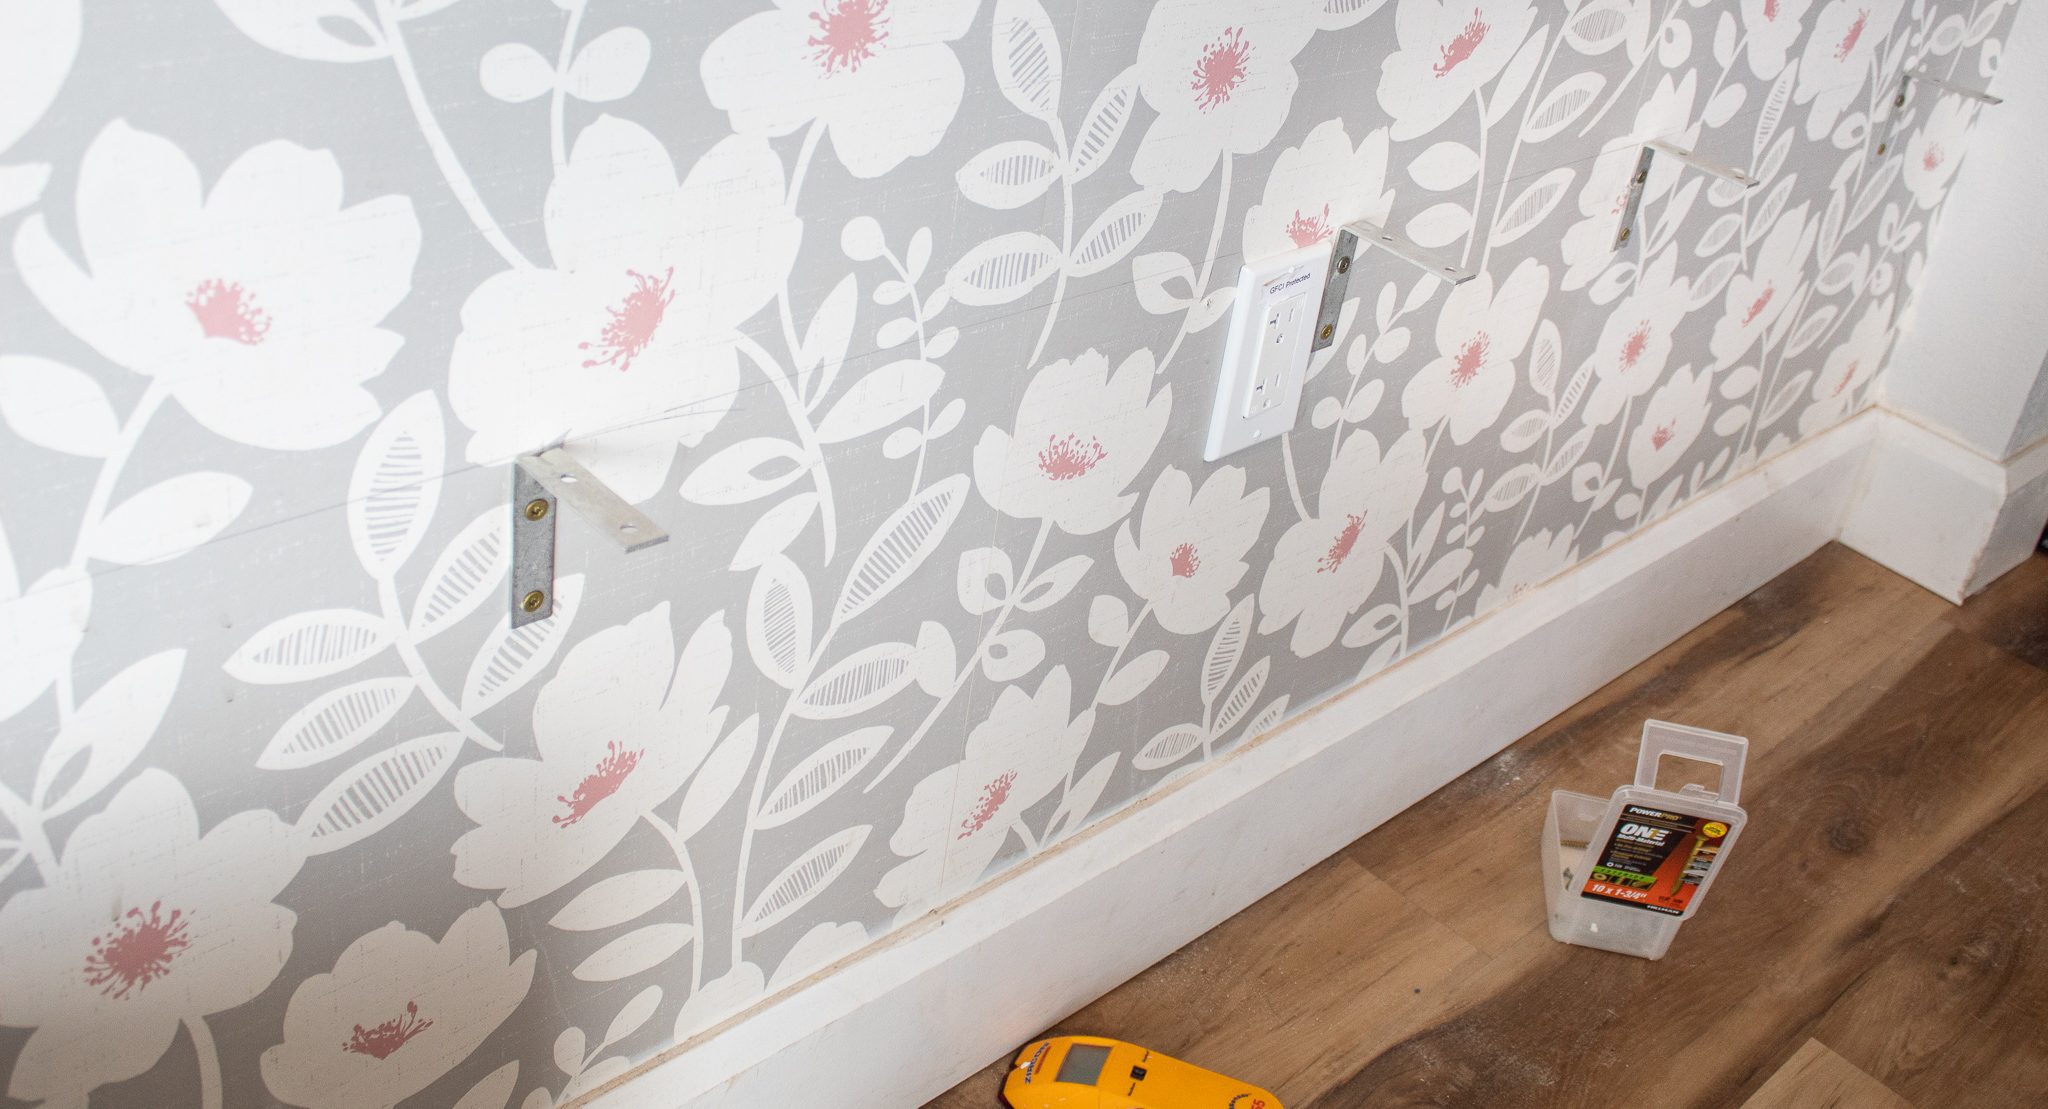
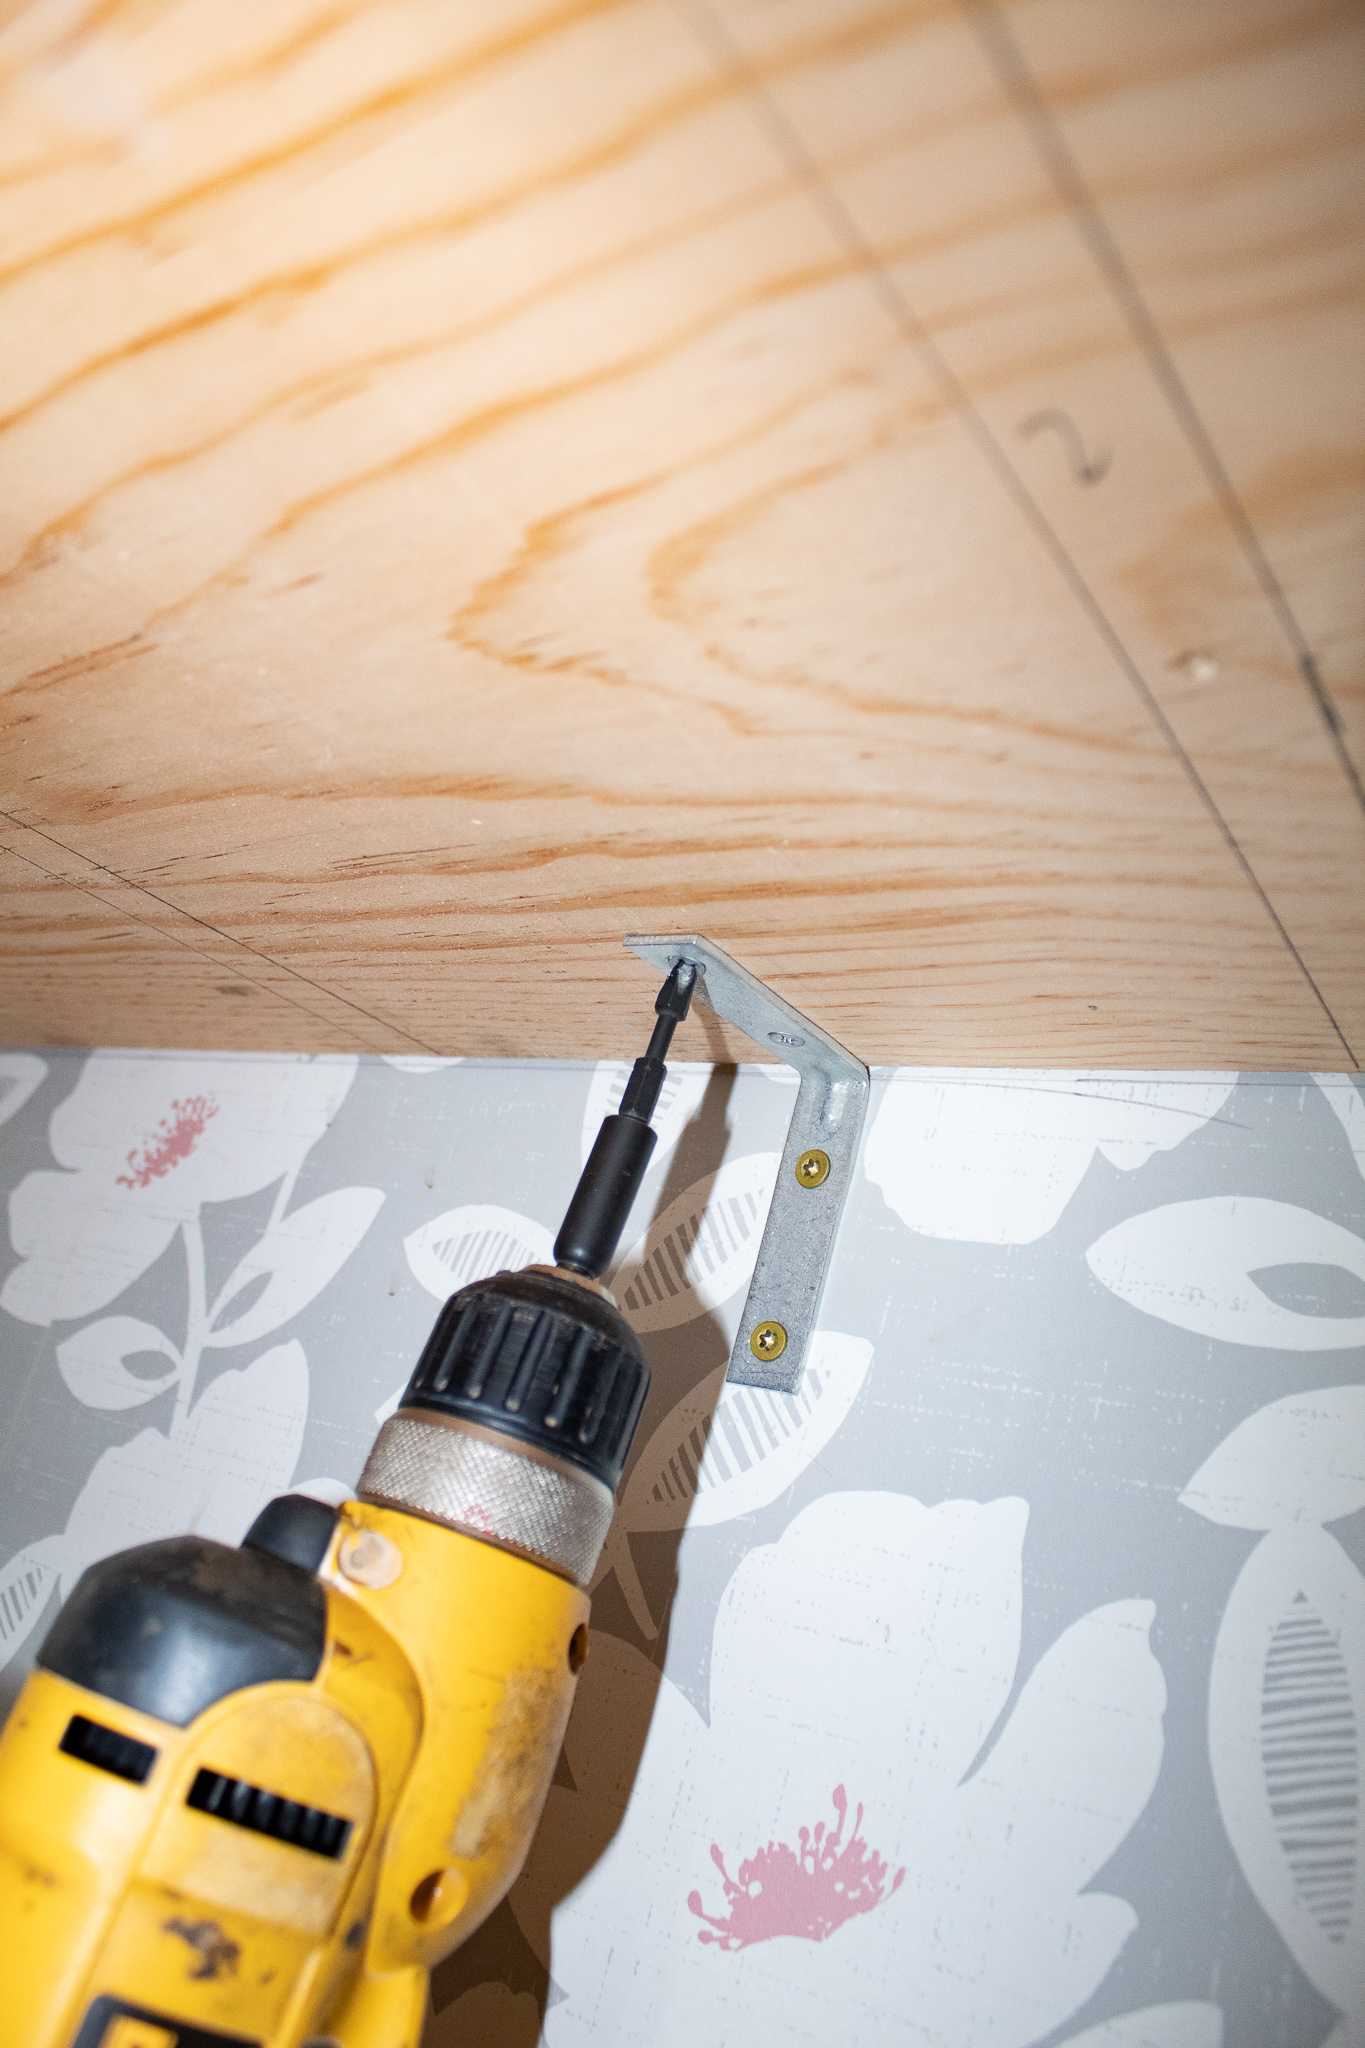
6. Mounting The Wall Brackets
Before you mount your top board, you will want to secure your brackets on the wall. Ronny hung four brackets on the wall. We found these heavy duty corner braces at Home Depot. They each have an over 50 lb weight capacity.
Ronny used a stud finder to find a stud for drilling in the brackets. Using the wood screws, he drilled in the brackets, spacing them evenly across the length of the shoe rack.
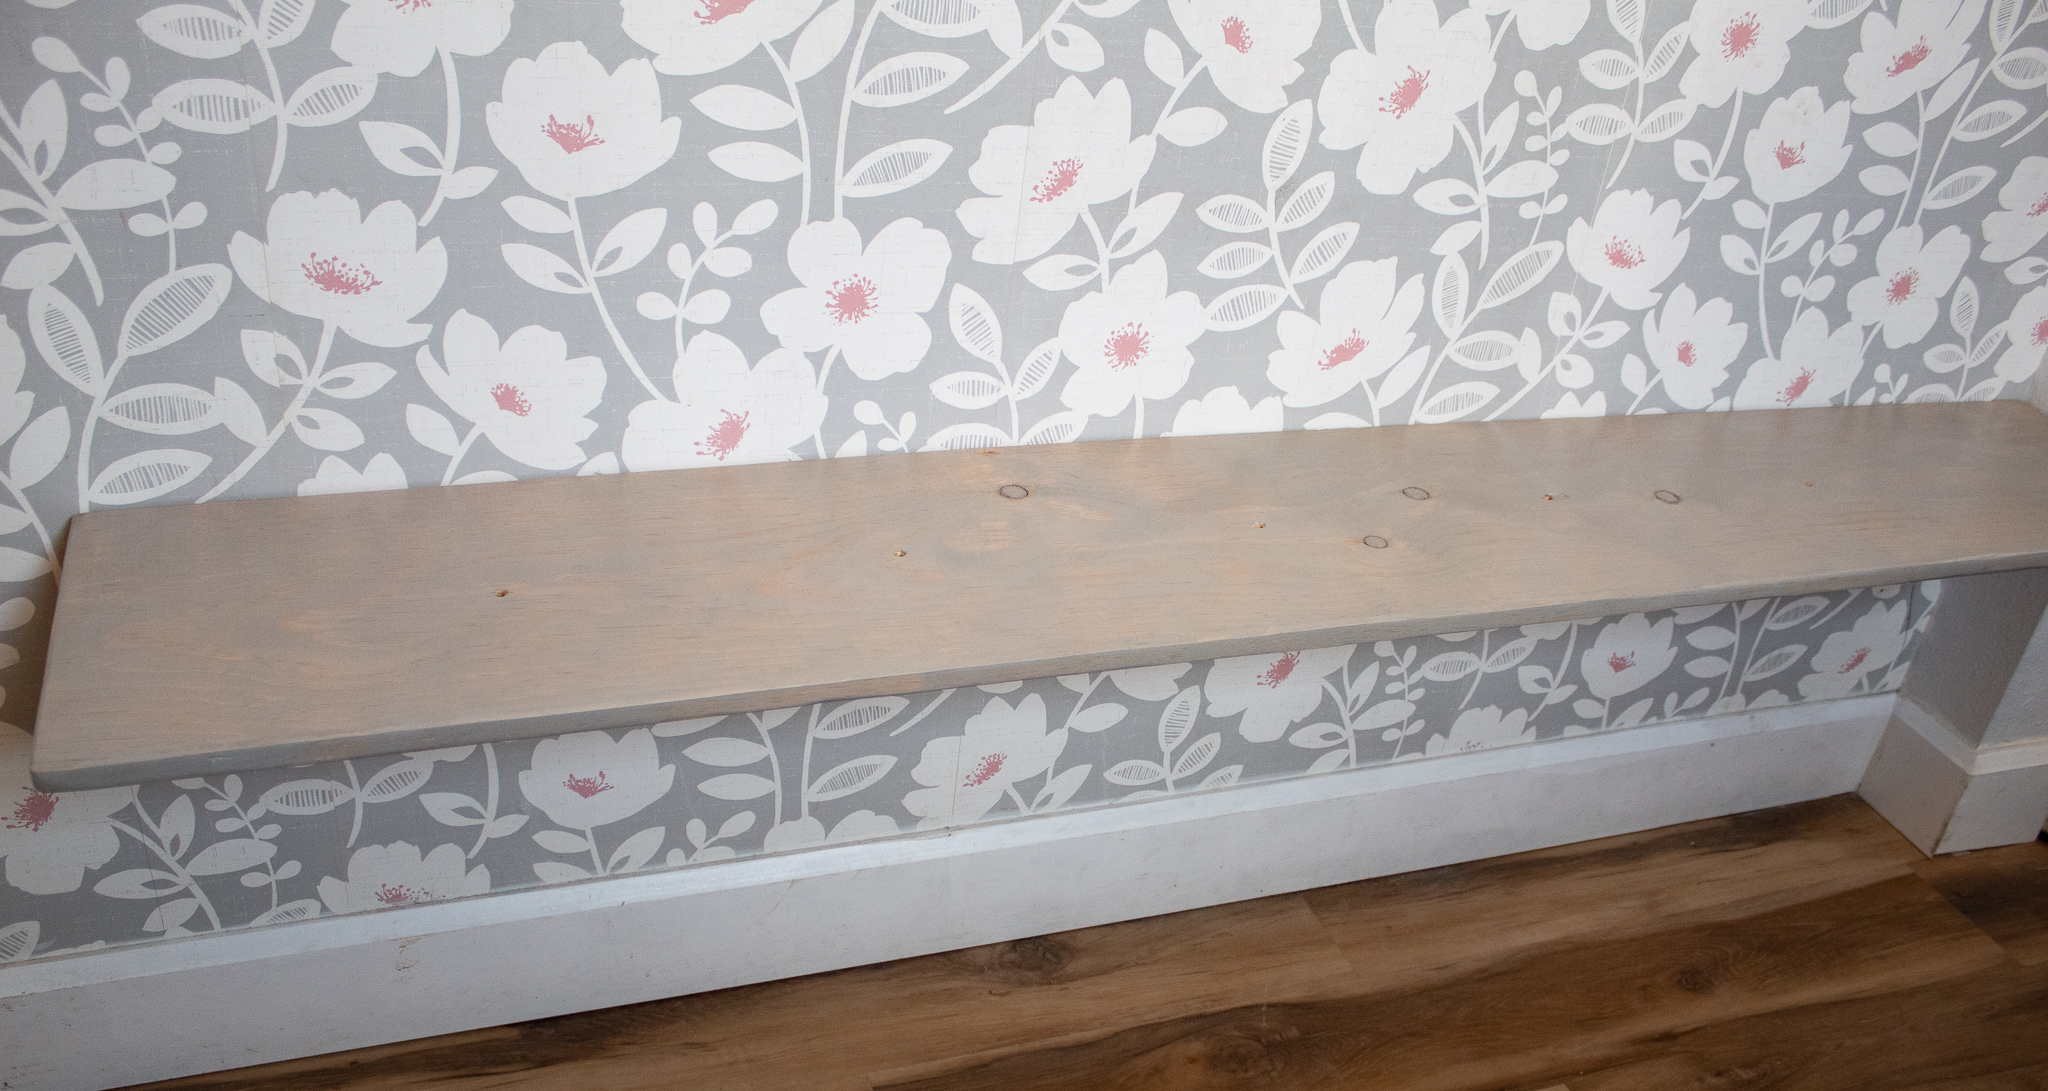
7. Mounting The Top Board
For this next step Ronny used the small screws that came with the wall brackets. He first sat the top board on the 4 already mounted brackets. Then he drilled the board onto the brackets from underneath.
8. Mounting The Middle and Bottom Boards
Next Ronny mounted the previously assembled middle and bottom rows of the shoe rack. This is heavy so you may need two people. Or you can place something to suspend it underneath (like a paint can) while you drill in the screws through the top board.
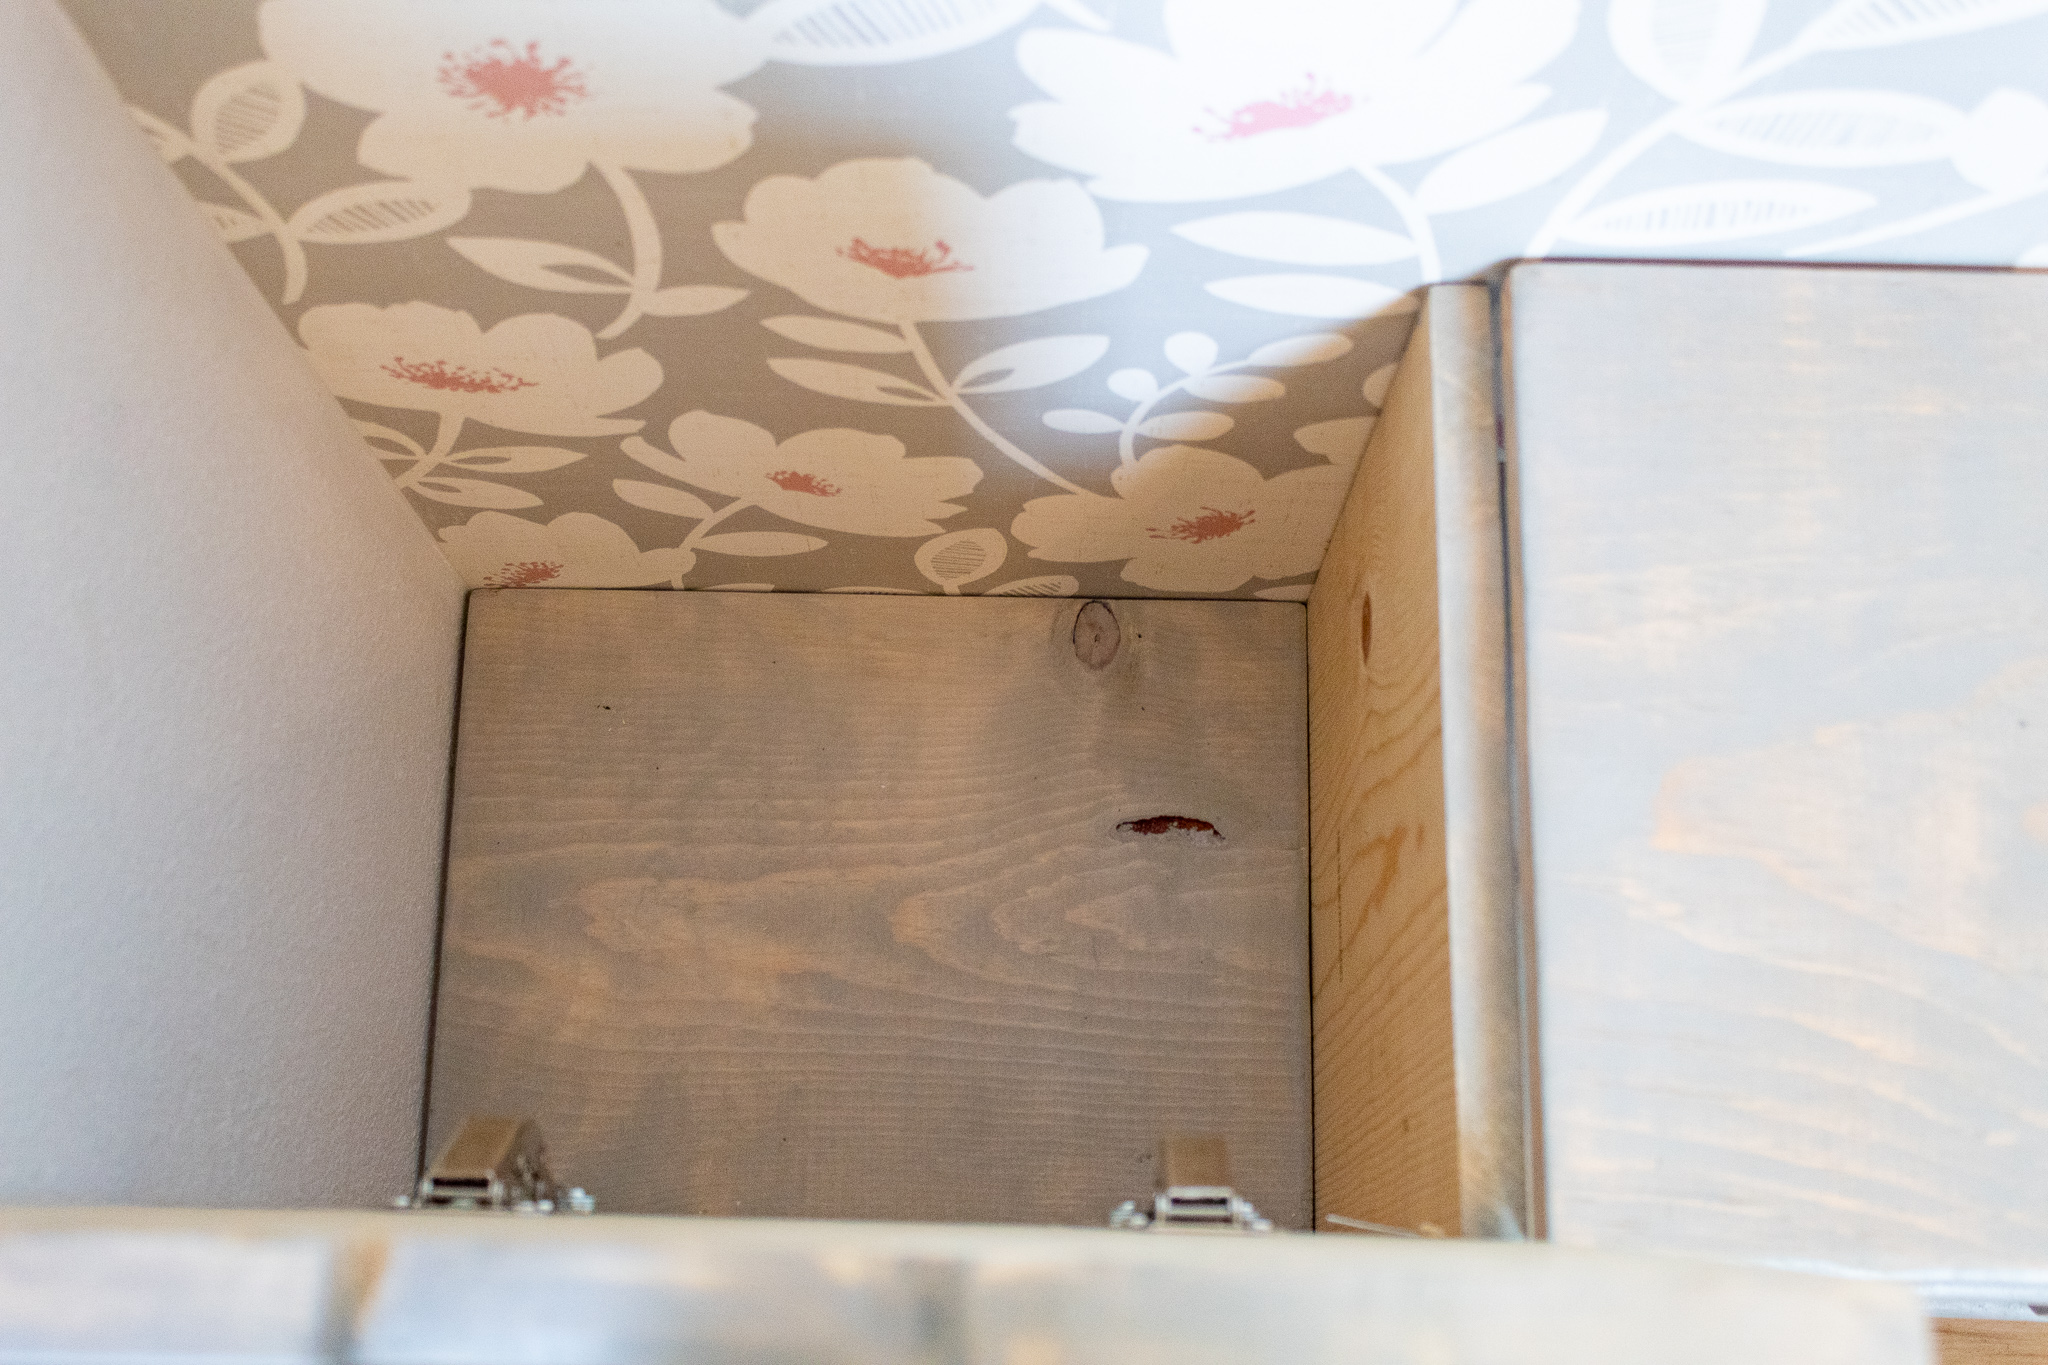
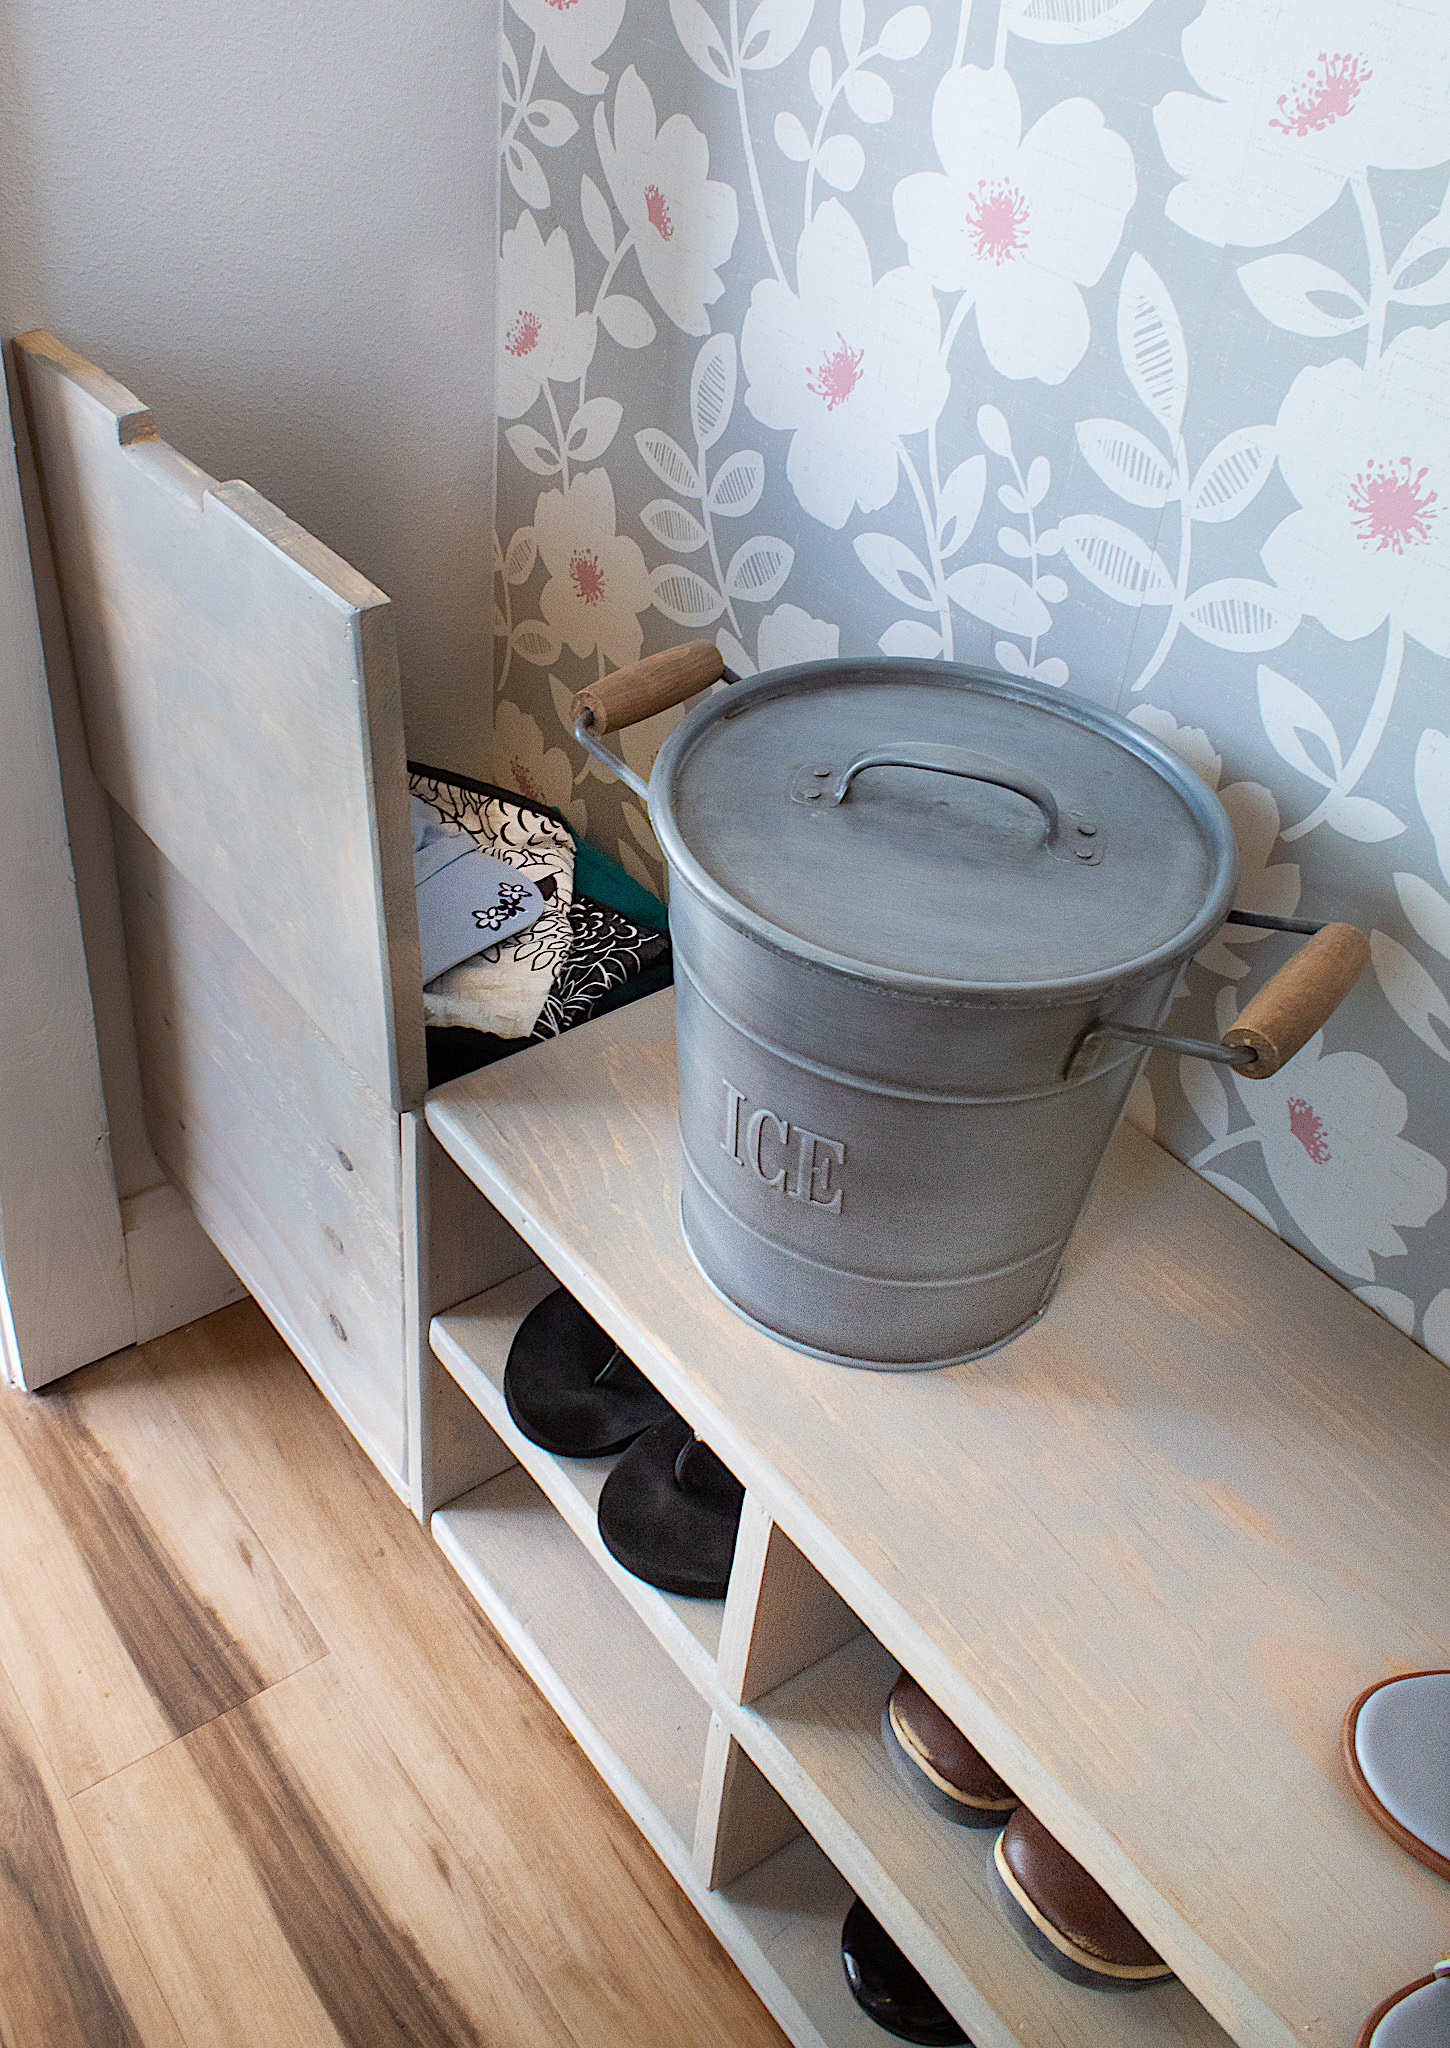
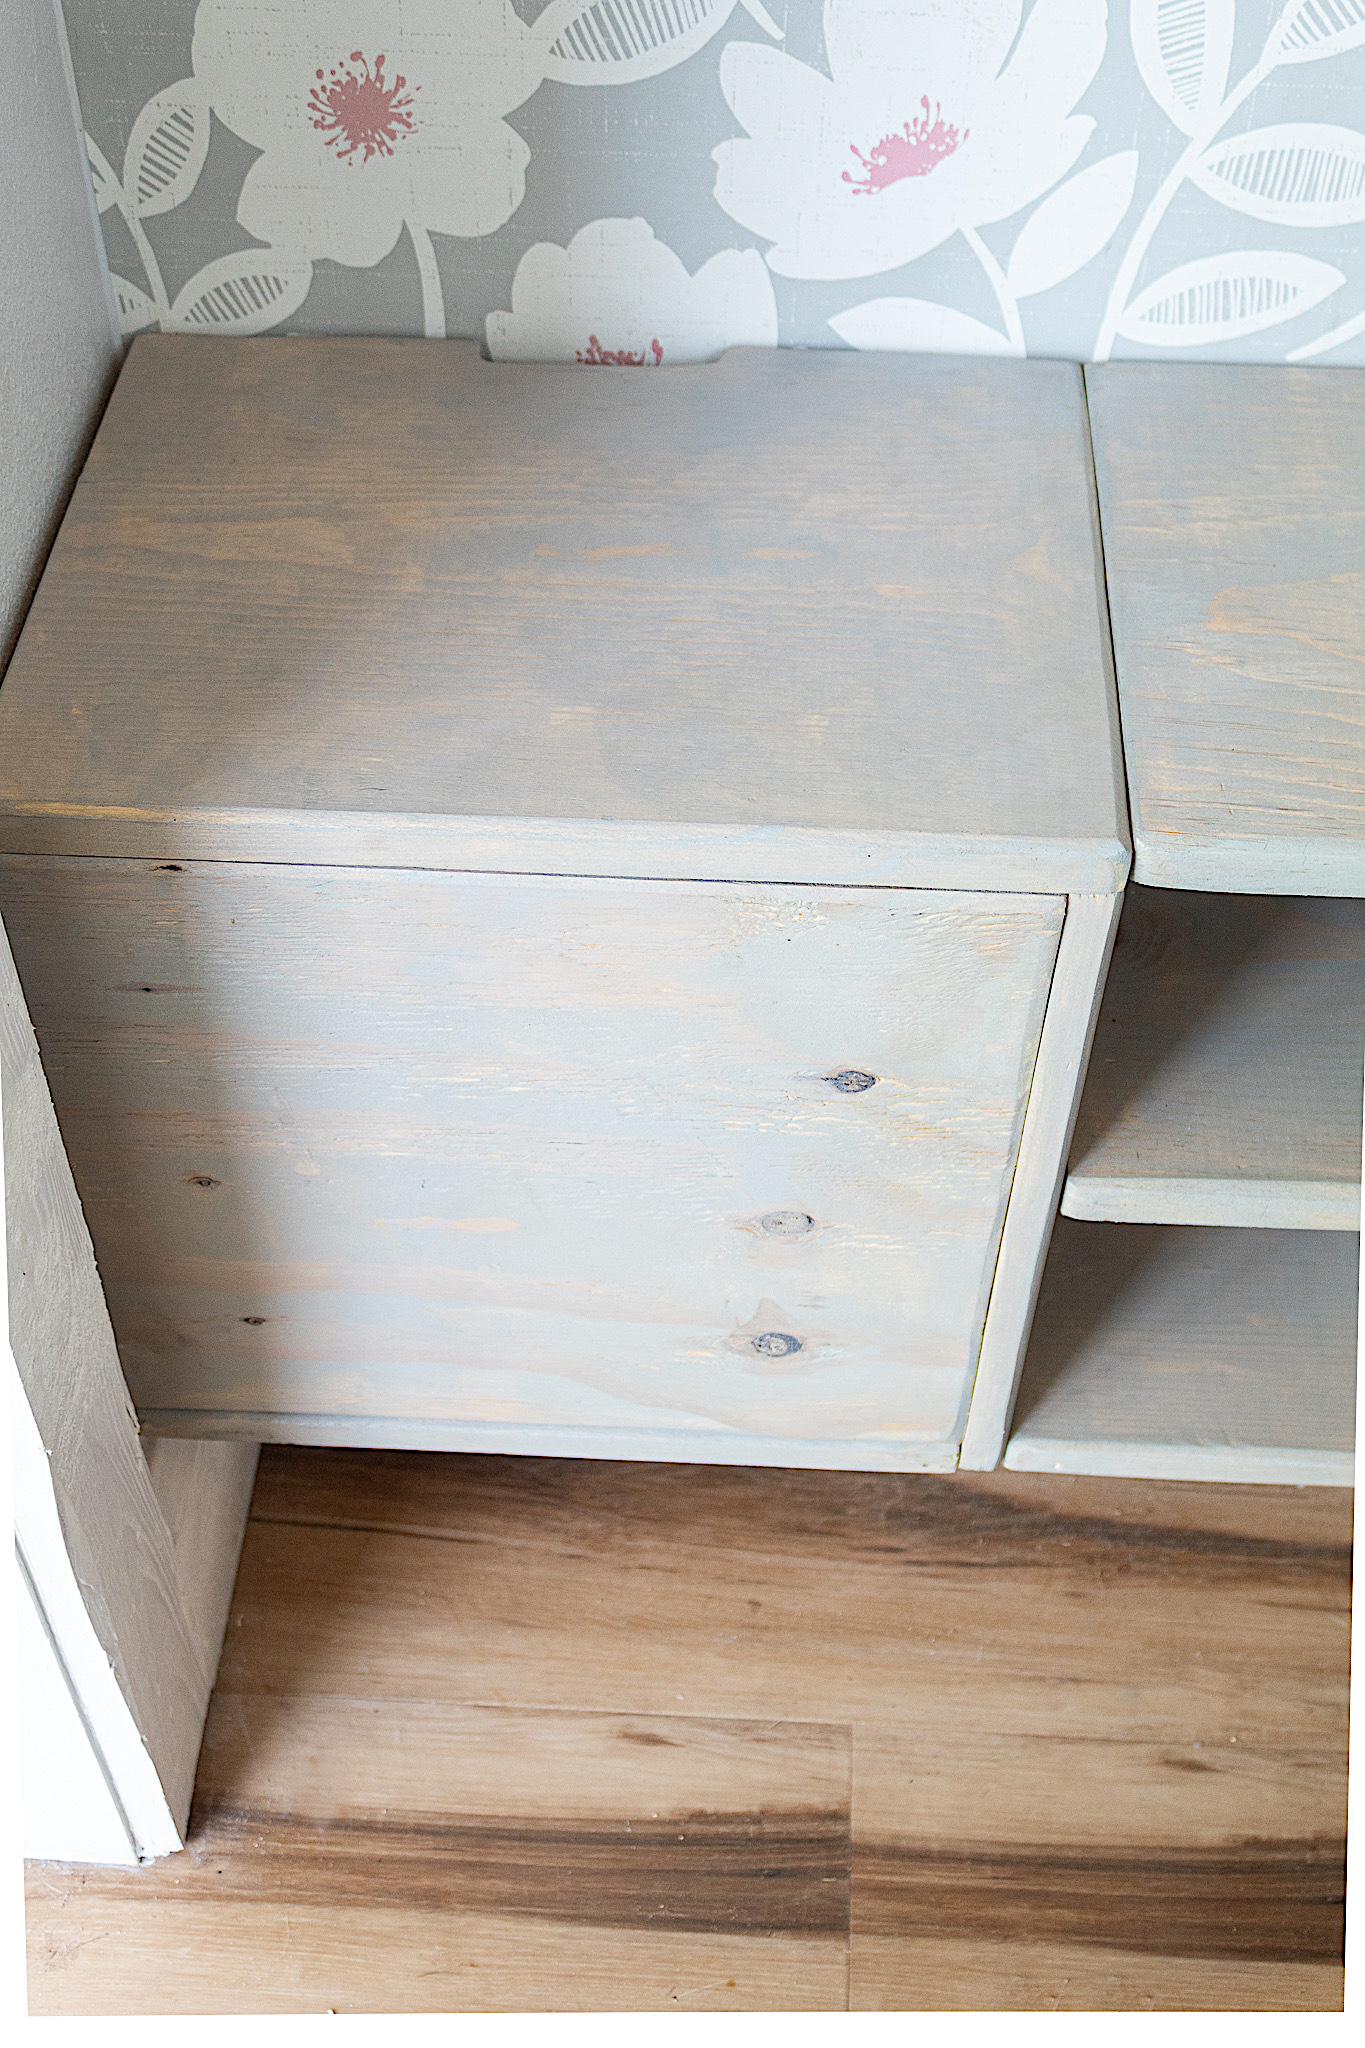
9. Adding A Storage Bin
I wanted to incorporate a small storage bin at one end of the shoe rack for bags and hats. Ronny used some remaining pieces of the wood and cut three pieces each measuring 14″ on all sides. If your rack doesn’t but up to a wall, you will need to cut one more piece.
One of the pieces he nailed to the end of the shoe rack and a second one he nailed on as the floor of the bin. You’re basically creating a box with this design.
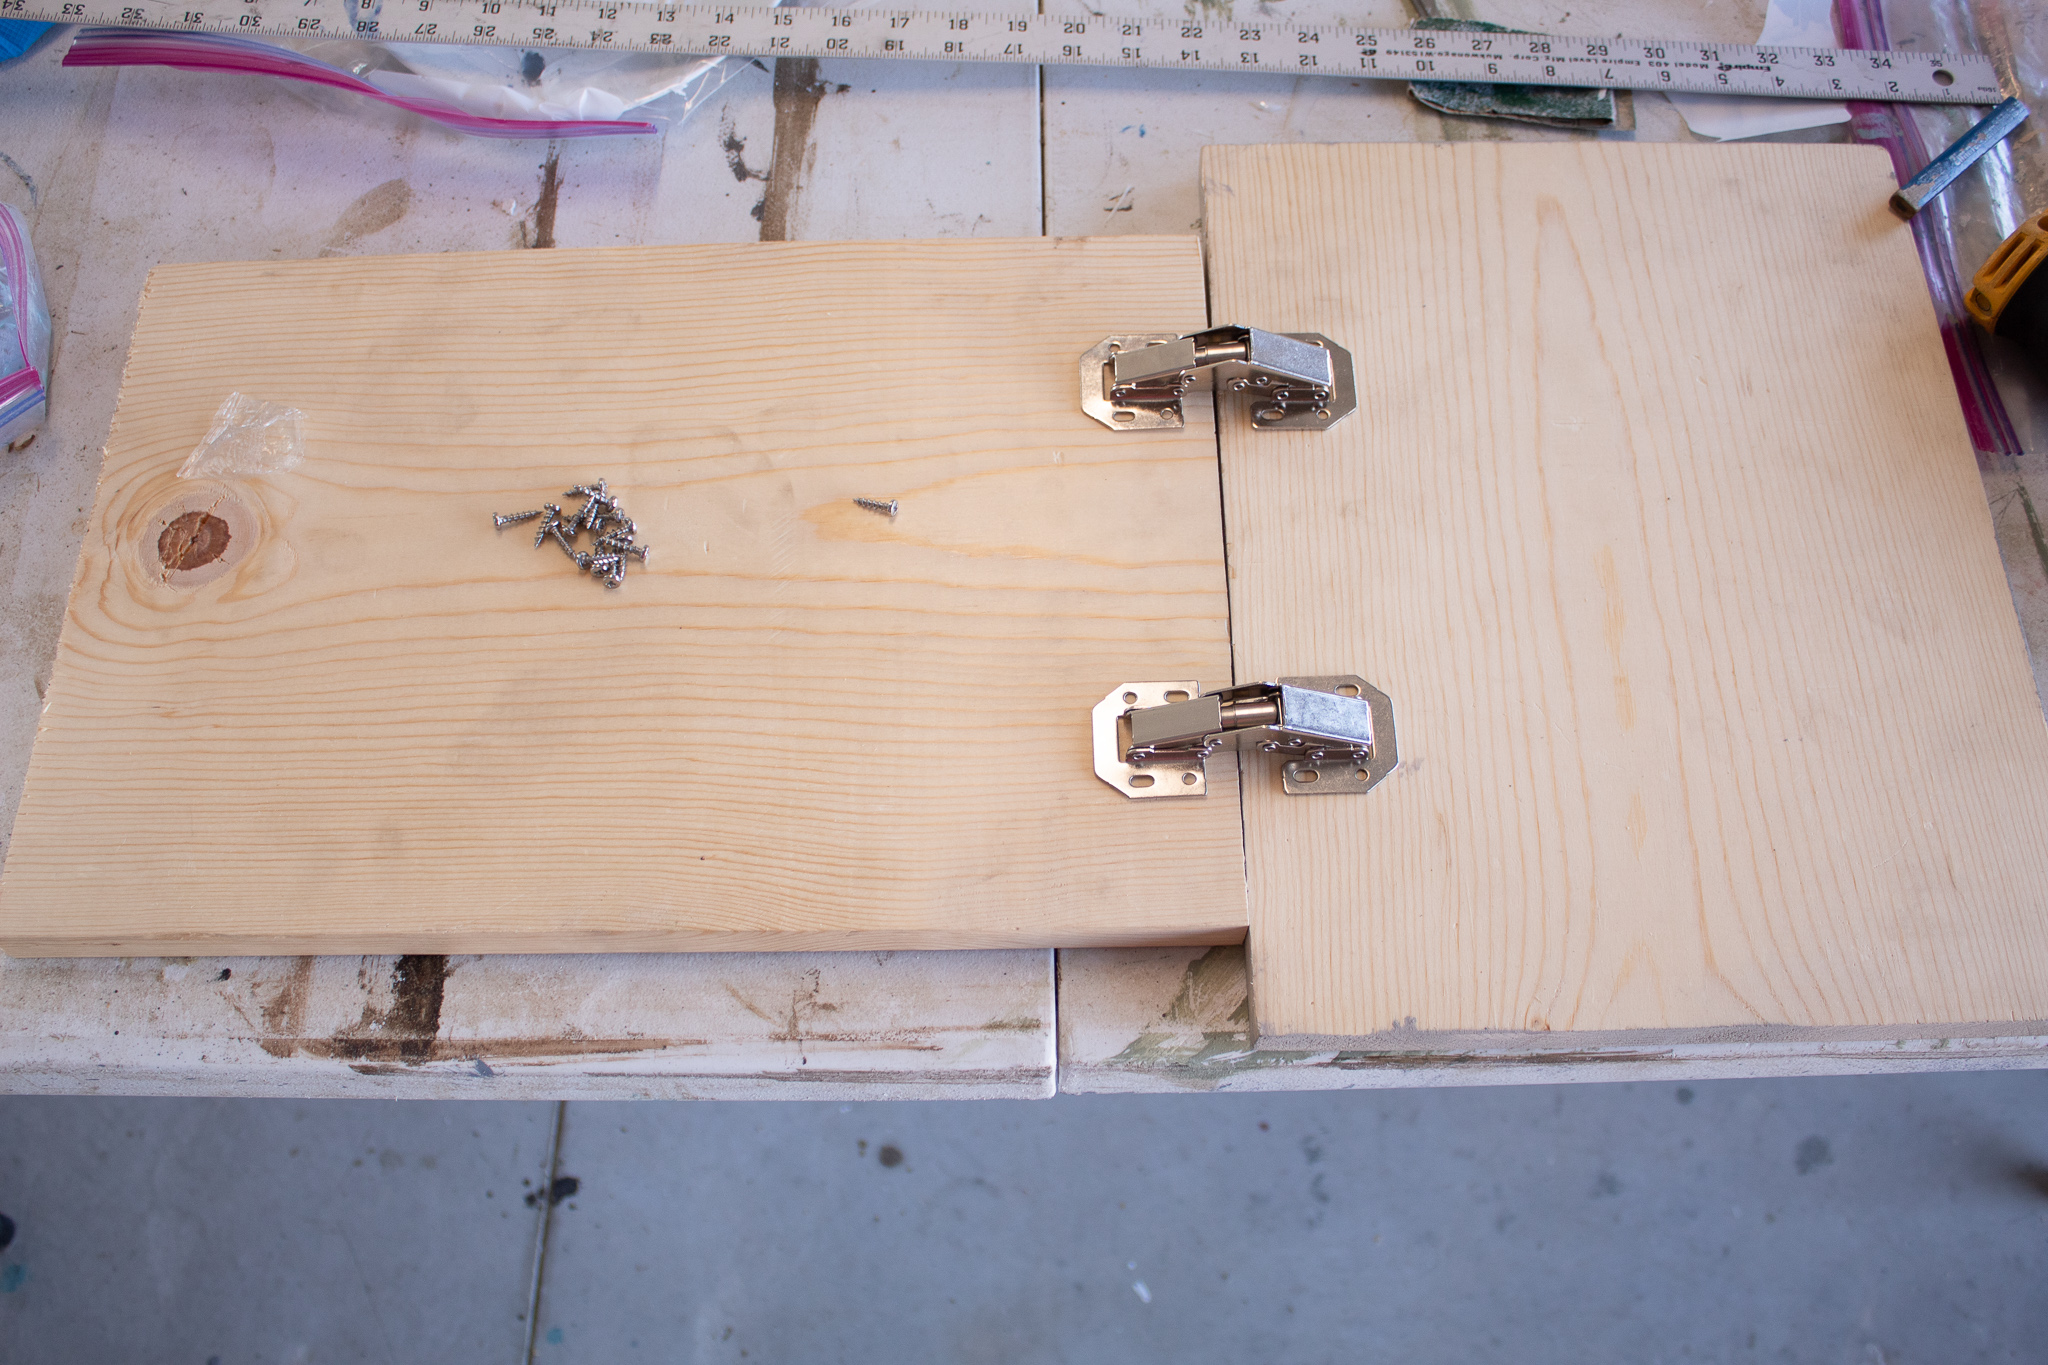
He measured and cut a piece for the lid of the bin. Then he took the lid and the remaining 14″ piece and connected these together with concealed hinges. Once these two pieces were connected, he nailed them on to complete the storage bin.
Ronny cut a small indentation on one end of the lid to create a handle for opening the top. You simply slide your fingers in and pull the lid up towards you.
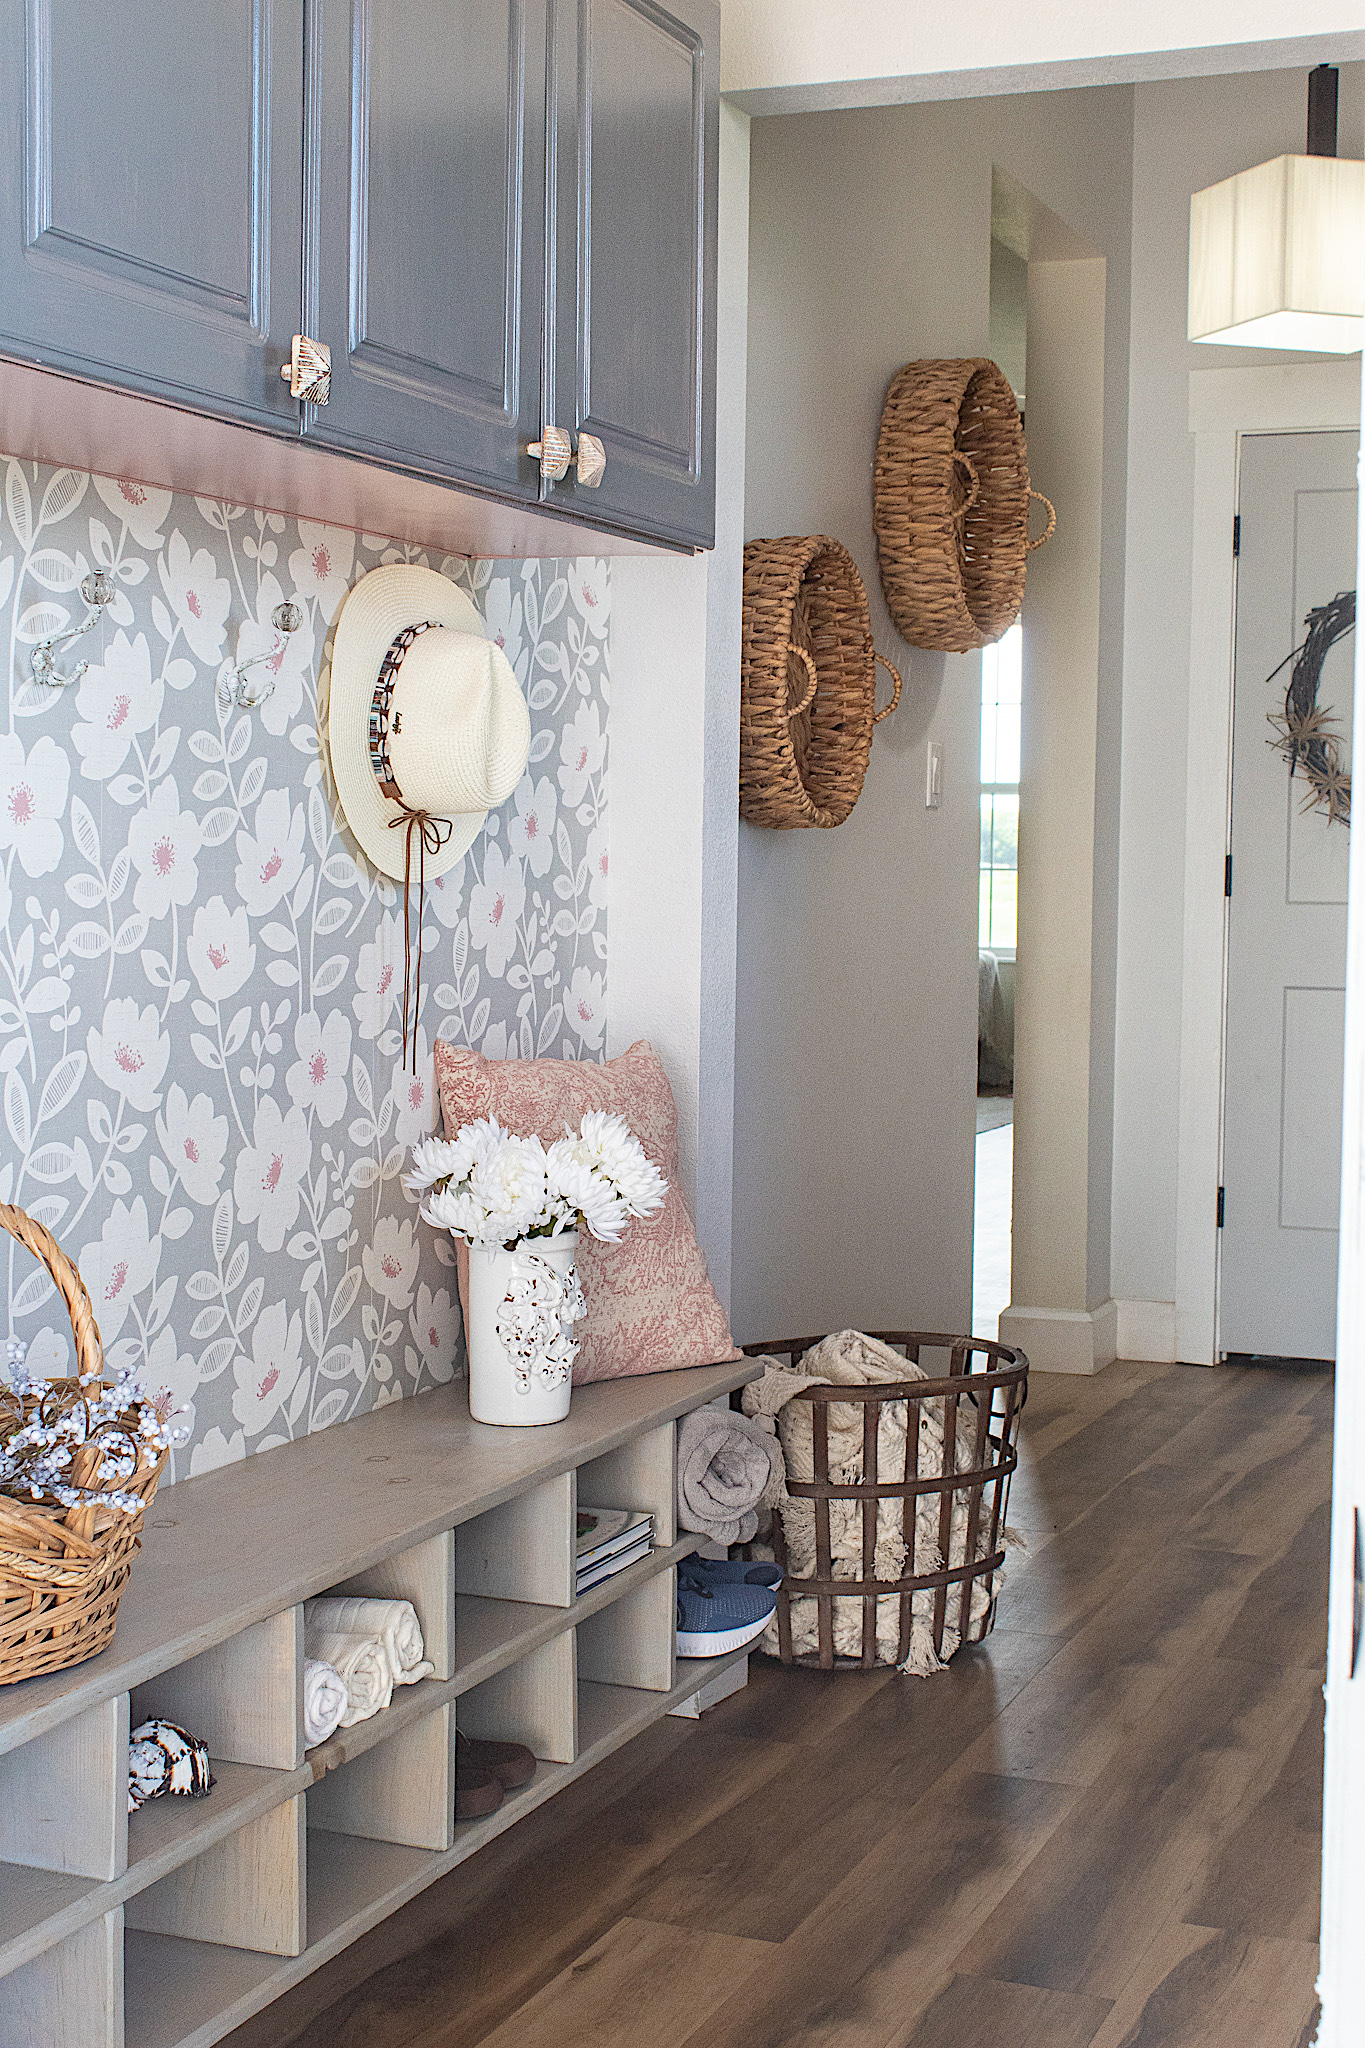
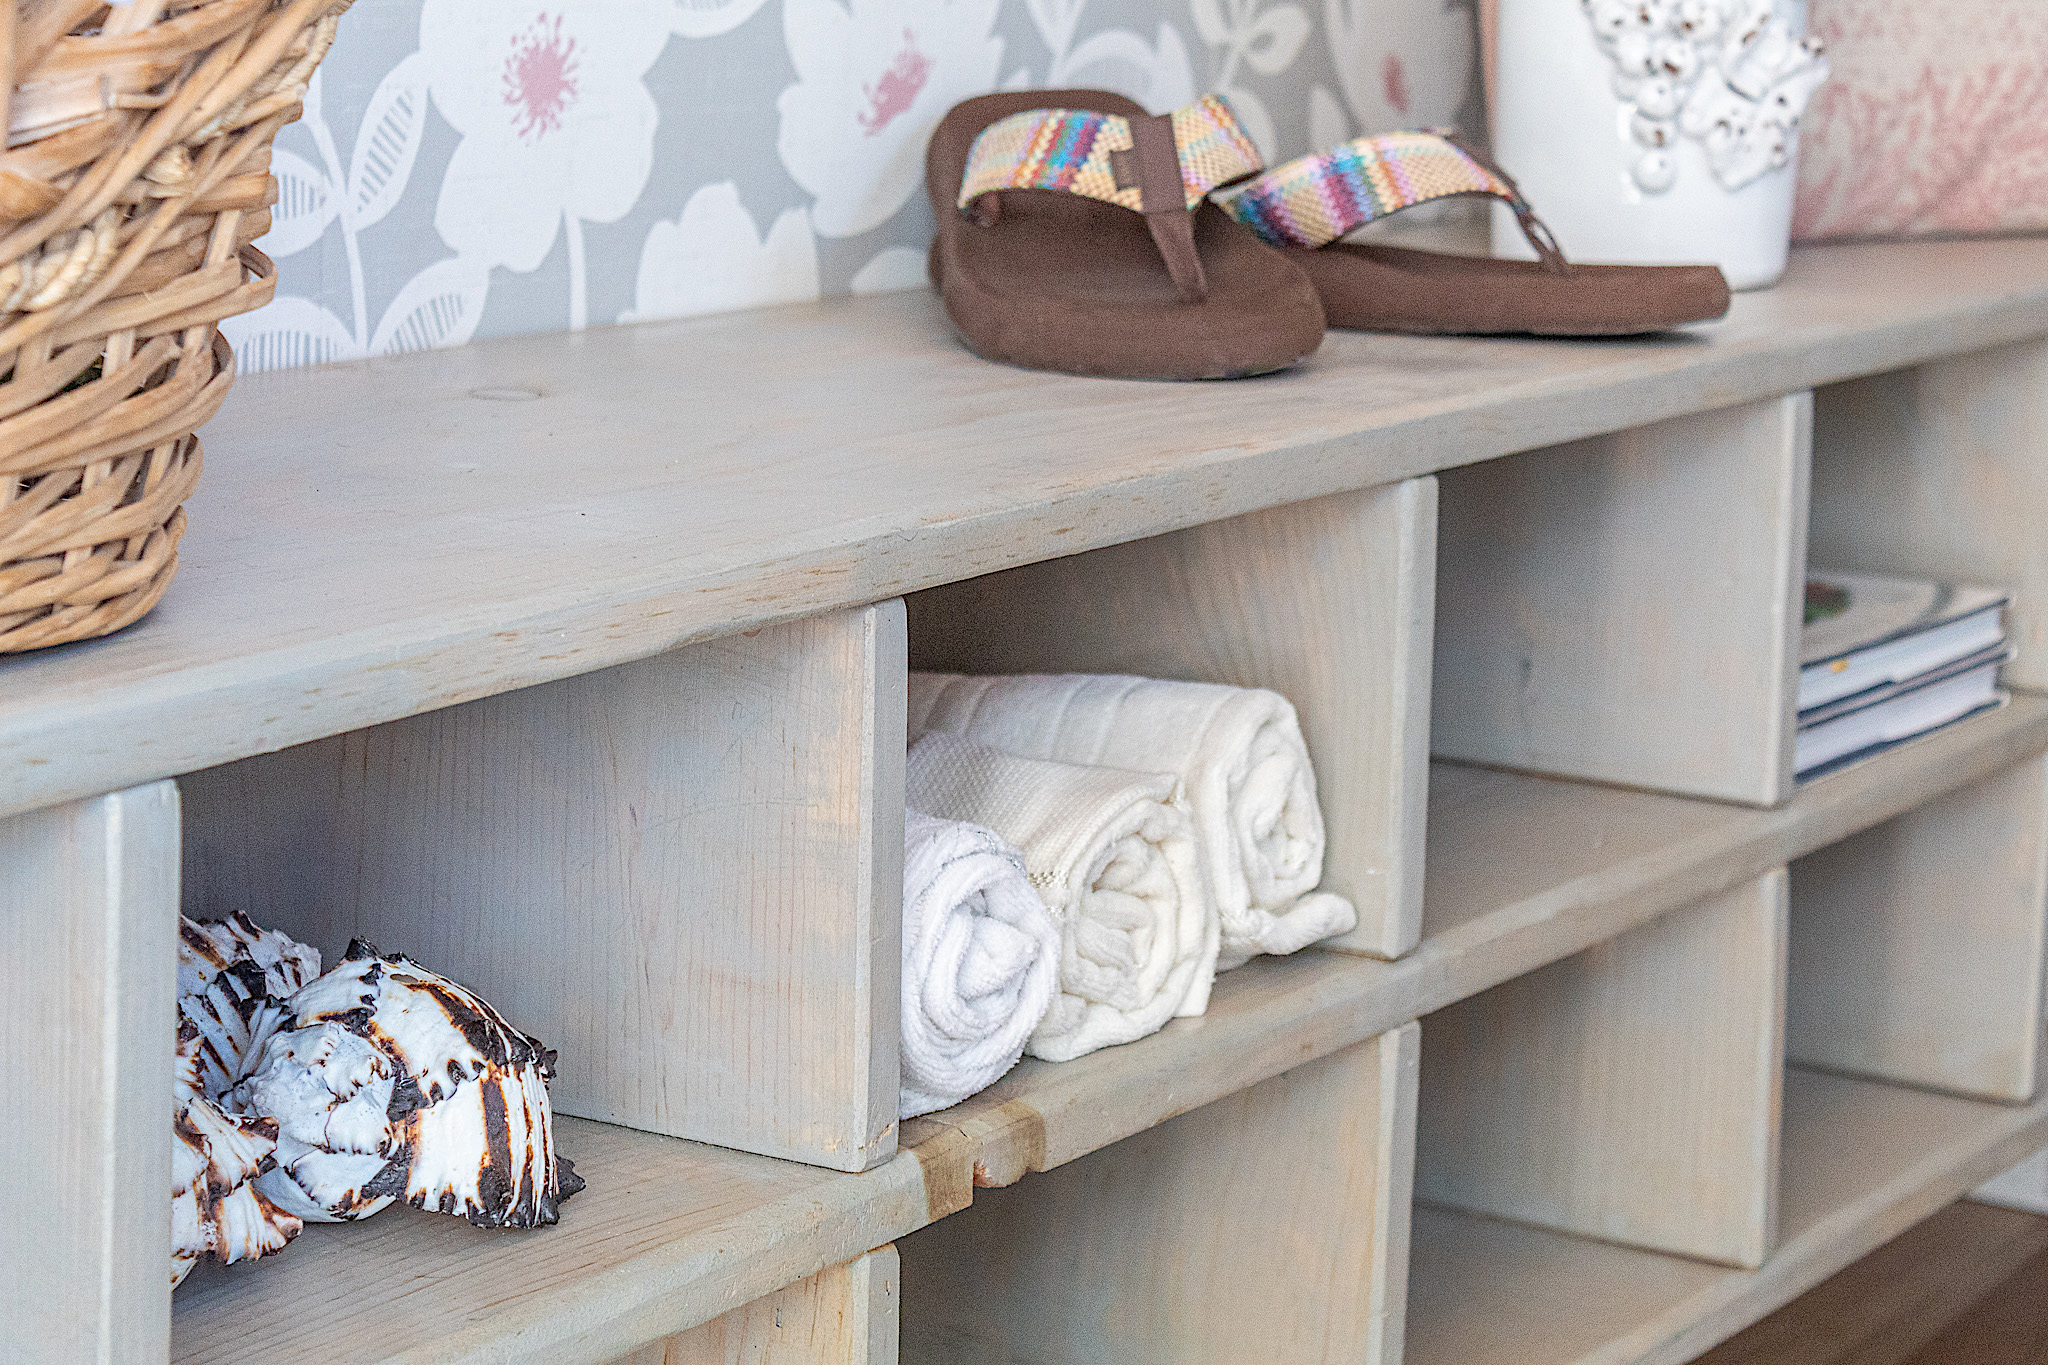
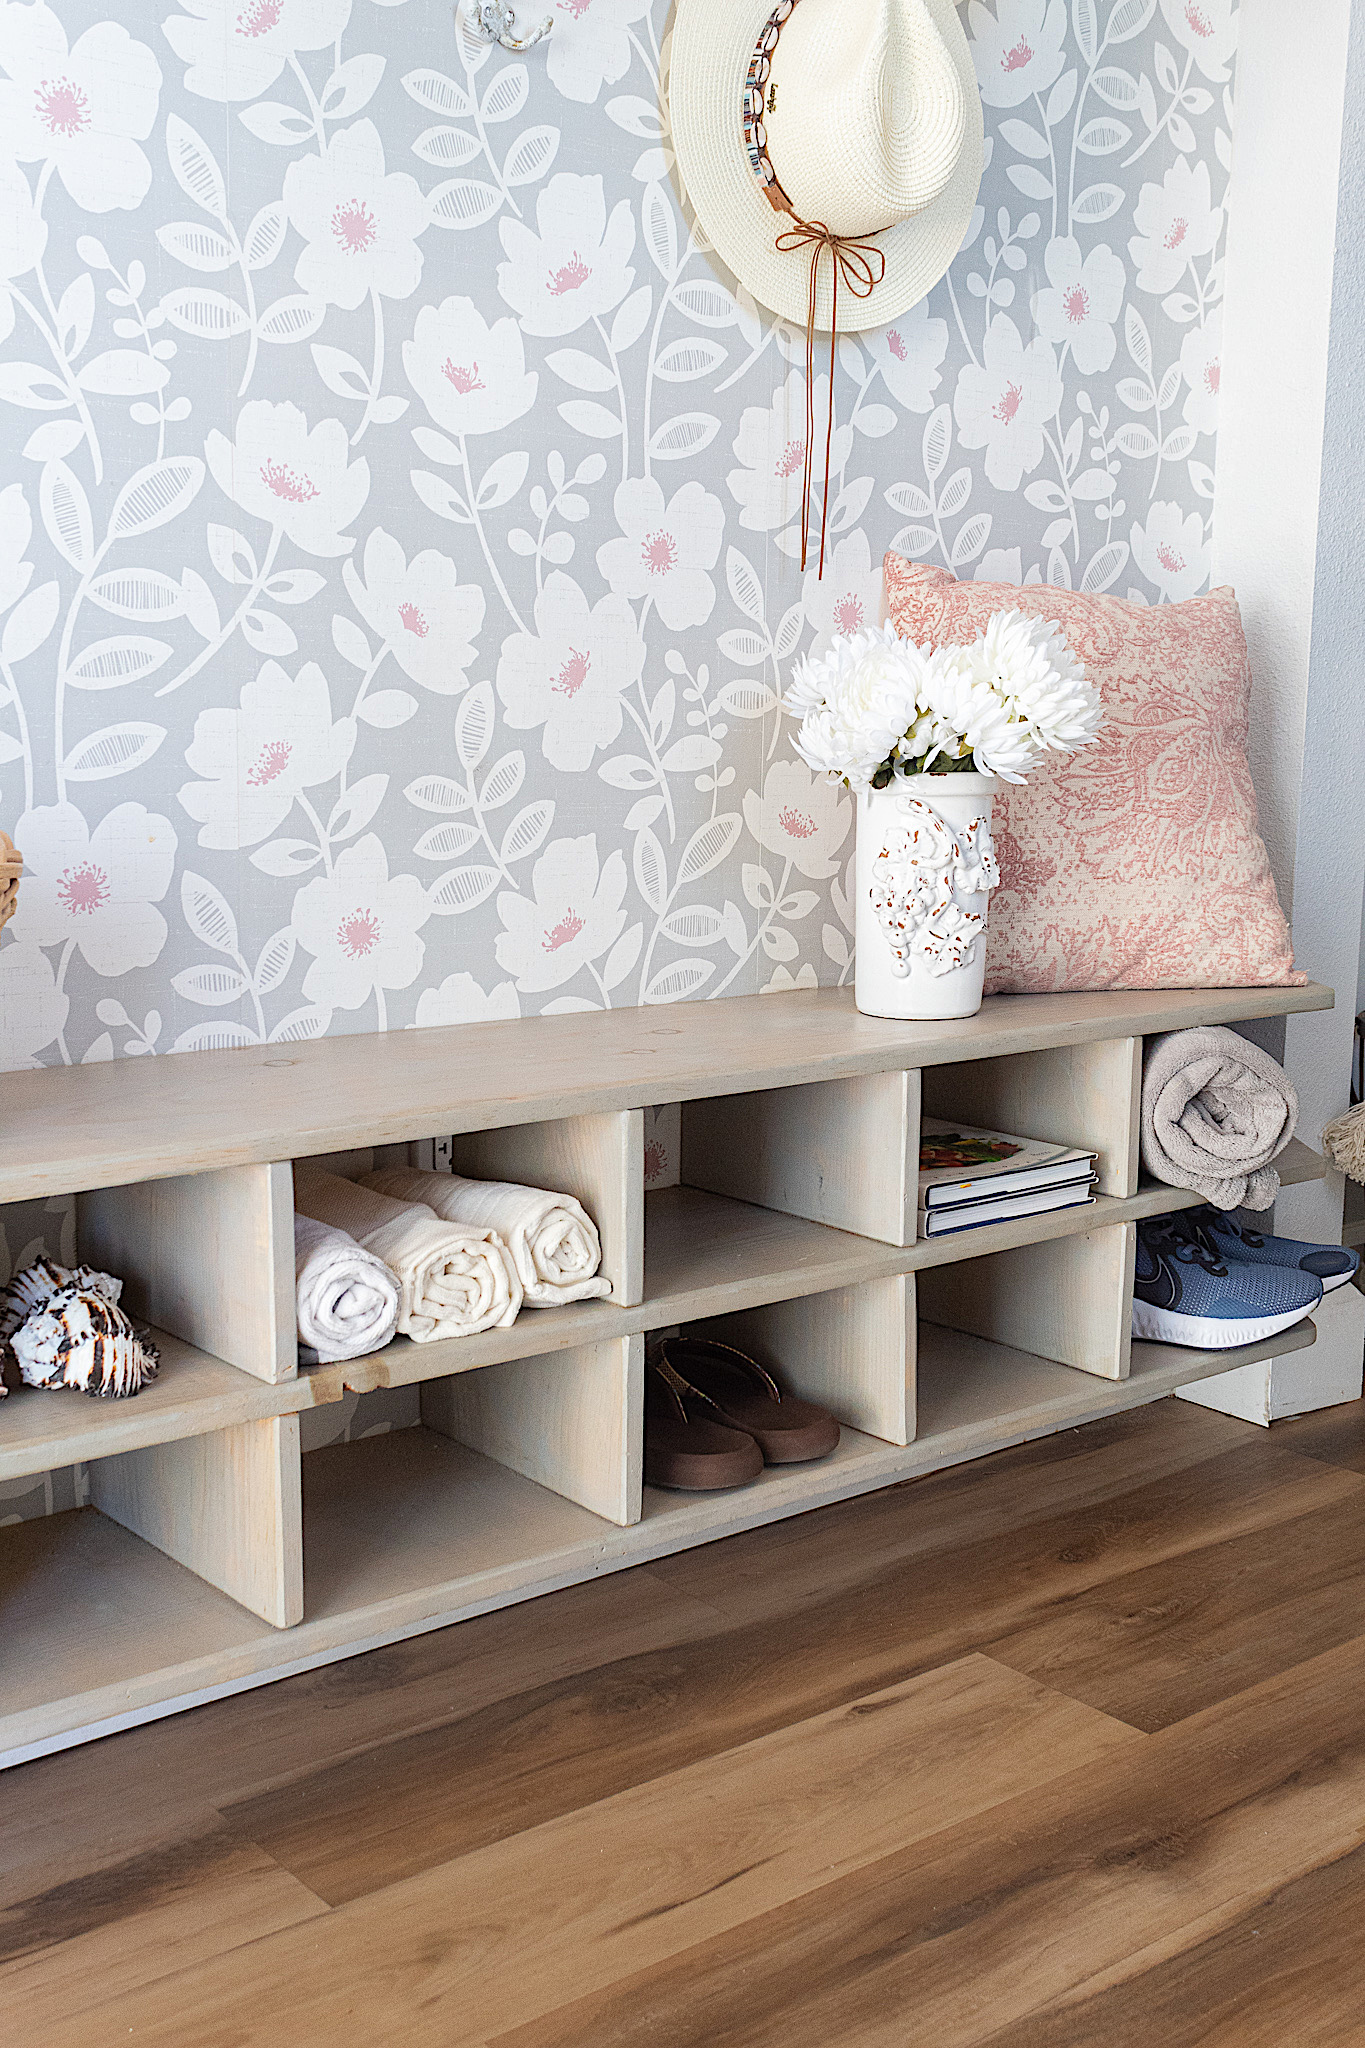
And there you have it! A beautiful organization shelf with storage that doubles as a bench. You could make this suitable to your needs by making it longer or shorter. You could add more cubbies for shoes or make your storage bin bigger.
If you liked this tutorial and you’d like to be part of more fun projects, please be sure to join our tribe and SUBSCRIBE at the bottom of this page! Thank you so much for stopping by my friends. I so appreciate you.