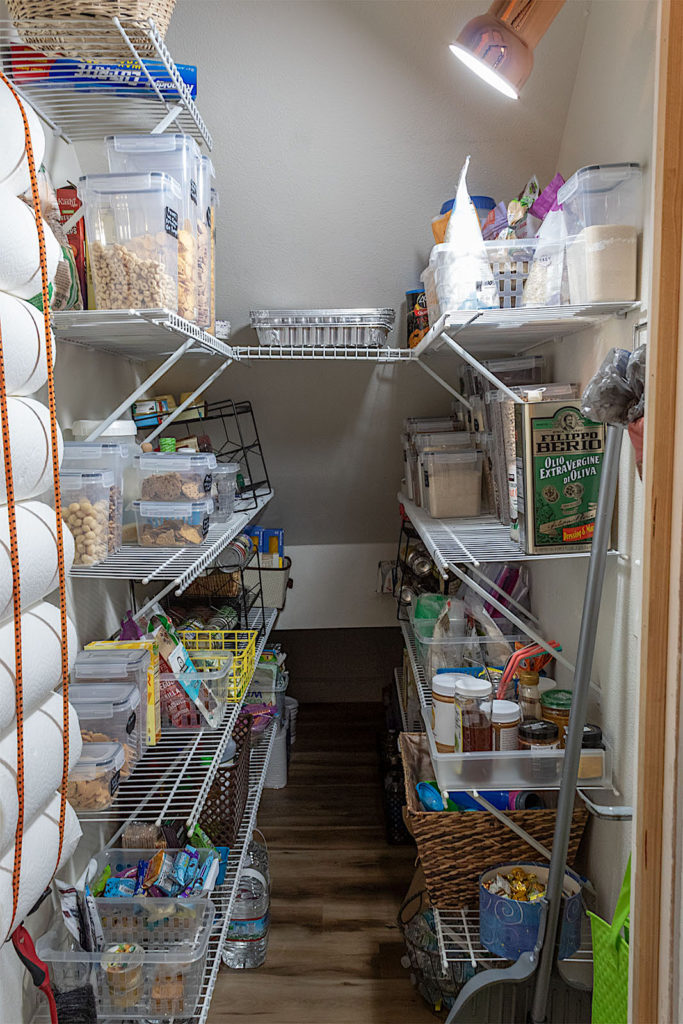
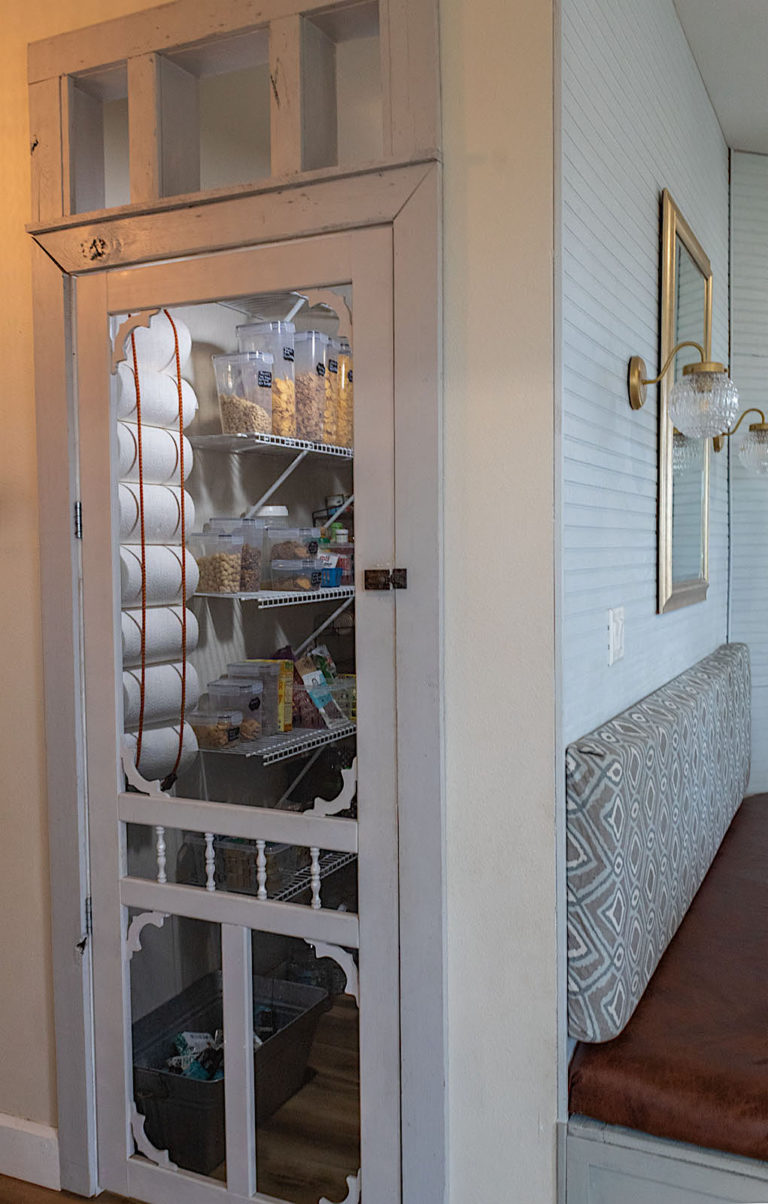
Hi everyone, Jessica here sending you a warm greeting! If there is one area of our home which I wish we would have configured differently when we were designing it, it would be the pantry. Although deep, it is quite narrow. My husband being 6’4″ has a bit of a struggle when he goes in there!
Don’t get me wrong, there’s actually quite an open space for storage, but it is tucked way in the back and under our stairwell. This is good for housing cleaning supplies and emergency canned goods, but it is not practical for everyday use. You literally have to crawl on all fours to access it.
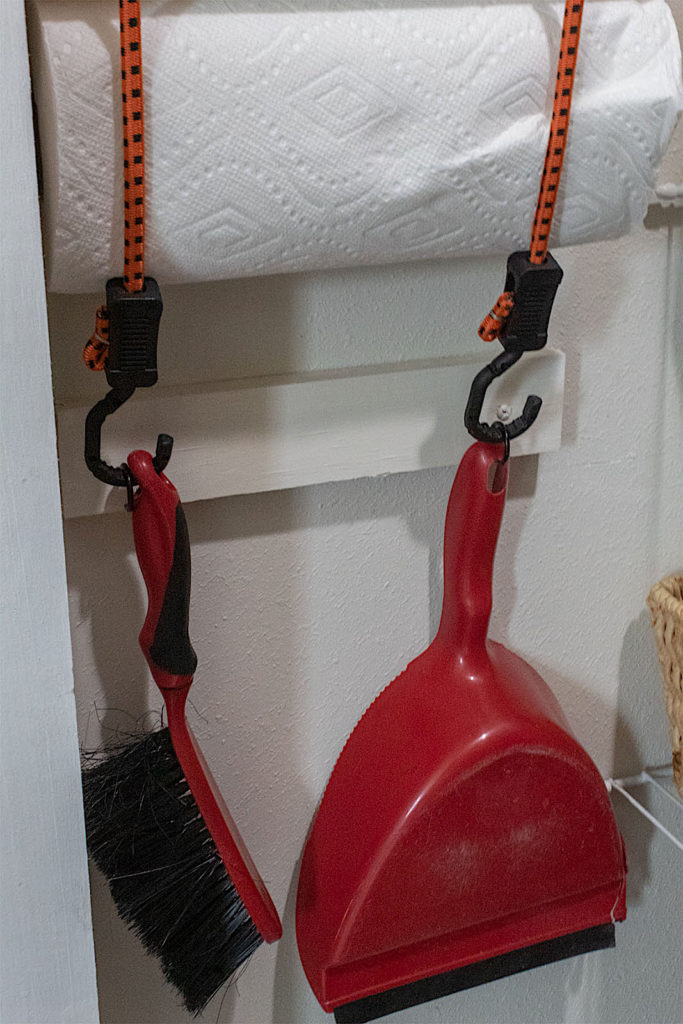
In an effort to use every inch of our pantry wisely, I created this paper towel holder on a narrow strip of wall at the very entrance of our pantry. It has been one of the best and easiest projects I have done in our home.
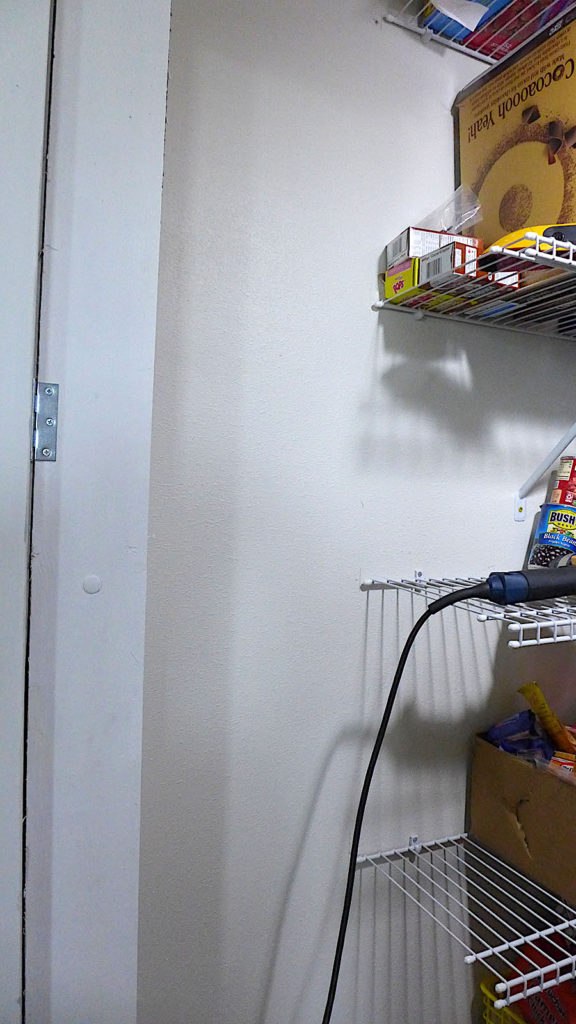
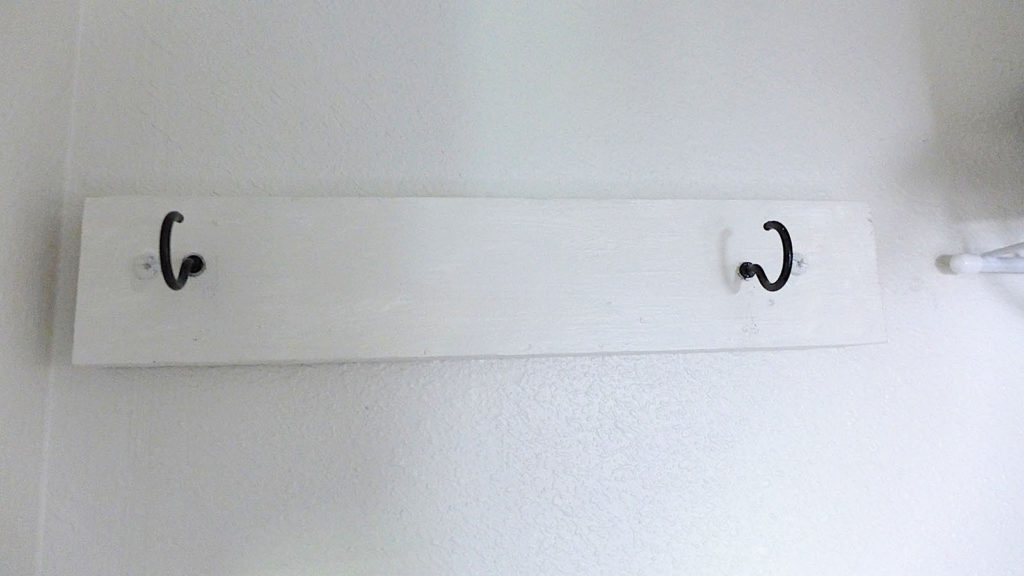
Below is a before picture of the wall. As you can see, there’s not a whole lot of room available since we have shelving on both sides of the pantry. So creating a vertical holder was the ideal way to go.
Today I will show you how easy it is to create this holder.
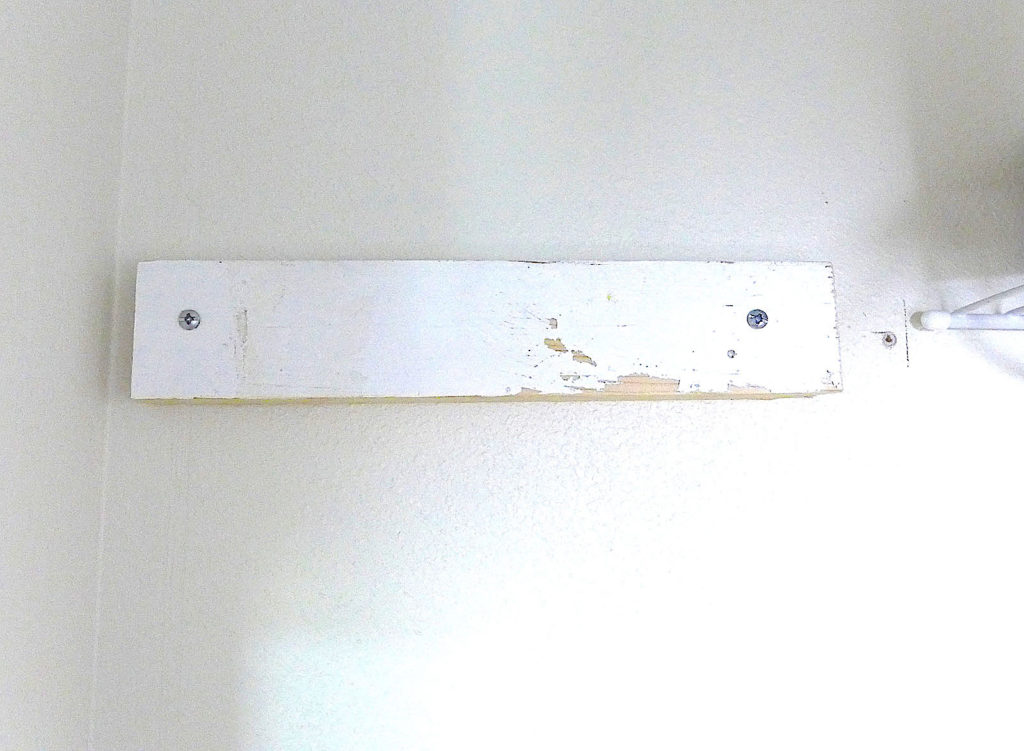
To begin cut two small pieces of scrap wood 11″ long and 2″ wide. (These dimensions can vary slightly). These wood pieces will hold your hooks for the bungee cords. Using your drill with a drill bit that is the width or a little bit wider than that of the stem of your screws, drill two holes into each piece of wood. Place your holes at the far ends of your wood pieces. (see pic below)
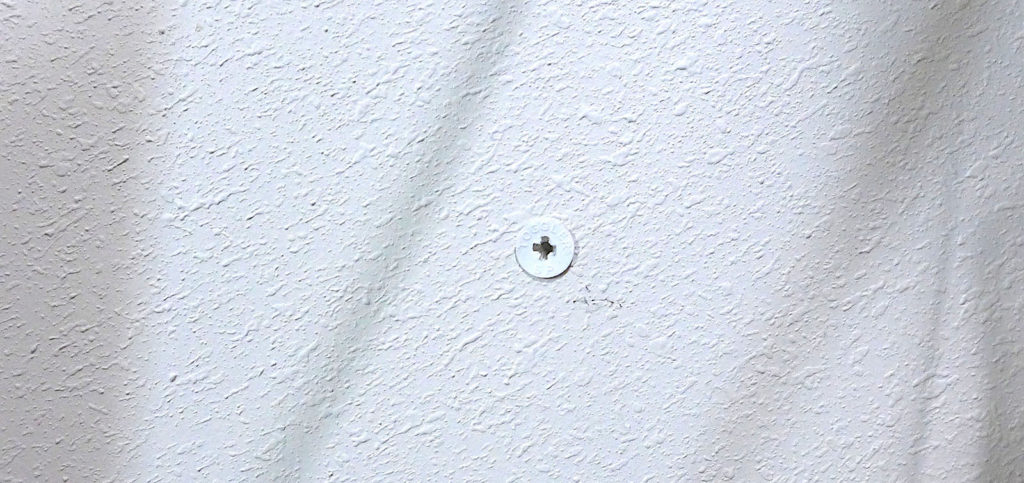
Once you’ve made your holes, hold each piece up to the wall at the location where you will mount it. Using your sharpie, mark a dot on the wall, through each hole. These marks will show you where to screw in your anchors. Be sure to screw in your anchors before drilling in your screws to the wall. This will make sure your pieces are strongly secured to the wall. You don’t want your paper towel holder to loosen later.
I measured a distance of 52″ between my top and bottom pieces. This distance allows for 9 or 10 paper towel rolls in the holder. You can make it less or more of a distance.
Disclosure: Some of the links provided are affiliate links. By purchasing through these links you are supporting this family blog and the work we do and there is no extra cost to you. If you would like to read our full disclosure, click HERE.
Once my wood pieces were mounted on the wall, I painted them the same color as my wall so they would blend in better.
Next I drilled a small pilot hole for the hooks and screwed in two hooks per piece. You may not need to make pilot holes. You may be able to twist your hooks in by hand.
Finally, take your bungee cords and hook them to the top hooks, then pull them down and connect them to the bottom hooks. Then simply slide in your paper towel rolls.
And that’s it friends. Pretty easy huh? This paper towel holder may not be the fanciest looking, but it sure is functional and a great organization tool—two qualities I love. I personally don’t mind seeing it through our screened pantry door. I think it adds farmhouse character!
I hope you enjoyed this tutorial and be sure to SUBSCRIBE at the bottom of this page for more fun DIY’s!