Hello lovely readers! Today I’m sharing with you a wonderful way to add vintage appeal to your furniture pieces. You may have heard of rub-on furniture transfers. These are absolutely beautiful and I love to use them. However, they can get pricey.
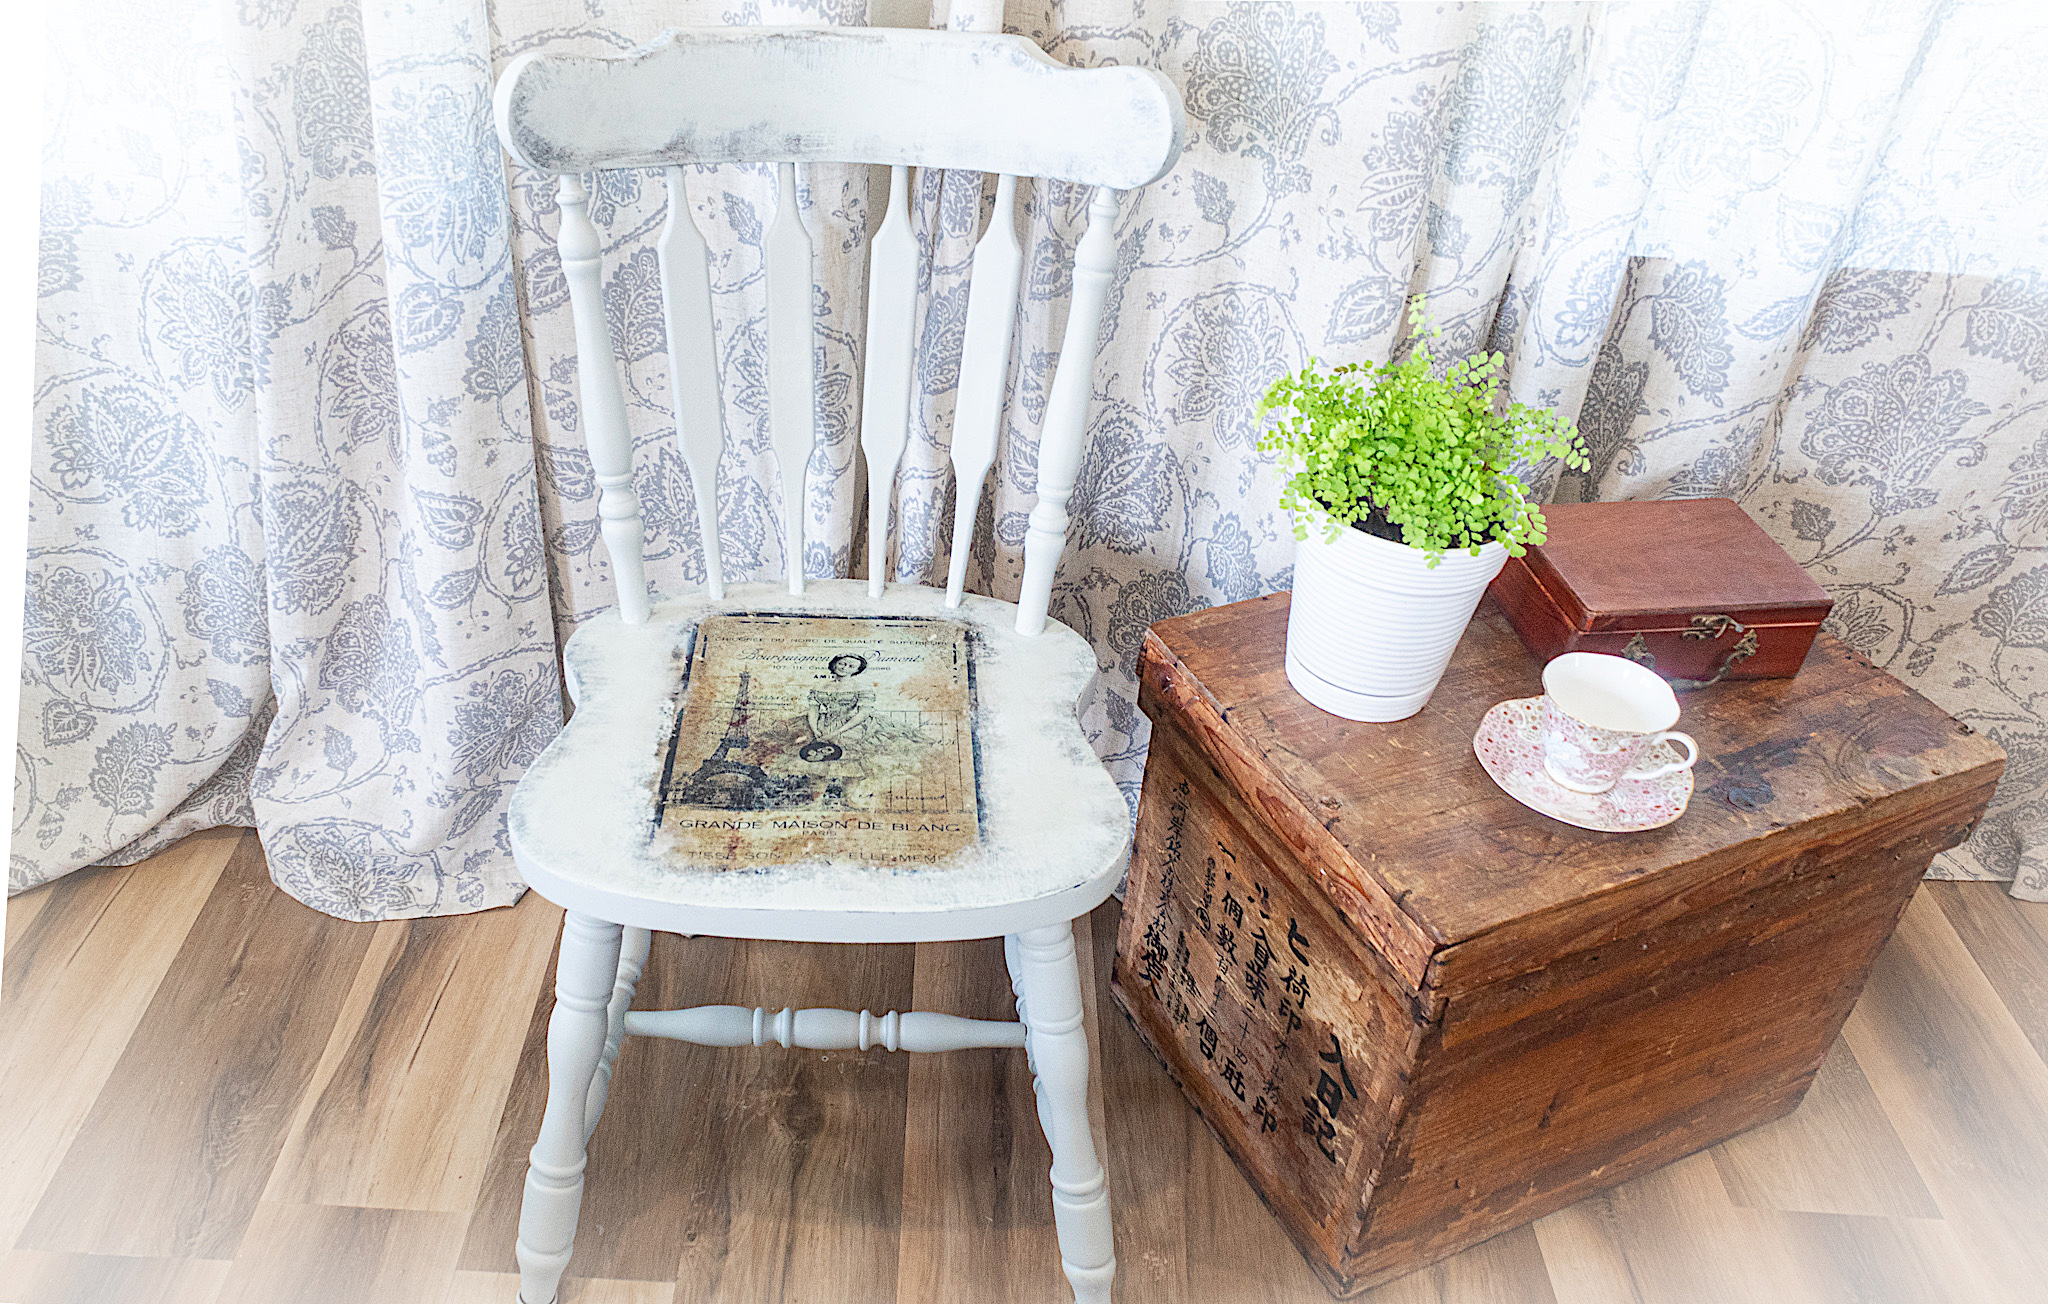
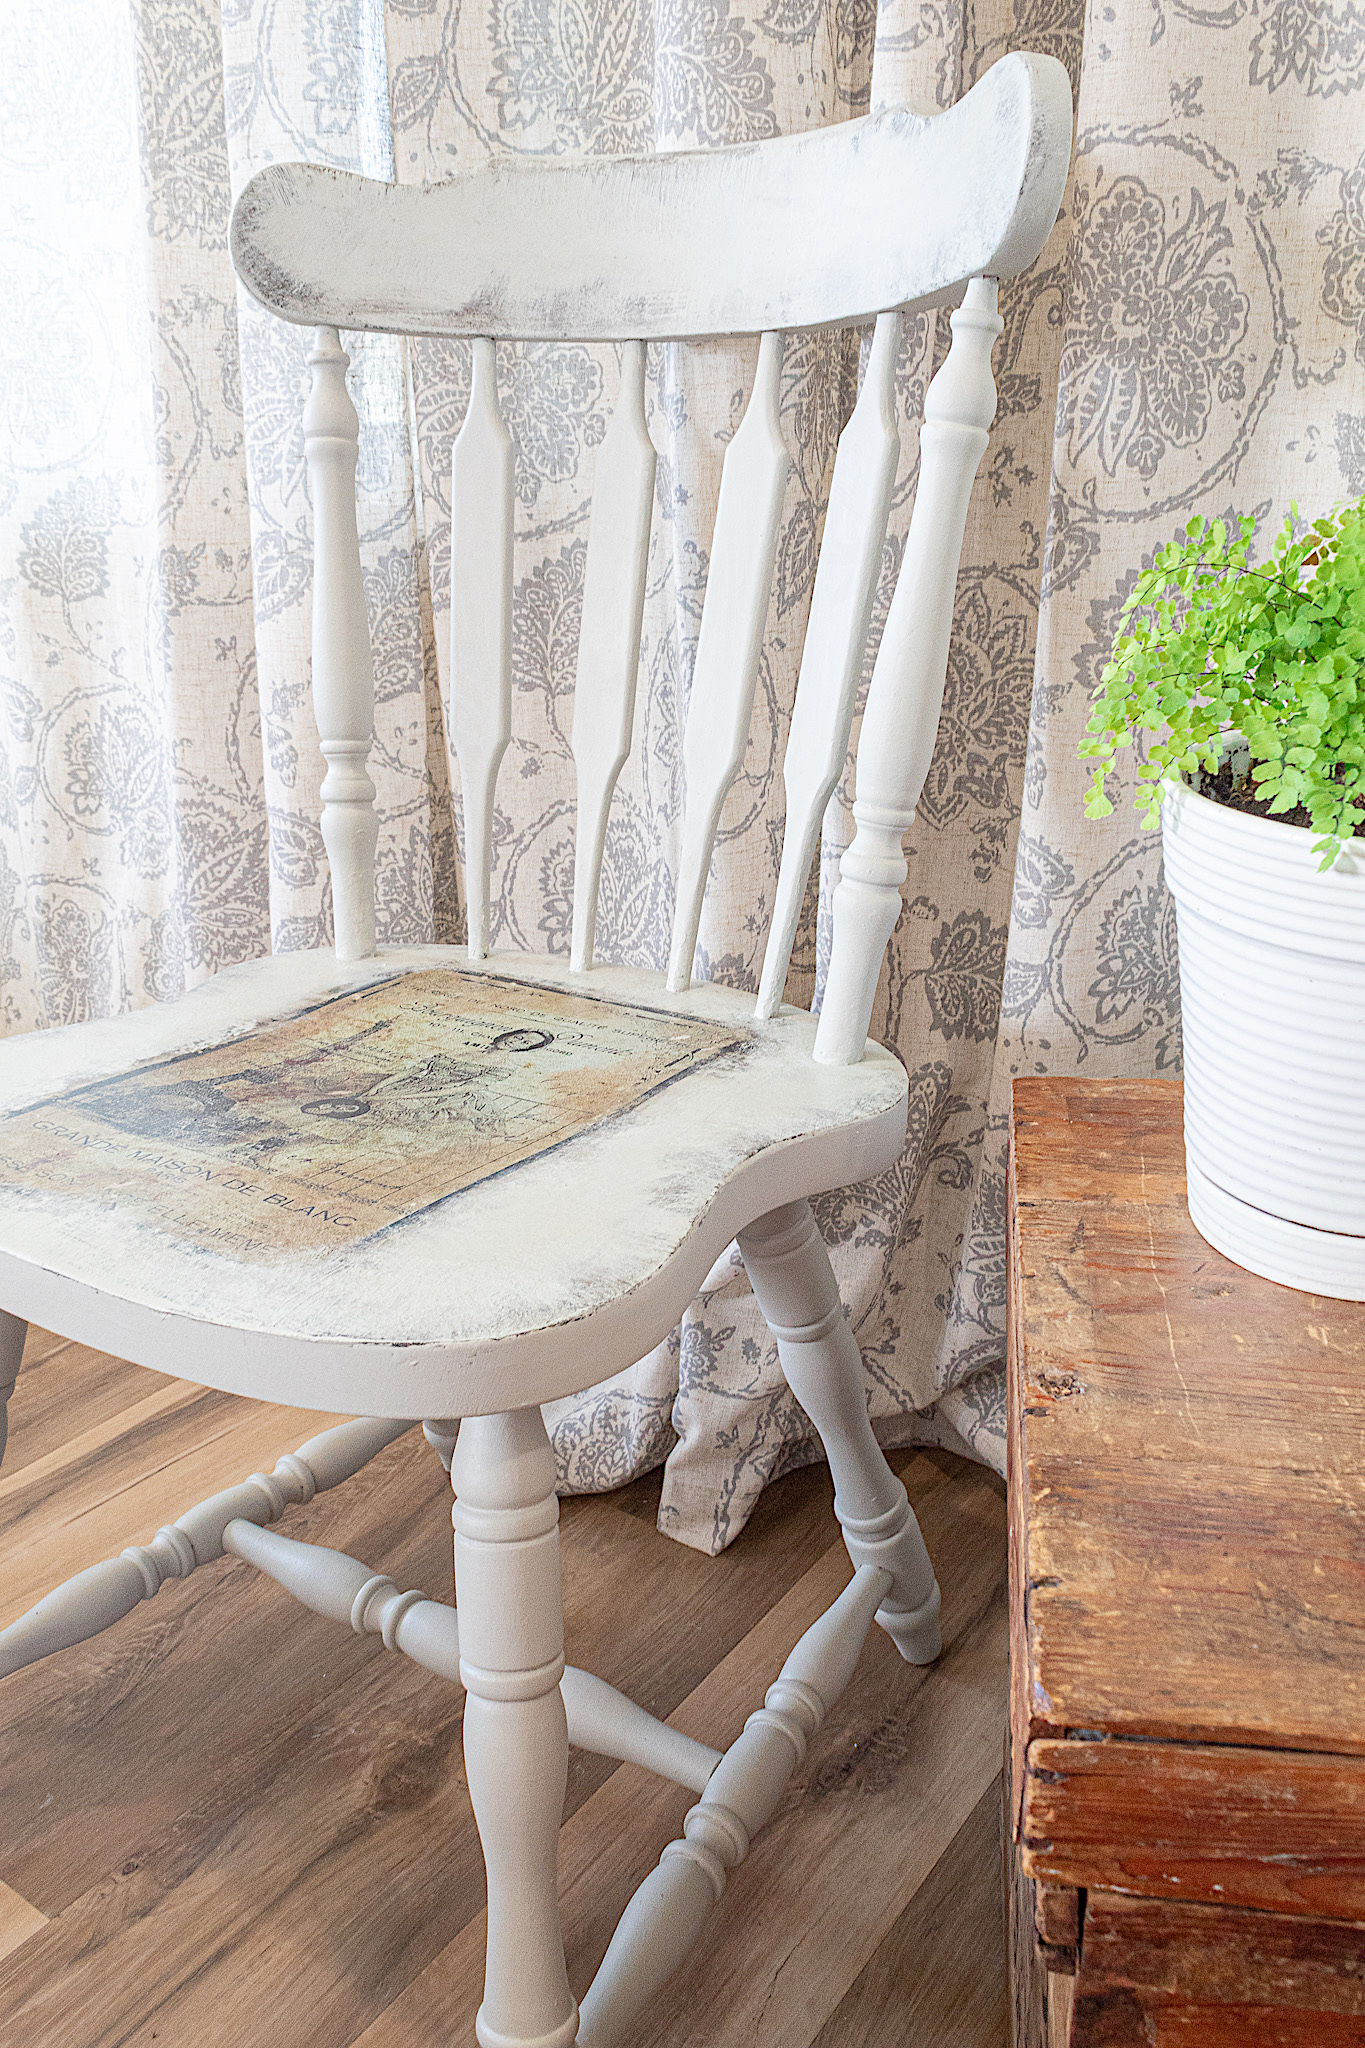
Adding a printed image transfer with your image of choice to your furniture pieces is another way to achieve a gorgeous look. And it is very inexpensive. Thank you for stopping by and take a look at how I transformed this old chair.
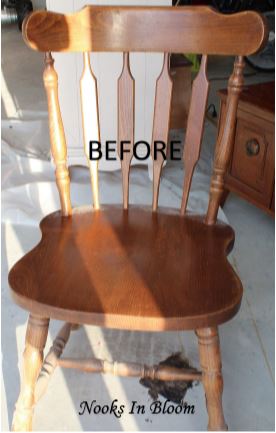
This was a $6 find I picked up at the thrift store. It was in good condition and I liked its classic lines. It was perfect for a vintage makeover.
Disclosure: Some of the links provided are affiliate links. By purchasing through these links it supports this blog and the work we do and there is no extra cost to you. If you would like to read our full disclosure, click HERE.
MATERIALS LIST:
Behr’s Arid Plains paint (chalked using THIS recipe)
electric sander (this is the sander that has lasted me the longest) and sand paper
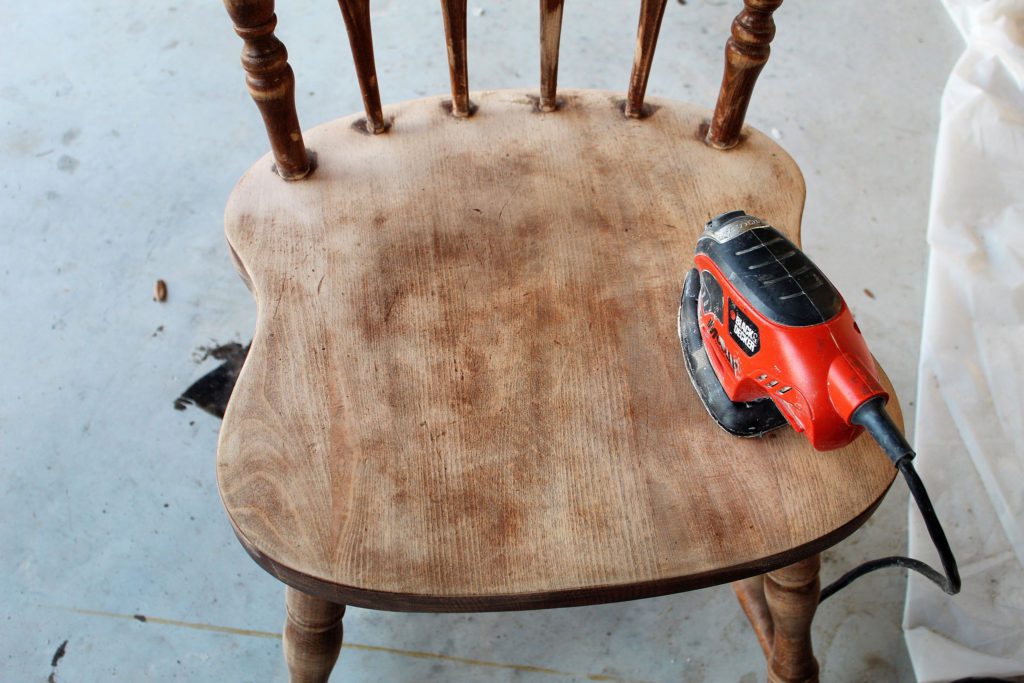
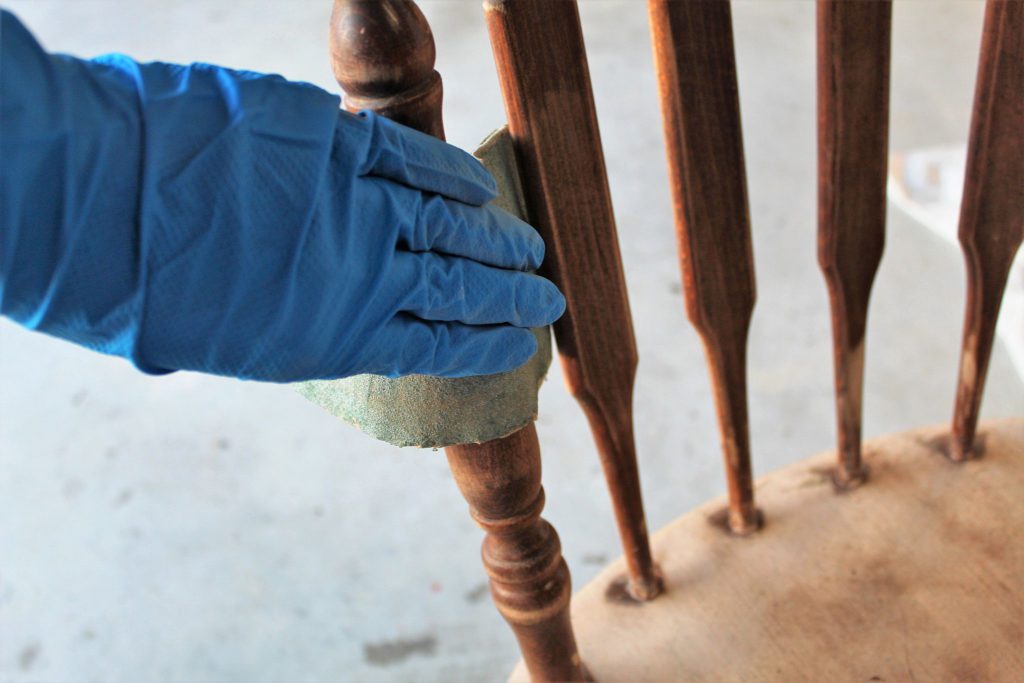
I first gave the chair a light sanding. I used my orbital sander on the seat and hand sanded the legs and chair back. Then I gave everything a good cleaning.
2. Paint
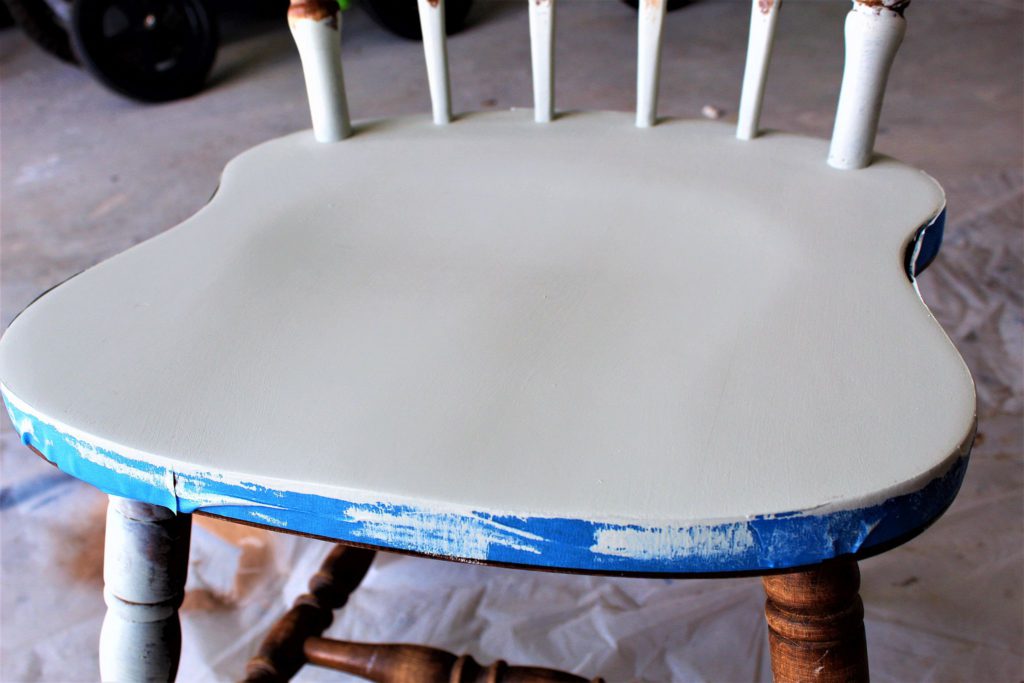
I hand painted the chair with two coats of my Arid Plains paint. I left some parts exposed as I was initially going to add a paint blending technique to the chair, but later I decided to keep everything one color. It’s not unusual for me to change directions with my vision several times when I’m doing furniture renovations!
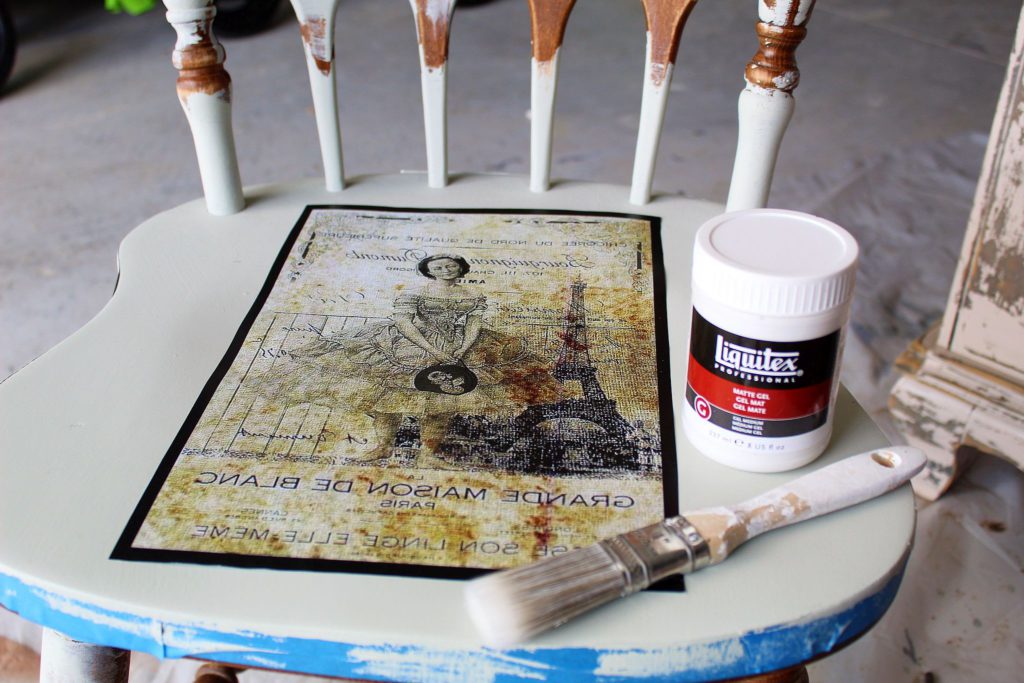
3. Applying Your Image Transfer
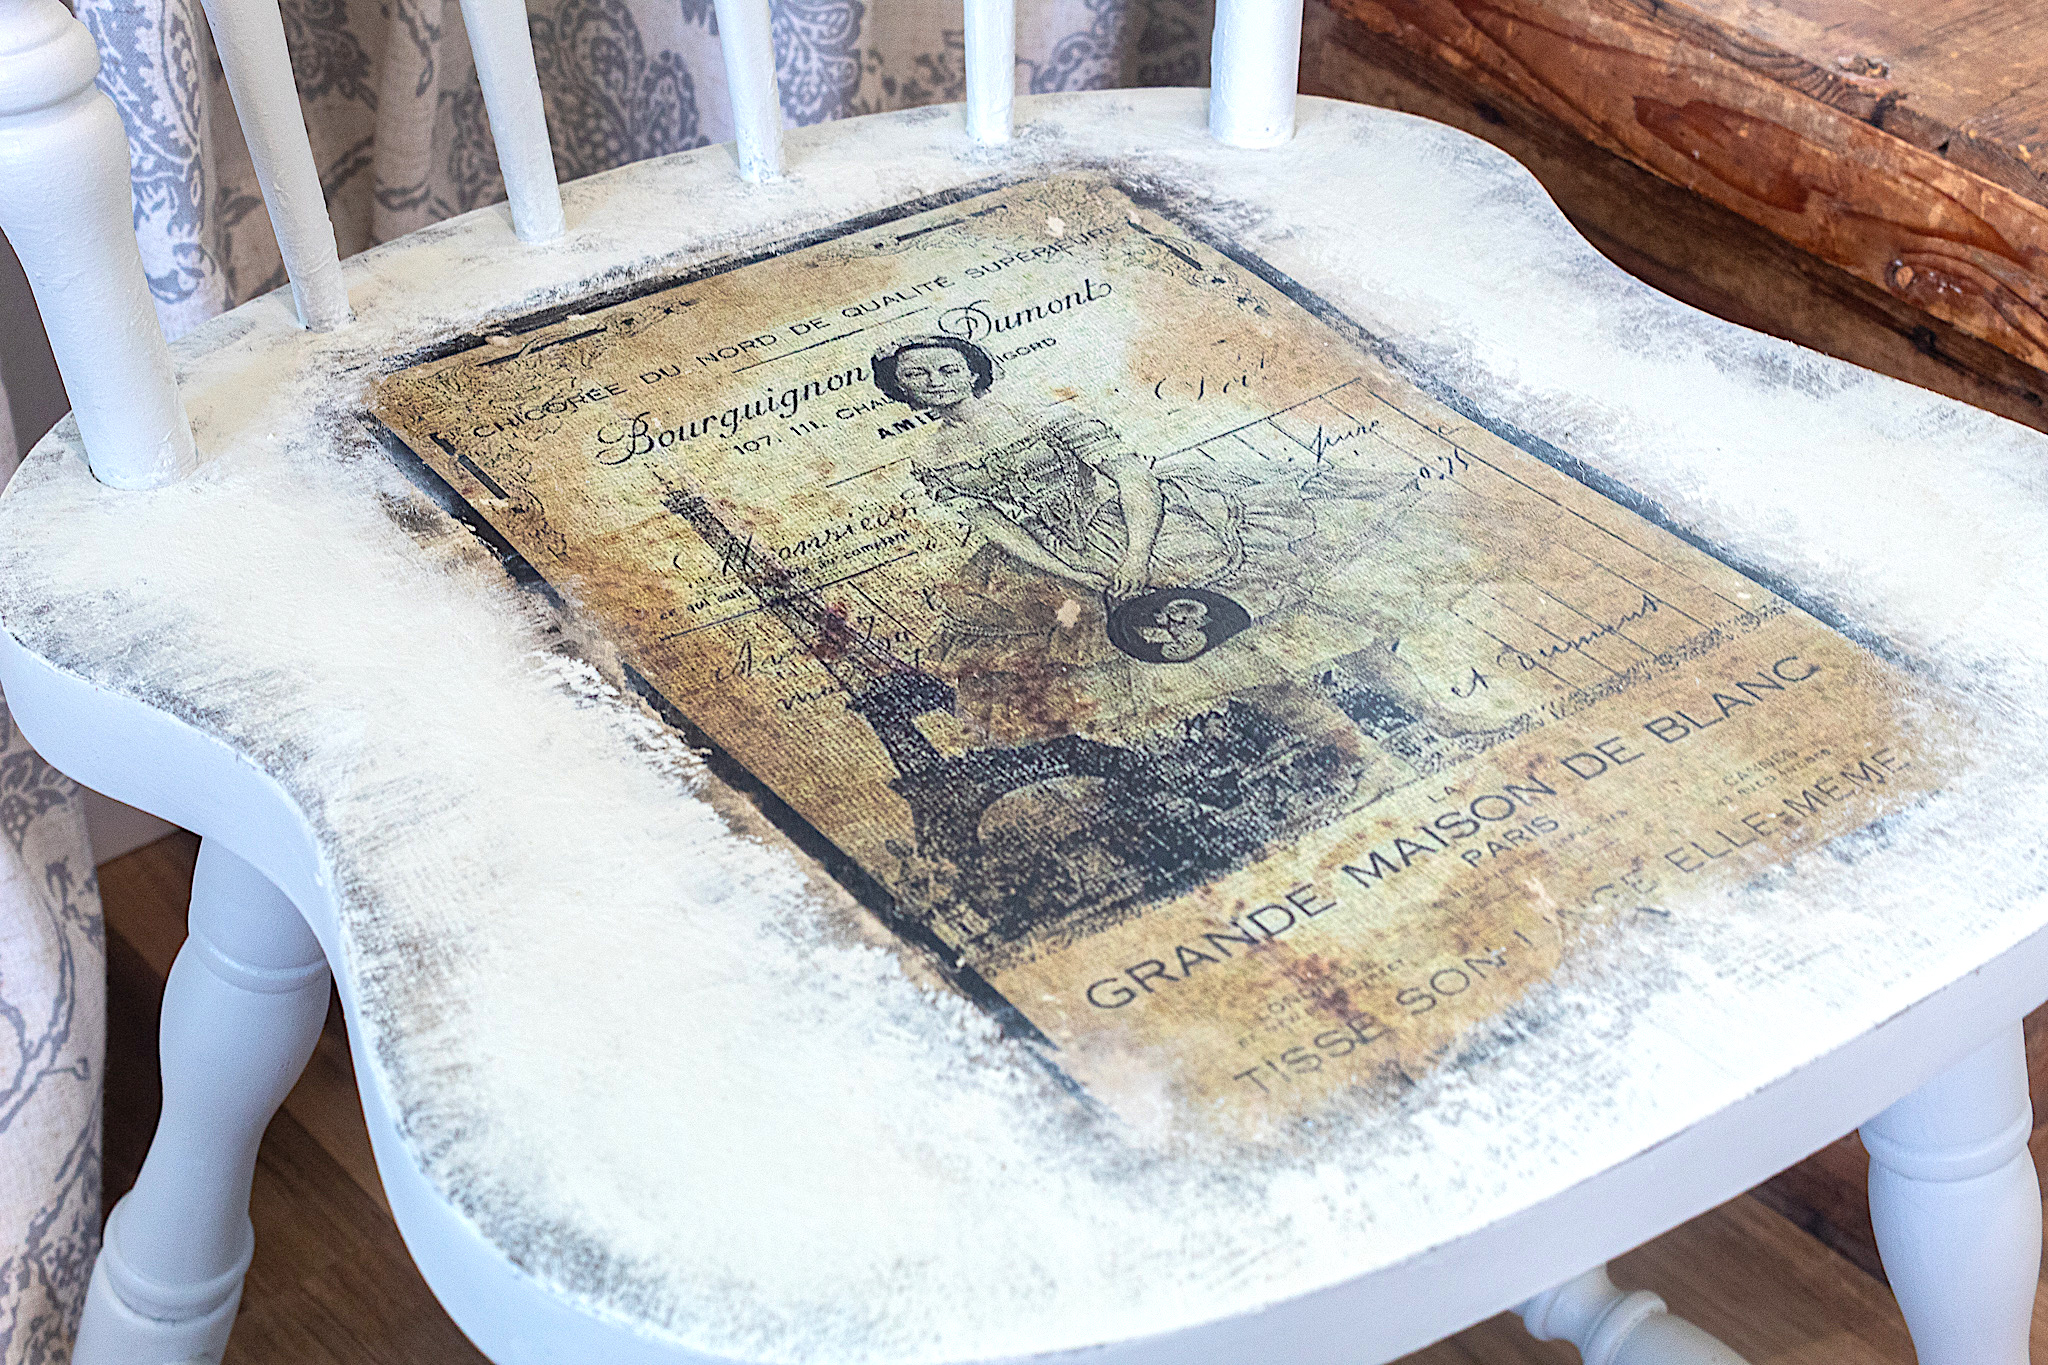
There is a great tutorial on Artisan Enhancements on image transfers. I found this image online and it was free to use (always be careful to avoid any copyright issues). I thought it was so pretty with the Victorian girl under the Eiffel Tower and I loved the vintage aesthetic. I emailed the image to a local UPS store and they printed it for under $2. BE SURE to have them print it in reverse and on regular paper— no stock or thick paper.
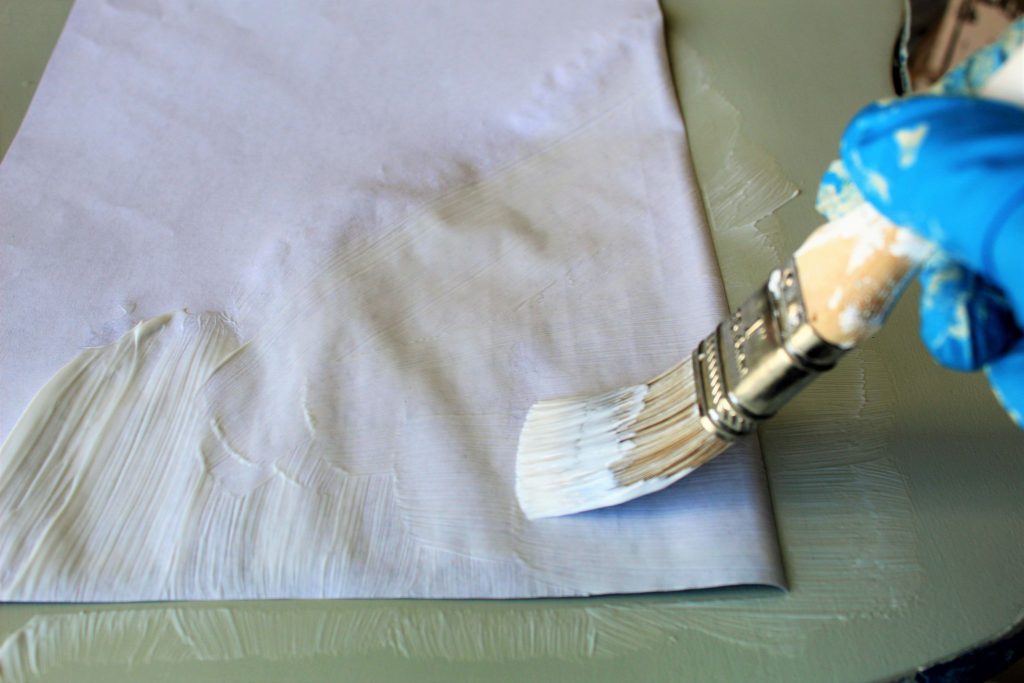
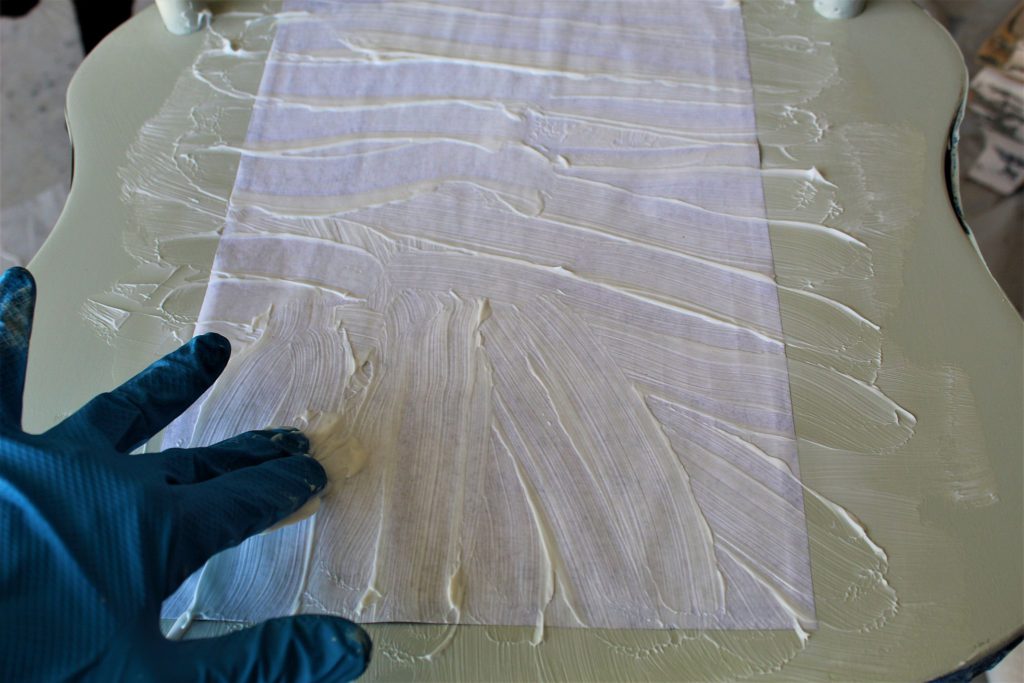
I applied the image face down and goo’d (probably not a real word) it all over with my transfer gel. Be generous with the gel. I used my fingers to smooth out any wrinkles or air pockets. I went over and over it until it felt nice and “suctioned” on. Then I wiped off any excess gel outside of the image area.
t
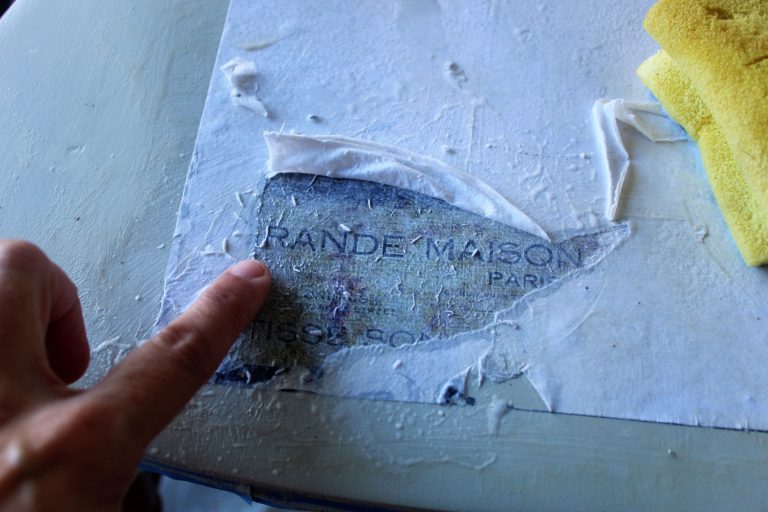
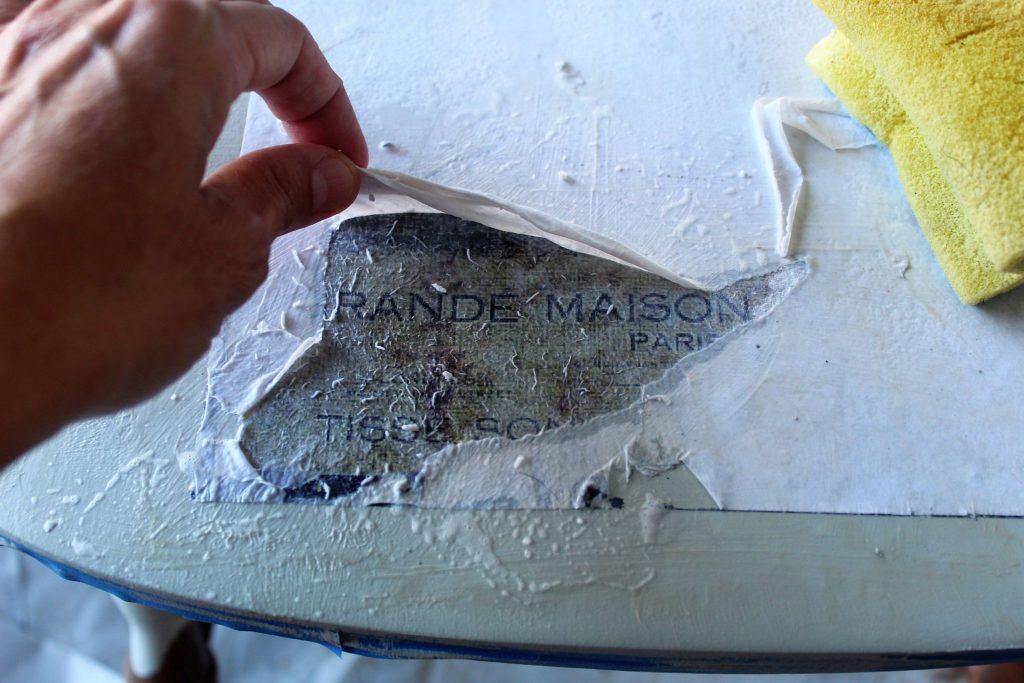
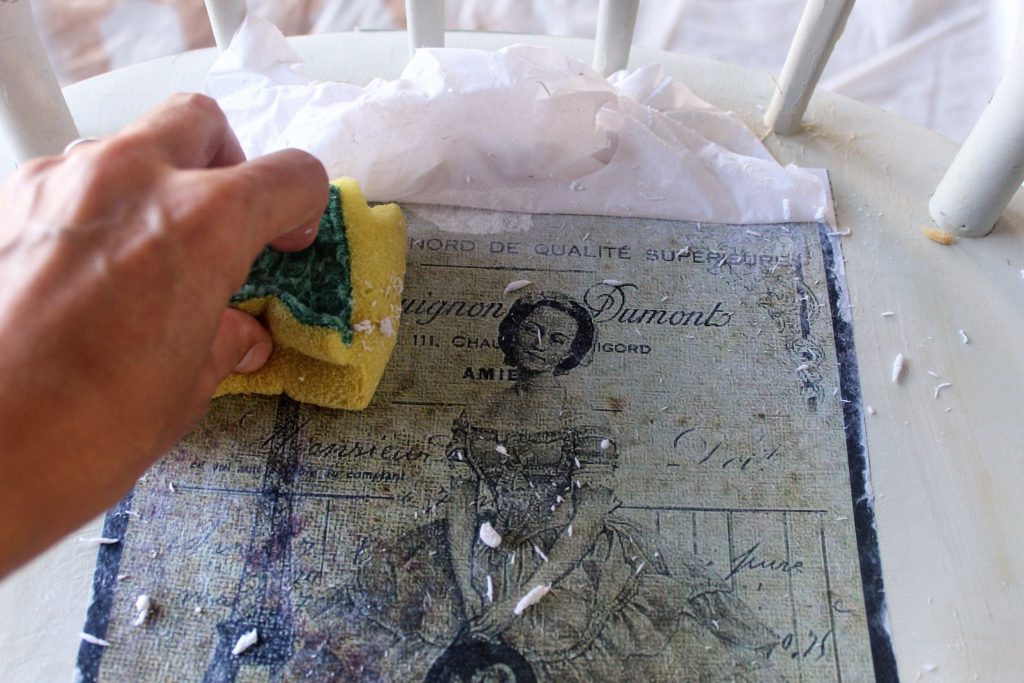
I let the transfer gel dry over night. I was very excited about the next part…the image reveal. With my water mister, a sponge, and my very sophisticated tool (the finger), I got to work gently rubbing over the image, making sure I dampened it with the mister as I went. Don’t over wet, just enough to help the gel rub off.
The reveal process takes a bit of time, so don’t hurry yourself. After I got the first layer off, I could see the entire image but it was hazy. So I let it dry and then came back over it with a damp sponge again, rubbing off more of the residue. I repeated this 3 or 4 times until the image was nice and vivid.
4. Glazing
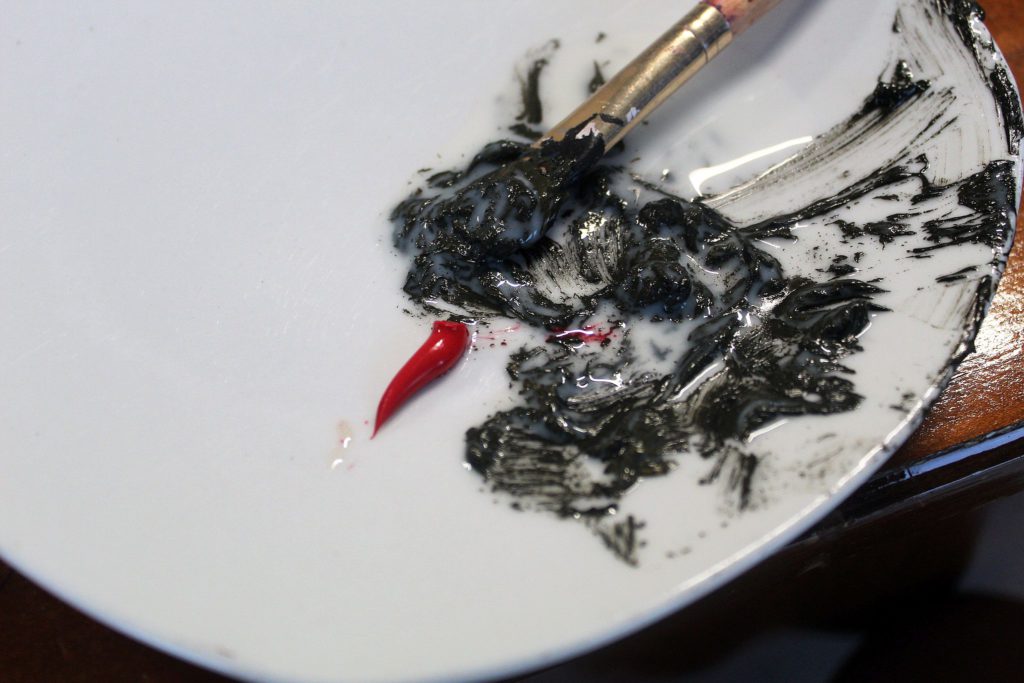
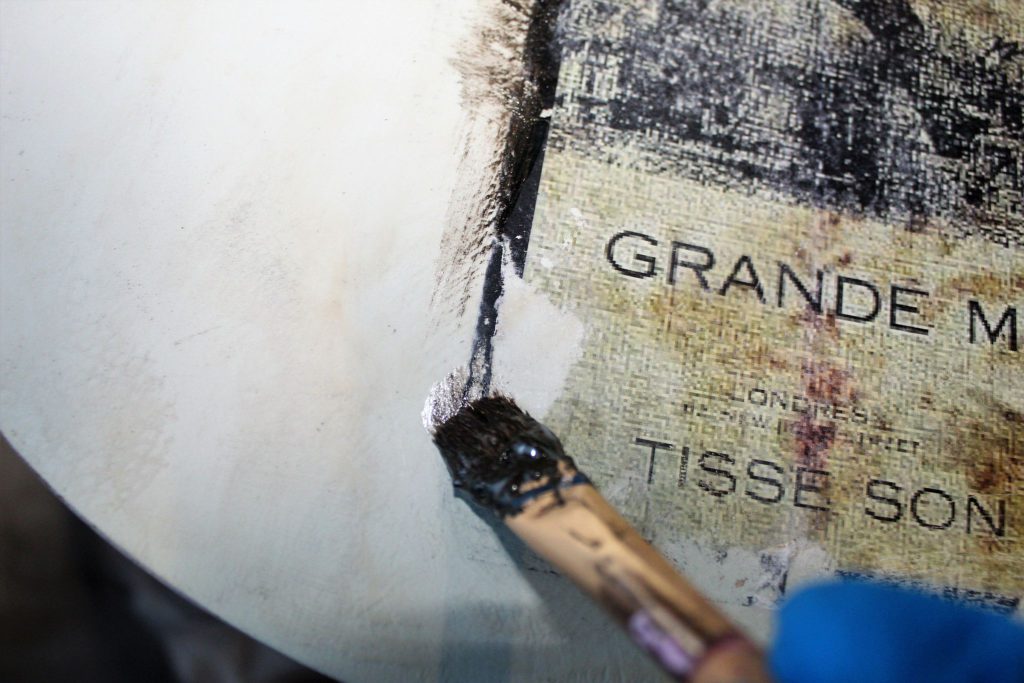
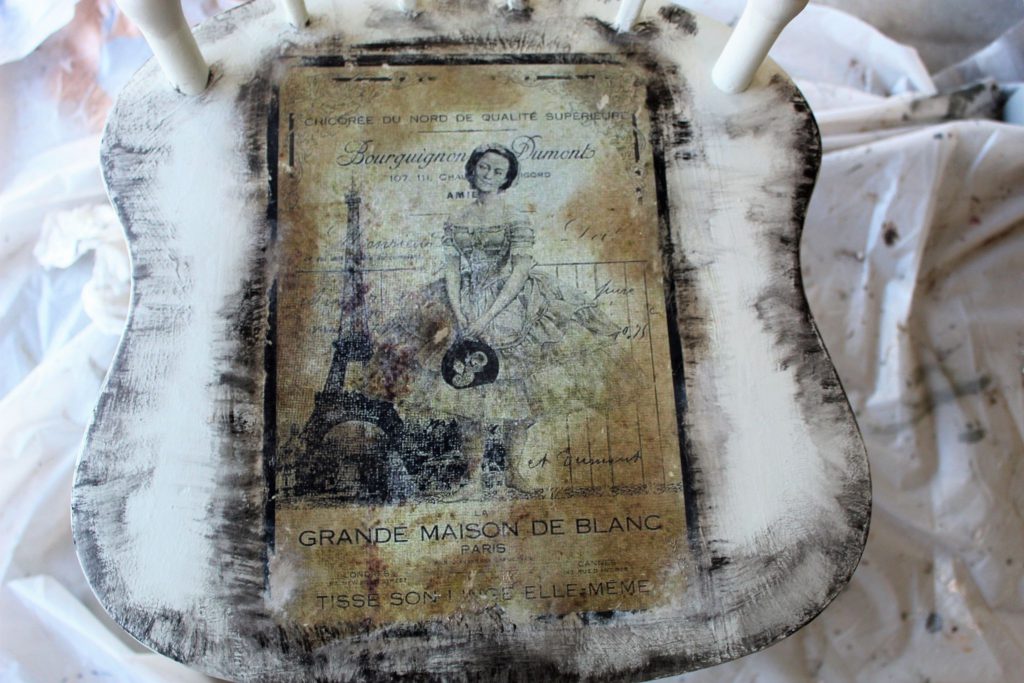
During the rubbing-off process I purposely distressed some of the edges of the image to give it a more worn look. I also wanted to make sure the chair’s aesthetic matched the vintage style of the image. I decided to add some glaze to give the painted chair an antique effect. I mixed some black acrylic paint with my glazing medium (approximately 2 parts paint to 1 part glaze). In the picture you see some red, but I ended up going with just the black for my glaze.
Then I went around the image with a small paint brush and feathered some of the glaze. This technique helps give the image a more integrated look. I also applied the antiquing wax over distressed parts for a more aged appearance and around the chair’s edges.
Now I must warn you that things get ugly before they get pretty! Take a look at the next picture. The glaze looks pretty messy…
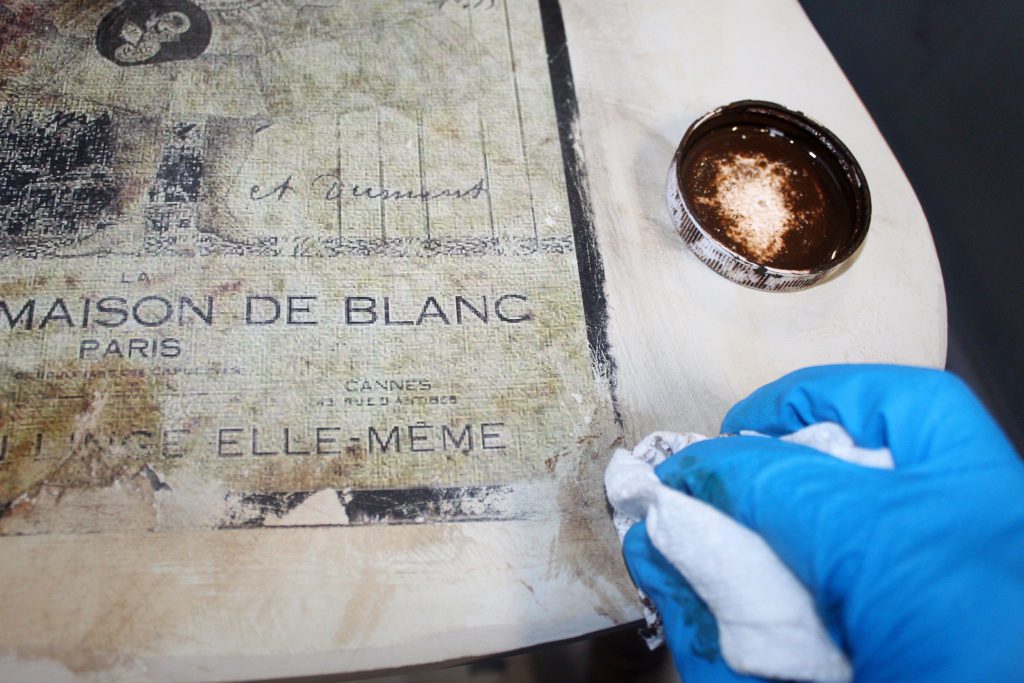
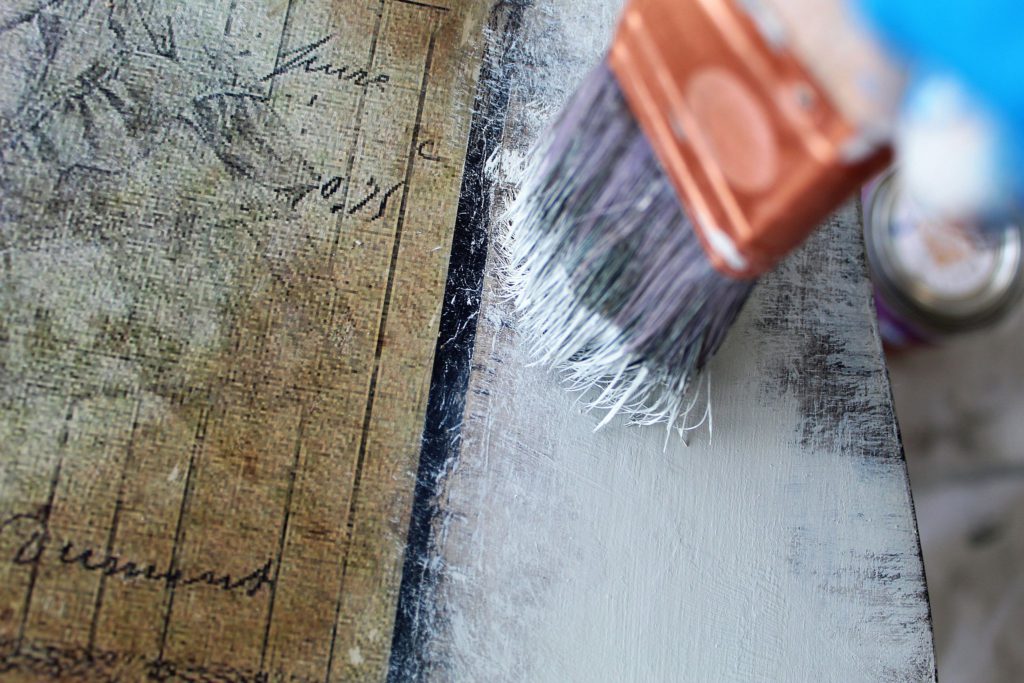
4. Touch Up With Paint
This next step brings the entire look together. I took my paint brush and lightly dabbed it up and down over some of the glazed parts with my Arid Plains paint. Only a little paint on my brush at a time. This added a textured look while softening some of the black. It also helped blend the image into the background.
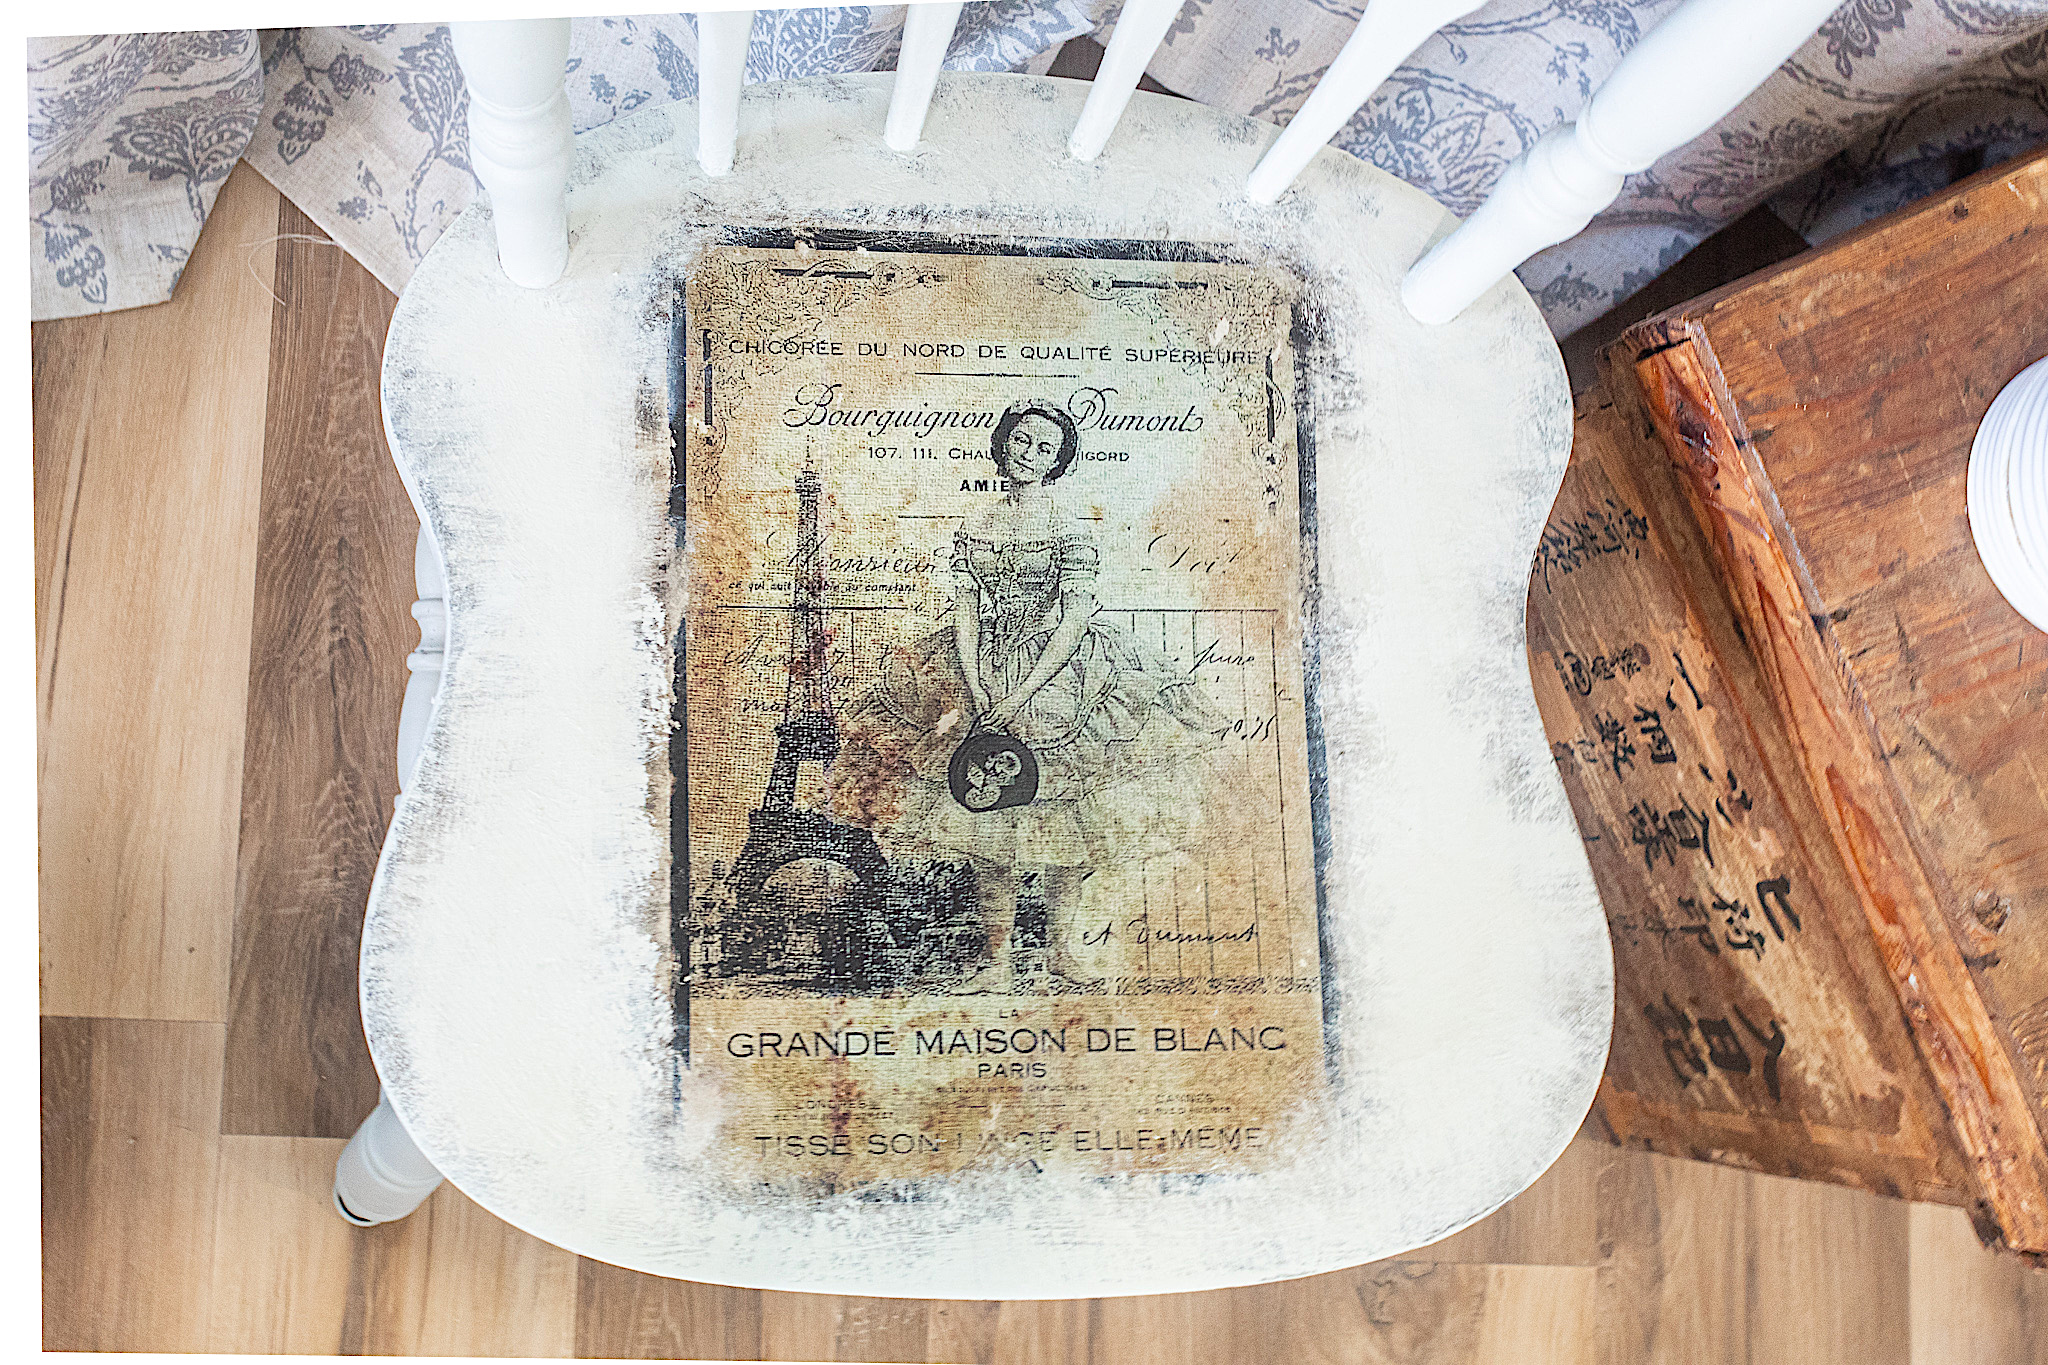
6. Final Step, Seal Your Piece
inI sealed the chair by applying my clear wax with a paper towel all over. I gave the chair a few days before sitting on it. I love this finishing wax and use it a lot. Once the wax is cured it is an excellent protector. I’ve had this chair for over a year and the finish still looks great even after lots of sitting on it.
Now you can enjoy your stylish time-honored furniture! This technique does require a good amount of patience as the rubbing process takes some time. But I feel it is worth it. The results of incorporating a printed image with a gorgeous vintage aesthetic is a way to create art in your home. I can see using this technique to preserve beautiful family pictures as well.
Thank you SO much for stopping by and being a part of the Nooks In Bloom family. I love sharing with you and am excited to show you some exciting projects coming up. Be sure to SUBSCRIBE (scroll to the bottom of the page) so you don’t miss anything!
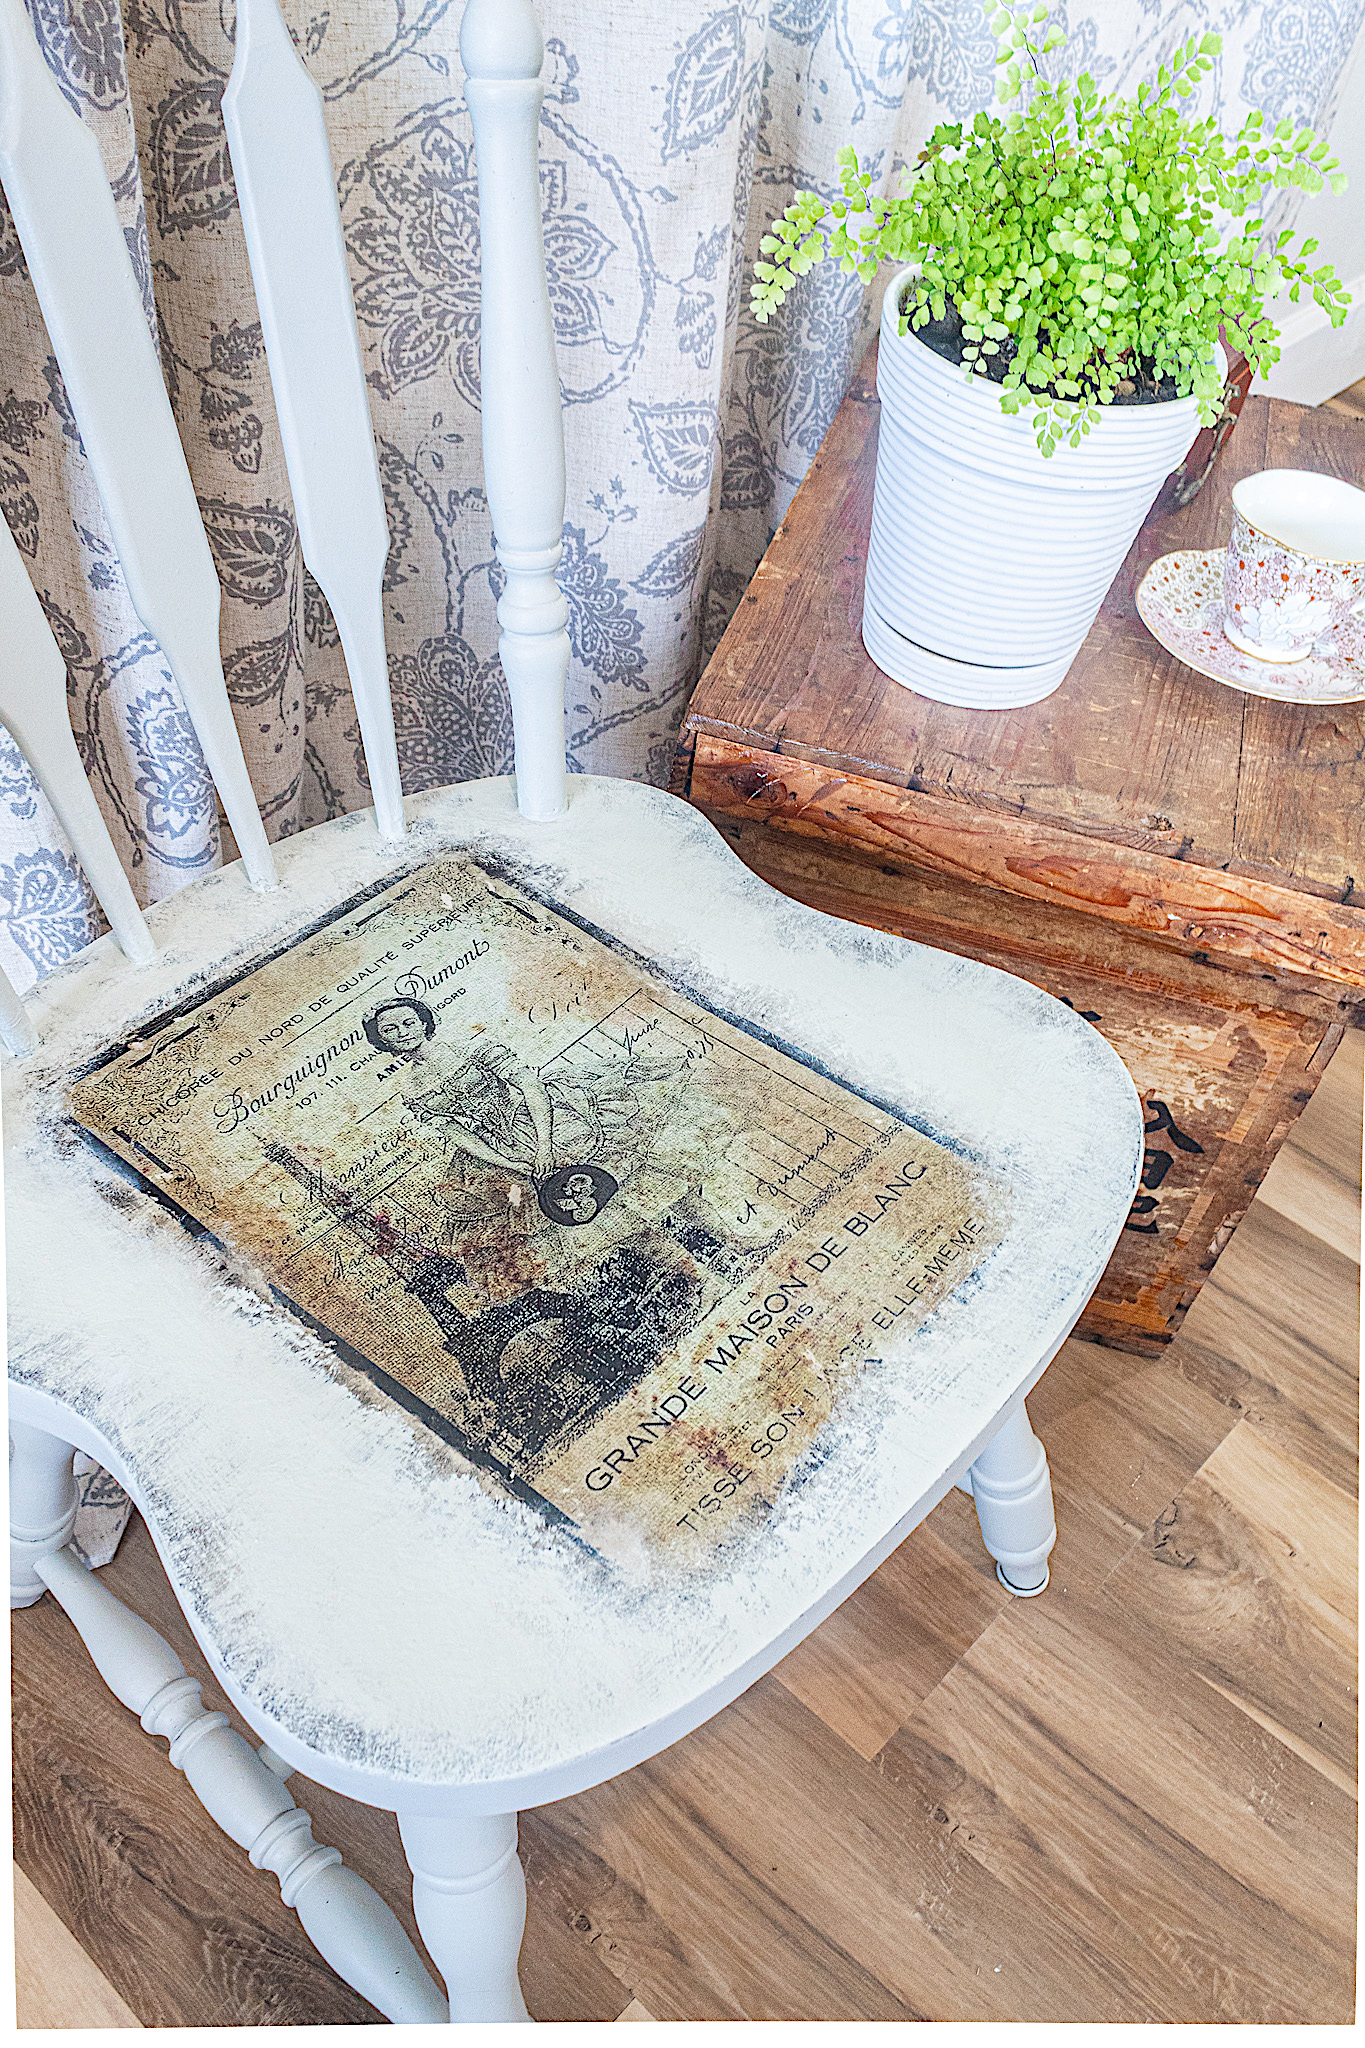
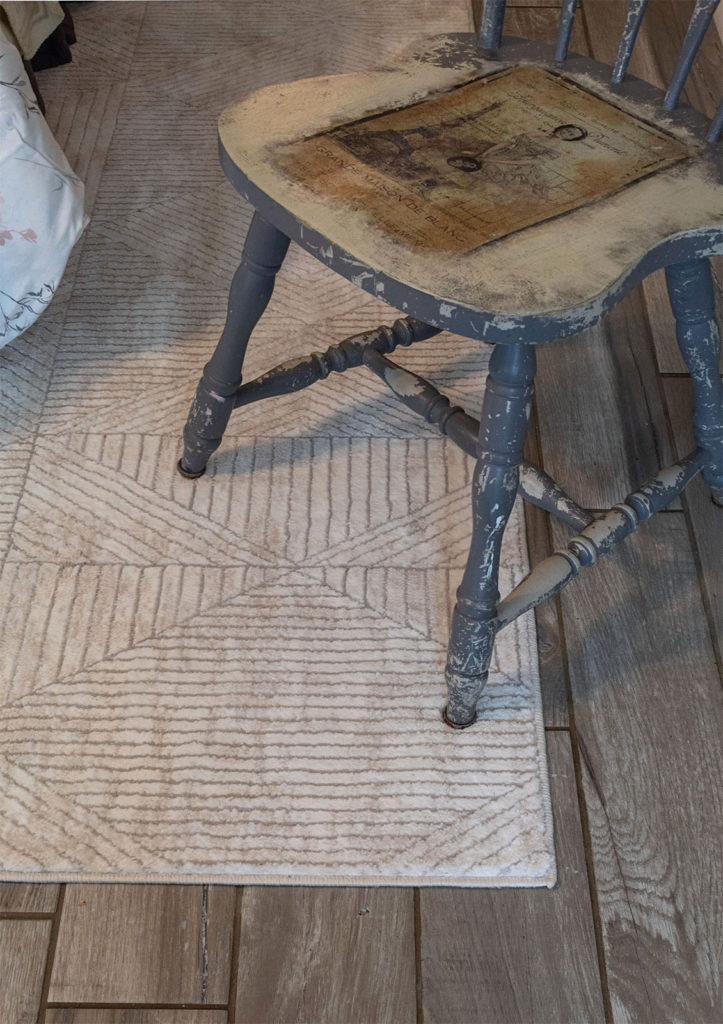
Update: Several years later...
It has been a few years since I renovated this chair. It is still a beloved piece in our home. After a couple years the paint suffered some chips and wearing with the amount of traffic in our house. I added a coat of dark gray paint to it, in haphazard fashion. Over time the gray has distressed, exposing the lighter color underneath and creating a gorgeous weathered look!