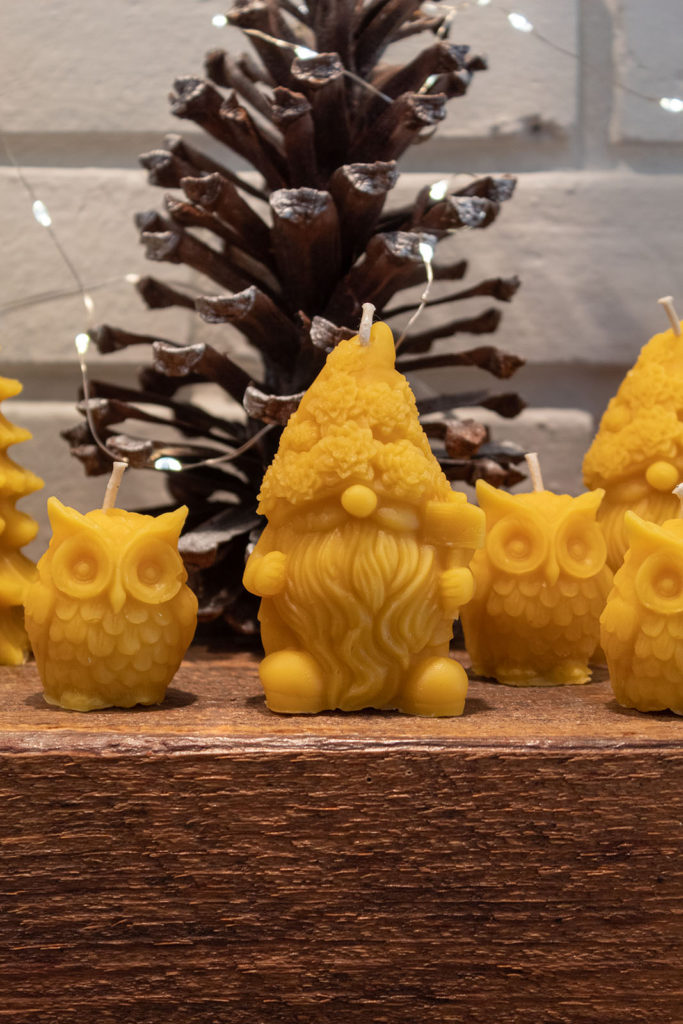
Can you believe Christmas is only 5 days away! As you can see, I’m very behind in sharing any holiday posts with you. We have just been in the thick of life enjoying our new home, hosting friends and knee deep in kids’ activities. In case you are scrambling for last minute gifts, consider these adorable hand poured beeswax candles. I’m going to show you just how easy it is to make them!
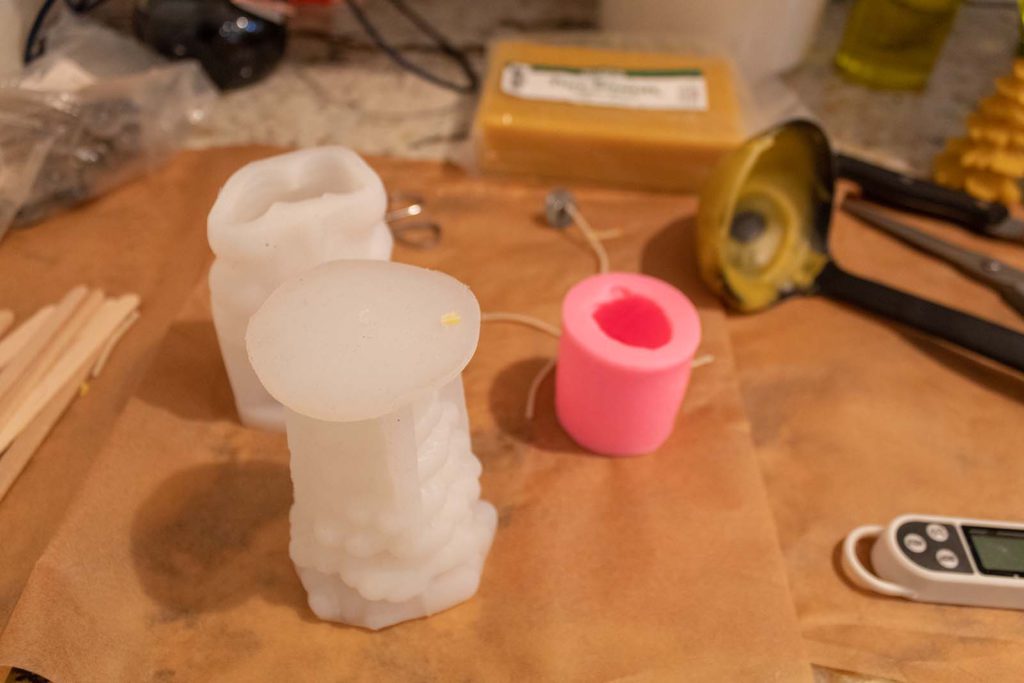
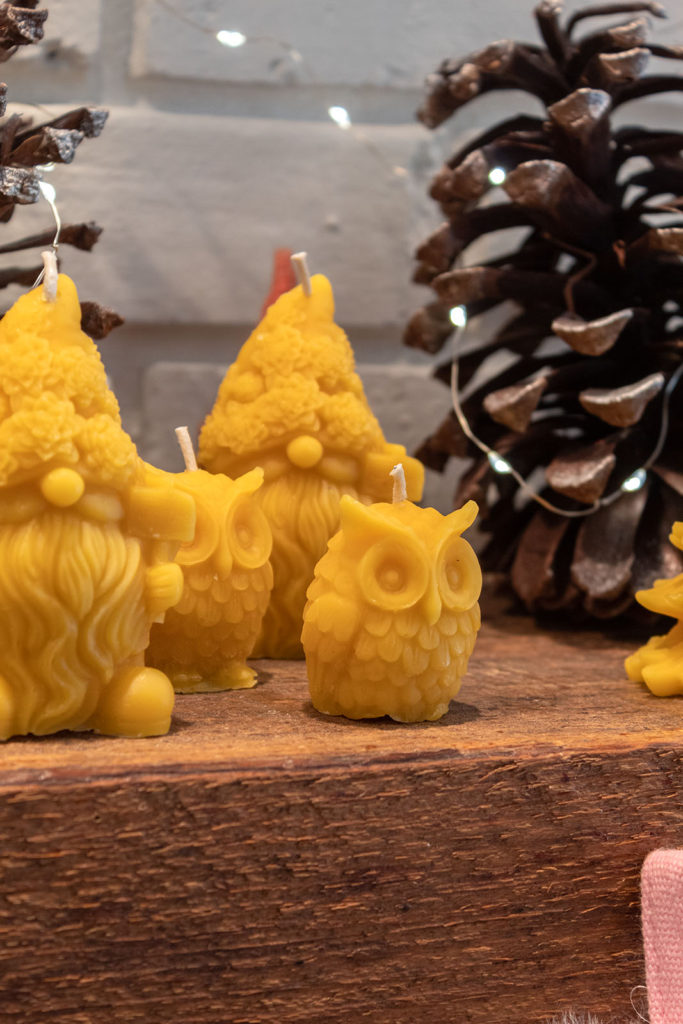
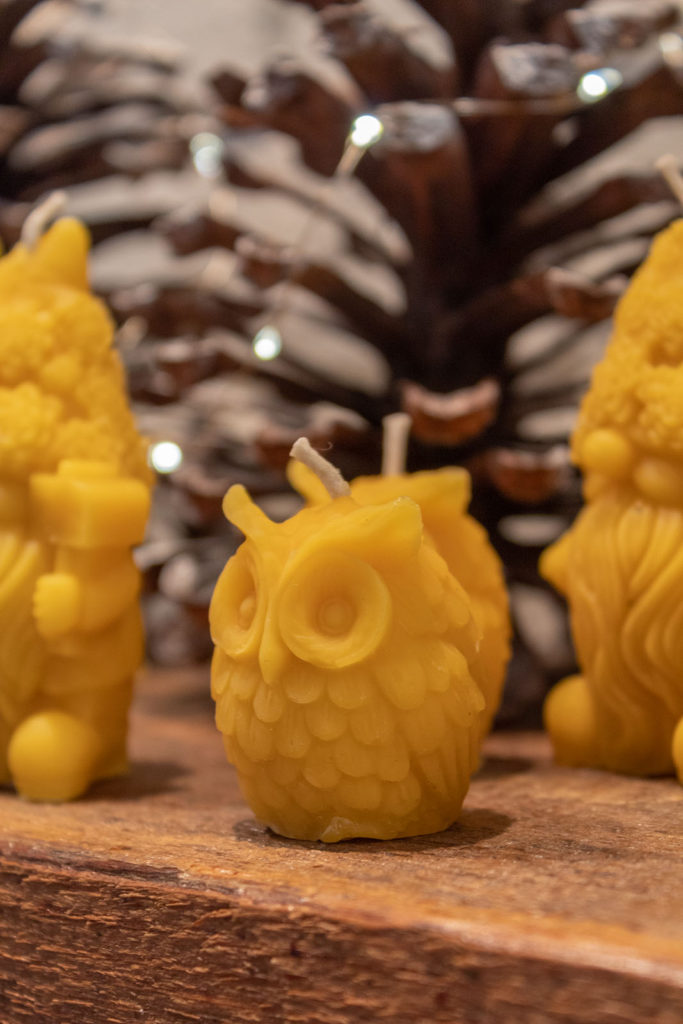
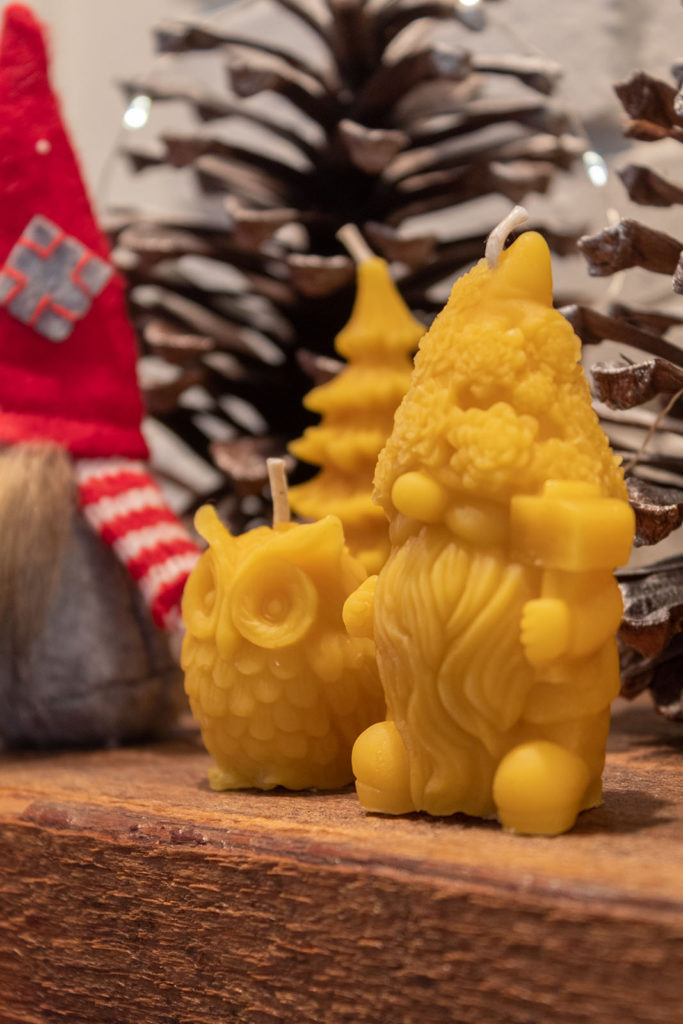
To begin, gather all your materials. I chose these three molds, the gnome, Christmas tree, and a cute little owl. You can find many different molds on Amazon. I would look for 3D, silicone molds.
Disclosure: Some of the links provided are affiliate links. By purchasing through these links it supports this blog and the work we do and there is no extra cost to you. If you would like to read our full disclosure, click HERE.
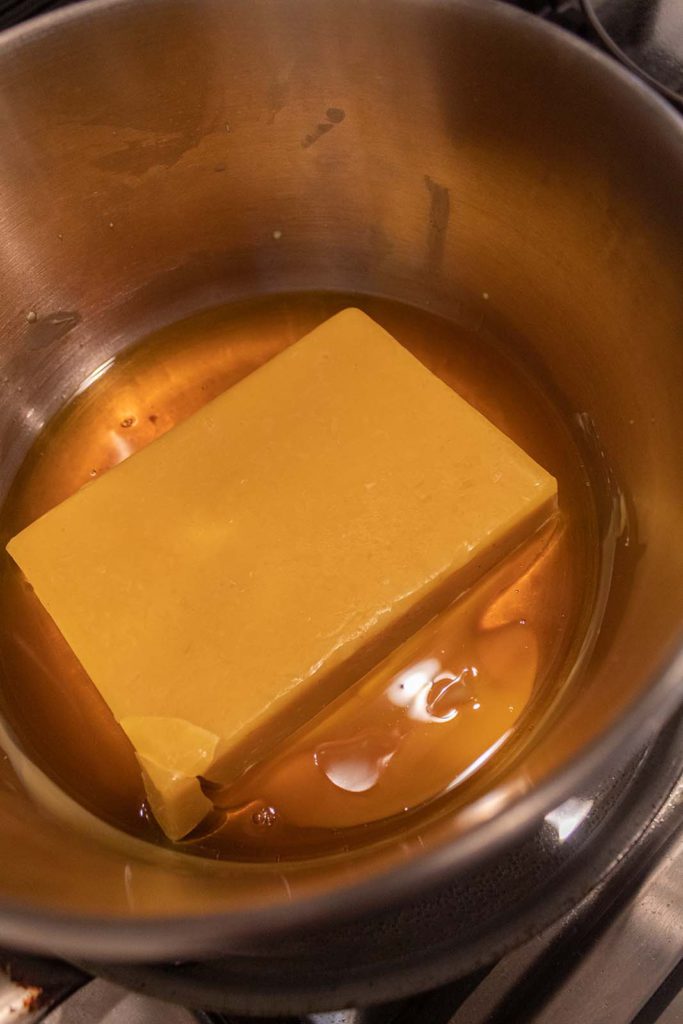
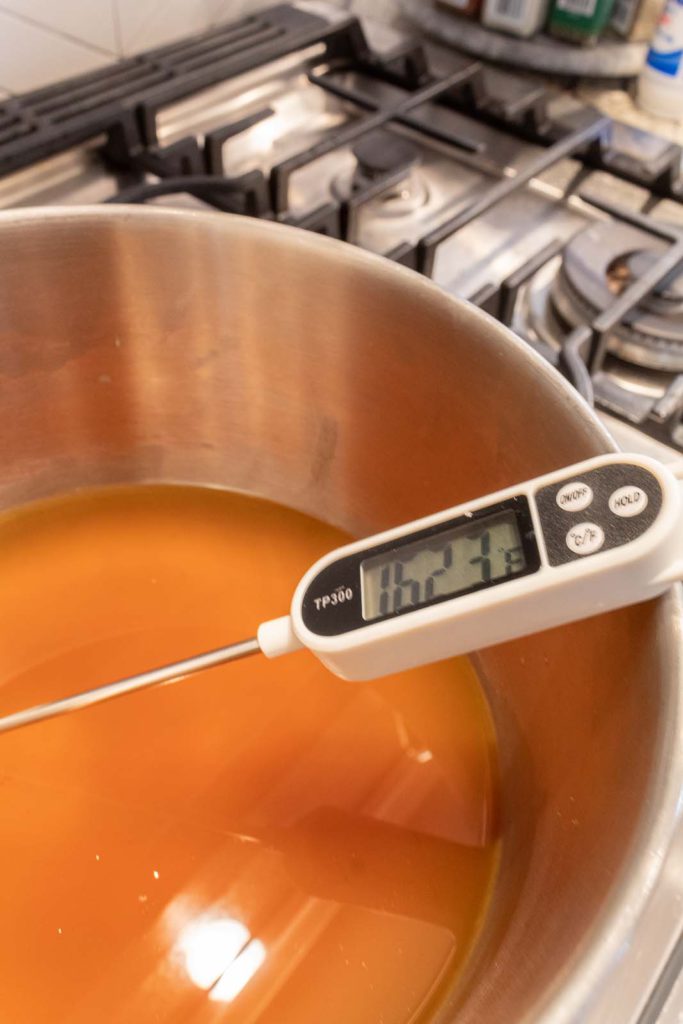
Step 1. Melt Your Wax
I melted my wax in a double boiler on the stove on a lower setting until it reached a temperature between 155° and 165° F. This is a good temperature for pouring to avoid sink holes or bubbles forming in your candles.
Step 2. Prepare Your Molds
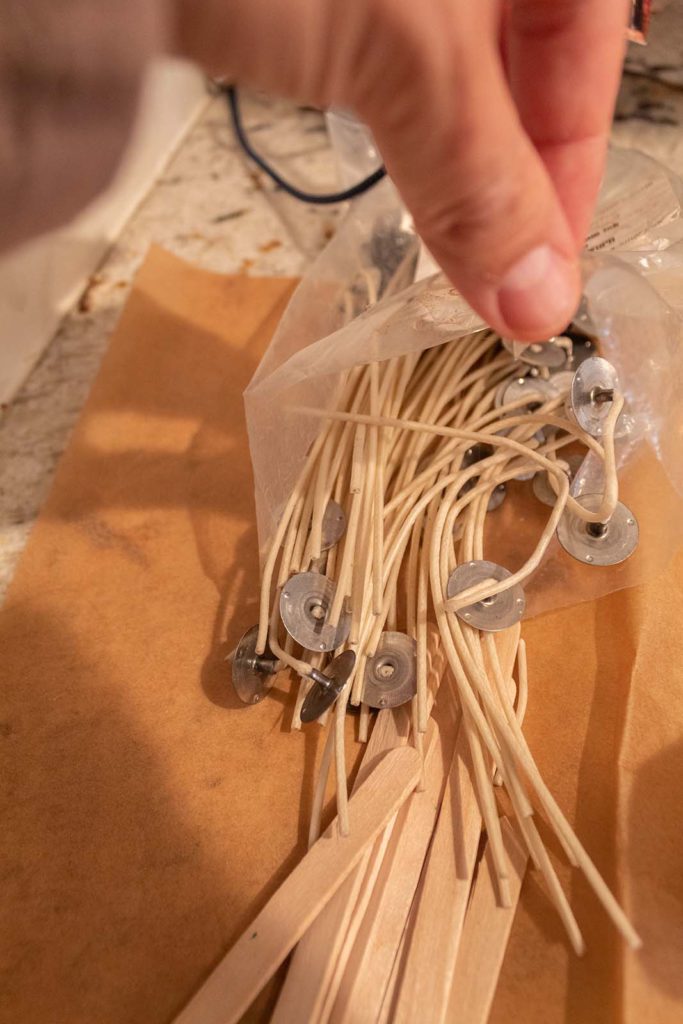
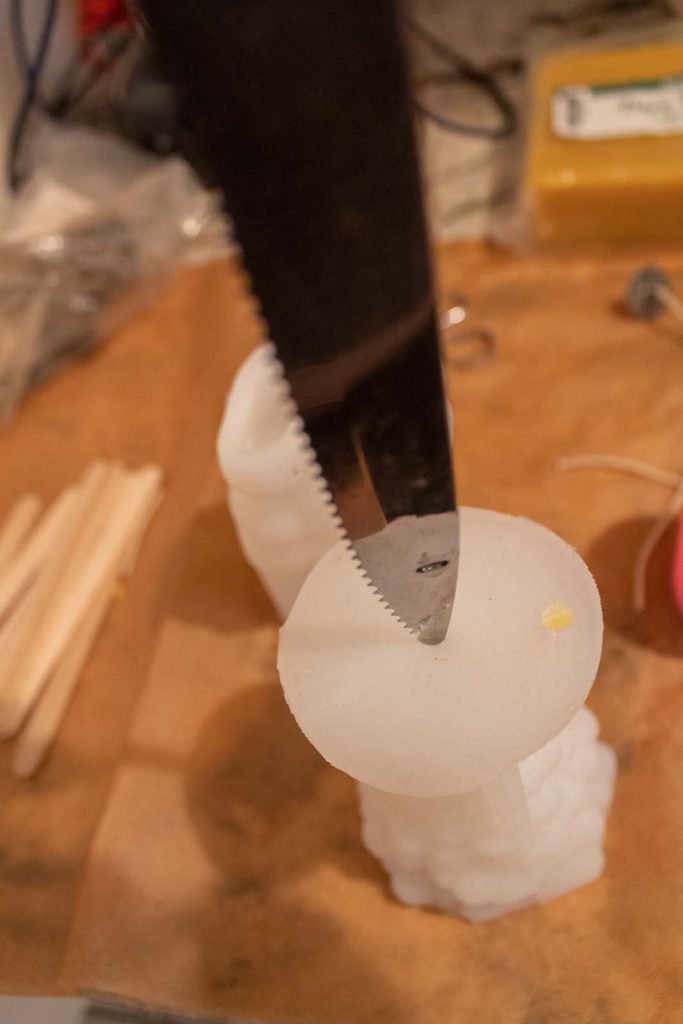
I had these wicks left over from another project. I will cut off the metal base and they will work just fine. However, I recommend getting a roll of wick instead. It will probably be easier to work with. I also recommend a wick needle for puncturing holes in your molds. I did not have one on hand, so I just used a knife to puncture a hole in the top of each mold.
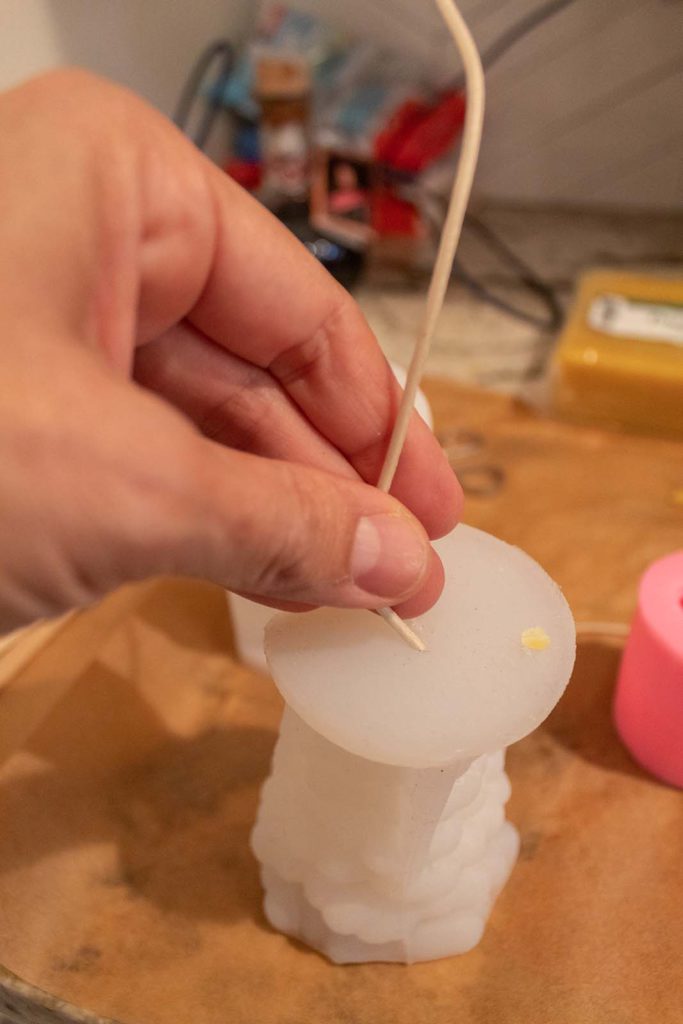
Once the hole was made, I was able to push the wick through the top of the mold. Then, using tweezers or my fingers, I pulled the wick through to the other side of the mold, making sure to leave about a 1/4 inch of wick on the top of the mold.
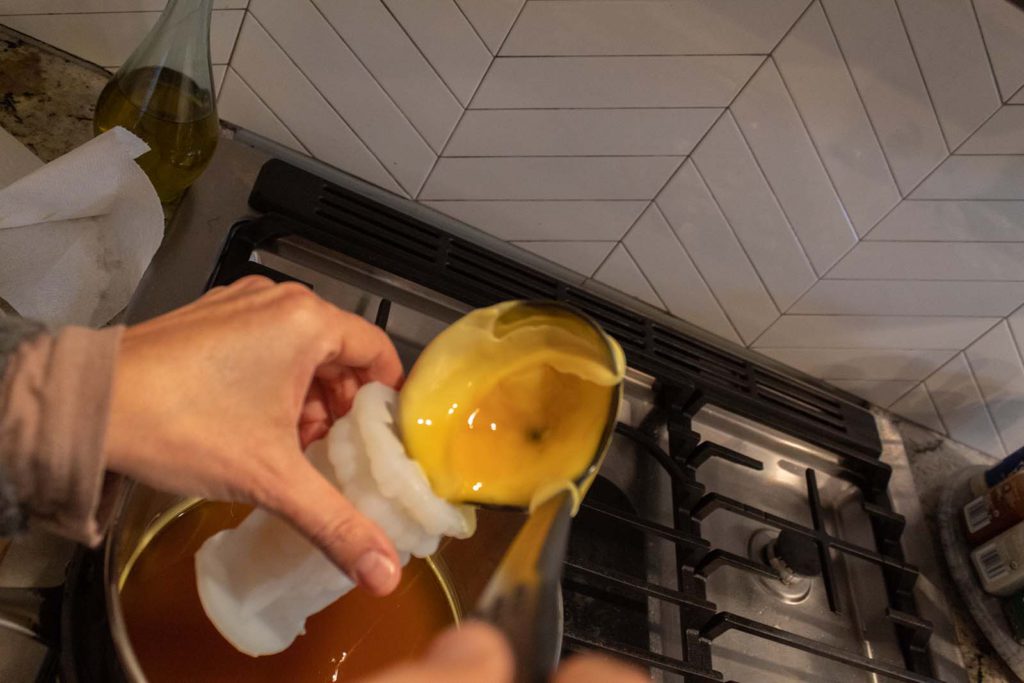
Step 3. Pour Your Candles
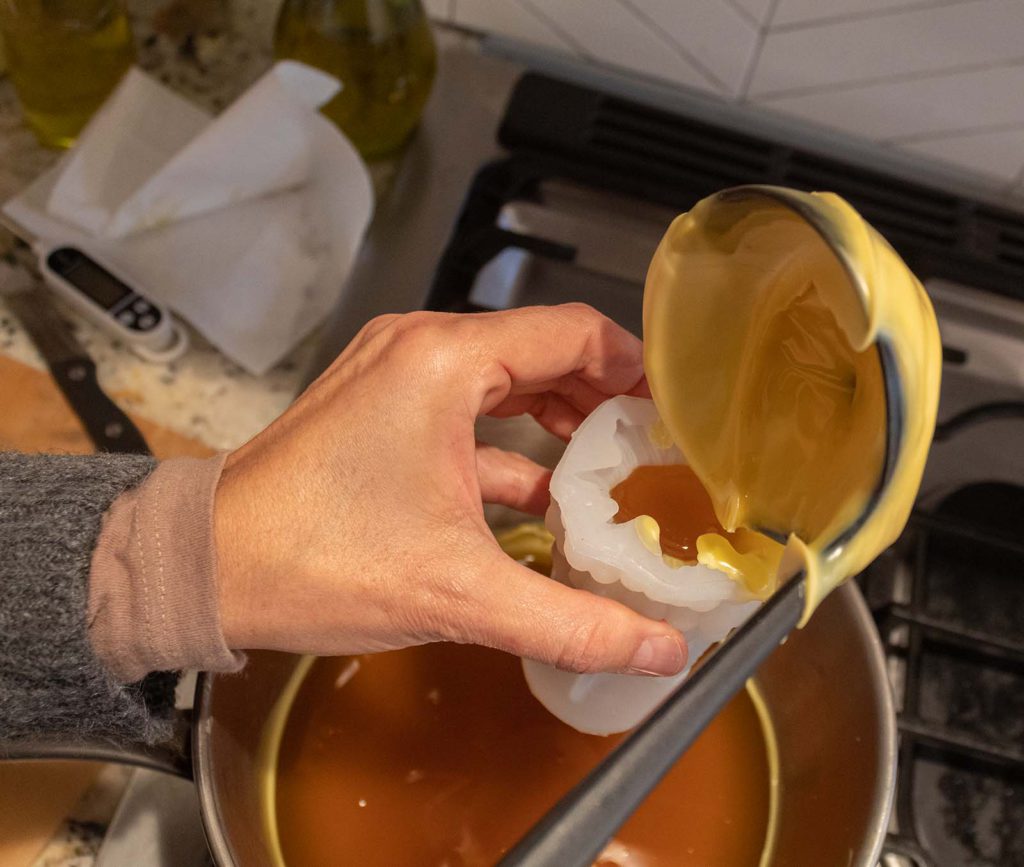
When the wax is at the recommended temperature between 155°-165° F, you can begin to pour the wax into your molds. Try to pour the wax into the middle part of the mold. I used a thrift store ladle to scoop out the wax.
If you’re making several batches, the ladle will start to accumulate dried wax. Don’t worry, you can peel that off.
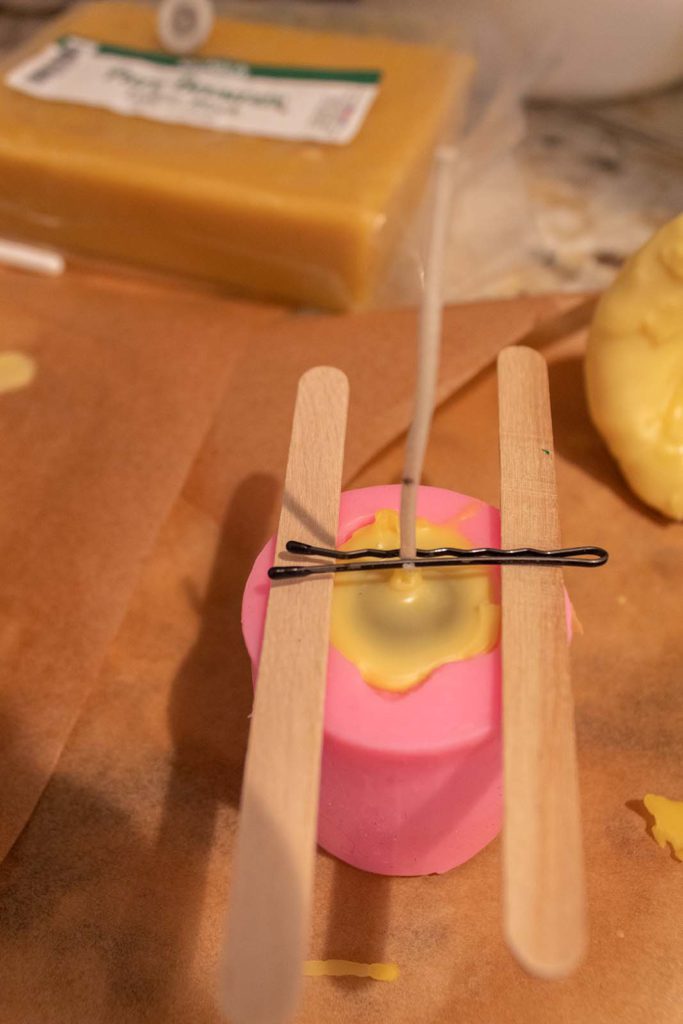
Step 4. Center Your Wicks
You will need two popsicle sticks and a bobby pin for this next step. Place popsicle sticks on the outer edges of the poured mold. Then clamp a bobby pin at the base of the wick. The bobby pin will sit perpendicularly over the popsicle sticks, allowing you to keep the wick in the middle position as the wax dries and hardens.
Allow about 40 minutes cool down time for your candles. This is where you need to have some patience in case you want to do several batches of candles. Don’t hurry through this step. You don’t want the candles to damage while trying to release them from the molds. After about 40 minutes (some candles may need longer) you will notice that the color is all even and the same as the original block of wax.
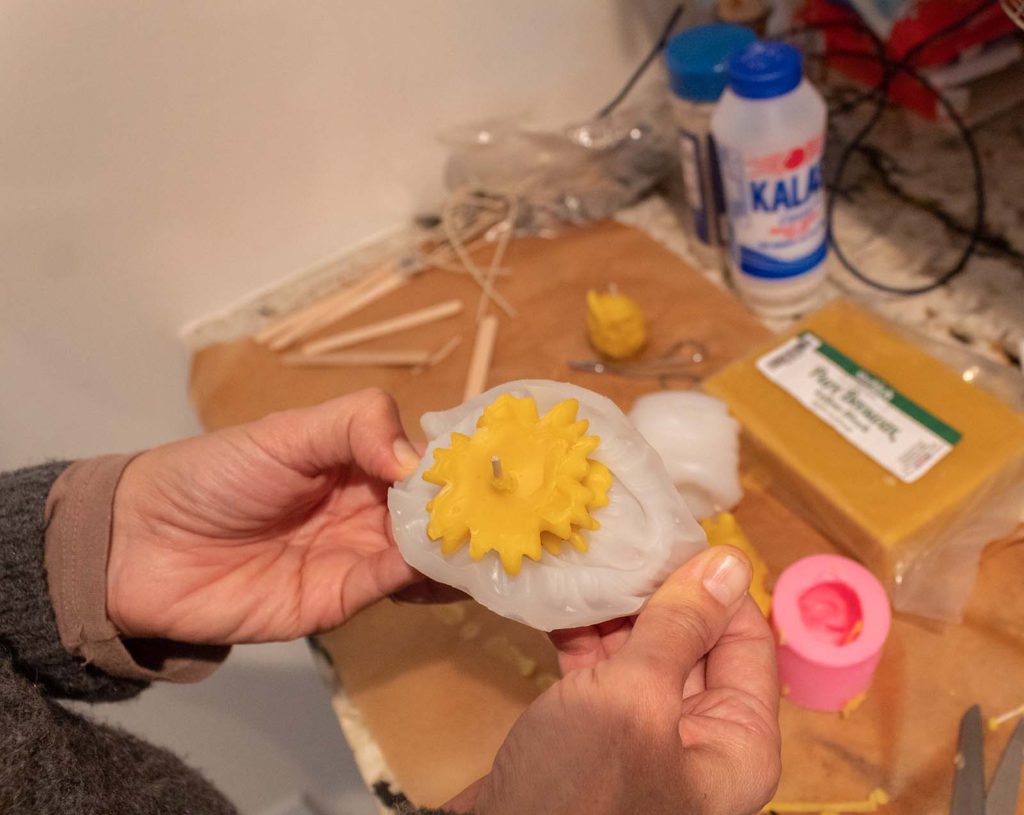
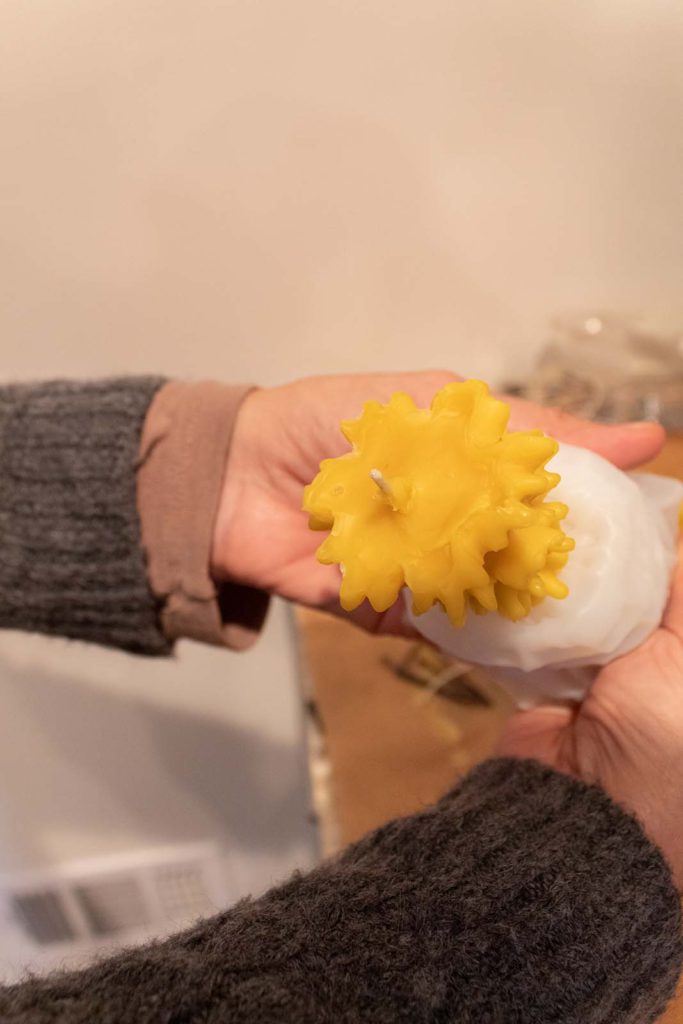
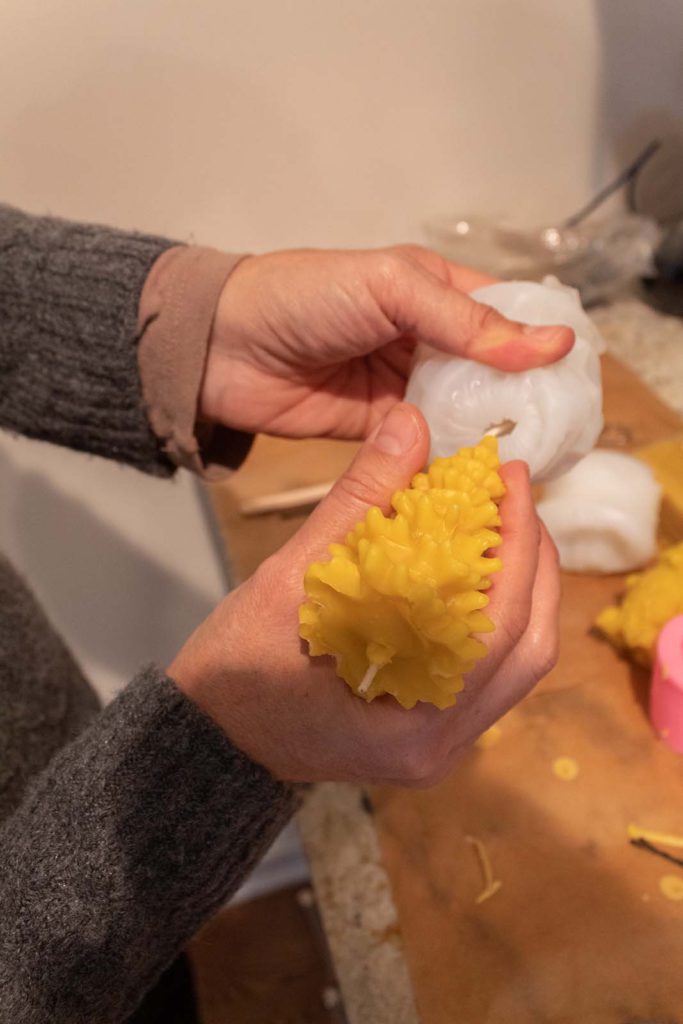
Step 5. Release Your Candles
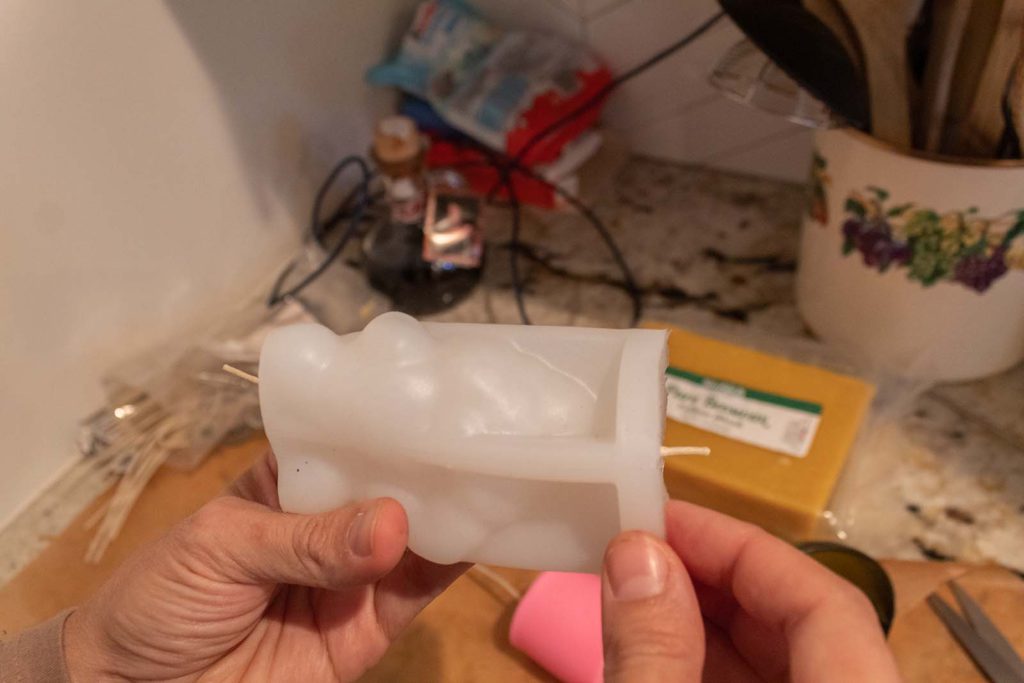
Once fully cooled down, begin releasing each candle from the mold by carefully and slowly rolling back the mold. You can use a mold release spray prior to pouring your wax if you like, but we had no issues with any wax sticking to the molds. I tried not to put too much pressure on the candle itself as I rolled back the mold.
It is so rewarding to see the candles start popping out of the molds and coming to life!
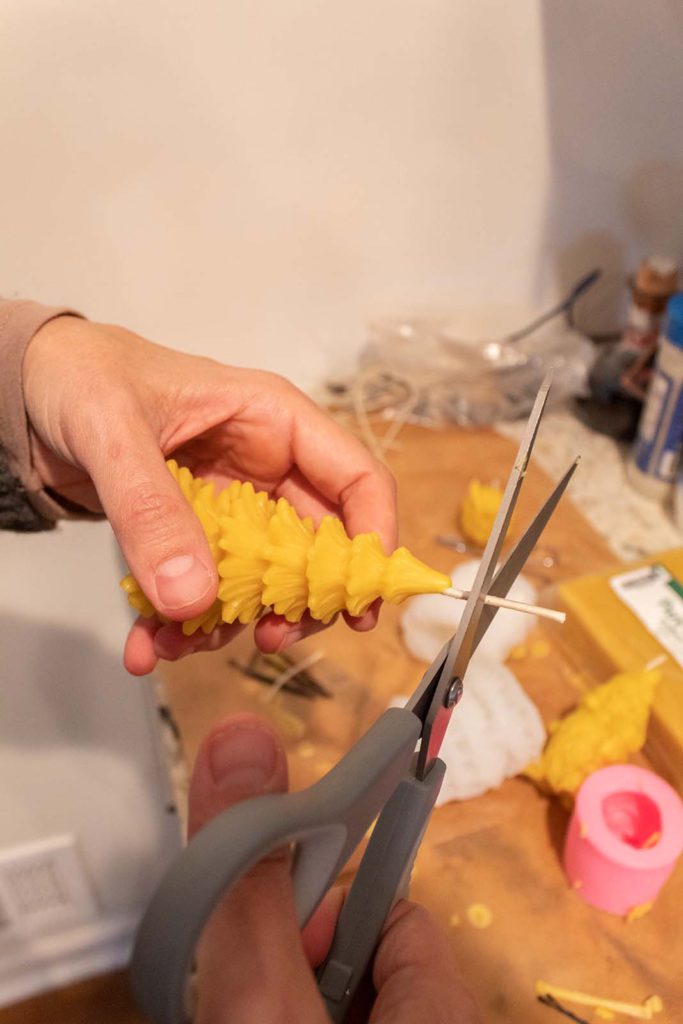
Step 6. Trim Your Wicks
Now that your candles are made, the final step is to trim the wicks. Make sure you leave a 1/4 inch of wick on the top for ideal burning. Use a wick trimmer to cut the wick on the bottom to the base of the candle.
Now Enjoy Your Candles!
My friends, I hope you enjoyed learning with me how to make these super cute candles. I gifted these to teachers and families. You can also enjoy them at home with no worry about chemicals or toxins!
May your holidays be cheery and bright and I’ll be back soon with some exciting posts! Be sure to follow along.