Hola queridos and Happy New Year! I hope you are enjoying 2024 so far and living life to the fullest. I am kicking off the year by tackling a somewhat neglected area of our new home—the basement!
In today’s post I’m heading to Ross to shop for some budget-friendly housewares. We are going to be transforming our cavernous basement into a French Cottage Inspired Bedroom. I have to admit I’m going to have to dig deep into my creative toolbox to pull this one off. But I’m ready for challenge and excited to share all the great finds for this basement bedroom reno!
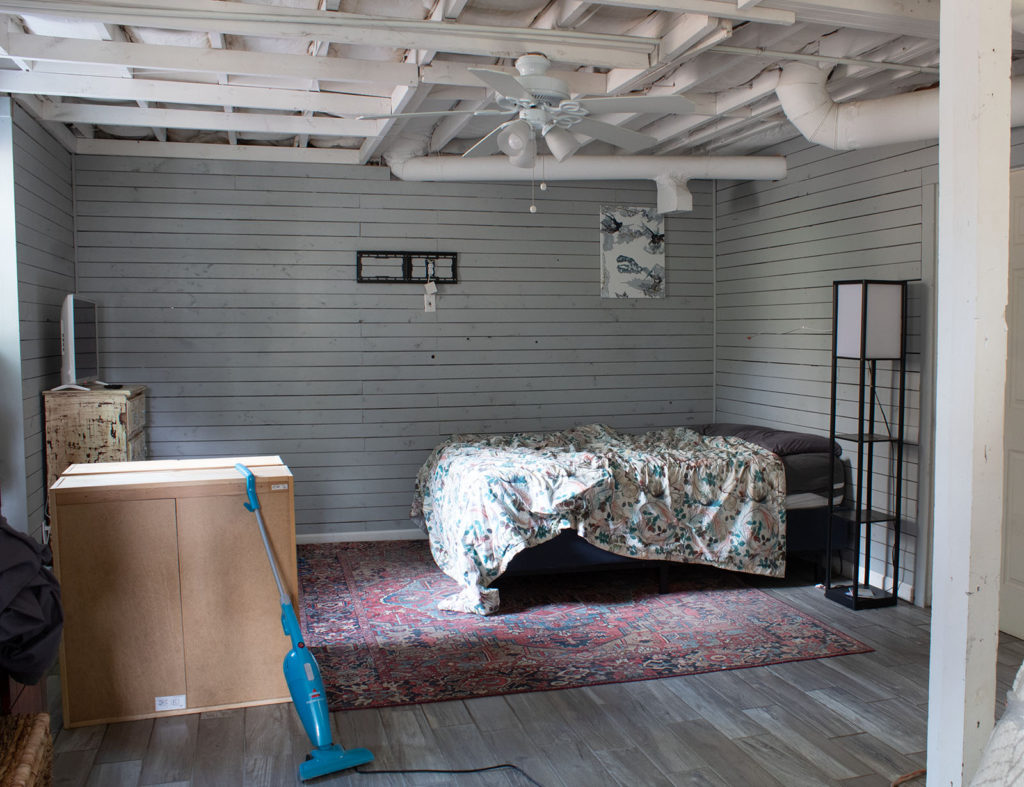
Before we get started with this renovation, take a look at the space before. This part of the basement is an open area with two small windows. It doesn’t see much light and with the layout lacking a defined enclosed space, one would not naturally envision a cozy bedroom.
Up until now, the space has been a catch all for random things such as a printer, some unhung wall cabinets, and a bed with an outdated comforter.
Step 1. Prep and Plan the Layout
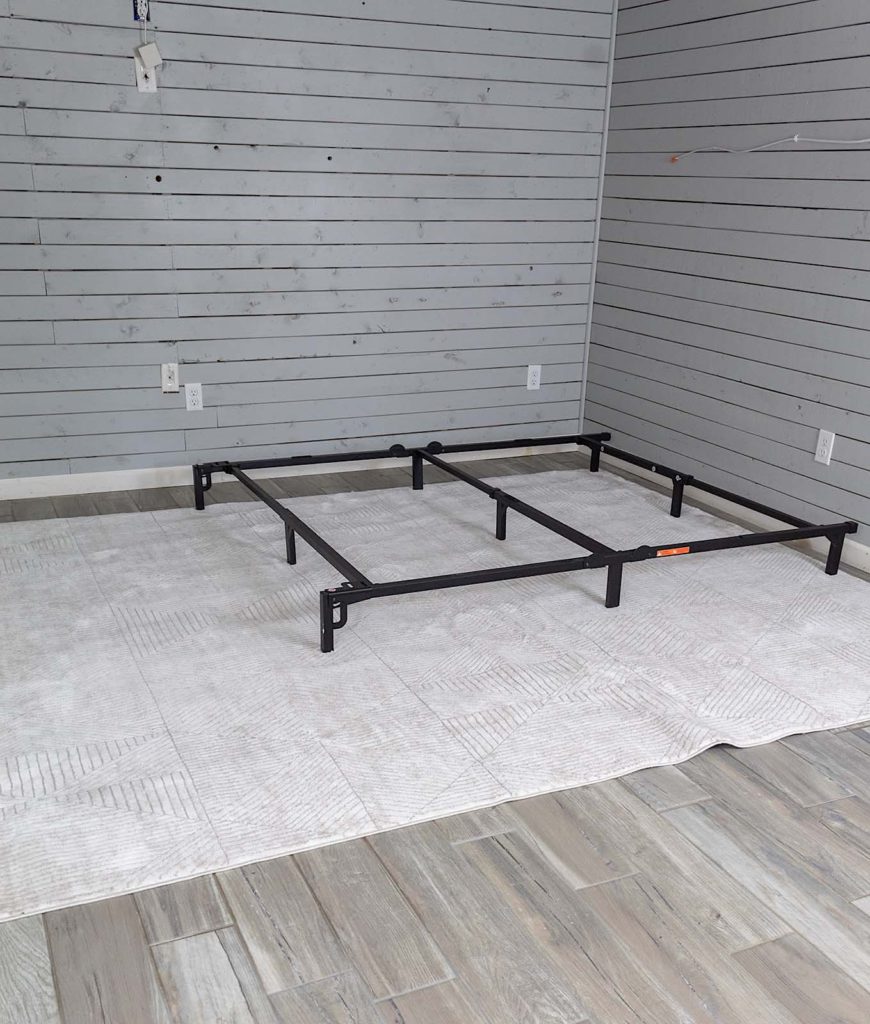
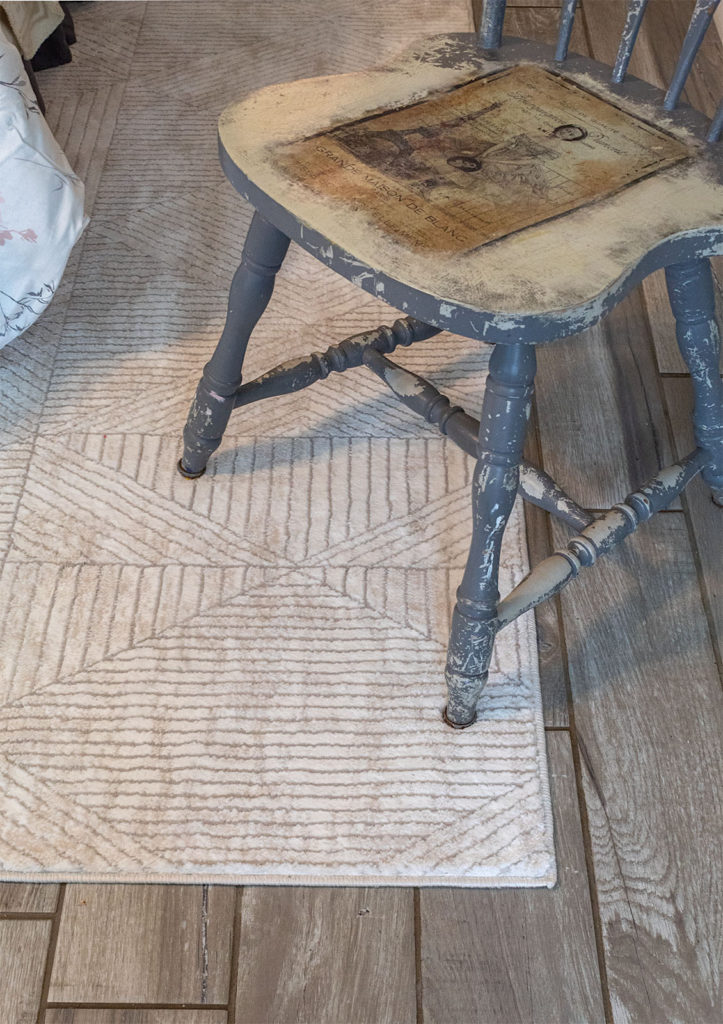
A large area rug is a great way to set the stage for your room’s look. I found this area rug with a subtle geometric pattern and neutral colors at Ross. The lighter palette of this rug will help brighten up the dark space. Rugs are great for adding warmth and making spaces feel more homey.
To prep we first cleared everything out and did some cleaning. I initially placed the bed frame off-centered in the space. I later changed it realizing this was not the ideal position for an optimal aesthetic and use of the space. Instead I centered the bed on the back wall which looked much better.
Design tip: When styling a bedroom, if the layout of the room lacks symmetry, utilize your anchoring elements such as rugs, a bed, and furniture to help make things appear more balanced.
Disclosure: Some of the links provided are affiliate links. By purchasing through these links it supports this blog and the work we do and there is no extra cost to you. If you would like to read our full disclosure, click HERE.
Step 2. Making the bed—the linens
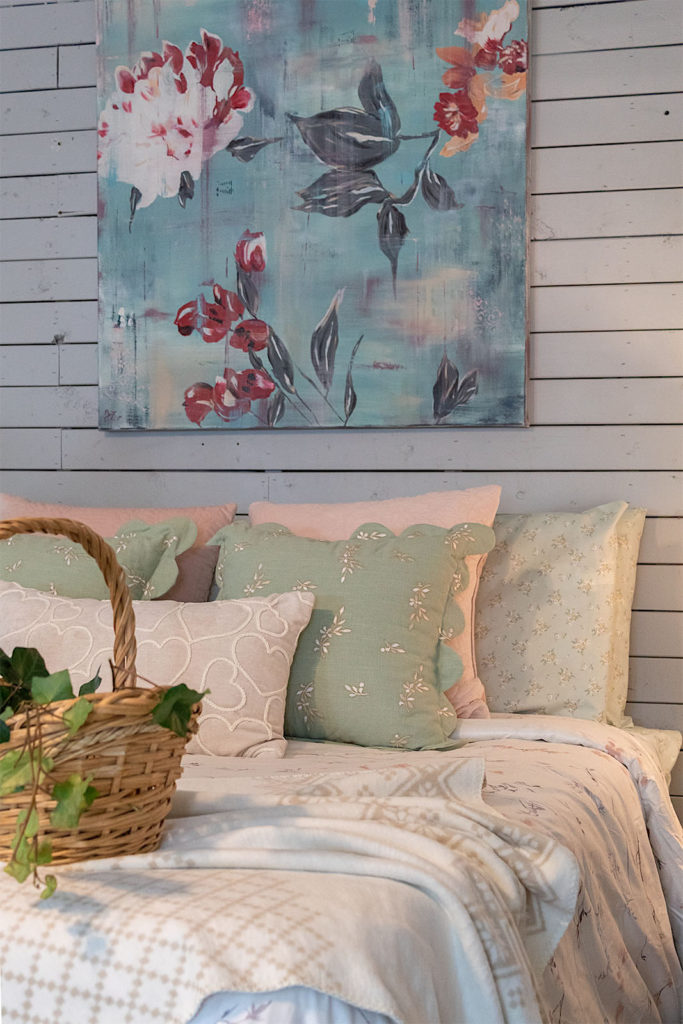
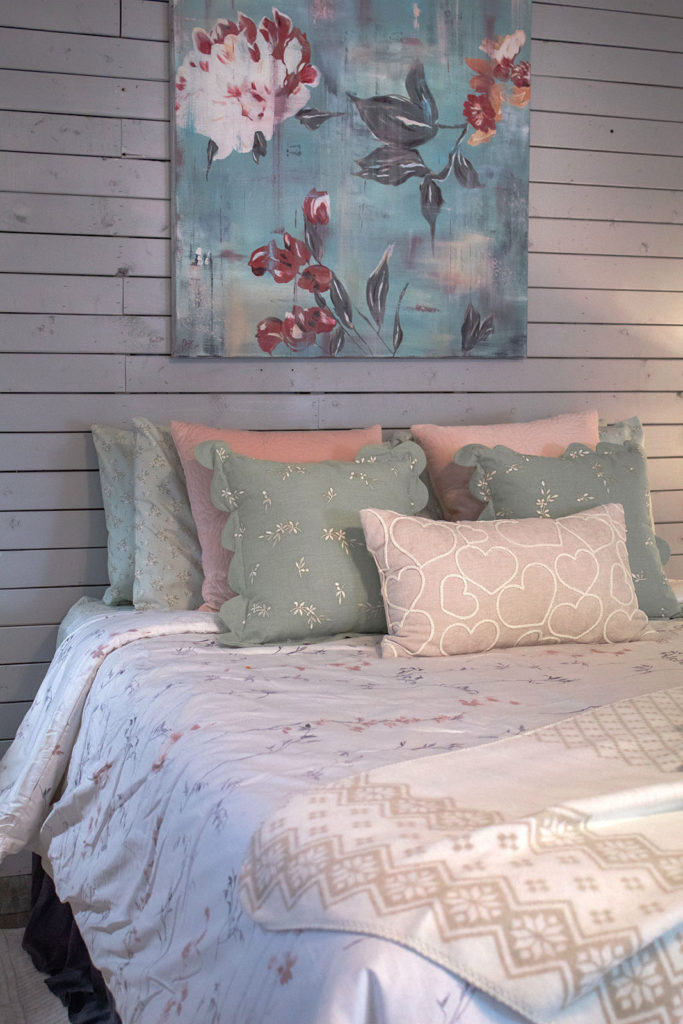
The bed is the star attraction of the bedroom. It’s likely the first thing you notice when you walk into the room. To capture our French Cottage look, the bedding we choose is going to be key.
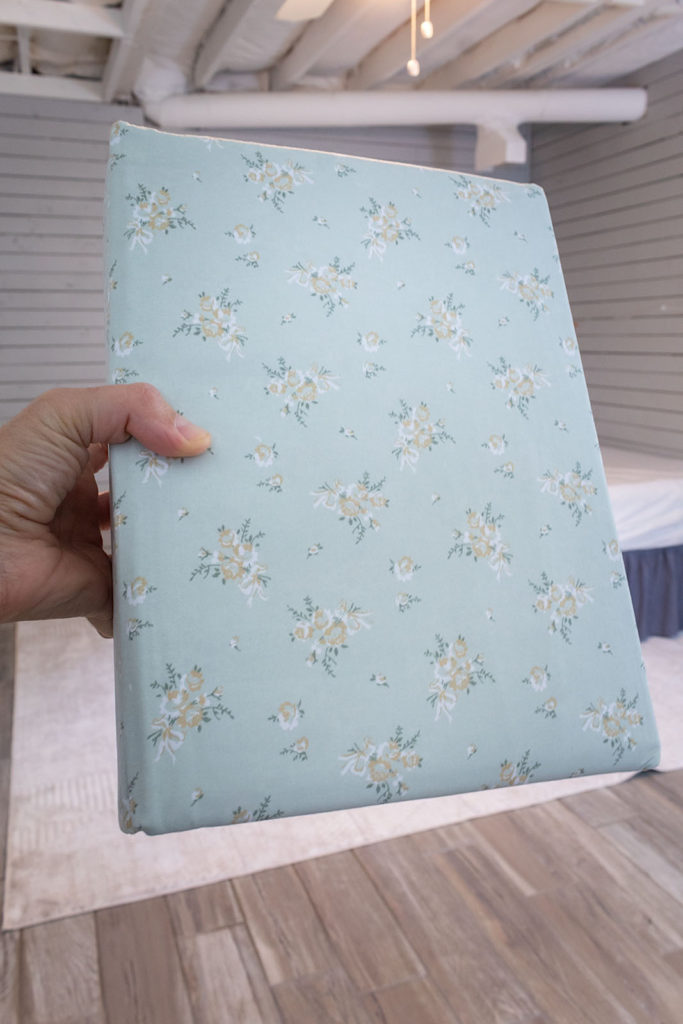
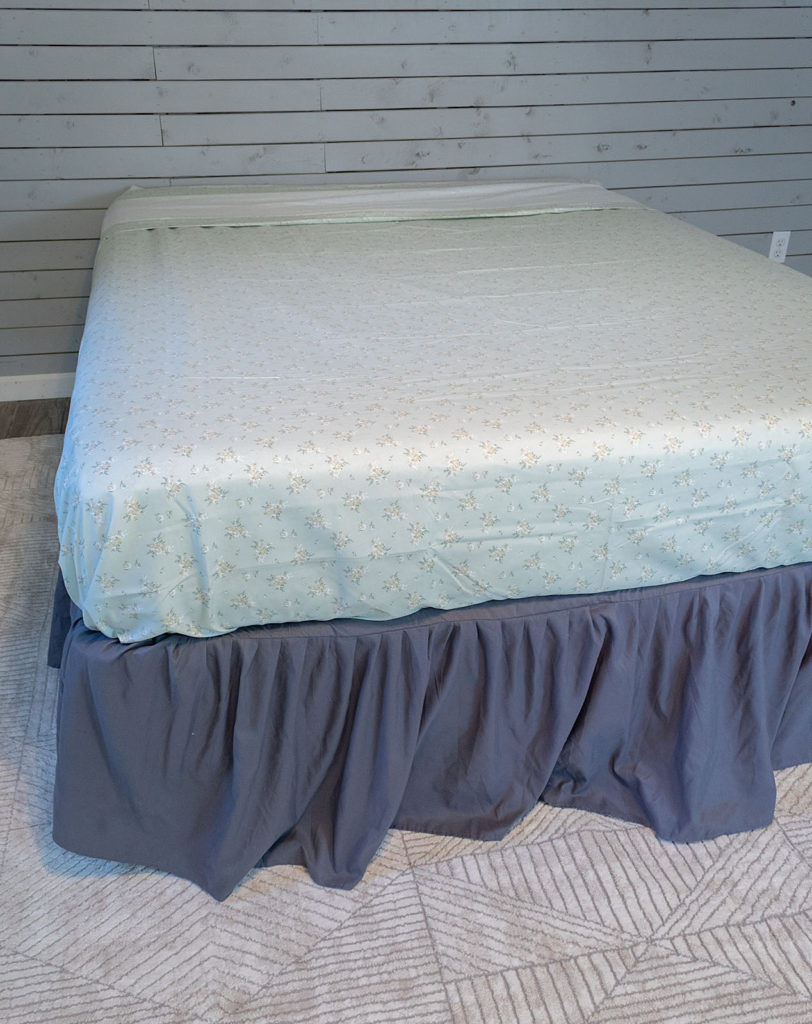
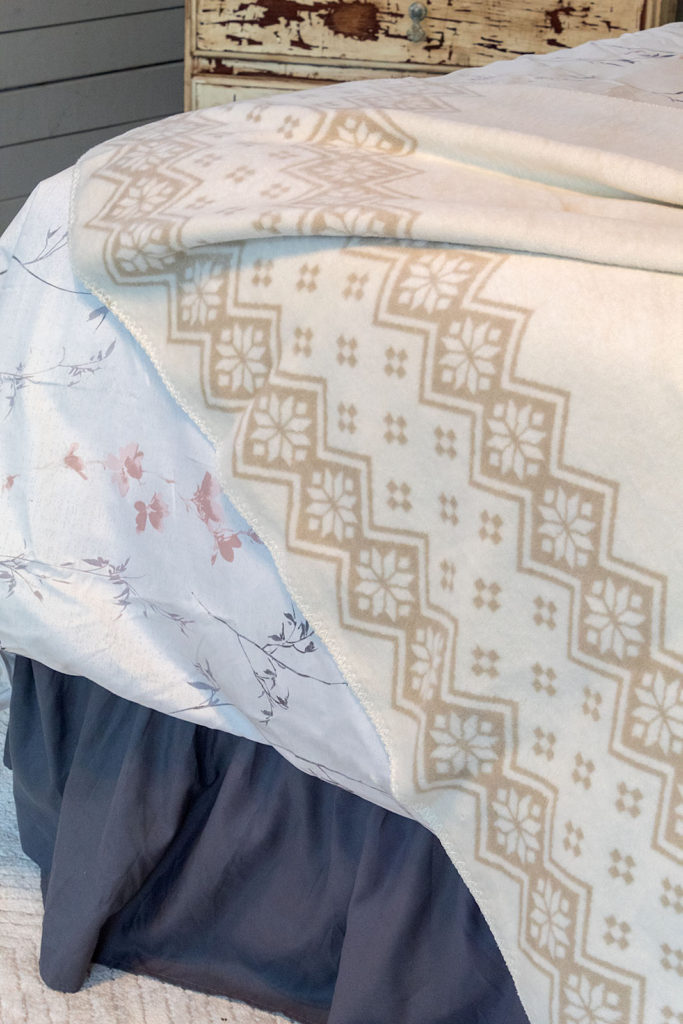
At Ross, and similar discount stores, you have several choices in bed sheets to peruse through at affordable prices. I found these lovely mint green sheets with a delicate floral print. Although there were other great options in the store, (see my shopping video below), I couldn’t resist the color and cottage charm of these sheets.
Once I got the sheets on the bed I knew I had made the right choice. Already the bed was looking so pretty. I even liked how the mint green contrasted with the dark grey bed skirt. I’m glad they worked together because it was the only bed skirt I had on hand!
If wrinkles in your sheets bother you, you can always spritz them with some water and toss them in the dryer for a few minutes. I didn’t do that for the sake of time during our photo shoot for this post.
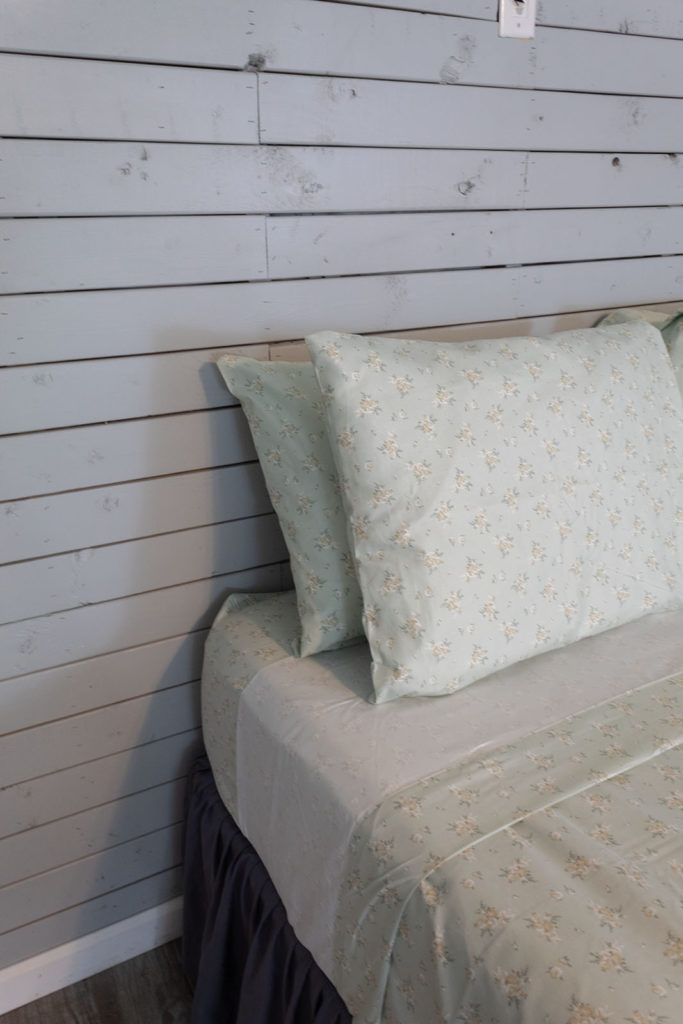
And a slight oversight, as you can see in the next picture, is to lay your top sheet with the non-printed side facing up so when you fold the hem back you see the printed side (if this is important to you)…I tend to forget to do that!
Pillow Placement
When styling the bed, I like to use my standard sleeping pillows as a base to set up the structure for the throw pillows. In the absence of a headboard, I’m simply going to prop my pillows up against the wall as shown in the next picture.
Side note: the look I’m creating today is not necessarily a practical one for everyday set up as it takes a little bit of time. I like to implement this look for special occasions and for guest visits. However, I know there are some people who put in the time and care to layer up their beds every morning because they honor what is special for them in their home’s aesthetic. It truly is a personal choice!
The Delight of a Pretty Comforter
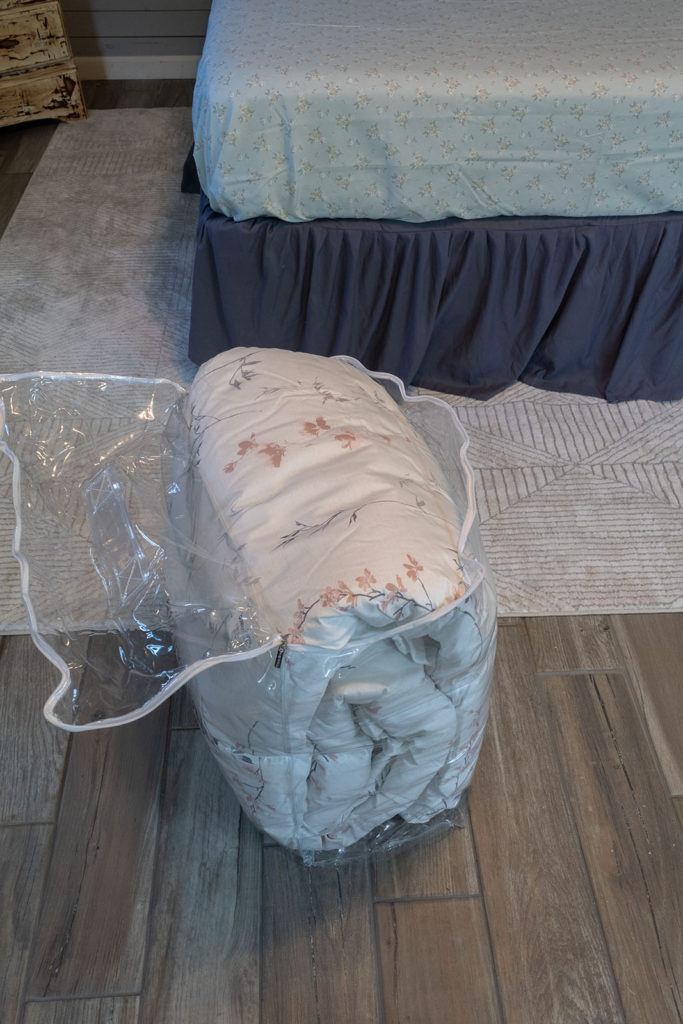
Choices for a queen comforter in a neutral color were limited at the store. I actually enjoy the challenge of having to think outside the box when you don’t have a lot to choose from in the store. This exercise stretches the design imagination.
The comforter I ended up going with was a great choice in the end, although I wasn’t too sure while in store. When I got the comforter on the bed it looked so lovely.
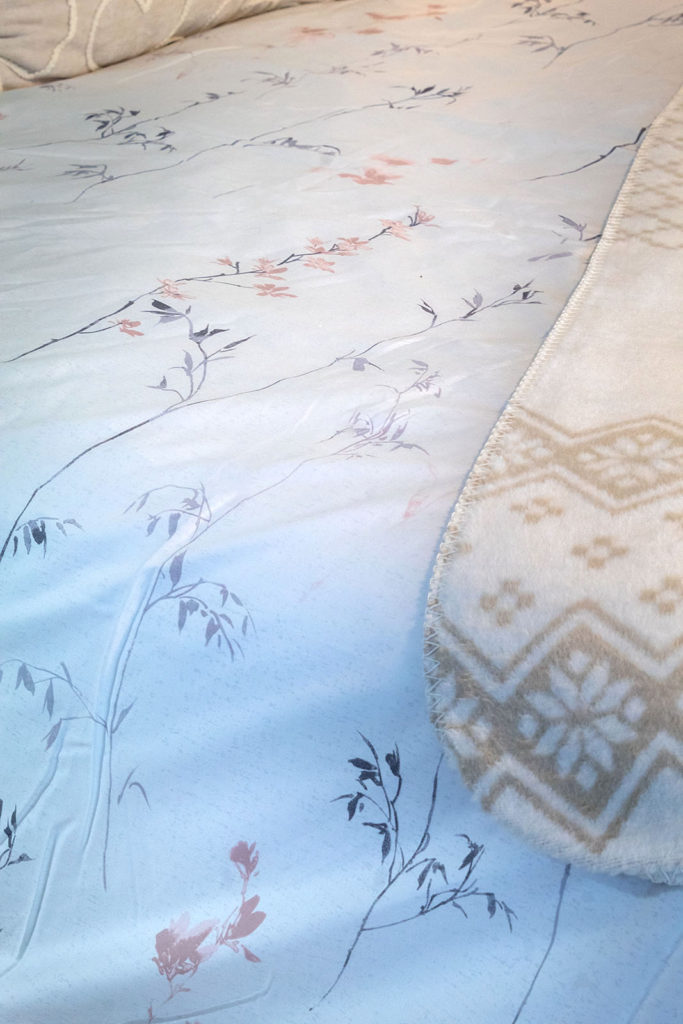
The grey flowers in the comforter complement the grey bed skirt and the delicate floral print adds a beautiful feel to the room.
I often refer to the act of adding layers when decorating. Layers can induce a wow factor in a room. Linens, textiles, accessories and wall art help bring in those dimensions that entice the visual experience.
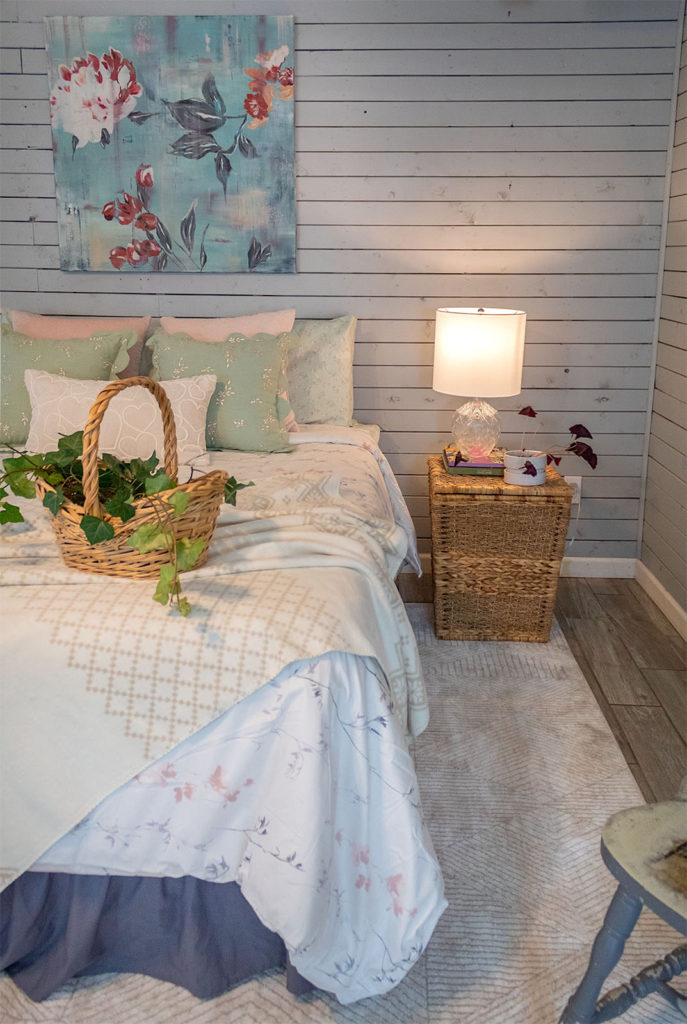
Throw blankets casually draped at the end of the bed are one of my favorite details in a bedroom. They can be both functional and stylish. In those winter months, having an extra blanket you can reach for is comforting.
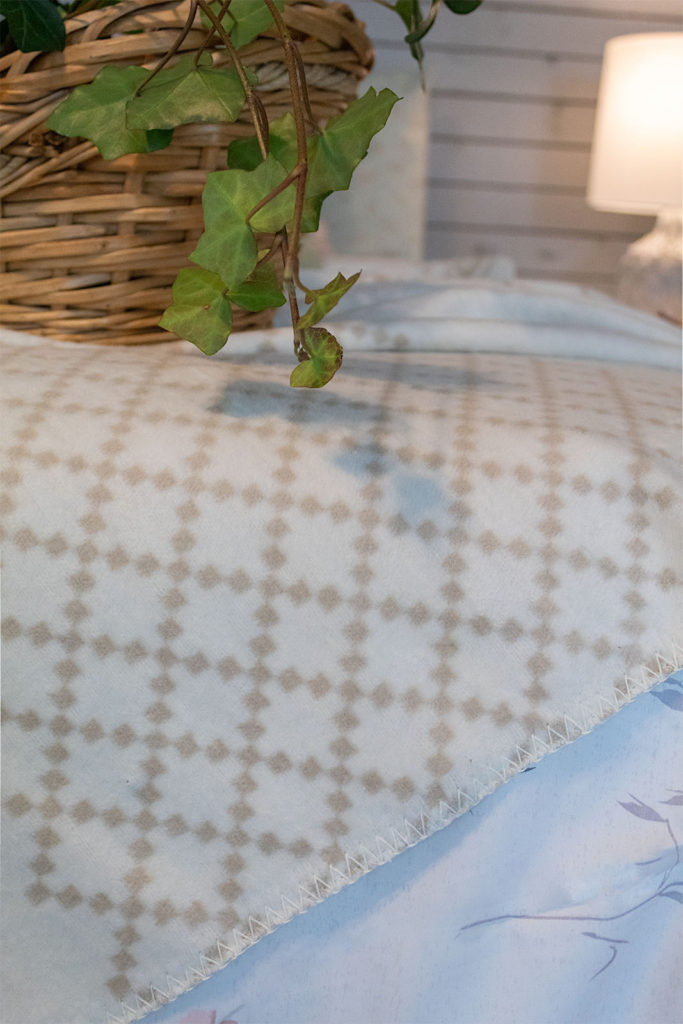
I found this cozy throw blanket with a beige and white pattern. I like mixing patterns up in ways that work. Taking some risks with patterns has its rewards. The colors in the throw blanket are going to tie into other elements in the room. I will show you how everything is going to harmonize in the end.
Step 3. Making the bed—the throw pillows
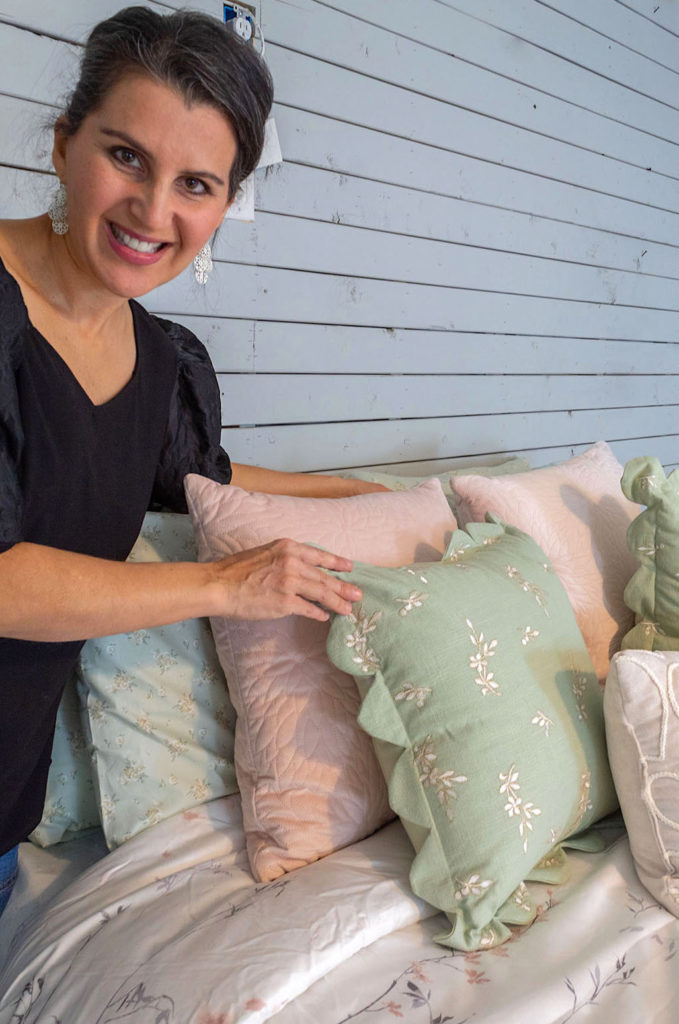
I get excited shopping for throw pillows, especially at Ross or other discount stores. It is fun to go through their assortment of random pillows. You never know what’s going to be in stock so it makes for an adventurous treasure hunt. I got lucky today and found some beautiful, affordable pillows to fit our French Cottage theme.
To create that cottage feel with the pillows, I bring in colors that are soft and that tie into the colors of the bed sheets and the comforter.
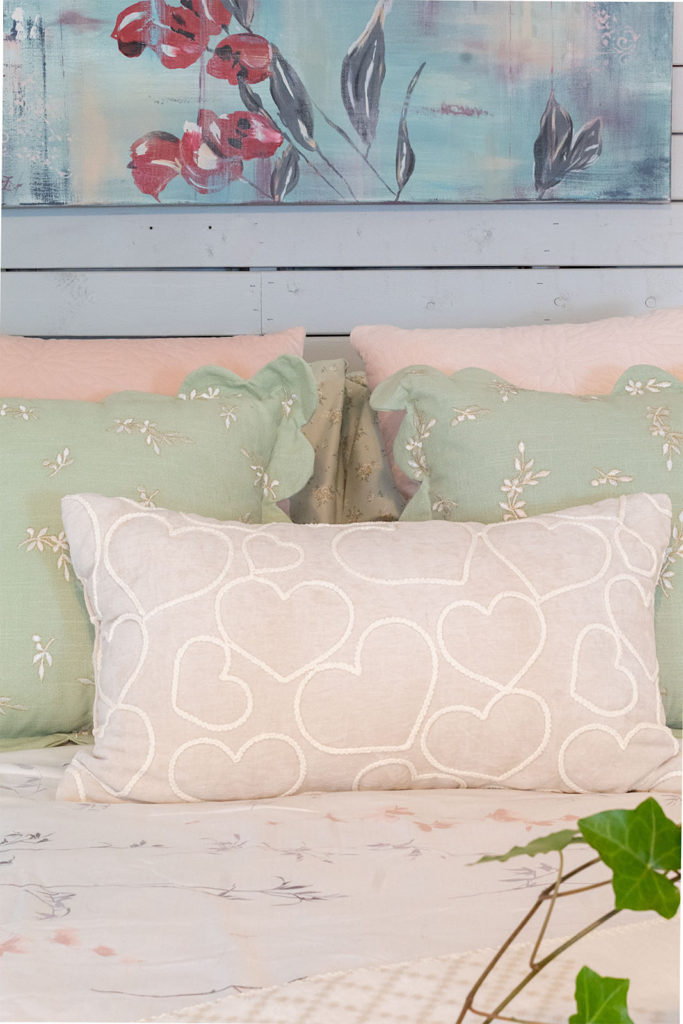
I found a set of two pillows in the most gorgeous hue of pink with patterns of stitched leaves. To create a lovely contrast of colors, I stacked these in between the standard bed pillows and some French-worthy mint green floral pillows with scalloped edges I also bought.
Front and center I placed a rectangular pillow with stitched white hearts. It added a feminine and fun touch. I’m always a little leery to bring in cutesy decor as you risk ending up with a cheesy look or even something more suitable for a kid’s bedroom. But in this case, the linen-like textured fabric, the neutral color, and the style of the heart pattern was just perfect for our cottage theme.
In addition, the color of the heart pillow played nicely off the colors in the throw blanket, helping pull the look together on the bed.
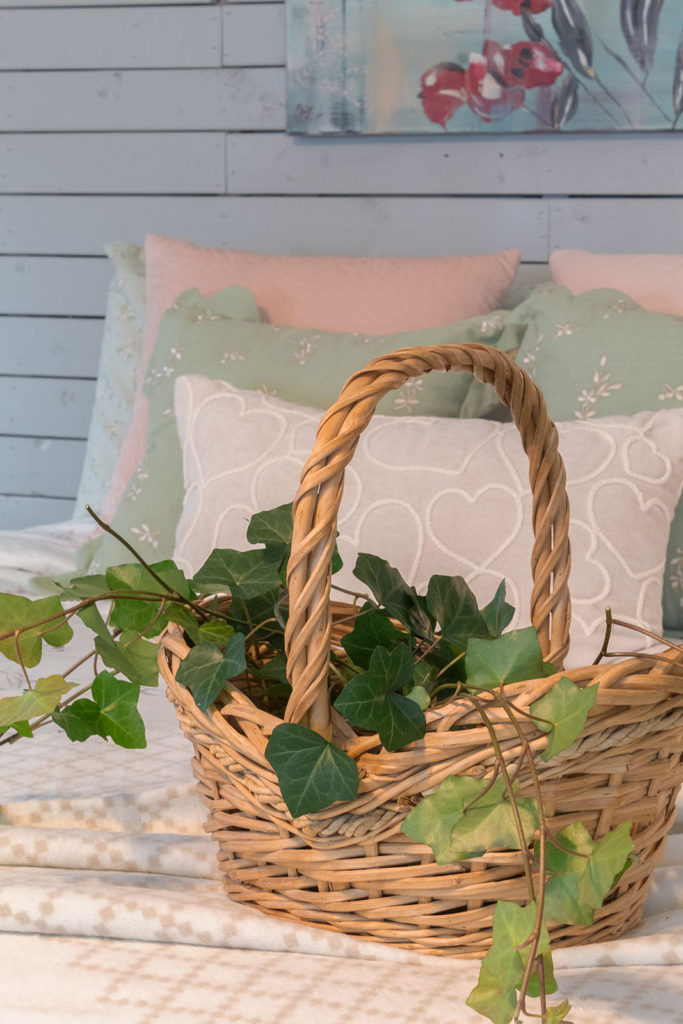
Even though it is winter where we live right now and there is little to nothing in bloom, I can always find something in the yard that I can use for greenery. I took a few clippings of ivy and placed them in a basket. I then positioned the basket over the throw blanket and wow, the nature detail adds instant cottage charm! Since the ivy stems are not in water, they will only last a day or two. But it is a nice touch for guests or when you’re entertaining.
Step 4. Complementary Furnishings
Now that the bed is all dressed up I am getting really excited about the look in this space. It truly is looking like a bedroom I’d love to curl up in.
To fill in the room and make it more whole, I’m going to balance out either side of the bed with some furnishings. On one side I place a dresser that I renovated years ago. Its distressed look will fit in nicely with the French Cottage feel. You may recognize it from our previous home. Reusing and relocating existing furniture and decor is a wonderful way to be resourceful and keep things exciting!
Design tip: Mixing in varying patterns in a room has its rewards. I love the French homes where the scene is a casual dance of patterns in the furnishings, textiles and decor. Effortlessly and tastefully they give the home a lived in feel. One way to ensure cohesiveness is to stay within the same style. (i.e. florals, vintage, modern, relaxed, etc.) Also mind the colors in the room so that they play nicely together.
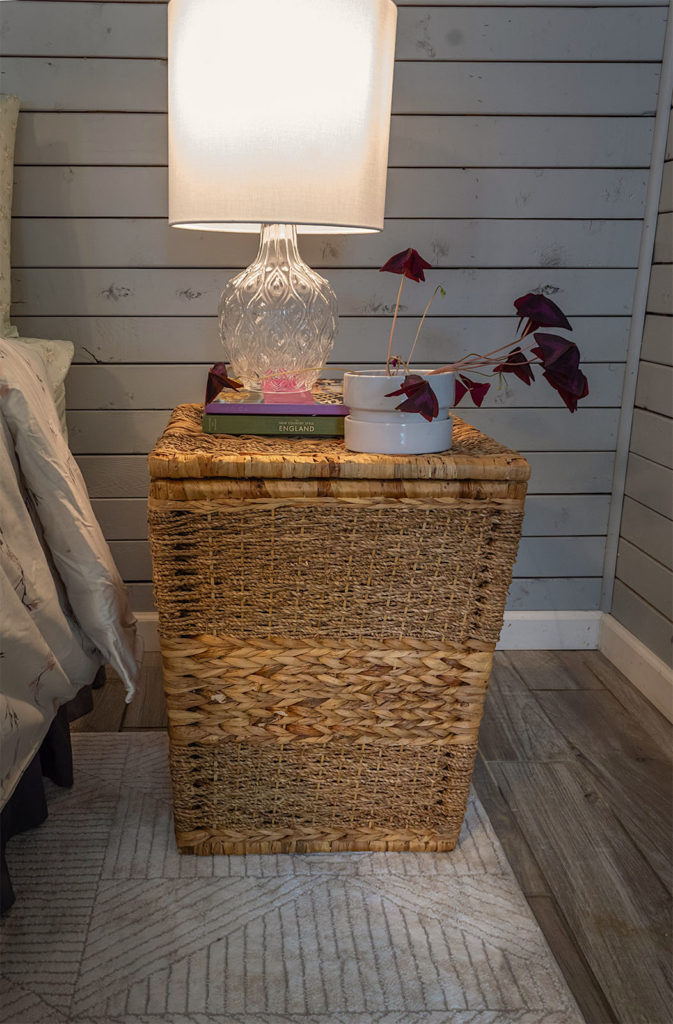
Rather than going out and spending on a new night stand, which can be costly, I opted for a large woven basket with a lid to stand in as a night stand. Once I got it into the space I was even more pleased with how it looked. It added beauty and character and the added storage capacity is a bonus.
Catty corner to the bed, I placed a single chair I had renovated years ago by adding a French decoupage print to it. It has beautifully weathered over time and it makes the room look even more cottage-like.
Step 5. Accessories and Wall Decor
The small details play a big role in completing the look. You don’t have to go overboard, but using decor pieces in the right doses and locations can make all the difference.
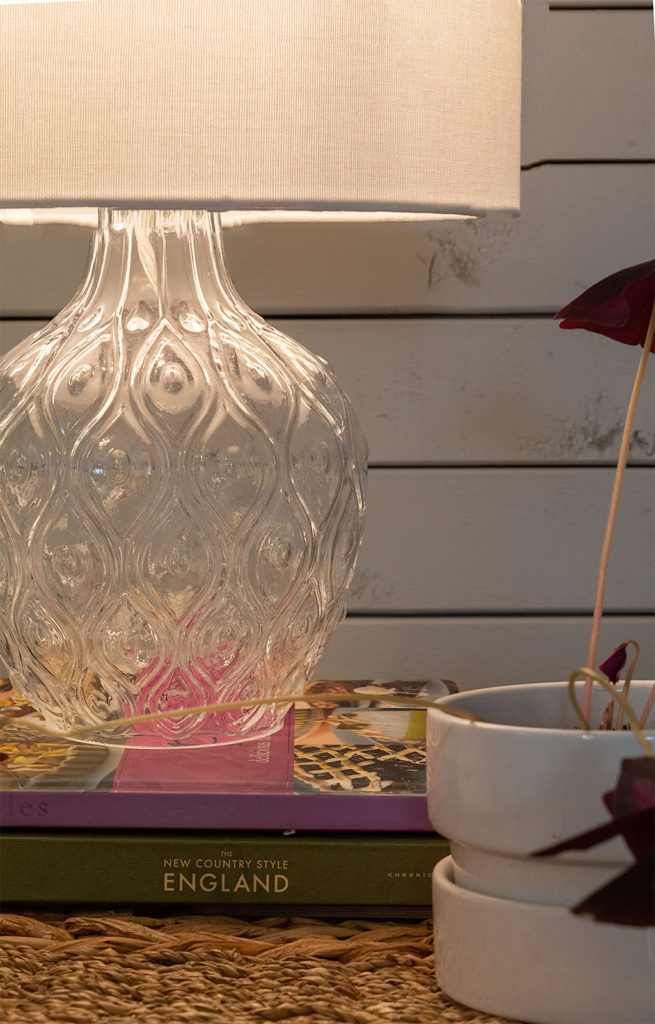
To stay within budget I only purchased one decor item—a lamp for the night stand from Home Goods. Everything else is something I already owned. I do love how this lamp with the peacock glass adds style and warms up the corner. Thrift store books in varying sizes and colors are an affordable way to add height and complementary color to your decor. You’ll spot these books in many of my posts as I love trying them out in new scenes.
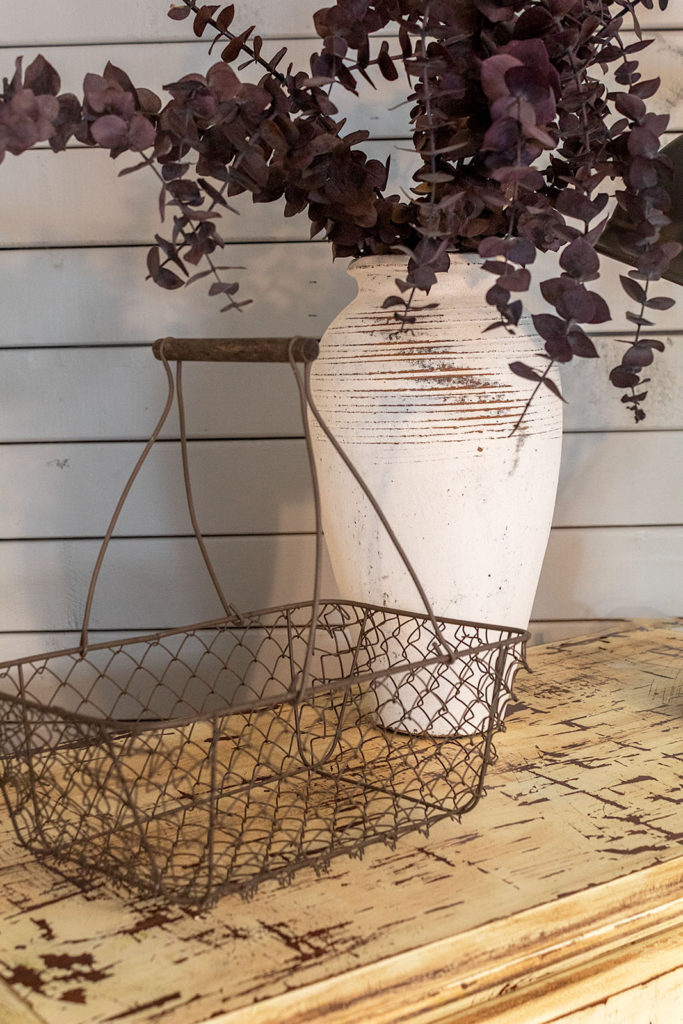
Although decor is vital as fillers and focal points, I like to keep it simple. I feel it makes more of a statement this way. On the dresser I placed a vase with some purple eucalyptus, a vintage style reading lamp and an empty metal basket. The varying heights and textures work together and each item is in rhythm with a more rustic, laid back cottage theme.
And don’t forget your walls. They are key players in the room. It’s important to scale the decor to the size of the wall when possible. I hung a large floral painting that I painted over the bed. I love how the color and distressed aesthetic bring in that French Cottage feel. Art can take the style of a space to a new level.
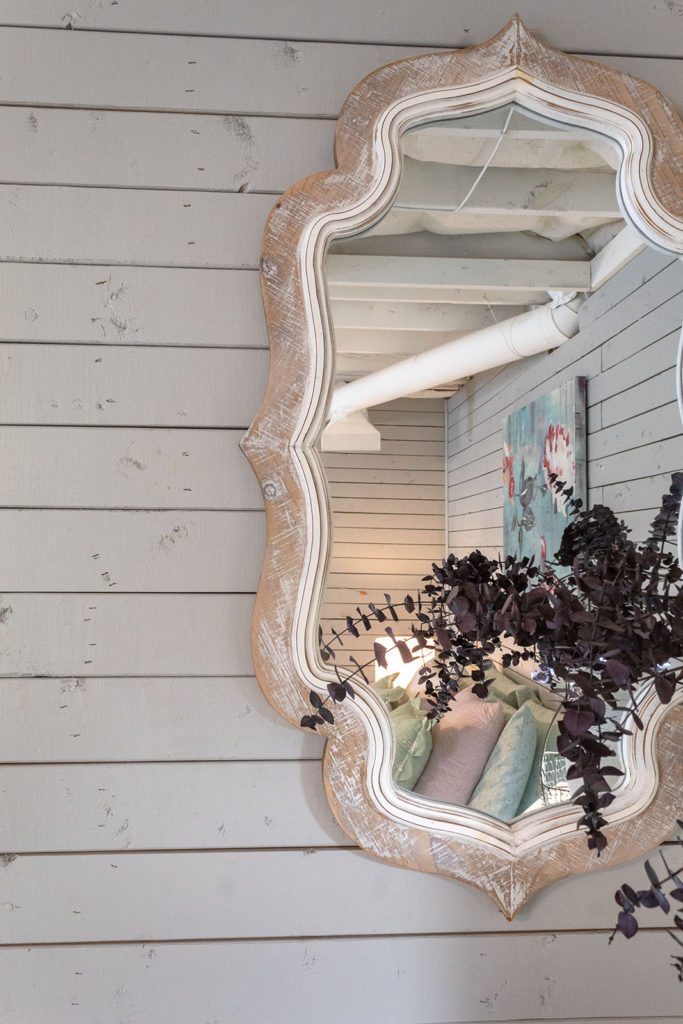
A wooden framed mirror with curves and rustic details was perfect for the corner over the dresser.
Watch The Video Of This Makeover
Dear Nooks In Bloom family, thank you from the bottom of my heart for reading this post. It means the world that you appreciate what I do. Let me know in the comments below what you think of this basement makeover. I always love hearing from you!
I will leave you with one more view of the before and after of this space. I will see you soon!