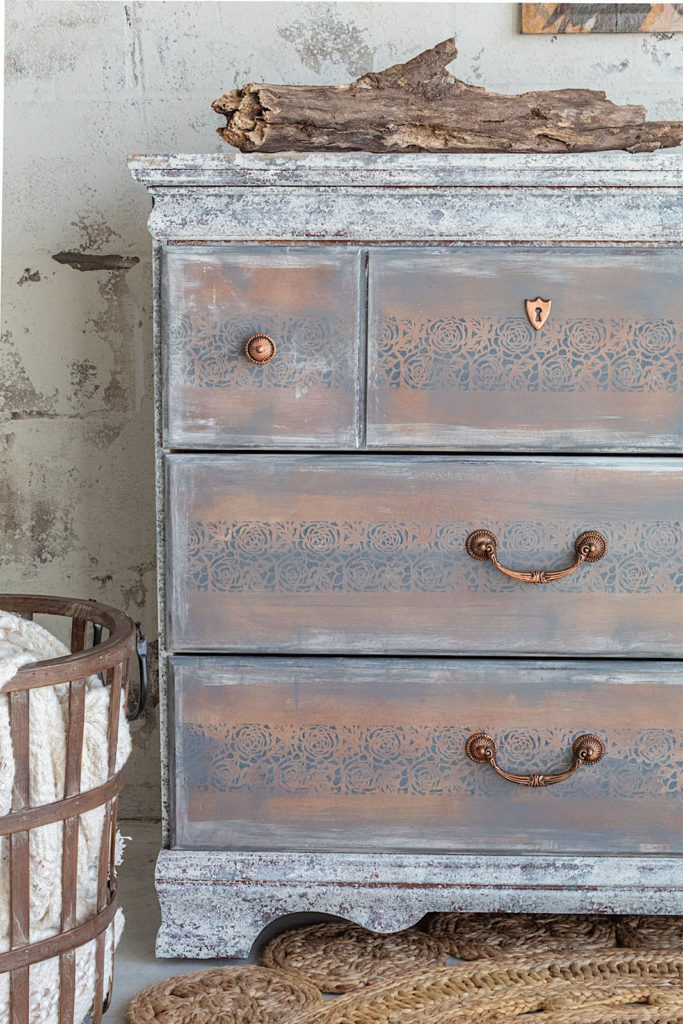
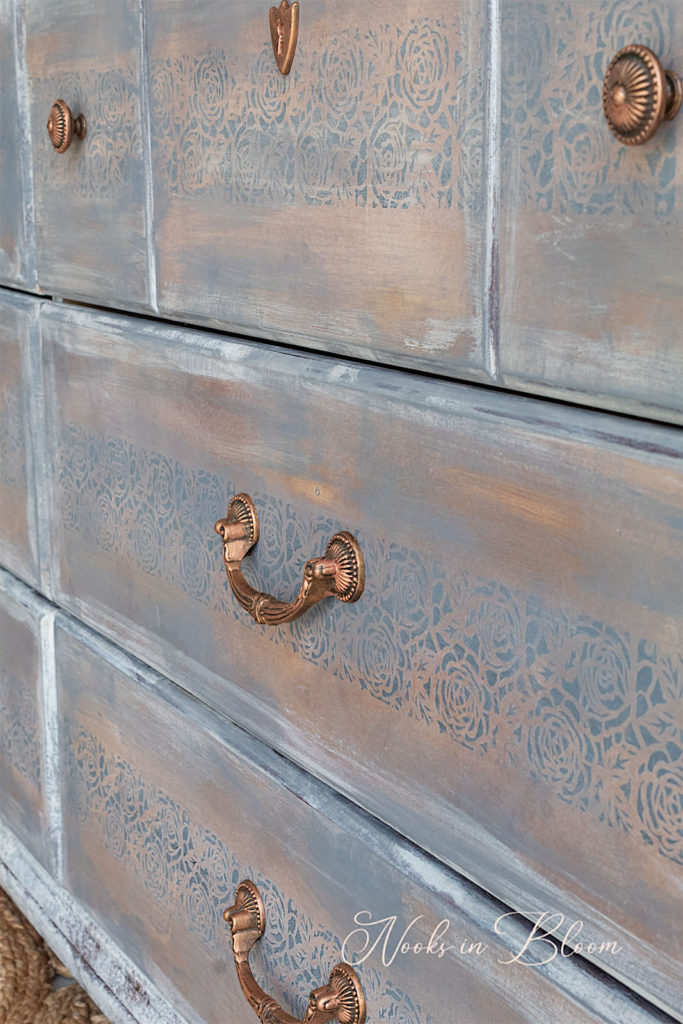
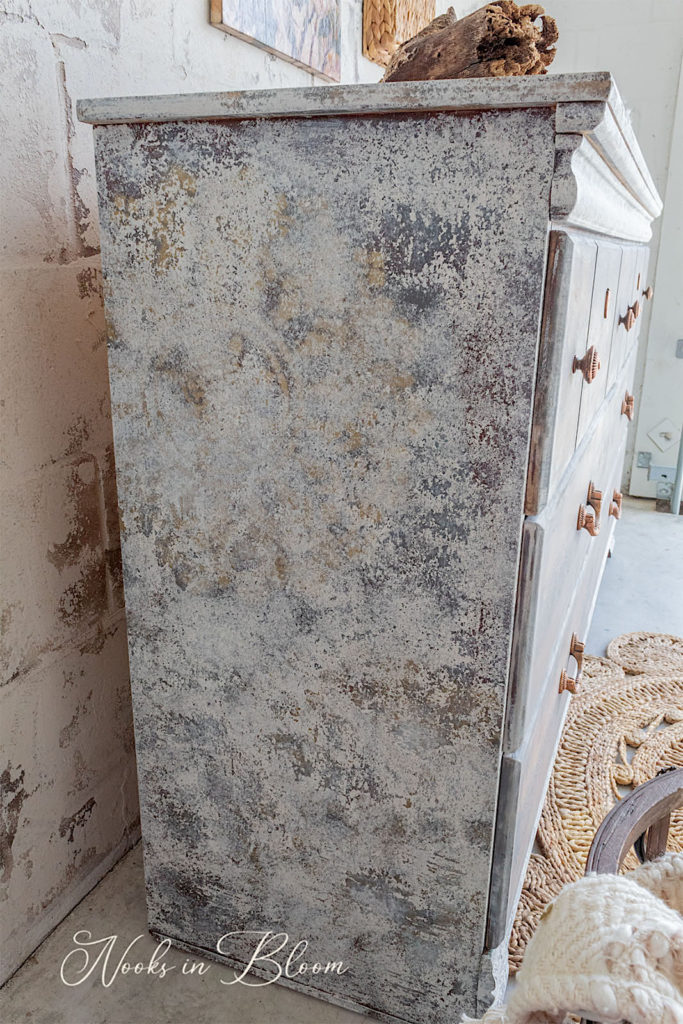
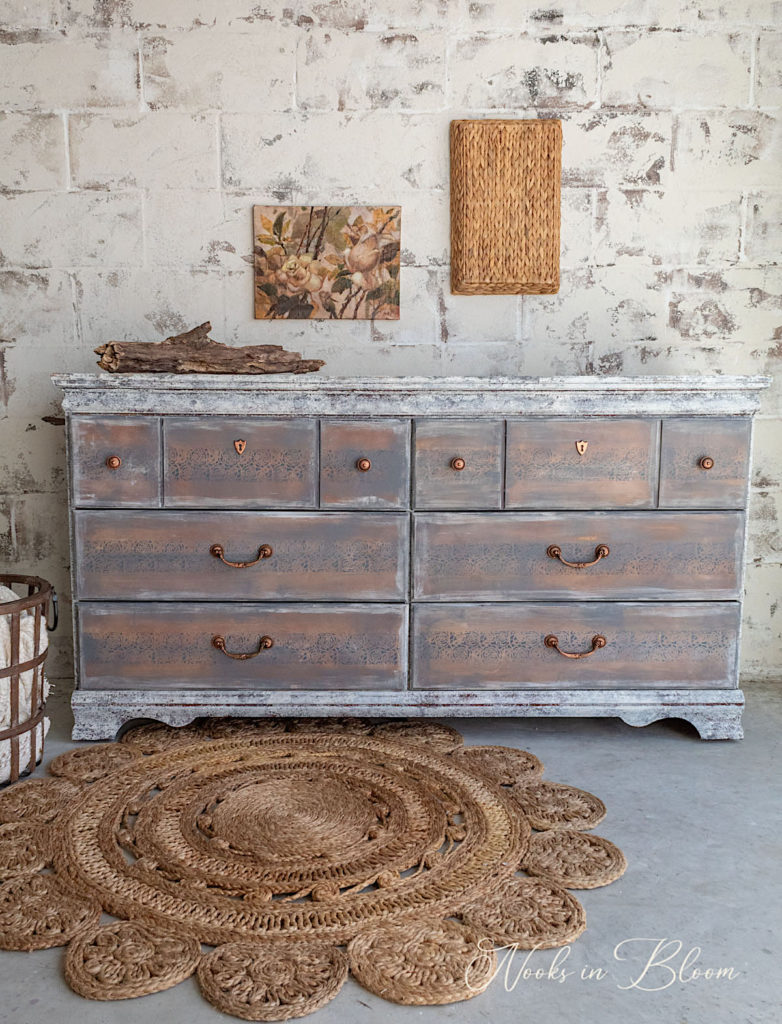
Cracked patina. Smoky-rustic drawer fronts. Subtle stencil details. This renovation has it all! I’m in love with how this dresser came out. It is rich in character and definitely something you will not find in a store.
Being able to create your own fabulous, artistic furniture pieces is SO rewarding. Today I’m going to show you each technique I used to re-imagine a worn, vintage look on this salvaged dresser.
Every furniture piece I work on takes me in new directions. I start out with a vision and as I begin sanding or painting, my ideas tend to morph into something beyond my original scope. And until I feel the look is complete I simply can’t rest!
Disclosure: Some of the links provided are affiliate links. By purchasing through these links you are supporting this family blog and the work we do and there is no extra cost to you. If you would like to read our full disclosure, click HERE.
When I step back and look at a refinished piece, no matter how far I veered off course or how many extra hours I put in, it has to feel right. Each piece calls for its own process and manifests its own personality.
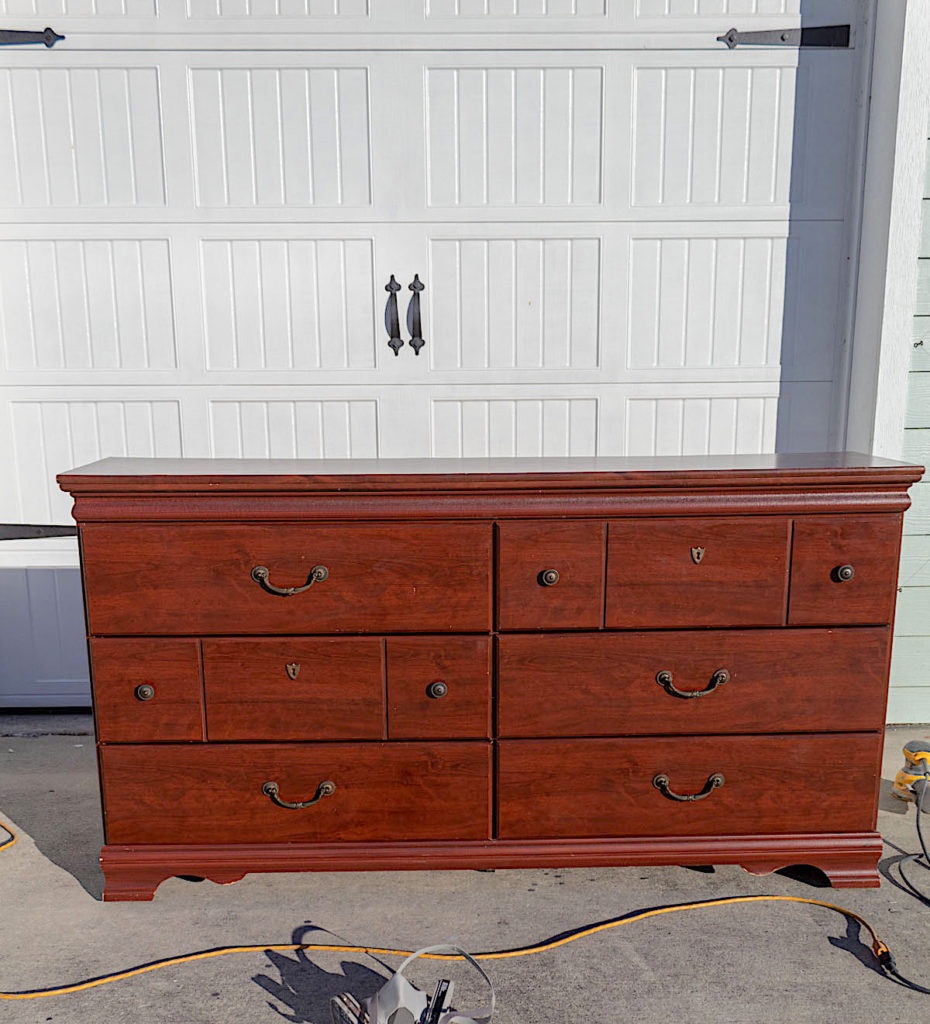
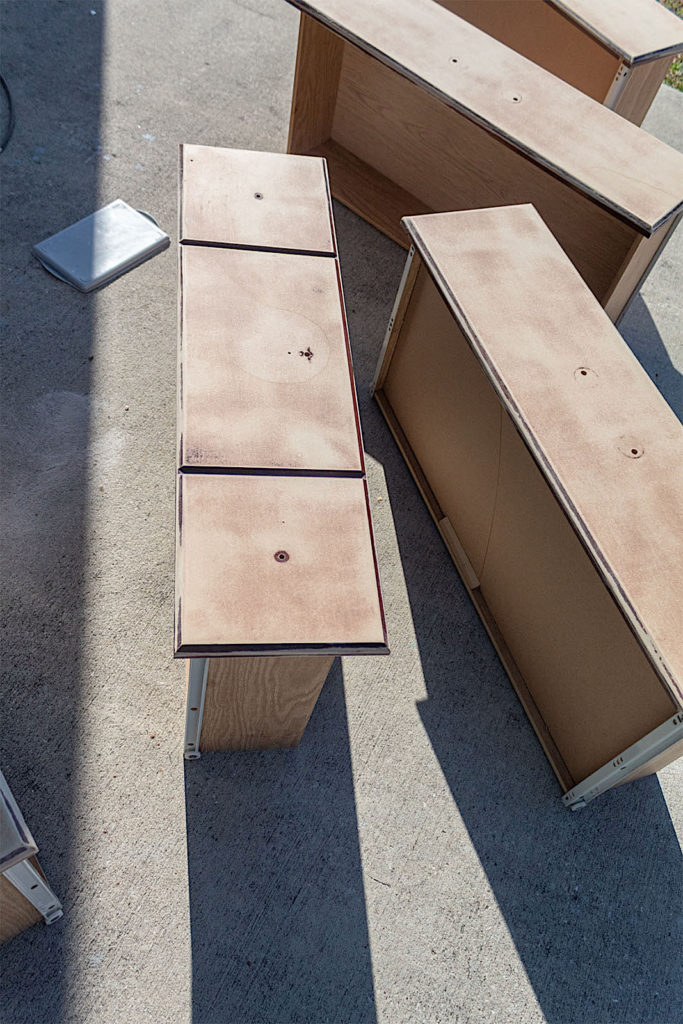
I found this piece on FB marketplace. It looks okay in the picture but it needed a ton of prep work. I had to glue most of the drawers in various places where the wood had cracked or the tracks were off. It was also very dirty inside. Often the most laborious part of a furniture renovation is the prep work.
Step 1. Prep and Sand
Using my orbital sander I took the drawers down to the raw wood. I first used an 80 grit sandpaper to do the heavy sanding and finished things off with 400 grit for a smooth feel.
Tip** To get the finish off of the crevices where my sander wouldn’t fit, I folded a piece of sandpaper and manually rubbed it over the surface.
For the rest of the piece, I simply rough sanded the surface to knock some of the clear coat off, but I did not spend much time on this.
The Drawers
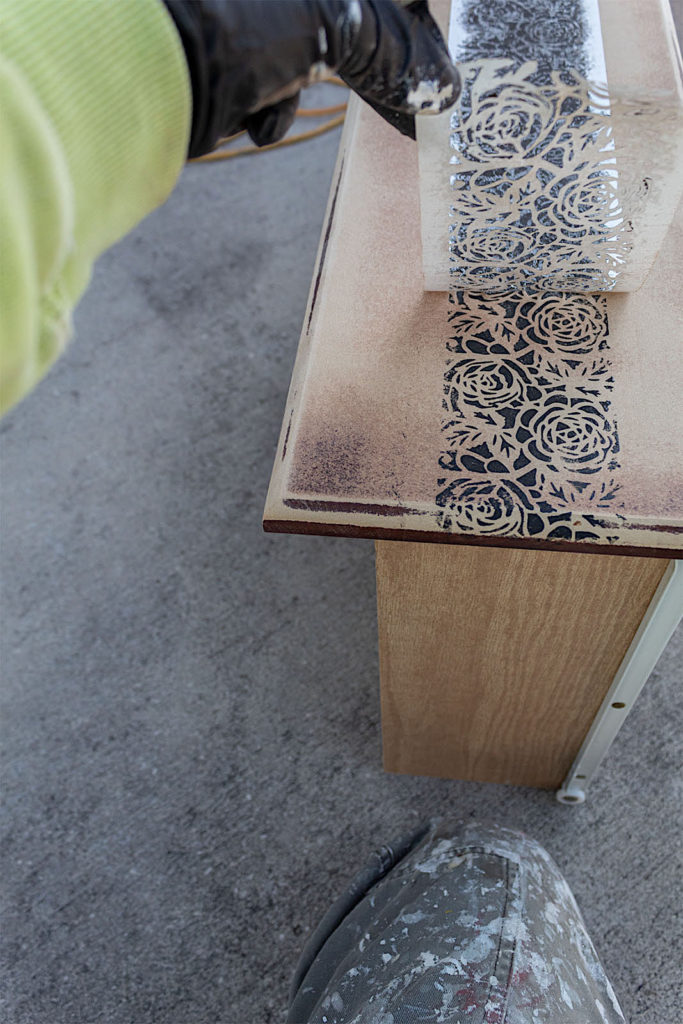
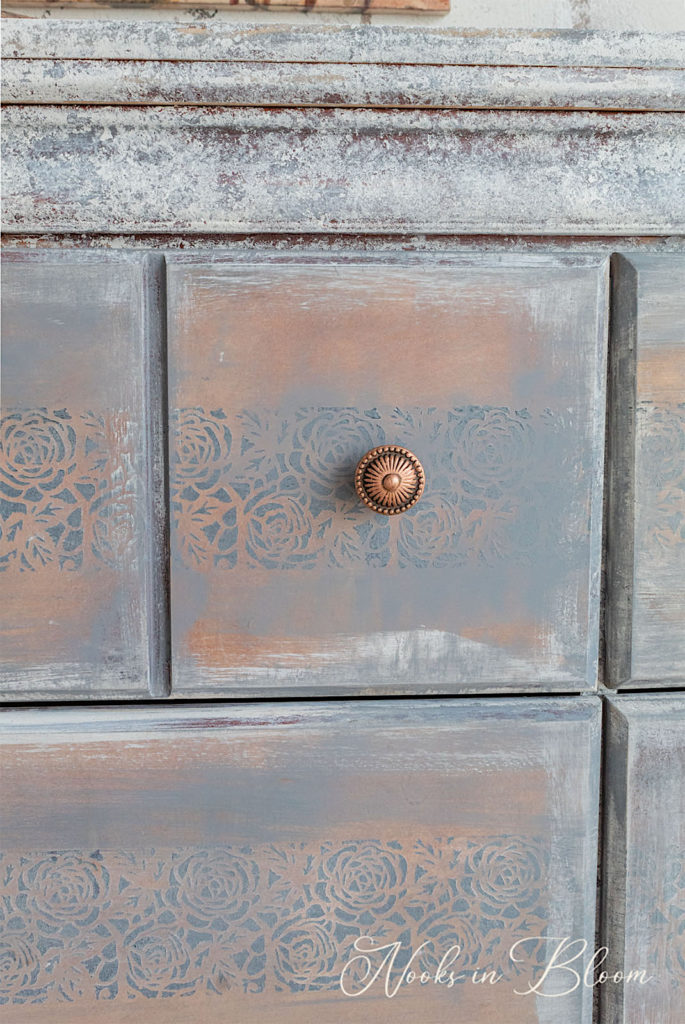
Apply Stencil
If you’ve followed me for a while, you may have noticed I’ve used this stencil on drawer fronts several times. These Stick & Style Stencils By Redesign With Prima are not only beautiful but they last forever! I like to create variations on the look with paint and wax over the stencils.
Make sure you use a dense bristle chalk paint brush or a stencil brush to apply your paint. Dab your brush up and down over the stencil. Avoid sideways strokes over the stencil as this could smudge the stencil.
You don’t need a ton of paint on the stencil, just enough to cover all the details. Once you’ve filled up the stencil, slowly peel it back.
I just smile every time I see the pretty roses on the wood. It is a delicate yet noticeable detail. I like to use dark colors so the stencil is not lost on the wood.
Wax
I’m all about creating dimension with my paint work. I could leave the stenciled drawers as is at this point, but I’d rather play with some wax and paint to further develop the look.
To start I apply some driftwood gray wax in random parts over the drawer fronts. I use a paper towel and dab the wax up and down or in small circular motions to create blotches. I have various hues of Chalk Mountain Waxes. Having Lyme disease, I try to work with as little toxic materials as possible. These are 100% natural and don’t have a chemical smell and they are simply wonderful to work with.
Stain
Once the wax dries I apply one coat of Early American Stain. The purpose of the stain is to make the wood a little let porous so I can afterwards apply paint and move it over the surface. If I don’t apply a stain, the paint will immediately be absorbed into the wood and I won’t be able to create the look I want.
You can use any stain you like for this step, but I would recommend a lighter stain so you can still see the stencils.
Soften With Paint
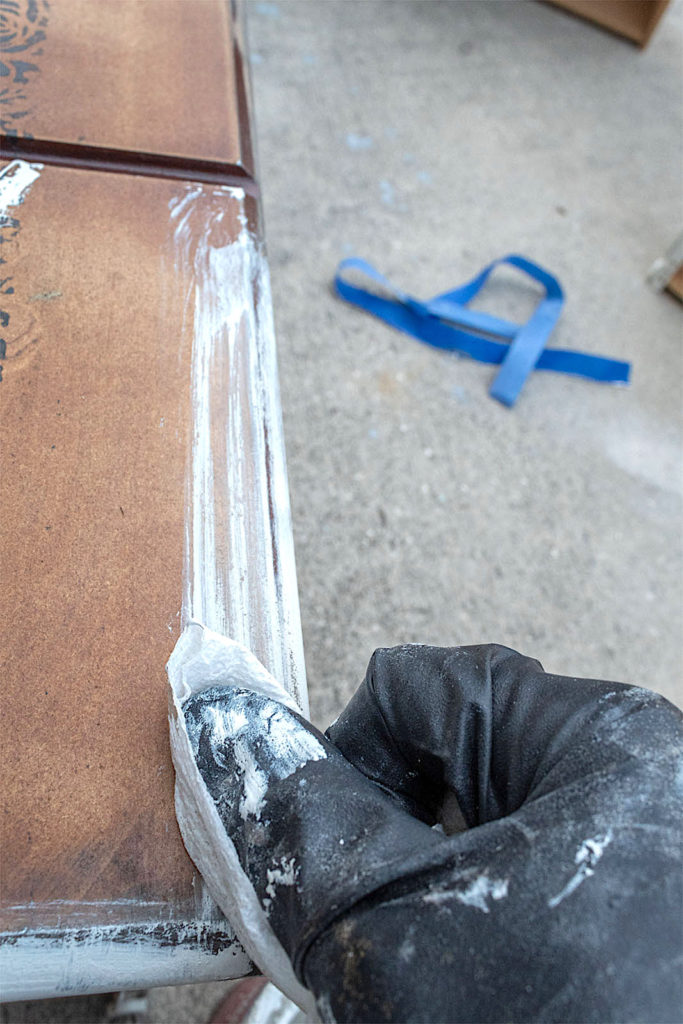
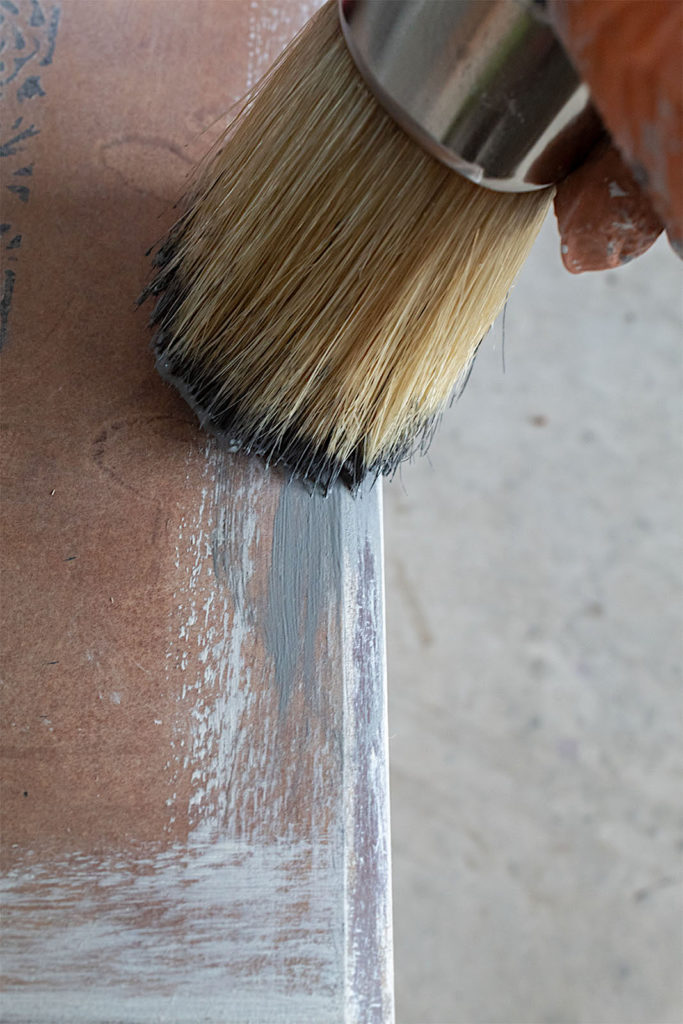
I don’t wait long for the stain to dry. I’m going to experiment a little with paint until I like the look. First I rub on some of my Weathered White paint with a paper towel. I only apply it around the edges; outlining the drawer front if you will.
This is a sloppy technique, nothing fancy. Also with a paper towel, I pull the paint back and off a little to thin out the look.
Then for a little variation I brush on some quick, light strokes of my Antique Tin paint over the white.
I also thin the gray out a little by immediately wiping back with a paper towel.
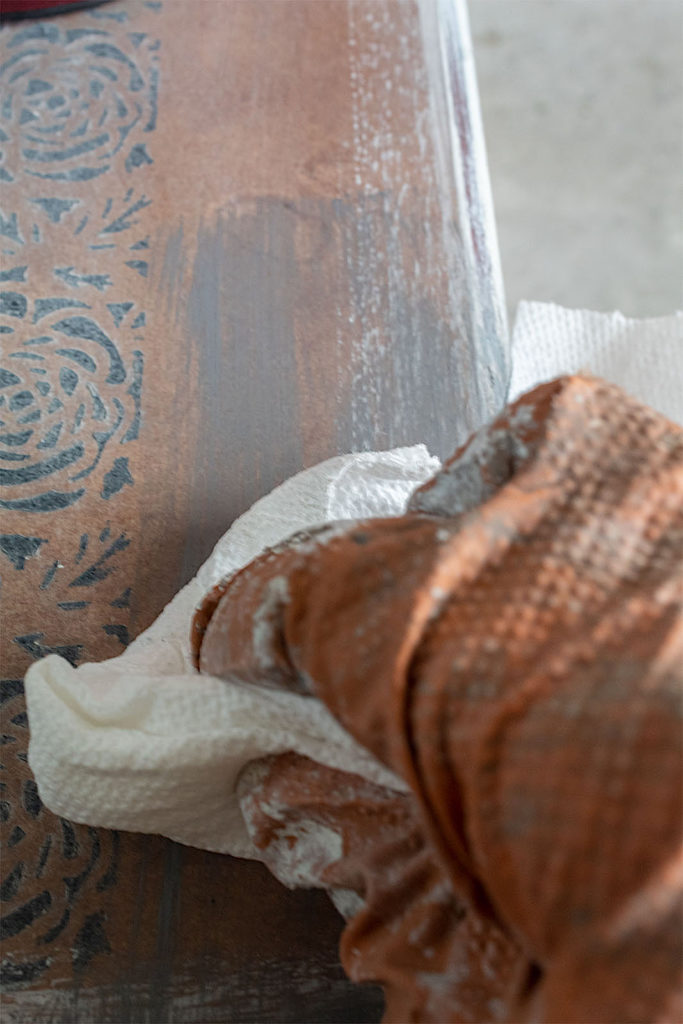
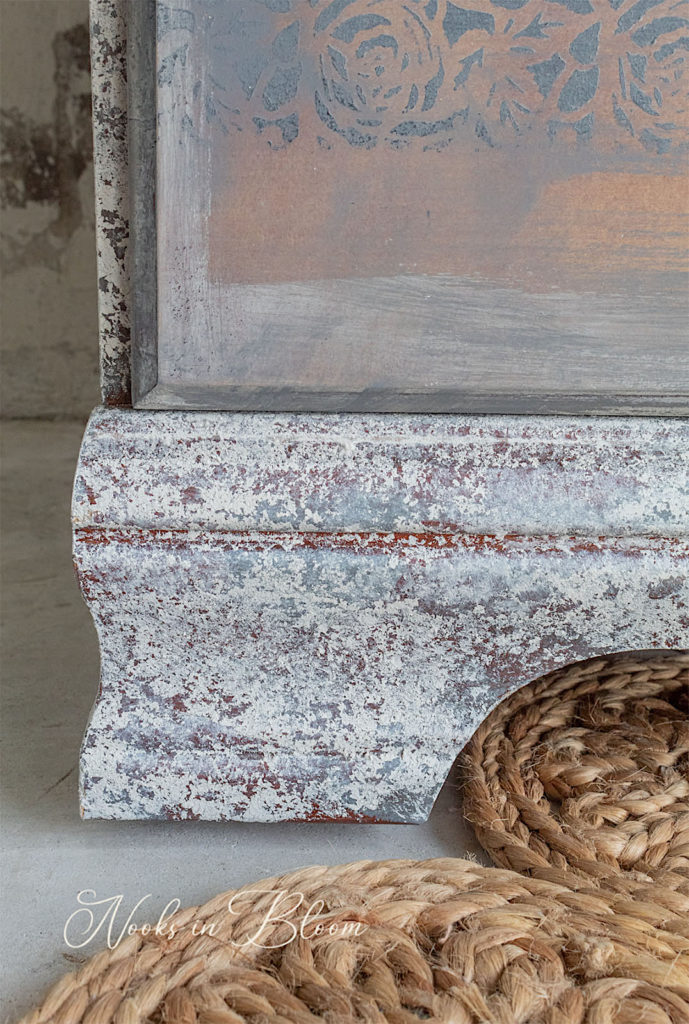
Sand
To break the paint up ever so slightly for a rustic detail, I quickly run a piece of sandpaper over the edges. Don’t go overboard with the sanding so you don’t get rid of the paint entirely.
Cerusing Wax
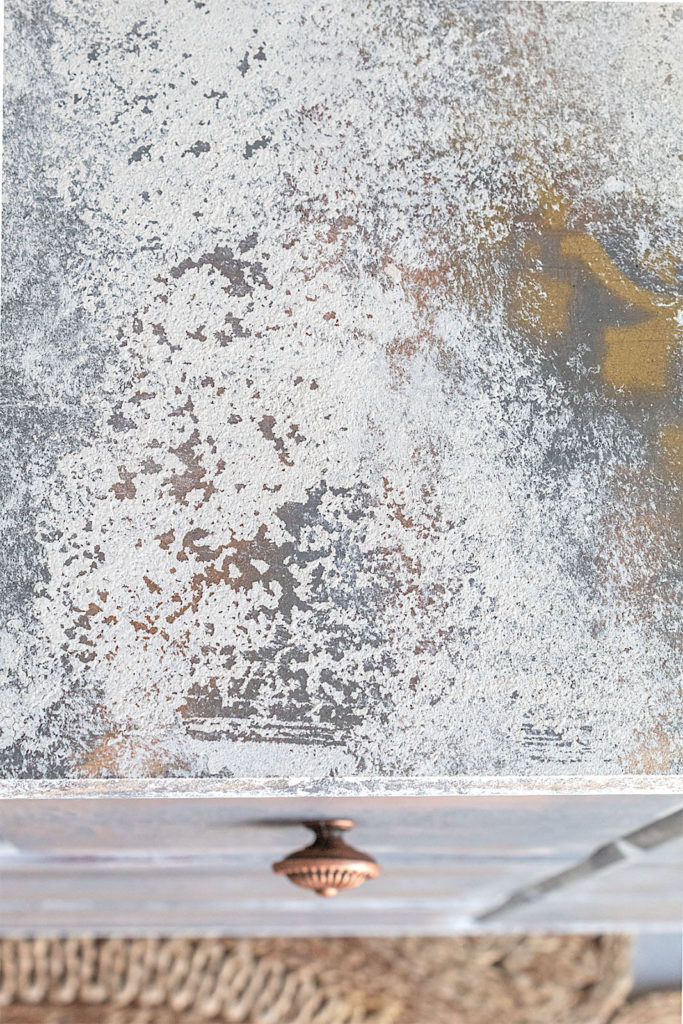
To seal the drawers and add one more layering of a softening aesthetic, I rub cerusing wax over the entire drawer front. I like using cerusing wax to lighten the finish up gently. It adds a level of haze that is so beautiful.
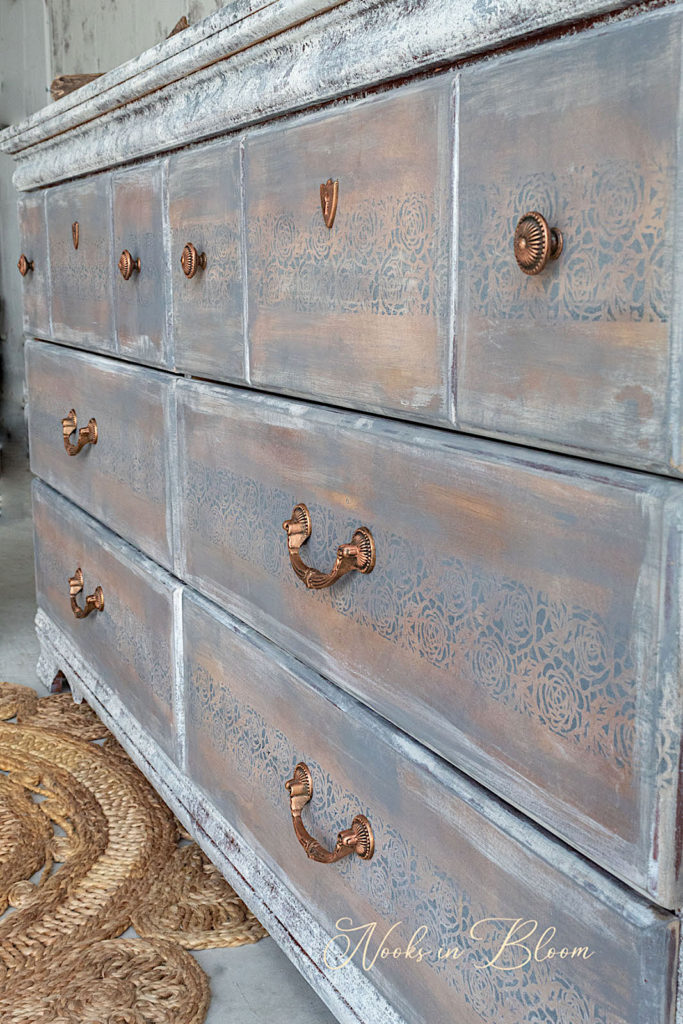
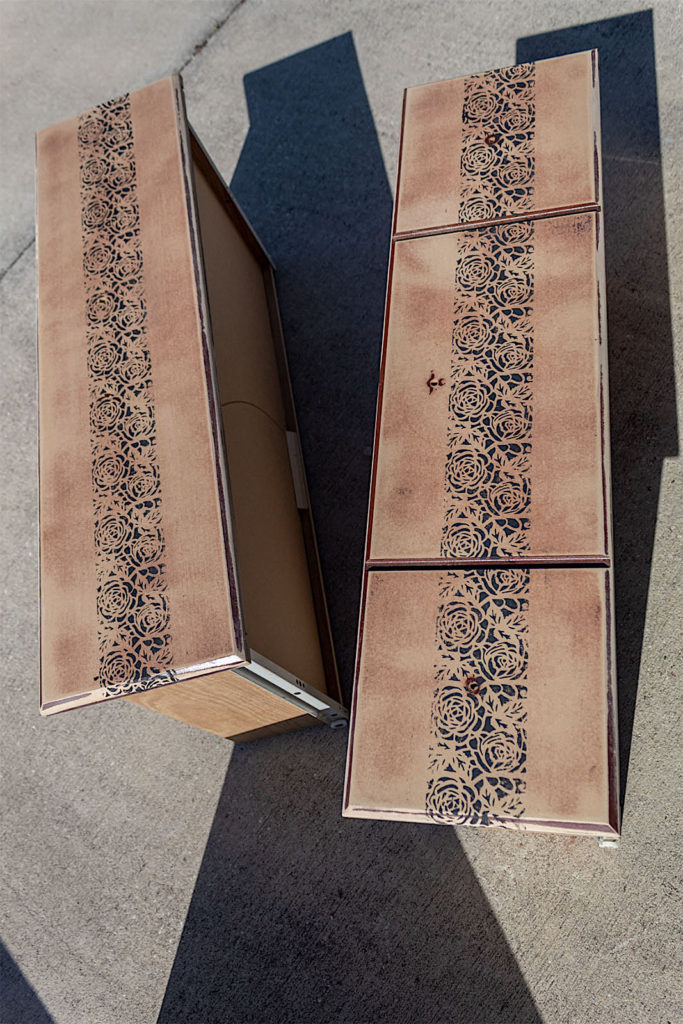
There were a few steps that went into finishing each of the drawers, but it was so worth it. The smoky aesthetic with the subtle stencils in the background gave this piece such magnificent style and character.
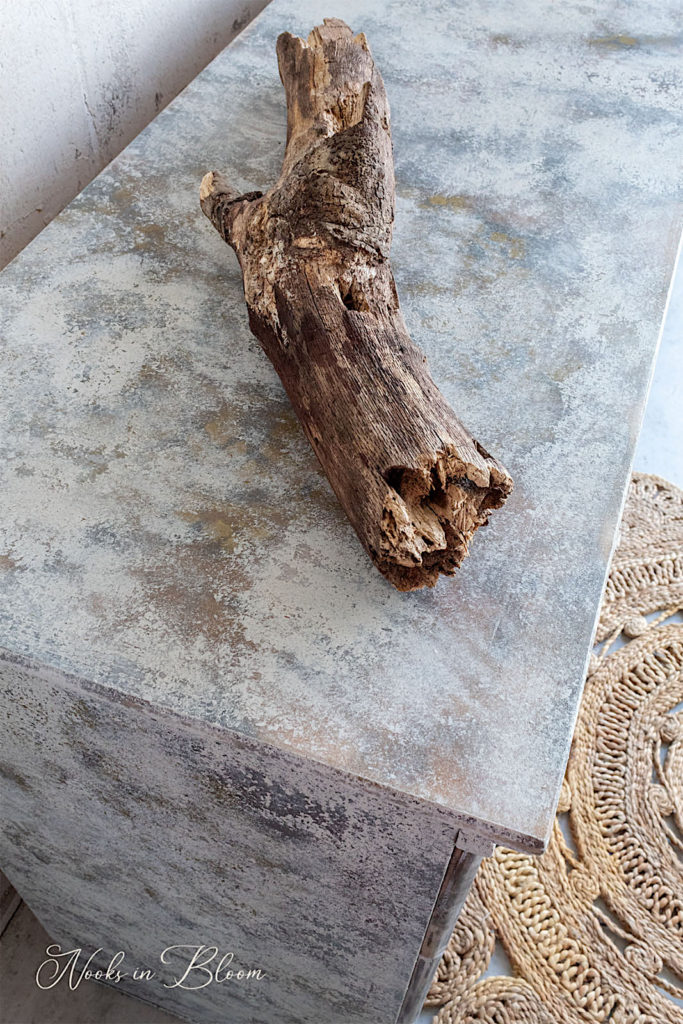
Now For The Cracked Patina Finish
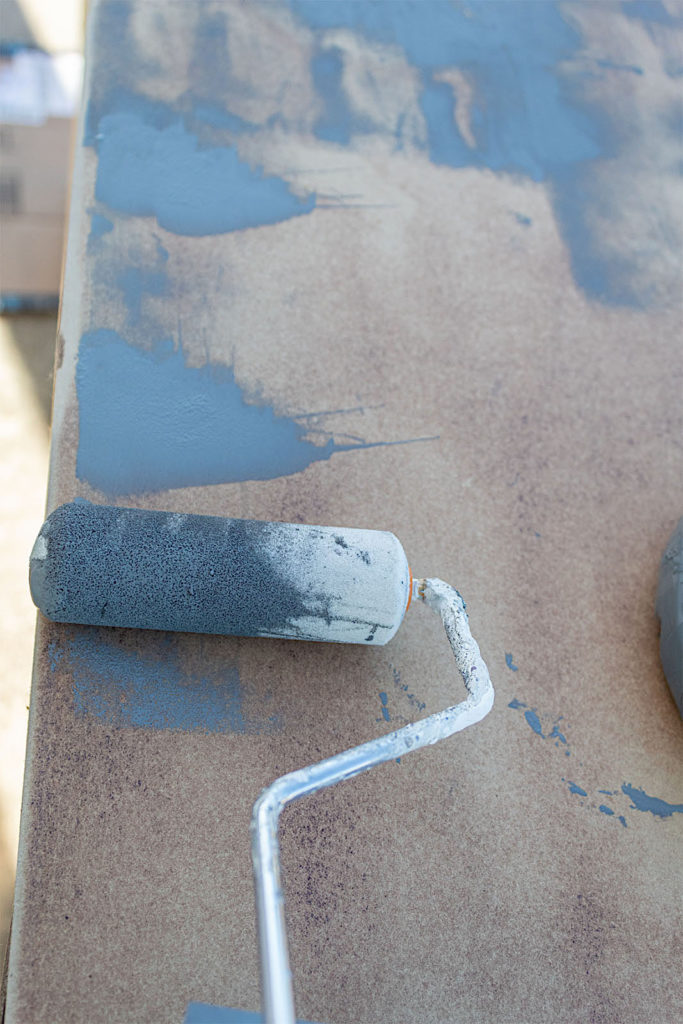
To get a fabulous cracked patina effect, we are going to need at least two different colors of paint. I first apply my Antique Tin, a rich gray color, using a mini roller on the dresser.
I used a mini roller instead of a brush since it is a quick way to apply paint in a blotchy pattern, which is what I wanted. I like the marks the roller makes with the gray and I made sure to leave some of the brown of the wood exposed.
Again, the goal is to achieve dimension. Leaving some of the gray exposed, while adding gray in parts, will give me two colors to work with as undertones.
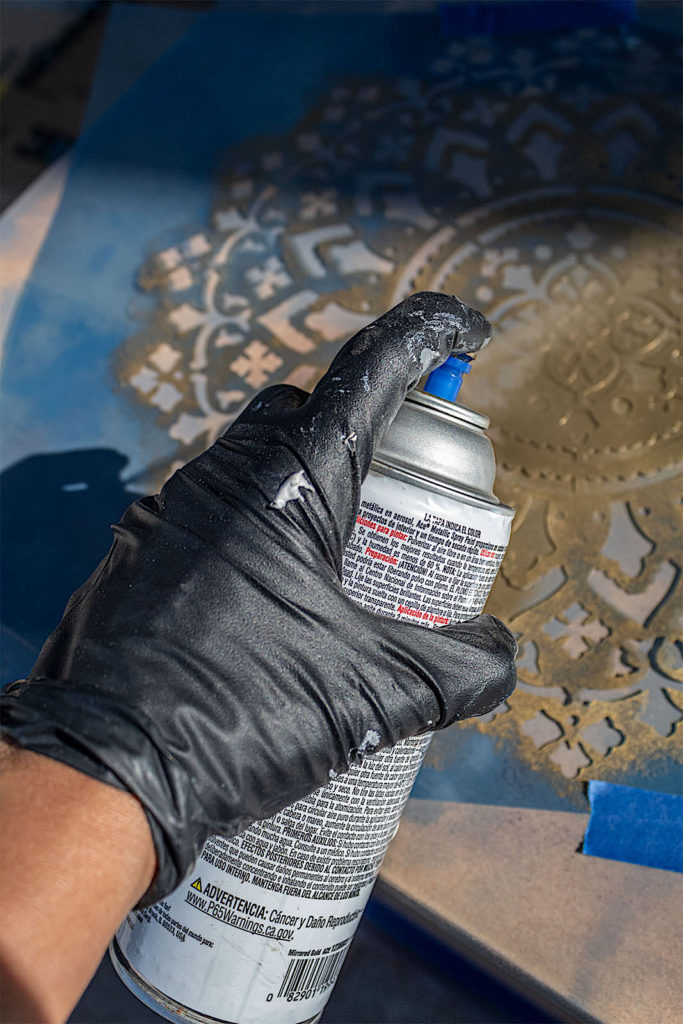
Add Some Large Stencils
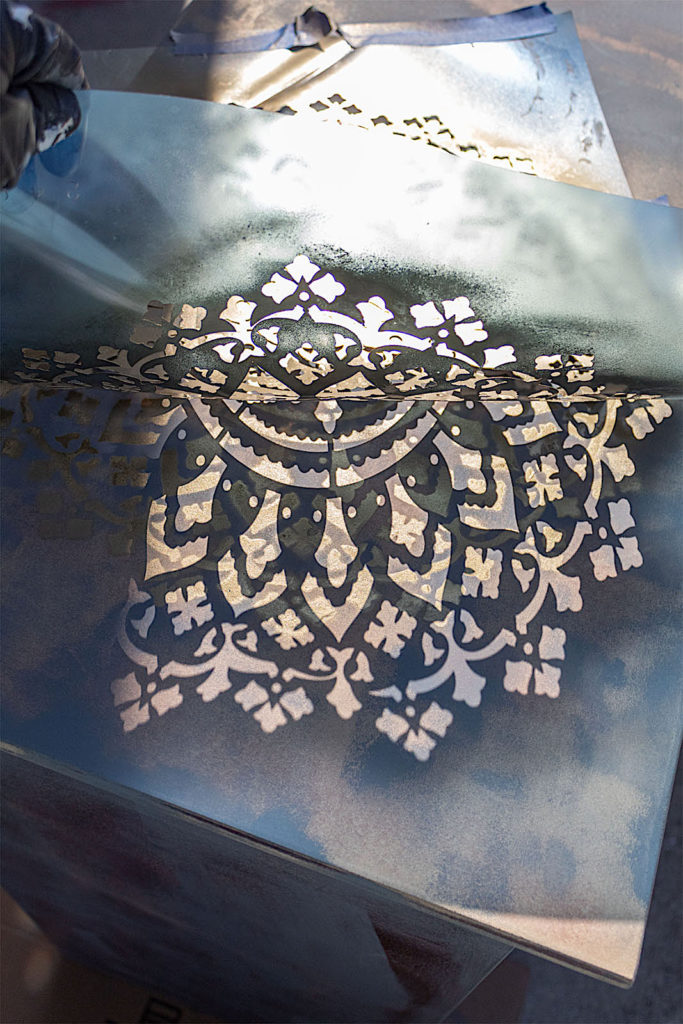
I was feeling jewel tones for this piece. A subtle touch of gold details nestled in the rustic finish was something I envisioned for this dresser. To do this, I spray painted my decorative large stencil in a few places on the top and sides of the piece.
Don’t worry about getting things perfect at this point. The paint and the stencils we’re applying will be mostly hidden under the top coat of paint so it’s okay if things are blotchy and a bit messy right now.
Oh, but I do love how those gold stencils shine. Gives me an idea for a future look…
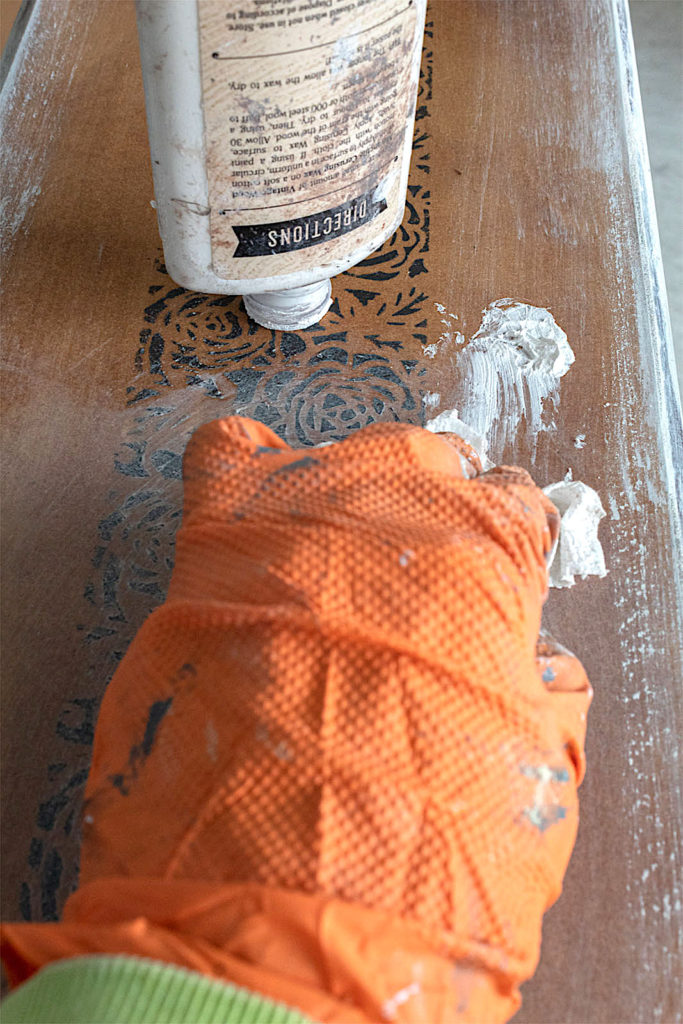
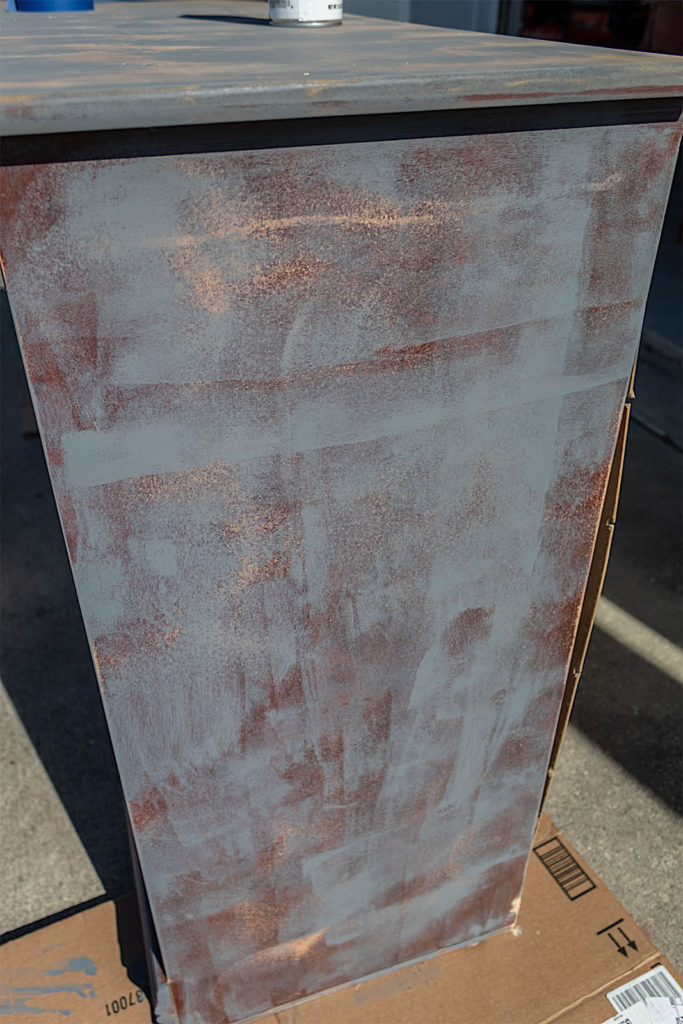
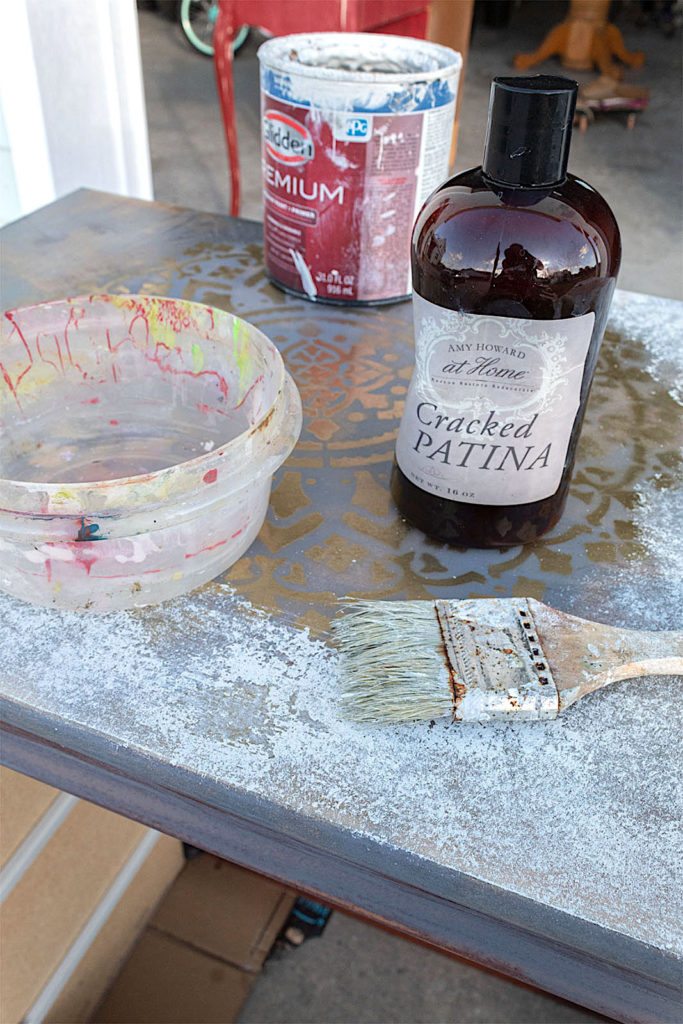
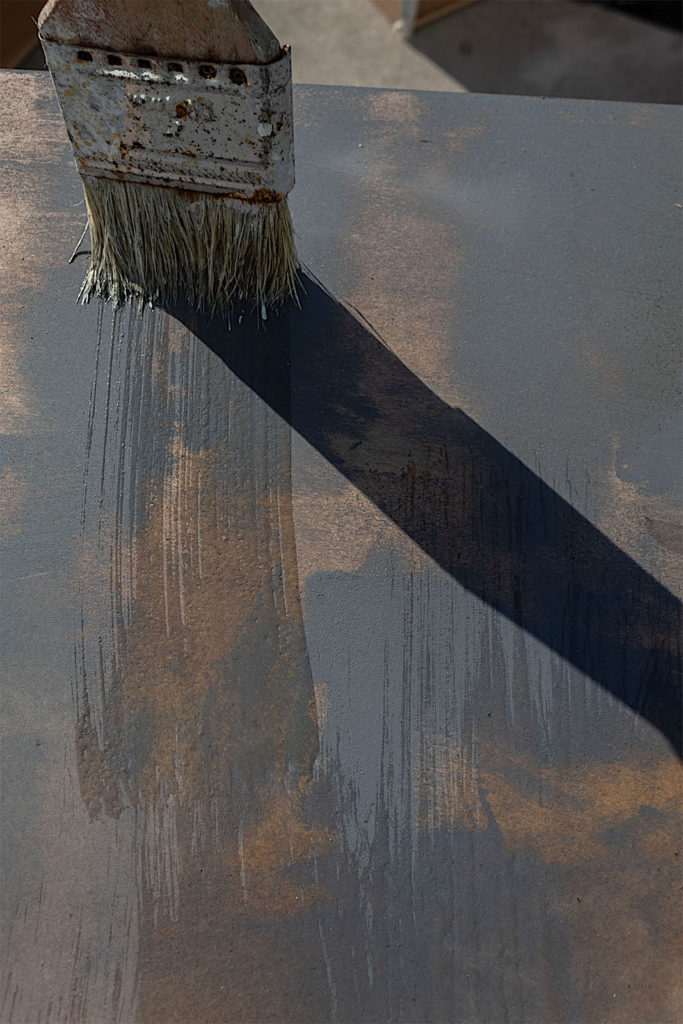
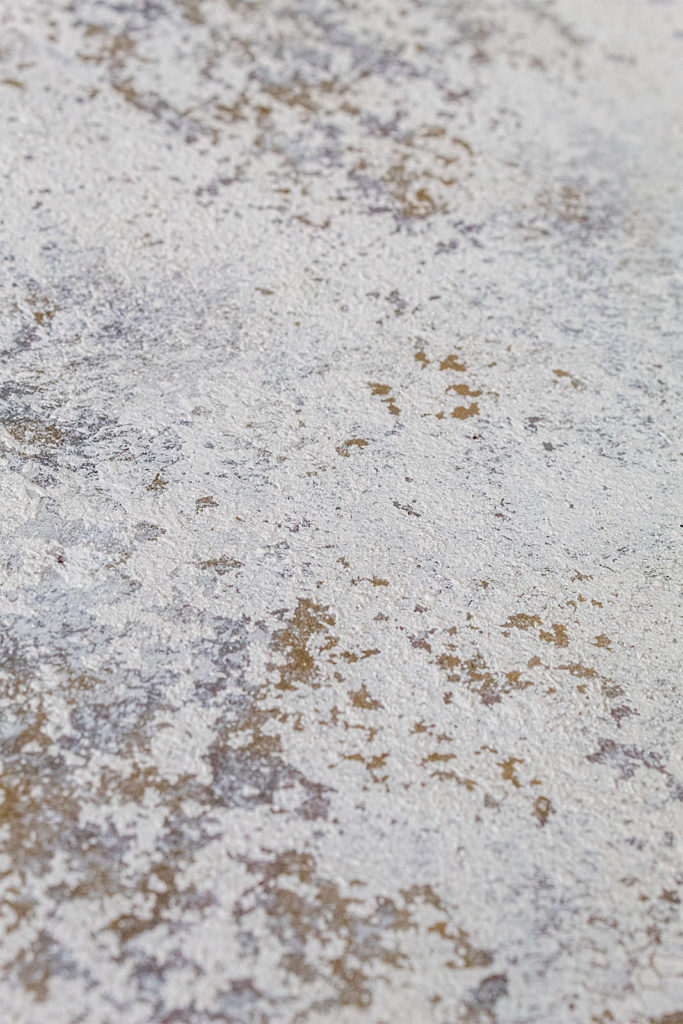
Apply Cracked Patina
Now that I have my gold stencils on, I will apply my cracked patina. The cracked patina will go under my final layer of paint and will cause the top color to crack. I love this product because it instantly makes a piece look like it’s been aging for years.
I use an old chippy brush to paint on the cracked patina. You can either dispose of the brush after or wash it with soap and comb out the bristles with an old comb as I do.
Pour a small amount of the cracked patina into a bowl. A little of this product goes a long way. Although the instructions recommend adding some water, I find it works better for me undiluted.
I apply the cracked patina by painting it on. I try to work quickly because this stuff dries fast. Make sure the patina is completely dry before adding the paint.
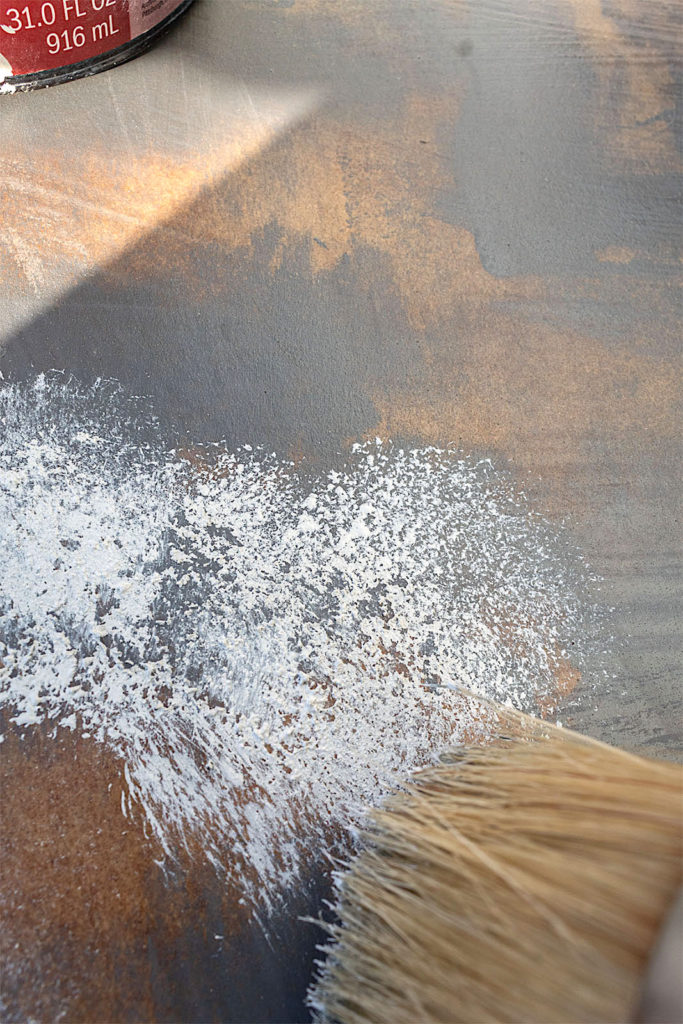
Final Coat Of Paint
After all these steps I can finally get to dive into my favorite part of the renovation. The moment when all the character and layers come together is where I get lost in the creative process.
I start by applying my Weathered White paint with my round, dense chalk paint brush. I do not use any water for this technique, as I normally wood when painting with chalk paint. I go up and down with my brush over the surface.
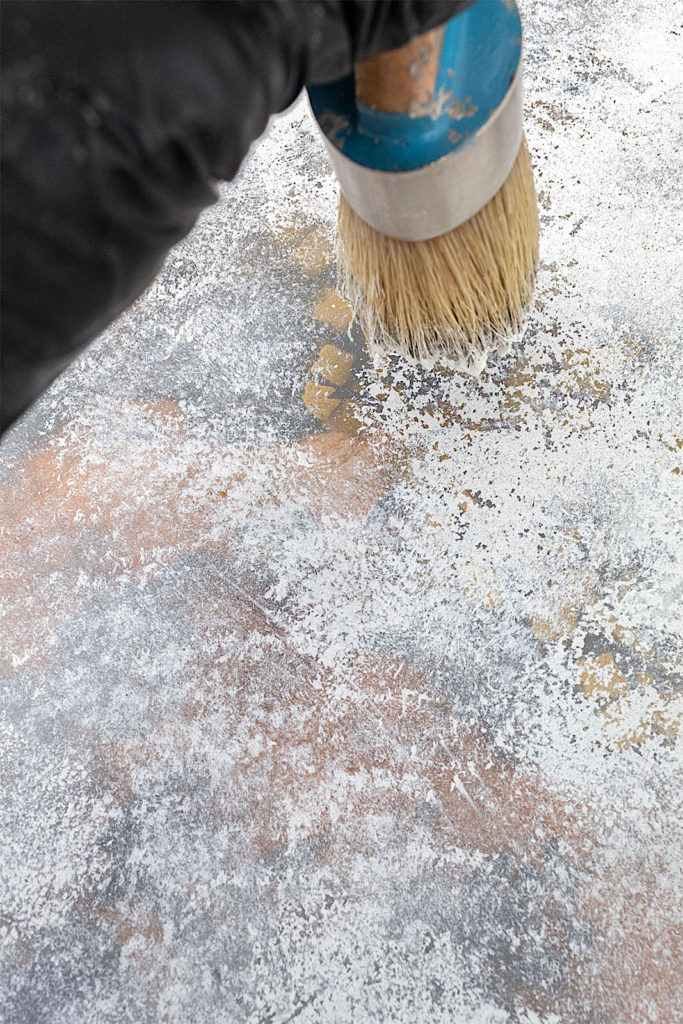
I keep paint coverage slightly heavy when I apply it with my brush. Then I wait a few seconds, (don’t wait longer than approximately 30 seconds), and I go back over the section I just painted, softly hitting the surface up and down with my brush.
This causes the brush to remove some of the paint, exposing the colors underneath in a distressed fashion.
I continue doing this, working the white paint and watching the crackled effect take place. As you experiment with the amount of paint you apply, followed by the dabbing up and down brush technique, you will get varying results in each spot. I also recommend leaving small parts of the under colors and the stencils exposed. How much or how little you leave exposed will change up your final look. It is up to you what you prefer.
If you feel your top color is too thinned out, you can fill in with more paint on a subsequent coat, but be careful not to completely cover your crackled look.
I think this dresser turned out so beautiful. Even the texture feels old and as if the piece has been worn down in parts over the years.
So guys what did you think of this renovation? Pretty unique and magnificent wouldn’t you say? Let me know what you think in the comments below and if you have any questions with the different steps.