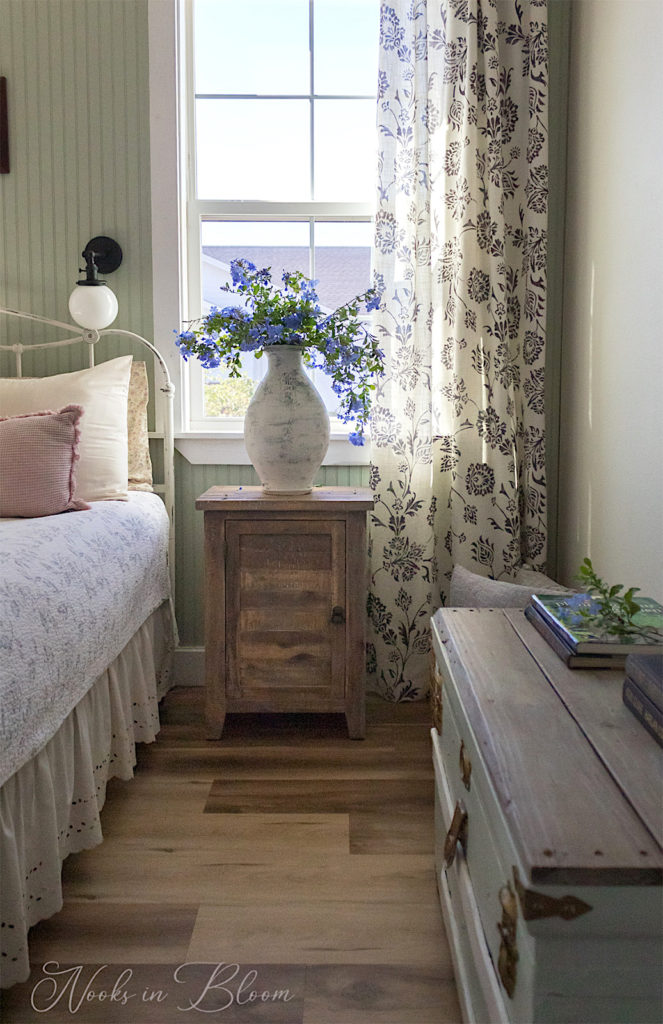
Hello lovely readers! I am so into faux effects lately. After creating our “aged stone” kitchen accent wall, I’ve been on a roll! I just can’t get enough of this European-inspired look. Today I’m going to show you how I turned this thrift store vase into a French aged dream in a few easy steps.
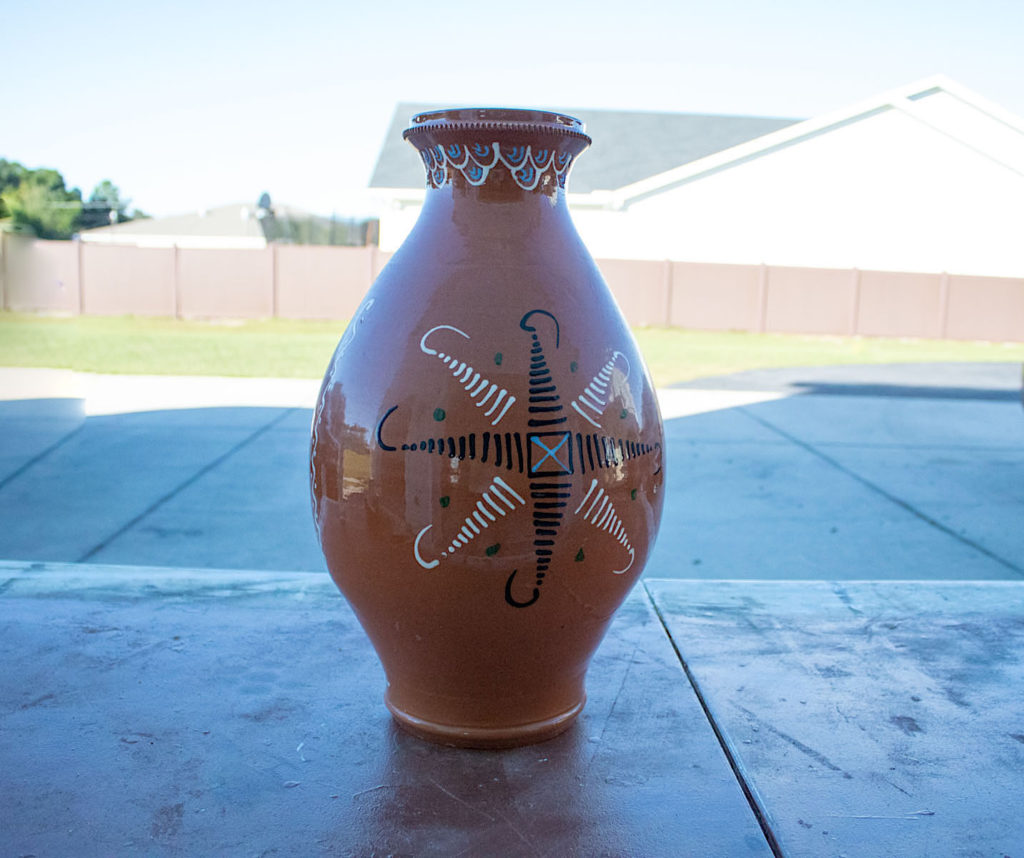
The Before
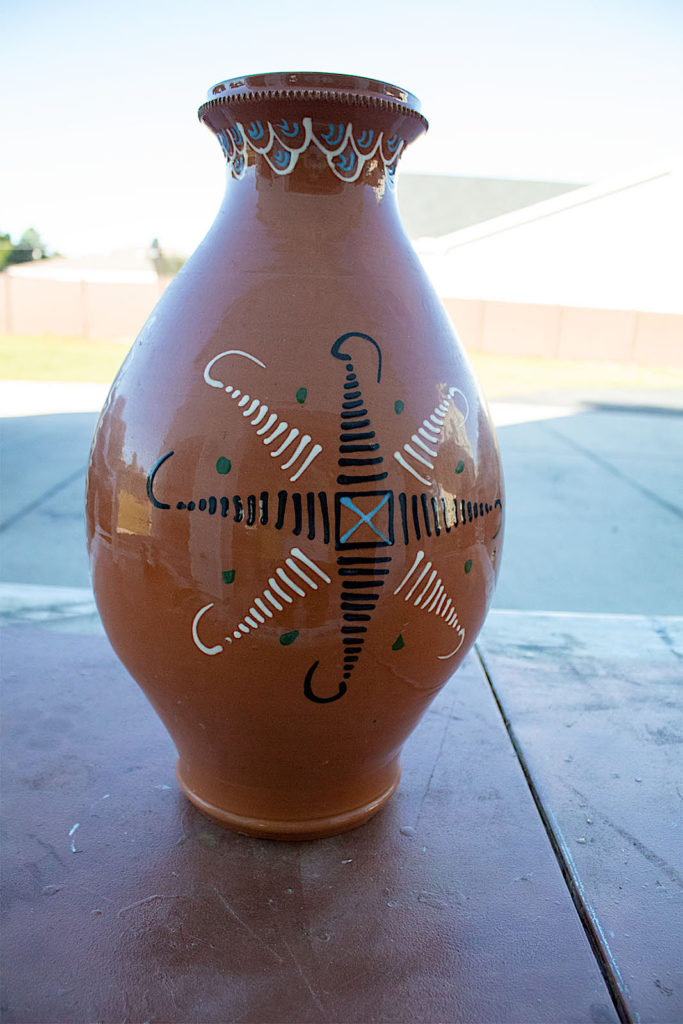
This vase cost me $6 at the thrift store. It looked like it was hand painted in a southwestern or Native American style. Although lovely, it just wasn’t my style. The plan was to transform it a vase fit for the French countryside.
As you can see the finish on this vase was very glossy, but that would not be a problem once we would start adding the layers of chalk paint. The chalk paint recipe I use gives paint very good adherence.
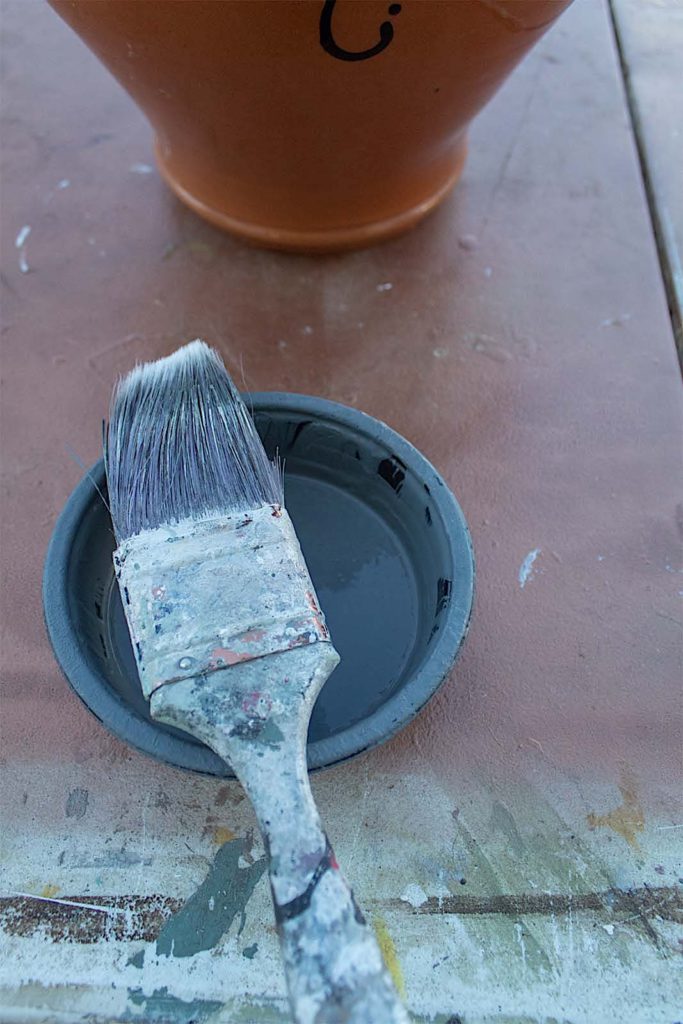
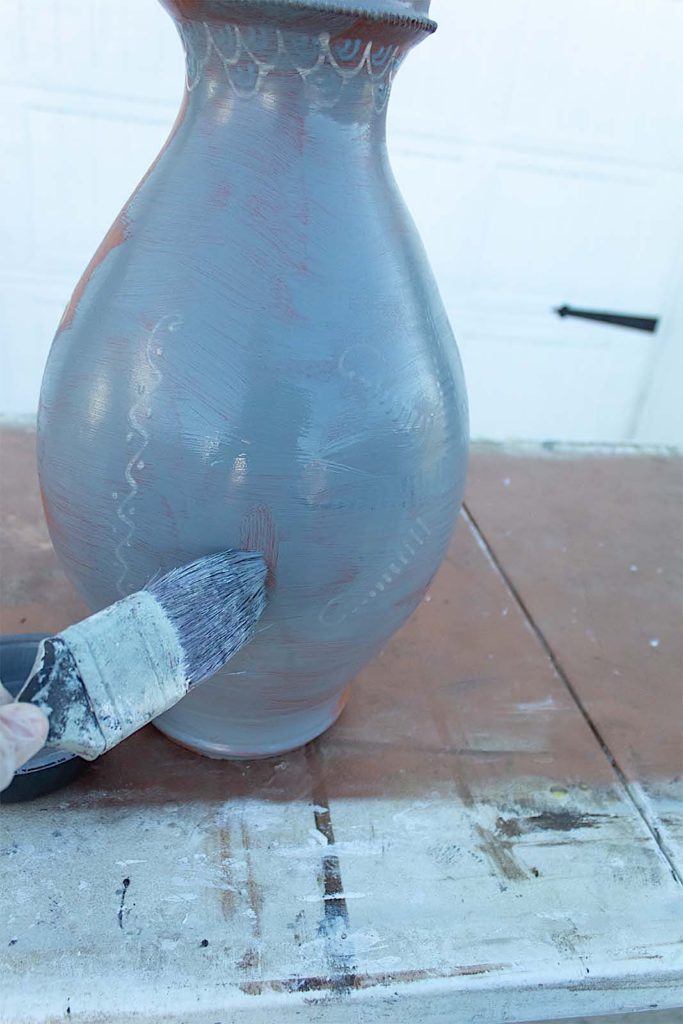
I begin by applying my first color of chalk paint, Antique Tin by Behr. By adding a darker color as my base it will contrast with my white top coat. You want to create contrast in colors when distressing so you can really see the texture and depth between paint layers.
Disclosure: Some of the links provided are affiliate links. By purchasing through these links you are supporting this family blog and the work we do and there is no extra cost to you. Full disclosure HERE.
Use your misting bottle to keep your surface moist. That will help move your paint over your surface. Chalk paint tends to dry fairly quickly, especially when working outdoors like I was. You don’t want it dripping wet, just moist while you are applying your paint.
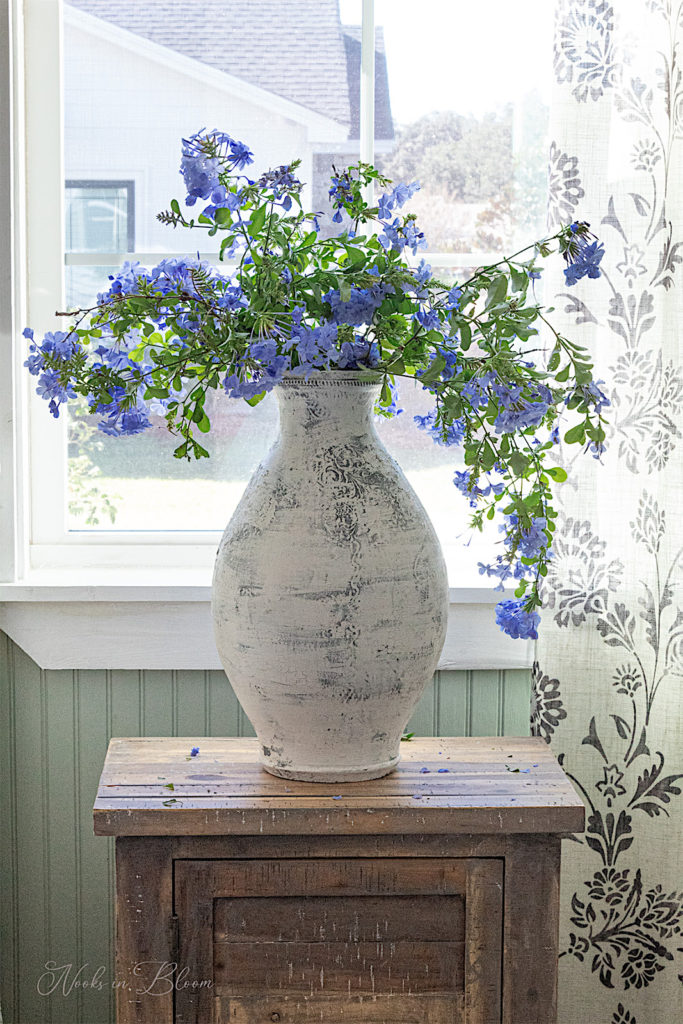
The picture below shows what the vase looked like after one coat of paint. The second coat gives you more coverage (this comes after the stencils). You can also add a primer prior to painting.
Because this vase was for my personal use, not for selling, I wasn’t overly concerned with the durability of the finish.
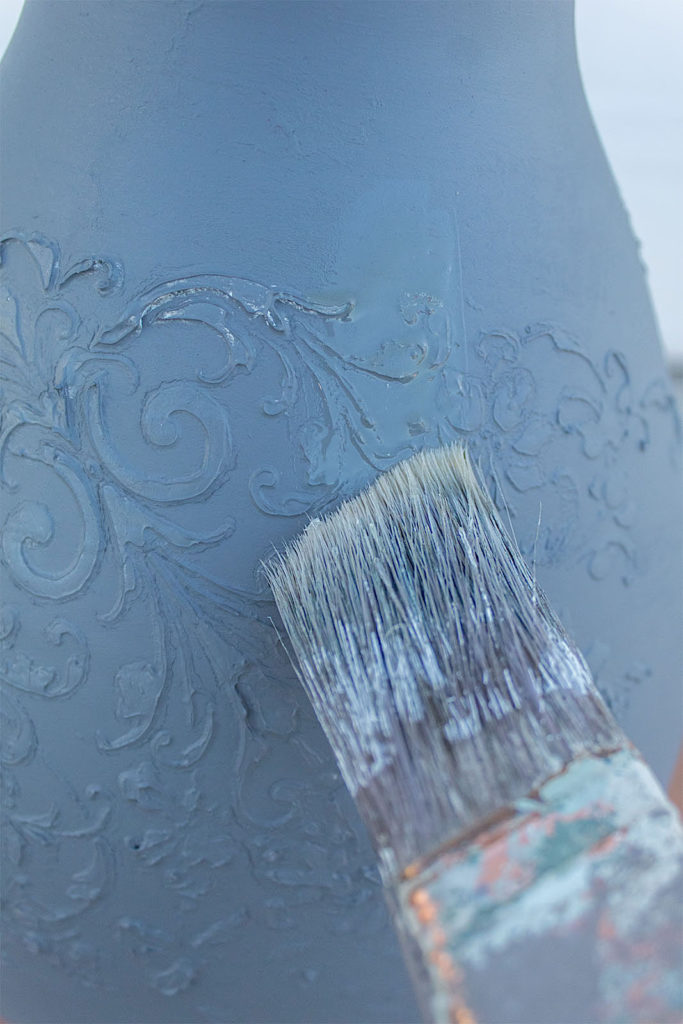
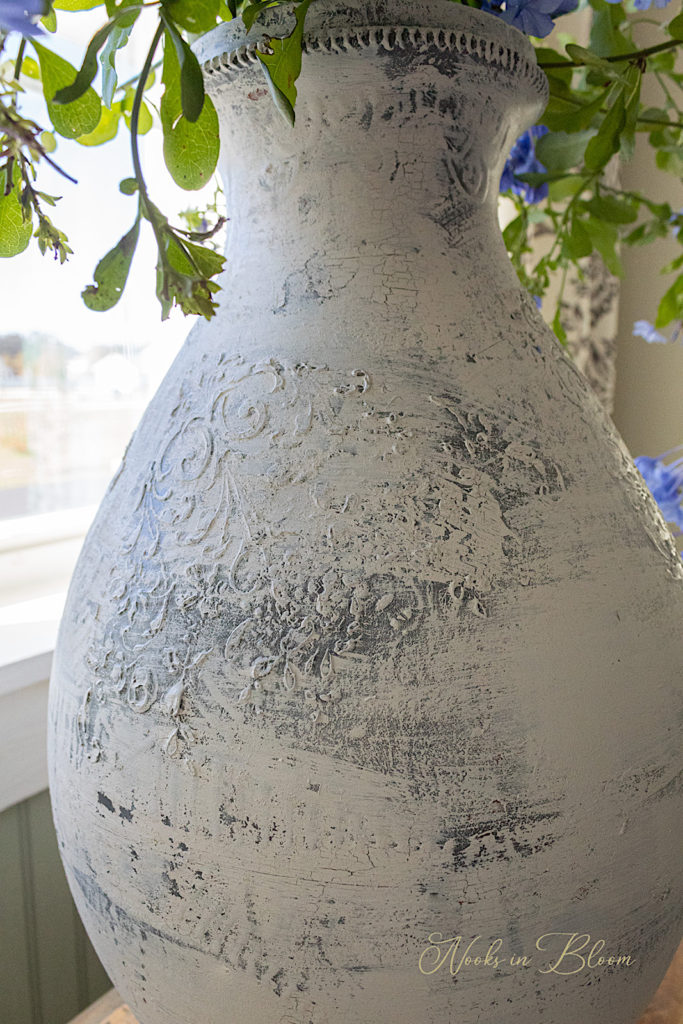
Step 2. Add Raised Stencils
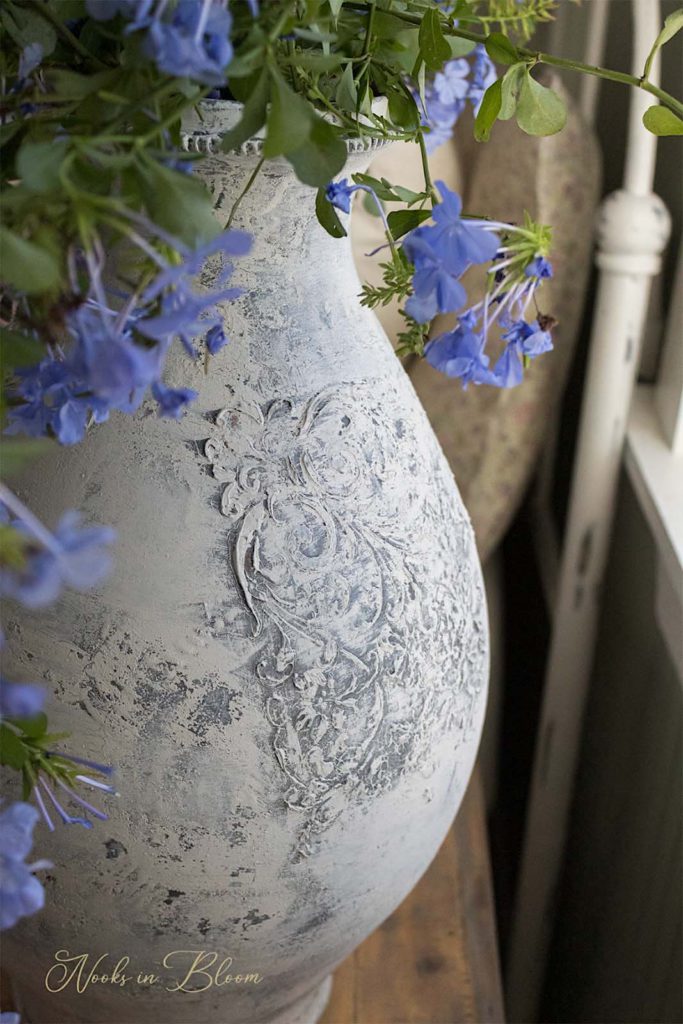
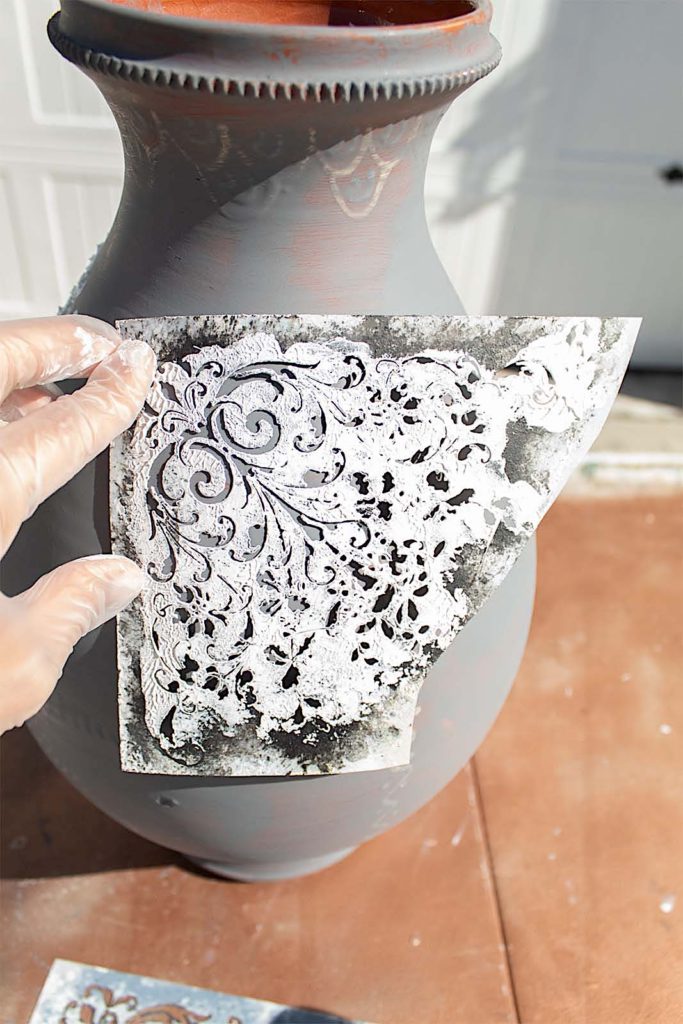
To add some lovely French character, I decided to apply some raised stencils to the vase. Just a couple would be enough to create a beautiful detail. I love using my Flower Mandala Stencils anytime I want to create a French-inspired finish. They are so ornate and feminine.
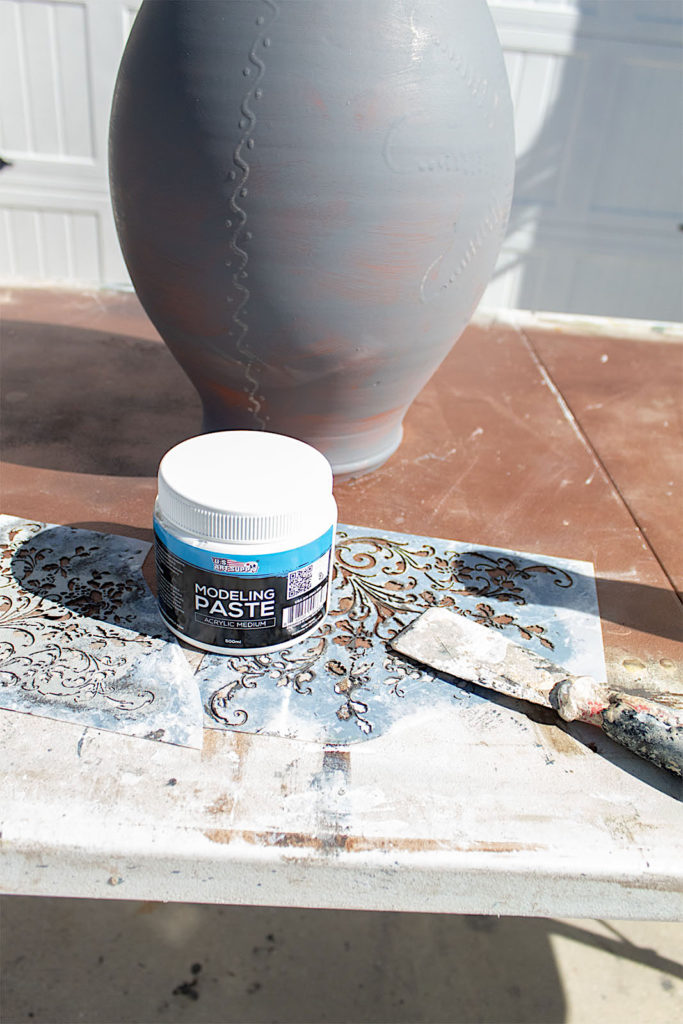
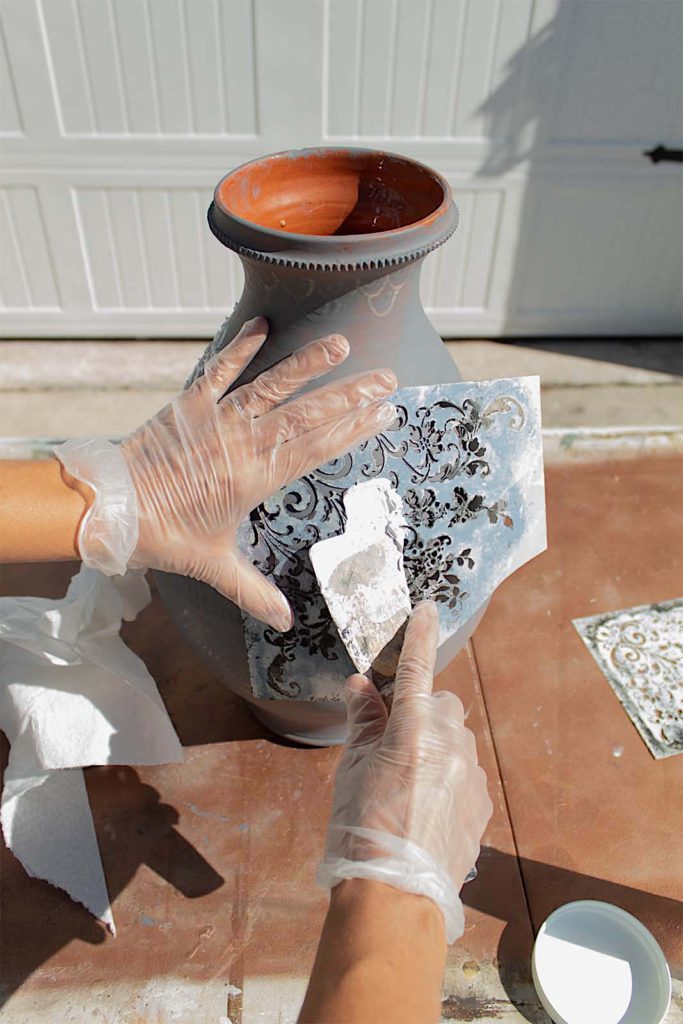
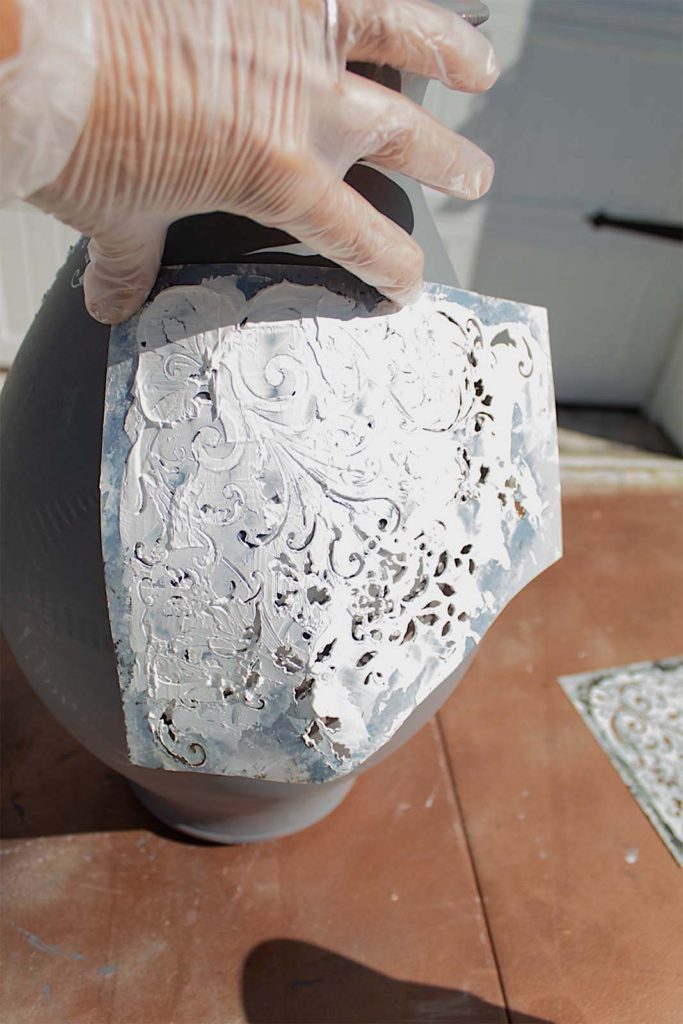
This molding paste works really nicely for raised stencils. To begin I take my putty knife and start carefully rubbing the paste over my stencil. I hold the stencil in place with one hand. You can also use painters tape to secure the stencil.
Be sure to keep your putty knife motions flat over the stencil. That keeps the paste from seeping under the parts of the stencil.
I apply a generous amount of paste. Once the stencil is fully covered, I come back over and scrape off the excess. You want the level of the paste to be just a little over the stencil, so that it is almost flush with it.
Once you have your paste scraped back evenly, slowly pull back your stencil to reveal the imprinted stencil on your surface. I love this part.
I never stress about imperfect stencils on my pieces or if there’s a little smudging going on. Especially with distressed and aged finishes, the imperfections will blend into the texture of the finish.
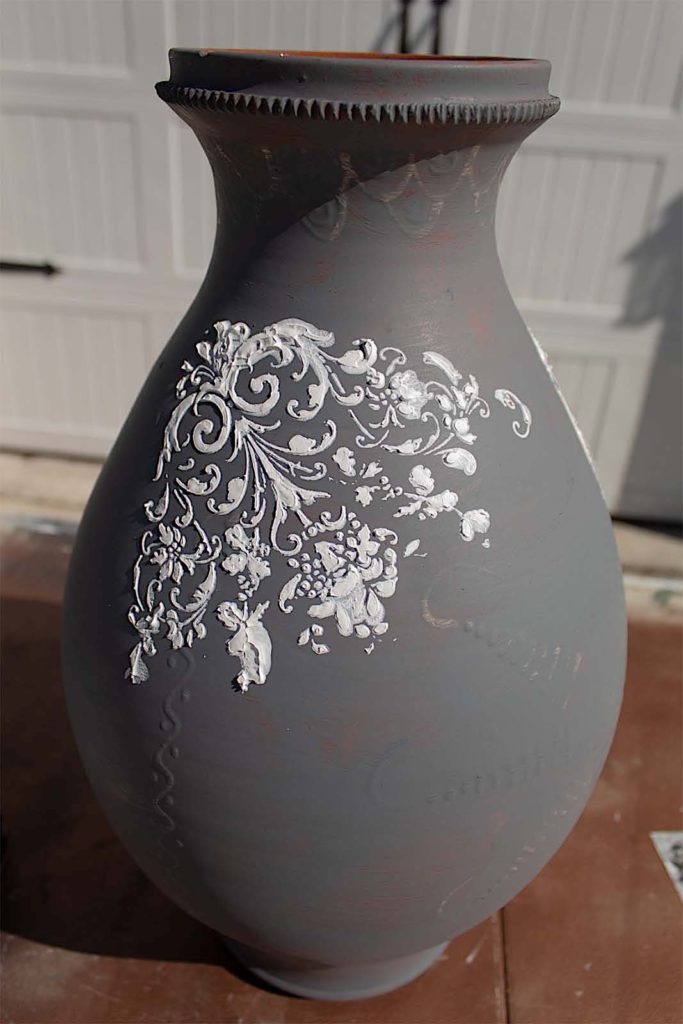
Using some scrap sandpaper, I carefully and gently go over the dried stencil. This helps to knock off any high points and make the surface more even and smooth.
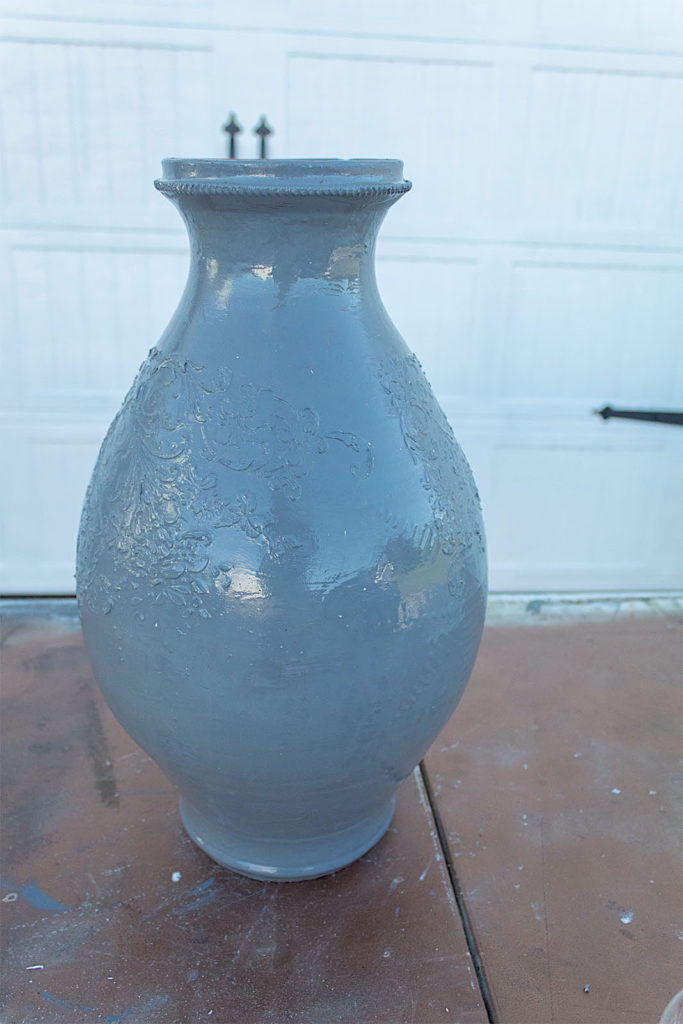
3. Add A 2nd Coat Of Your Base Color
Now that my raised stencils are in place and dry, I paint one more coat of gray.
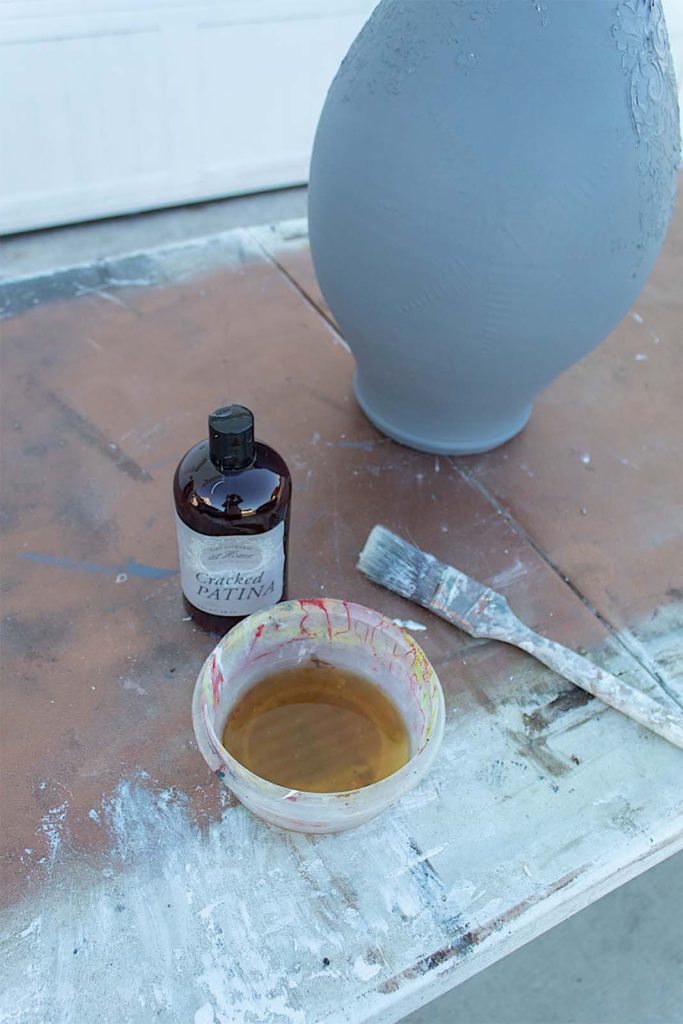
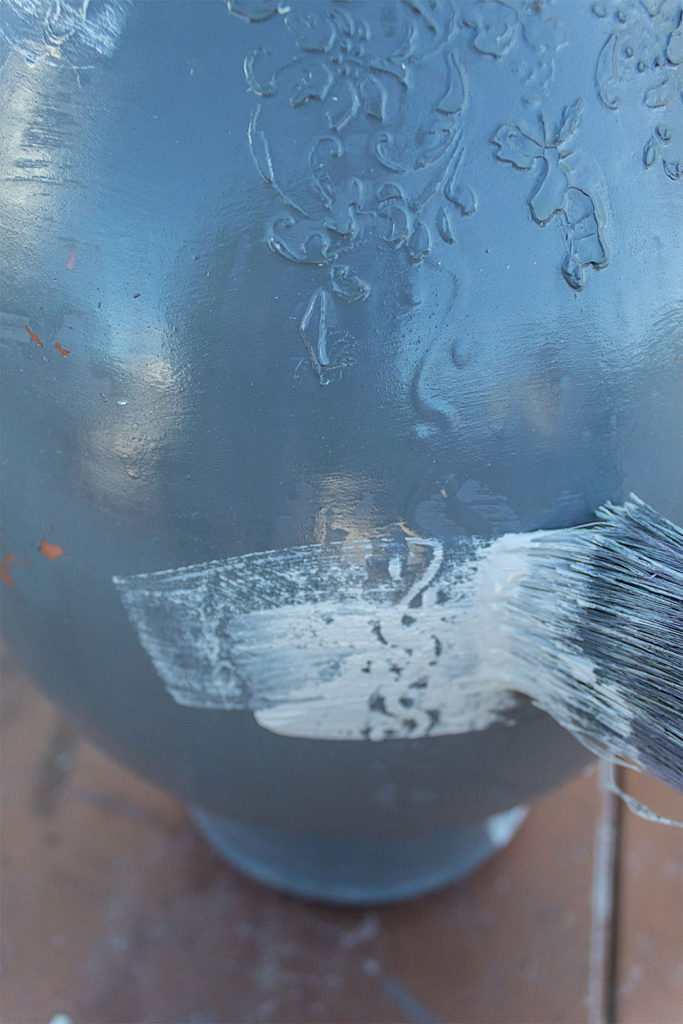
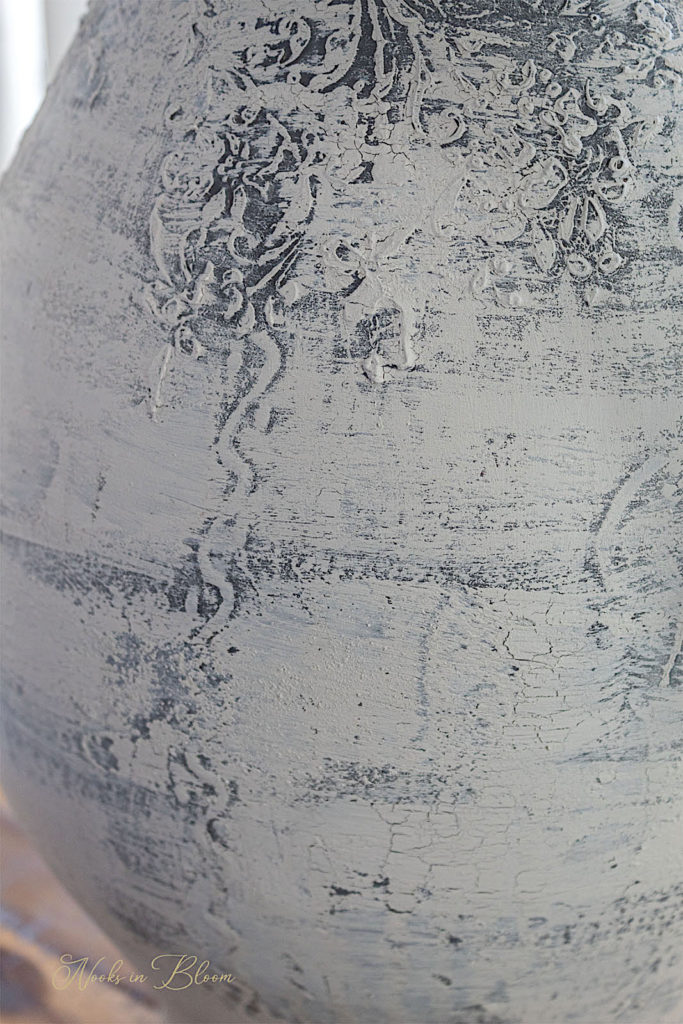
4. Adding Cracked Patina
My world has changed since discovering cracked patina! I love this stuff. It is so easy to get a beautifully aged and cracked finish. I pour a small amount into a cup (a little goes a long way) and brush it onto my painted surface. It will look wet when you’re applying it. You don’t need heavy coverage but you do want even coverage.
To create the cracked patina effect, you’ll need one paint color already applied. The patina product will dry onto this color, in my case, the gray. The magic happens once the next color is applied over the dried cracked patina. You will see the paint shrink back and crack in places, exposing the color underneath.
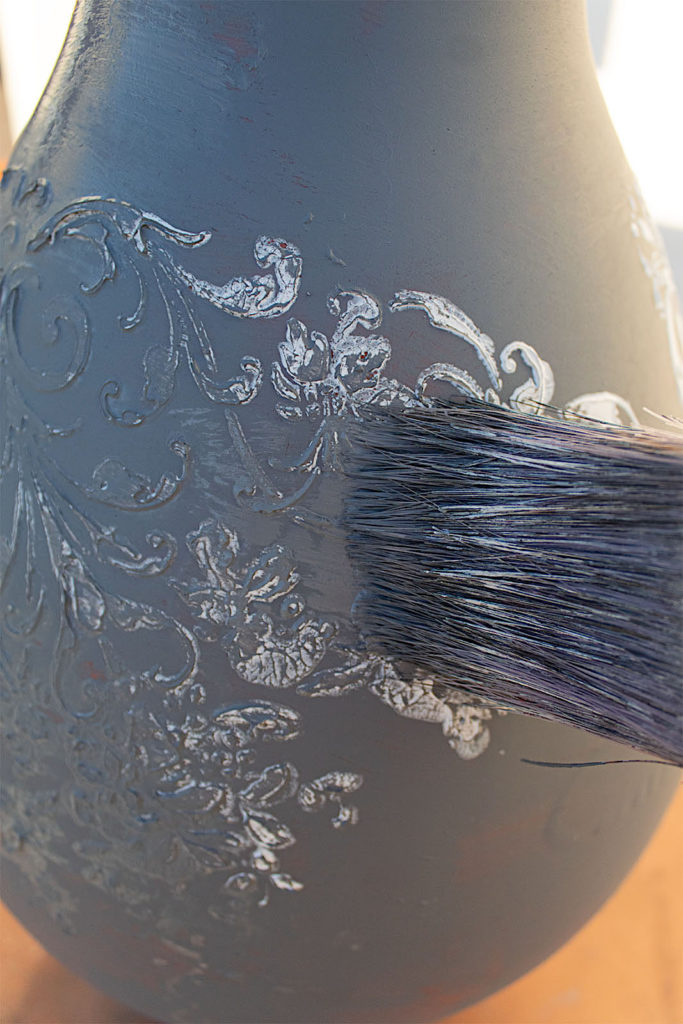
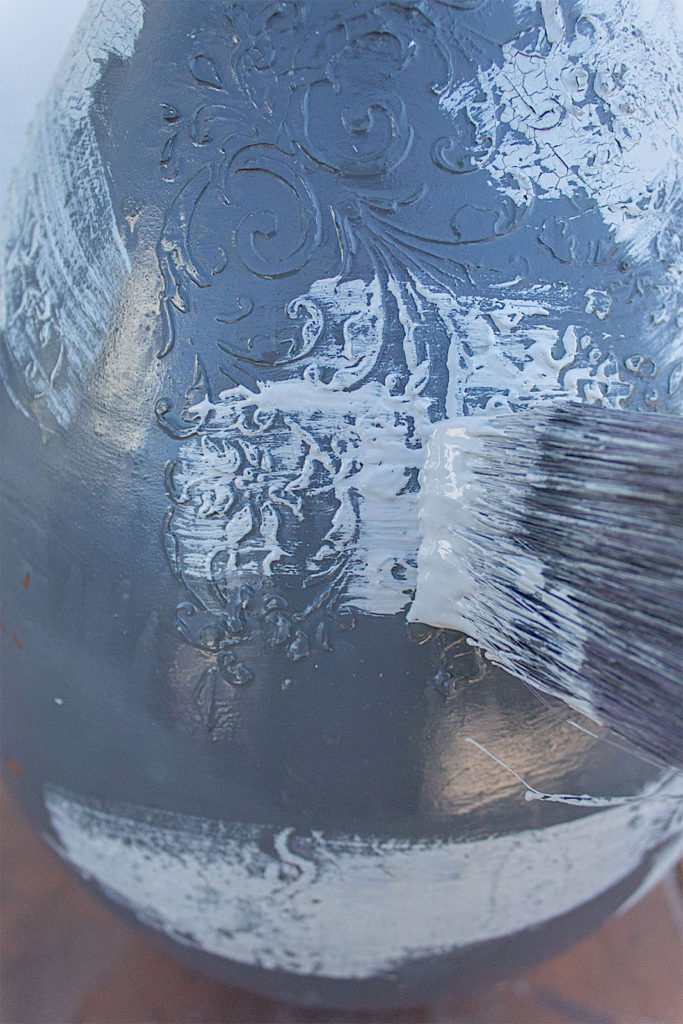
5. Apply Your Top Color
Now comes the fun part. Once the cracked patina is dry, I start applying my Weathered White color. I dry brushed, no spraying with my misting bottle this time, all over the vase.
I played with the amount of paint I applied. I noticed that in the parts where I applied the paint thicker, it would crack more.
Over the stenciled parts I went lighter with my brush, making sure to keep some of the gray exposed. This helped to add dimension.
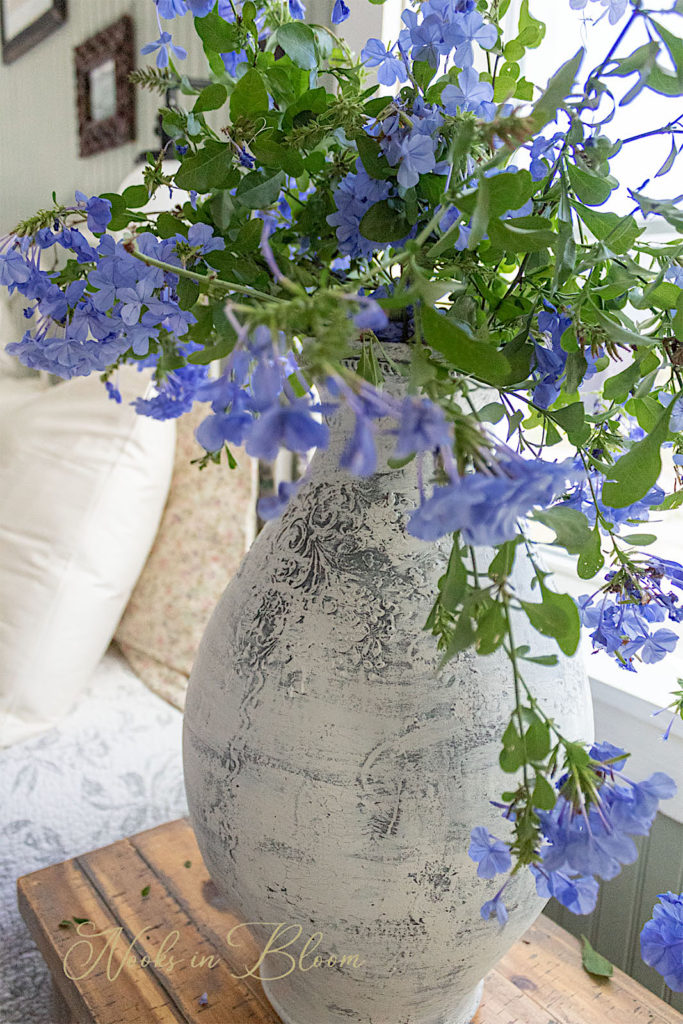
And that is it for this amazing transformation! It really is super easy and you can add more color layers with the patina for even more depth and character.
If you want to give your finish some extra protection, I would suggest adding a coat of Flat Out to maintain the rustic aesthetic. A glossy clear coat my alter the look.
Watch The Video Of This Transformation
If you liked this tutorial or if I missed something please let me know in the comments below. I always love hearing from you! Be safe and be sure to check out my youtube channel for lots of video tutorials!