Hello beautiful readers! Have you ever worked on a renovation project that turned out to be more work than fun? I know, silly question…it’s easy to fall into those never-ending laborious traps leaving you with little energy left for creating!
Well, today’s post is totally not about this. In fact, quite the contrary occurred with this chest of drawers renovation. From beginning to end I was in a creative zen. Projects like these are what quenches my artistic thirst, but also leave me inspired to do more…
Leveraging Products To Elevate Your Design
In today’s post I’m going to show you how to take the aesthetic of your furniture pieces to new heights by incorporating specific products in your process. Knowing when and what products to use is very empowering, especially when you seek to create something that sets itself apart from the rest.
Let's Get Started!
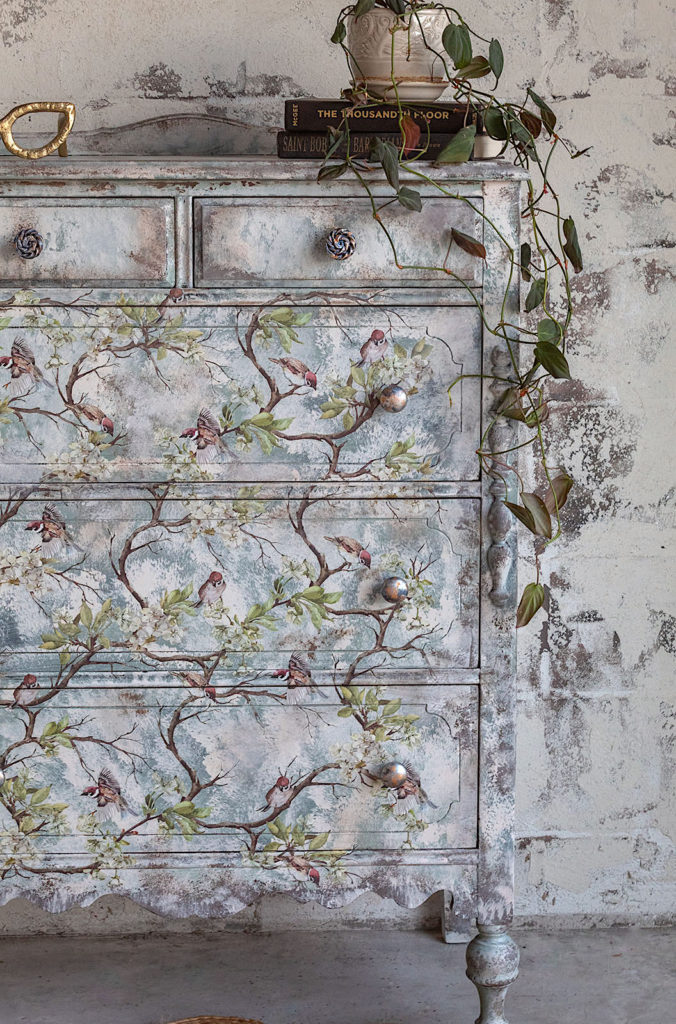
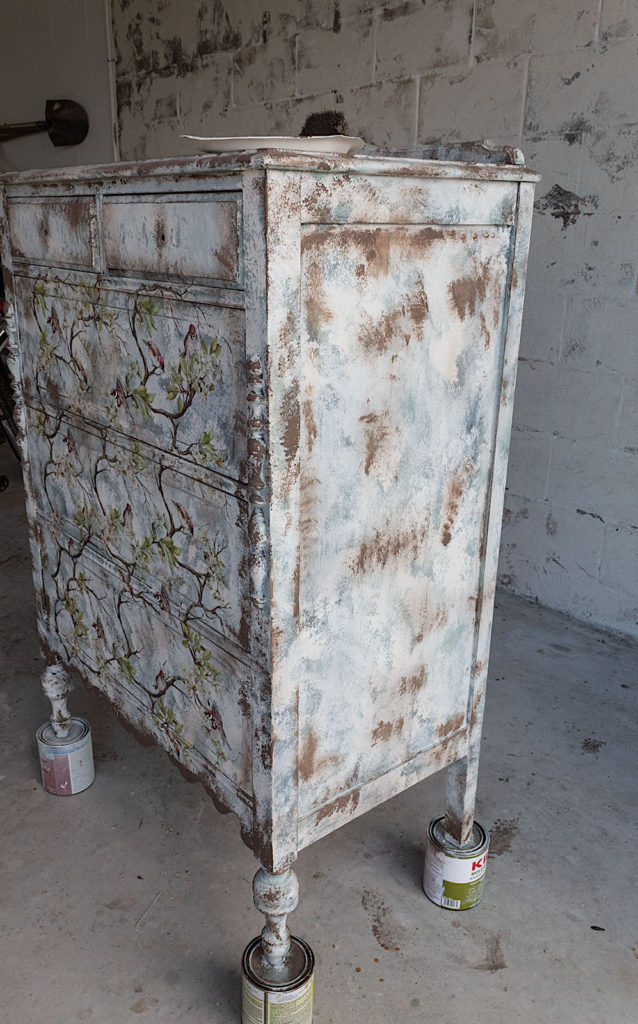
This curbside pickup had seen its better days, but if you look beyond the chipped paint, nicks and filth, you can imagine all the details and curves coming to life in a whole new scene.
Disclosure: Some of the links provided are affiliate links. By purchasing through these links it supports this blog and the work we do and there is no extra cost to you. If you would like to read our full disclosure, click HERE.
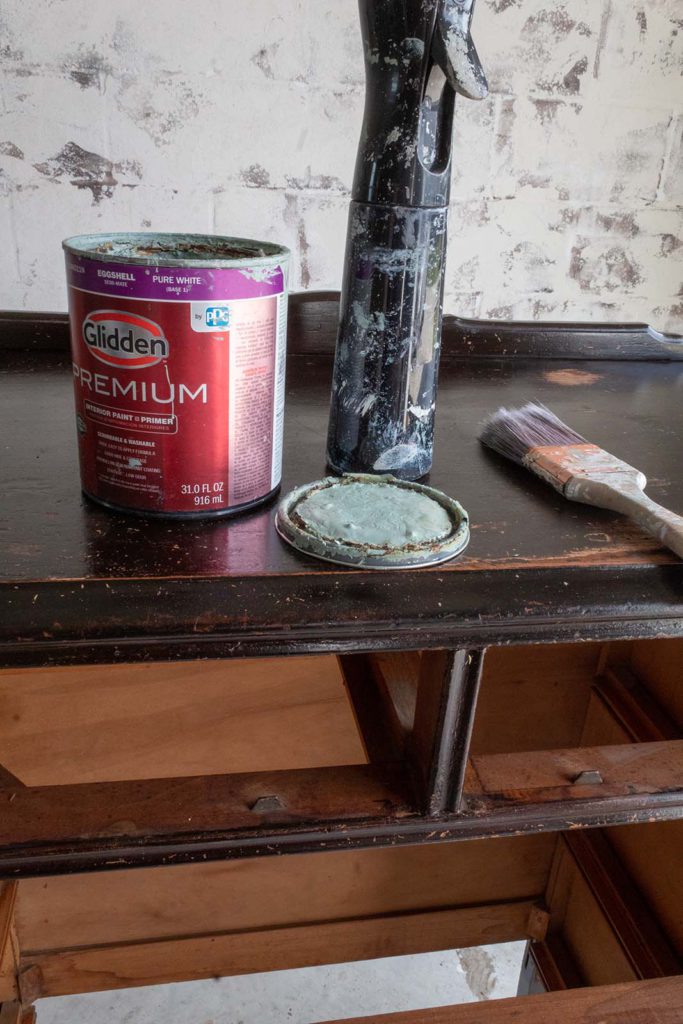
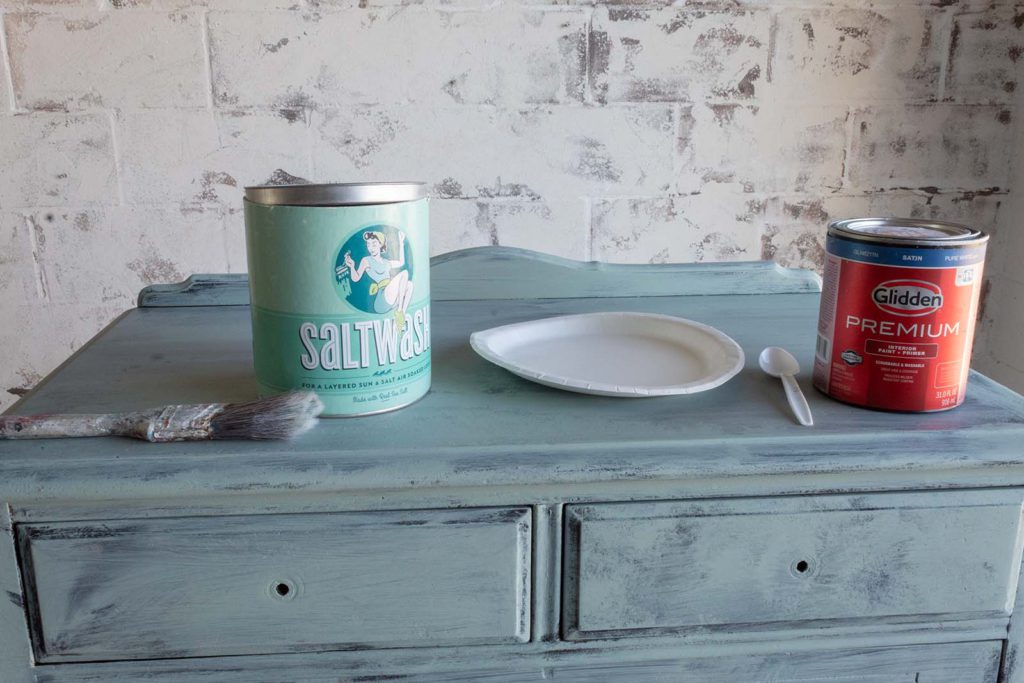
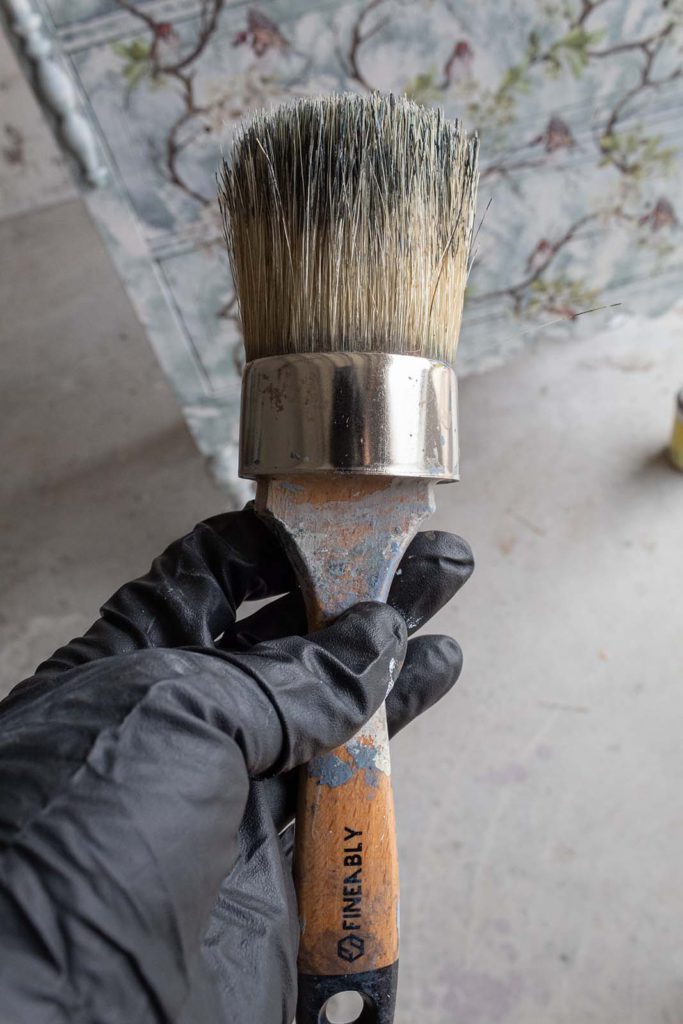
Materials Used:
√ 1 salvaged furniture piece √ 2 Purdy paint brushes √ 1 chalk paintbrush √ Saltwash use coupon code saltwashlove for 10% off √ Blossom Flight furniture transfer (you can buy on Etsy) √ Chocolate Swirl paint by Behr √ Green Balsam paint by Behr √ Weathered White paint by Behr **I made the chalk paint in this tutorial by using this recipe √ Shellac √ misting bottle √ utility knife √ 1 plastic spoon and container for mixing √ paper towels √ clear finishing wax
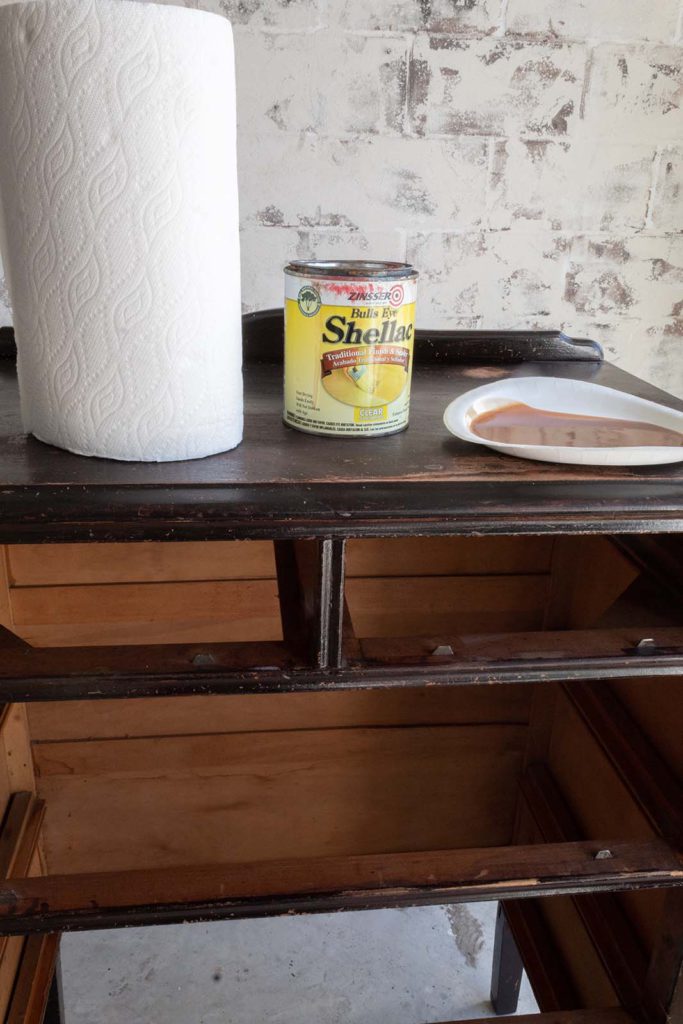
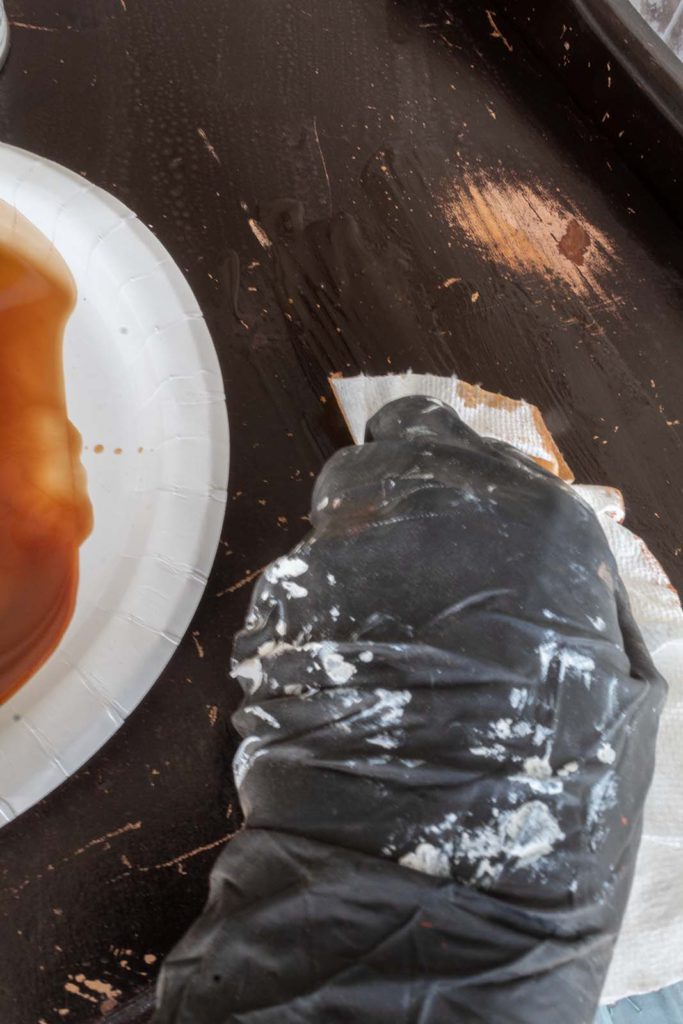
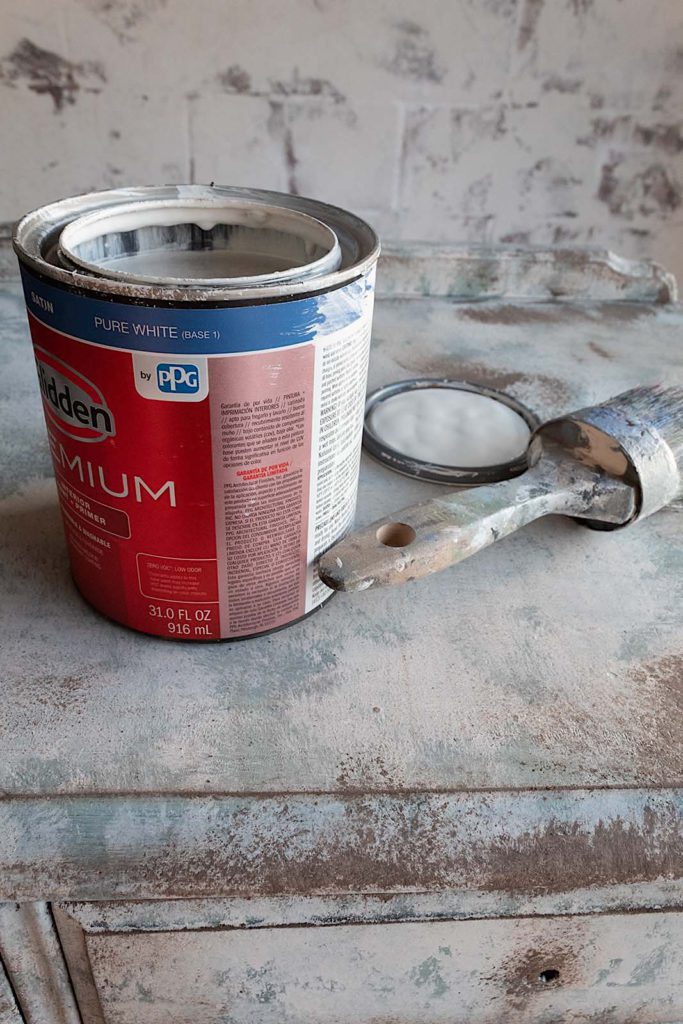
Lately I’ve been priming with shellac on all my pieces. I find it quicker than painting on a primer. It works wonderfully as a primer and dries quickly which is a benefit when you’re itching to get started on your renovation.
To apply it I simply wipe it all over the surface of my piece with paper towels. Make sure you have first cleaned your piece and that you are wearing a safety mask to avoid breathing in the fumes.
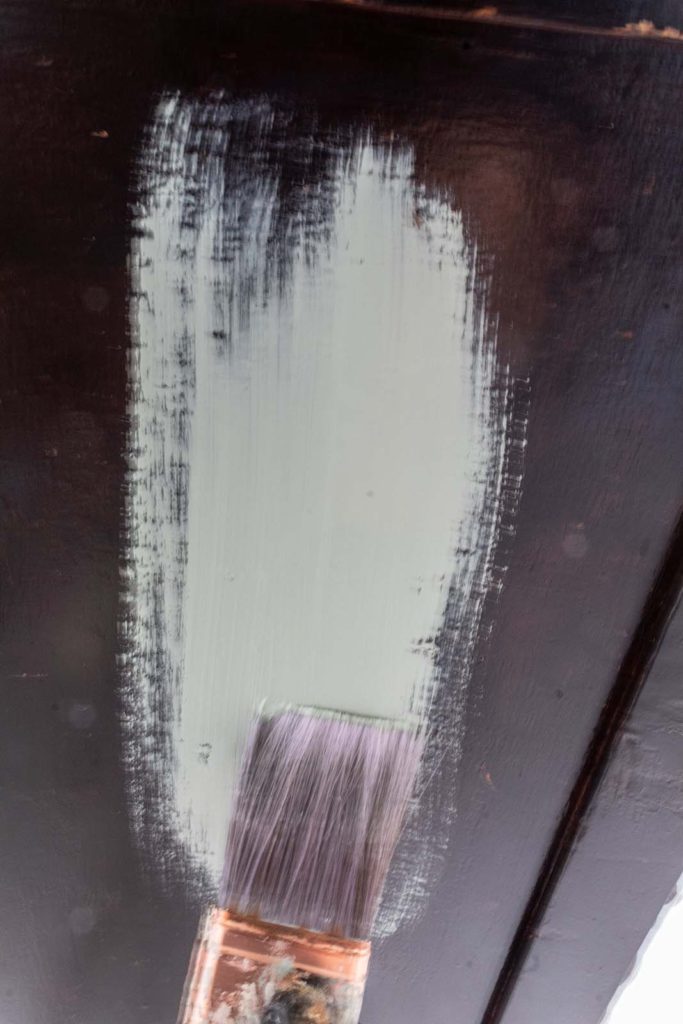
Step 2. Begin Painting
Once your shellac is dry (I waited about an hour), you can begin applying your base coat. I picked Green Balsam by Behr, a pretty mint color as my base. It will add subtle undertones to our vintage look.
I use my misting bottle to apply the chalk paint over the entire chest of drawers. The moisture helps to move the paint.
I apply my base coat in random fashion using both horizontal and vertical strokes. I also play with my brush to add texture by dabbing it up and down over the surface. This sloppy coat is the beginning of a textured aesthetic.
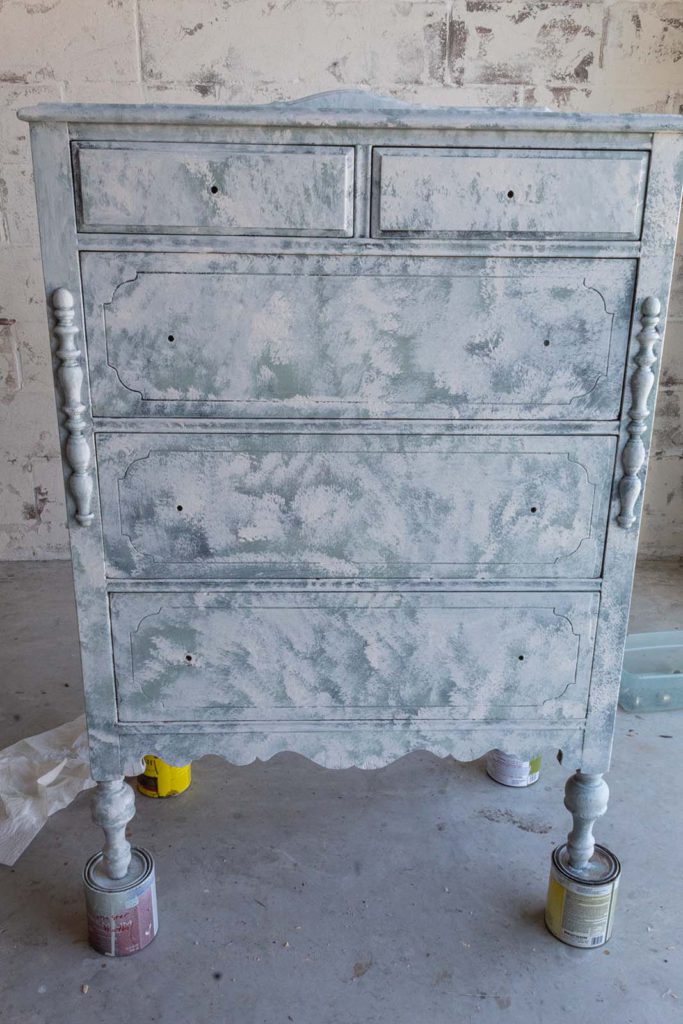
Below is what the furniture looked like after the Green Balsam was applied. It’s not going to look pretty at this point. The goal is just to slap on a base a color. We will be adding more layers that will bring the look together magnificently.
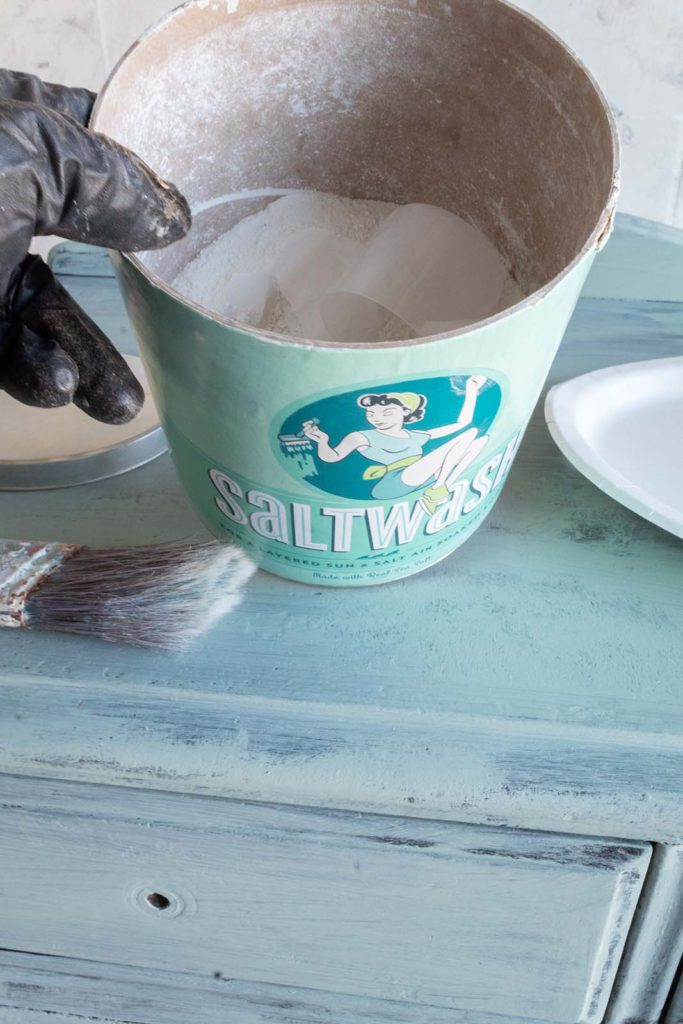
Step 3. The Power of Saltwash
One of my favorite products to work with is Saltwash. It adds a textured finish that is simply beautiful. I used Saltwash in our kitchen to create a faux stone wall and it came out like a Tuscan dream!
Using Saltwash in today’s renovation is going to be the key ingredient to creating a weathered finish rich in texture and character.
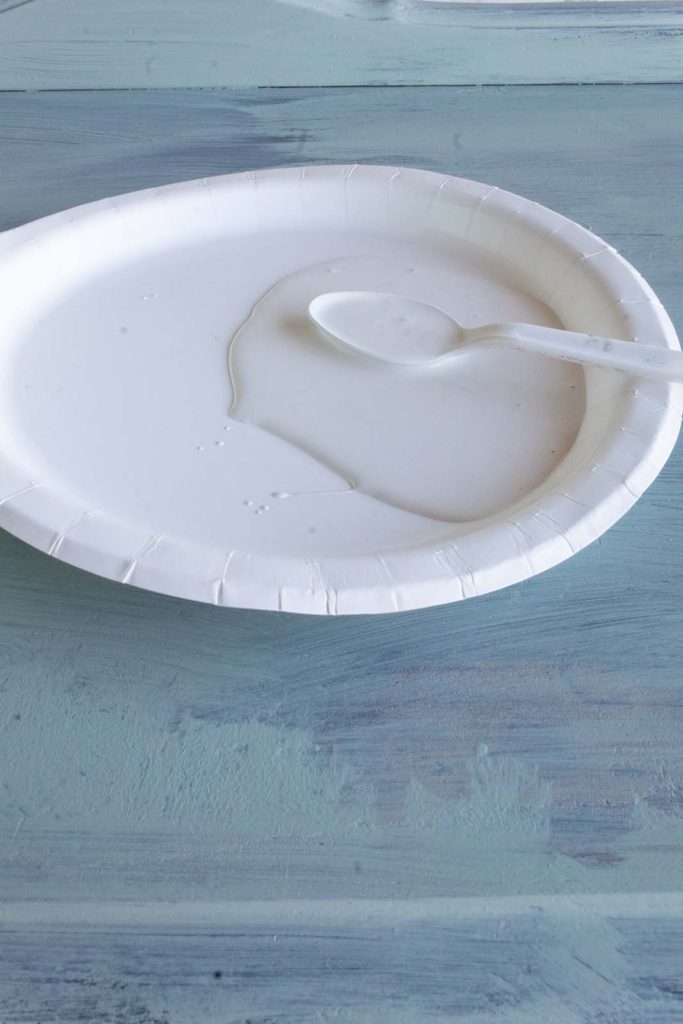
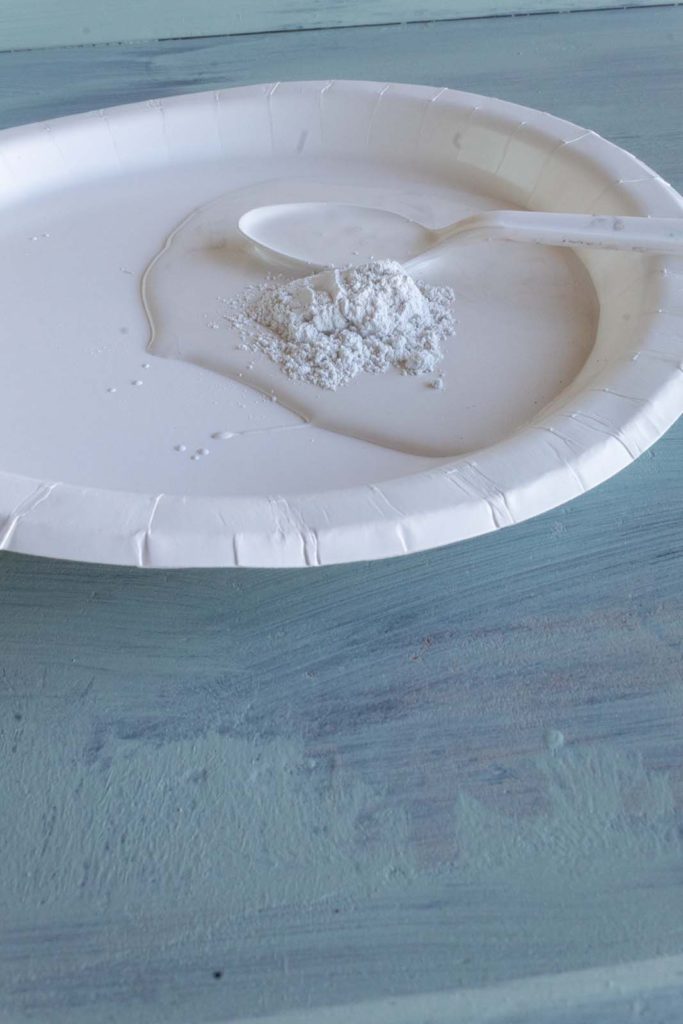
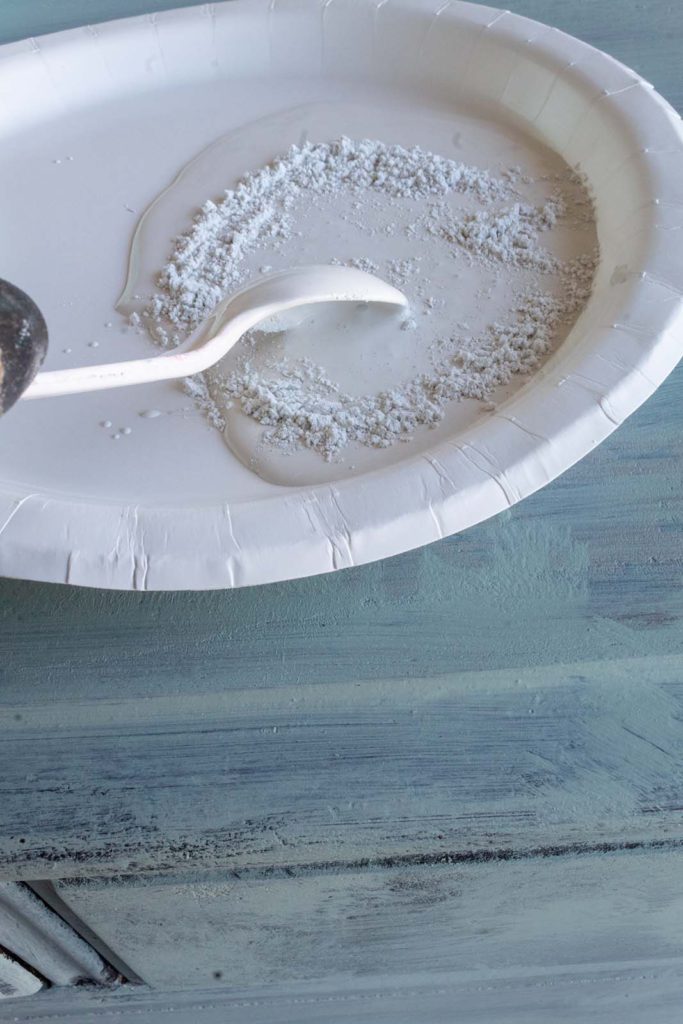
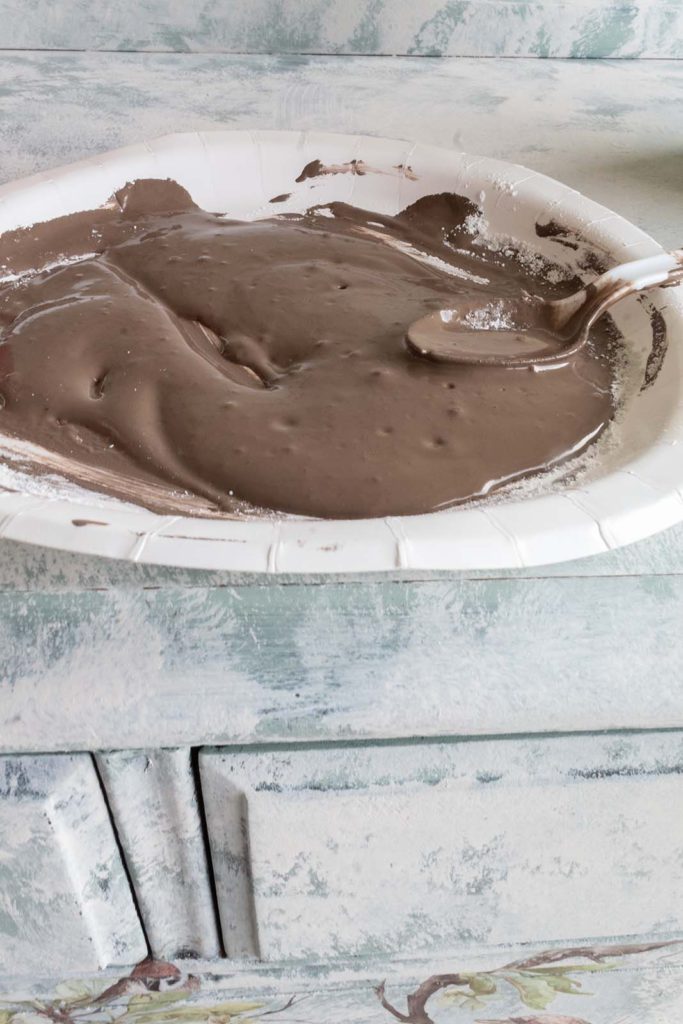
The powder-like/salty consistency of this product is what transforms the paint into a tool for creating a unique look on your surface. To use the Saltwash, first pour a little paint on a paper plate. For this next layer of paint, I’m using Weathered White.
The more Saltwash you add to your paint, the coarser your paint will become. For this project I’m adding almost equal parts Saltwash to paint…a little less of the Saltwash. (i.e. 5 tablespoons of paint to 3 tablespoons Saltwash). Feel free to play with the amounts until you obtain a consistency you like.
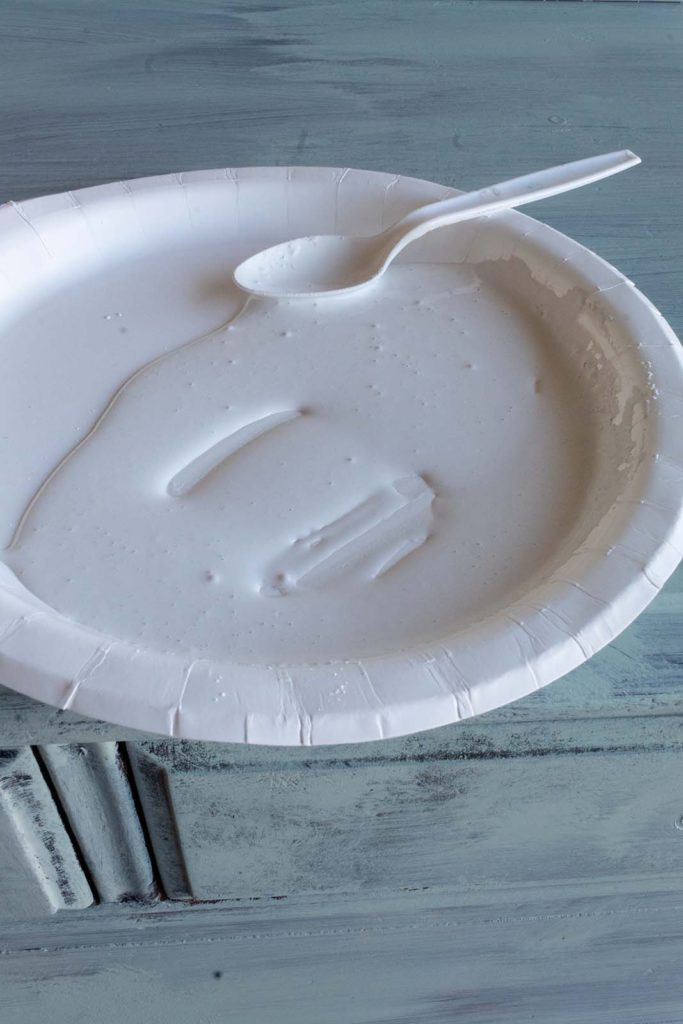
Using a spoon, mix your Saltwash and paint until well combined.
You will notice a granular look in your paint once you have stirred it all together. This is normal and what we want to see.
Let's Make Some Magic!
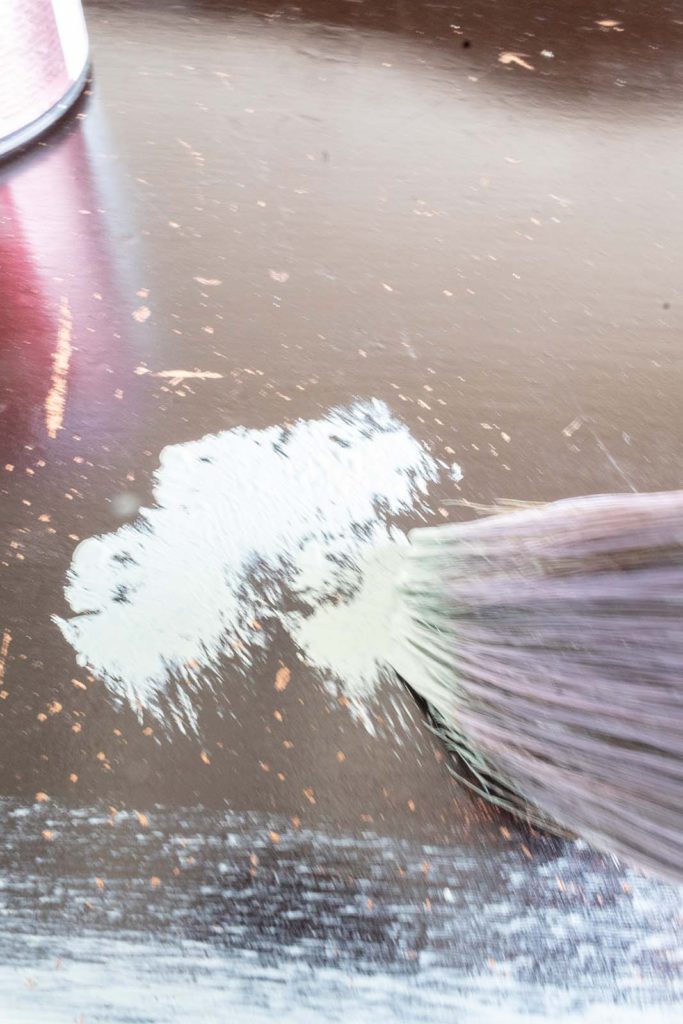
Step 4. Applying The Second Paint Color
Using my Purdy brush I begin applying the Weathered White paint that has been Saltwashed to the furniture piece. I don’t use the misting bottle because I want to keep the coverage dense and textured. The moisture would thin the paint out and that is not what I’m aiming for.
I apply the paint mainly with up and down dabbing motions (using my brush to kind of hit the surface) over the furniture. In some parts I go heavier and in other parts I go lighter. I’m also careful to leave random parts of the green color below visible in parts.
As you apply your paint you will begin to see all the yummy texture the saltwashed paint creates. This is what’s going to give some dimension to our surface and ultimately elicit an illusion of something old and weathered.
Continue applying the white all around the surface of your piece. It will look a little bit like textured clouds all over.
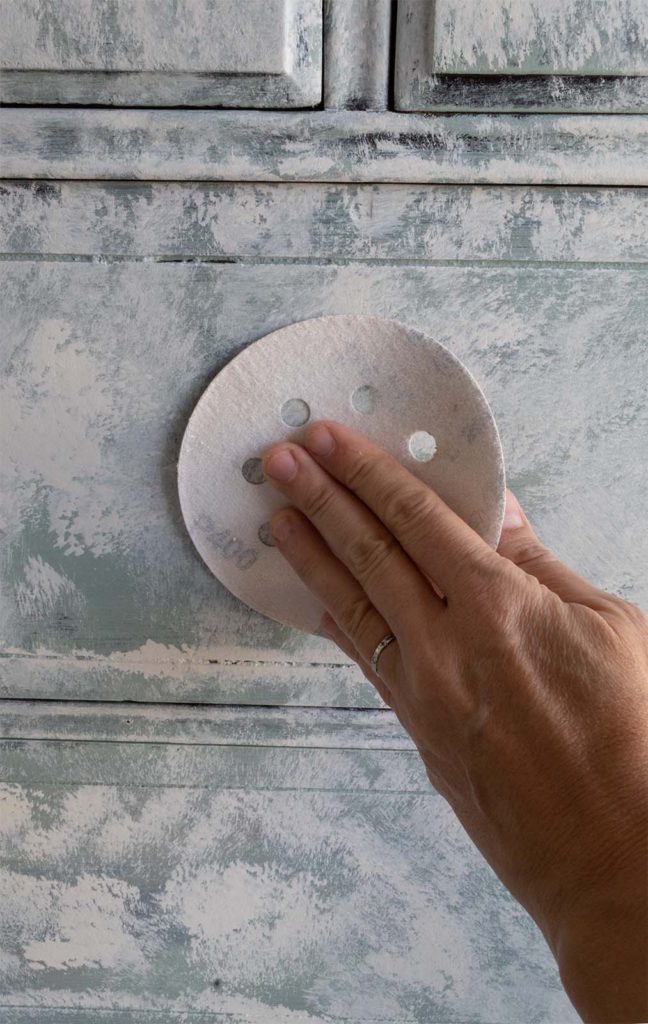
Step 5. Light Sanding
When the white paint dries, I recommend going over the surface with a high grit piece of sandpaper (i.e. 400). This is a quick rough sanding for the purpose of knocking off any pointy parts and making the finish more smooth to the touch. **note, you are not sanding down the elevations and texture you just created, it’s simply to soften the feel a little bit.
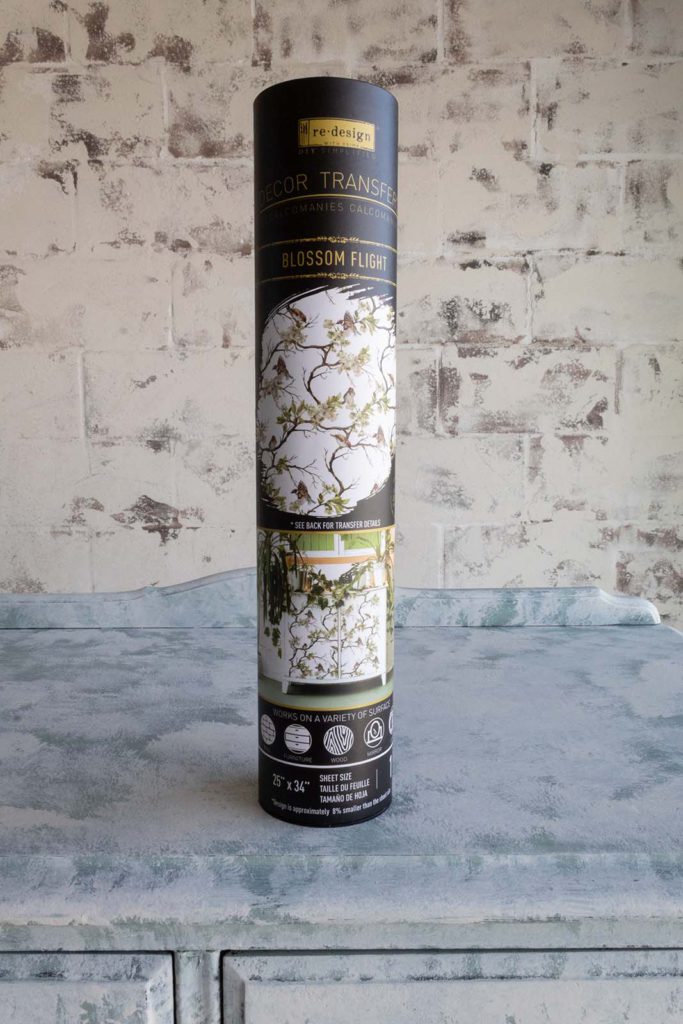
Step 6. Transfer Time
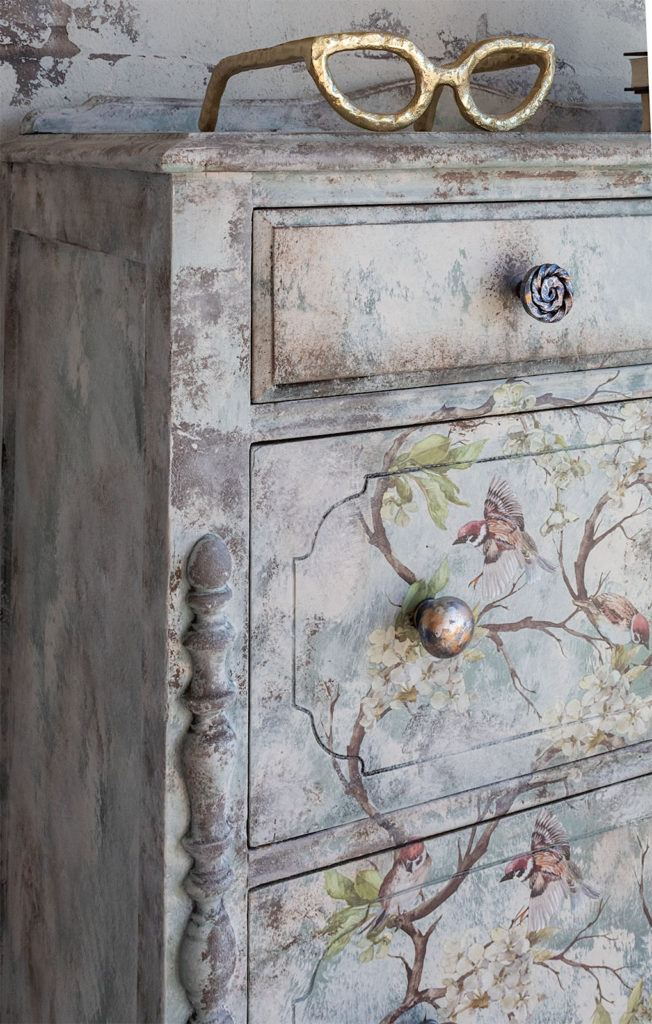
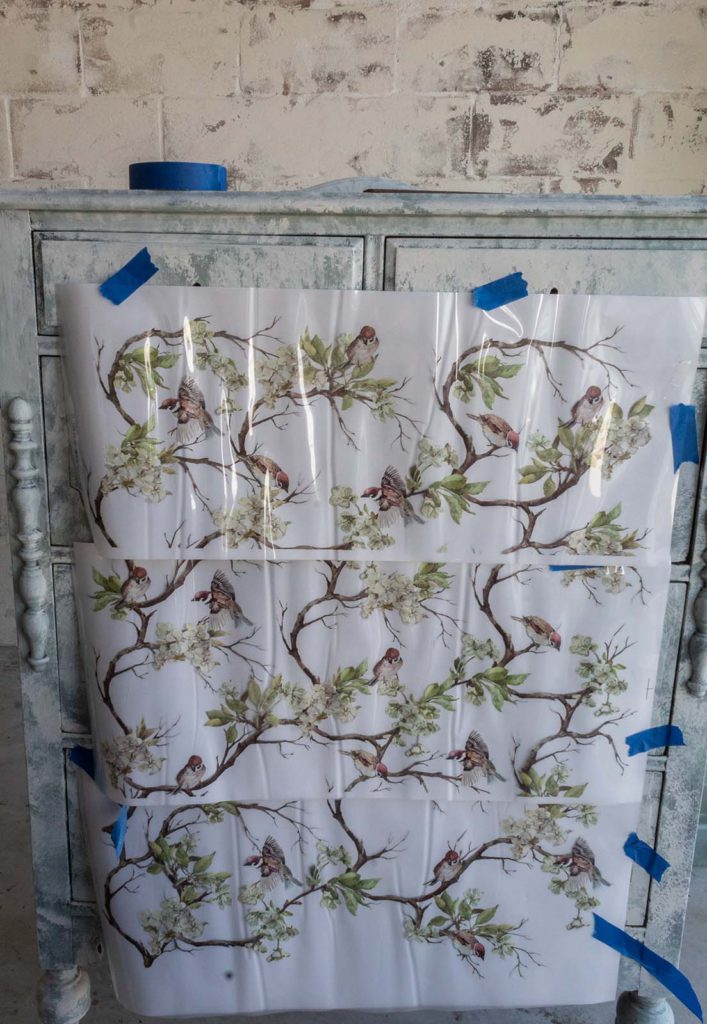
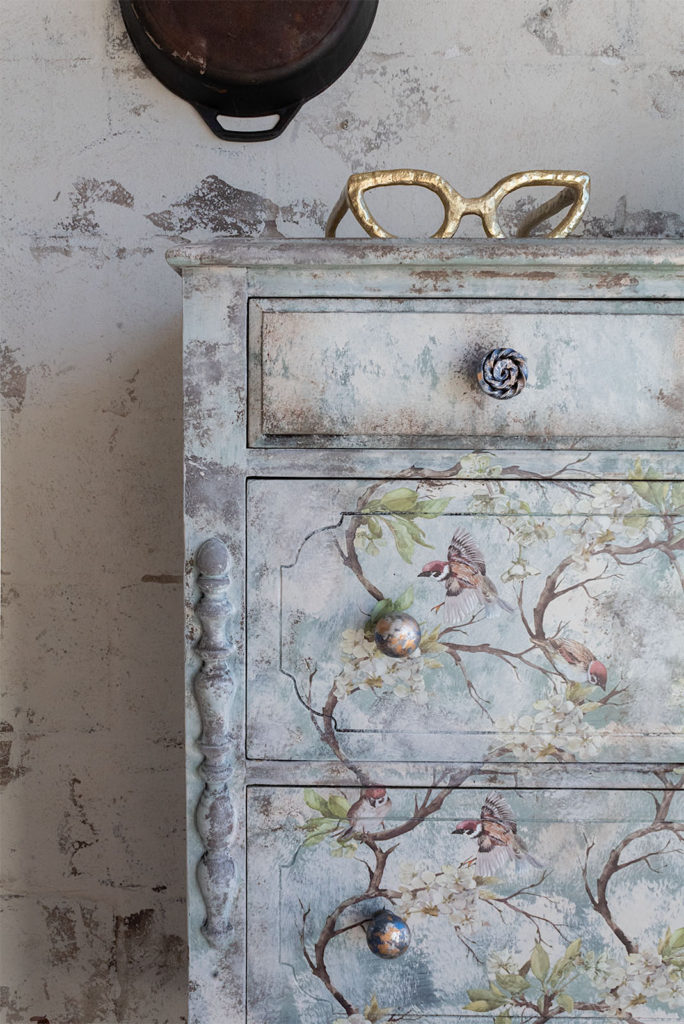
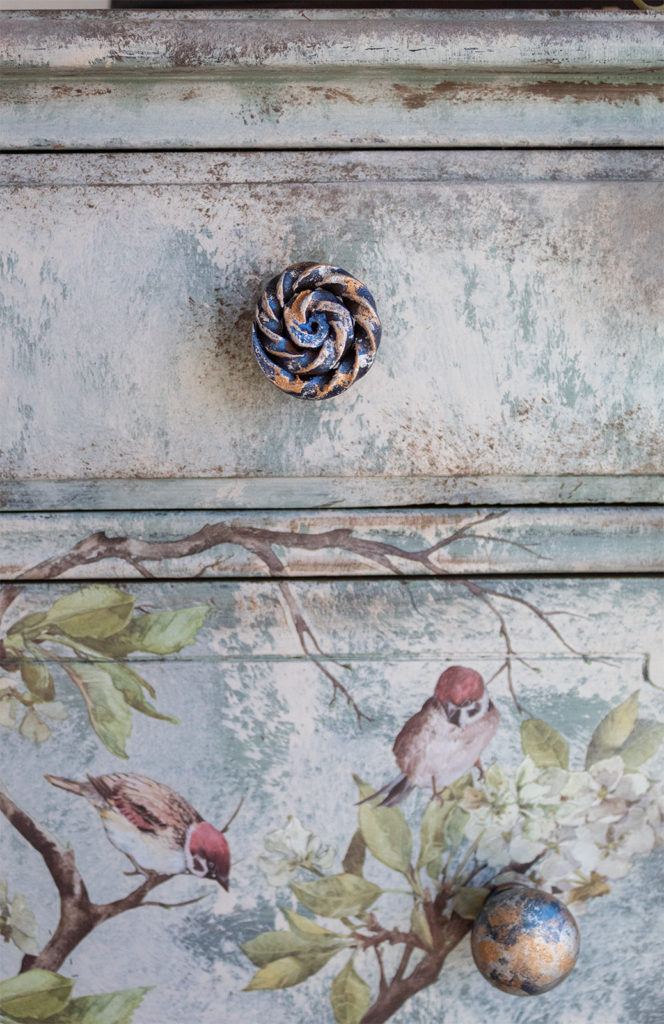
The creative fun continues…next we are going to add our rub-on transfer. I’ve picked Blossom Flight for this chest of drawers. I think the birds and the branches are going to add a gorgeous visual on this piece. When choosing my paint colors, I always try to tie these to those of the transfer. Doing this creates more harmony in your aesthetic.
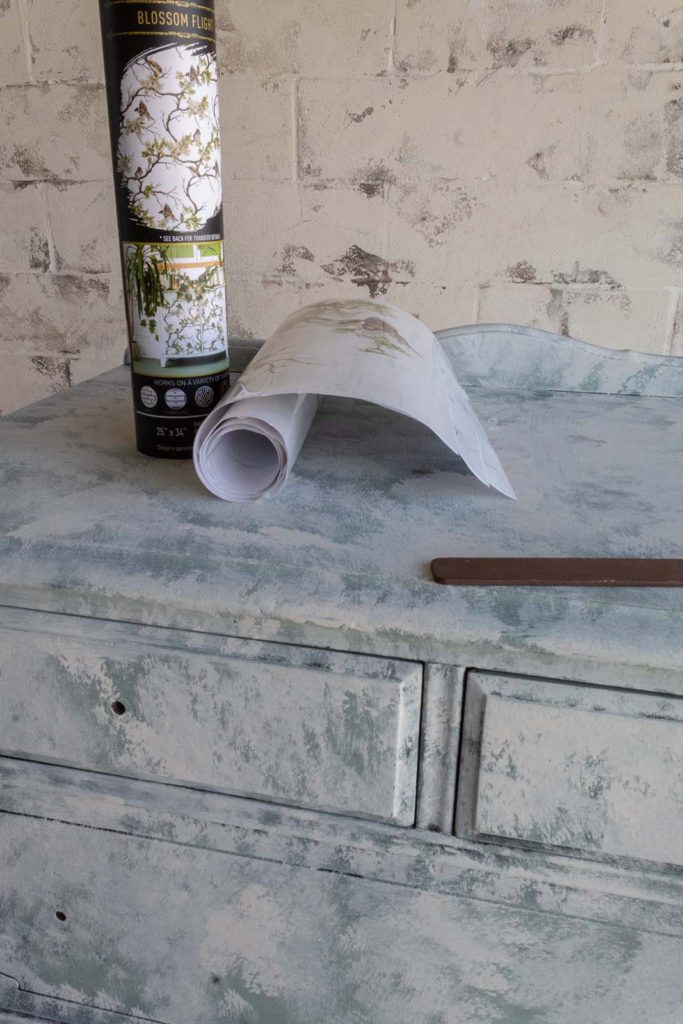
The transfer comes in a long tube which includes a wooden stick and of course the transfer. You can watch the video at the end of this post to see how I apply the transfer, but I will try to explain it here in steps.
I always suggest positioning your transfer where you plan to apply it before adhering it. I use painters tape to hang it in place so I can step back and make sure I like how things will look.
I use the stick to rub the transfer over and over and over again until fully adhered. When applying a furniture transfer you have to take your time and go slowly. (again, the video at the end of this post demonstrates how to do this).
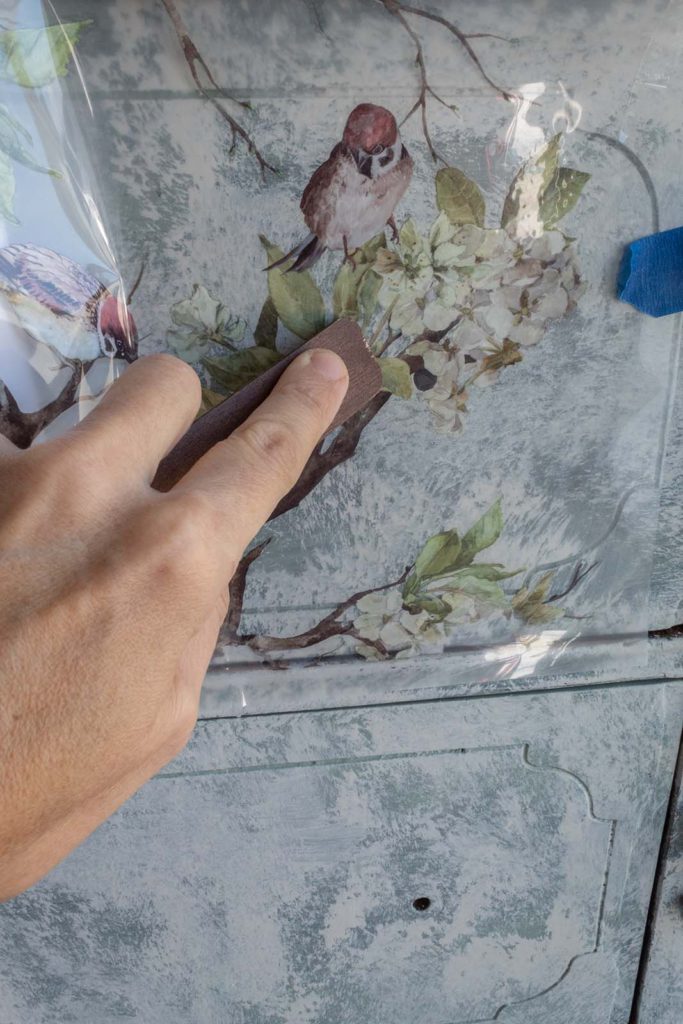
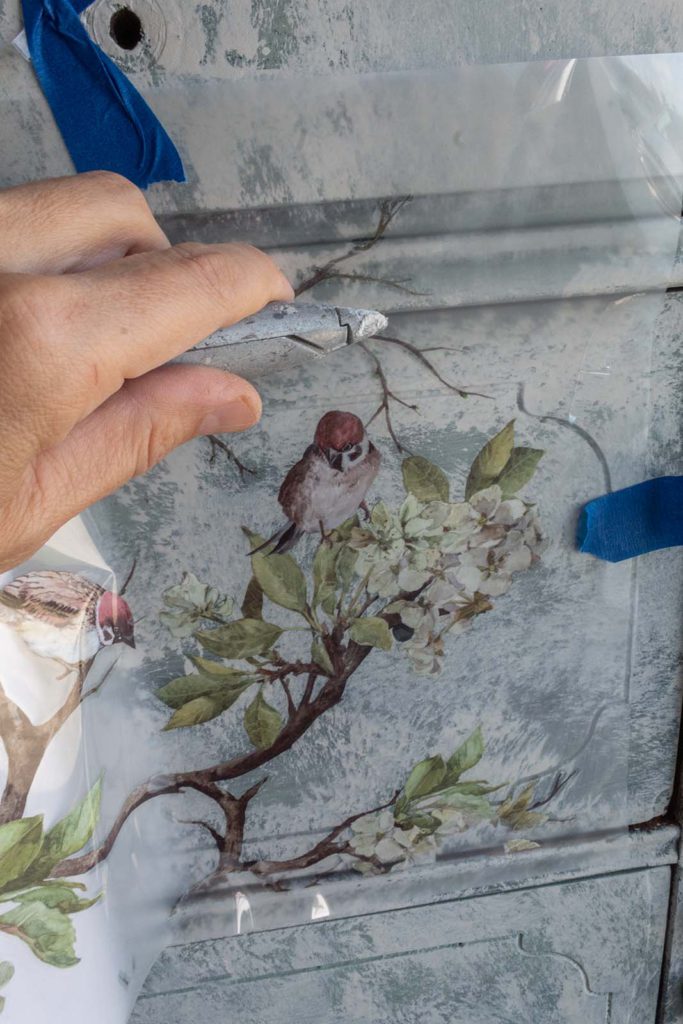
I use my utility knife to trim around drawers and any indentations in the furniture.
After applying the transfer, you can get go over it gently with the coarse side of a sponge to burnish the transfer. This will remove any white outlines.
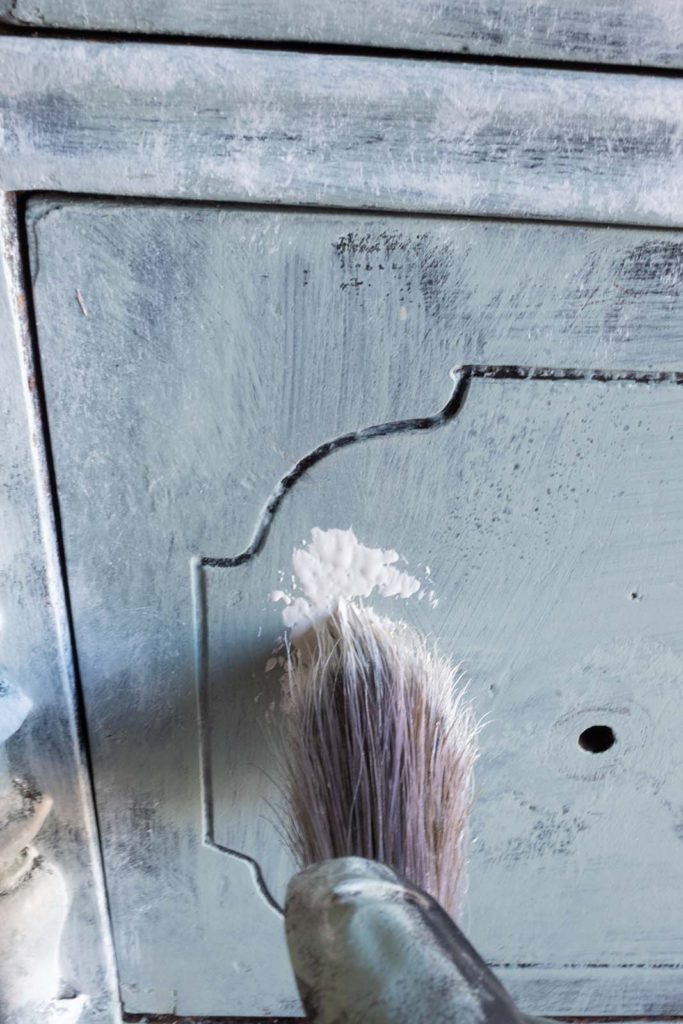
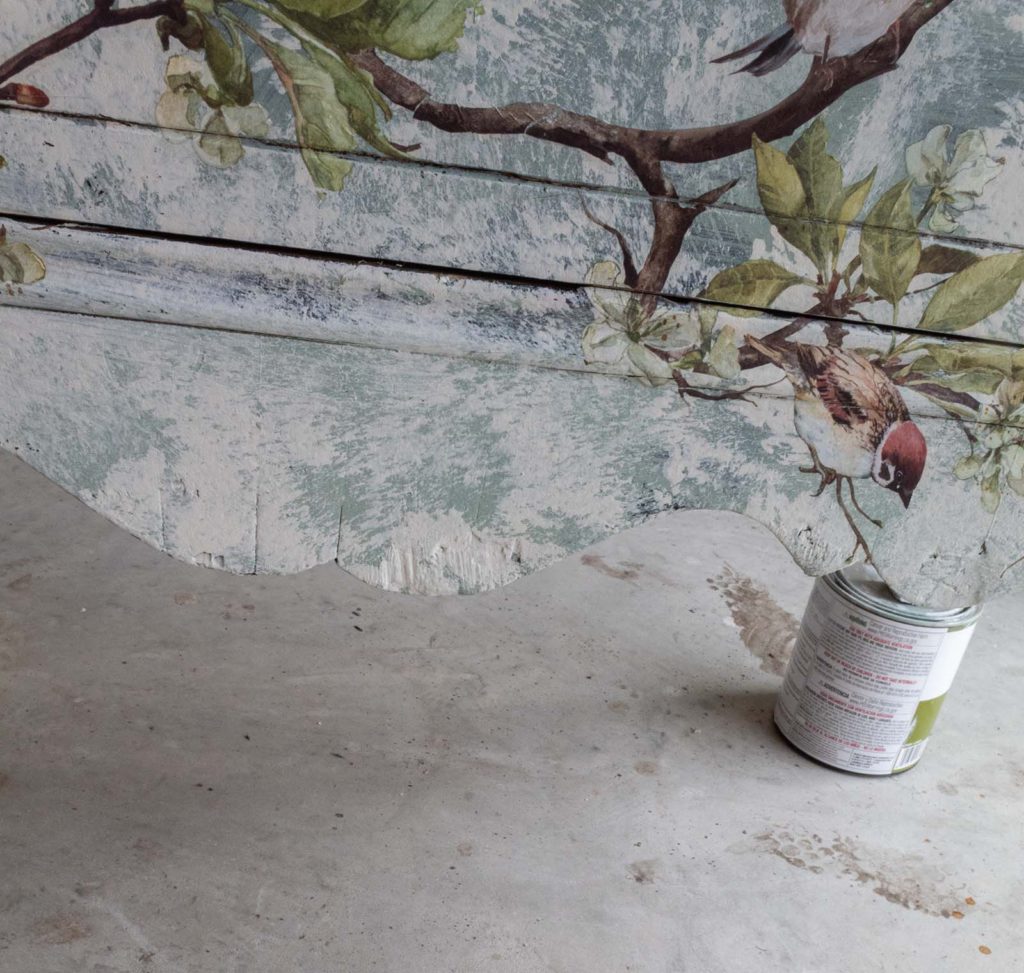
Step 7. Using Paint For An Aging Effect
In this next step I am going to use my Chocolate Swirl (brown) paint to create a visual of old and worn character on this piece. I purposefully added the transfer before this final paint color. That way I can work around the transfer, giving the illusion that the transfer blends into the background.
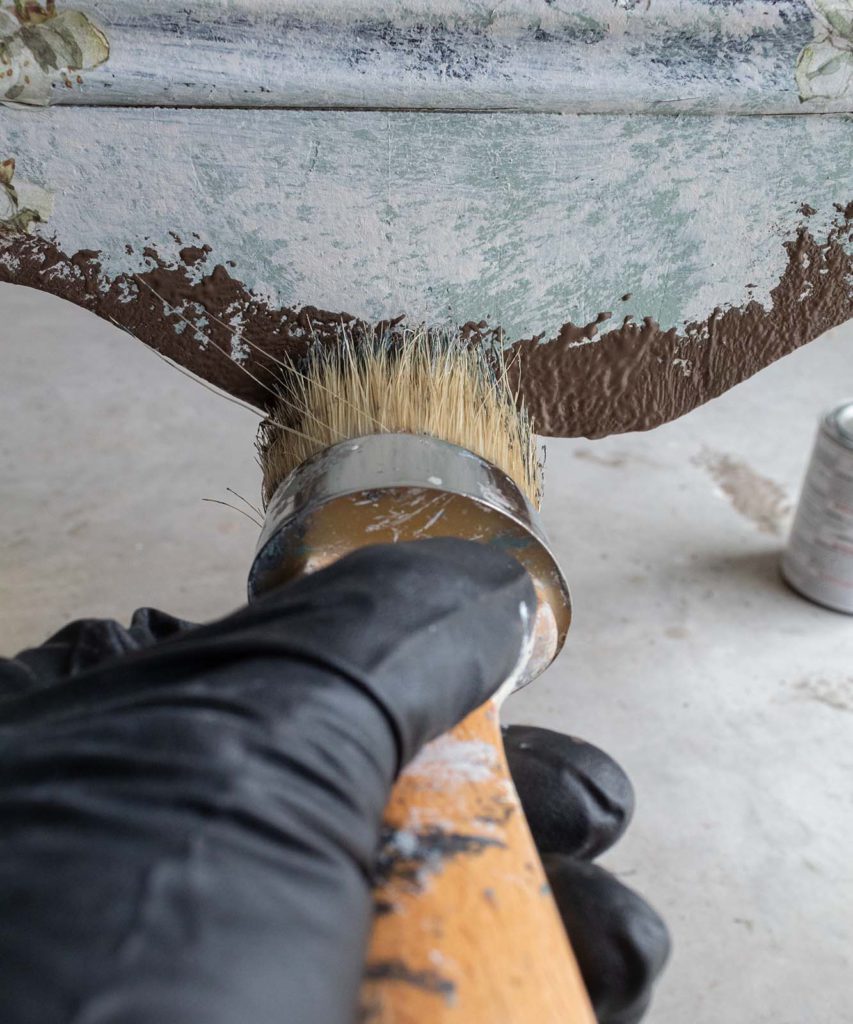
Again I’m adding Saltwash to my paint. The theme here is rich texture and character. The Saltwash’ed paint will help me achieve that.
For this step I’m going to use a round chalk paint brush. The bristles are dense and this will help add even more of a textured appearance.
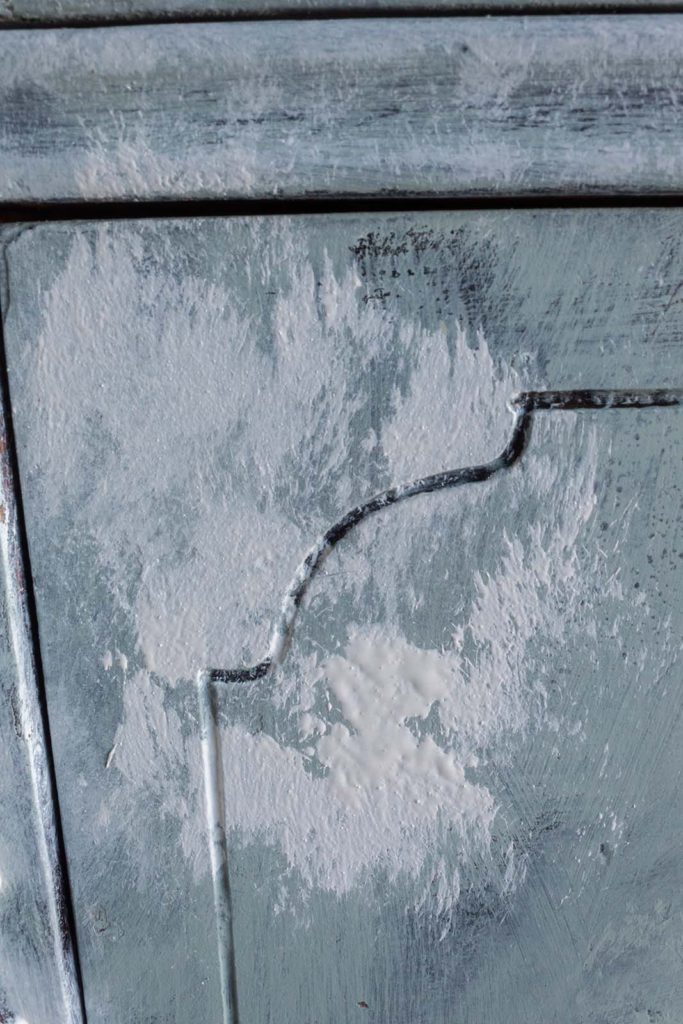
This technique is great for covering up imperfections on old pieces of furniture.
The beautiful curved bottom of this piece has quite a few nicks in it as you can see in the next picture.
To fix this, while adding more dimension to the overall look, I’m going to apply some paint, in thick amounts over this section. It’s important to use the chalk paint brush in an up and down motion. This will create the elevation we need to disguise the cracks and nicks. Avoid doing sideways strokes here.
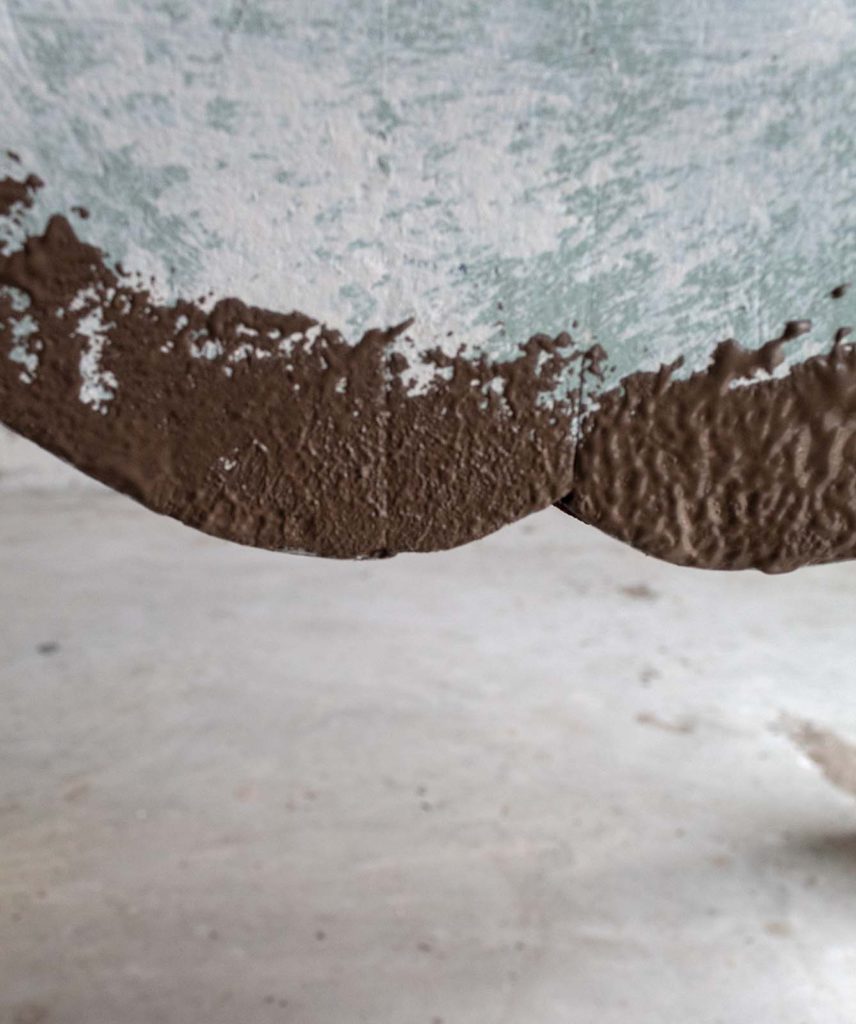
Already you can see the effect. I may even add another coat after the brown dries a little, just to fully hide any imperfections.
I also use the brown sporadically all around the piece—continuously with an up and down motion with my brush. In some parts I apply the paint more heavily and in others a little lighter.
The brown, along with the other colors, works to create such stunning character. It also “dirties” things up a little bit which I love.
Step 8. Soften Up The Brown
I’m going to soften up the look slightly by adding a little bit of the weathered white paint (no Saltwash needed) over some of the brown parts.
I like the brown, but by adding hints of the white over some of the brown spots, the aesthetic is going to be even more time-worn. The white will work together with the brown for a more antique’d look. (check out the video below to see how I did this step).
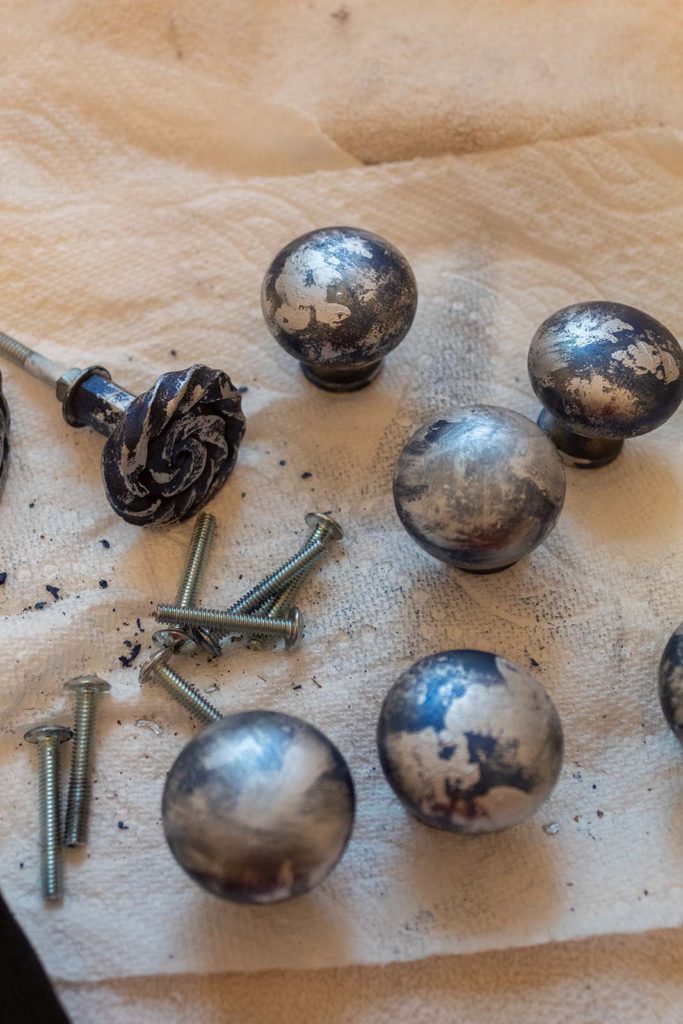
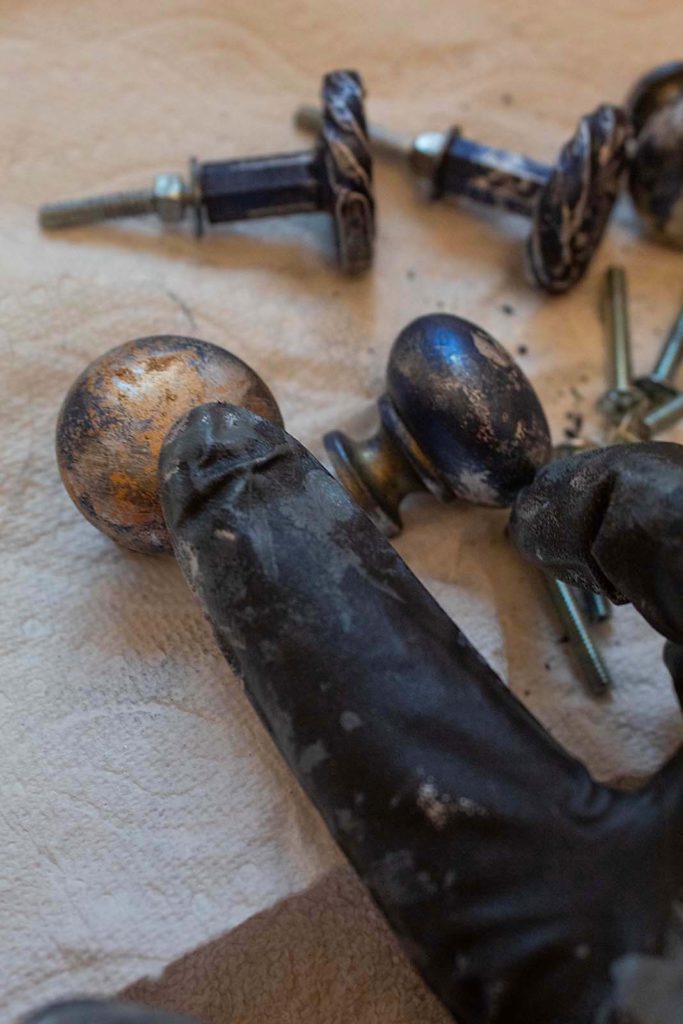
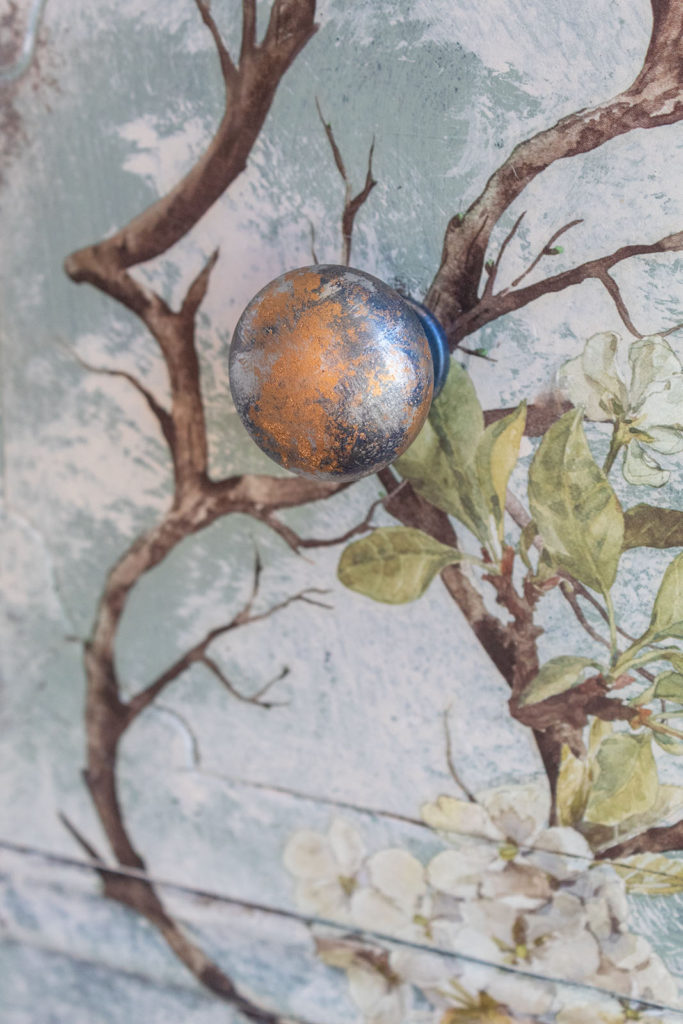
Step 9. Reviving The Hardware
The hardware on this piece was in serious need of some updating. I always try to work with the hardware that comes with a furniture piece. I believe that paint and wax can go a long way in transforming the look.
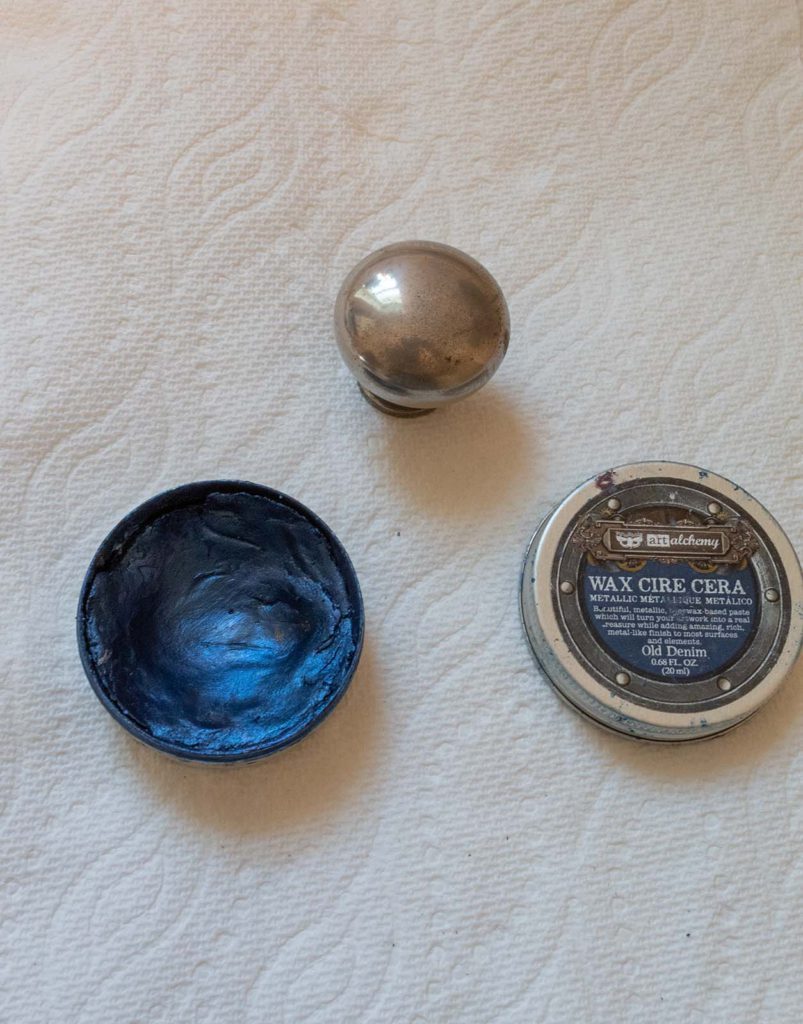
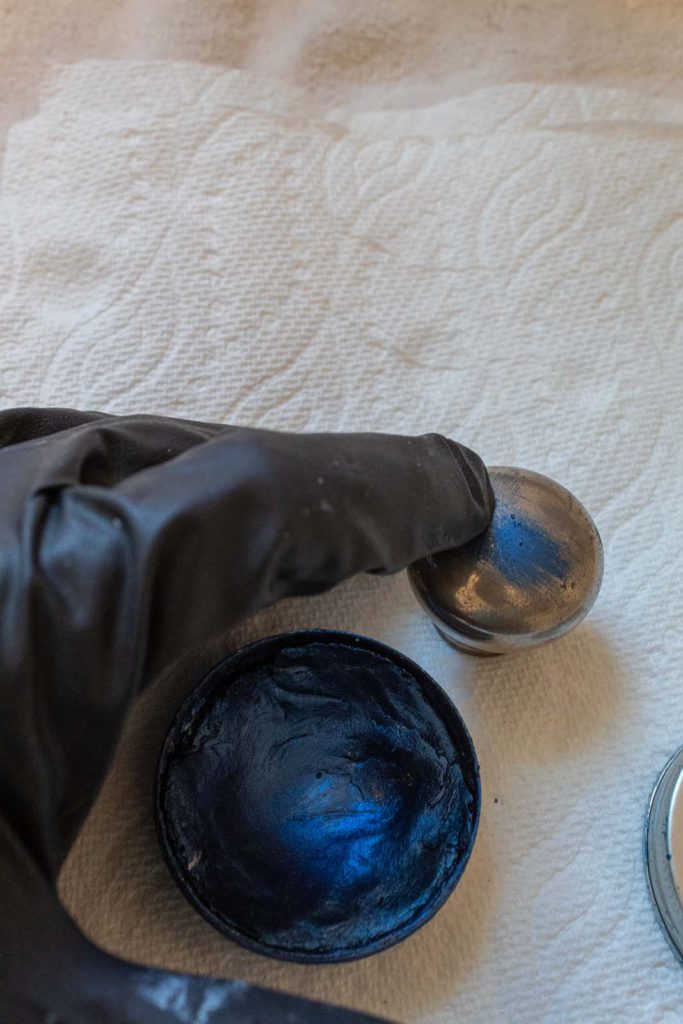
To revive the hardware I’m going to use three different metallic waxes. First, I am going to start with a beautiful blue called Old Denim.
This electric blue is going to be a stunning base to give the hardware a funky new look. I apply it to the hardware by rubbing it all over with my gloved fingers. These waxes are great at adhering to any surface and they dry super quick.
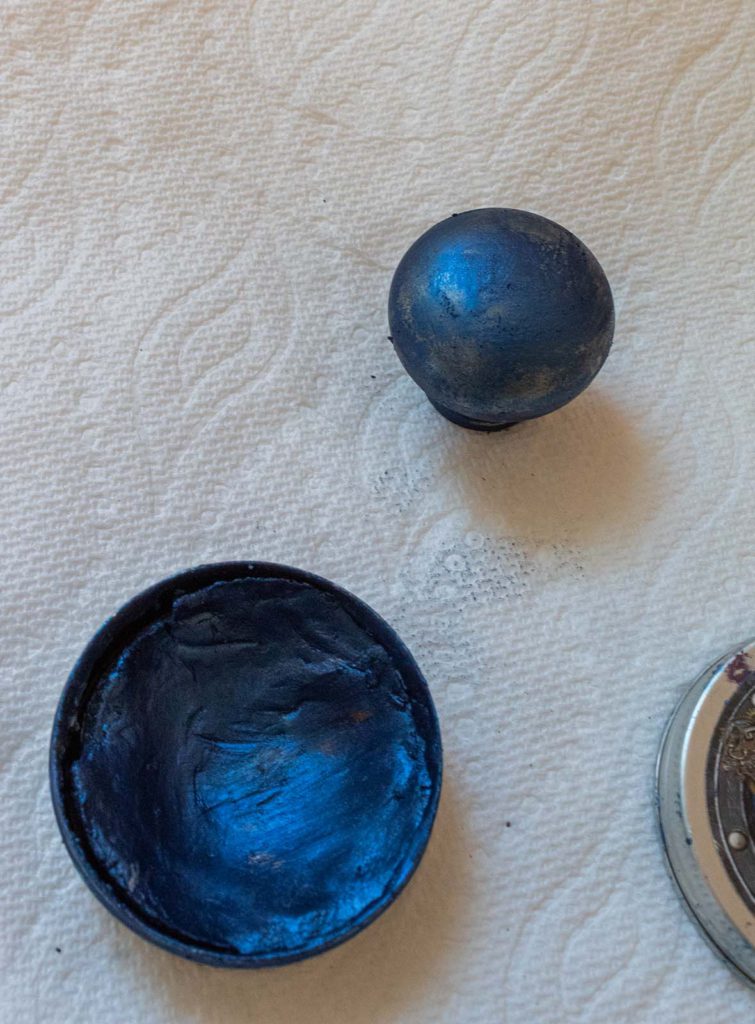
Once the blue dries I am going to add some silver, using Silver Leaf Rub n’ Buff. This time I’m only applying the silver in a few, random spots. I don’t want to entirely cover the blue.
Look how cool the knobs are looking already!
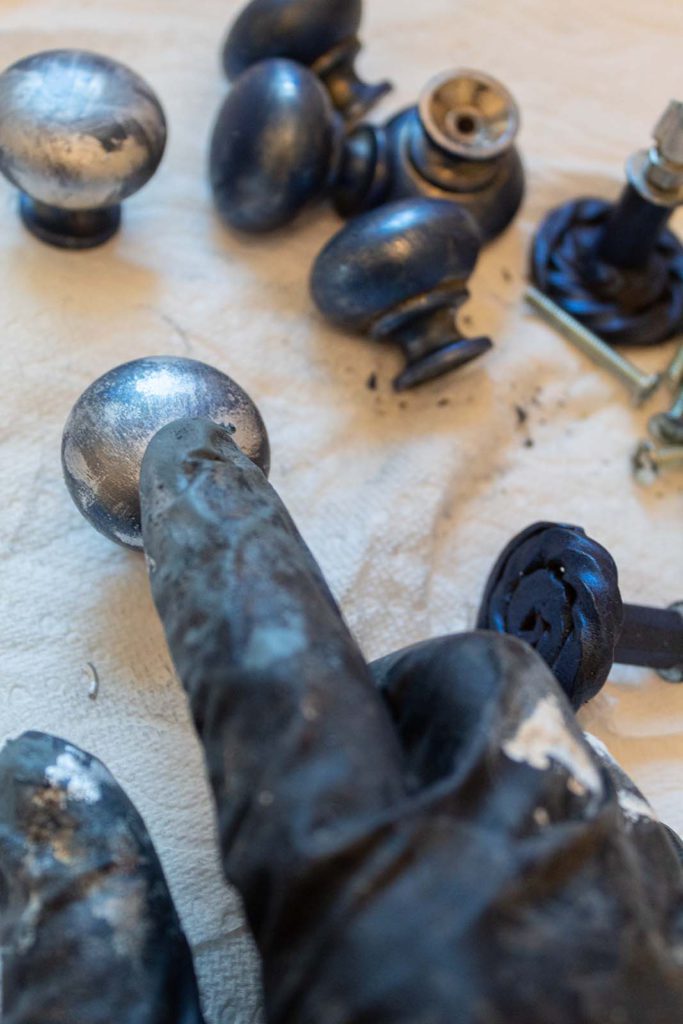
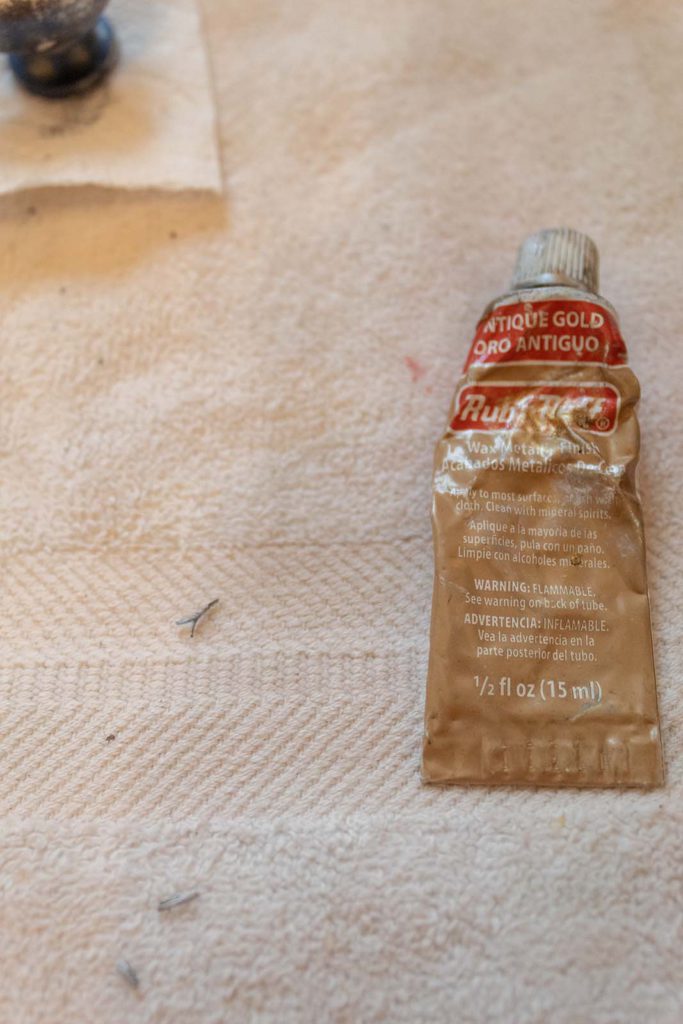
The last wax I add is Antique Gold Rub ‘n Buff. The gold will warm things up a little while helping to finish the look.
I lay the gold on a little thick to create some texture.
Step 10. Sealing Your Furniture
I sealed the furniture with my favorite finishing wax, Southern Strokes Bees Wax Finishing Wax. To do this I rubbed the wax on with a paper towel in circular motions over the surface of the chest of drawers. I waited a couple hours and then came back with a lint free rag and buffed the wax—nothing elaborate, just rubbed it over the surface one more time.
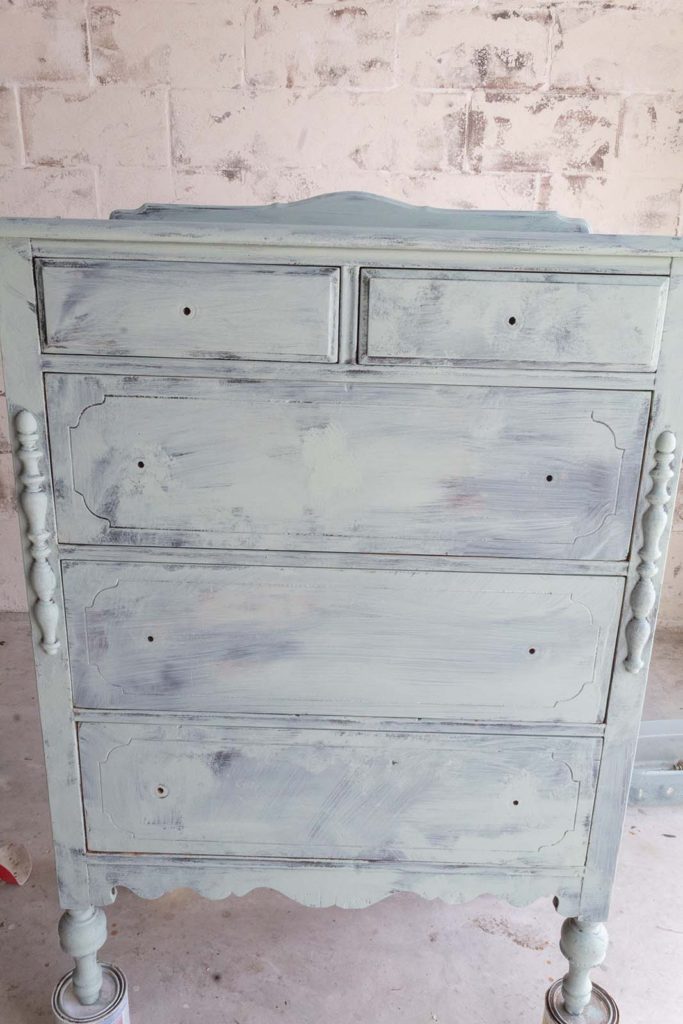
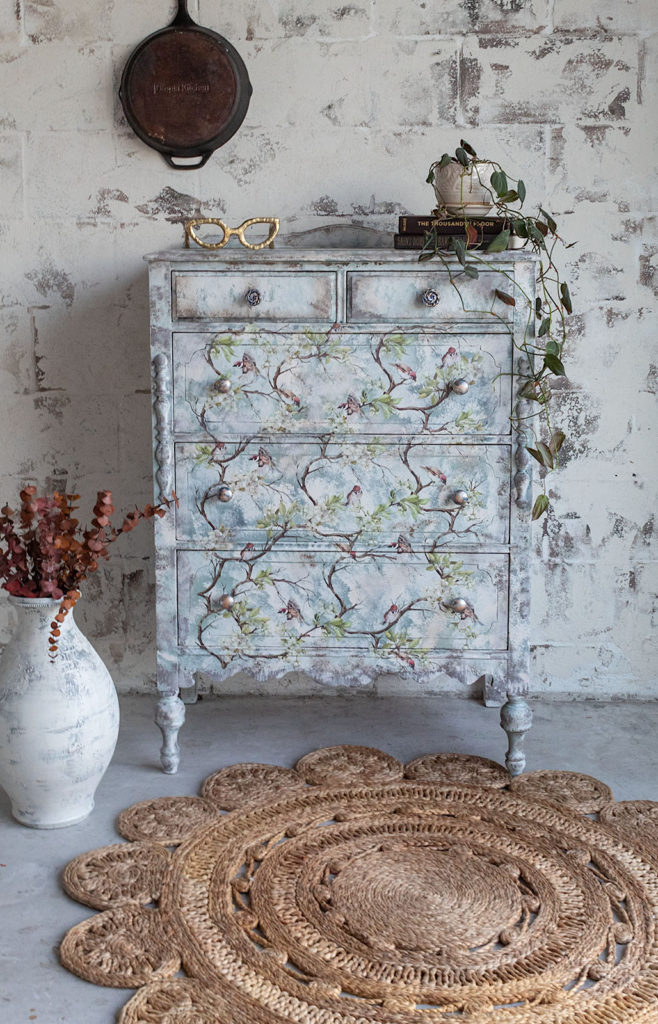
The Final Reveal!
Watch The Video Of This Renovation
Dear friends. What did you think of this furniture renovation? Isn’t it spectacular! I’m particularly proud of this one…Let me know what you think in the comments below.