Dear Santa: please send some elves to clean my house, wrap some presents, do my hair, make some meals… oh and throw in a massage or two.
Hello beautiful readers! What’s on your Christmas list this year? How are your holiday preparations coming along? Probably better than mine! Let’s just say if I don’t get on the ball soon, and I mean like yesterday soon, Santa may just skip our house all together!
But even with the holiday chaos and last-minute rush, I can’t let the moment pass without posting a fun and easy Christmas tutorial that I think you will love!
Each year I make at least one Christmas wreath to decorate the interior or exterior of our home. A girl can’t have too many wreaths right? You may recall the 48″ Magnificent Christmas Wreath that my hubby risked his life hanging at the tippy top of our roof line or the Holly Berry Wreathwith the three little birds that exuded Christmas cheer.
There is something so special about making your own wreath for whatever season inspires you. The love that goes into creating something beautiful and custom to your own taste is wonderfully rewarding!
To save on materials, you can recycle wreaths by changing them up each year for a new look.
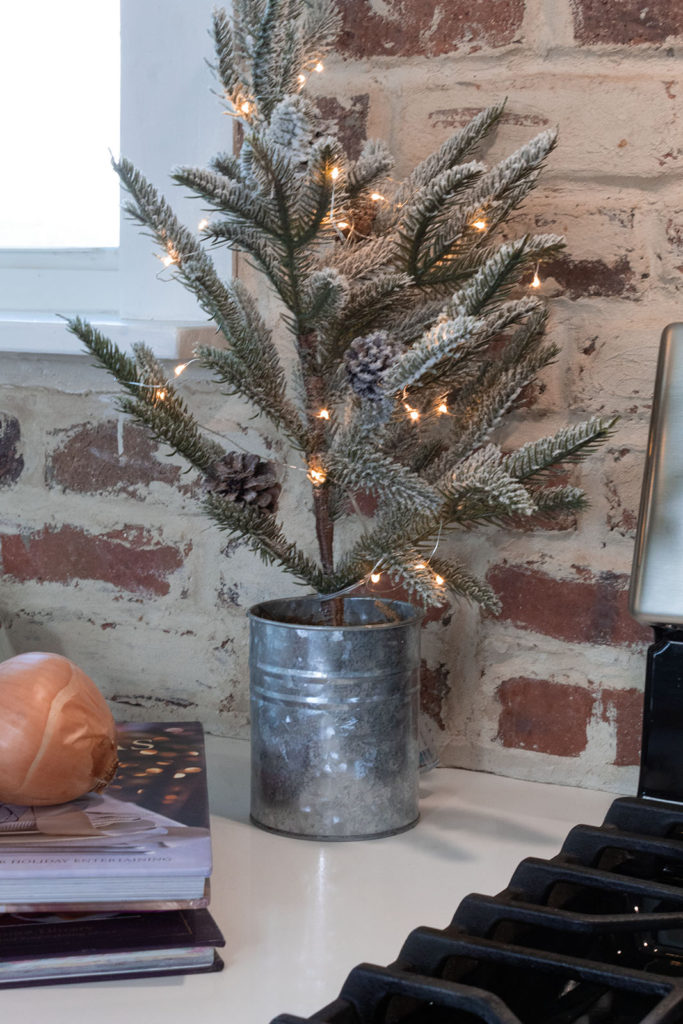
Bring the Color and Warmth Indoors
Today I’ll show you how to make this striking wreath using only a few materials. So crank up the Christmas music, pour yourself some hot cocoa, and let’s get started creating this fabulous Christmas wreath!
Disclosure: Some of the links provided are affiliate links. By purchasing through these links it supports this blog and the work we do and there is no extra cost to you. If you would like to read our full disclosure, click HERE.
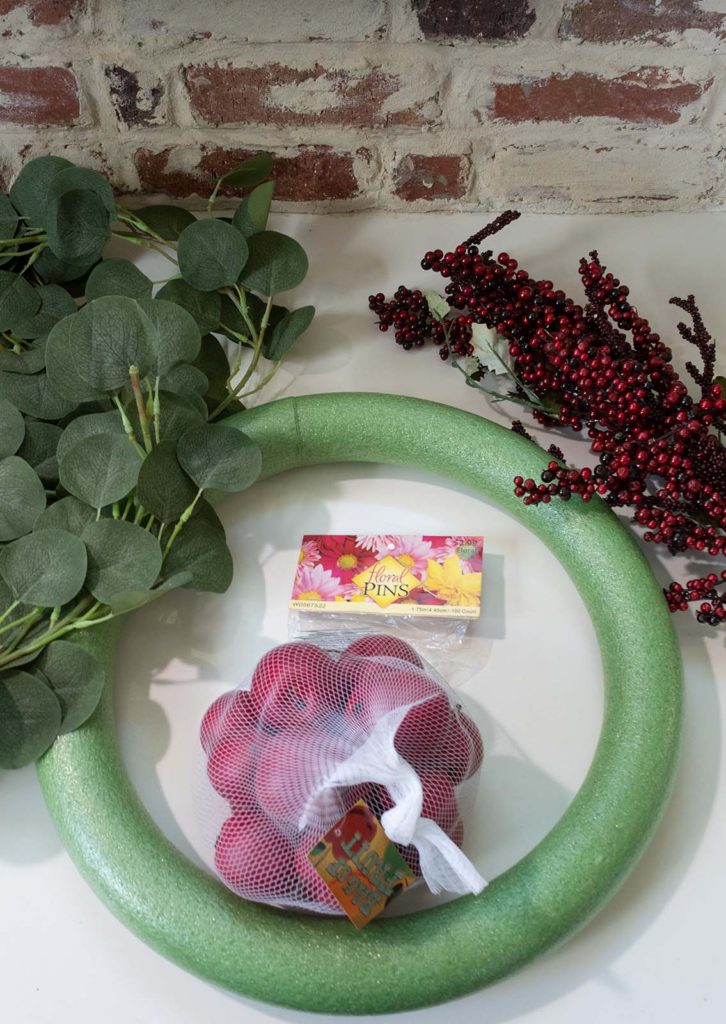
To make this wreath you’re going to need a few supplies that you can pick up at your local craft store or buy online. The foam floral ring is perfect for this project since you can pin everything into it with ease.
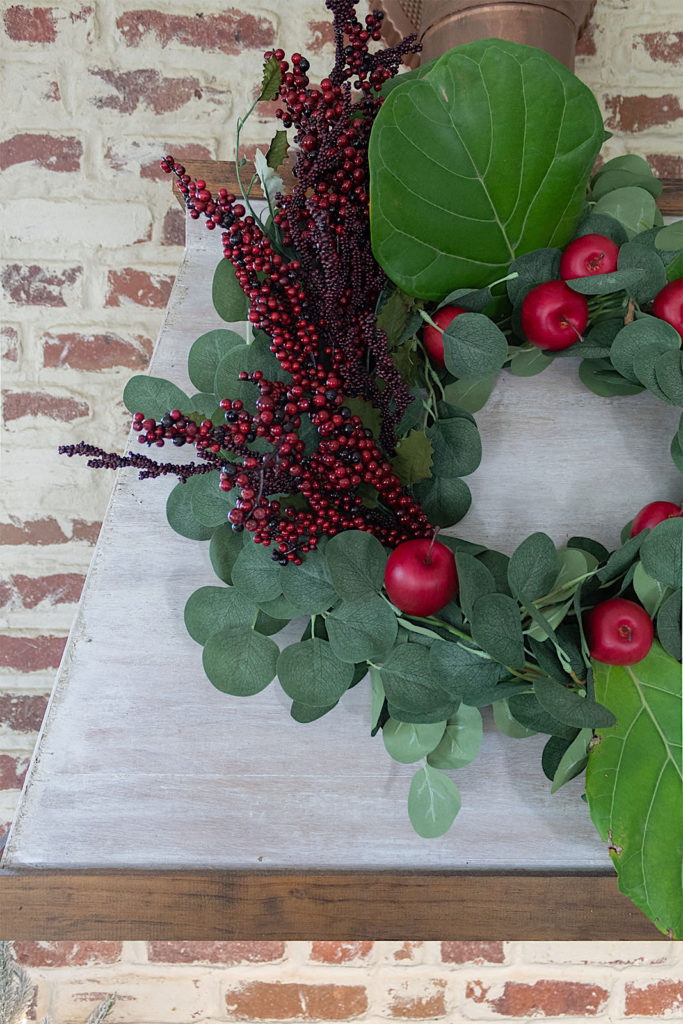
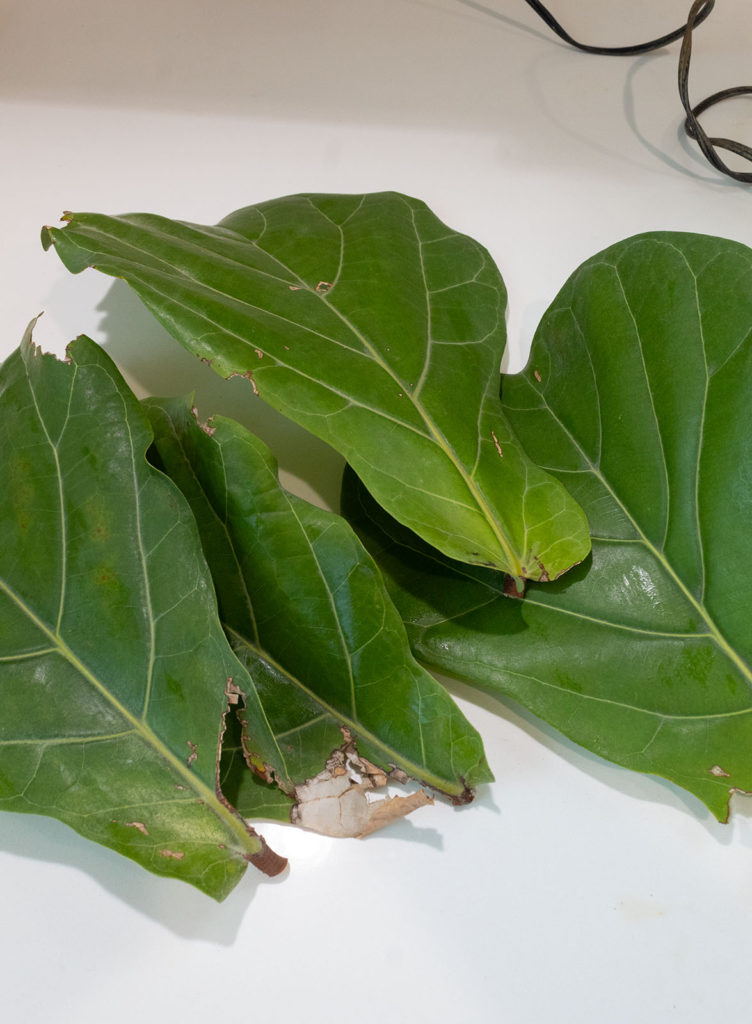
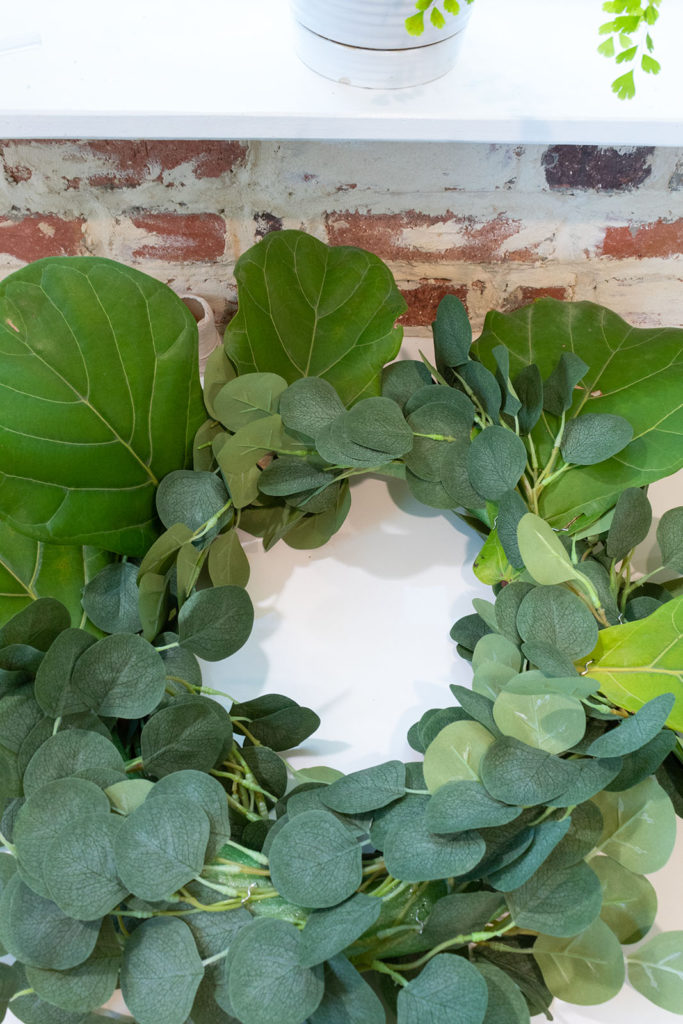
The only thing missing from this picture are the leaves I pruned from our Fiddle Leaf Fig plant—a last minute fix to fill in gaps that proved to be just the perfect detail for some added style.
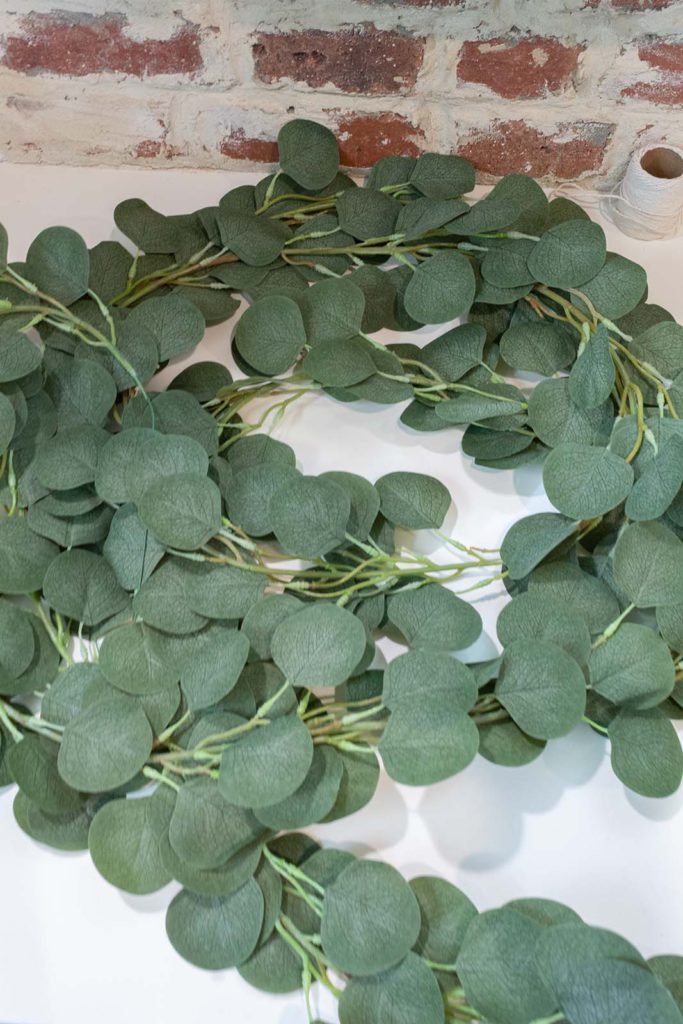
Step 1. Weave In Your Eucalyptus
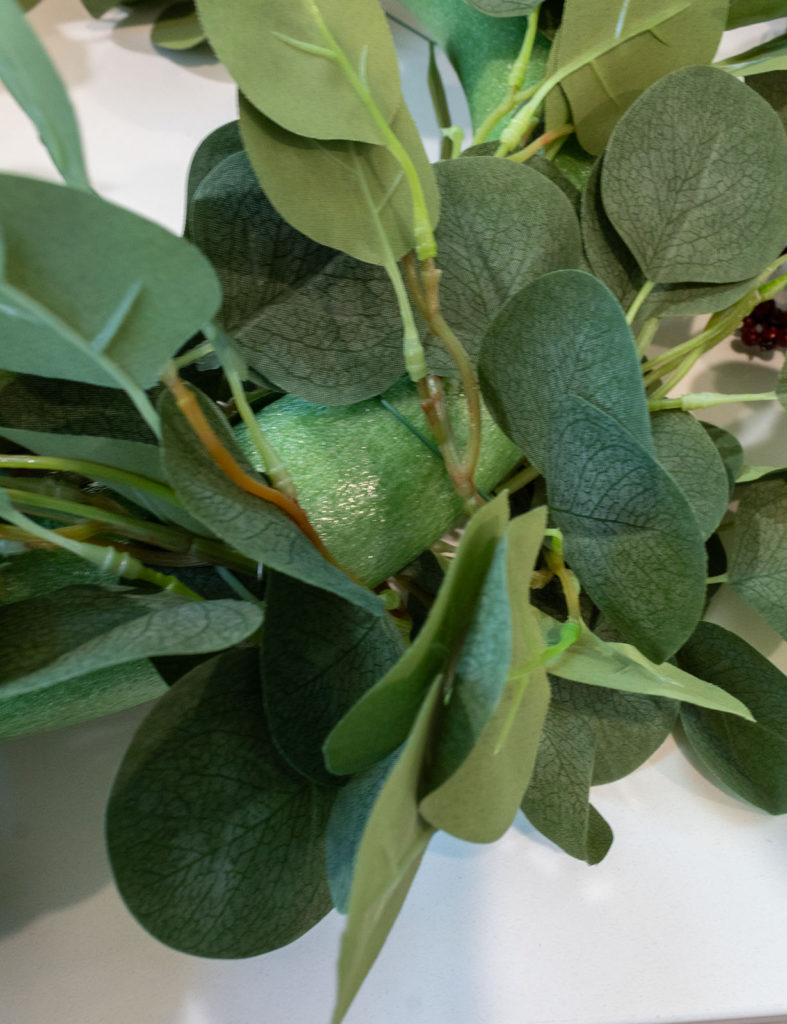
I already had a couple faux eucalyptus vines from a previous project. They measure approximately 4 or 5 feet each. The eucalyptus is going to be the base of our wreath. I’ve always liked the look of eucalyptus in Christmas decor.
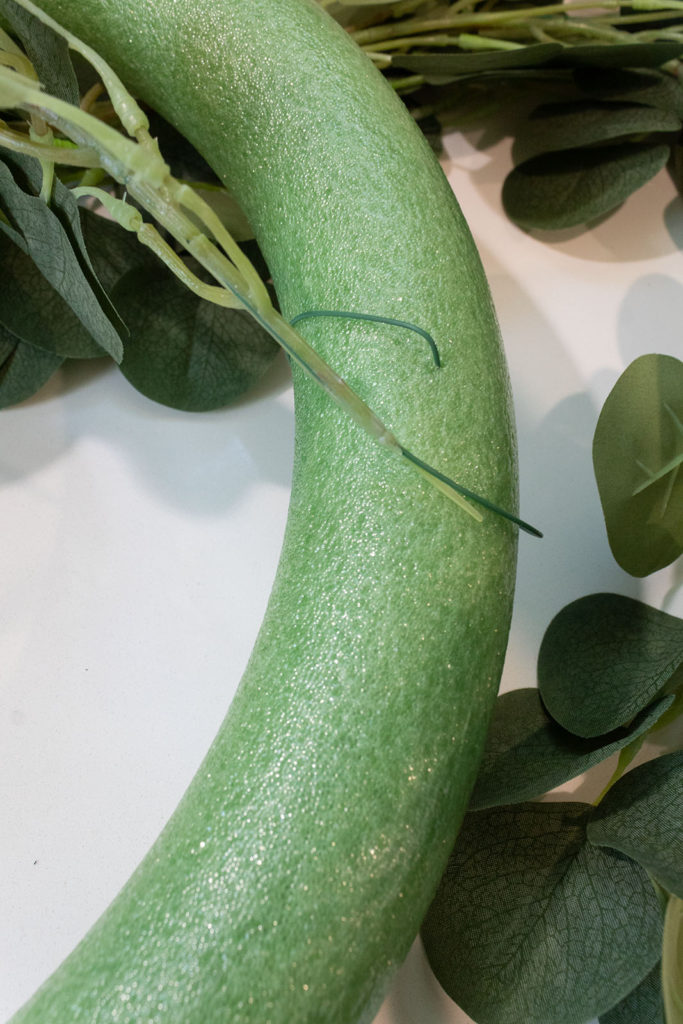
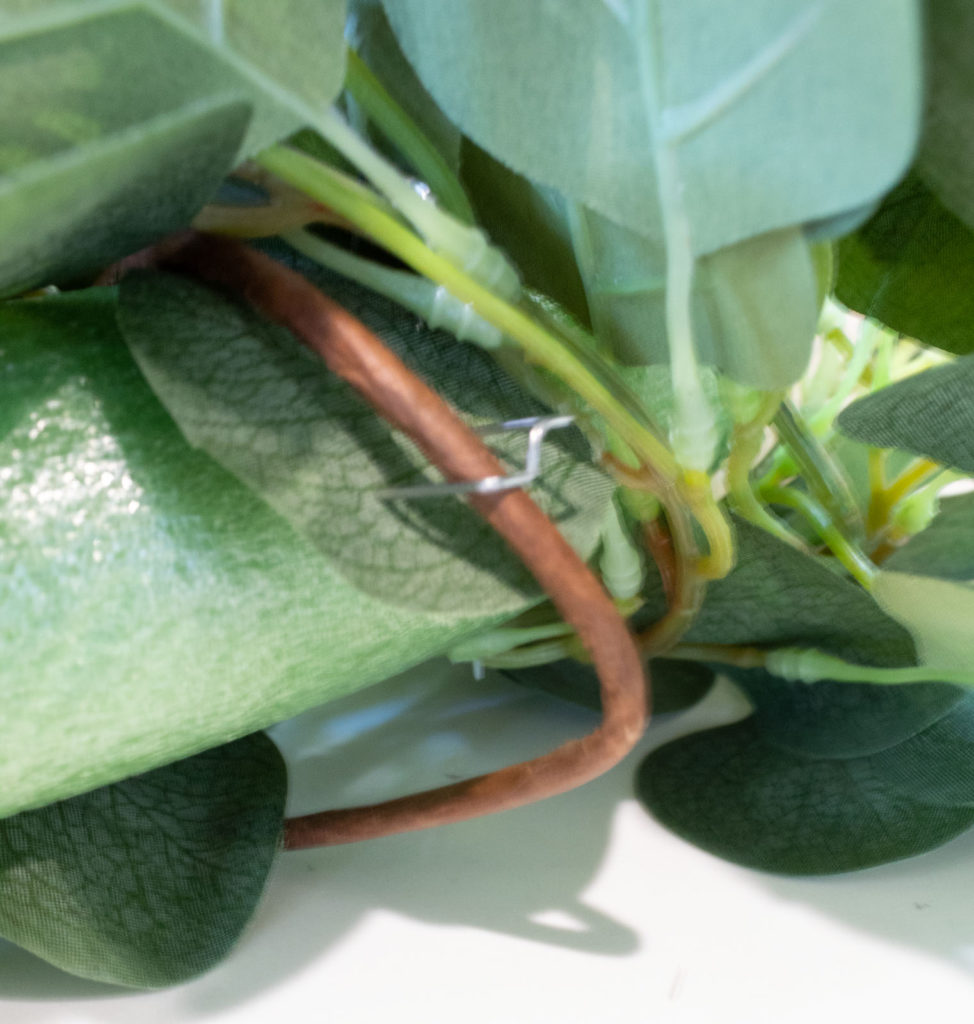
To begin adding the eucalyptus to the foam ring, I take the wire end of the first vine and stab it into my foam ring to help secure the vine.
I find this process of stabbing into the hard foam quite satisfying…should I be worried?
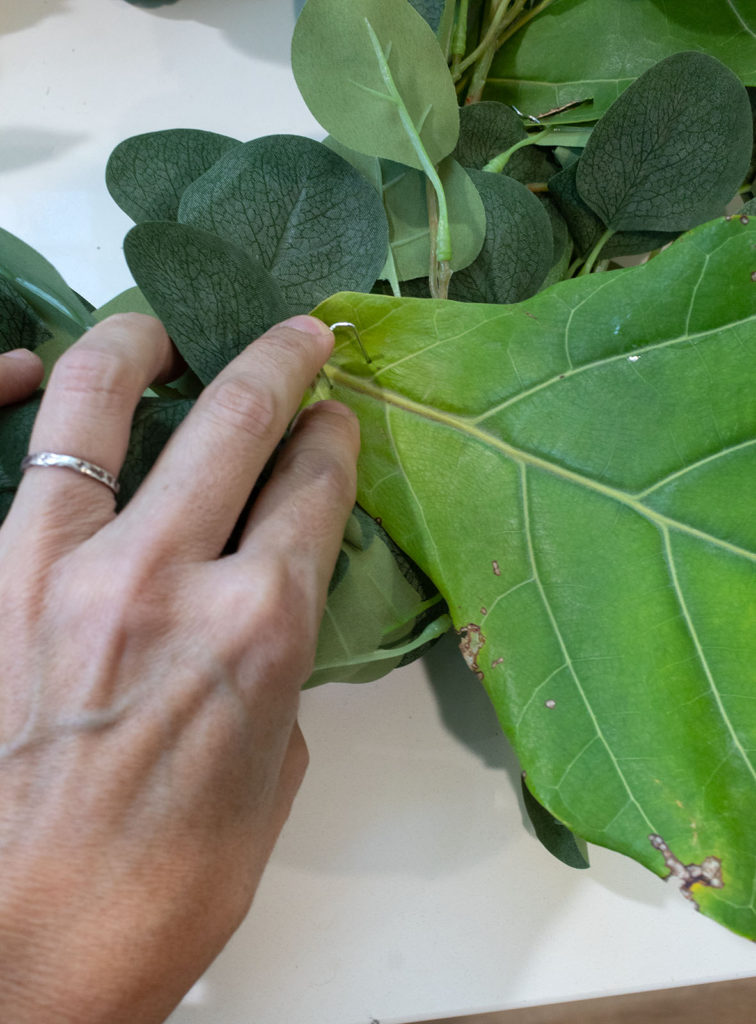
Next I carefully begin threading my eucalyptus under and over the ring, going around the entire circle. I use my floral pins to help secure the vine to the ring. The pins have two pointy ends. Carefully push these into the firm foam.
Try placing the pins under leaves and where they won’t be so readily visible. But don’t fret about this too much as we will be adding subsequent layers of materials that will help cover the metal clips. Repeat the process by adding any more eucalyptus vines you may have. The goal is to get good coverage with the eucalyptus.
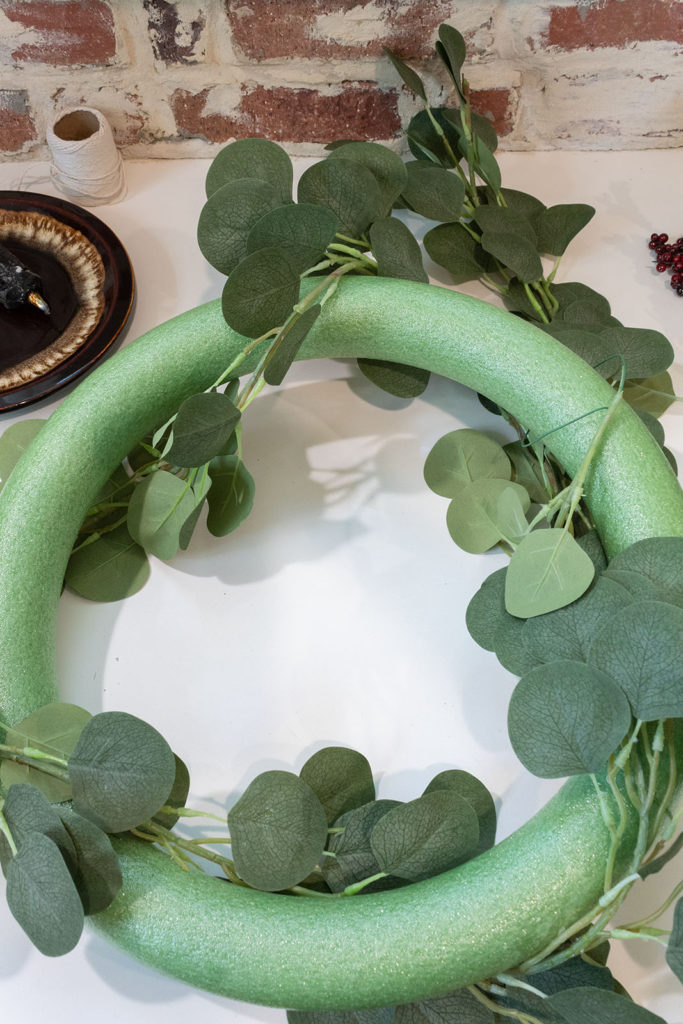
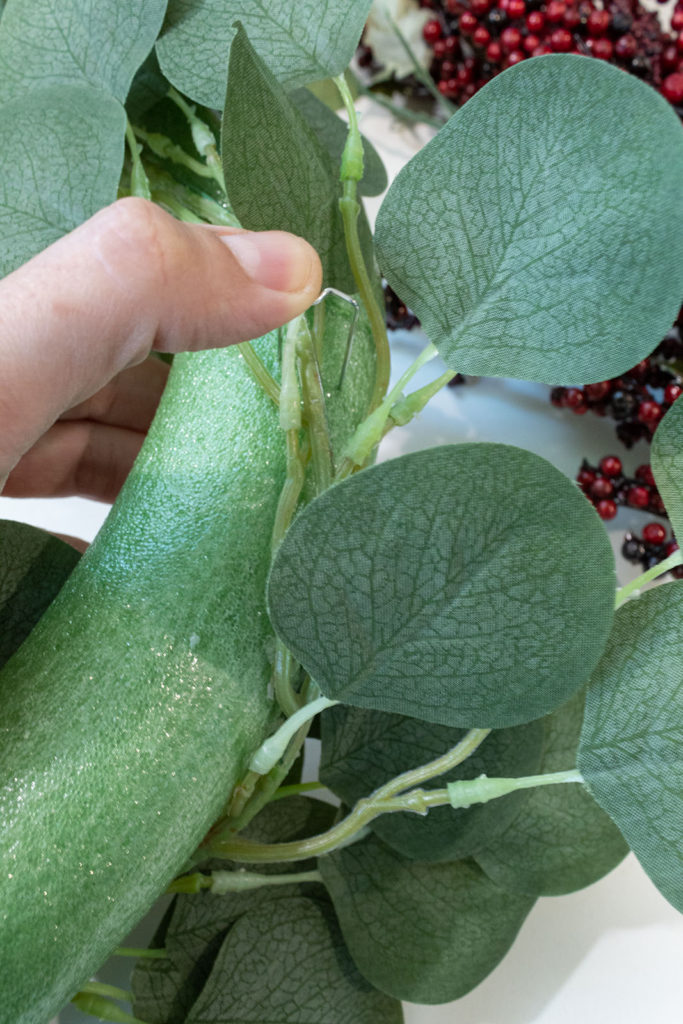
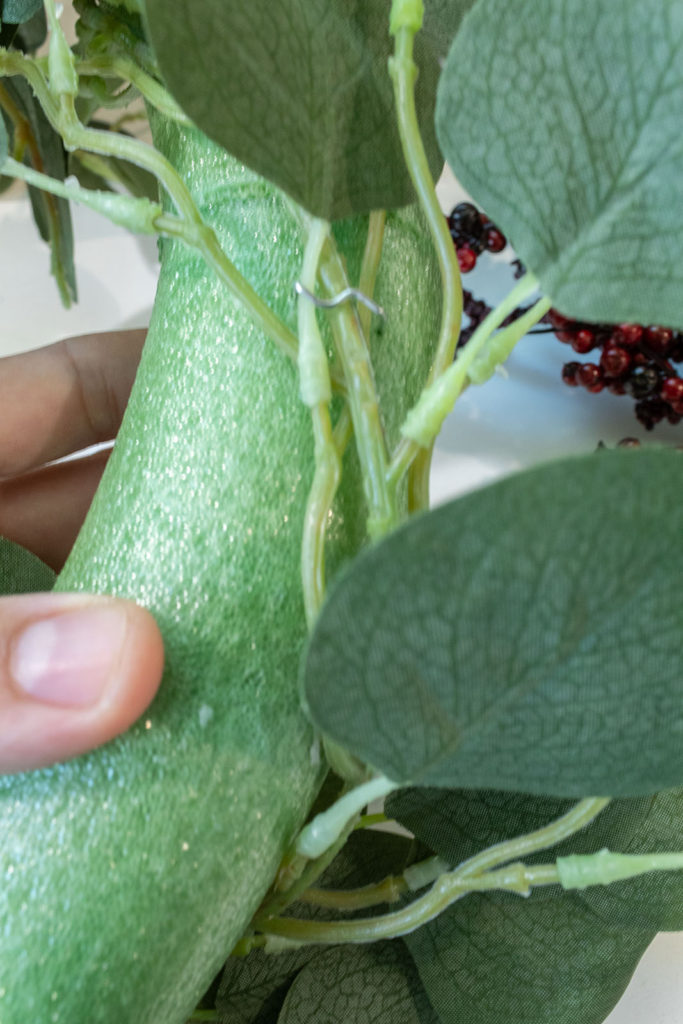
2. Fill In The Gaps
Depending on how much eucalyptus foliage you have, you may need to add in fillers. Although I got pretty good coverage with just two vines of eucalyptus, there were still some gaps where you could see some of the green foam peaking through.
Enter House Plant Leaves
It’s not unusual to have to improvise when it comes to DIY projects. Sometimes things don’t go quite as planned and you have to make adjustments to your original vision. But trust me, as I speak from experience, these moments end up creating something even better!
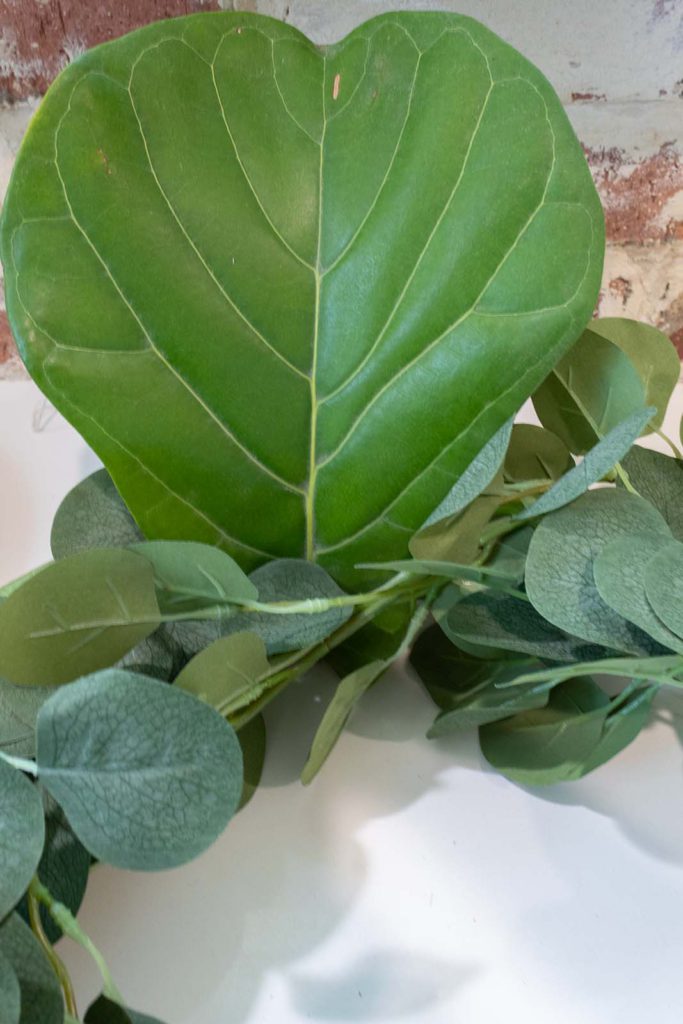
Without stripping my beautiful Fiddle Leaf Fig of its green foliage, I pruned a few not-so-perfect leaves. These leaves will be the element that changes everything about this wreath!
I suggest finding a plant with some large leaves around the house that can spare 4 or 5 leaves. You are going to love the beauty that this touch of nature adds to your wreath!
Once again the floral pins come in handy for pinning the leaves to the ring. The large leaves were perfect for filling in the gaps. And what a wonderful way to bring in some tropical flair.
I purposely left an open space, free from the large leaves, on one side of the wreath. I will show you why in the next step.
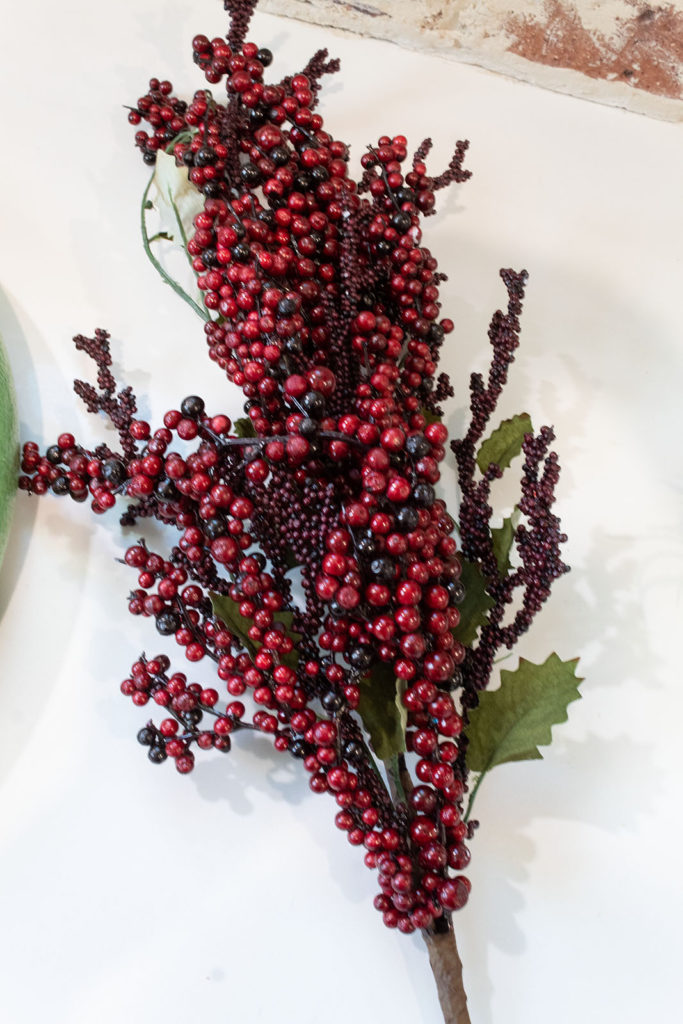
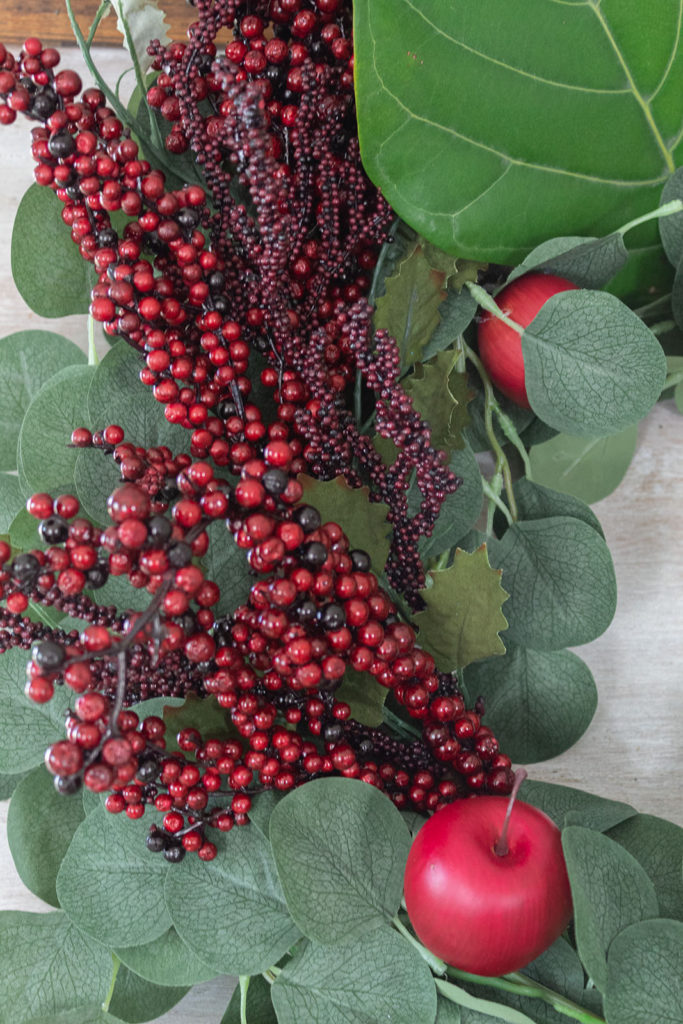
Step 3. Add In Some Berries
One big bunch of red berries is all you need to make a statement on this wreath.
Next I added my bunch of Christmas berries. I curved the wire stem around the wreath ring and used pins to help hold it in place. I made sure to weave it through leaves and foliage to hide it.
Next I pulled the bunch up through the middle of the wreath and rested it on the top of the left side of the wreath. (this is easier to demonstrate in the video at the end of this post).
I used pins to help position the berries so that they looked like a cascade of red on one side of the wreath.
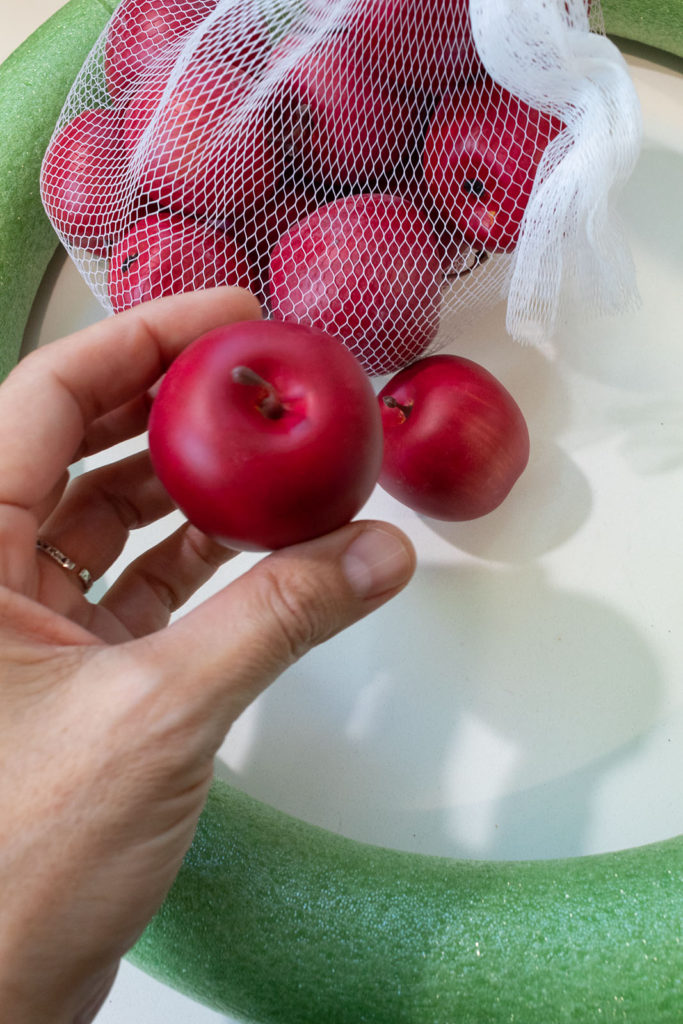
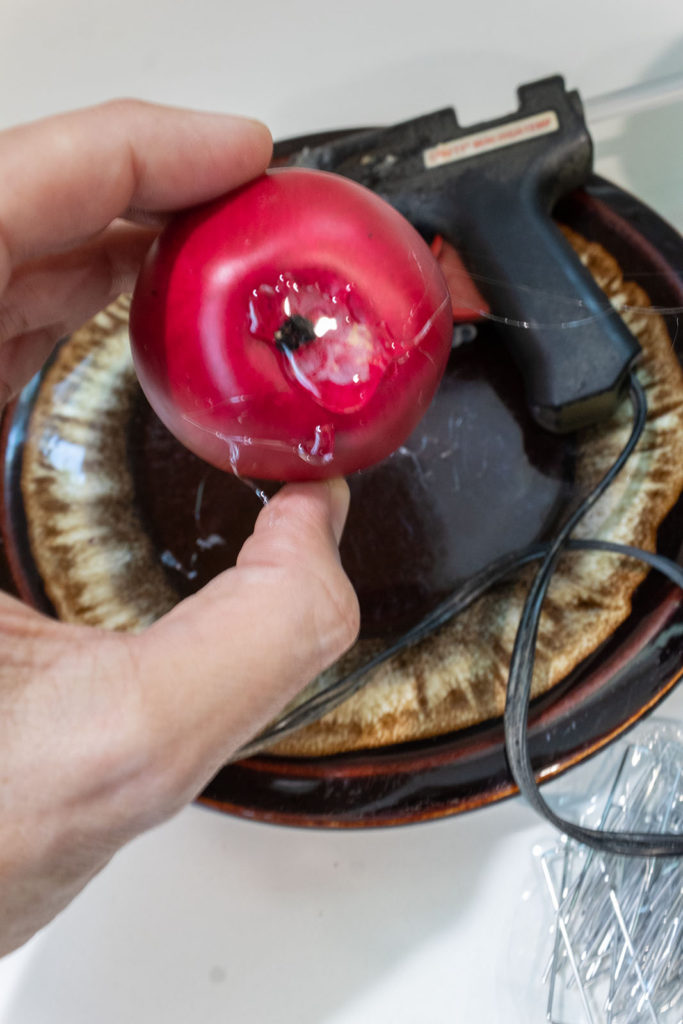
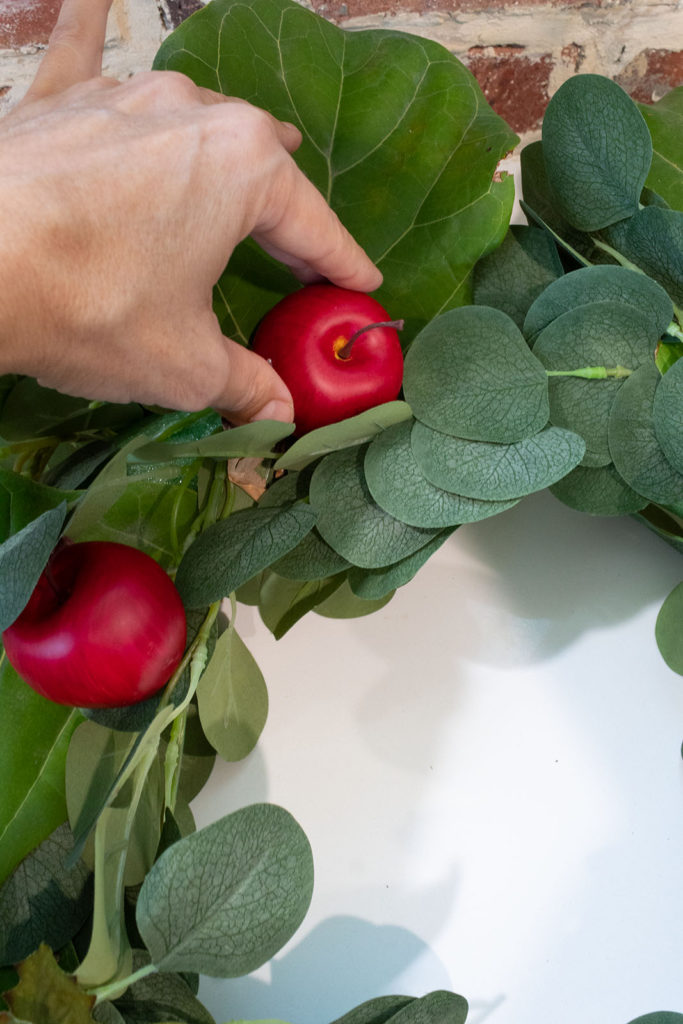
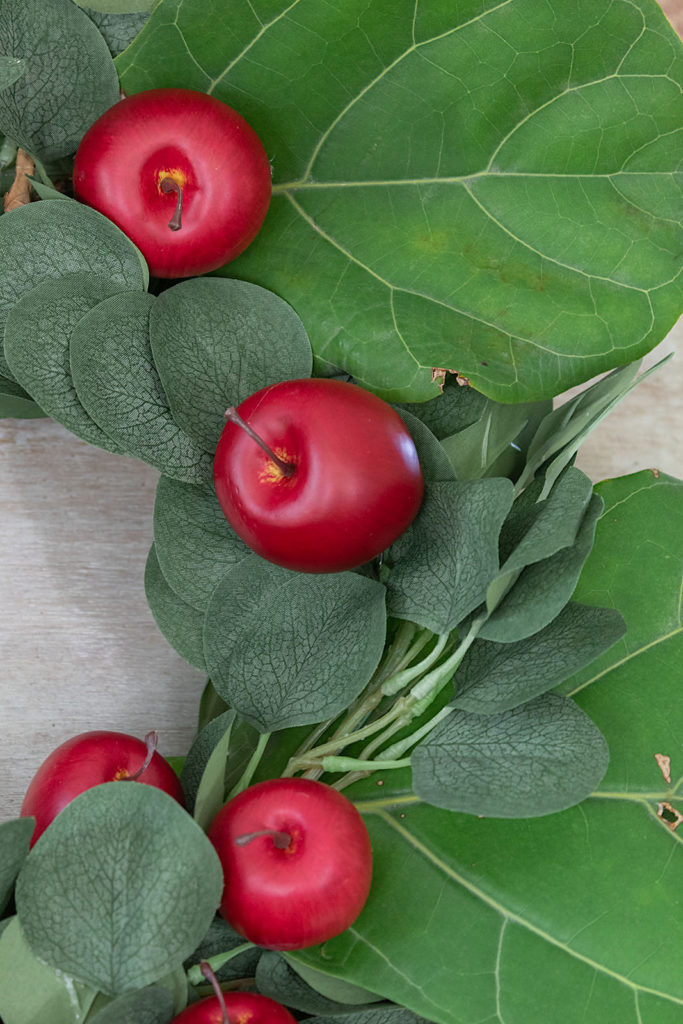
Step 4. Time For Some Apple Love
Finally, for a fun and festive touch, I added the mini apples to the wreath.
Carefully using my glue gun, I first applied a good glob of glue on the bottom of an apple. Then I would find a flat spot along the wreath where I could affix the apple.
These apples are very lightweight. Once the glue cooled, the apples stayed in place with no problem.
I didn’t use the whole bag of apples, just enough to add some festive pops of color around the wreath. You can certainly add more, but I suggest not overwhelming the aesthetic with too much of anything.
The light and fresh feel of this wreath is what makes it eye-catching.
Hang and Enjoy!
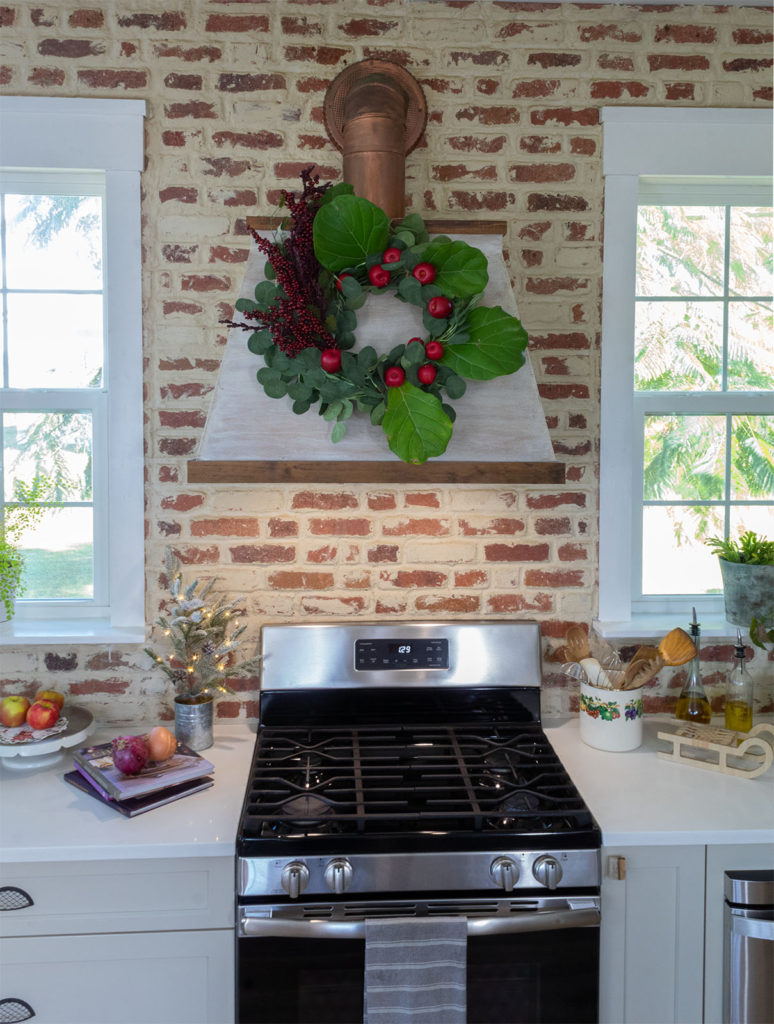
I hung this wreath on our kitchen range hood and it instantly brightened up the whole space. I really adore this look. It is so vibrant and seriously packs some Christmas punch. Mixing both faux and real foliage made this wreath come alive.
Watch The Video Of This Wreath DIY
So my friends, what do you think of this tutorial? Would you try a version of this wreath at home? Let me know if I missed anything and stay tuned for some exciting projects coming soon!
In the meantime, I wish each of you the safest, most heart-filling Christmas ever! And thank you for being a part of this creative journey with me!