Giving wood a paint-washed look creates a soft, organically beautiful aesthetic. I love using this technique when I want to bring attention to wooden elements on a furniture piece while preserving their natural beauty. Paint-washing adds a gentle earthiness to pieces that can be both rustic and modern.
In today’s tutorial, I will walk you through this incredibly easy technique. You will see just how lovely it is to paint-wash and hopefully be inspired to try it out on your furniture, picture frames, mantels or other wood elements in your home!
Disclosure: Some of the links provided are affiliate links. By purchasing through these links you are supporting this family blog and the work we do and there is no extra cost to you. If you would like to read our full disclosure, click HERE.
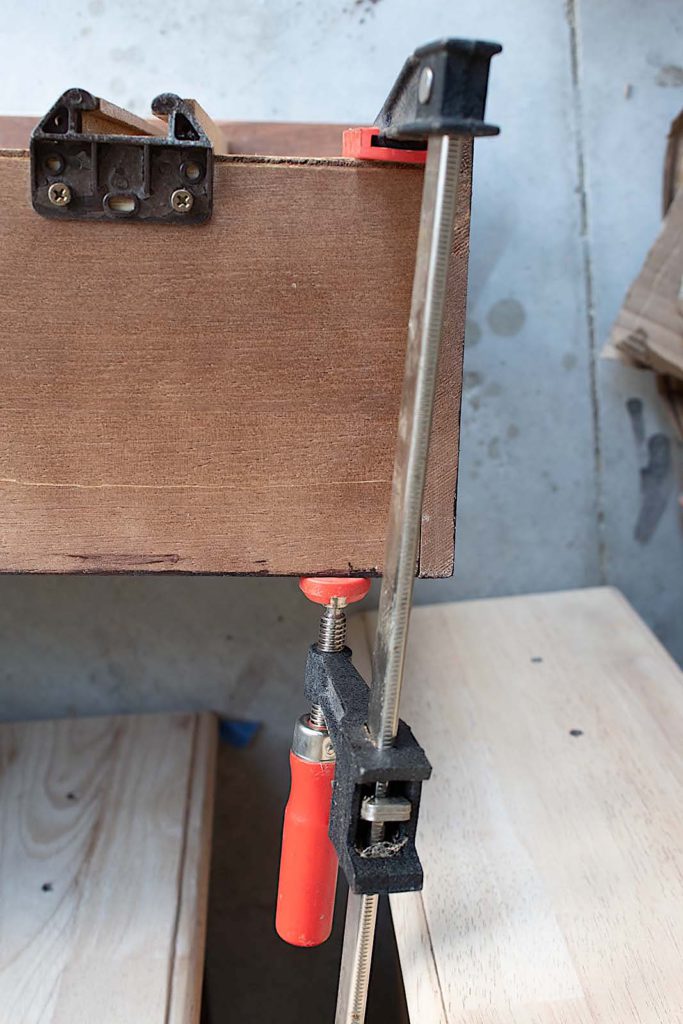
I found this dresser on FB marketplace. Marketplace is one of my favorite sources for salvaging pieces. At first glance this dresser looked like it was in pretty solid shape but once I began working on it, I realized it needed a ton of help.
Most of, if not all of the drawers needed gluing and some parts of the wood had been chipped off. I like using wood filler or Dixie Belle Mud for repairing any nicks. For reinforcing drawers, I use my favorite wood glue, Titebond, and my 24″ clamps.
Step 1. Prep Your Piece
Although chalk paint adheres well to just about any surface, I always like to give my pieces a quick sanding prior to painting, especially if I’m not priming.
It takes me a couple of minutes to run my orbital sander swiftly over any surface I plan to paint. The sanding helps to knock off debris and add a tad of friction to the finish.
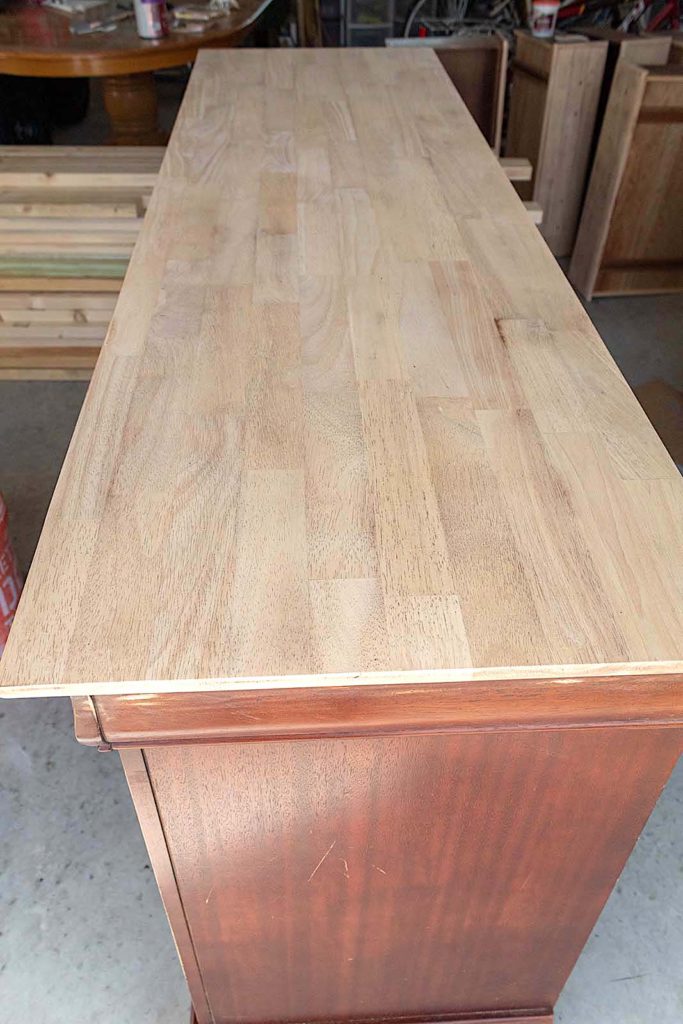
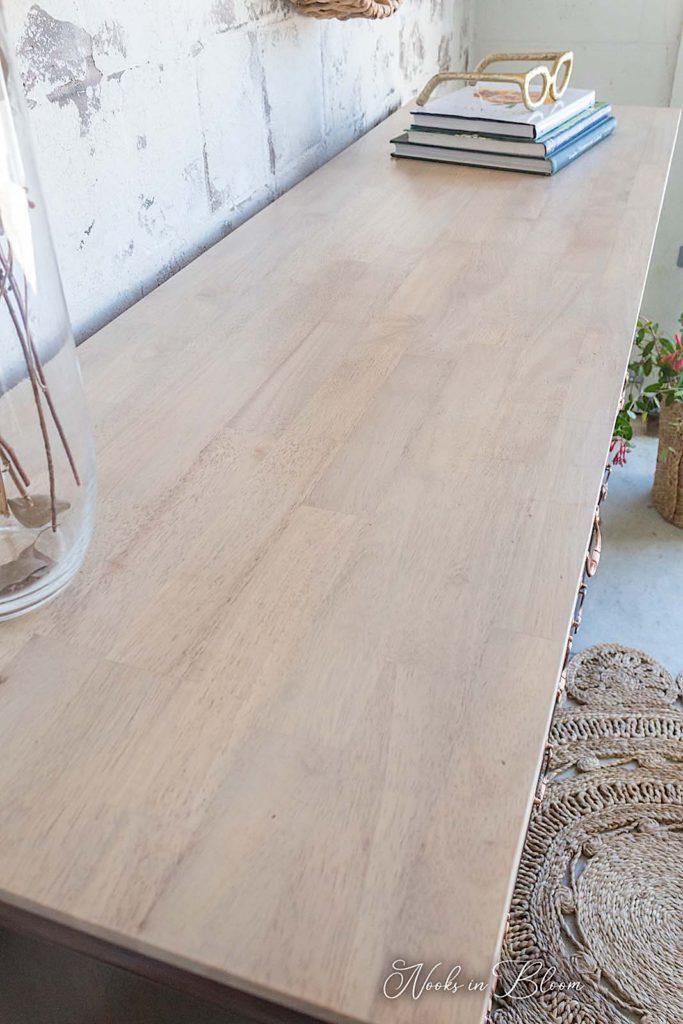
The parts of this piece that did get a deep sanding were the drawer fronts and the top. I sanded down to the raw wood using 60 grit sandpaper and finishing with 400 grit for a smooth, soft feel.
What happened next...
My friends, I always want to share the positives, as well as any set backs when it comes to furniture renovations. Things don’t always come out as planned, but that is how we learn. Woops moments are opportunities to make something even better!
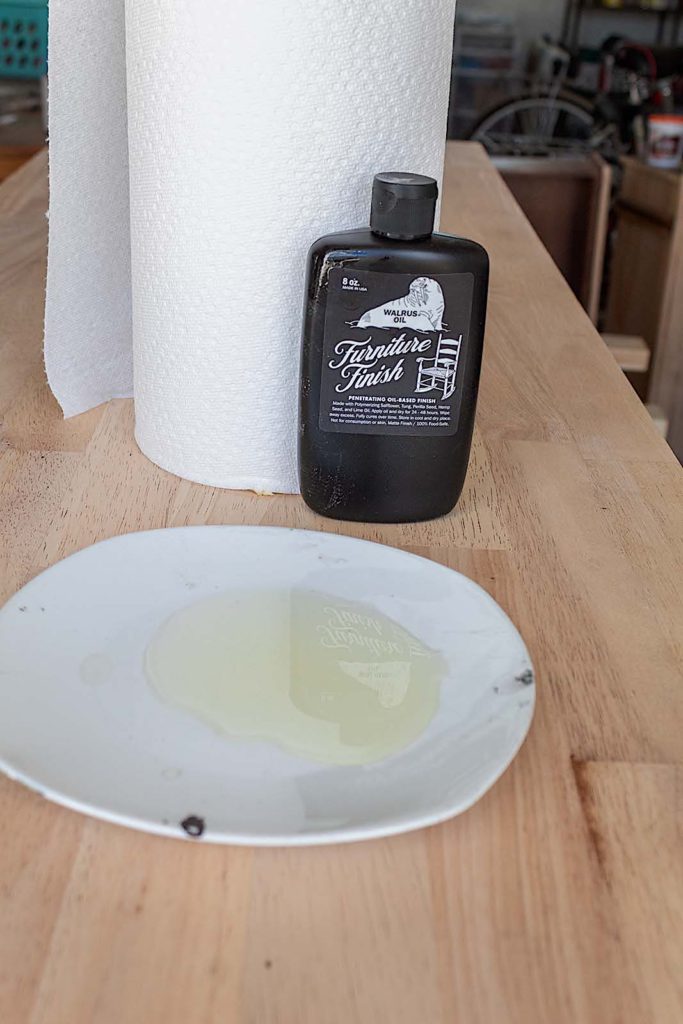
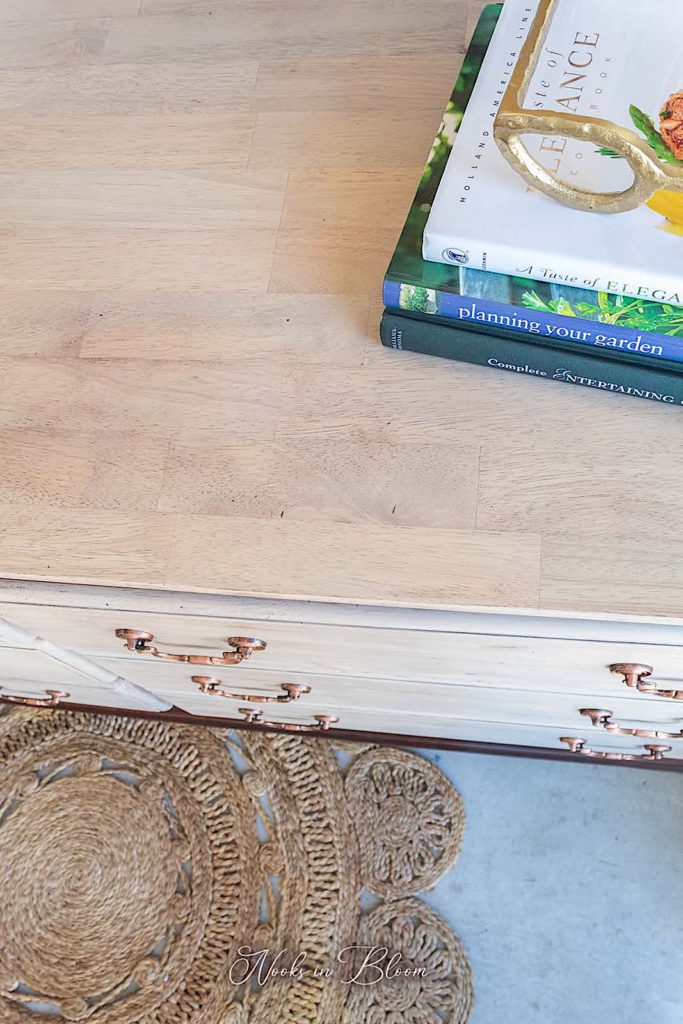
I’ve used Walrus Oil in the past and really liked it. I planned to use it to bring out the natural beauty of the wood on the dresser top, however, things didn’t go so well…
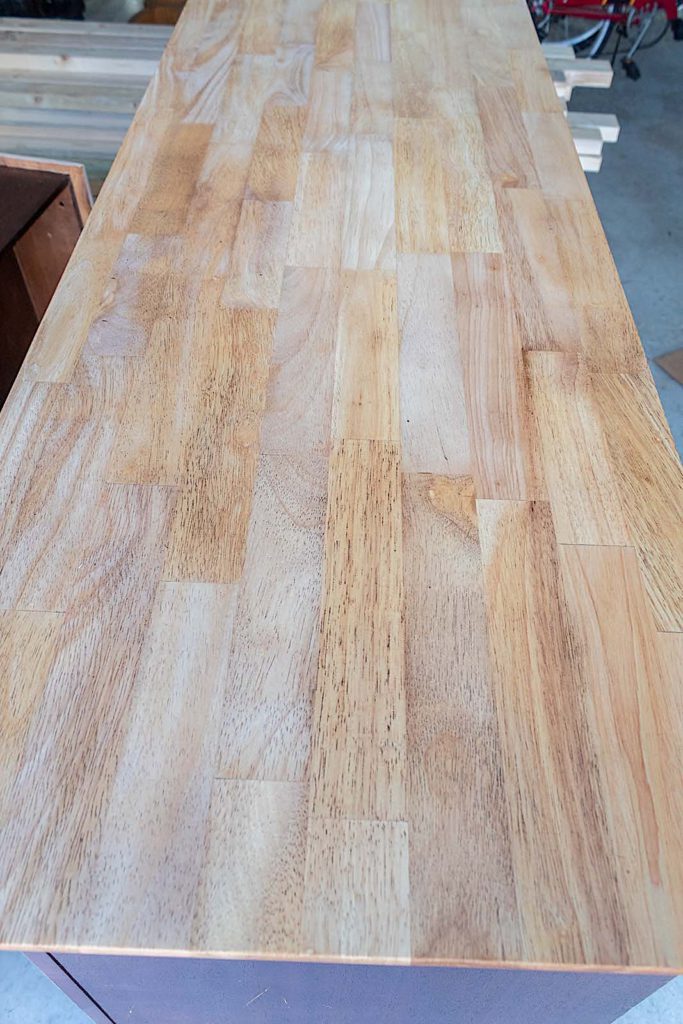
The tannins in whatever wood you are working with can alter the end color when applying stain or oil. In this case when I applied hemp oil to the sanded dresser top, the wood turned slightly yellow in some parts. The entire top looked completely blotch! That’s when I decided to change directions and do some paint washing.
Step 2. Paint Wash Technique
I knew that paint washing would be a beautiful remedy to my yellowish, blotchy dresser top. It would still preserve the wood grain look, while evening things out.
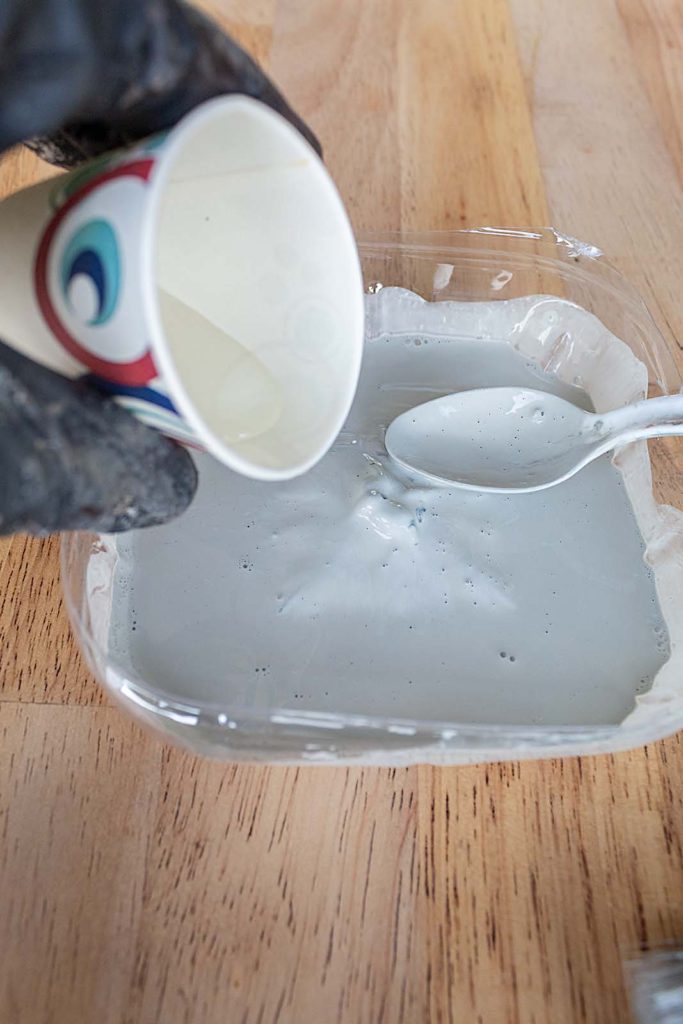
Pour
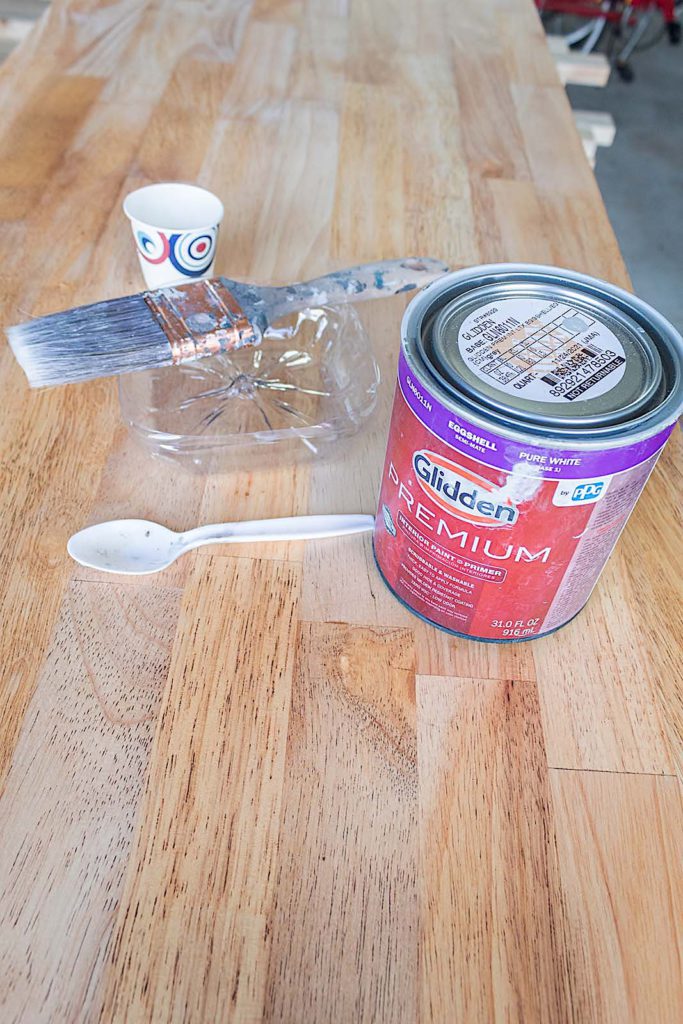
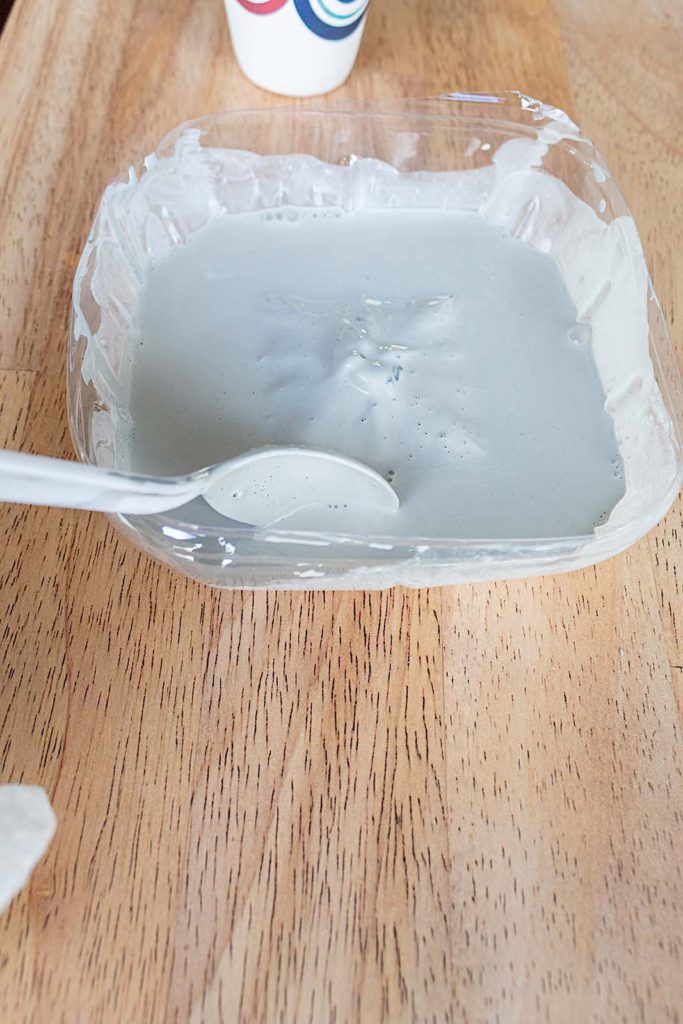
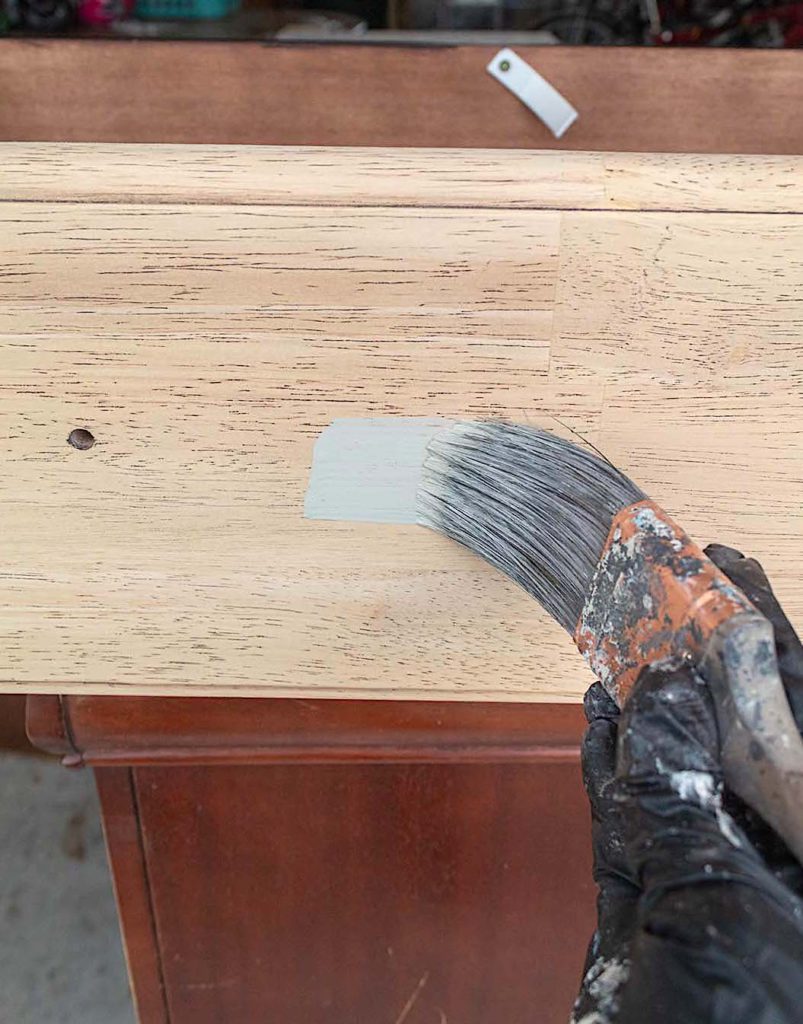
To create my paint wash, I poured equal parts of my Grey paint to equal parts water in a container.
Mix
With a plastic spoon I mixed the water and paint until well combined.
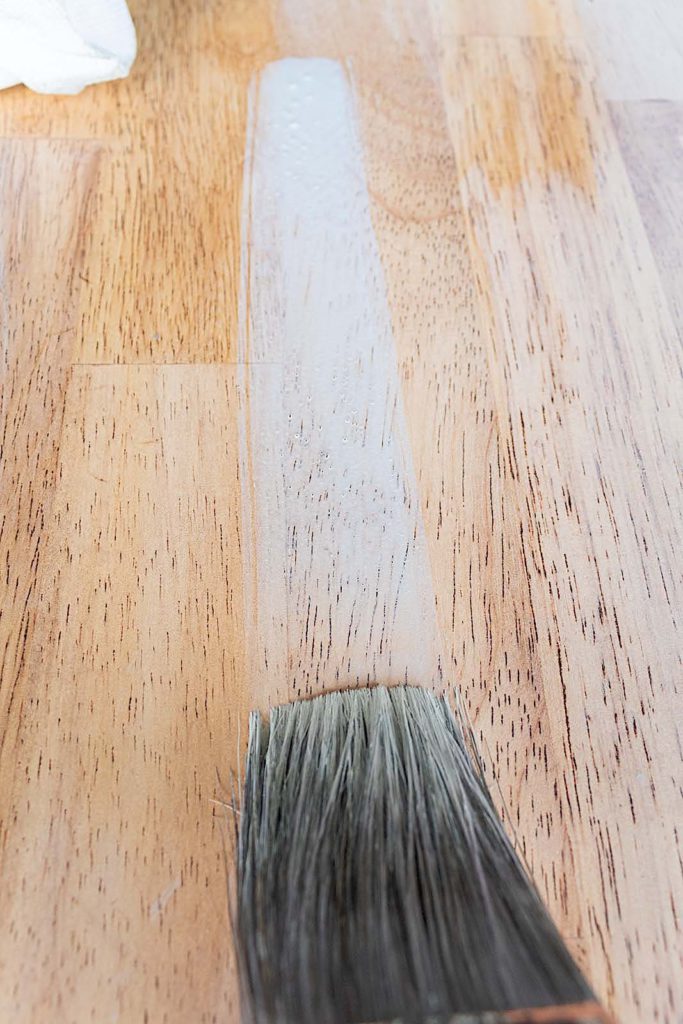
Paint
Using a paint brush, paint on some of the wash in the direction of your wood grain.
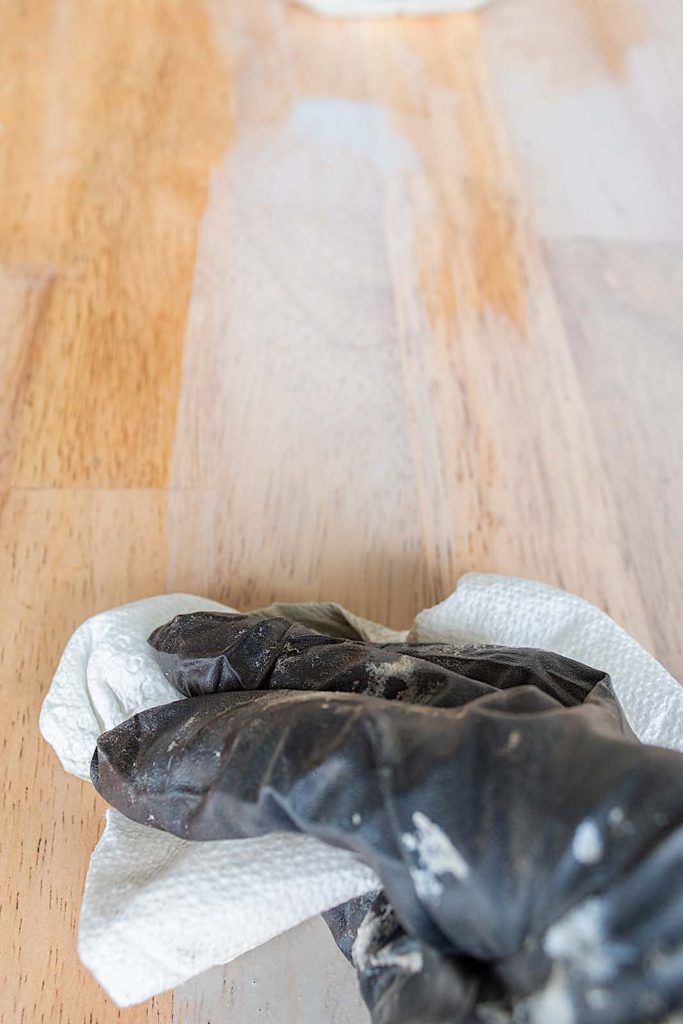
Wipe Back
As soon as you apply your paint, wipe it back with a paper towel. You don’t want to allow your paint to dry. You want to thin it out for that soft, hint of grey or whatever paint color you decide to use.
Continue doing this over the entire area of your wood. You will love the results. If you want to go a little darker with your paint color, let the first coat dry and repeat the process again.
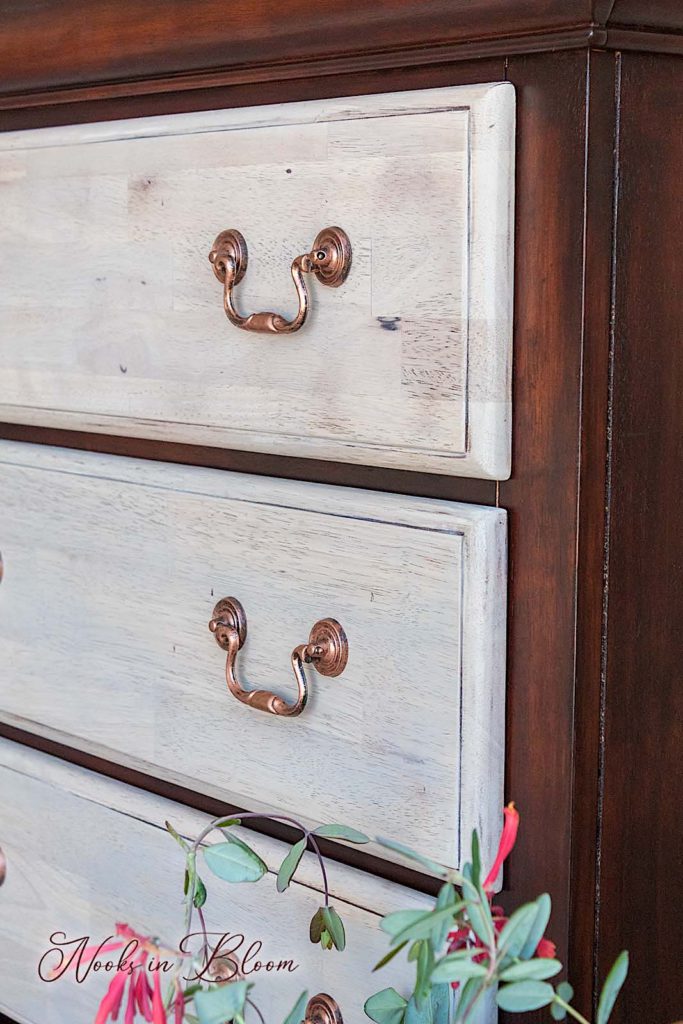
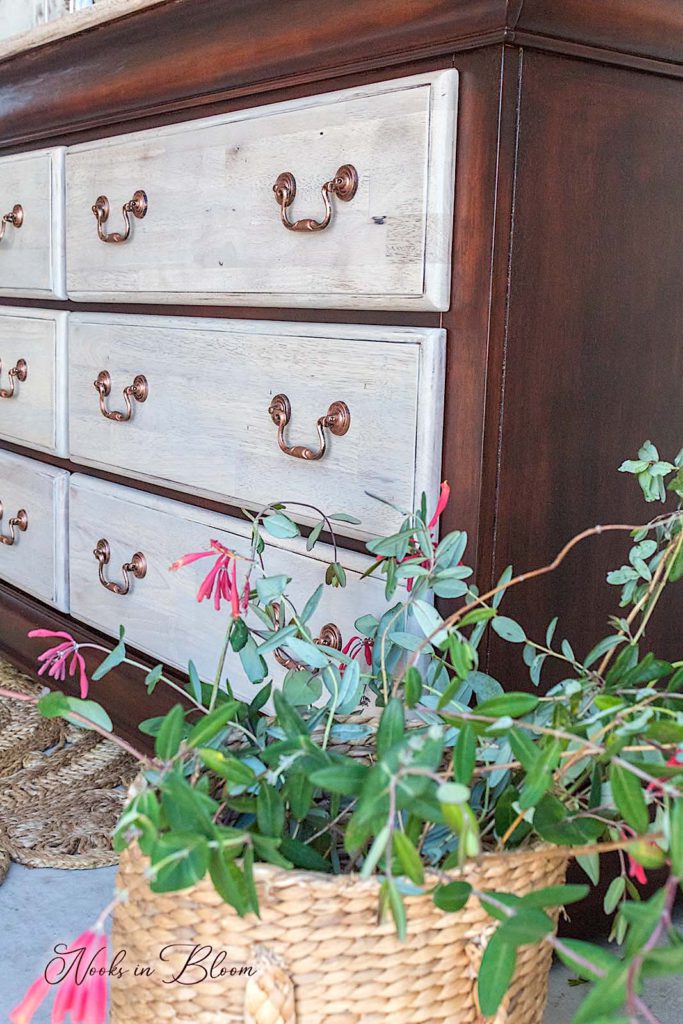
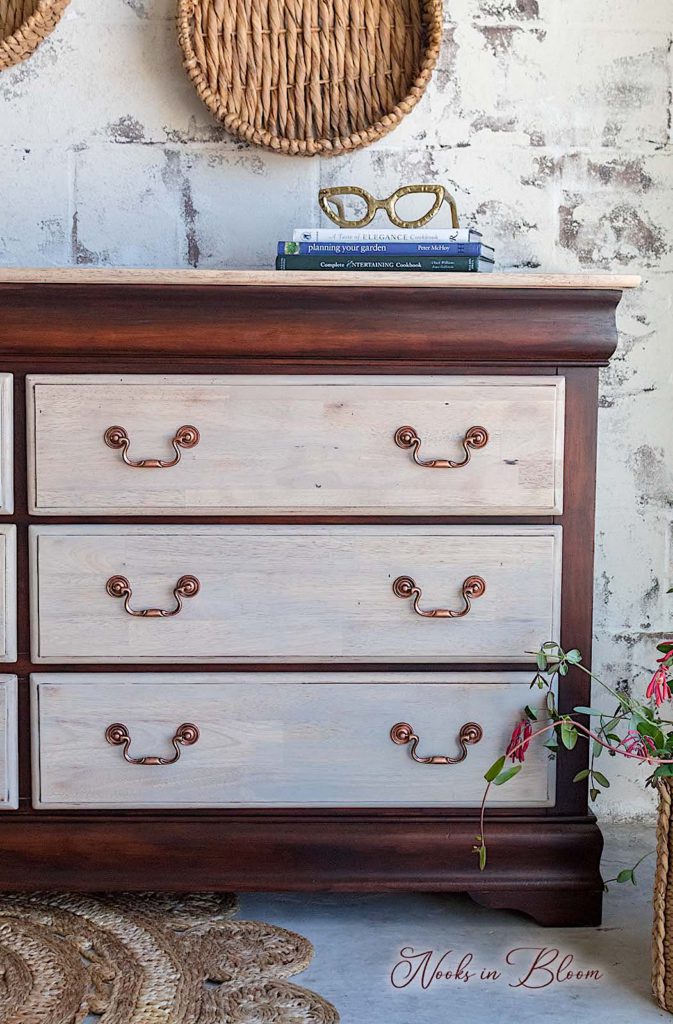
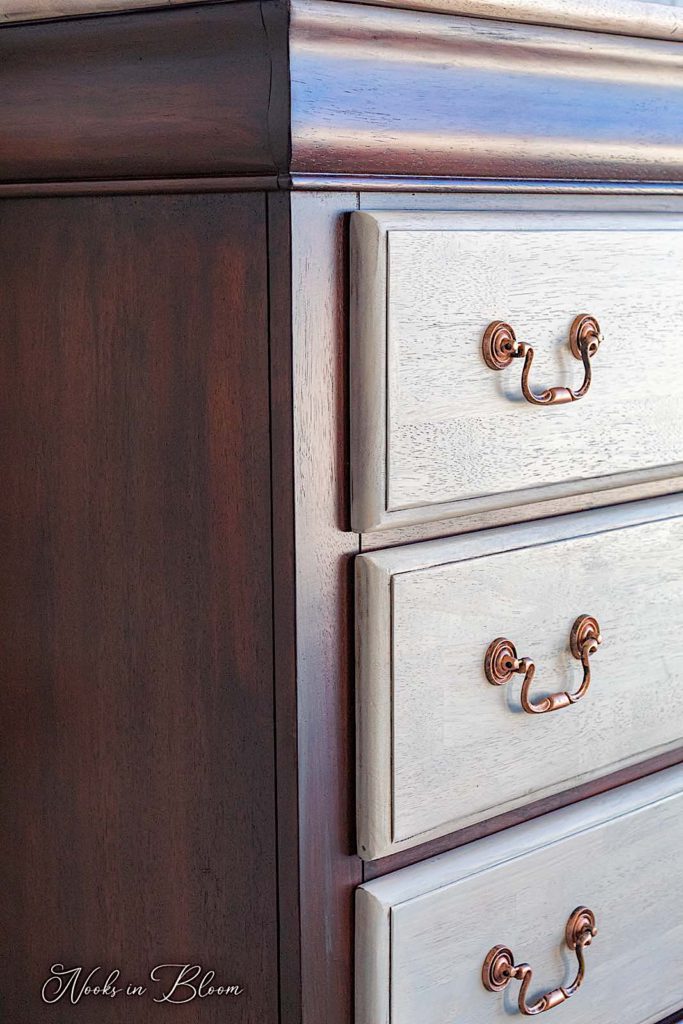
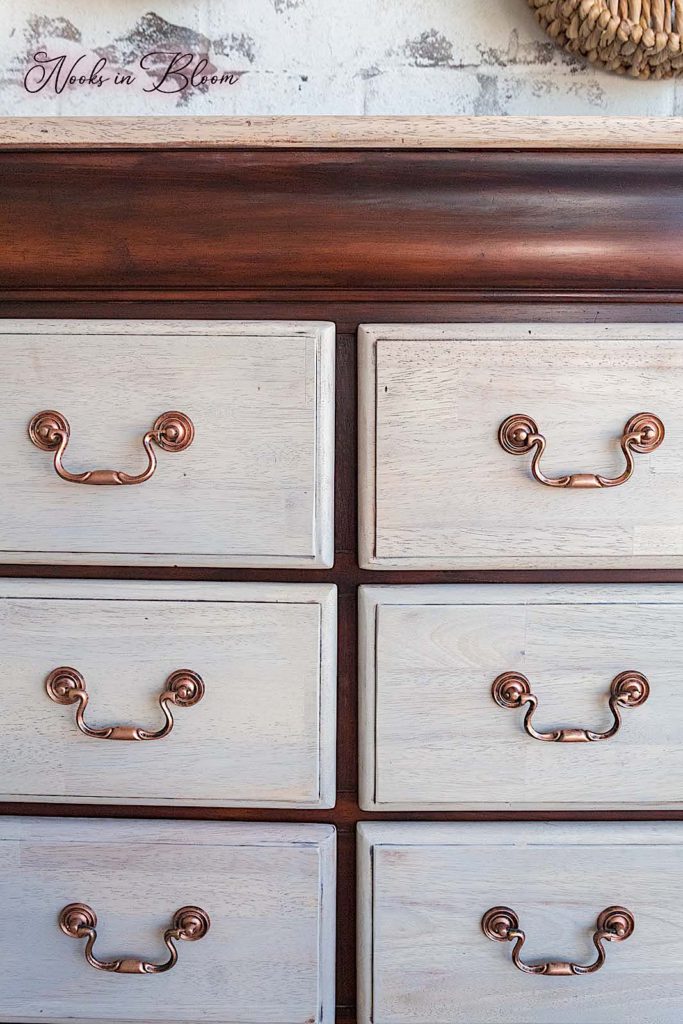
I decided to do the same thing on the drawer fronts since the wood of this dresser was so gorgeous and the washed look enhanced it fabulously.
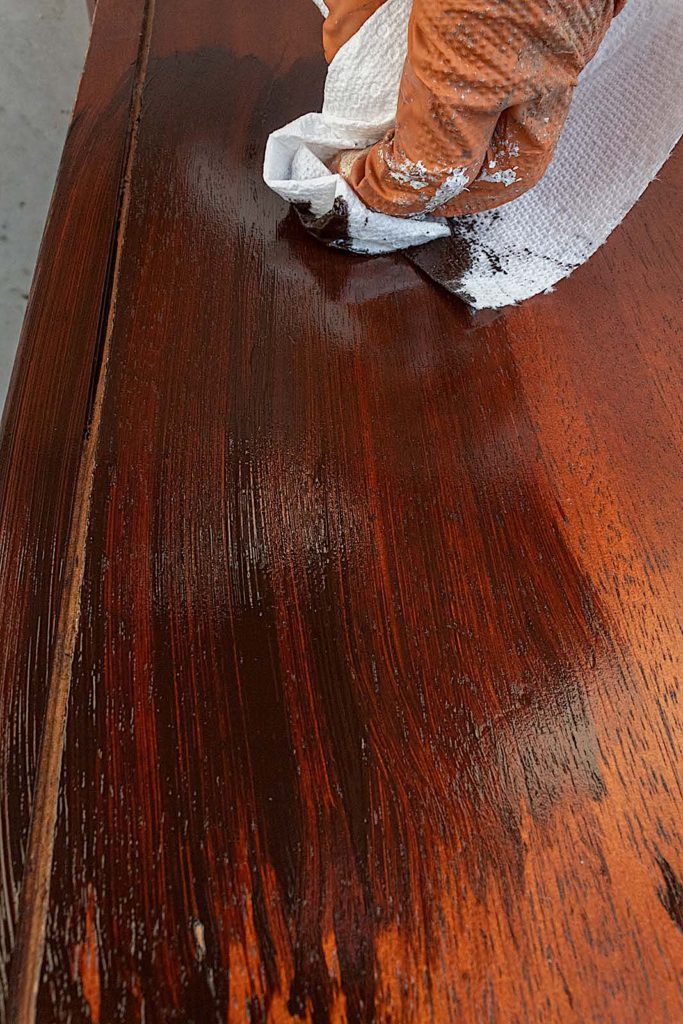
Step 3. Gel Staining
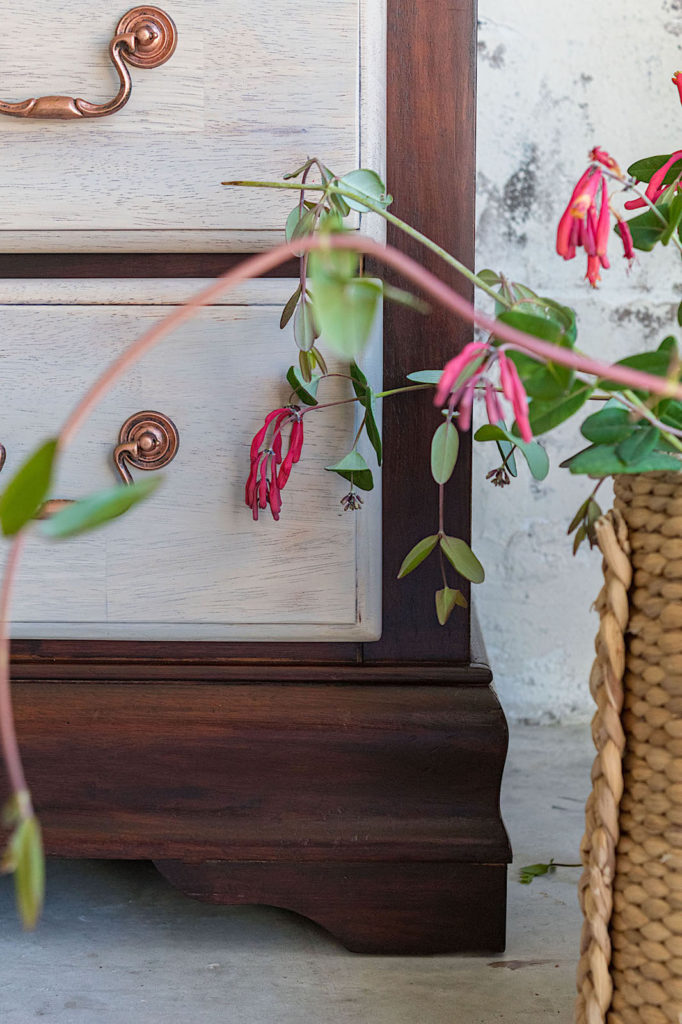
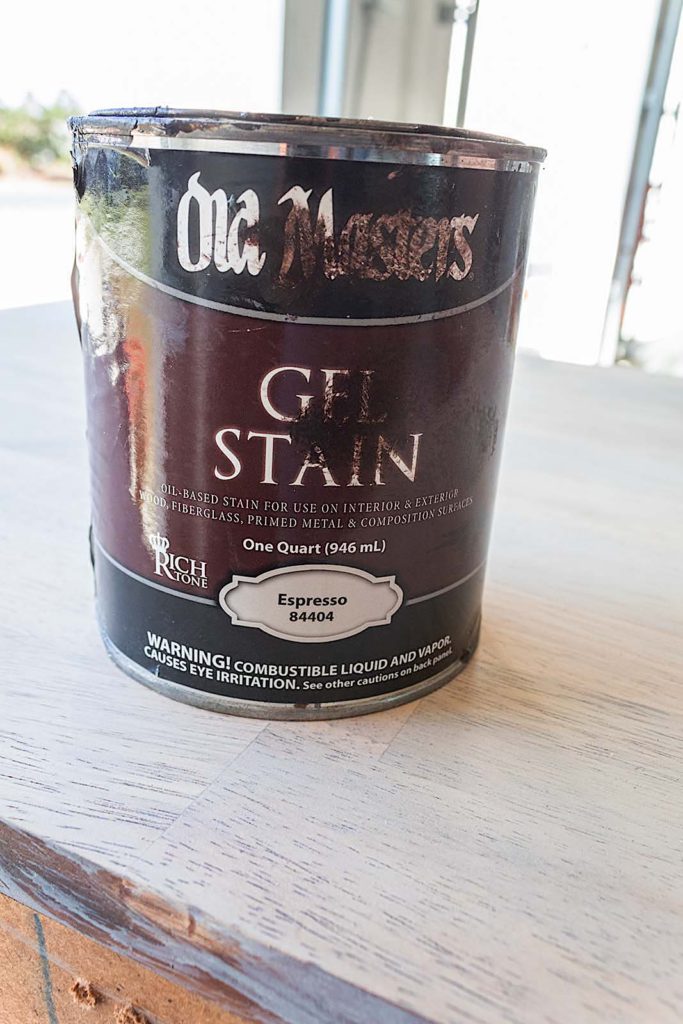
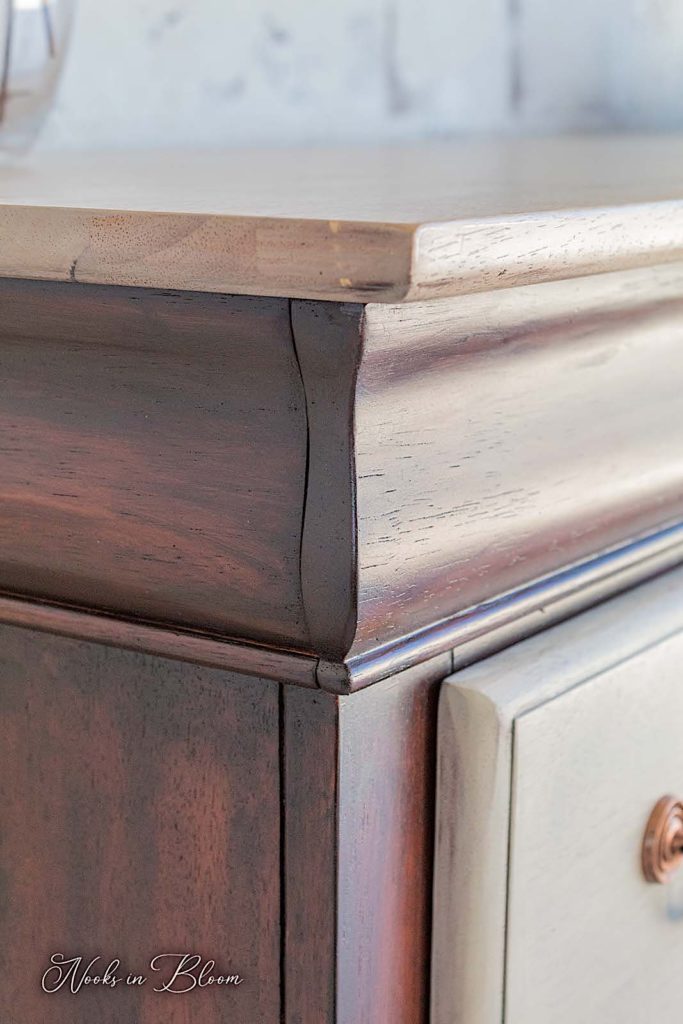
Once I completed all my paint washing, I could finish the rest of the dresser with gel stain. I opted for gel stain for this piece rather than paint because, again, the wood quality of this piece was simply wonderful. I really wanted to preserve this aspect of the dresser. Gel stain is a great way to recondition wood while enhancing with color.
Old Masters makes beautiful gel stains. It can be a little pricey but I will get multiple furniture renovations out of one quart, so for me, it is worth it.
Benefits of Gel Stain over Stain
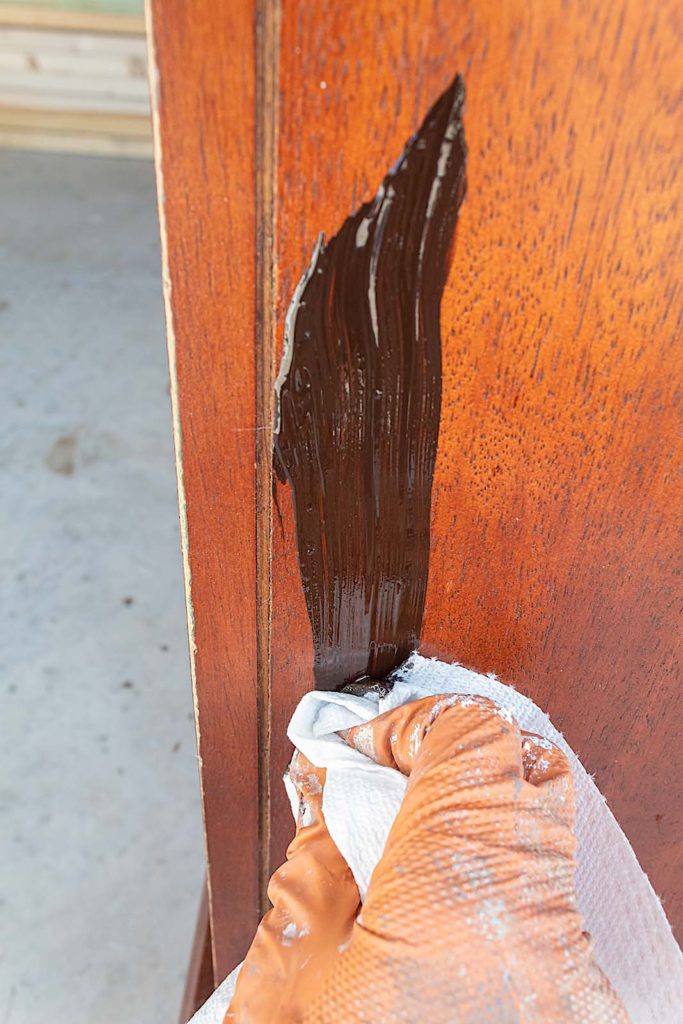
√ You don’t need to sand your surface √ Will help cover up nicks and imperfections √ Helps recondition and revive a prior stained or clear coated finish √ A little goes a long way
You can apply your gel stain with a brush, but I prefer sparing a brush and simply using paper towels with a gloved hand to apply my gel stain. I rub it on in the direction of the wood grain. Then I wipe off any excess with a clean paper towel.
The first coat may look a little uneven so I like to add a second coat. Everything comes together so nicely on the second coat.
Step 4. Final Details
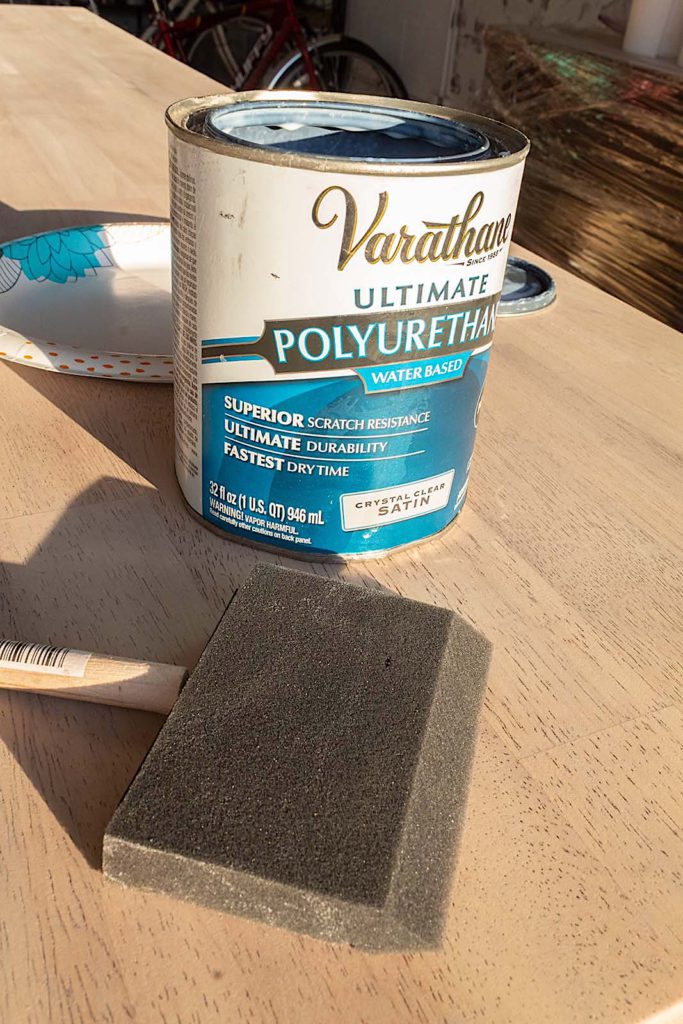
I used clear coat to seal the dresser top and the drawer fronts. You can watch this video I did to see how I get a flawless clear coat on my pieces. If you want to give the gel stain extra protection you can also add a top coat to it.
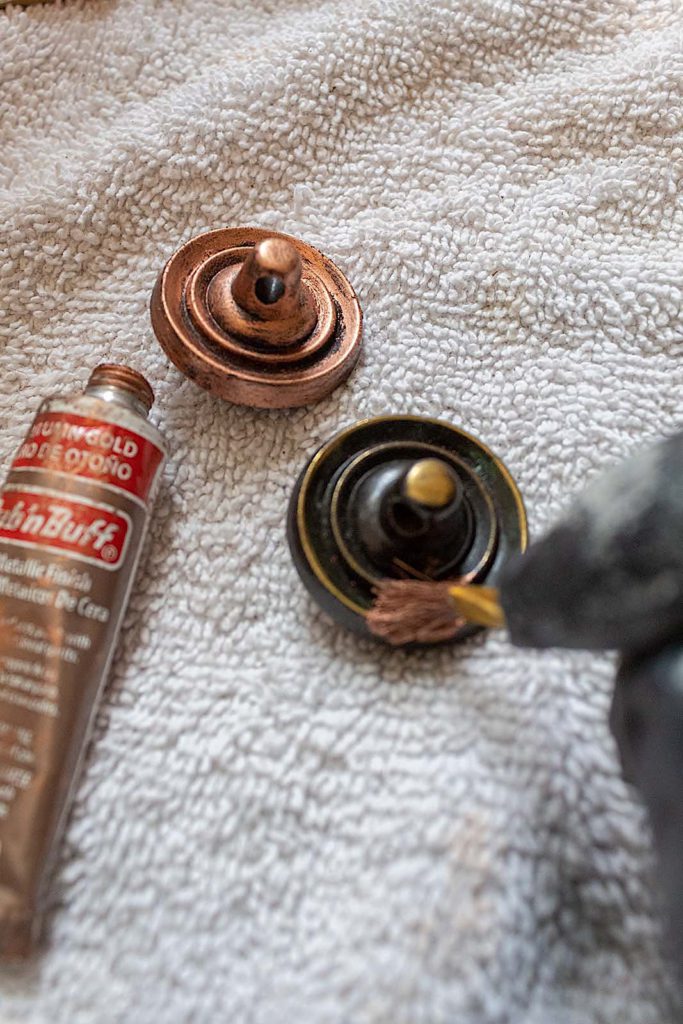
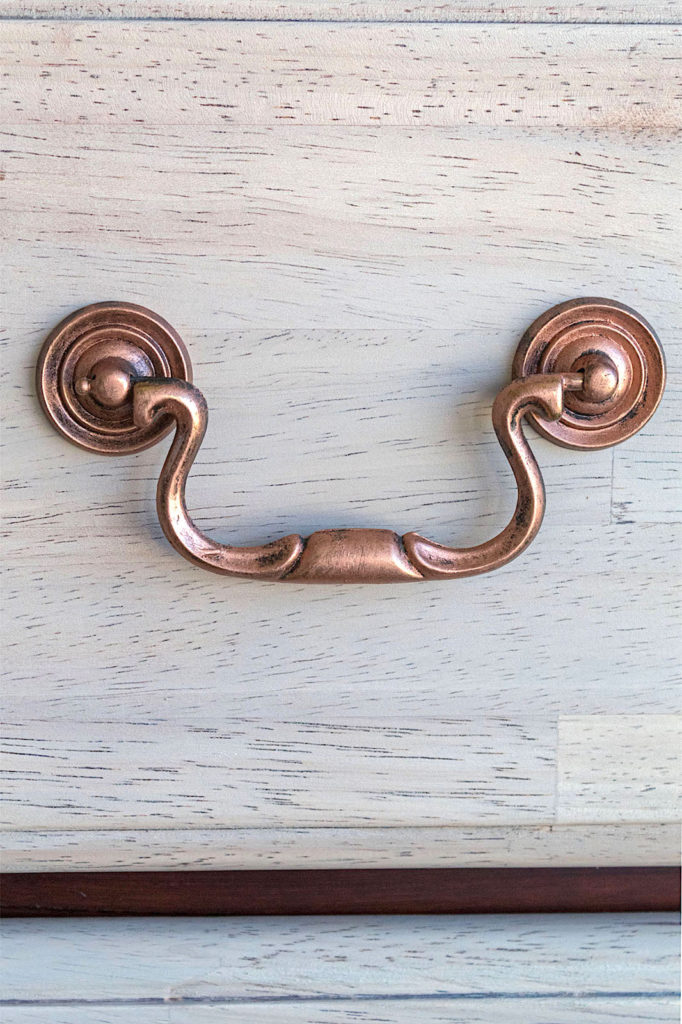
To brighten up the hardware I used Autumn Gold Rub ‘n Buff. This stuff is magical! One coat and the metal is revived with a striking color.
Watch The Video Of This RENO
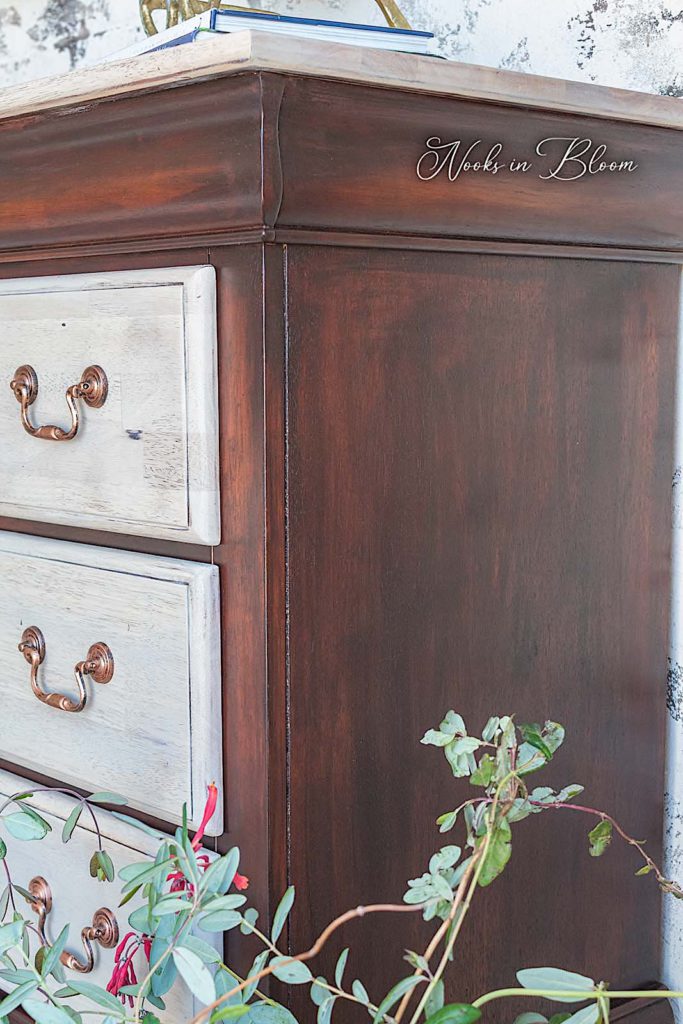
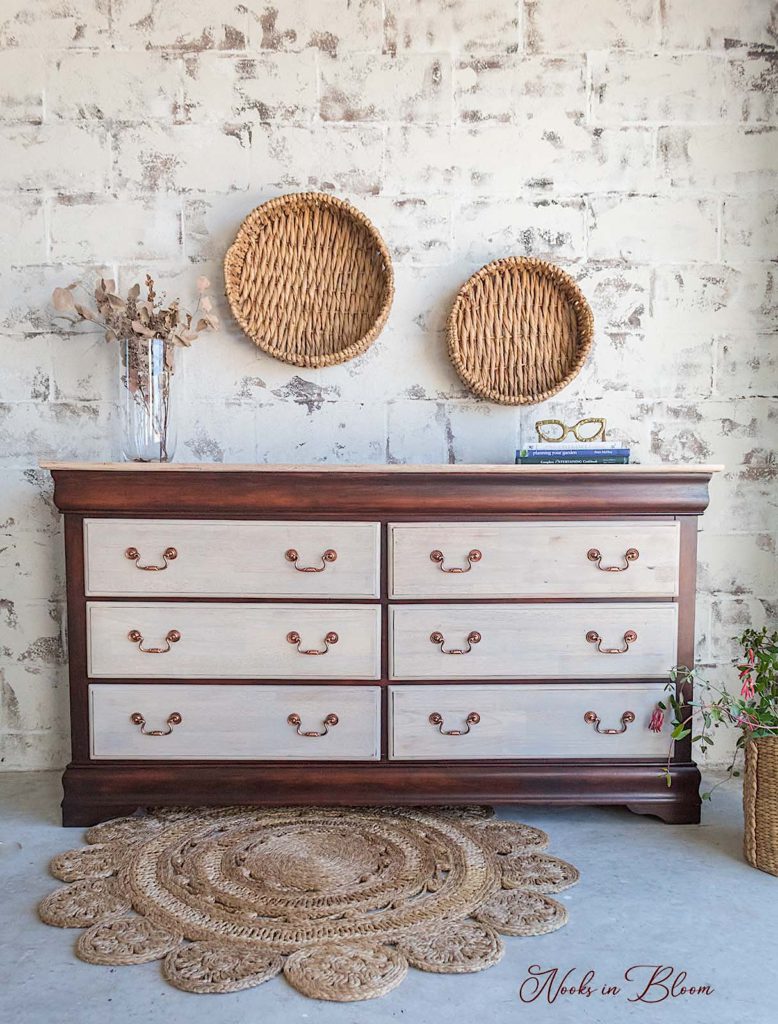
I love the final result of this piece. I’m used to adding layers and patterns to my furniture renovations. I wanted to try something different this time and I’m so glad I did.
The beauty of the raw wood and the contrasting tones of wood work together to create a piece that makes a design statement with its simple, yet elegant aesthetic.
Sweet readers, I hope you liked this renovation tutorial. Let me know what you think in the comments below!
Be sure to SUBSCRIBE at the bottom of this page so you can catch more fun tutorials and I will see you real soon!