Hello sweet friends. In the craziness of moving I’ve accumulated a backlog of posts that I’ve been dying to share with you!
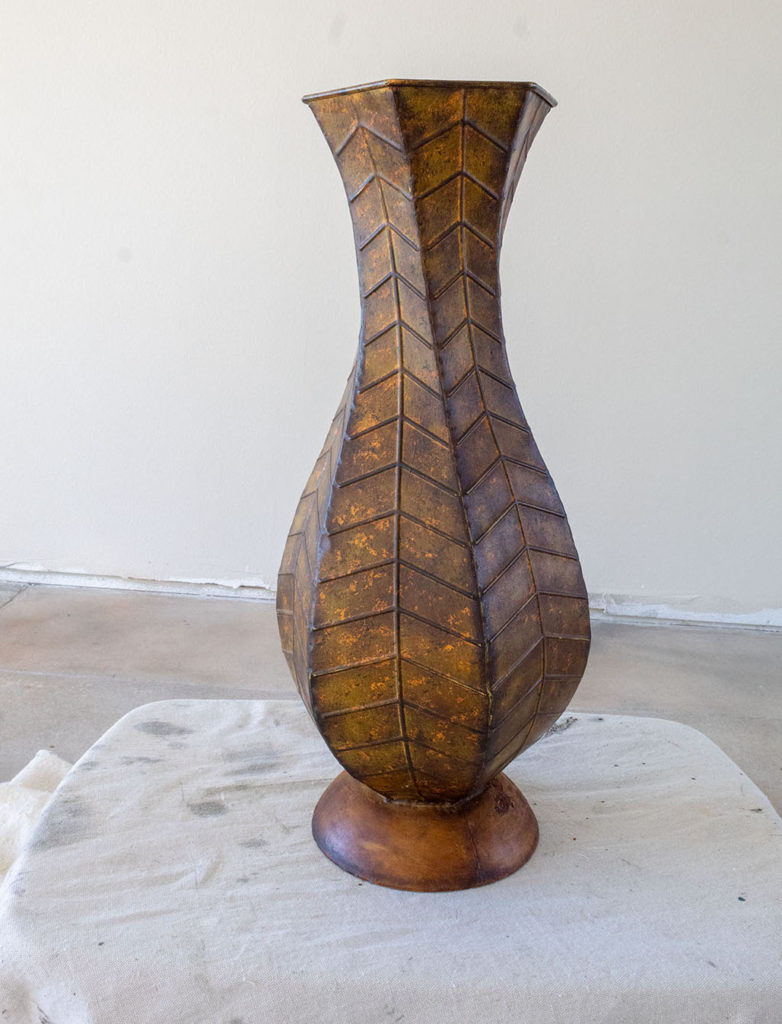
Some of you may have already gotten wind of this thrifted vase tutorial from my Youtube channel. The transformation of this dated, rusty vase was incredibly quick and easy while using only a few materials. You can use this technique to update decor around the house. Take a look at what the vase looked like before.
This vase was SO orange I couldn’t wait to change up the color. And pieces of its surface were chipping off to expose areas of rust. I got it for $4 and I really liked its size and shape. I knew I could work with the rest of the scariness to make something pretty.
Disclosure: Some of the links provided are affiliate links. By purchasing through these links it supports this blog and the work we do and there is no extra cost to you. If you would like to read our full disclosure, click HERE.
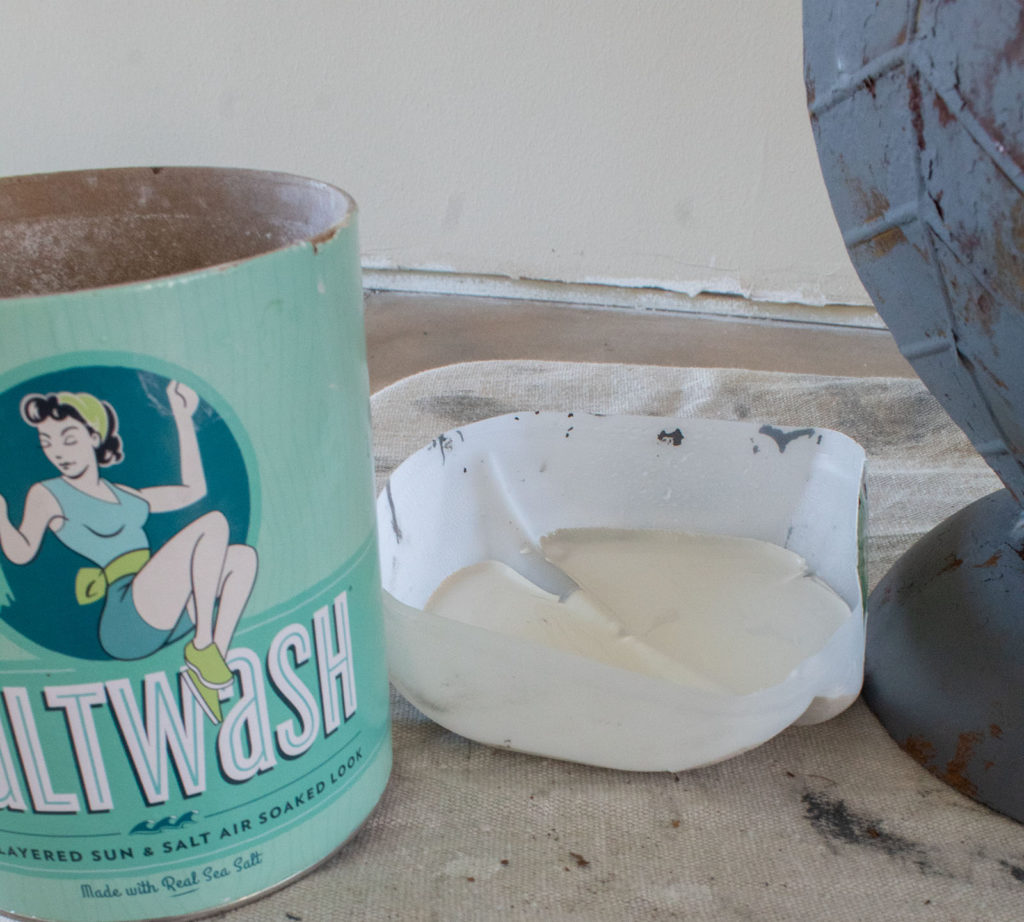
Enter Saltwash
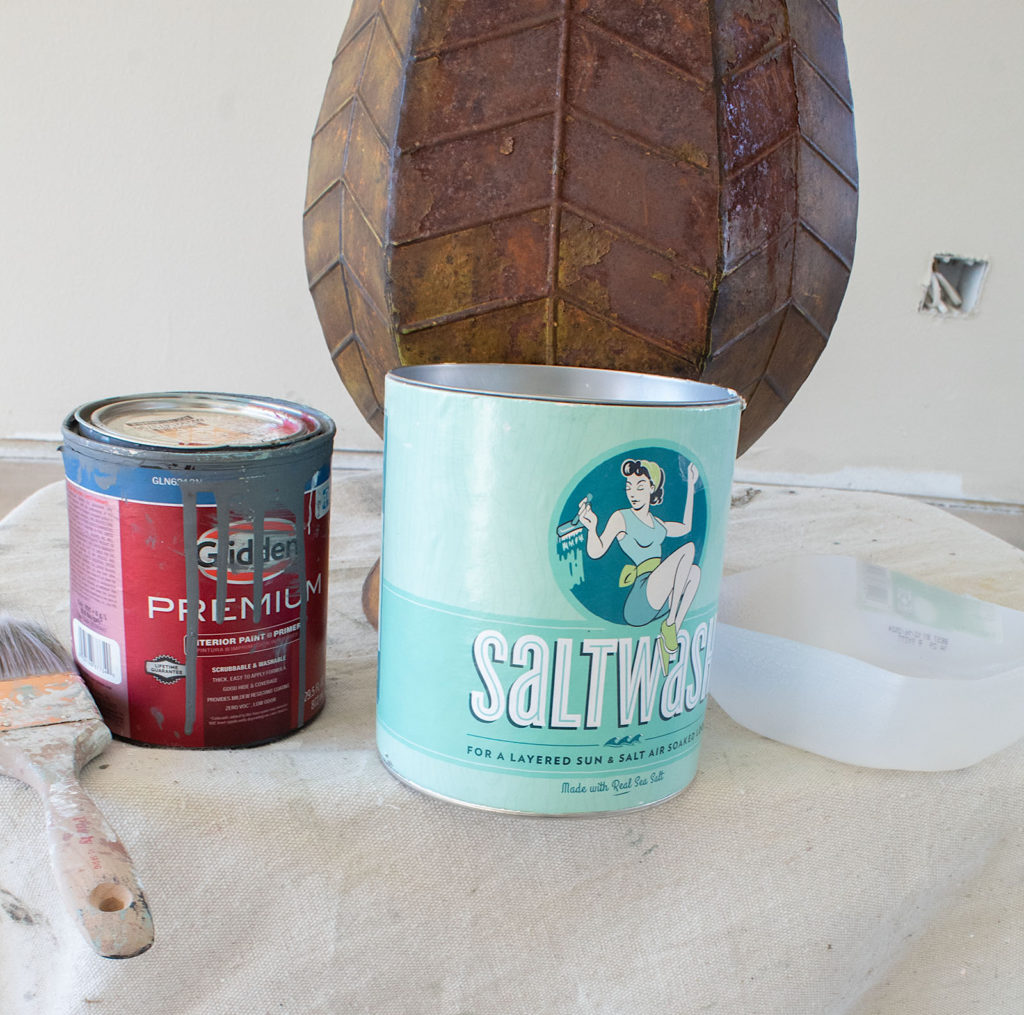
Today I’m using one of my favorite products, Saltwash, to add beautiful texture to this vase. You may have seen me using this product when I gave the kitchen in our previous home a gorgeous Tuscan-inspired wall. I love how Saltwash, combined with paint, creates an appearance of something worn over the years. Its an instant ager!
Let's Get Started!
Materials:
√ Weathered White and Antique Tin Paints By Behr, made into chalk paint using this recipe √ Saltwash (use this link for 10% off) √ 2 Purdy paint brushes √ Plastic spoon √ 2 disposable mixing bowls
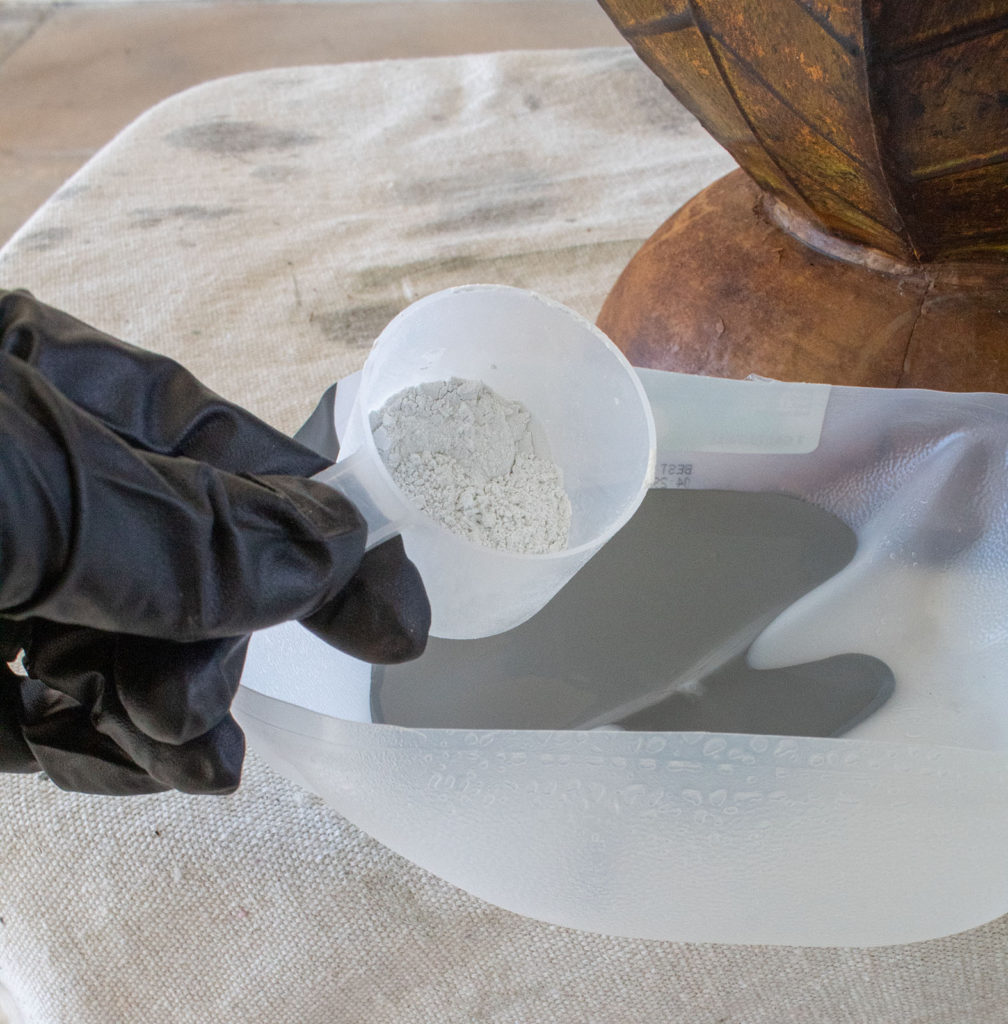
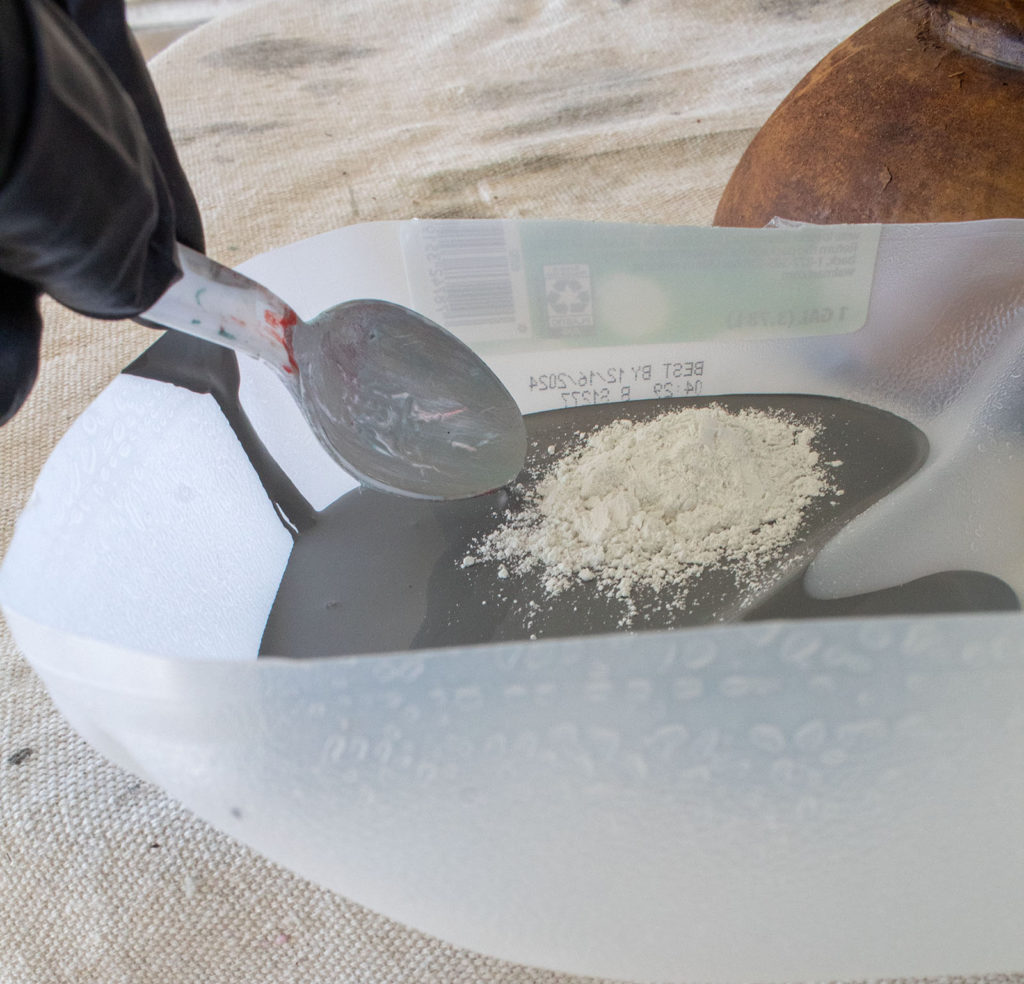
Step 1. Create The Saltwash Mix
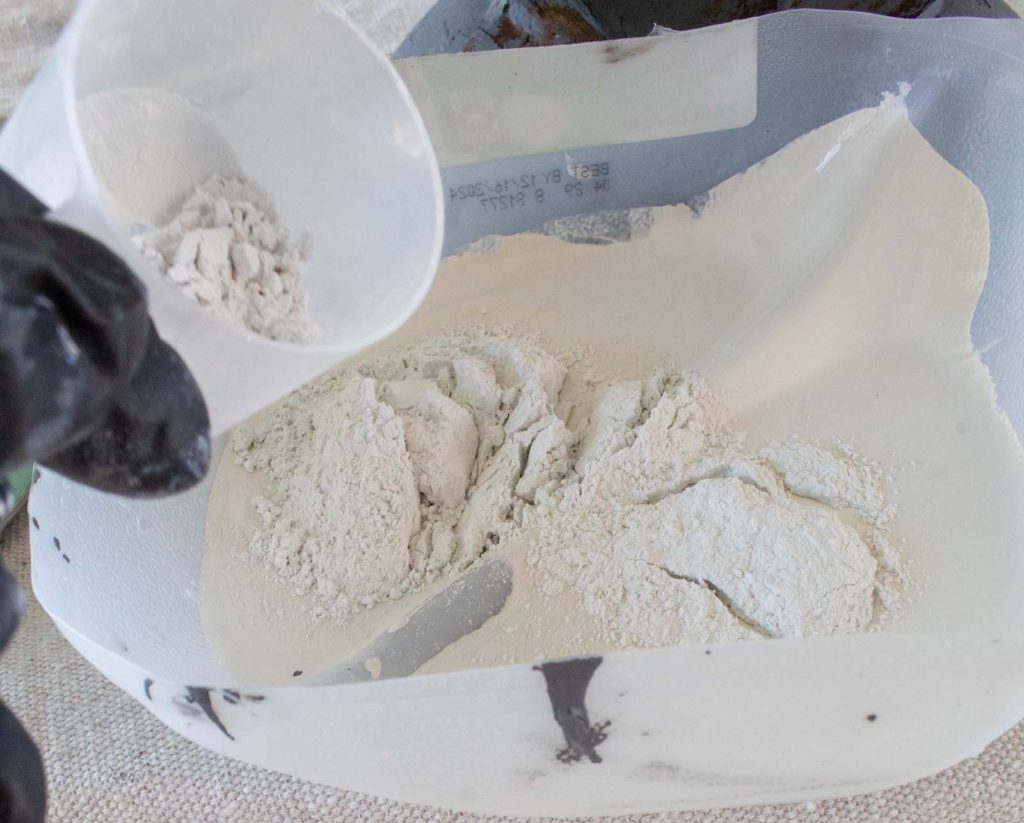
To begin I’m going to pour approximately equal parts paint to equal parts Saltwash in a disposable mixing bowl. I’m using the Antique Tin color as my base color on this base.
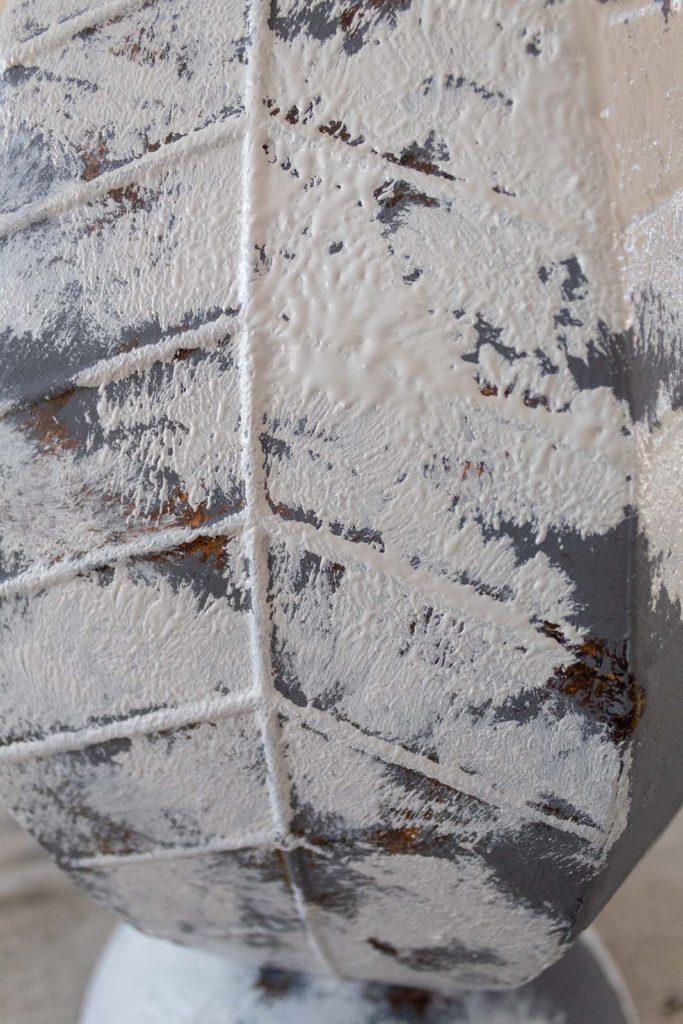
The Saltwash is a grainy powder and when mixed with the chalk paint it will make the paint slightly course. The more of the Saltwash you add, the thicker and more course the mixture will become.
I’m adding enough to get some elevation and texture on the surface of the vase, but I’m not overdoing it with a clumpy mix. This is not necessary for what I have in mind today.
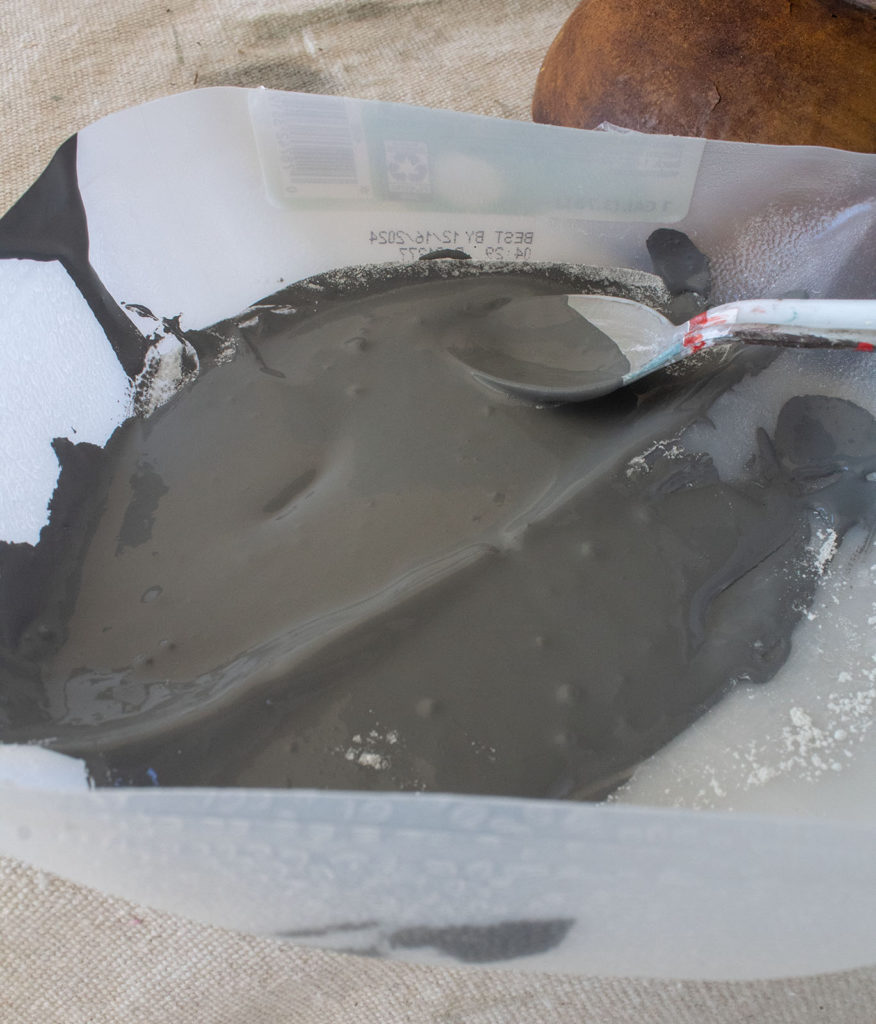
I mix the paint and the Saltwash together real well. You will see some of the granules in the paint. This is what you want to see.
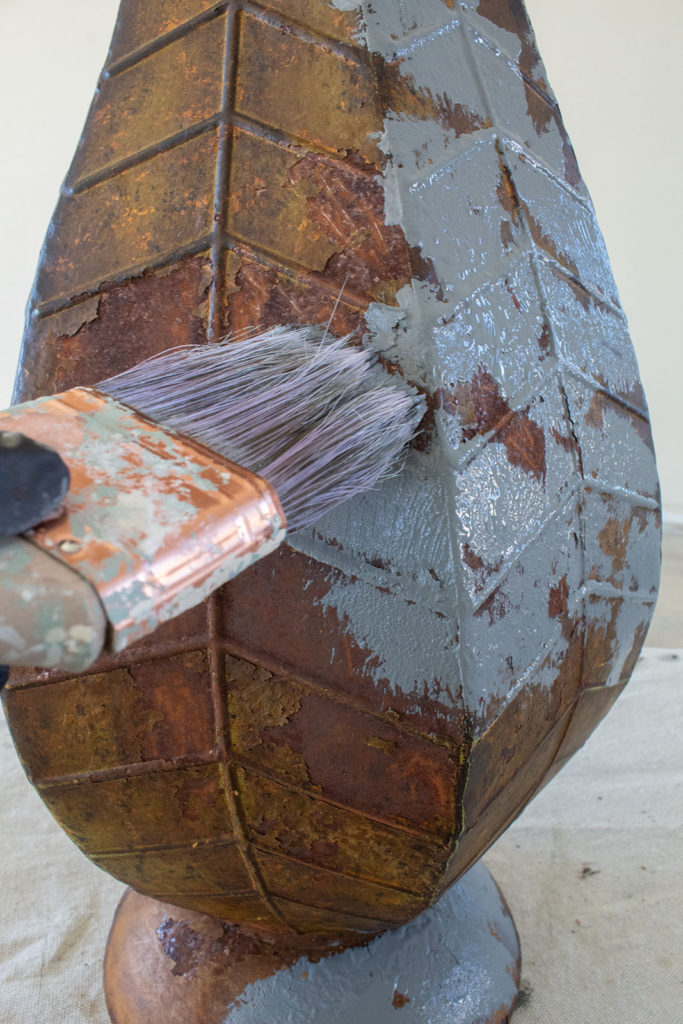
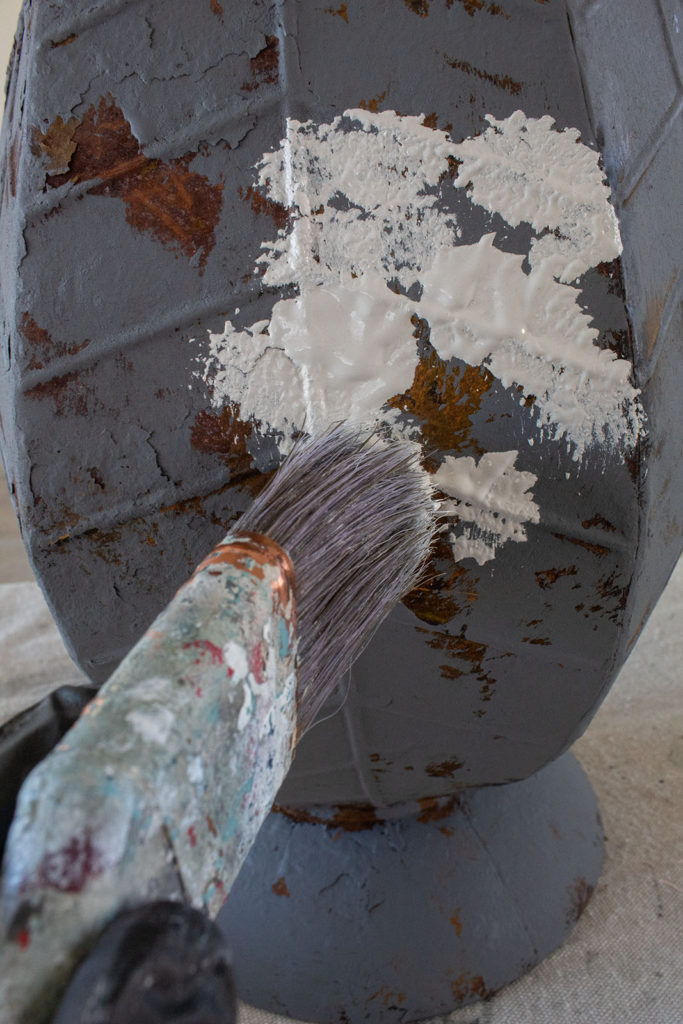
Step 2. Apply The First Layer of Paint
To create a more textured look on the vase, I use my Purdy brush in a tapping up and down motion all around the surface. I leave some of the orange parts exposed. This will help create more dimension in the aesthetic.
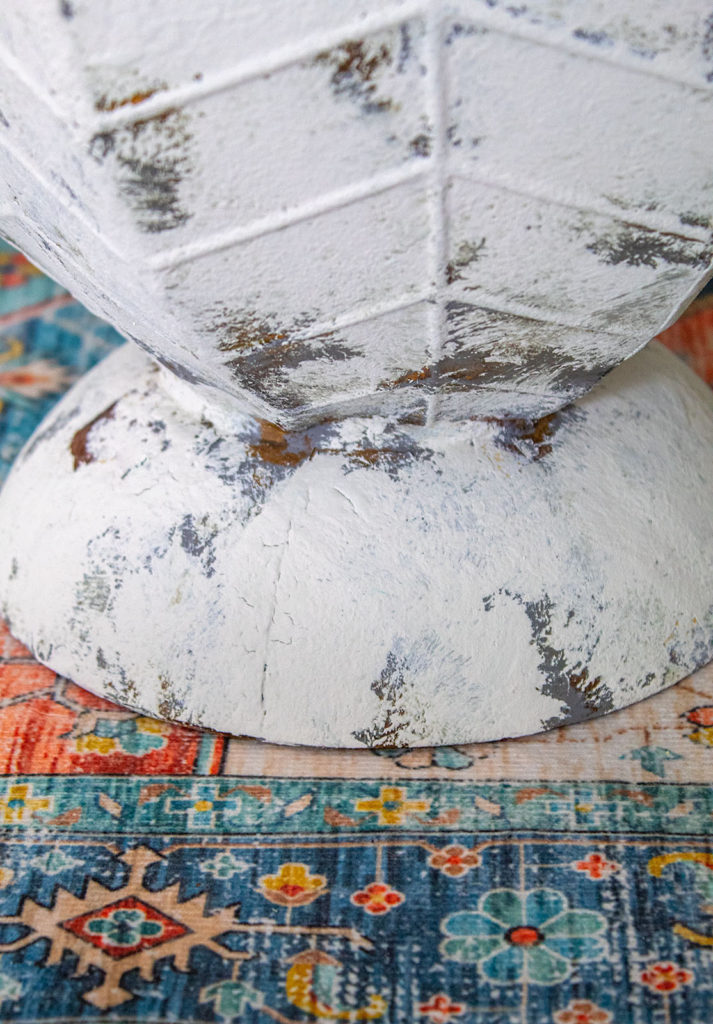
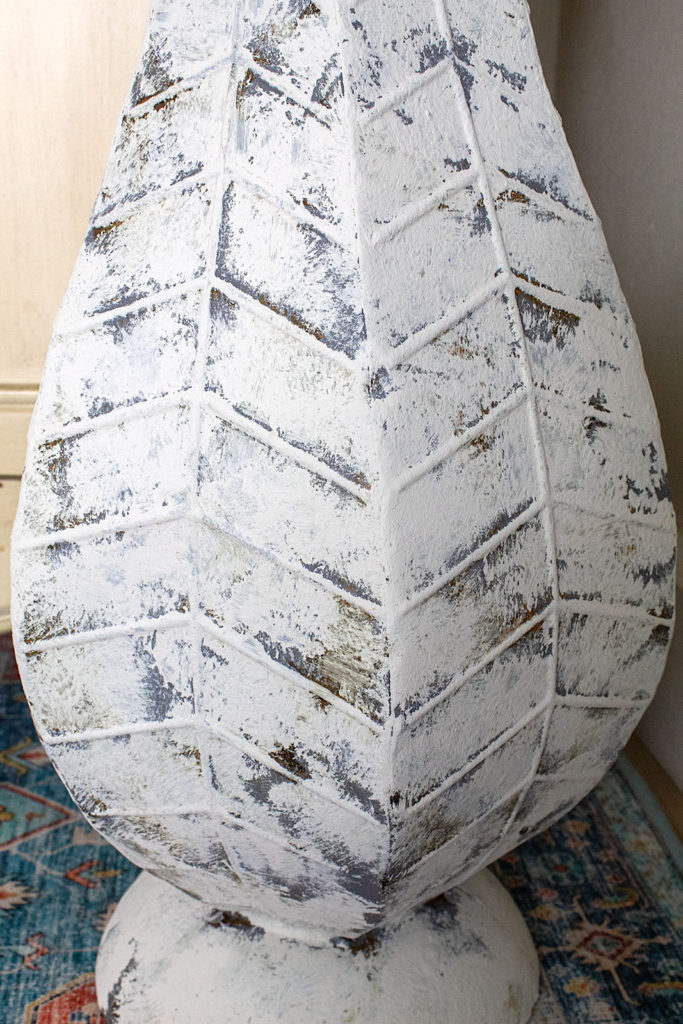
I’m really happy with how the vase is looking after just one coat of paint. Already it is transformed into something different. I like how the gray and the rusty parts work together to give the vase a chic weathered appearance.
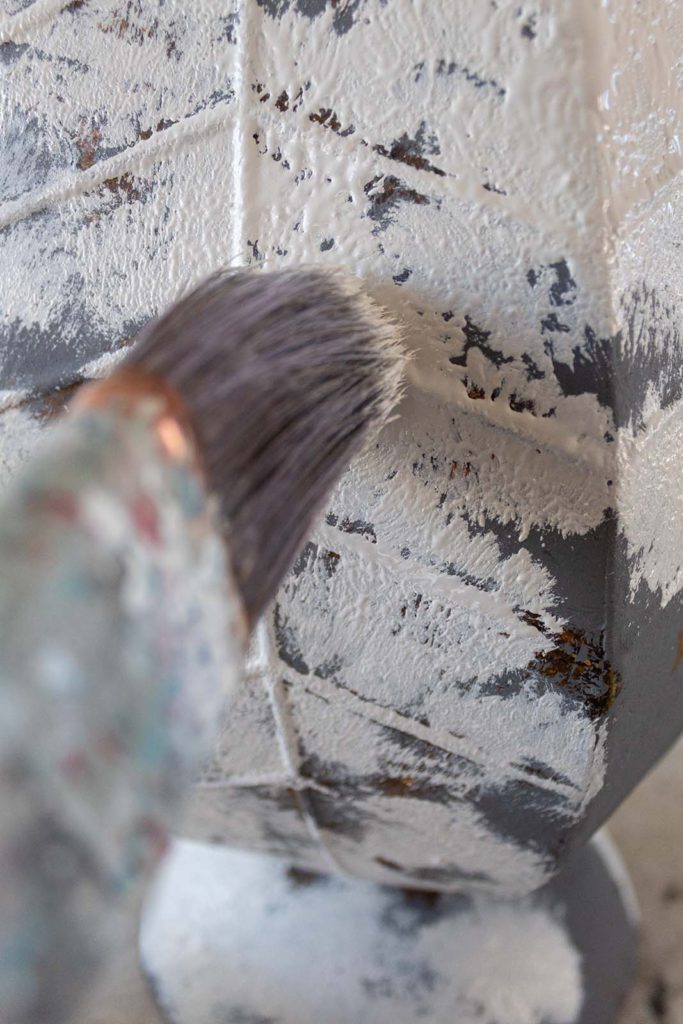
Step 3. Add The Second Layer of Paint
Next, I’m going to do the same thing to my Weathered White paint. I’m going to add some of the Saltwash and mix it all together.
I don’t need large amounts of paint for this project. A little chalk paint tends to go a long way. And I love that my Saltwash jar is so big. I bought mine about a year ago and multiple projects later, I still have over half a jar left.
I begin applying my white paint with the same hitting motion of my paint brush. You should see peaks forming in parts of your painted areas. This is due to the thicker, grainy consistency of the Saltwash.
If you notice that the peaks begin to sag and possibly drip downwards, you can simply take your paint brush tip and tap on them once or twice. This will flatten them out enough to not drip anymore, without losing the textured look we want.
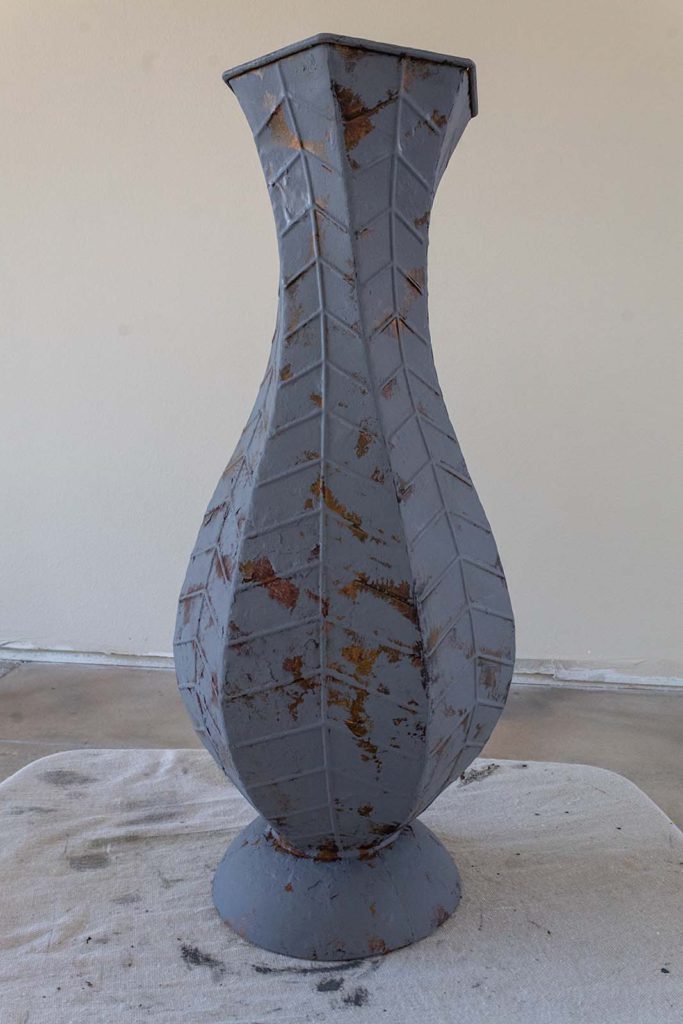
Once I finish applying the first coat of white paint, I let it dry for about 20 minutes. Then I apply a second coat in parts where I want to make the areas a bit more vivid.
The different hues on this vase, the orange-rusty color, plus the deep gray and the white, all work together magnificently to create something out of a French country scene. I love the subtle color palette and how the Chevron pattern of the original vase adds even more character to the finished piece.
**If you don’t want to worry about eventual rust marks coming through your paint, (this happened a few months down the road on my vase), you could always apply an anti-rust clear coat to the surface before you begin painting.**
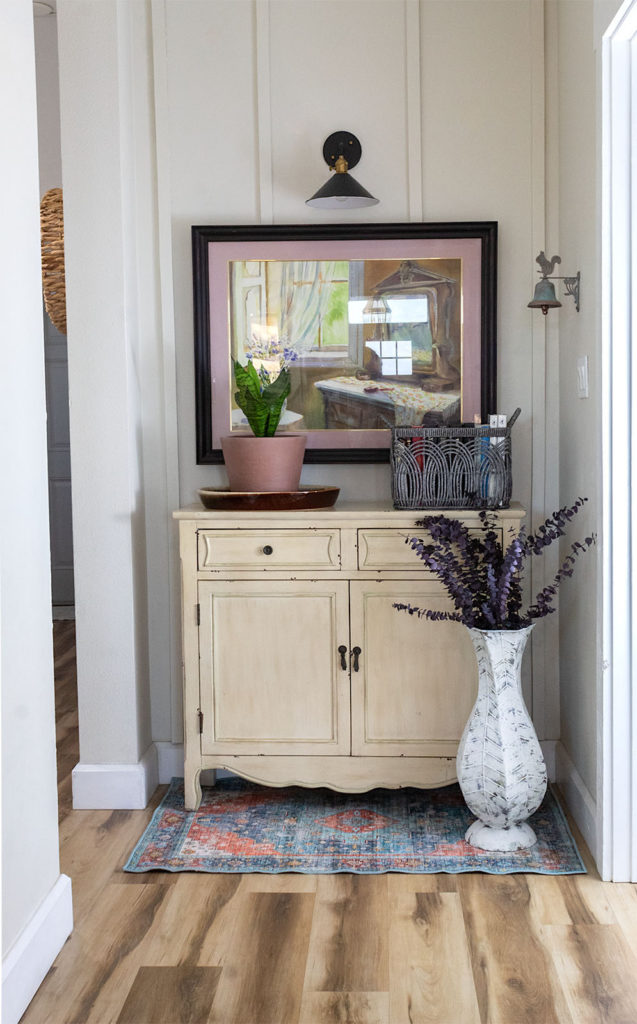
This project was right up my alley—fast to complete and with only a few materials. In less than an hour this vase was given a fabulous new look.
You don’t need to spend a ton of money to have pretty decor around the home. Let me know what you think of this tutorial! Be sure to browse the blog for all of my free home decor tutorials.
Thank you for following me friends and I will see you again soon!