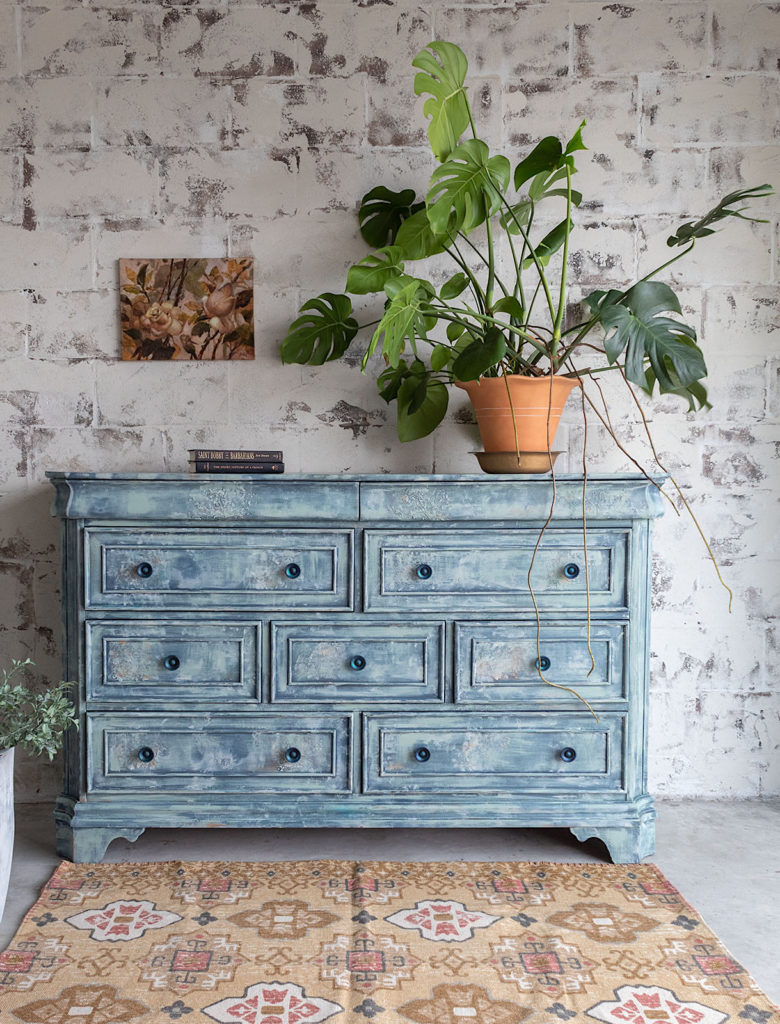
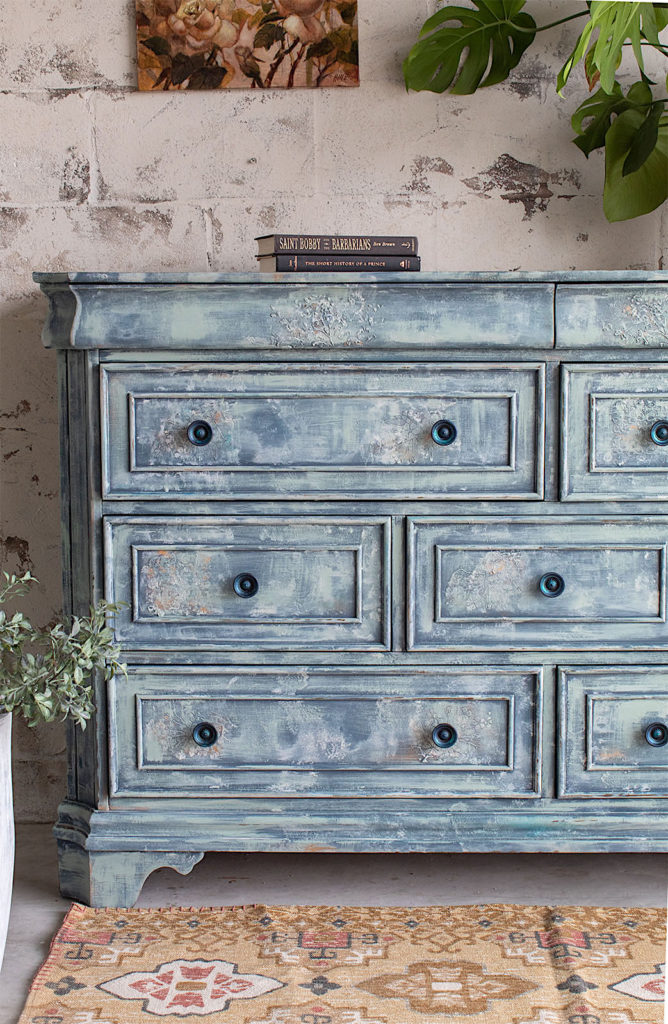
Hello fabulous friends! Refinishing this dresser ended up being more work than I expected. My original vision didn’t quit pan out and off I went down a creative rabbit hole. The good news is, the extra effort paid off. I absolutely LOVE the final finish. It truly is a unique and stunning visual if I do say so myself!
When creating art it is bound to happen. The art piece or in this case the furniture piece, may have different plans for your vision. I’ve learned to just roll with it. Feel out what the piece is saying to you at each step. Are you getting a “wow” or simply a “meh.” I actually enjoy these challenges. They get my creative juices flowing…
Now I hope I haven’t scared you away talking about the struggles of furniture renovating. The good thing is you learn new techniques each time you refinish a piece. And today I’m sharing all the great techniques I used to achieve this vintage-inspired finish. You will not want to miss it!
Disclosure: Some of the links provided are affiliate links. By purchasing through these links it supports this blog and the work we do and there is no extra cost to you. If you would like to read our full disclosure, click HERE.
Let's Get Started!
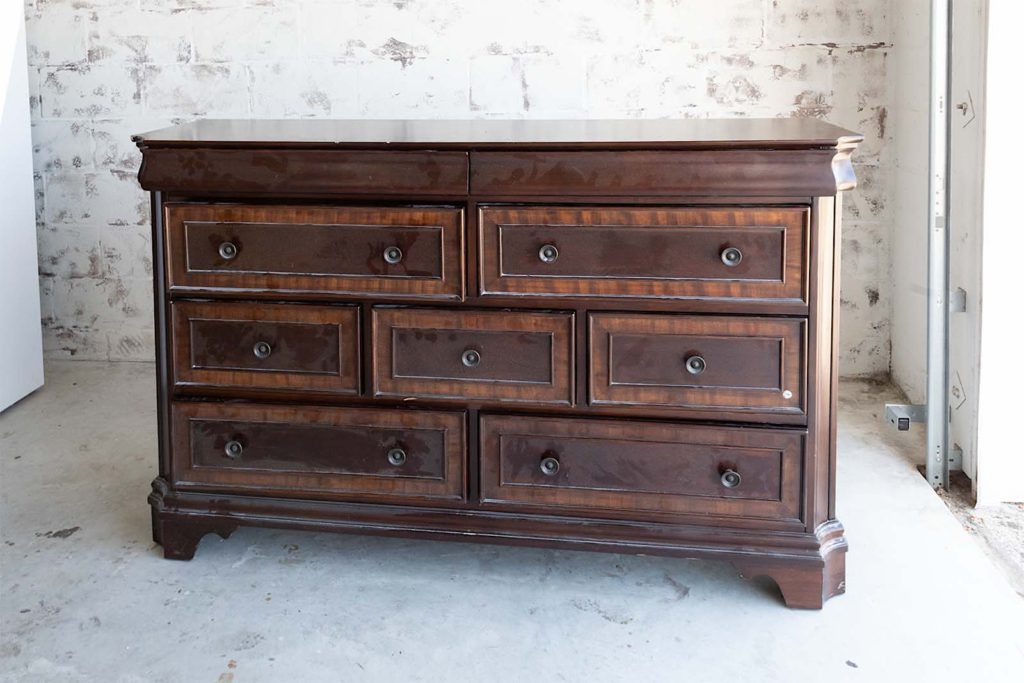
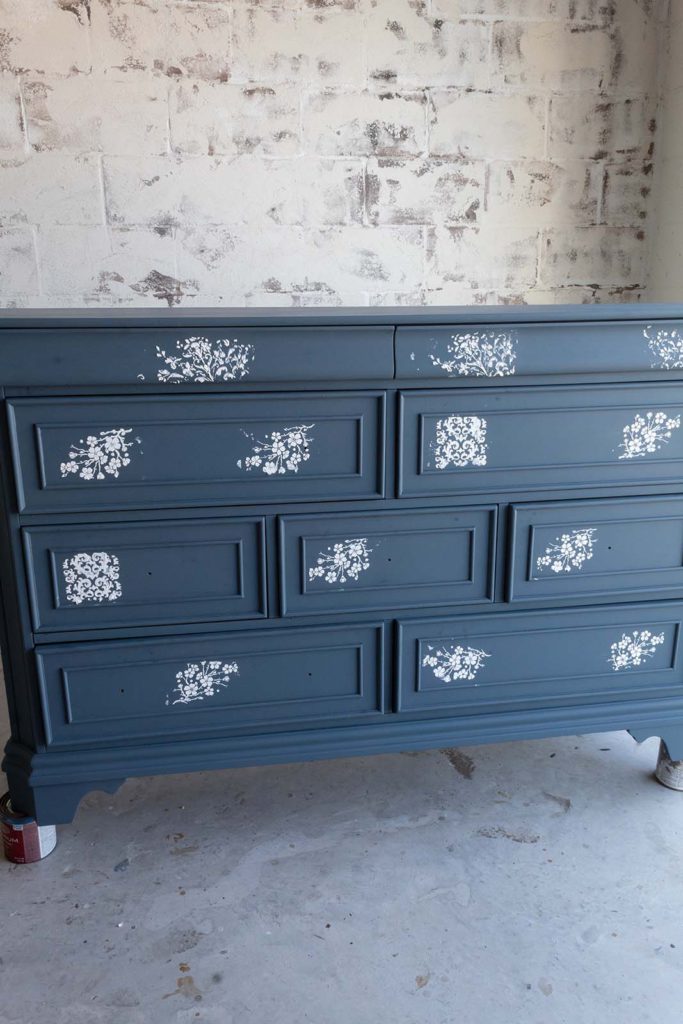
This is what the dresser looked like when I got it off of Facebook Marketplace. It needed a thorough cleaning, a new bottom board, and several nicks filled in. Other than that, it was pretty solid.
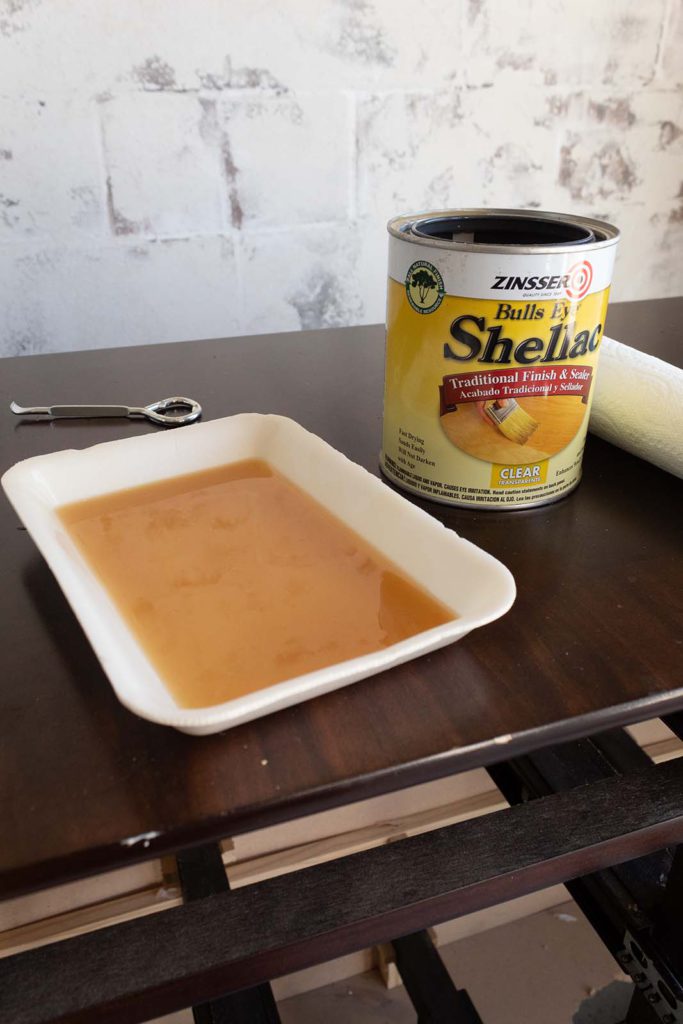
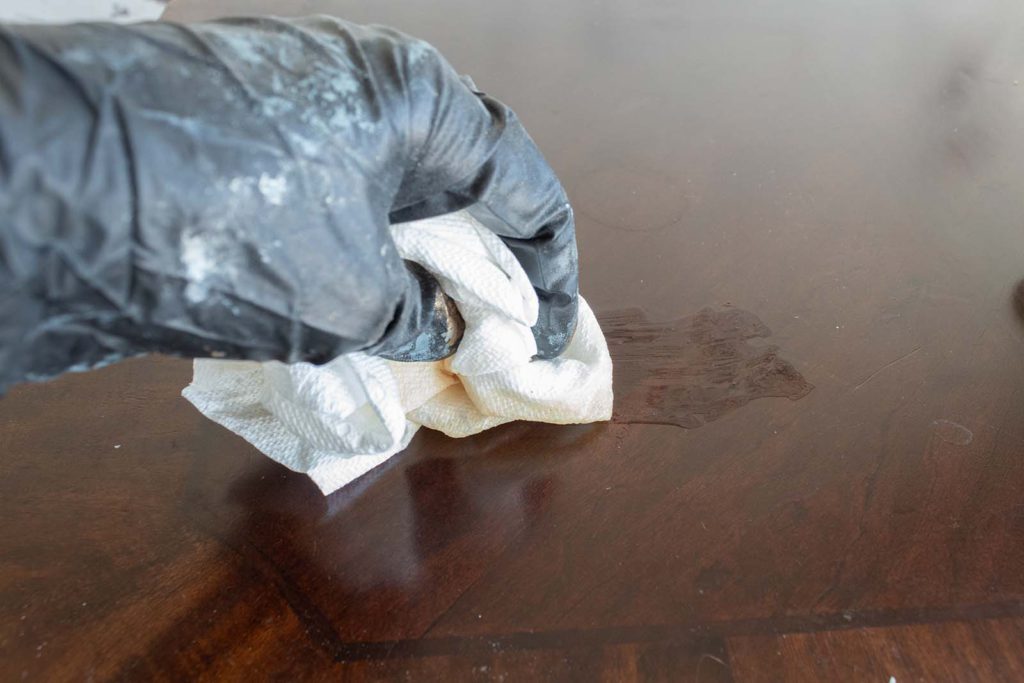
Step 1. Prime
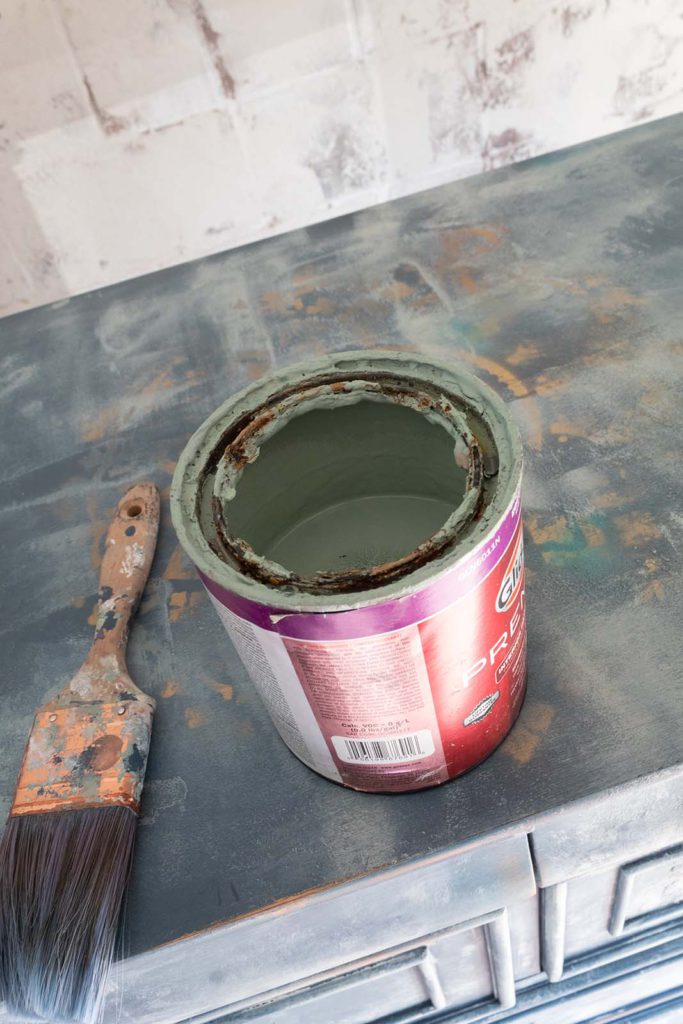
I used shellac to prime the dresser. It’s my go to primer these days. It’s easy to apply (rub on with paper towels) and it dries very quickly.
Step 2. Apply 1st Coat of Paint
Today I’m trying out a new color by Behr. It is called Undersea and it is a gorgeous, grayish blue. I’ve made it into chalk paint with my favorite recipe.
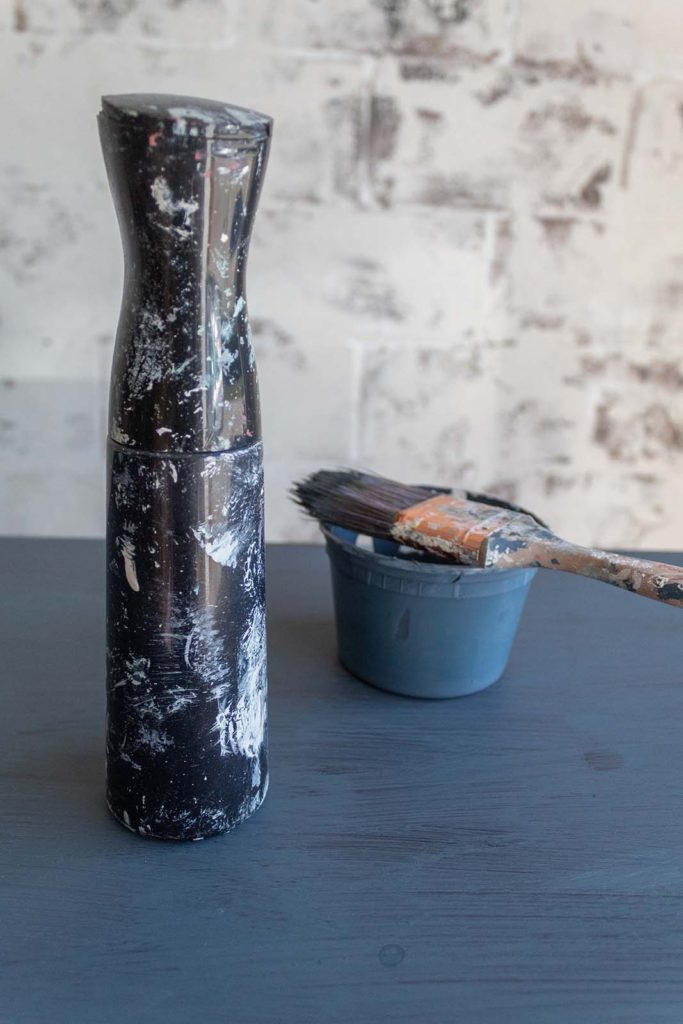
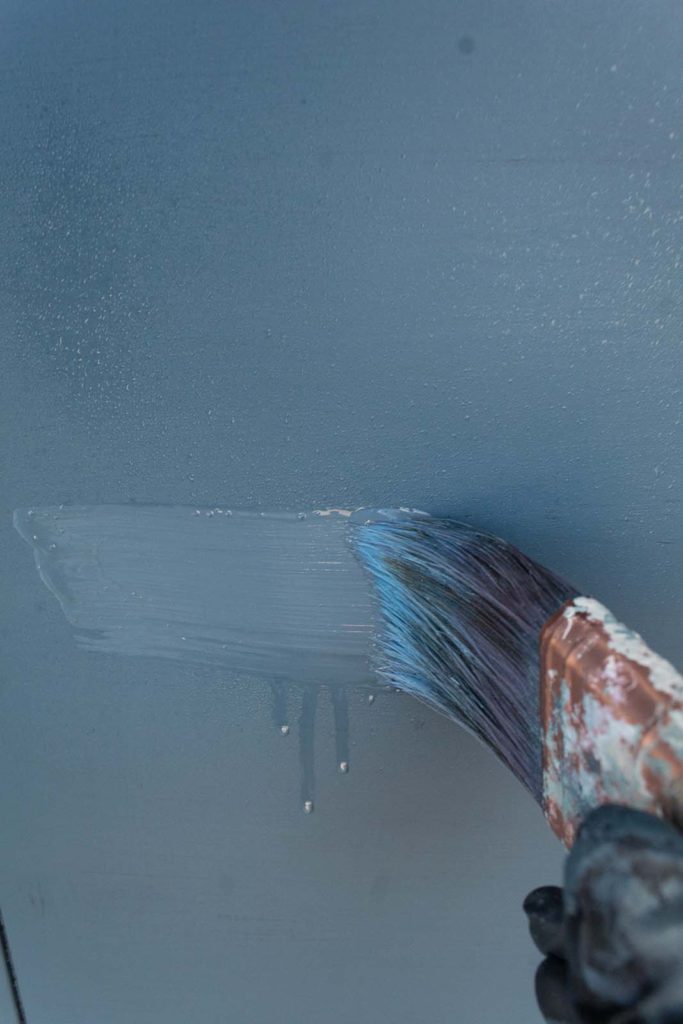
Using my misting bottle, I’m going to moisten the surface a little prior to brushing on the paint. I work in small sections and moisten as I go. This is the best rhythm I’ve found for applying chalk paint.
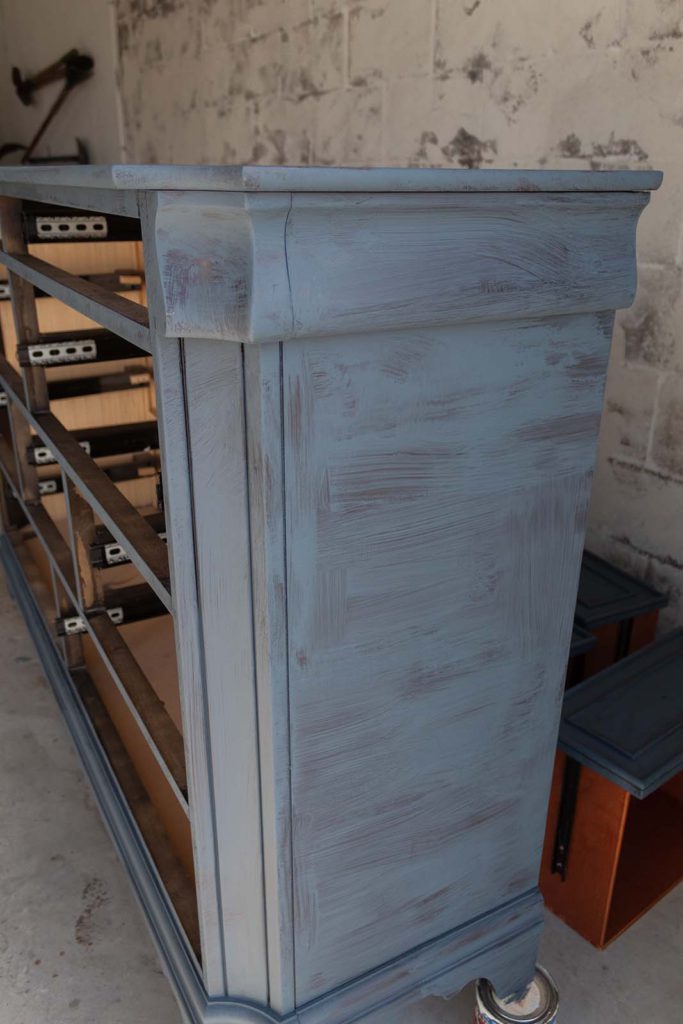
The first coat is going to dry a little streaked. That’s expected. Don’t stress about your first coat. Just get the paint on.
The dresser after 1 coat
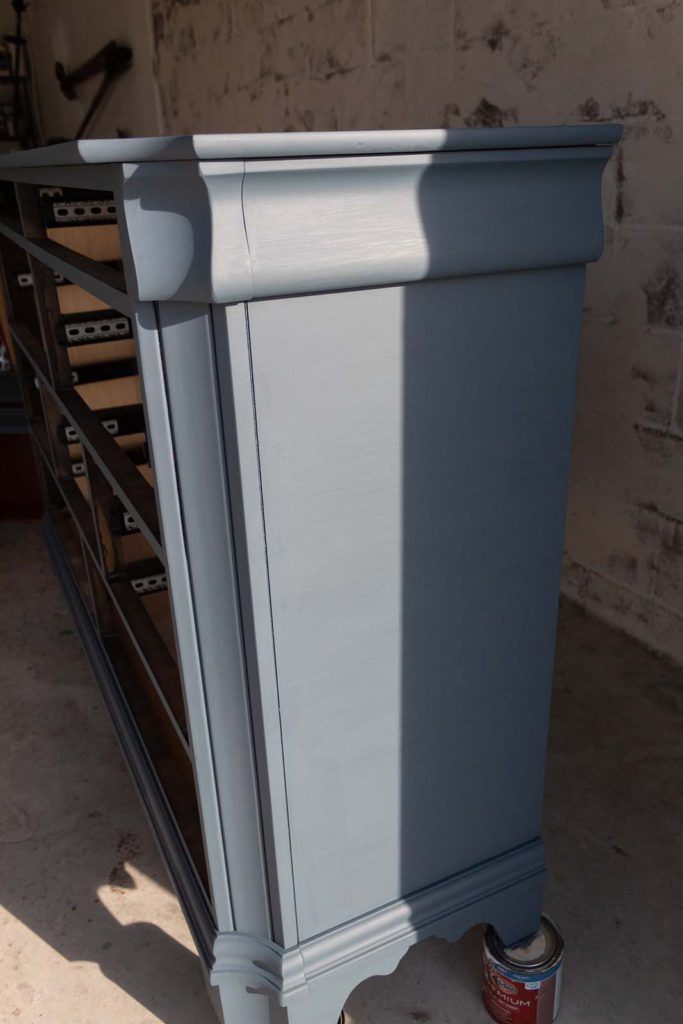
Step 3. Apply One or Two More Coats
I allow some dry time in between coats and add a total of three coats of the Undersea color. The good thing is that chalk paint dries fairly quickly so I was able to get three coats on in a short period.
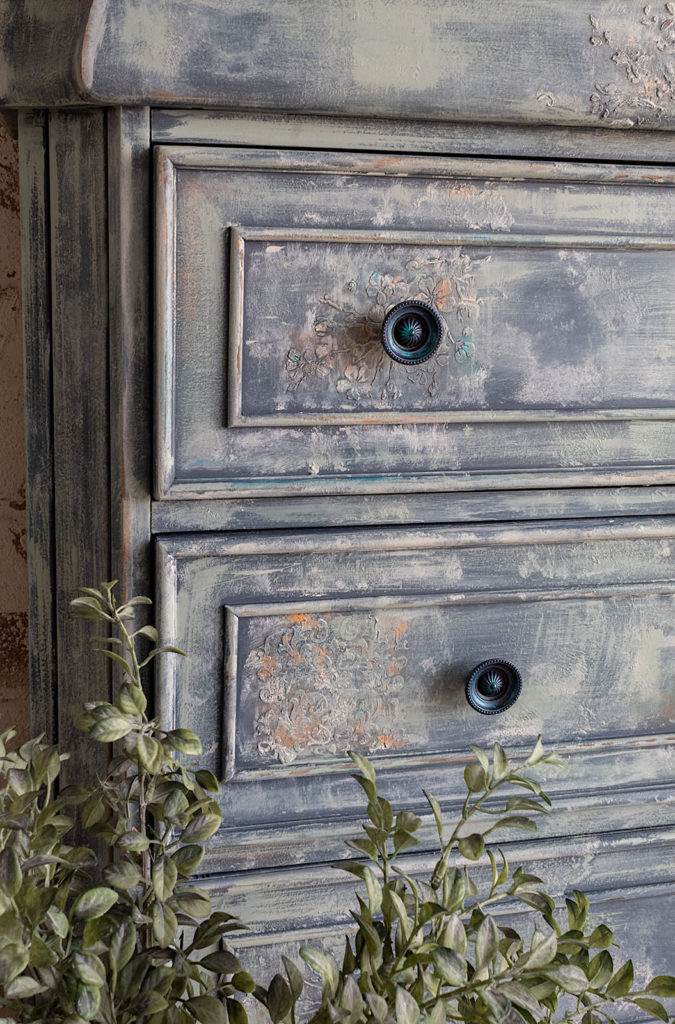
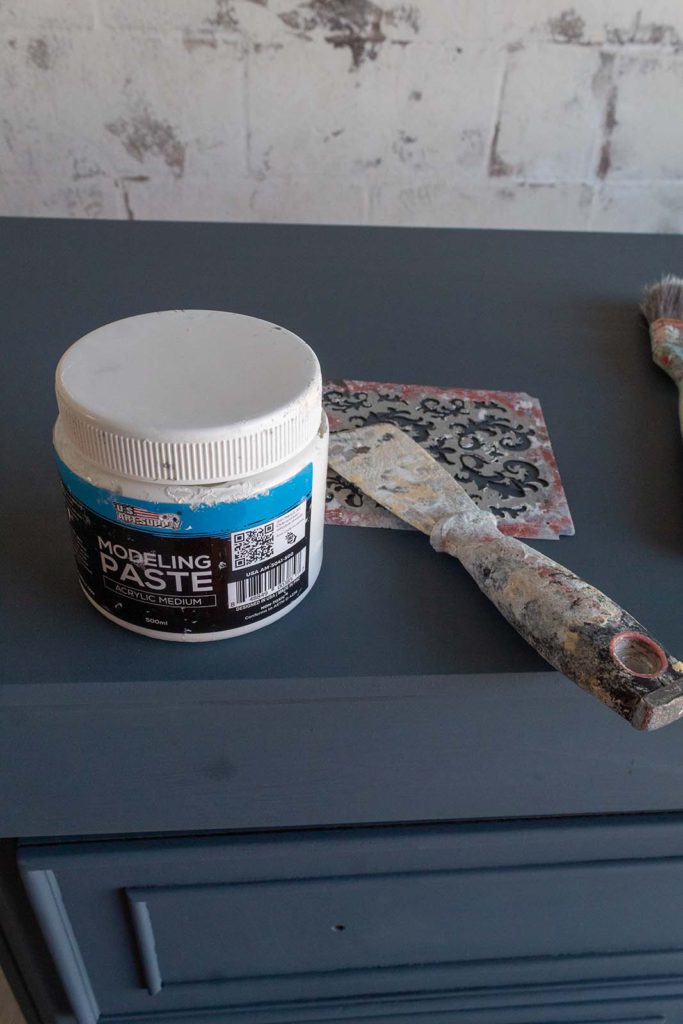
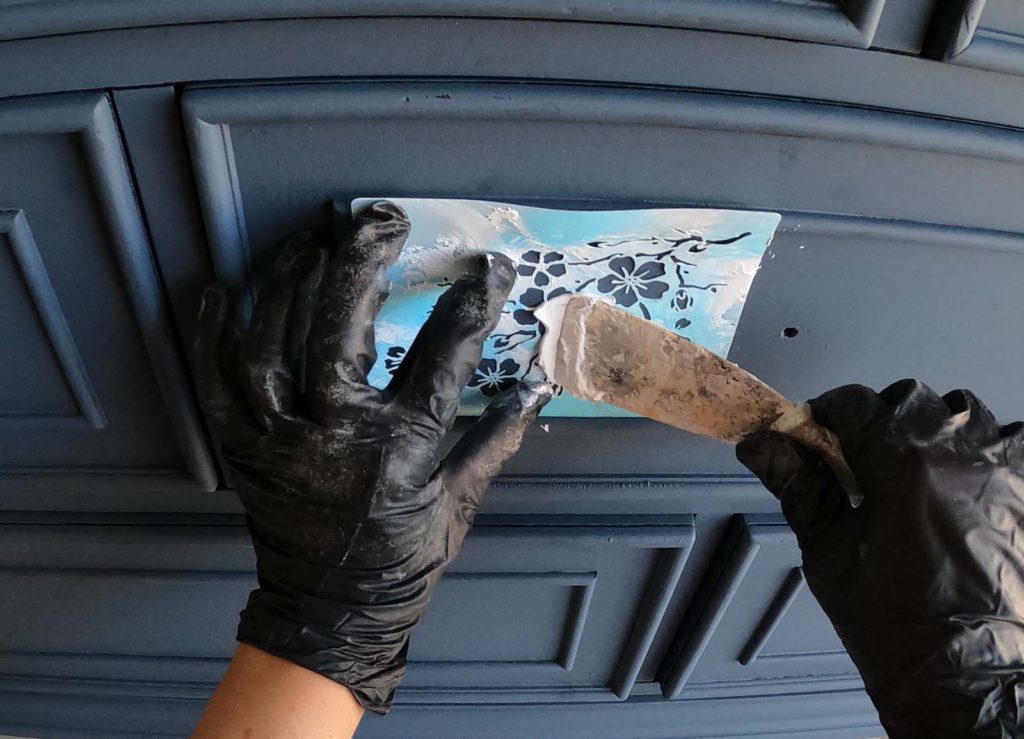
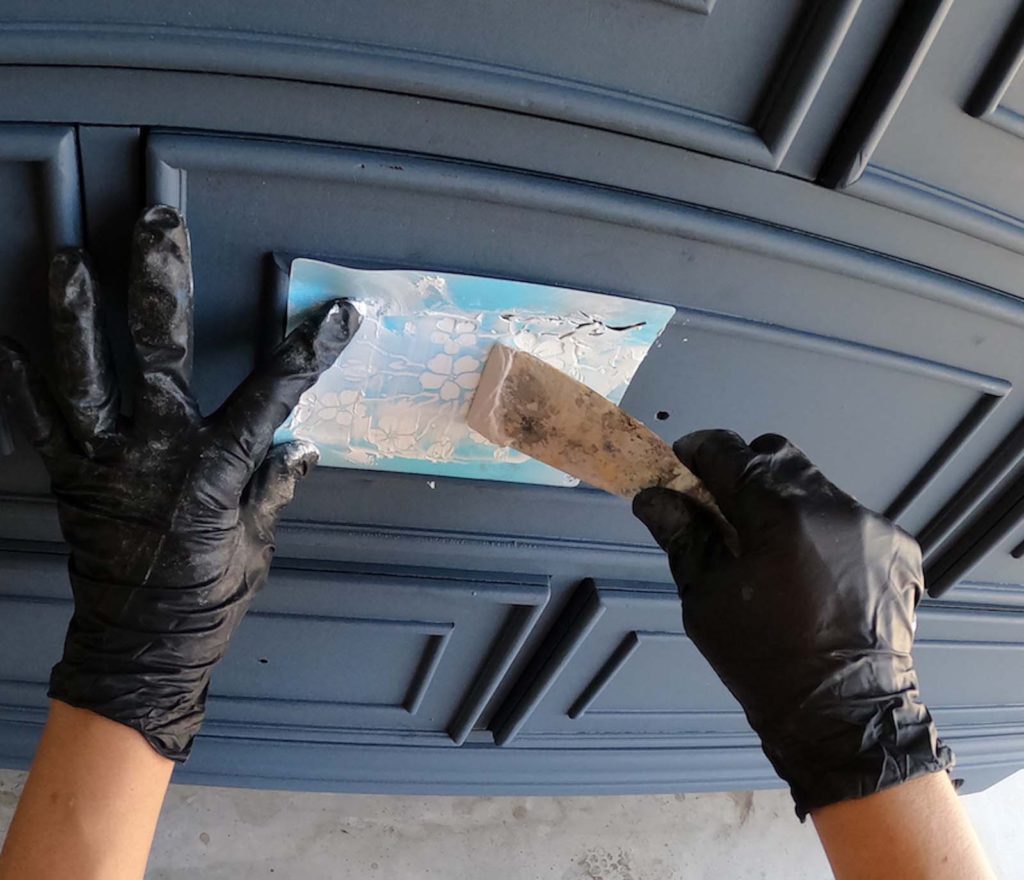
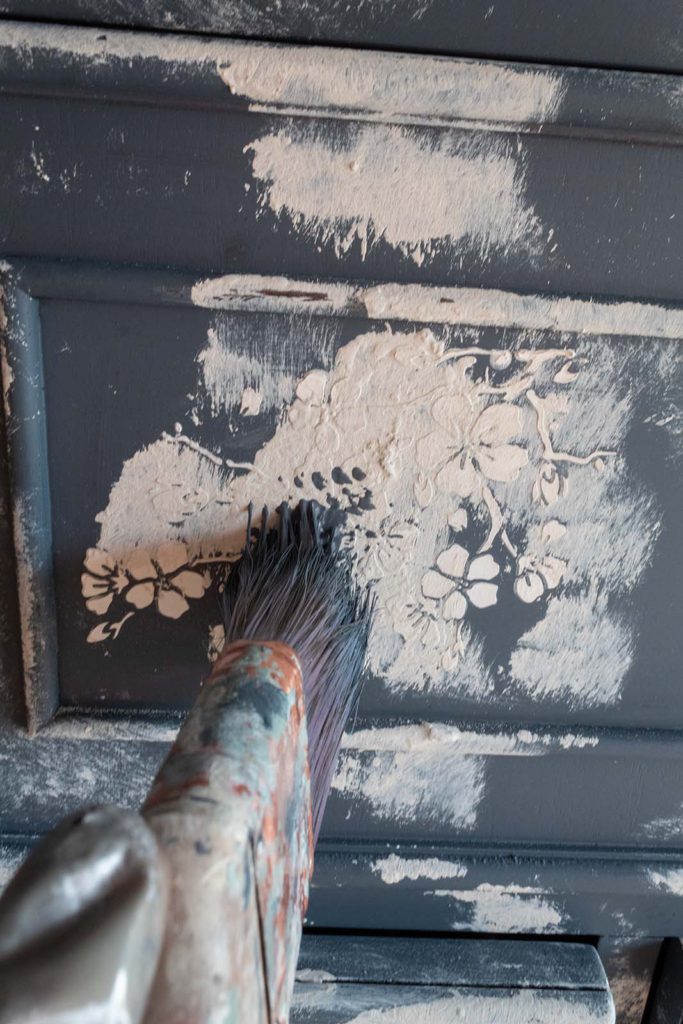
Step 4. Make Raised Stencils
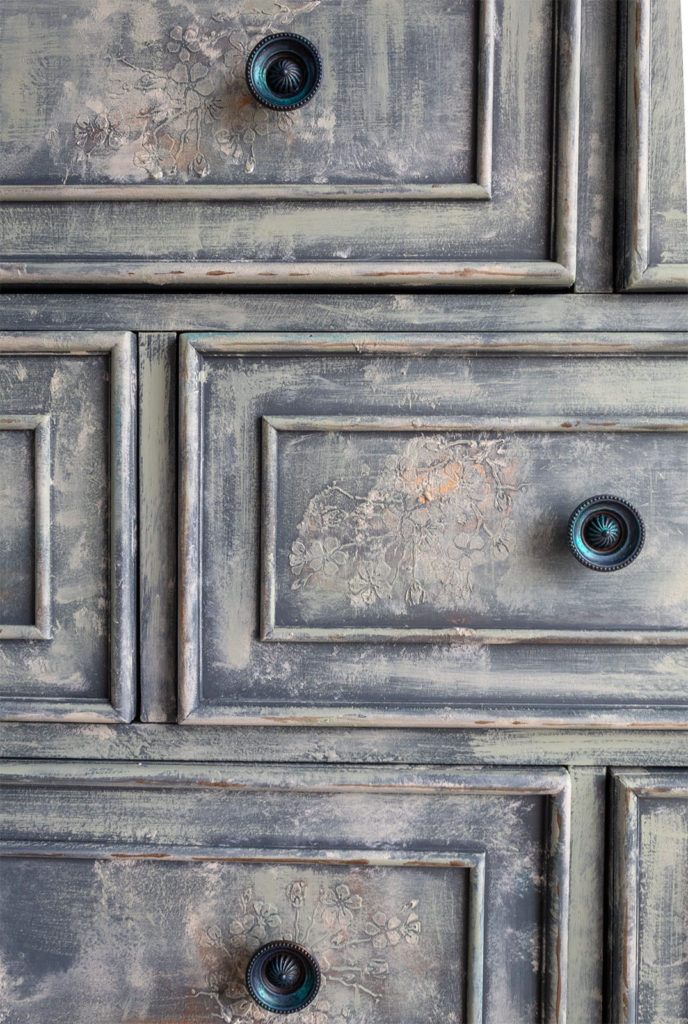
To give this piece some beautiful character and enhanced texture, I’m going to add some raised stencils to the front of the dresser. Making raised or textured stencils is super easy and pretty quick to do.
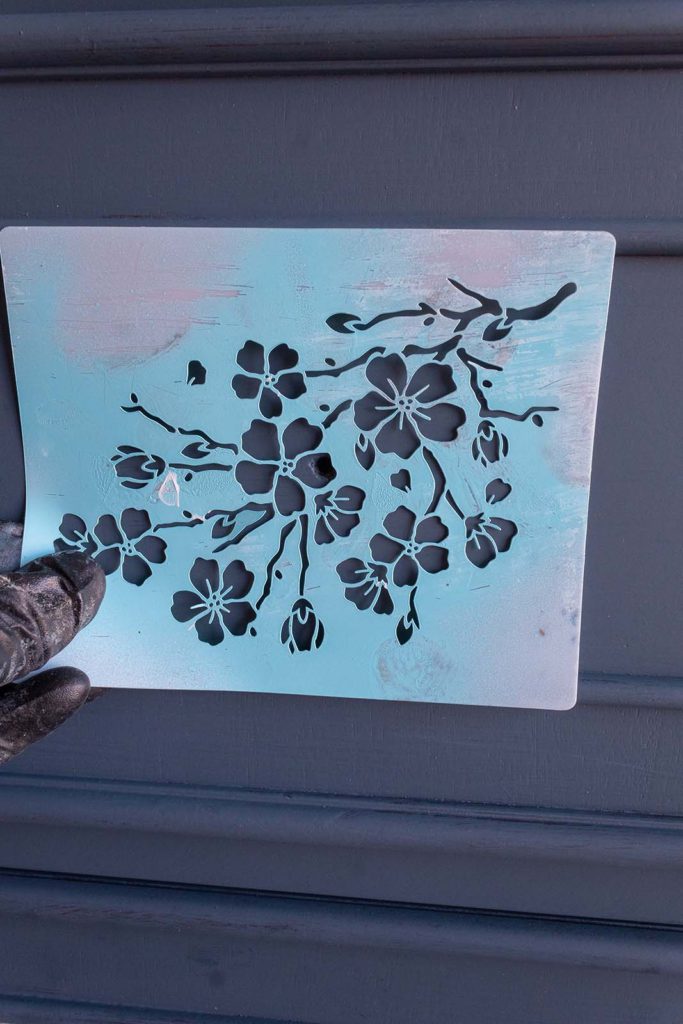
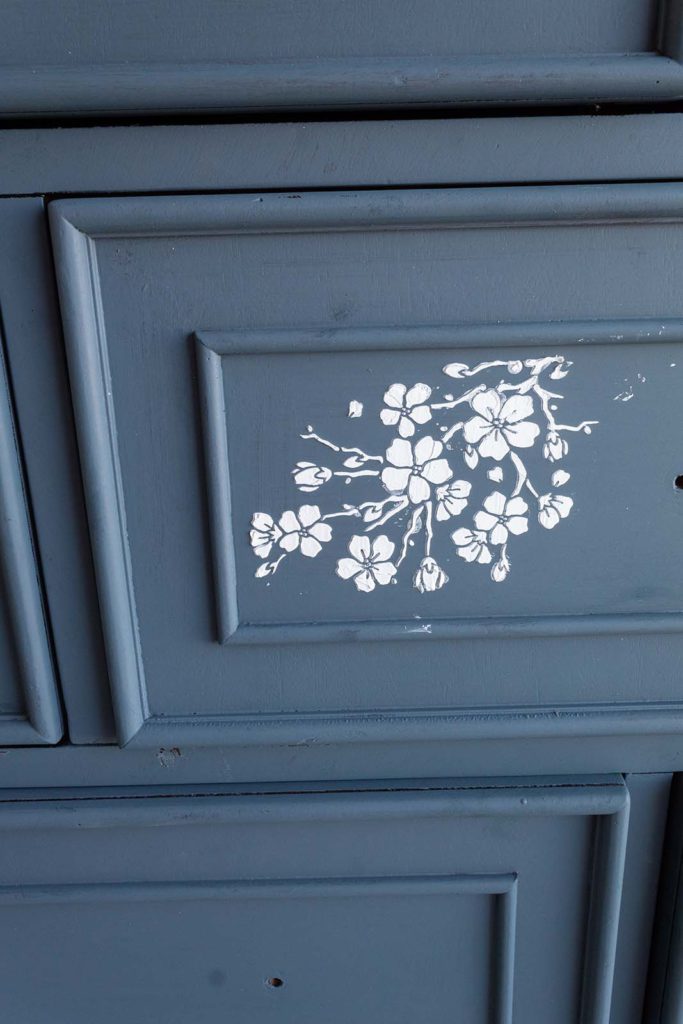
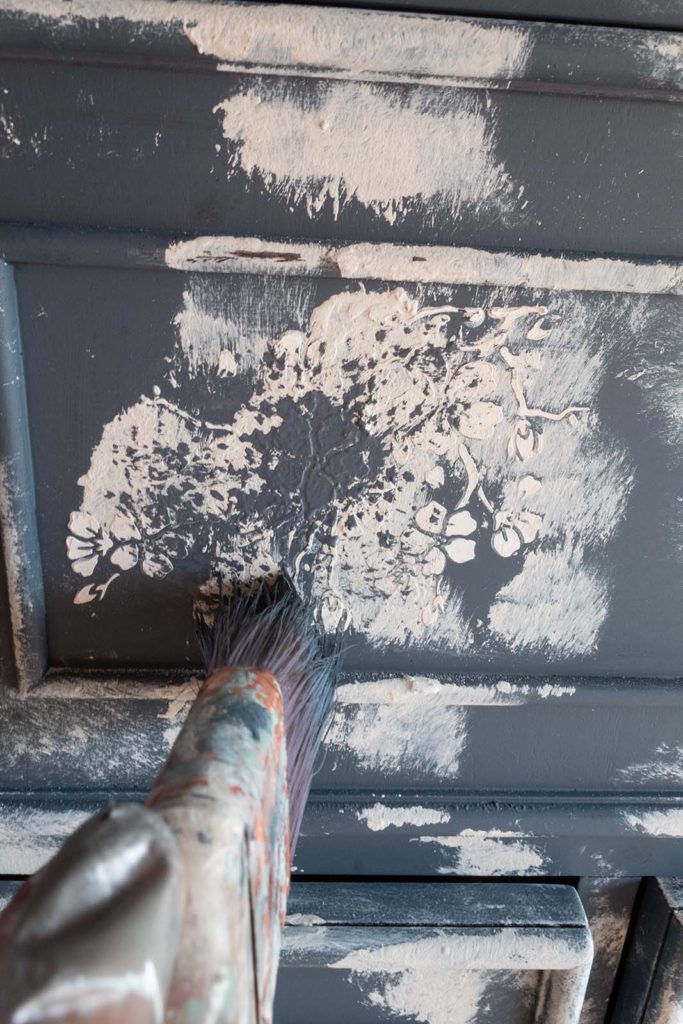
I position a small decorative stencil over one of the drawer fronts and hold it up with one hand.
I love how the stencil looks on the drawer front. Don’t worry, it is not going to stay white like this. We are going to be painting over it. I continue to apply the stencils to the front of the dresser. I wash the stencil in between each application to avoid smudging.
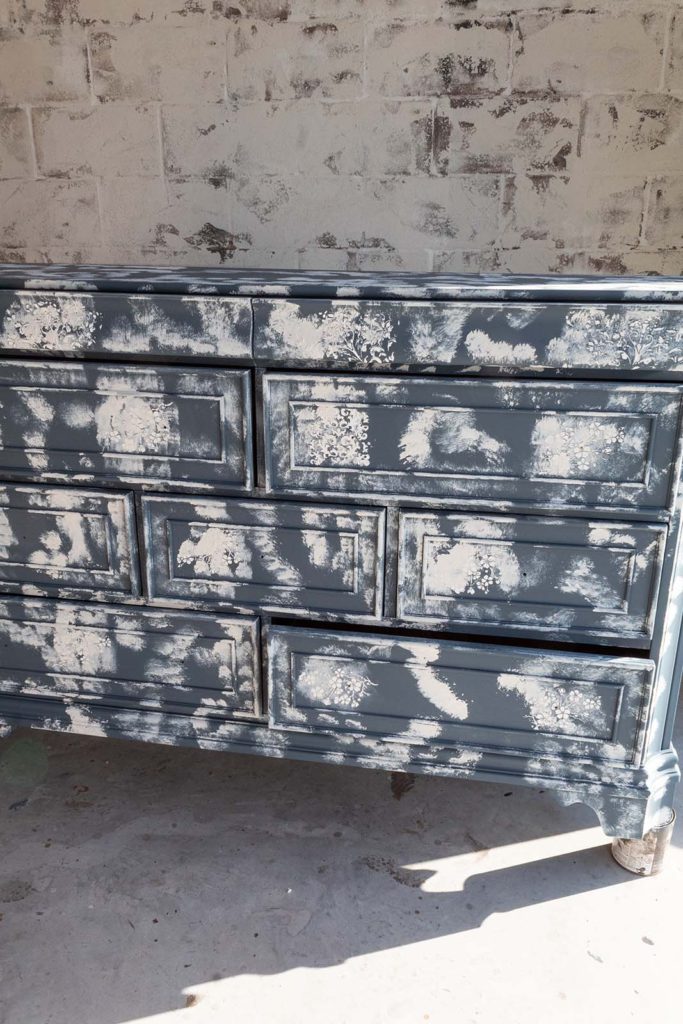
Step 5. Begin Paint Layering
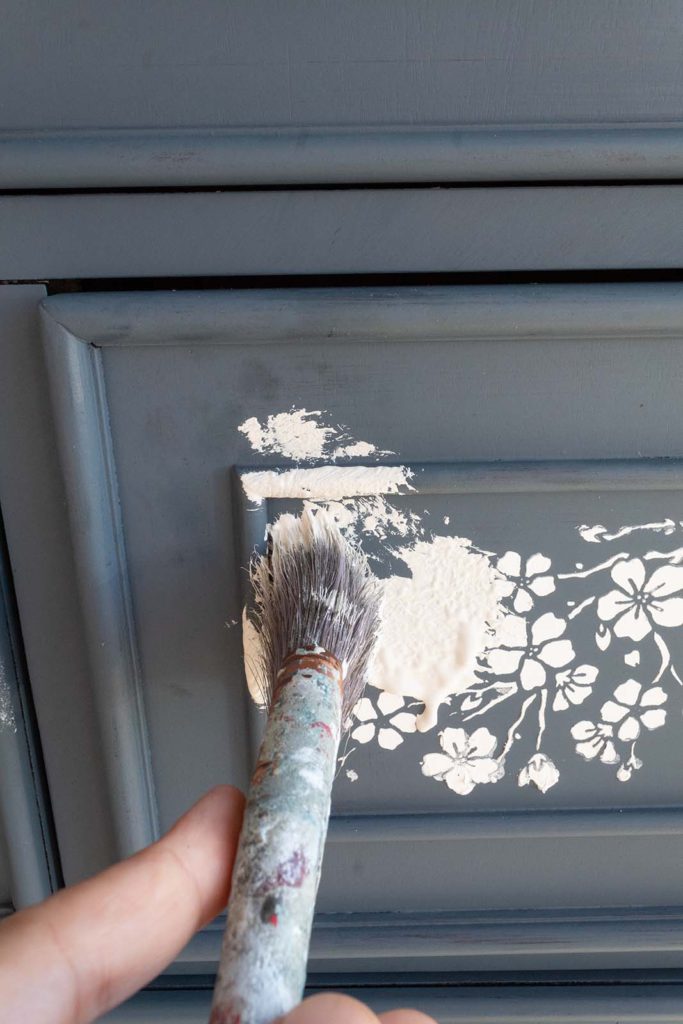
To begin adding some depth and texture to the dresser, I am going to switch colors to a contrasting color. I’m using Weathered White which I’ve made into chalk paint.
With my Purdy brush, I’m going to apply the paint by dabbing up and down. This technique will create a textured look.
I apply the paint in random parts over the stencil and the rest of the furniture piece. It’s going to look a little chaotic after I apply the white paint all over. But don’t worry, this is part of the process.
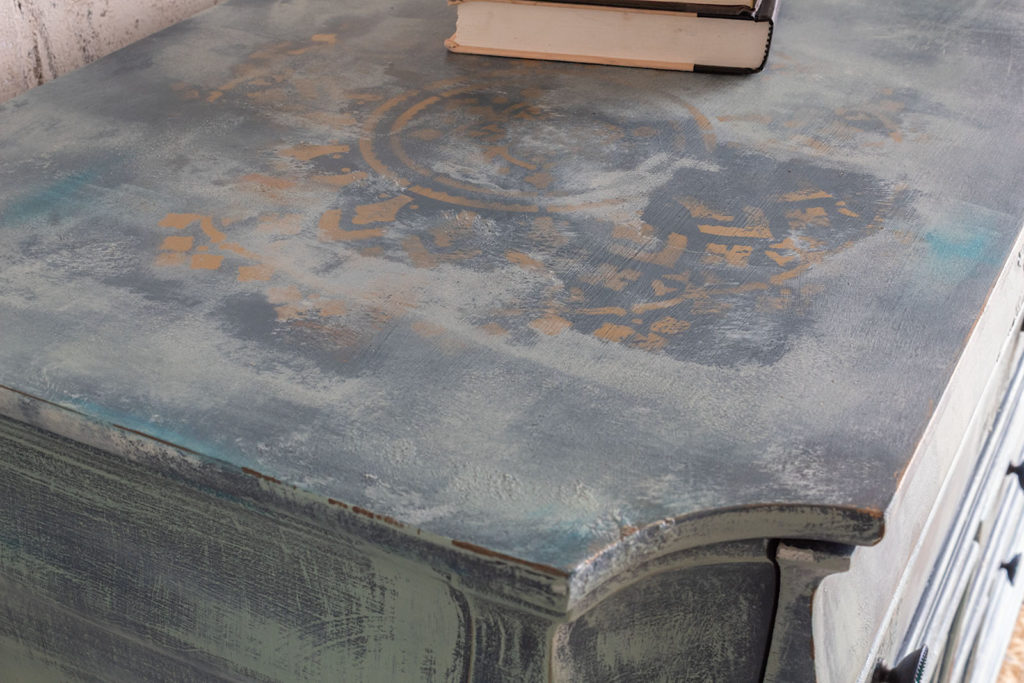
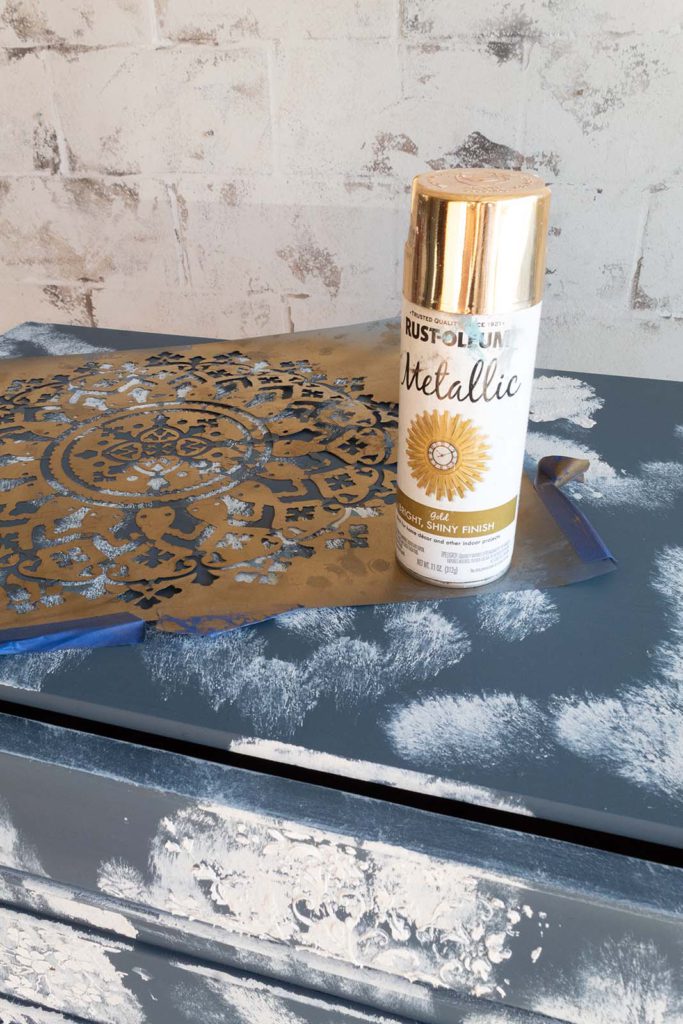
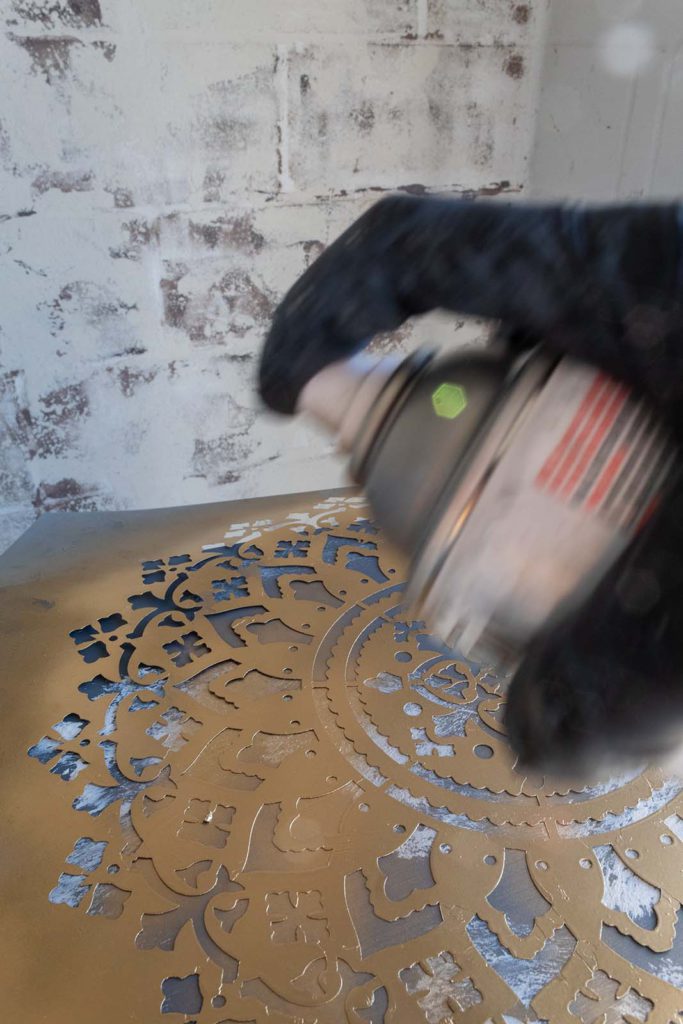
Step 6. Painted Stencil For A Touch Of Glam
I decide to add a stylish detail to the top of the piece. Using a large stencil that I had in my stash and some metallic gold paint, I spray the stencil in a few spots on the top of the dresser. Although the stencils will not be completely visible at the end of the painting process, they will be a gold detail that will add a little bit of glam and mystical charm.
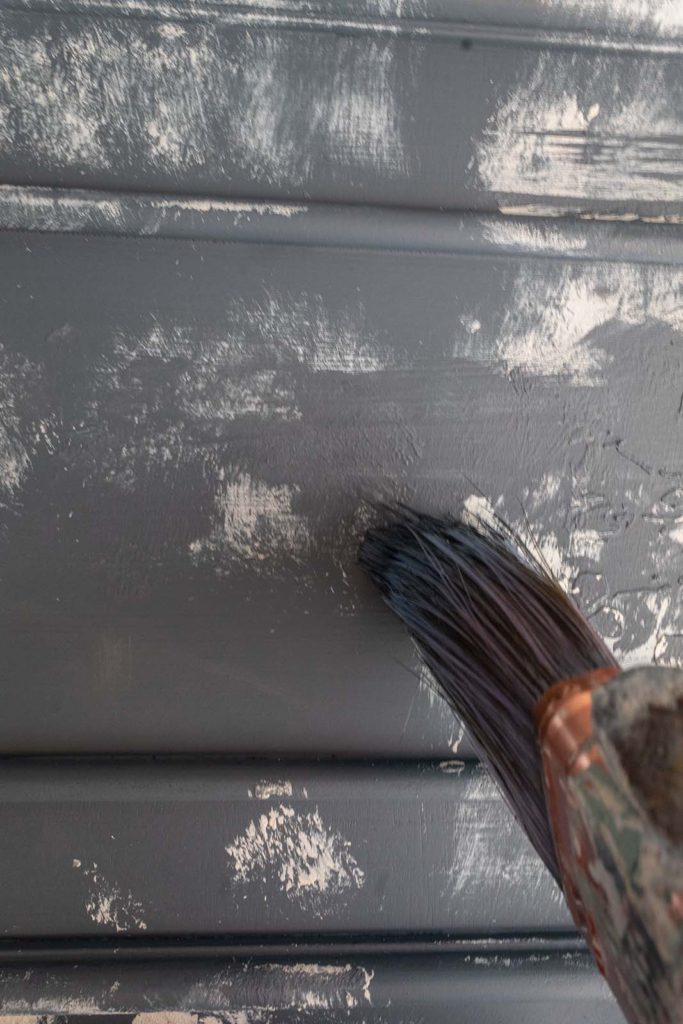
Step 7. Add More Undersea Color
Now that the Weathered White is dry, I’m going to add another layer of the first color, the Undersea color. I’m going to use the same dabbing up and down technique that I used for the Weathered White.
What I’m doing with this step is toning down the white, adding more texture, and creating a distressed or weathered look. The trick is to leave small amounts of the white exposed underneath the teal color.
You might be thinking at this point, “Wow, what did I get myself into? So many steps!” I was thinking the same thing right about this point, but remember how I told you at the beginning of this post that this dresser gave me a run for my money? Yup, each time I thought I was done, I would step back and look at the dresser. And something in me told me it wasn’t quite right just yet…
Luckily all the steps were easy and quick to move through. In the next step I’ll show you a really cool technique that I discovered through this process.
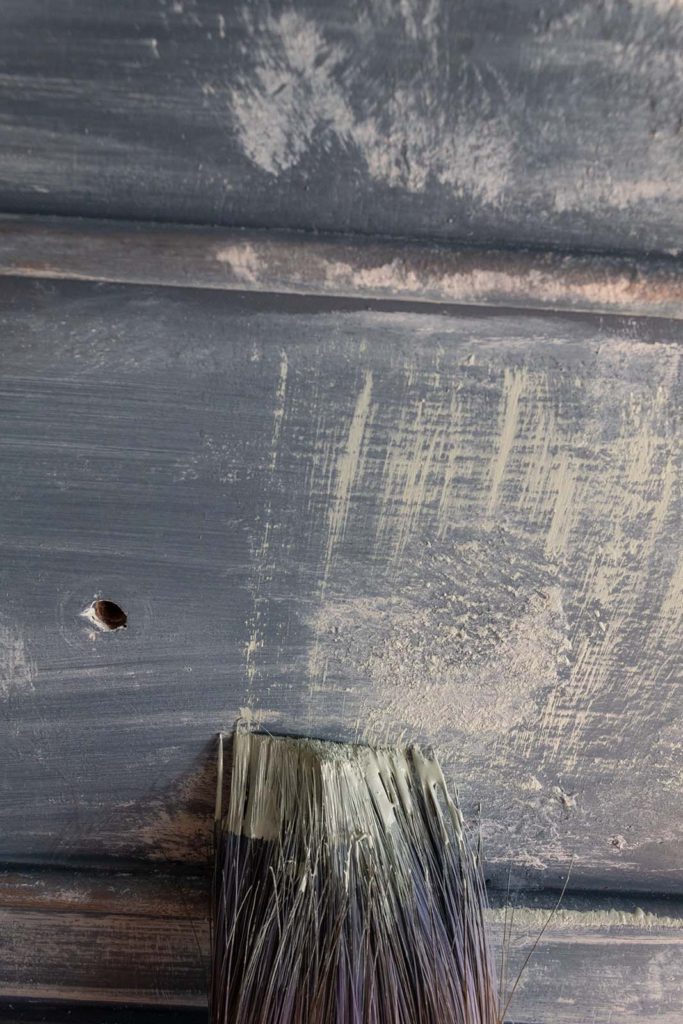
Step 8. Mini-Roller Time
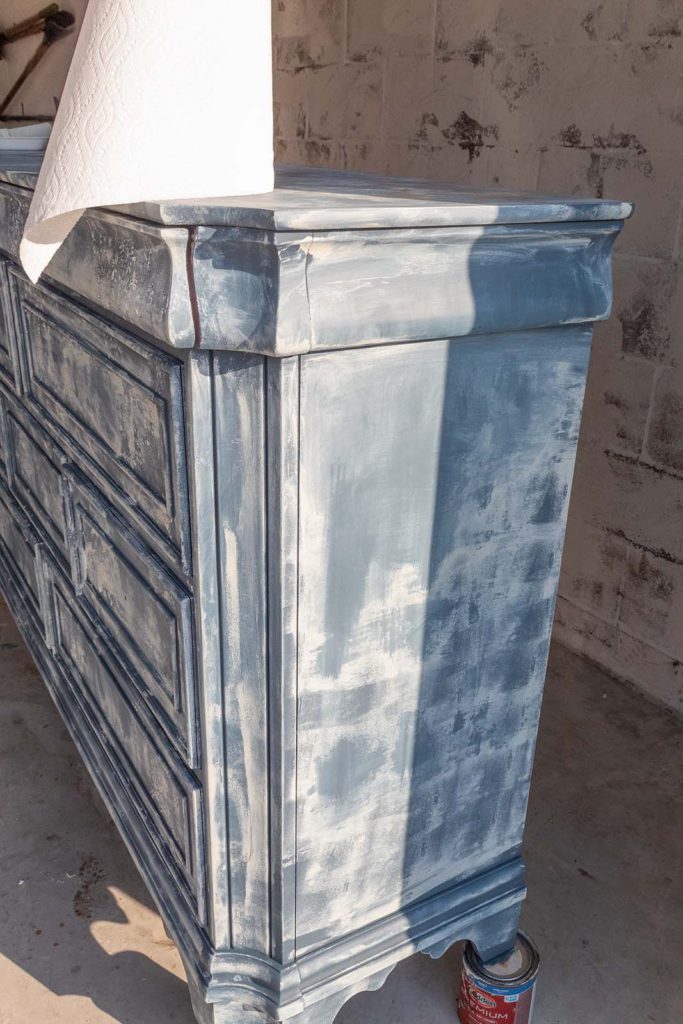
The dresser was looking interesting to say the least at this point. The teal and the white paints worked together to create texture and dimension, but the look wasn’t very cohesive. It was more messy than I would like.
One thing I’ve learned through painting furniture is that when things look messy or chaotic you can tone it all back down by painting over it or you can make it intentional. When you add to the business in an intentional way, it’s going to start to come together…let me show you.
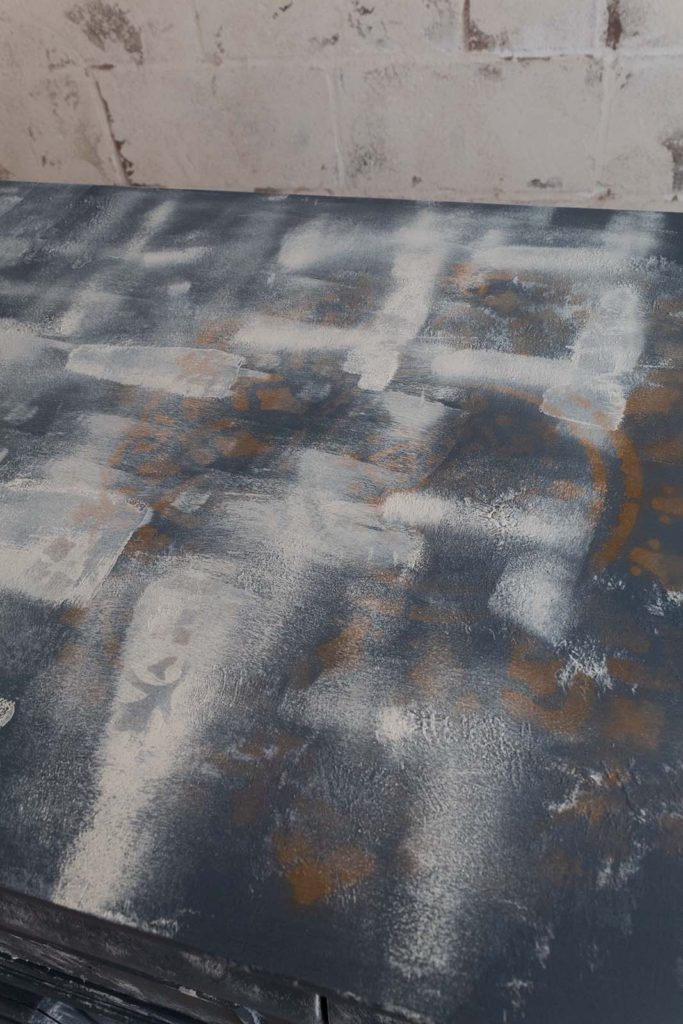
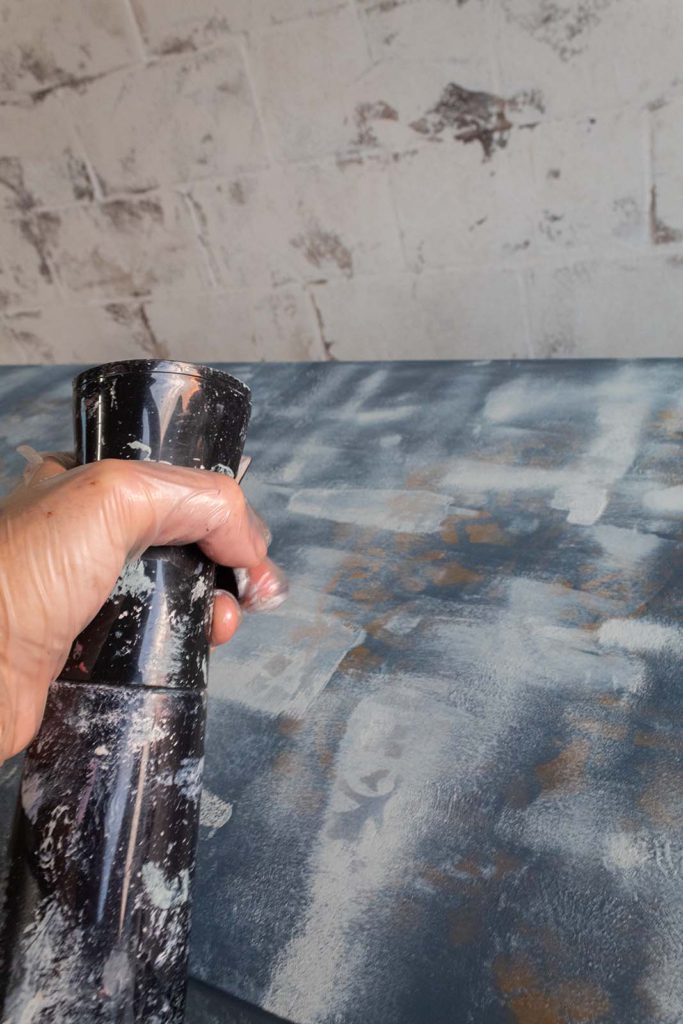
For this next technique, I’m using a paint mini-roller. The mini-roller is going to help create a unique effect over the surface. This is a three-step technique.
1. First, roll a small amount of paint over a small section applying pressure to disburse the paint. You’re going to see the roller marks. Just keep spreading the paint out, but don’t worry if it looks blotchy.
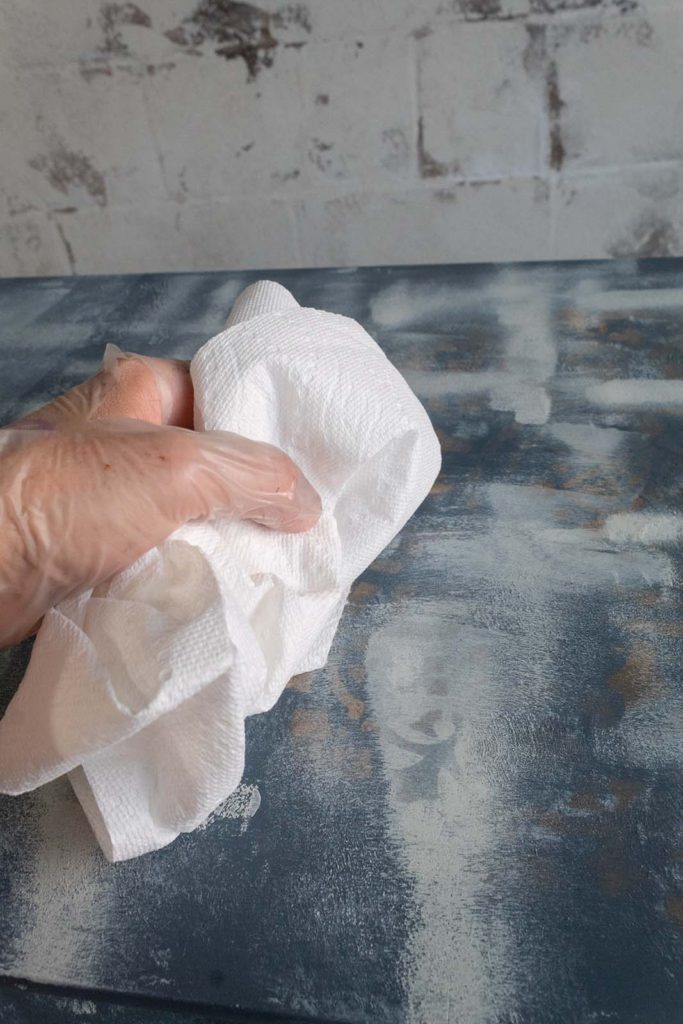
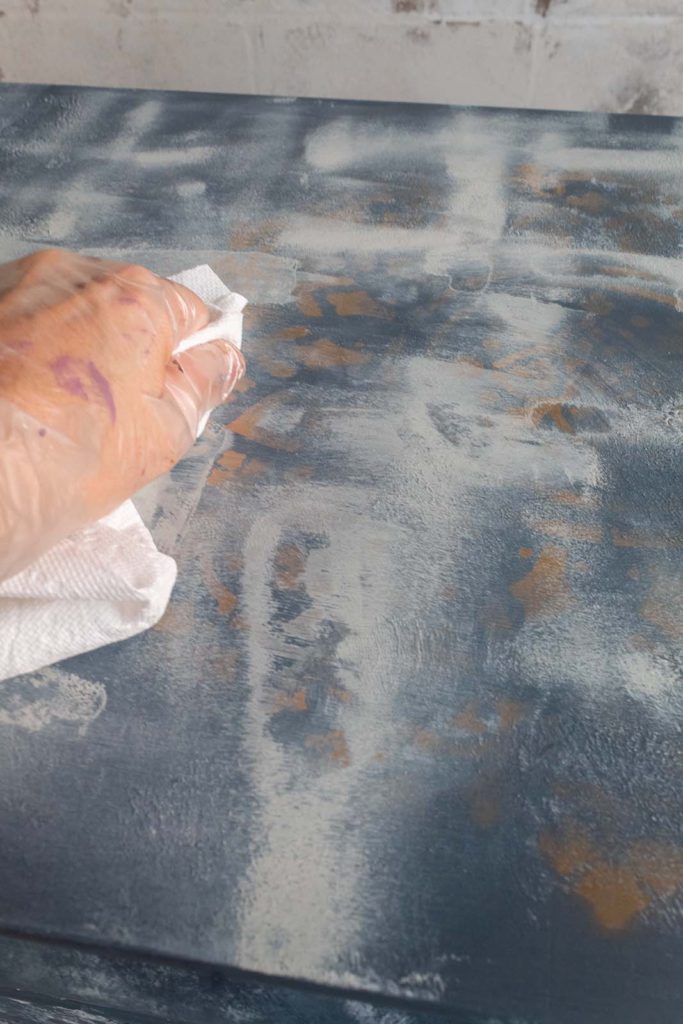
2. Then, grab your misting bottle in one hand and some paper towels bunched up in the other hand. With the misting bottle, spray over the entire painted area. Then take the paper towels and rub the paint back with some pressure. This is going to help reduce the blotchy look (leave some of the blotches as part of the look) and blend things together.
By doing this technique we are adding a smoky, aged look to all the other layers. Rubbing back the paint with water and paper towels is going to distress this layer (the Foggy London color) and beautifully reveal some of the other colors we’ve already painted on. I really got into this technique—it was a little addictive!
I went all around the dresser with the mini roller and what resulted was absolutely beautiful.
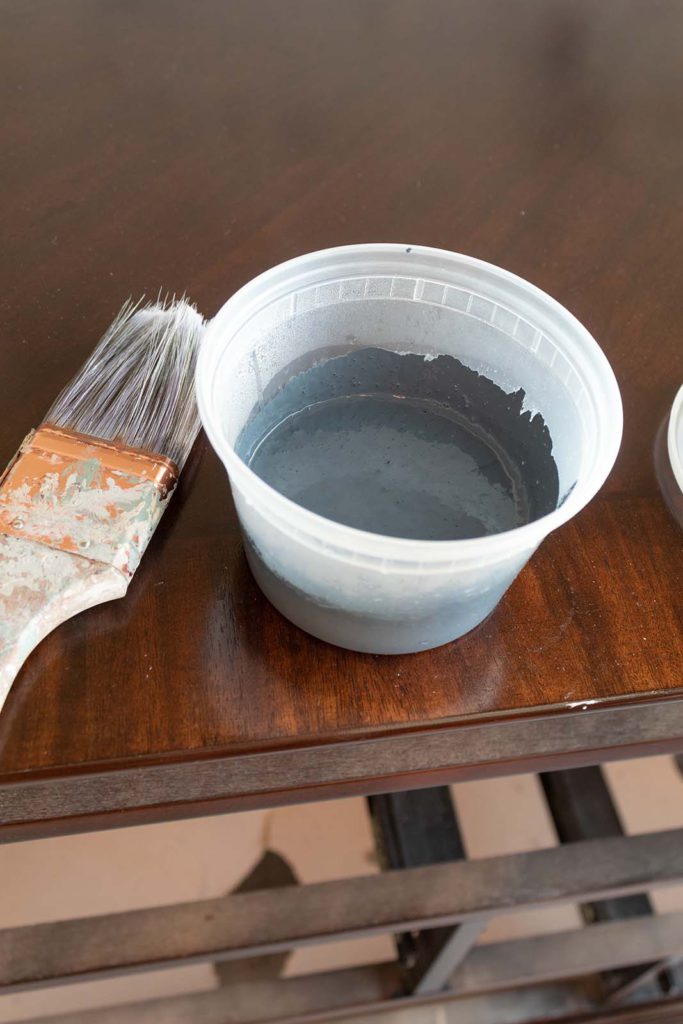
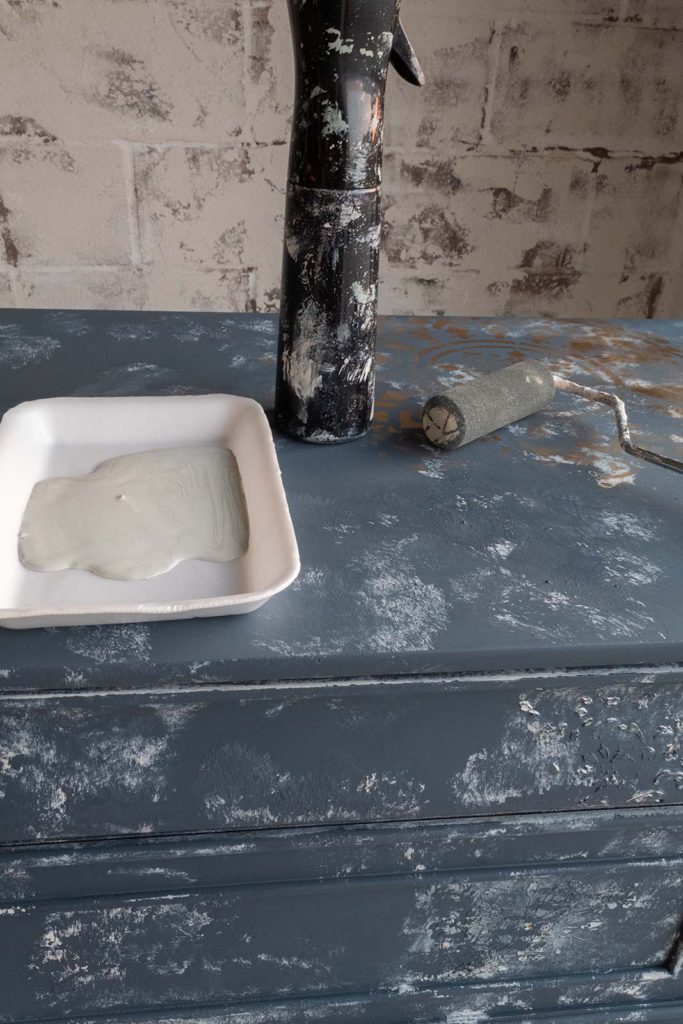
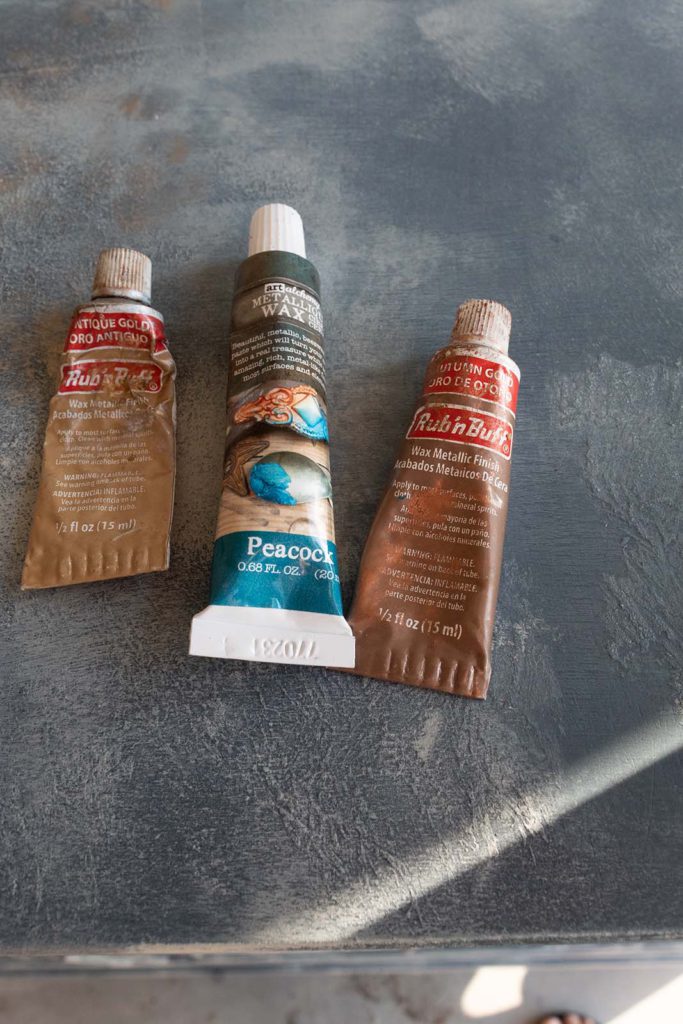
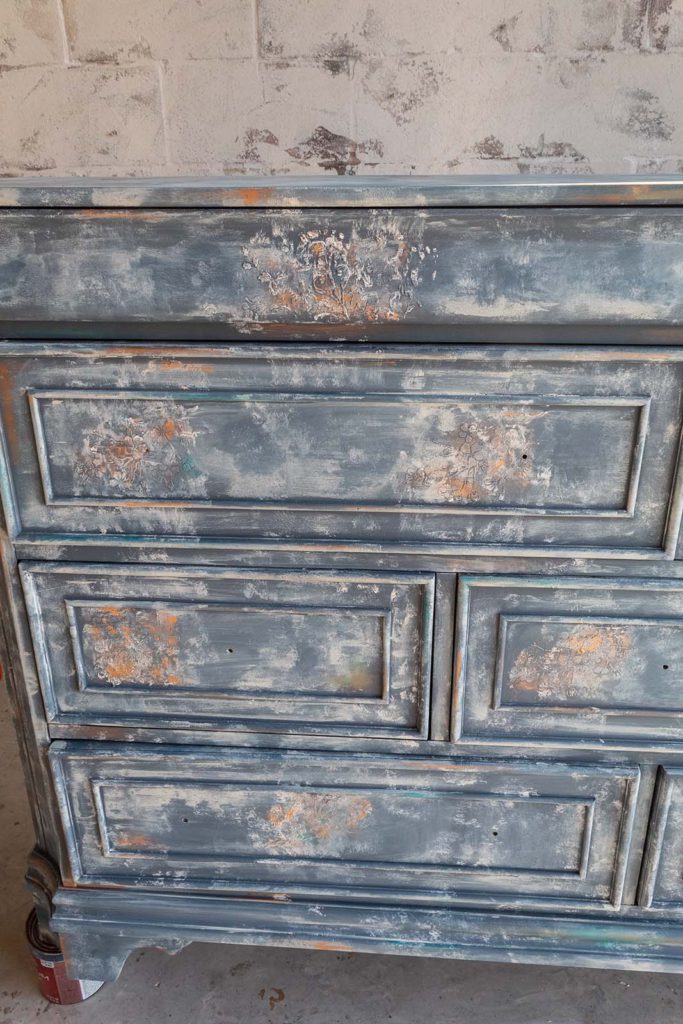
Step 9. Metallic Waxes
In the next step I’m going to use metallic waxes to accentuate the stencils. Although you see three waxes in the picture, I only ended up using Autumn Gold and Peacock.
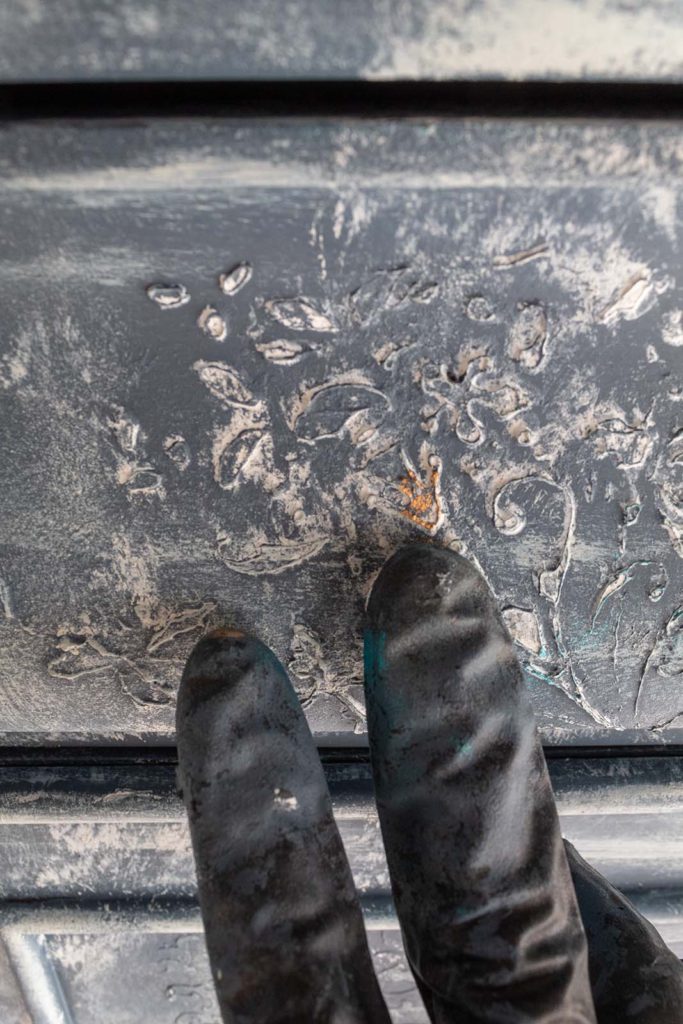
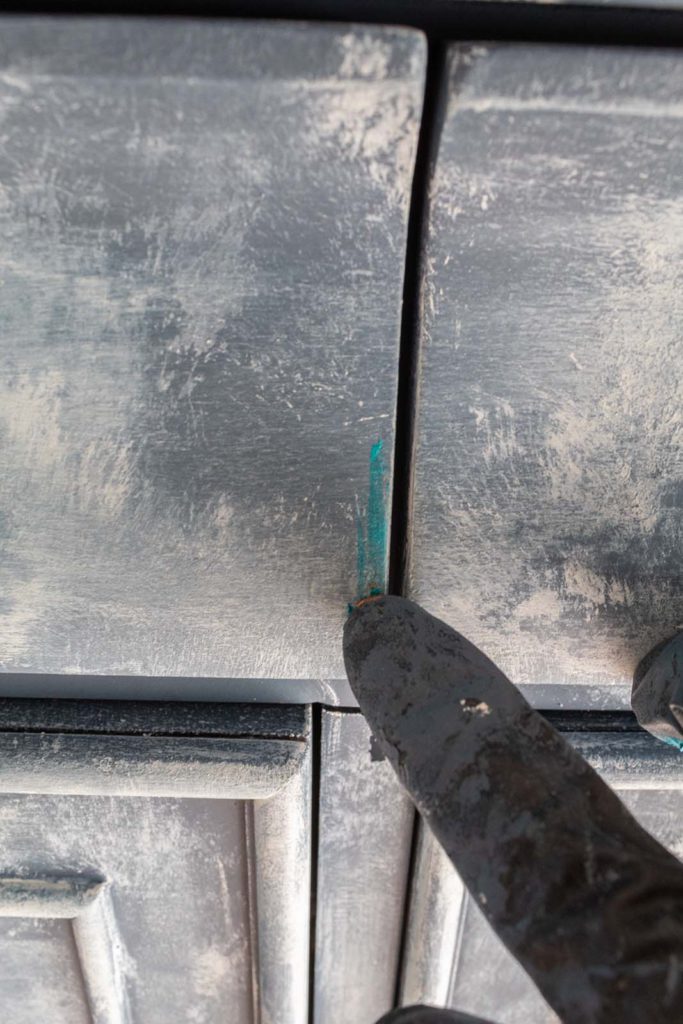
I start with Autumn Gold and I put a little bit on my gloved finger. Then I rub it on in a few spots over the stencil. The wax adds hints of color and draws out the details of the stencil.
Waxes can be strong so you only need to apply a little bit. I also went over some edges of the dresser for added detail.
In the next picture you can see how the piece looks with the added color from the waxes. I decided to tone down the orange appearance of the autumn gold wax. This would require on final coat of paint.
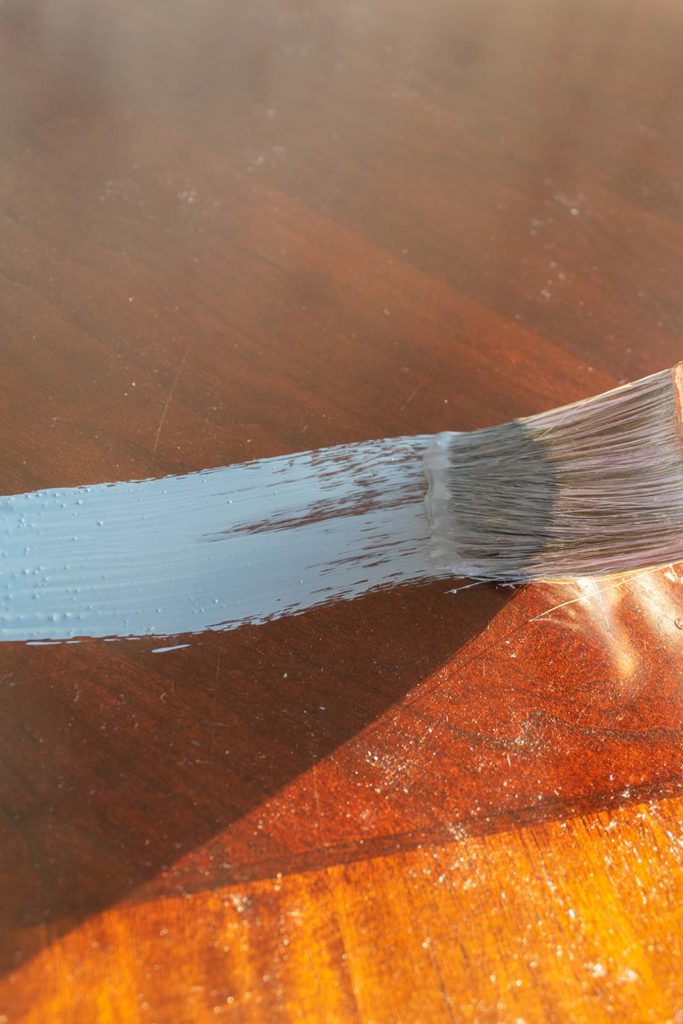
Step 10. Final Paint Color
I’m going to use Green Balsam, a pretty mint color, to add one more layer of color and texture. I’m only using a little bit of the paint. And I’m not using any moisture, simply dry brushing.
By going parallel over the surface with my brush and just lightly touching the surface with each stroke, the paint is bringing out beautiful texture. It is also adding a pretty minty hue, while toning down the colors of the waxes. I’m really loving this final look.
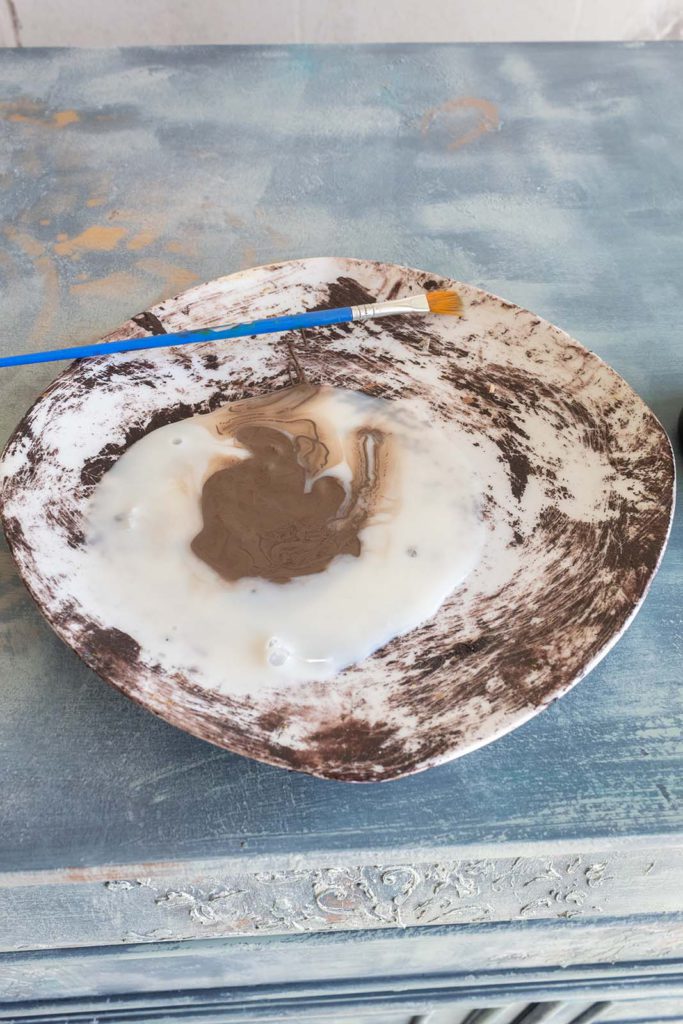
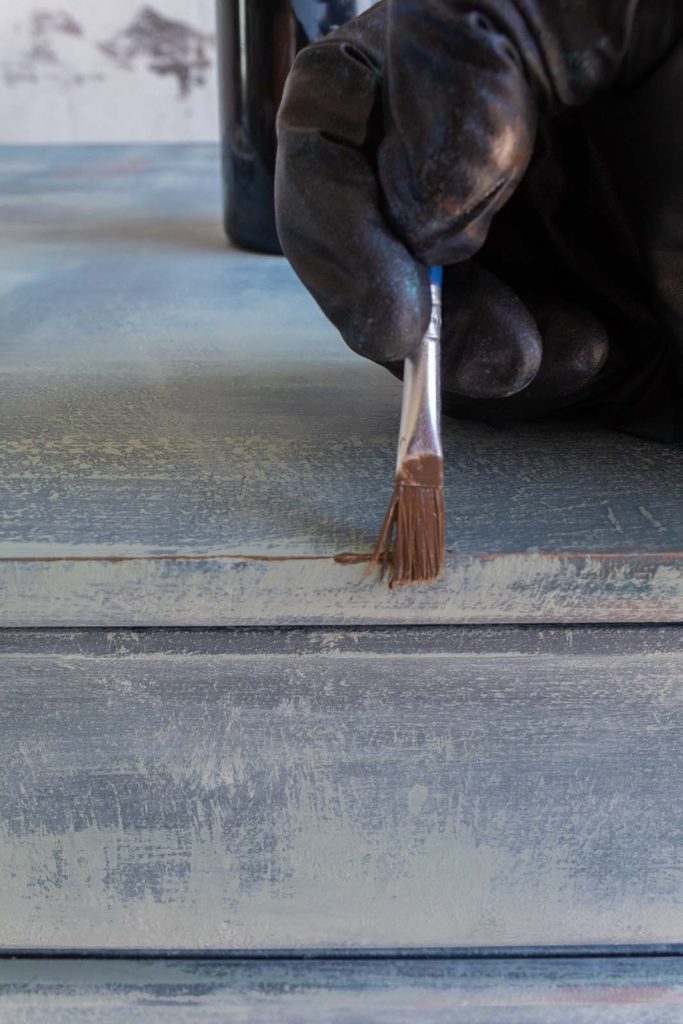
11. Final Optional Step
This last step is not necessary, but I thought it would add a little more character. I’m using glaze mixed with a small amount of leftover brown paint I had.
With a small painter’s brush, I’m going to paint along some corners and edges to create a distressed look.
And that’s it friends! Finally we were able to complete this dresser. Do you love it? I know it was a few steps more than we would have liked, but I think it is just dreamy now.
Before you leave, be sure to check out the video of this renovation. You can see the techniques first hand and watch the beautiful transformation of this dresser.