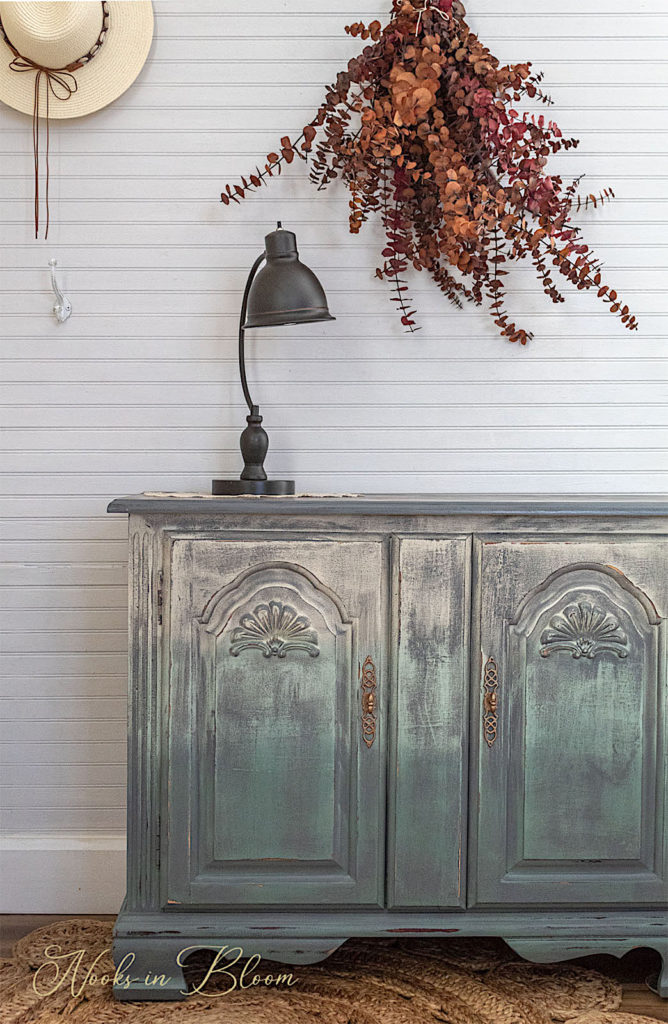
Hey NIB readers! I have a vintage treat to share with you today. I am loving this look and the happenstance technique that I discovered for creating it.
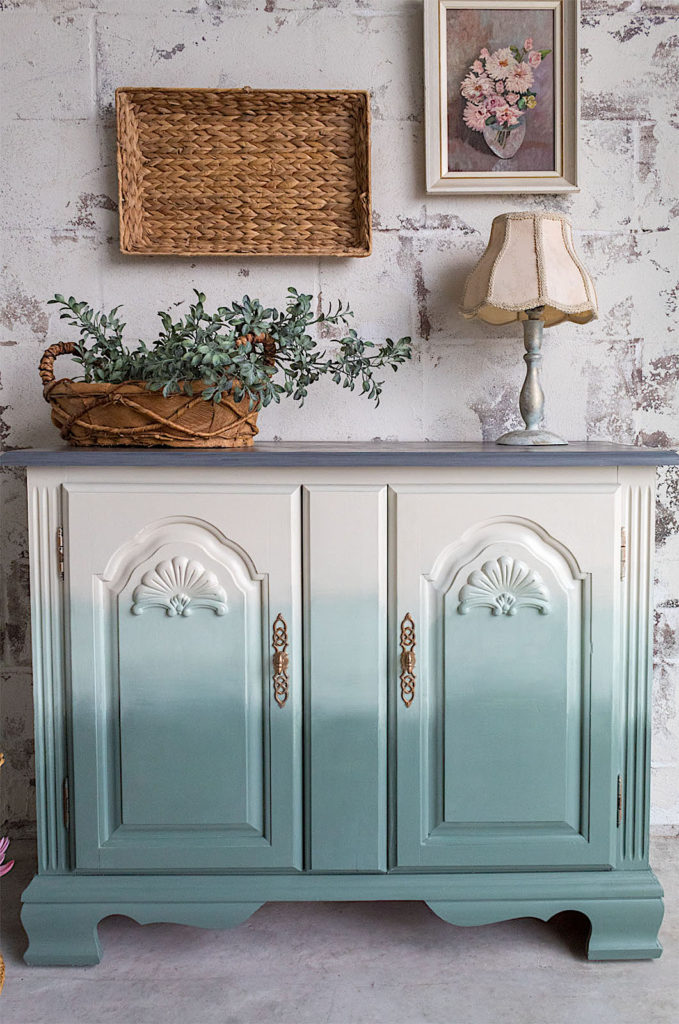
If you recall, this small dresser is one I had previously refinished in a blended paint style. See below.
Click on Image For Blending Tutorial
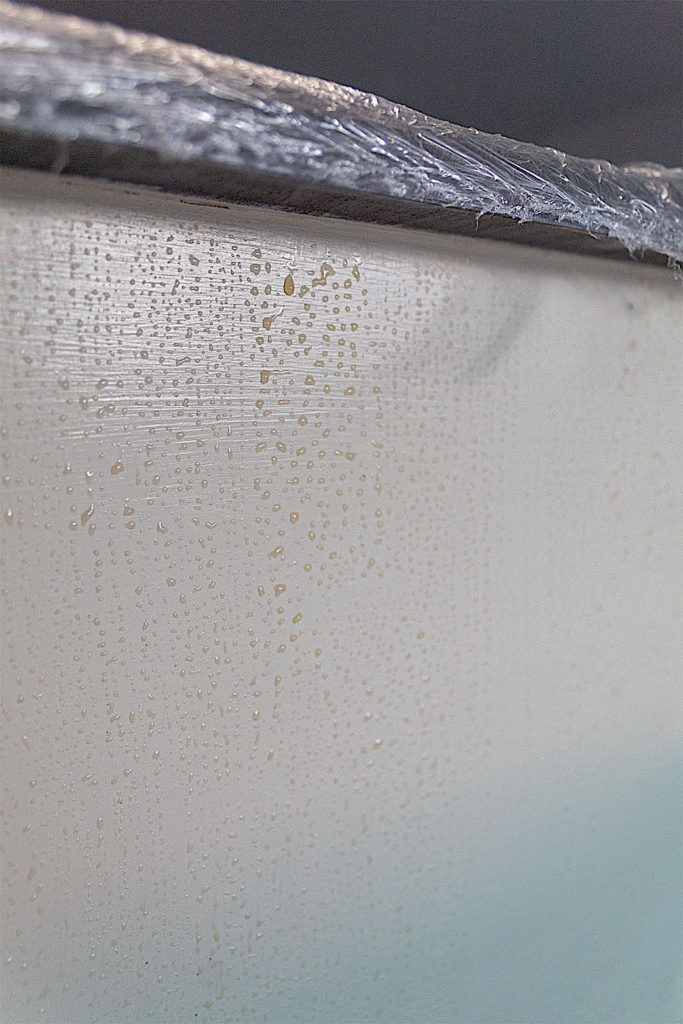
Although I had it wrapped in plastic in my garage waiting to be sold, someone must have bumped into it and chipped some of the paint off. See below.
Disclosure: Some of the links provided are affiliate links. By purchasing through these links you are supporting this family blog and the work we do and there is no extra cost to you. If you would like to read our full disclosure, click HERE.
Rather than starting this piece from scratch to repair the damage, I decided to work with what I had. And I’m so glad I did! I simply love the new aged look. Goes to show you that set backs can lead to even more gorgeous creations!
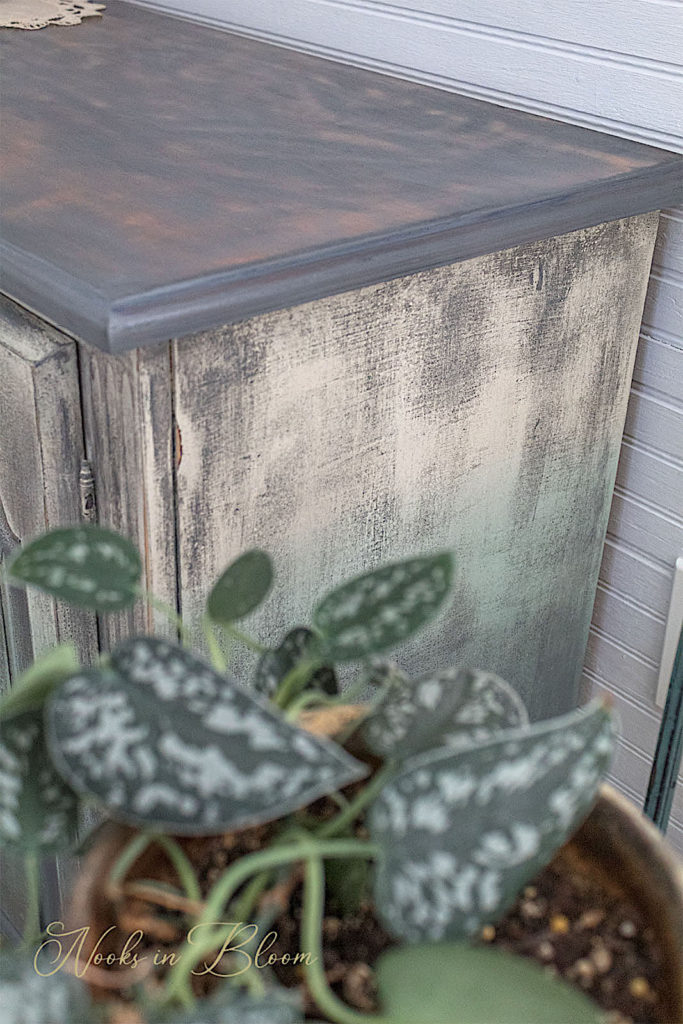
As I mentioned before, this piece was already painted. To create this look, I would suggest getting your piece to a painted finish. It doesn’t have to be blended with several colors, but that does add to the character of this style.
Since the finish of this dresser had been sealed with clear coat, I roughly sanded with the painted areas with some scrap paper. How much you sand will alter the final look of our vintage finish. (I’ll explain more in the next step).
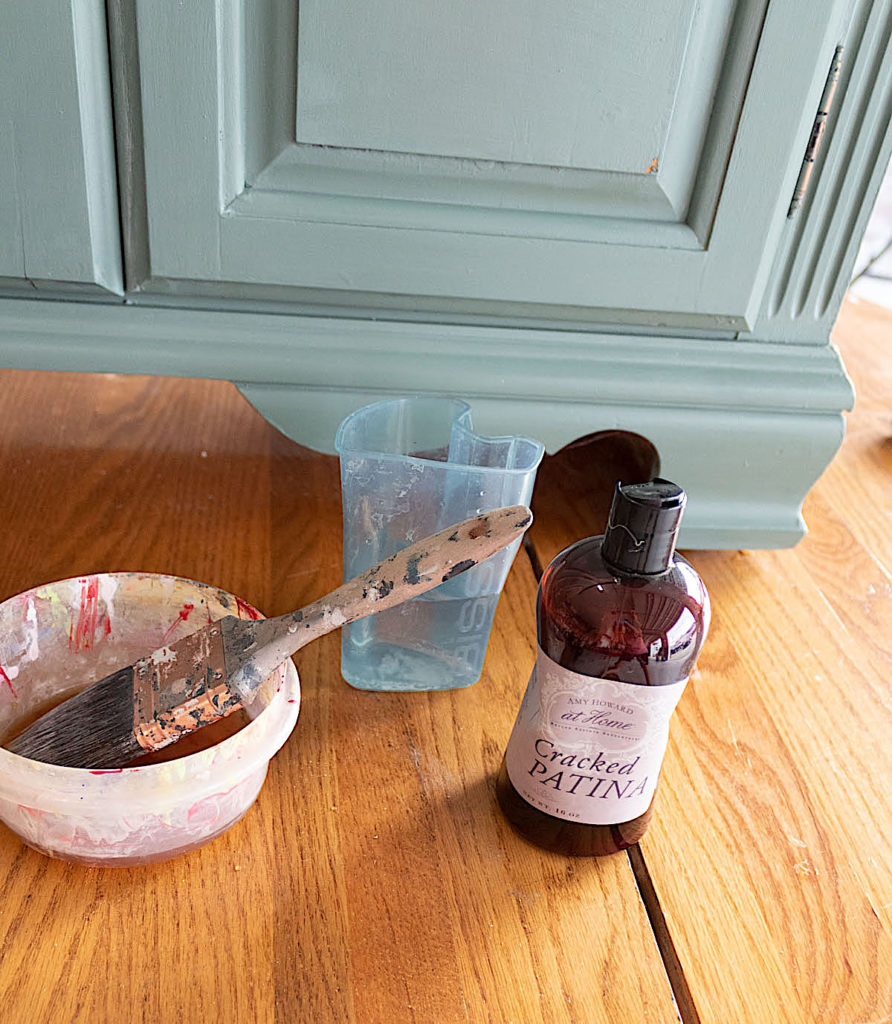
Step 2. Cracked Patina
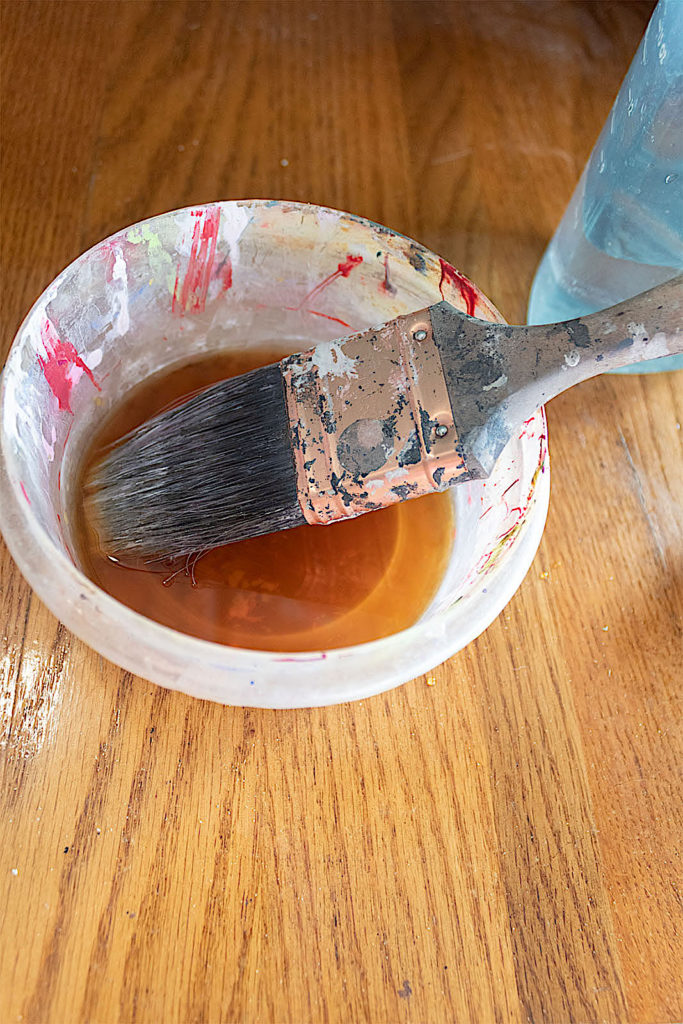
Cracked Patina is my favorite product these days, along with Saltwash. I love how easy it is to use and the gorgeous distressed effect it creates.
I’ve also used Cracked Patina to transform an outdated glossy vase into a dreamy French decor piece. If you’d like to see how I did that, visit my French Vase DIY tutorial.
I understand that you are supposed to add a little water to your cracked patina mix before applying. **Since doing this renovation I no longer add water. I feel that Patina works better for me without the water, but that is just my experience.
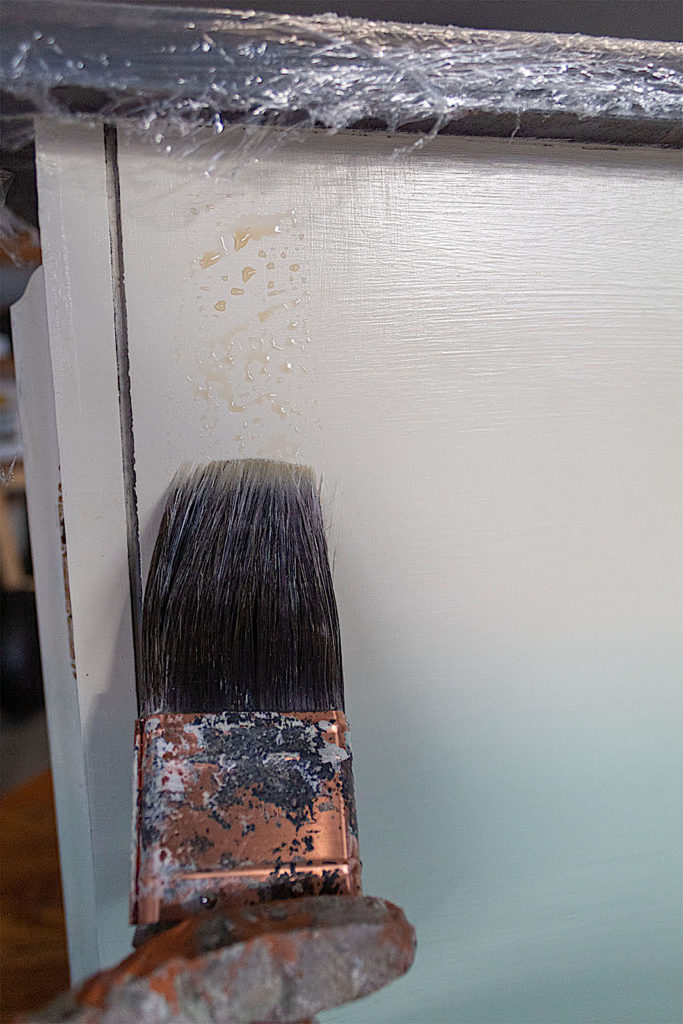
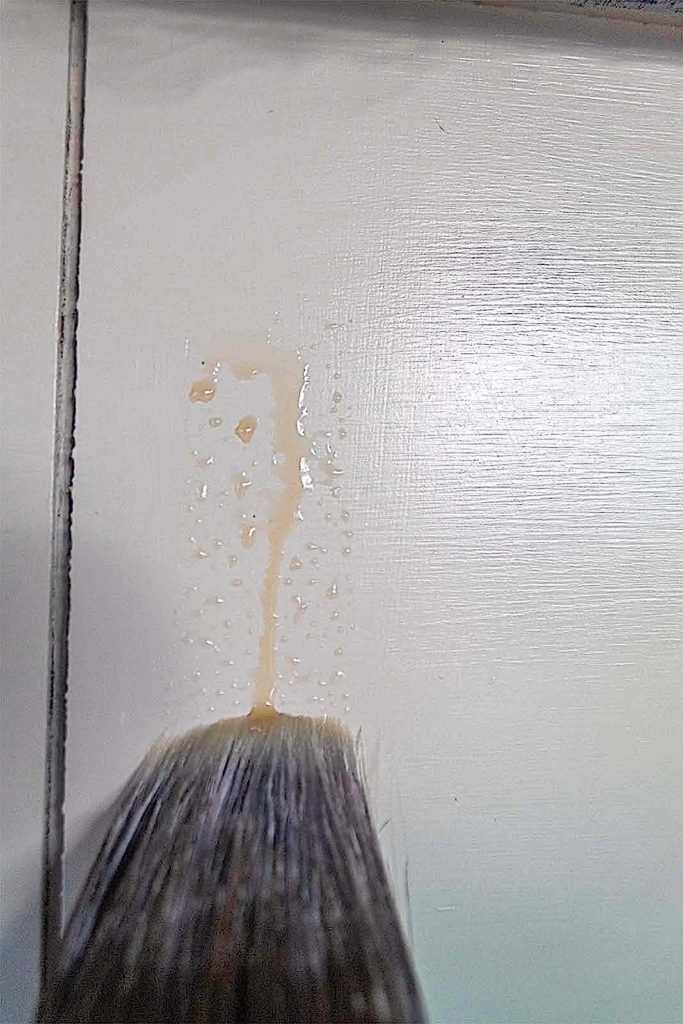
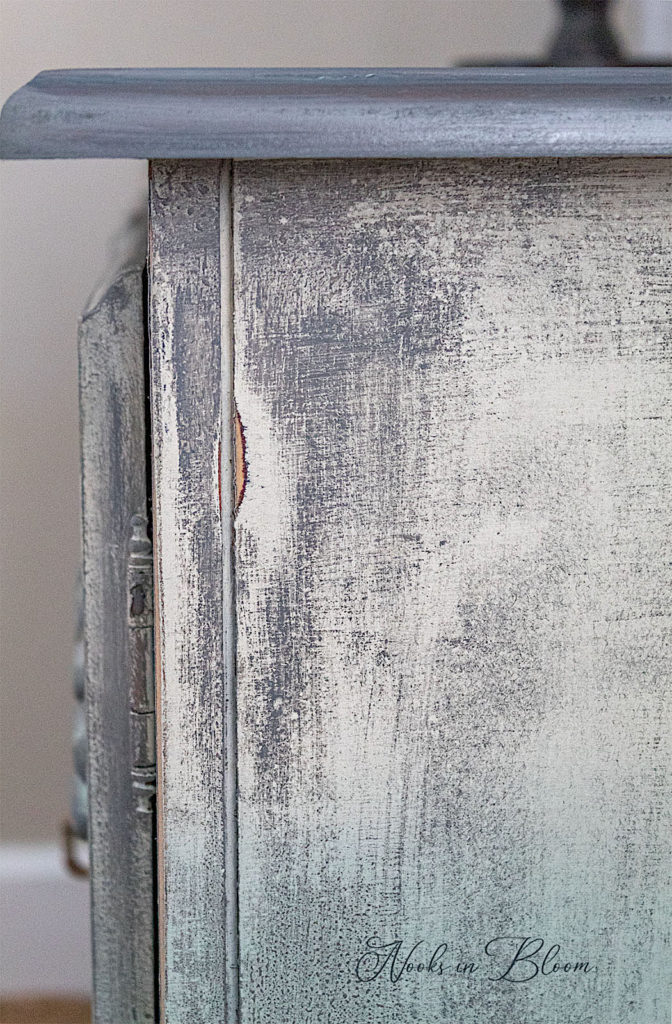
In this renovation things did not go as planned. It was my first time using this product. When I applied the cracked patina by painting it onto my painted surface, it beaded up.
You can see in these pictures how the liquid did not adhere in a cohesive manner (now I know it should if you want the cracked effect). My guess is that the clear coat or any finish with a sheen should be sanded down or painted over with a chalky paint before applying the cracked patina.
“Anyone who has never made a mistake has never tried anything new.”
― Albert Einstein
Oh no! Once the Cracked Patina dried, it left strings of beads all over the dresser. I thought about what I could do with that.
If there’s one thing I’ve learned in all these years of furniture renovations and DIY’ing is you’ve got to roll with the punches. If you live by this principal, you will obtain unexpected, amazing results.
**Tip: use an old brush to apply the Cracked Patina so that you don’t ruin a good brush OR do like I did and quickly wash off your brush after use. Get it nice and soapy and use an old comb through the bristles as you wash.
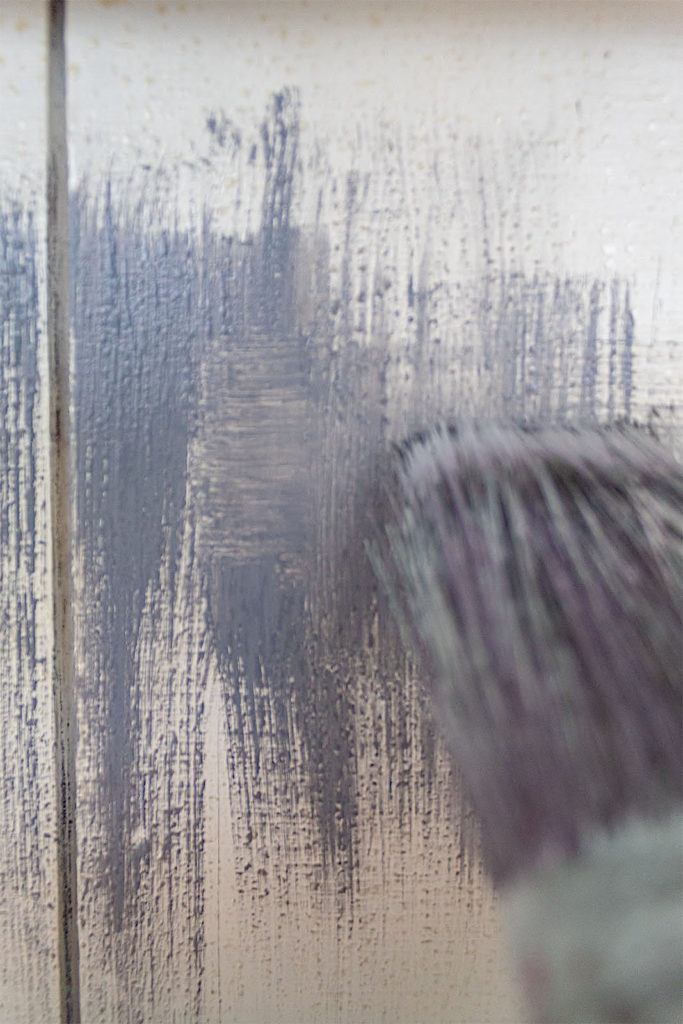
Step 3. Paint-The Magic Begins
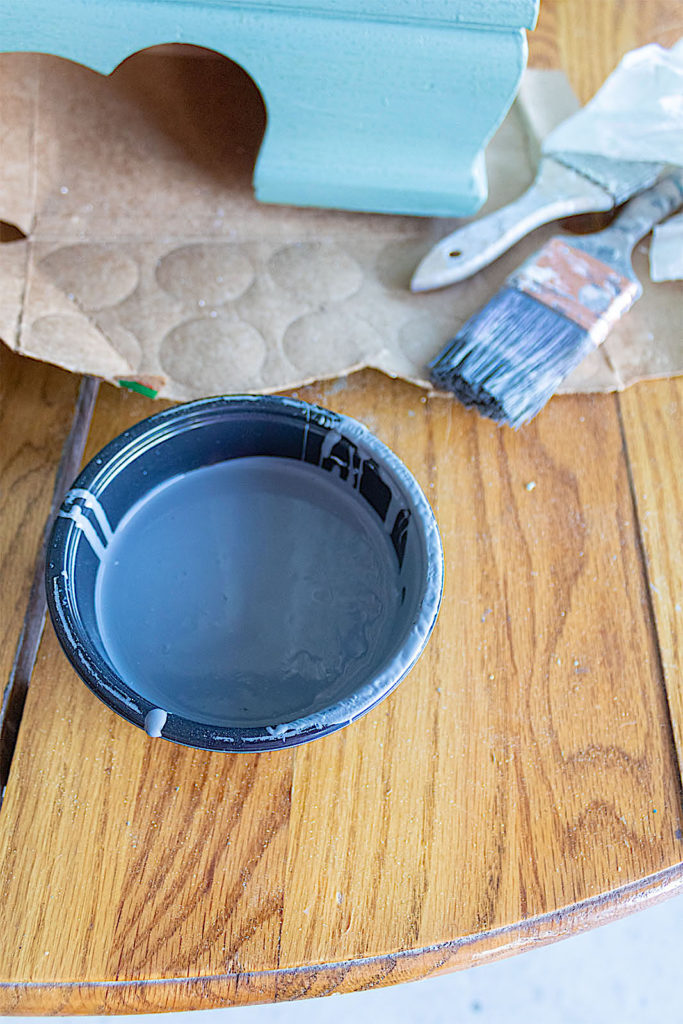
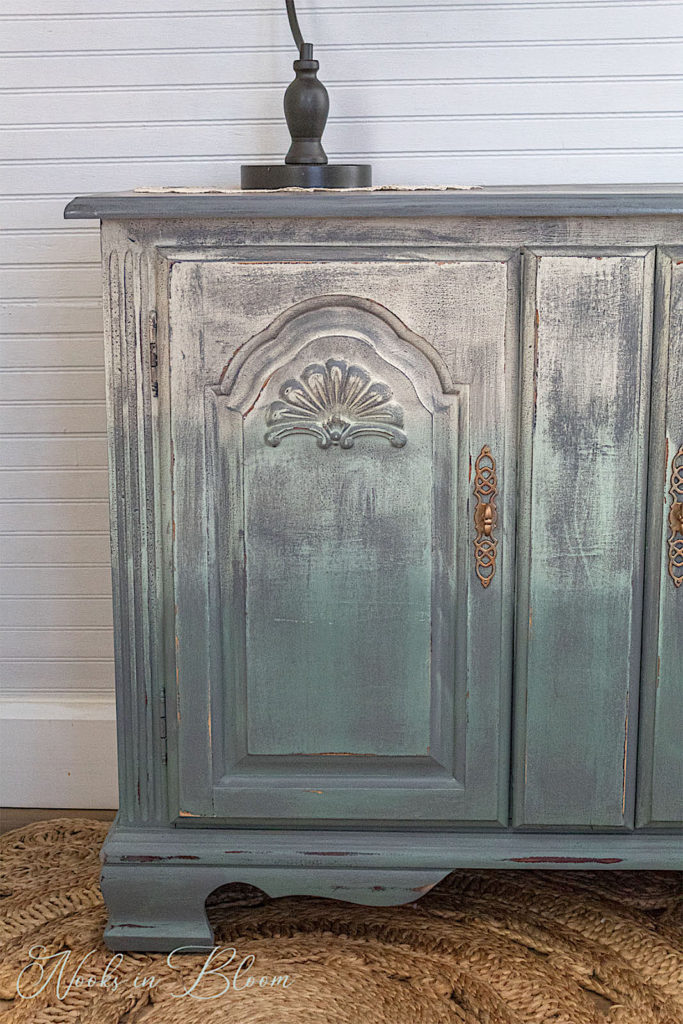
For this next part I picked Behr’s Antique Tin, a rich gray paint. I like to make my own chalk paint. I recommend chalk paint for this look because it will adhere better to the surface and the Cracked Patina.
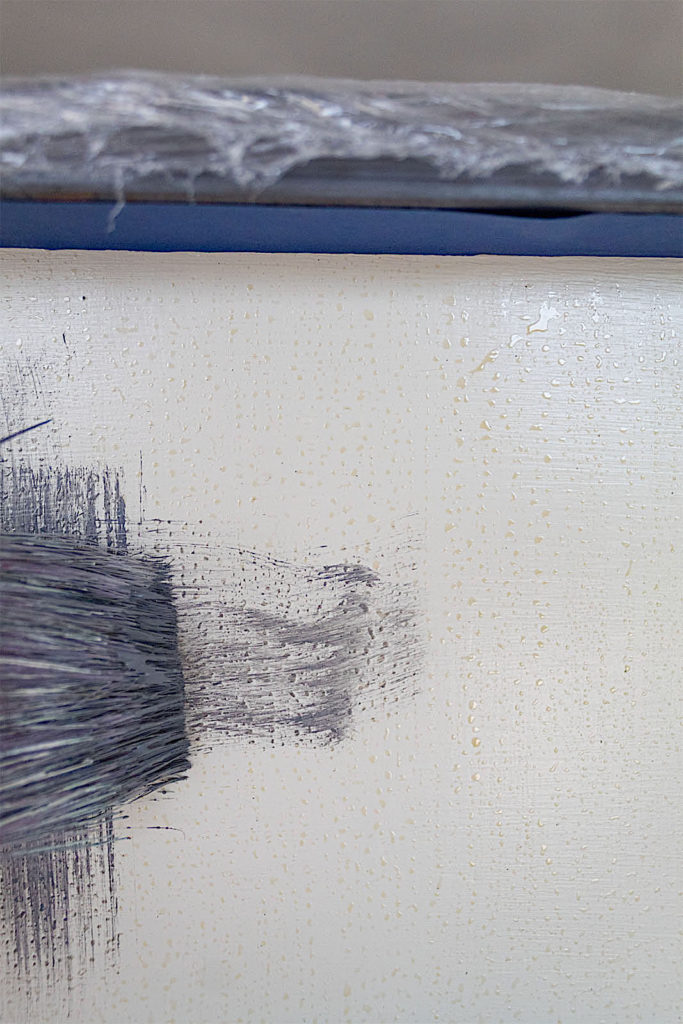
I am going to create a distressed, worn look with paint while using the beaded Patina to make this happen.
Painting Tips For This Look:
√ Only get a little paint on your brush at a time √ Brush lightly, not strongly over the beaded parts √ You can vary your coverage in parts but be sure to leave some of the under colors visible √ Mainly follow the direction of your wood with your strokes while adding in a few sideways strokes too
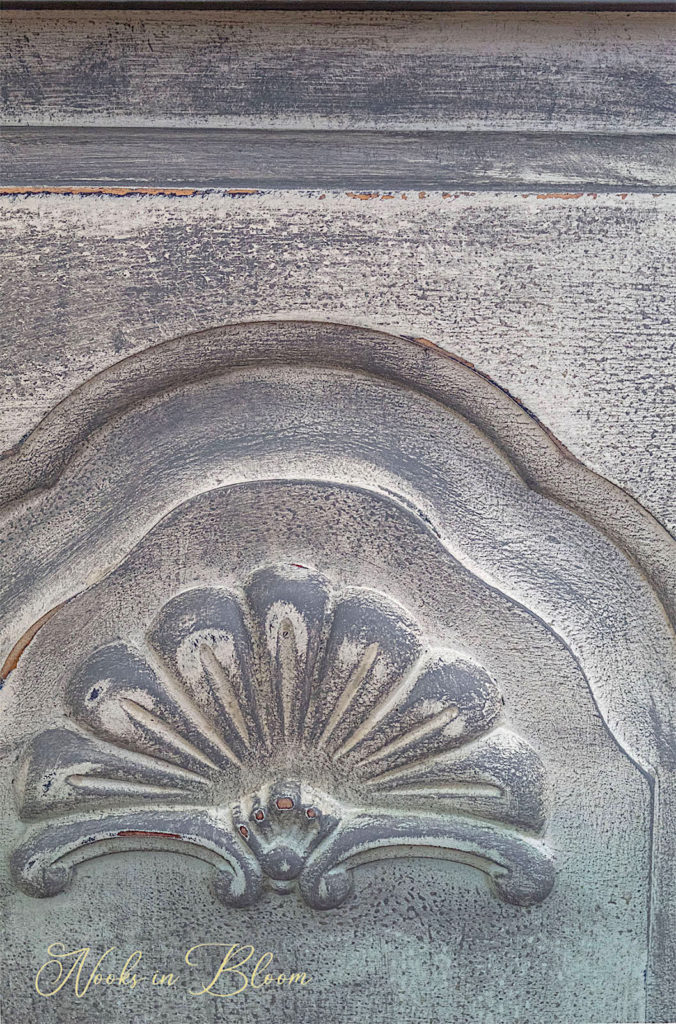
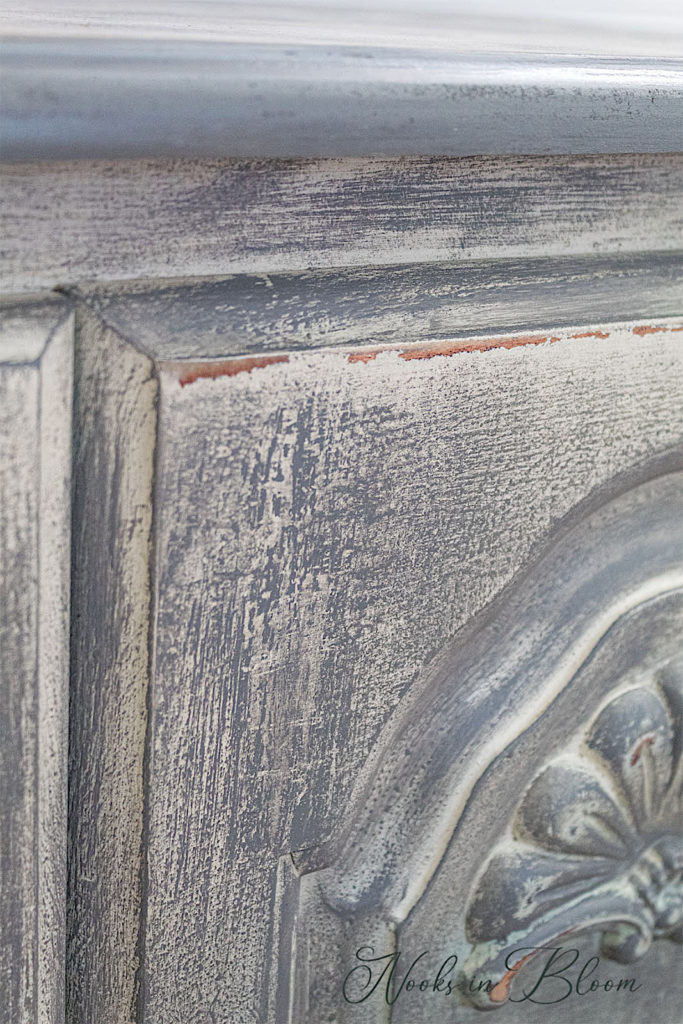
Once I began applying my gray paint over the beaded patina threads, I realized this was going to be oh so cool. The chalk paint, the tones of color underneath, the texture from the beads—everything worked together to create something unique and stunning. You can watch a video of this technique in at the end of this post.
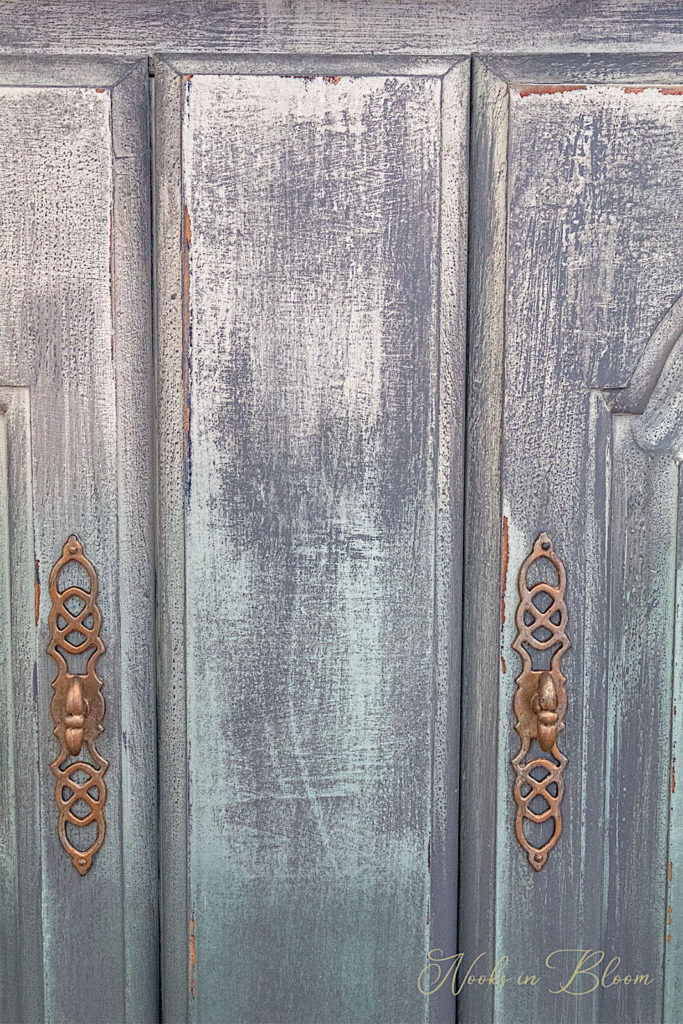
The trick here is not to be heavy handed with your paint. I left a lot of my colors underneath visible. The contrast of the dark gray with the mints and the cream, brought to life through the beaded texture, made this dresser look like it had been beautifully aging over time.
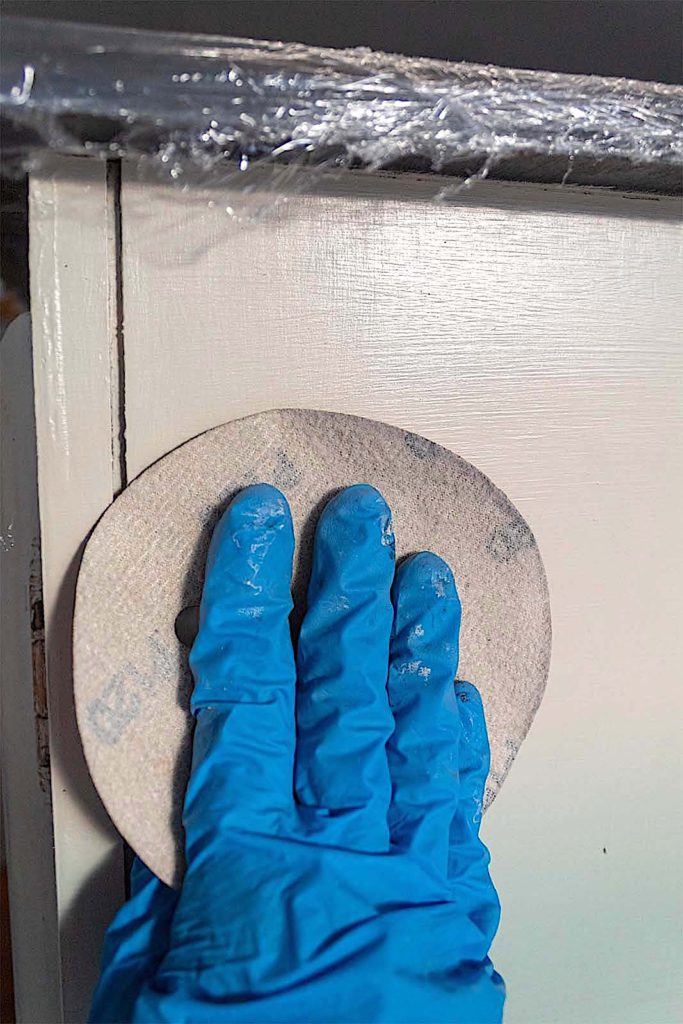
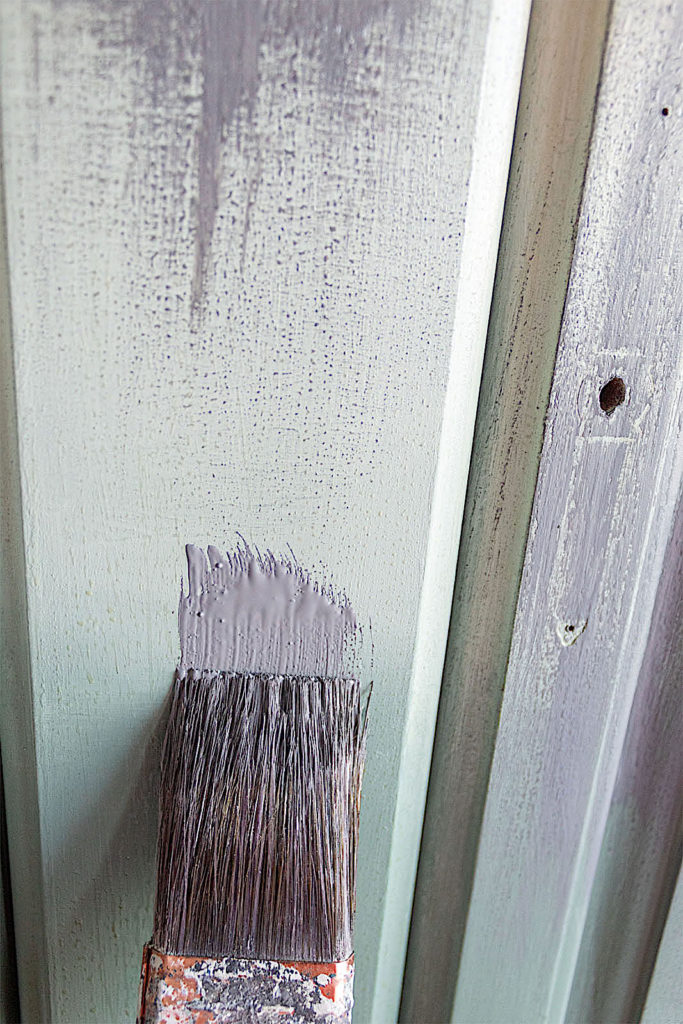
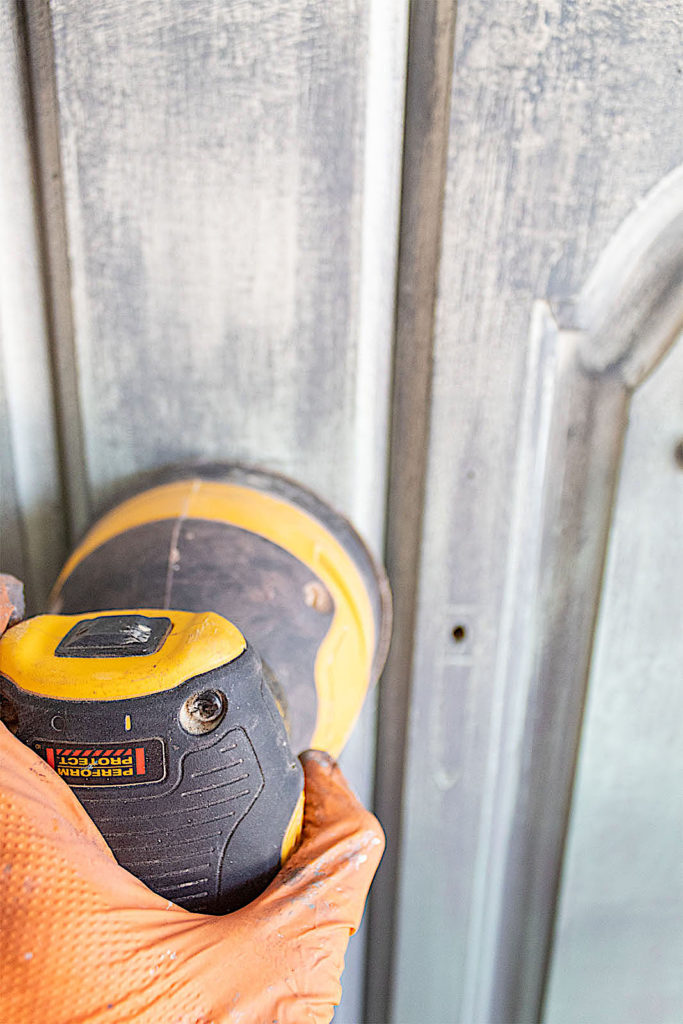
Step 4. Sand
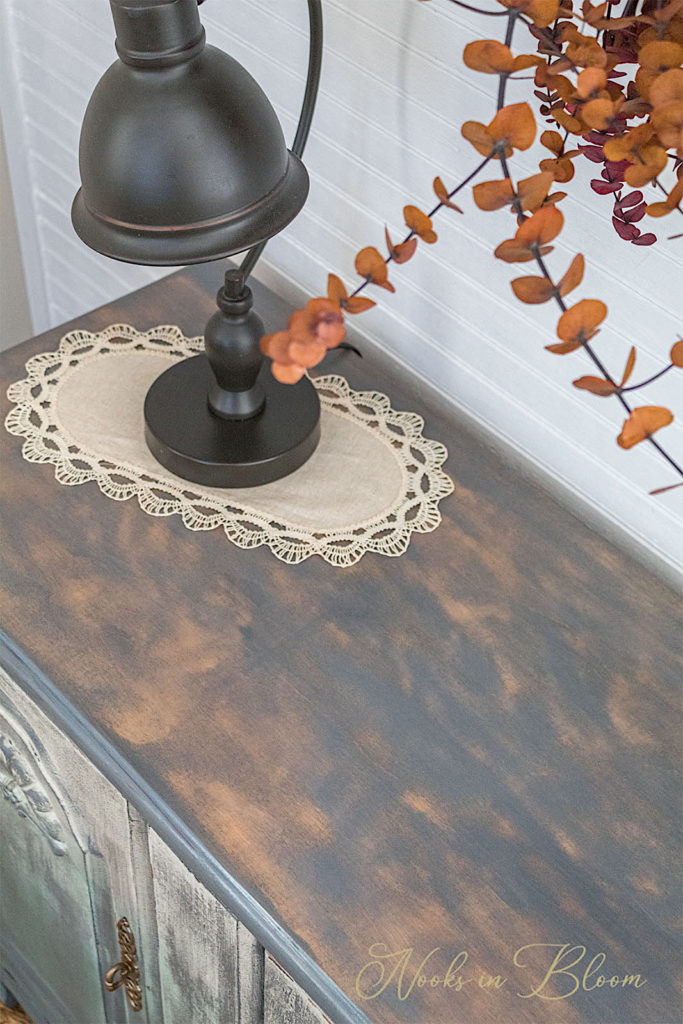
For a final detail, I took my orbital sander and quickly went over the painted parts. Without over-sanding, this step adds one more level of distressing. I also used the sander at an angle around some of the furniture edges to expose the raw wood underneath. I only did this in a few spots for additional worn aesthetic.
Watch The Video Of This Renovation
You can seal the finish with clear coat or clear wax if you want some extra protection. My favorite wax is Soft Southern Stroke’s Finishing Wax. It is non-toxic and smells lovely. When it dries and cures, it is very strong.
I very much enjoyed creating this look. I am always drawn to vintage styles that are both unique and timeless. This is a technique that saves you from having to sand a painted piece and which will create a whole new look. If you’re looking for a quick updo with loads of character, you should try this technique.
Thank you for reading this post and be sure to SUBSCRIBE to our tribe at the bottom of the page for more creative projects! Now I’ll leave you with some more pictures of this beautiful dresser.